
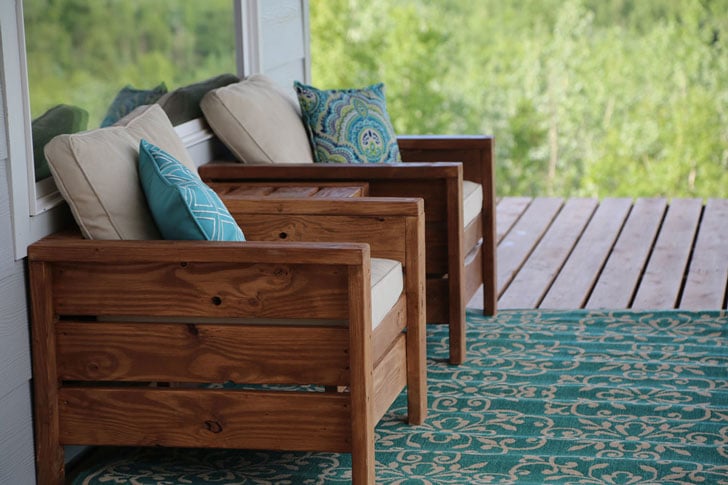

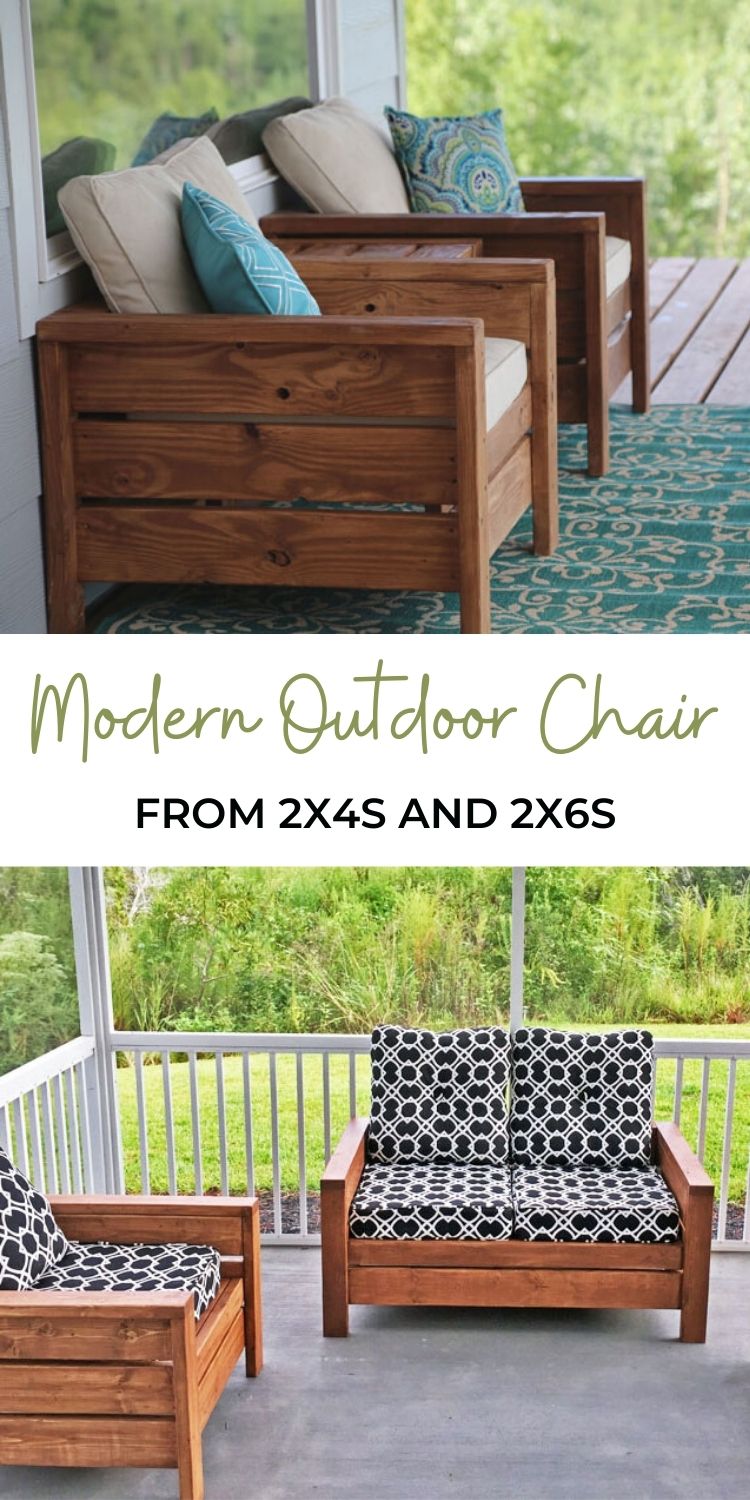
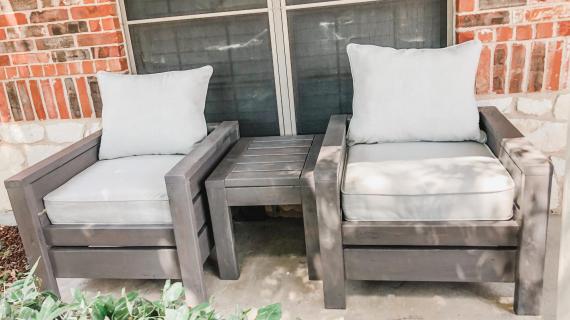
Easy to build, sturdy modern outdoor chairs for deck or patio - free plans step by step plans with diagrams by Ana-White.com.
Also check out our matching loveseat plans.
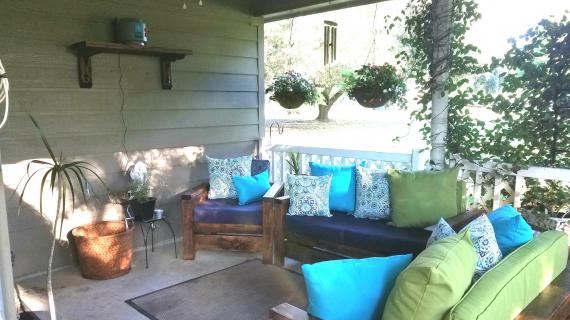
Are you looking for beautiful and sturdy seating for your outdoor space? Have you considered building your own? You can save a ton of money and get exactly what you want!
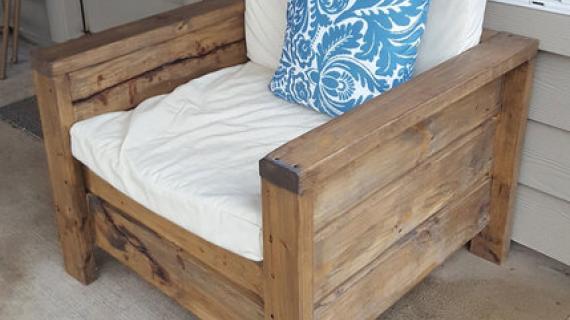
For about $20 a piece, I built these outdoor chairs!
We love they way they look. We love the sturdiness. We love how heavy they are - no one likes to chase outdoor furniture down in the wind. And we love how easy they are to build!
Building the Modern Outdoor Chairs
These chairs were so simple and easy to build!!! All just 2x4 and 2x6 lumber, right off the shelf!
Here's how I built it -
I cut all my boards according to the cut list below using a compound miter saw. You could also use a circular saw and a square, or even have your local home improvement store cut your boards for you. Good straight end cuts are very important.
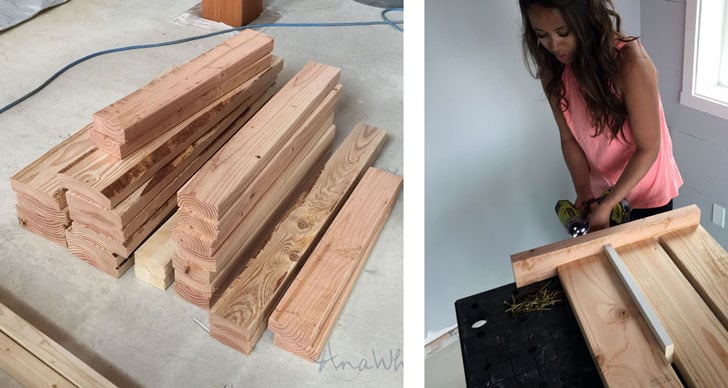
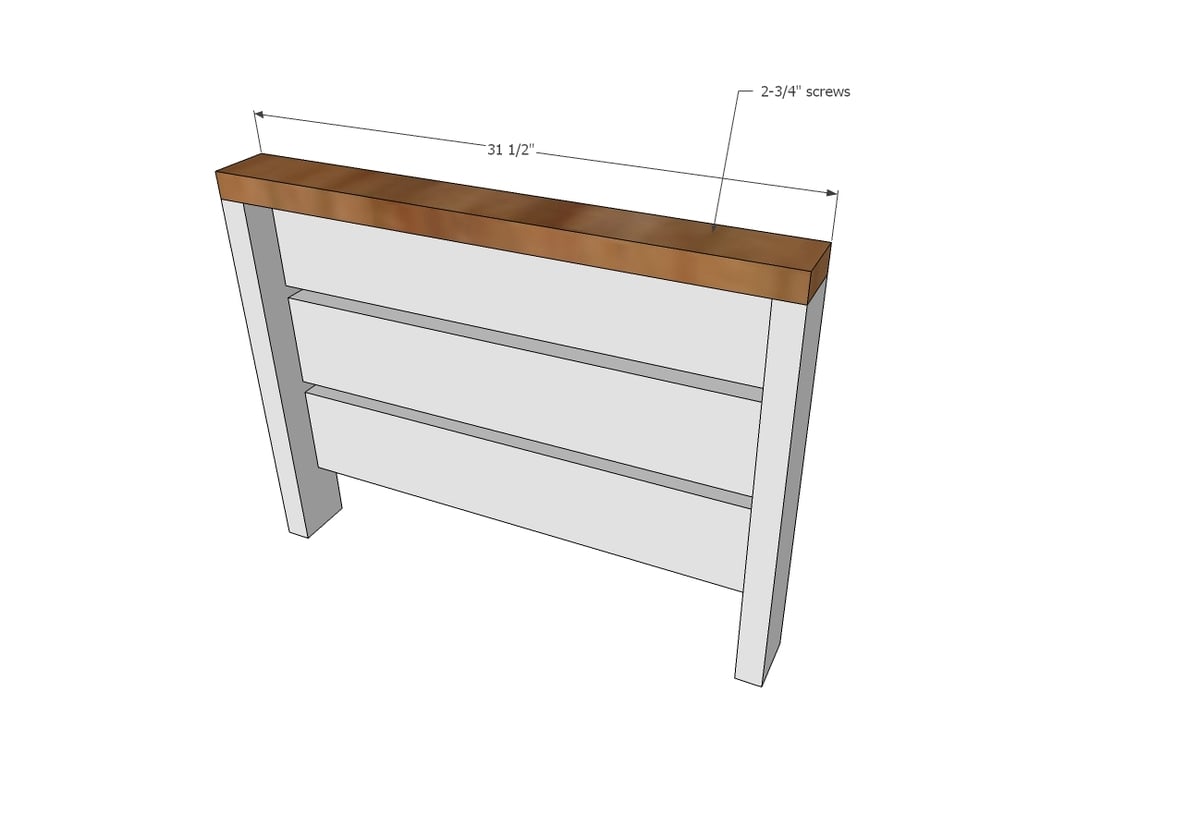
Then I attached the legs to the longer 2x6 boards, using 2-3/4” long deck screws. Notice the spacer in between the slats – it’s a scrap 1x that measures ¾” thick.
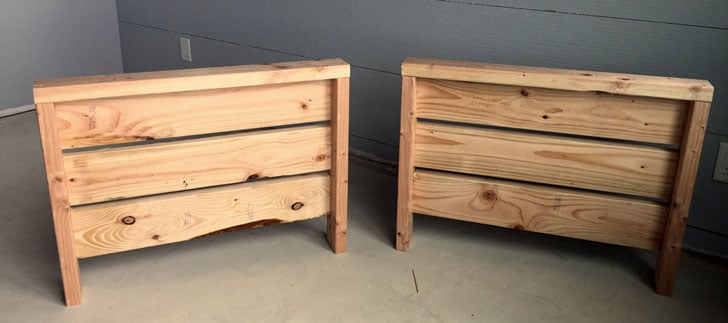
Here’s how it will look with both legs.
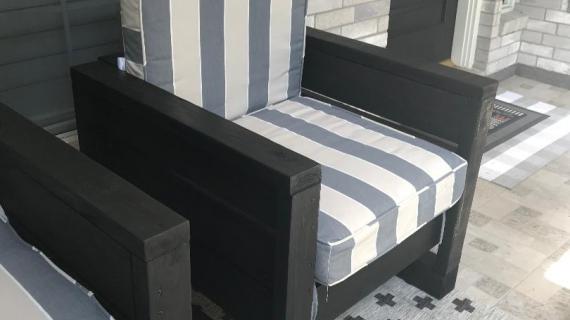
Then add the top armrest piece, and repeat for two arms (for one chair).
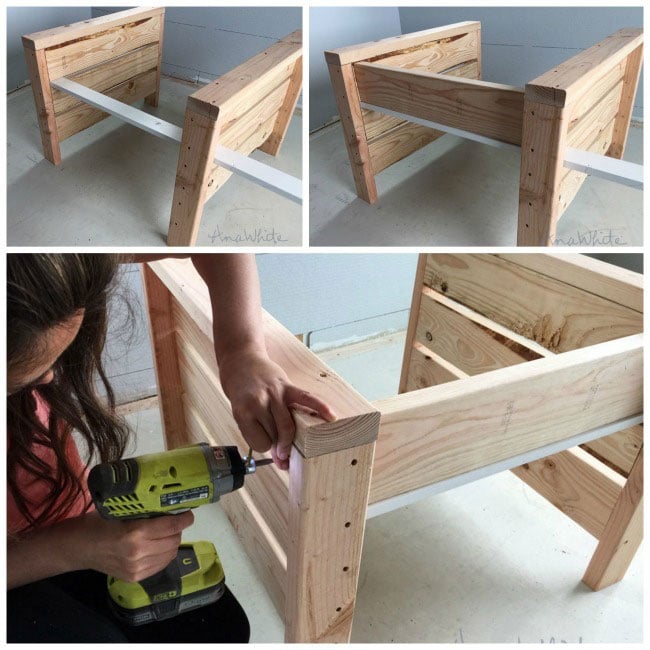
It’s ideal to have two people to assemble, but if you don’t, I used a board threaded between the slats to support my back boards while I attached. This is the most challenging step of the entire build.
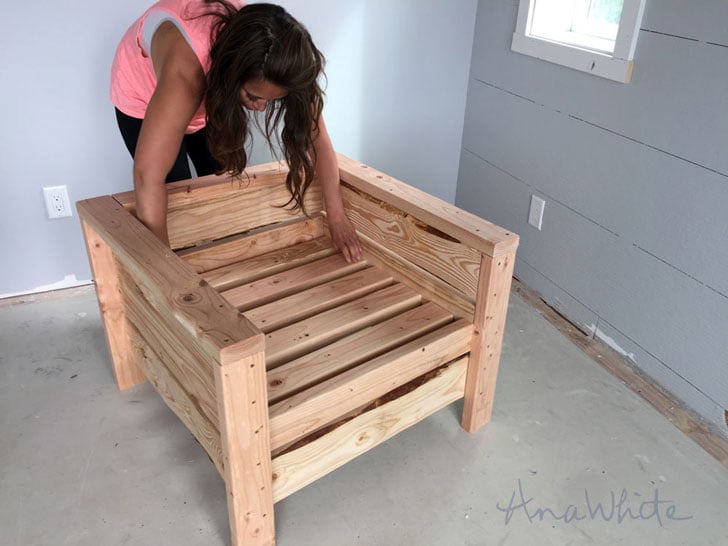
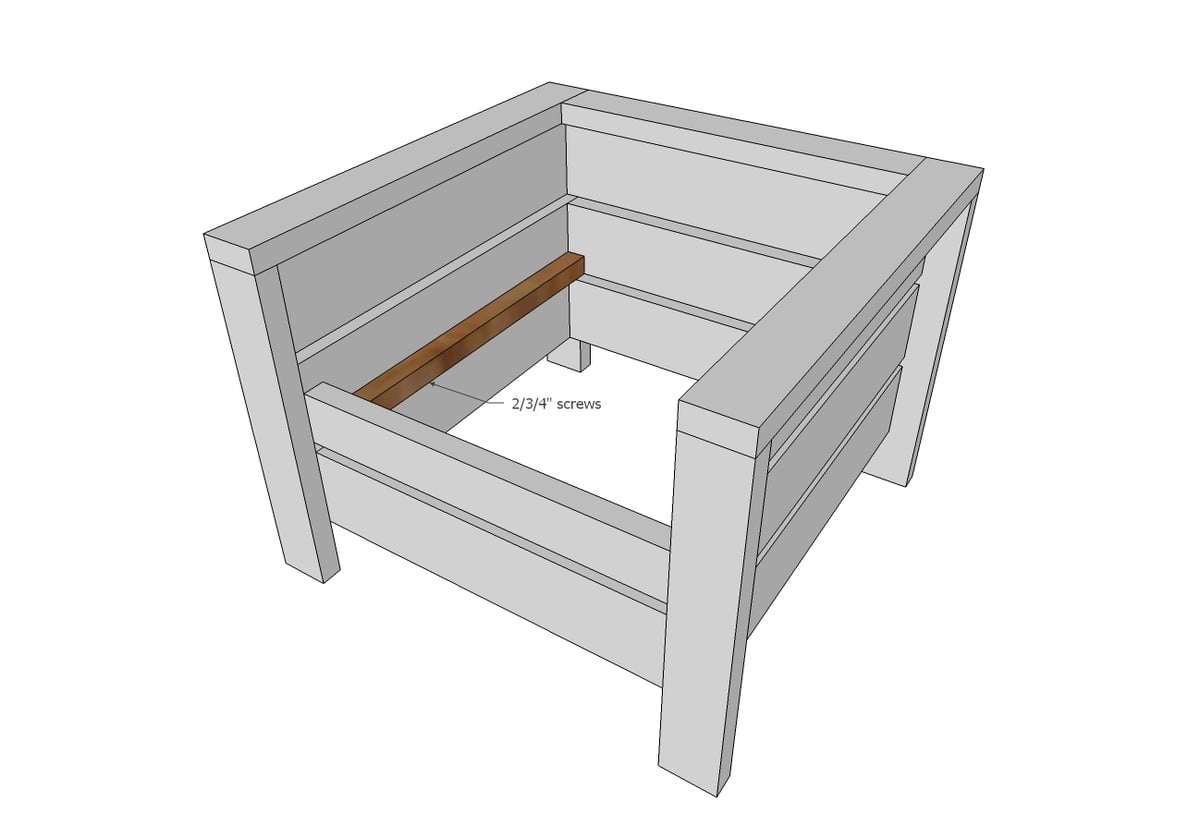
Once the arms are attached to the back and front pieces, two cleats are screwed to the insides of the arms, and seat slats rest on top. TIP: For added comfort, consider installing the seat at a slight downward angle.
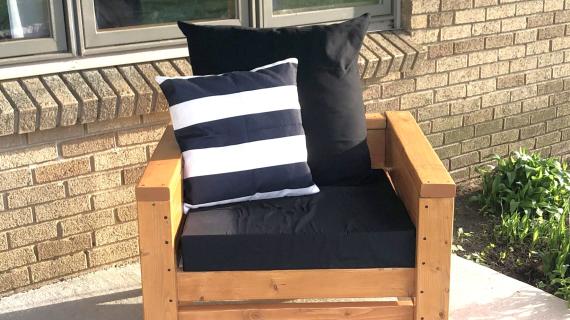
Turned out really well!

Good luck, and if you build, do share pics (you can add a brag post or tag me on instagram @anawhitediy or #anawhite) – can’t wait to see how your outdoor chairs turn out!
Plans follow, enjoy and share!

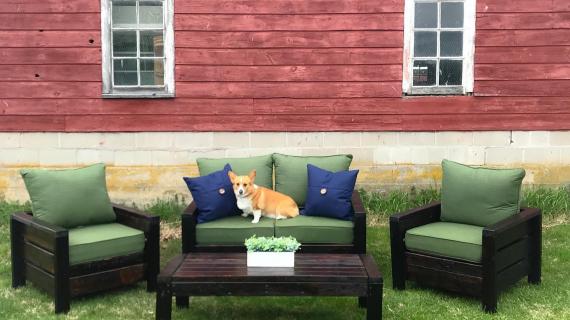
Loveseat Version
After many requests, we have created a loveseat plan version for your convenience.

Reader submitted photo by Joshh81
Thank you for submitting brag posts, it is helpful and encouraging!
Pin For Later!
Here's Some Tips to Build Better Outdoor Furniture

Want to build better outdoor furniture? Over the twenty years I've been building, maintaining, and enjoying my own outdoor furniture, I've learned a few tips that can help build longer lasting furniture.
Preparation
4 - 2x4 @ 8 feet long
4 - 2x6 @ 8 feet long
2-3/4" self tapping deck screws
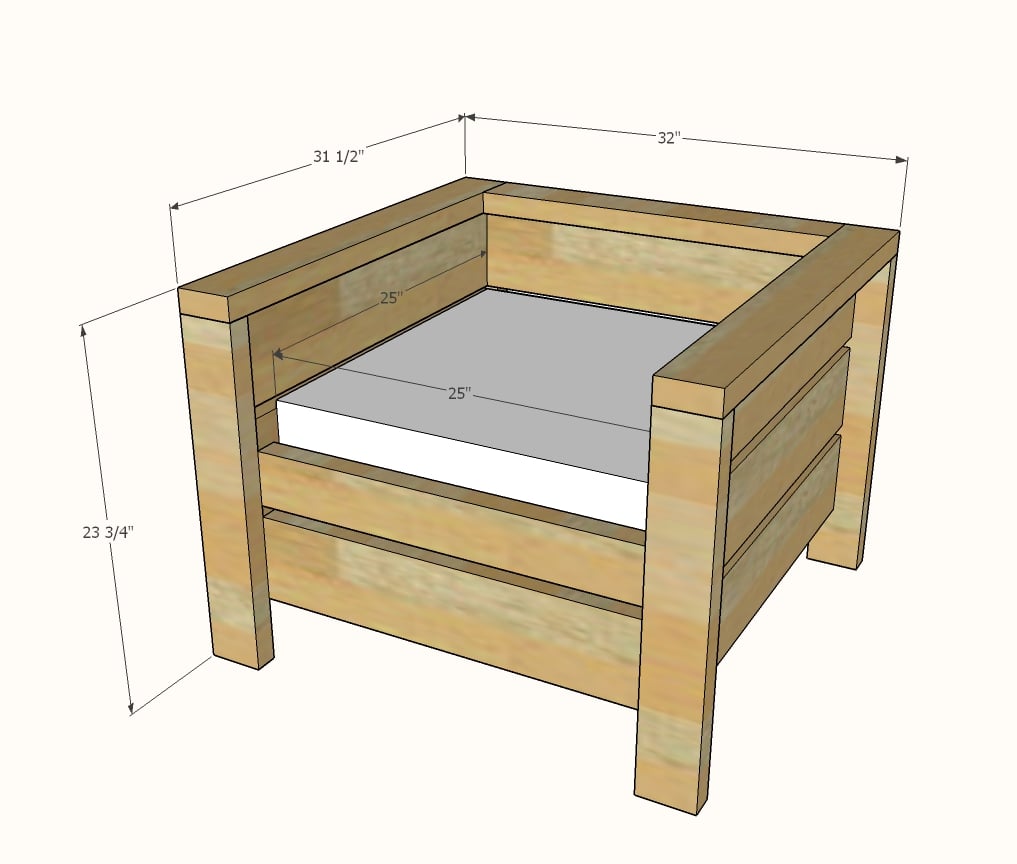
25" x 25" seat cushion (if smaller cushion, adjust plans to fit)
Exterior Glue
BEHR PREMIUM(R) Semi-Transparent Waterproofing Stain & Sealer
I recommend pefinishing boards before cutting.
CUT LIST PER ONE CHAIR
DESIGNED TO FIT 25" x 25" CUSHION
4 - 2x4 @ 22-1/4" - Legs
6 - 2x6 @ 28-1/2" - Side Slats
2 - 2x4 @ 31-1/2" - Arm Rests
4 - 2x6 @ 25" - Front and Back Slats
2 - 2x4 @ 25" - Front Top Slat and Back Top
2 - 2x2 @ 25-1/2" - Inside Cleat
5 - 2x4 @ 25" - Seat Slats (can get away with just 4)
This chair was designed to fit a 25" x 25" seat cushion. If different sized cushions are used, adjust plans accordingly.


Instructions
Step 1
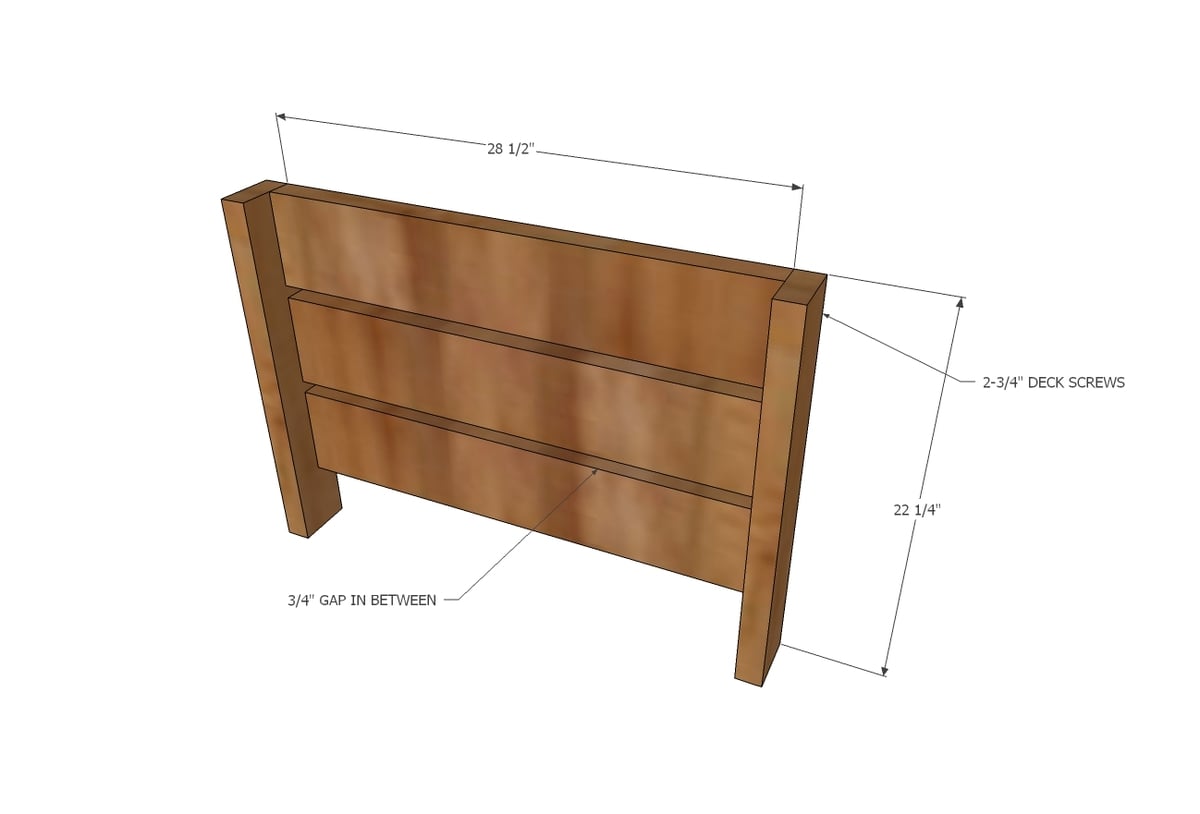
Use 2- 2-3/4" or longer screws and exterior wood glue to attach legs to the longer 2x6 boards, with 3/4" spacing in between. I used two screws per joint.
Step 2
Attach top with glue and 2-3/4" screws.
Step 3
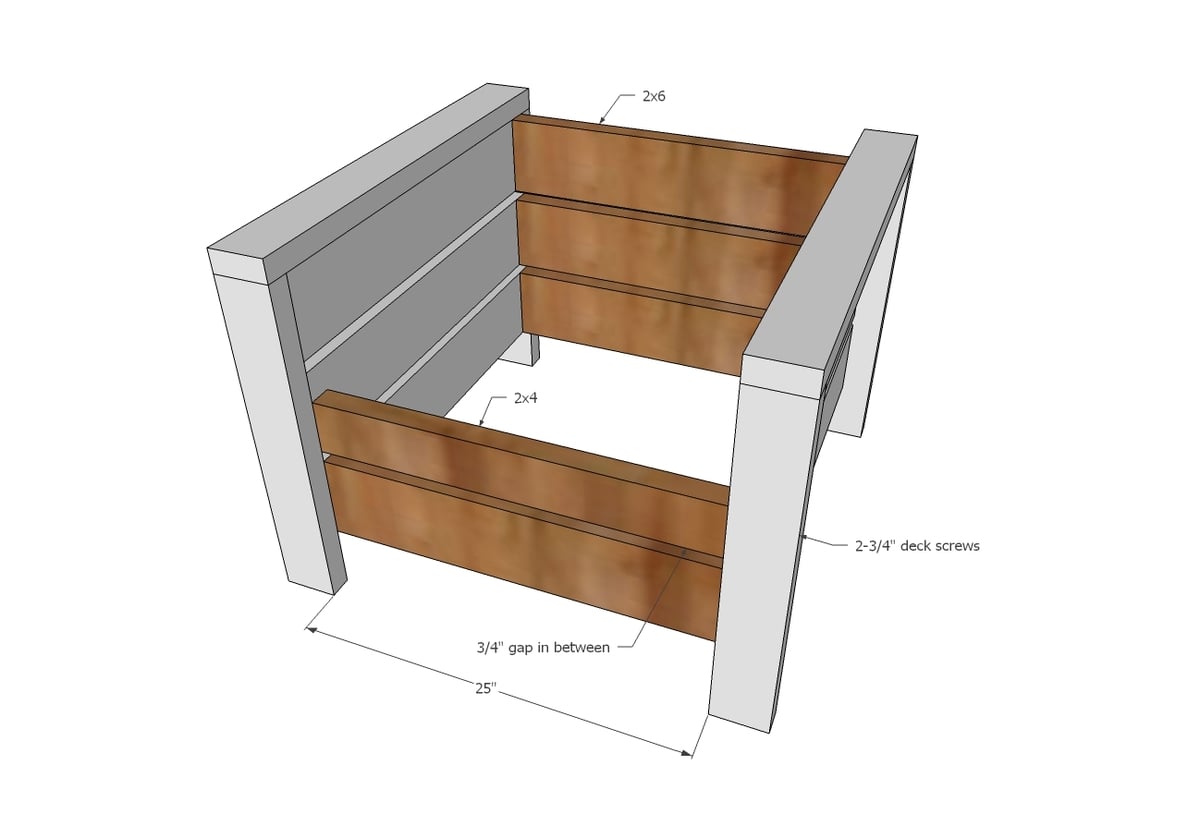
Attach front and back slats to arms to create the frame of the chair.
Step 4
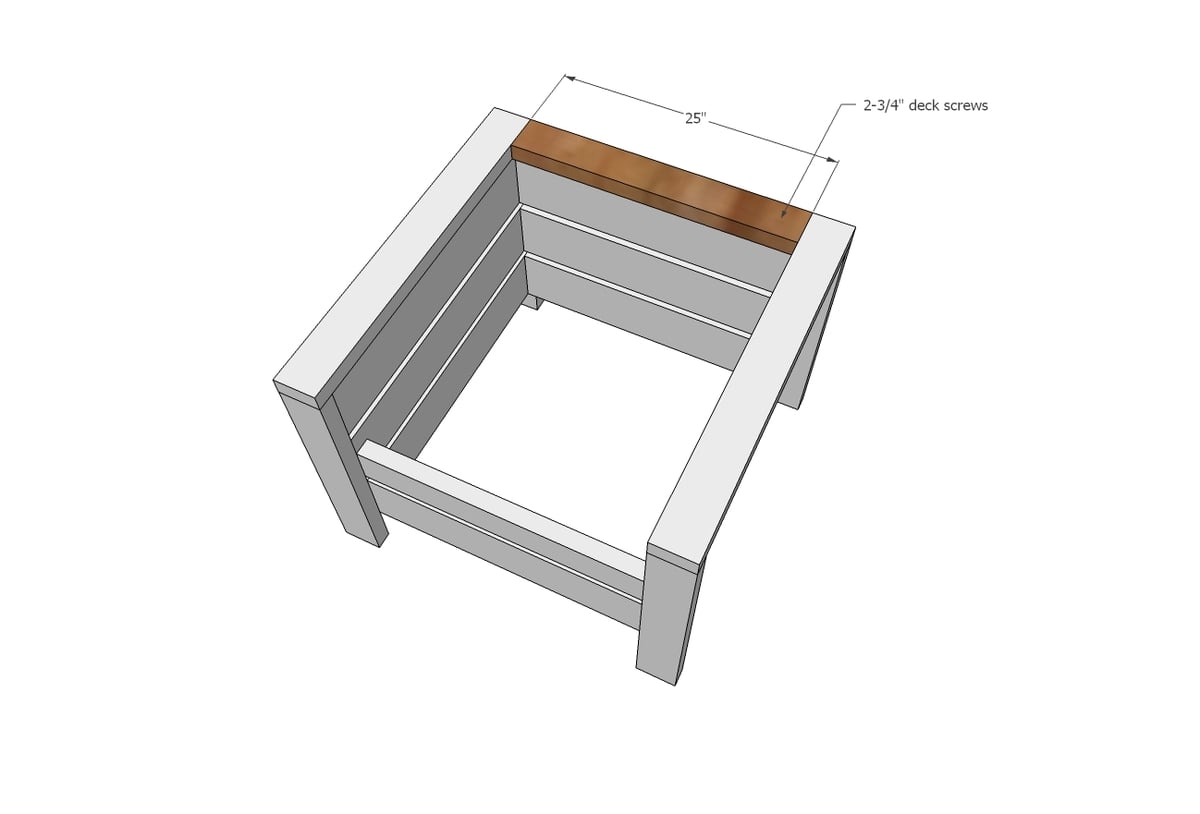
Attach back top piece with screws and glue.
Step 5
Step 6

Lay seat slats on cleats and screw down.


Comments
In reply to A few questions from the UK! by Sam_A
Straykitten
Mon, 01/10/2022 - 09:48
Would love to know the…
Would love to know the answer to this too!
slnix6598
Sun, 05/31/2020 - 04:48
"I recommend pefinishing…
"I recommend pefinishing boards before cutting." What does this mean?
These are my dimensions: Seat cushion dimensions: 24”L x 24”W x 5.5”H
Back cushion dimensions: 24”L x 23”W x 8”H
Do I need to adjust the cuts for these sizes?
ajmikol
Sat, 06/06/2020 - 09:02
Materials cost?
Hello,
Lovely plans Mrs. White, however I am curious how you were able to only pay 20$ for materials. 4 2x4s, 4 2x6s, a pack of screws and stain ran me close to 70$ at home depot. That is for 1 chair.
Thank you!
wjmathewsx
Sun, 06/28/2020 - 18:30
Amen. I just built a chair…
Amen. I just built a chair for $65 including tax. She said $40 for two chairs. So, I bought the wood in the shopping list and it came out to $65. Not bad, I thought, for two chairs... then I realized it was for one chair. This chair better last me the rest of my life.
fayray
Sat, 06/27/2020 - 15:46
In love with this chair!!!
I just finished this chair and I love it!!! I did pocket holes to screw the piece all together...took me about 5 hours to complete after I figured out how to use the kreg jig for the pocket screws. Already planning on making the love seat for our back porch.
dland41961
Tue, 06/30/2020 - 16:19
Chairs
I have built some. They are heavy lol
h3customwooddesigns
Mon, 07/13/2020 - 12:42
back yard chair
Awsome plans. Just completed my first chair. Will stain and then build a matching one as well
reecelowe1
Wed, 07/15/2020 - 00:30
GREAT!! This one is useful…
GREAT!! This one is useful for me... hope u keep post along the days like this
gooch1775
Wed, 07/15/2020 - 19:28
Just finished my first chair…
Just finished my first chair out of a set. When attaching rear top, it has an approx overhang of about 5/8” - which was very uncomfortable on my back.
I just trimmed down to be flush with the rear slats.
Stained with Early American stain and sealed with poly.
mrtickle
Thu, 07/16/2020 - 21:39
Side table idea
I made a slide in table from 1x8x15with a 2x8 screwed on one side of it , it just slides through from the inside between the top two 2x6 and perfect for putting your drink on and can switch sides. I also turned the sides around so that the sides are all level. Awesome plan very easy to make alone. Made two single and two loveseats in two days.
tbeland
Sat, 07/18/2020 - 15:51
Two-person lift. These chairs are HEAVY.
Just finished one chair this afternoon. I used pocket holes for everything so it took the better part of the day. Overall, the chair is very nice. However, the back is too low to provide any support for the pillow cushion. Oh, and I have only seen one comment about how heavy these chairs are. Once assembled, this chair is easily a two-person lift. I would avoid these plans if you were hoping to easily move these chairs around. They are meant to stay put. I would have to guess one chair easily weights over 50lbs and I didn't bother using 5 slates for the seat or the 2x2 rails. I allowed the wood to dry for 3 weeks as well.
I plan on taking these plans and modifying them with 1x4x8 and 1x6x8 instead. I'll have to look at redesigning the back as well so that it is higher. Using 1x will double the cost of every board though, so I'm looking at about $50 per chair now. I can't find cushions under $80 either. Lowe's had some on for $40 but the reviews were absolutely horrible. Total cost of the chair is closer to $130+ now.
In conclusion, these chairs are nice looking. However they are not meant to be moved around. They are meant to remain stationary. I can't image storing two or three of them in a shed over the winter. Finding decent cushions for under $50 is harder than you think it is too.
SamSimon
Wed, 03/17/2021 - 18:55
Lighter version of the modern chair
I am planning to replace recliners in my tv room with these chairs and sunbrella fabric so my cats can't destroy them. Did you ever
make the 1x4 and 1x6 version? Would you mind posting a picture and letting me know about any adjustments you made or problems that occurred. Thanks very much for your help.
priceb93
Sat, 07/25/2020 - 21:12
Stain color
What color stain did you use on your chairs?
M.Gordon
Tue, 07/28/2020 - 14:24
Good project! I really liked…
Good project! I really liked the black and white cloth on the pillows.
kiromagy
Wed, 07/29/2020 - 11:24
Wood type ?
what kind of wood are you using Ana ?
droeder2010
Sun, 08/23/2020 - 09:57
Do you have a plan for the…
Do you have a plan for the table in the middle ?
LovetoBuild20
Mon, 09/14/2020 - 18:56
Type of wood?
What kind of wood are you using? Just plain 2x4's? We live in the south and it's very humid, hot, sunny, rainy, and we have all kinds of bugs, like termites. Will these stand up to the weather and pests? Do I need to use a certain type of wood specimen so they will last?
Thanks
gdb
Tue, 02/02/2021 - 06:35
When you say 'place seat on…
When you say 'place seat on a slight incline', do you mean incline into the chair (so higher at the knees, lower at the backrest?)
In reply to When you say 'place seat on… by gdb
Straykitten
Mon, 01/10/2022 - 09:47
Would love to know the…
Would love to know the answer to this too!
Jorgecabrales
Fri, 04/30/2021 - 07:50
What would be a good selling…
What would be a good selling point for the set?
camelburrito
Mon, 05/24/2021 - 21:31
Pocket holes?
Ana, is it safe to build this chair with pocket holes (so the screws dont show outside ? if so which screws should we use
c.winks
Tue, 07/27/2021 - 14:33
Love, love, love my new…
Love, love, love my new chair. When I'd ordered my cushions, I'd order the set of 2 (back piece too). After getting it built I realized that the back cushion had no support, so I added on to the chair. And I must say, I look it looks amazing. I'm working on the matching bench now. Can't wait to get all of my chairs built and start using them.
Straykitten
Mon, 01/10/2022 - 09:46
Two modification questions!
Hi! Love these chairs. Just have two questions:
1. You mention that it's a good idea for added comfort, consider installing the seat at a slight downward angle. How would I do that?
2. Is there a way of making the back trim at the back level with the front edge of the back and the back of the arm ends?
Thanks in advance for any help! :D