Community Brag Posts

Console Table

Submitted by Anonymous (not verified) on Sun, 10/06/2019 - 15:17

Made from the rustic Console Table plans, used a dark oak stain and antique oil finish.

Built from Plan(s)
Estimated Cost
$80.00
Estimated Time Investment
Week Long Project (20 Hours or More)
Finish Used
Minwax antique oil finish
Recommended Skill Level
Intermediate

Barnwood Frame - Variation

Submitted by Joni on Fri, 02/10/2012 - 08:48

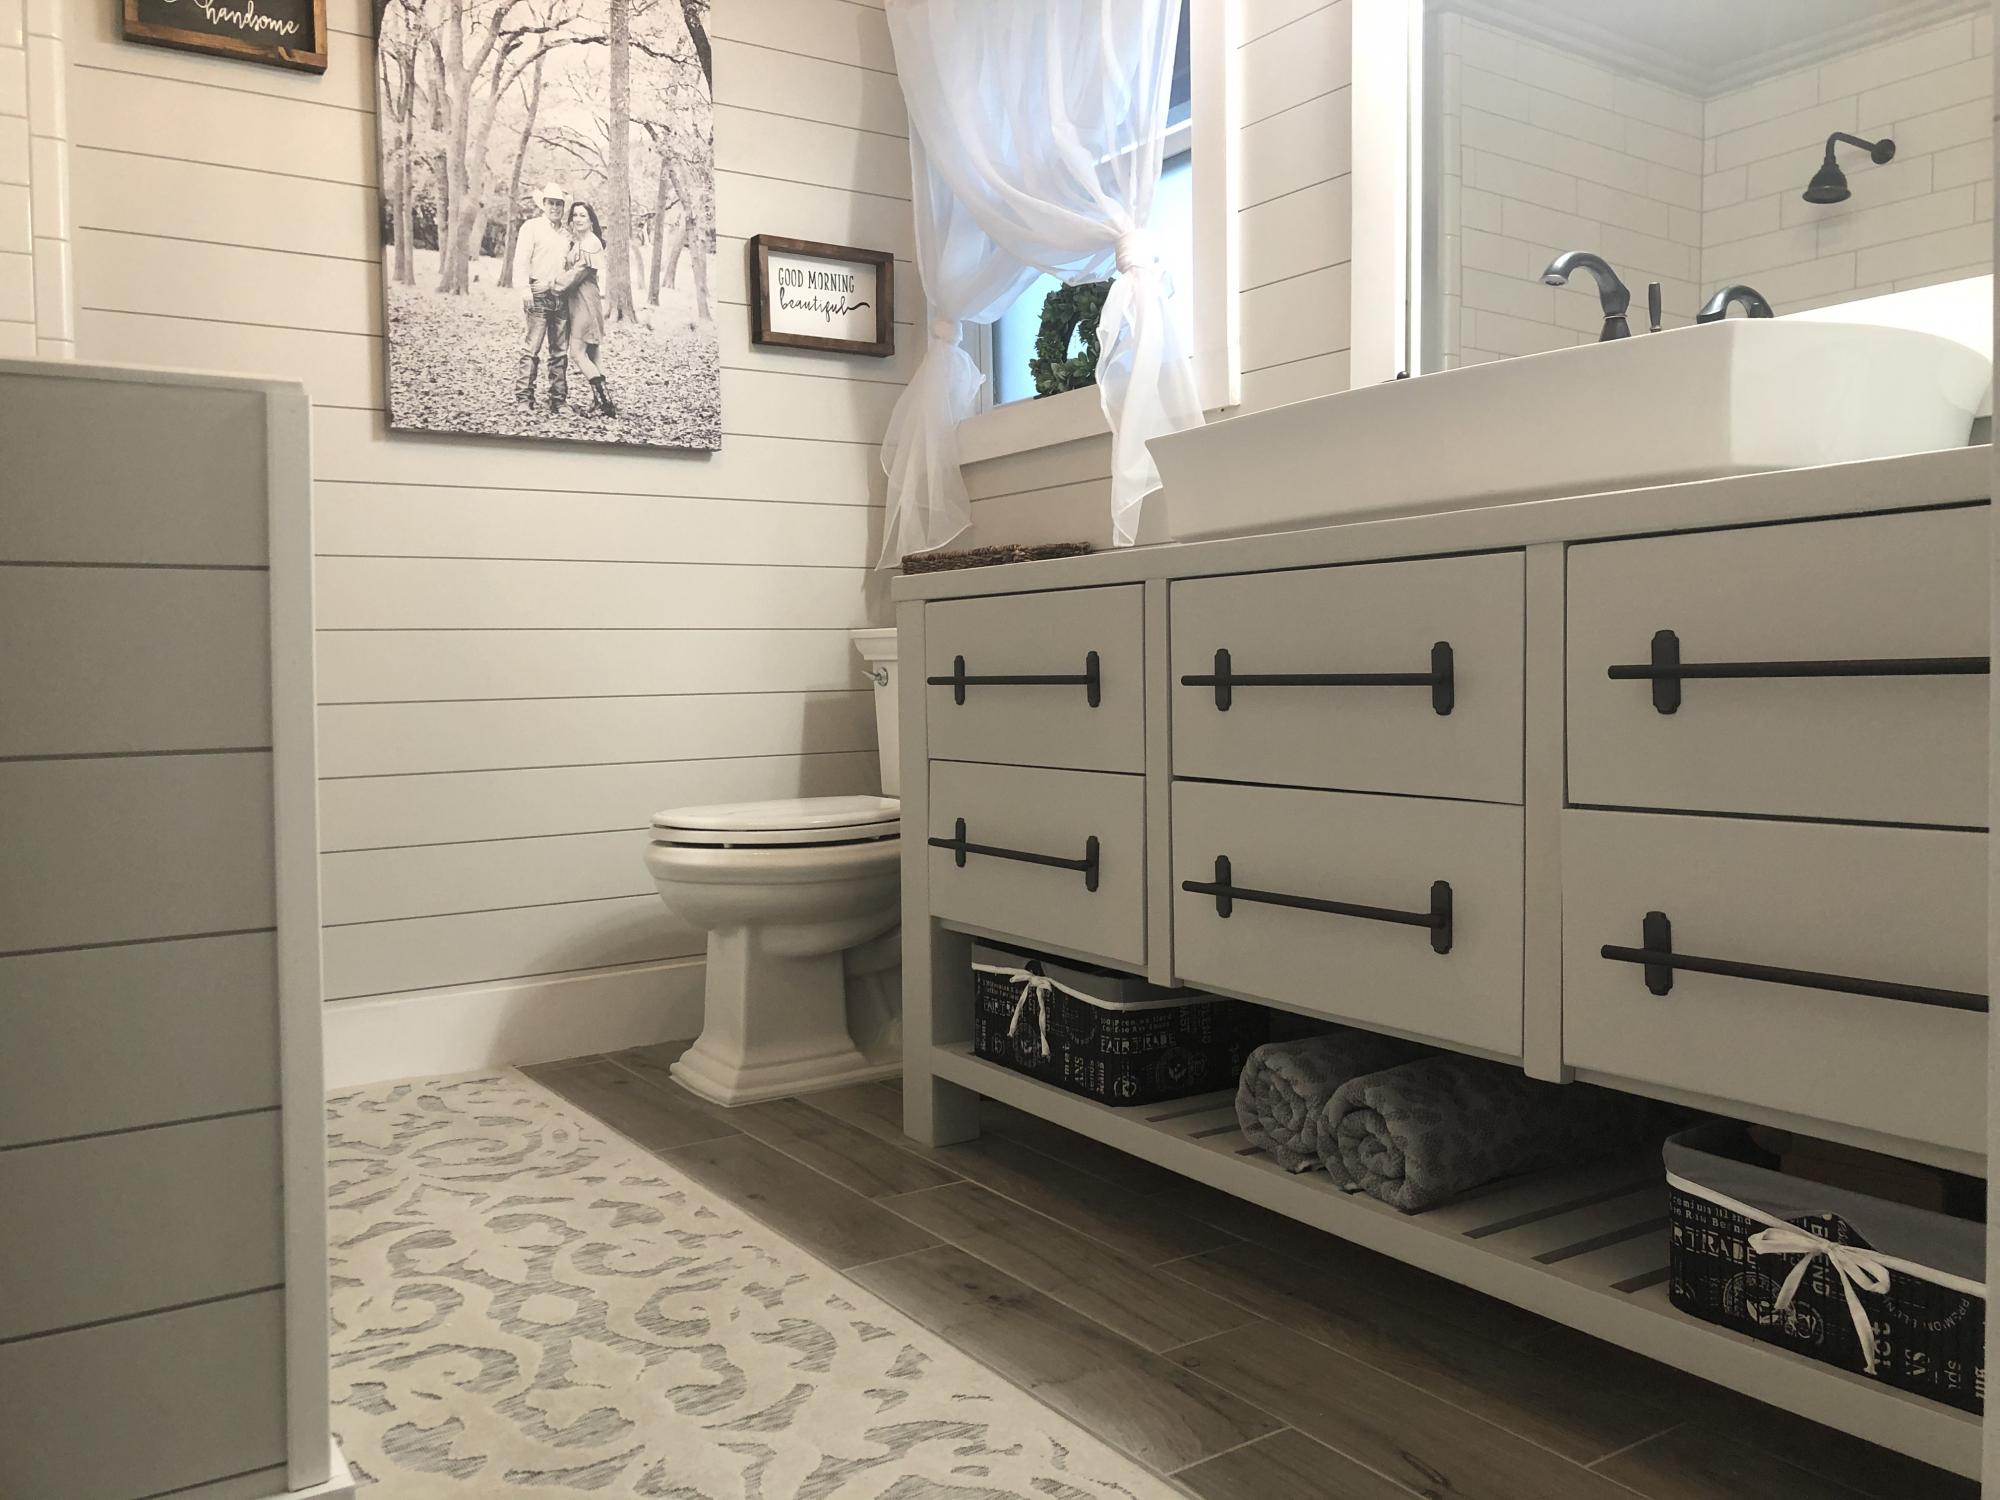
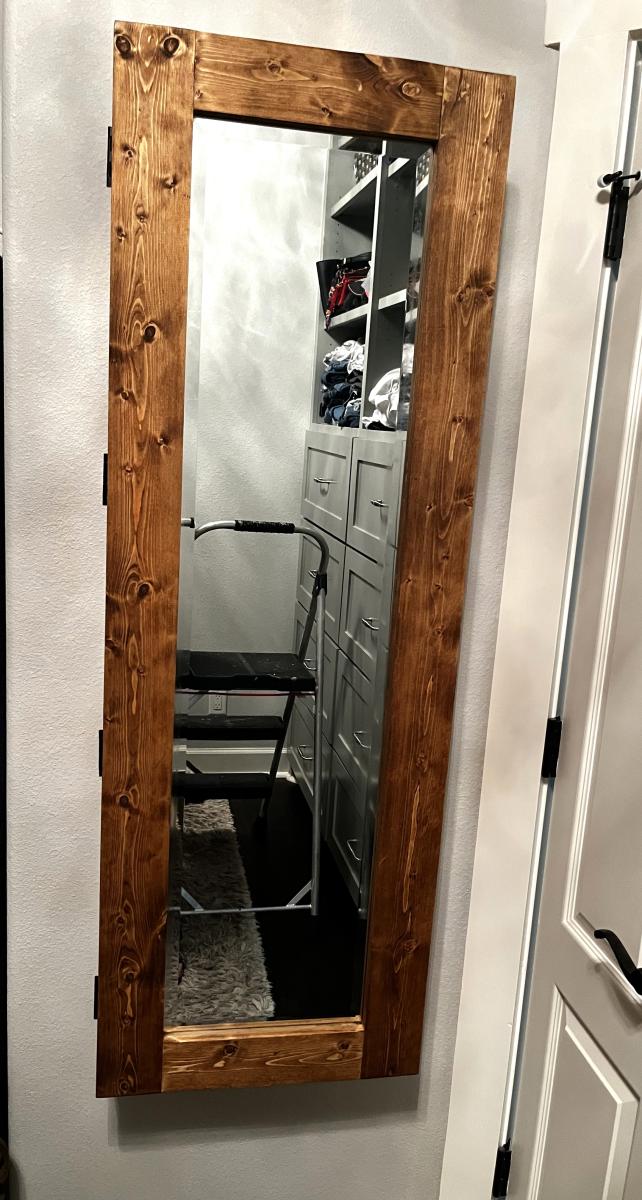
Have you checked out prices at framing stores lately? Since I didn't want to pay $250 for a frame, I decided to make one out of some spare 1x4 Douglas Fir that I had. It's a single board with a router cut at the edge for detailing. I routed a rabbet onto the back, and kreg-jigged it together. I distressed the wood by beating it with a hammer and chain.

Prior to completing the frame, I took a sample piece to the framing store (who would be matting it) to make sure they could work with my rabbet size. I ended up having to make it deeper and wider to accommodate them, so I would advise doing this if you're taking it to a framer.

I never dreamed I could actually make a frame, much less a piece of furniture. Thanks so much to Ana for sparking all of this. I've found my creative calling thanks to her!

Estimated Cost
Free (spare wood!)
Estimated Time Investment
Afternoon Project (3-6 Hours)
Finish Used
1. Minwax water-based wood conditioner. 2. Minwax mix of Onyx & American Walnut water-based stain. 3. General Finishes Glaze in Van Dyke Brown. 4. Bartley's Satin Polyurethane (4 coats).
Recommended Skill Level
Beginner

Comments

Becky Smith (not verified)

Thu, 02/16/2012 - 04:32

That is really beautiful! I've been considering the same build for the same reasons. Framing costs are outragous! I've never used a router before and I guess I'm a little intimidated by them. What do you think? Are they too hard to use? Worth investing in?

Thanks!

Joni

Tue, 02/21/2012 - 08:11

Becky -- thanks for the feedback. The router is hard for me, but I don't think I know all the ins and outs of how to use it. For making the rabbet on the back, I've found out that a table saw works SO MUCH BETTER than trying to use the router. I believe that a dado blade for the table saw could make the decorative cut (and much easier, faster, and cleaner than trying to use the router).

Modified fancy x

Beetle kill table. I chose to mortise the support and use pegs for effect. As such used 4x4 for leg uprights. Made the top removable because it's heavy!

Built from Plan(s)
Estimated Time Investment
Weekend Project (10-20 Hours)
Finish Used
Oil based gloss plolyurathane
Recommended Skill Level
Intermediate

Comments

Josh-Adam

Wed, 08/03/2016 - 09:59

That table looks awesome ! I am in the process of making one similar i went to a local mill and they had ambrosia maple to make the table topper and i am making the base. I was wondering how you went about making the table top removable did you use threaded inserts ? also how did you get the cross support cut out done? Last question i have is where did you find the 4x4 material i am in eastern north carolina and it seems it doesnt exist around here. thank you for sharing

Coen's Cabin Bed

Submitted by Anonymous (not verified) on Mon, 02/29/2016 - 15:28

This is a fairly easy build. It did take some time with three little ones running around, but the finished product is well worth it! My three-year-old doesn't want to get out of bed in the morning (win!).

Built from Plan(s)
Estimated Cost
$250-$300
Estimated Time Investment
Week Long Project (20 Hours or More)
Finish Used
Minwax weathered oak stain
Recommended Skill Level
Intermediate

Comments

Ana White Admin

Tue, 03/01/2016 - 12:19

You did an amazing job on this, I wouldn't want to get out of bed either! Thanks for sharing:)

Rustic Farmhouse Vanity

Submitted by jameslee on Thu, 10/10/2019 - 16:23

My master bathroom was my first DIY remodel. I took this room down to the studs and built it back up. I struggled to find the perfect vanity that felt strong and sturdy and could not find one. I needed a wide vanity to accommodate this 3 foot wide vessel sink. I found Ana White and this plan online and fell in love! This was my first build and I’ve become addicted to wood working since. As my first build, this took me most of a day to build and assemble drawers. Sanded and painted with a flat finish! I love it! Thank you Ana!

Estimated Cost
$200
Estimated Time Investment
Day Project (6-9 Hours)
Finish Used
General Finishes milk paint in Seagull Gray with a high performance flat finish. Hardware and sink found on Amazon.
Recommended Skill Level
Beginner

Comments

Kitchen Console and Hutch

Submitted by Anonymous (not verified) on Thu, 06/29/2023 - 09:44

48" X 60" built this A few years ago from pallets I picked up on side of Road

Mike Holman

x bench

Submitted by sidman on Tue, 02/14/2012 - 02:41

I loved this bench when I saw the plan and had to try it. Thanks Ana!

Estimated Cost
20.00
Estimated Time Investment
Afternoon Project (3-6 Hours)
Finish Used
Red oak stain on top and painted the botton black.
Recommended Skill Level
Starter Project

Comments

Play Teepee

Submitted by keiatbohma on Mon, 12/23/2013 - 21:17

Play Teepee used 4 yds of fabrics, 2.5 yd of webbing, bias tape, ribbon, heat and bond double sided adhesive, and 4 1x2s at 8 ft.

Built from Plan(s)
Estimated Time Investment
Afternoon Project (3-6 Hours)
Recommended Skill Level
Beginner

Outdoor sectional

I have been wanting outdoor seating by my pool forever but couldn't afford anything I liked. When I came across Ana White's plans for the outdoor sectional I knew I had to build two. They are just what I was wanting and cost under $200. It took my brother & I one afternoon to buy the supplies and put it all together. Since this furniture is outdoors 24/7, I had to caulk the seams & paint the whole thing. That process took two days. The biggest expense was of course the cushions from Home Depot that Ana White recommends for this sectional. I have to admit, they are well worth every penny. They look amazing! Can't wait to spruce them up with some throw pillows.

Built from Plan(s)
Estimated Cost
$150-$200 for sectional; $550 for cushions
Estimated Time Investment
Afternoon Project (3-6 Hours)
Recommended Skill Level
Beginner

Comments

1st Project - Dining Table for (Canadian) Thanksgiving

Submitted by KyleMohler on Sat, 10/12/2019 - 17:15

Hi Ana! - I'm so glad that I found your site. Thank-you SO much for your plans and video tutorials. 

I was recently in a car accident and found myself away from work for several months. Though I've always been hesitant to build anything (for lack of having been taught), I've found a new passion for woodwork. It's been a wonderful pastime and has created hours of fun with my young daughter. 

This is my first project (save for a few small boxes). - I'm very proud of the final product and was thrilled to be able to share it with my family for Canadian Thanksgiving this weekend.

The project was quite pricey, due in large part to the live-edge lumber that I sourced (2 x (2x6) @ 8ft). - The project includes the Fancy Farmhouse Table as well as 2 matching benches. 

Thanks again :)))

- Kyle

Estimated Cost
500.00
Estimated Time Investment
Week Long Project (20 Hours or More)
Finish Used
Miniwax American Colonial (2 coats) + high gloss polyurethane (4 coats to table top).
Recommended Skill Level
Intermediate

Cedar Garden Bed

I made this garden bed in one evening. I love it! I bought 6 6' cedar fence pickets and two cedar 1x2s. I don't have a table saw, and they wouldn't rip a fence picket for me at the store, so I had to buy the cedar 1x2's but the project was still very affordable. I wanted it a little wider than the original plan, so I just cut the 6' pickets in half for the sides.
It is 6' x 3' and I didn't bother to cut the dogears off. You probably wouldn't even be able to tell they are there. I didn't trim the top out because that would add on about $6, and I like it just the way it is.
Now, lets see if I can actually grow some plants in it!!
I'm a beginner, and this project was really easy.

Estimated Cost
$20
Estimated Time Investment
Afternoon Project (3-6 Hours)
Recommended Skill Level
Starter Project

Comments

Lisa P (not verified)

Tue, 04/03/2012 - 08:08

This is exactly how I was going to modify Ana's plans as well. Have you started growing anything yet? Looks great!

Tara Kirkland

Tue, 04/17/2012 - 20:55

Yes, I've started "trying" to grow a few things. I don't usually have much luck, but maybe.... just MAYBE this will be the year!! :)

Lindyer0523 (not verified)

Mon, 04/23/2012 - 07:13

What would you have used for the top trim?

Rustic X Console - Surprise Christmas Present for my Wife

So my wife found this on Pinterest last month and loved it. We have been searching for something to go behind our sectional couch in our den. When she showed it to me I discreetly emailed it to myself as a plan was forming in my head. She was working nights for the month of December so I worked on it in the garage in the evenings and hid it in the crawl space so she wouldn't see it. She woke up Christmas morning to find it in place with a bow (clearly made by a man who is much better at carpentry than bow making) attached and was very surprised and excited.

I distressed the wood using several highly complicated techniques such as hitting it with a hammer, dropping a bag of screws on it, and scratching it with a screwdriver. It was then sanded and stained with Minwax Provincial 211. I applied two coats of satin polyurethane for protection.

I liked the look of the hex head screws so after painting them flat black I actually used them to hold the top on.

Estimated Cost
$150
Estimated Time Investment
Weekend Project (10-20 Hours)
Finish Used
Minwax Provincial 211
Clear Satin polyurethane
Recommended Skill Level
Beginner

Comments

Reclaimed wood king bed

Submitted by Anonymous (not verified) on Thu, 10/17/2019 - 20:34

Built for a customer out of reclaimed 2x6 spruce corrral boards. There was a lot of sanding involved in prepping this wood, but I couldn’t be happier with how it turned out!

Built from Plan(s)
Estimated Time Investment
Week Long Project (20 Hours or More)
Recommended Skill Level
Intermediate

Outdoor Chairs

Submitted by Anonymous (not verified) on Fri, 07/07/2023 - 11:01

When my two teenage boys were out of school in 2020 due to Covid19, I had them choose a project to work on and they chose theses chairs. I made cushions to go with the chairs. I think it turned out fantastic! They were proud of their work and so was I.

Mimi's Hall Tree

Submitted by Erik on Fri, 02/24/2012 - 06:33

This is my first ever build (so be gentle). My fiance has always wanted a Hall Tree and her birthday was comming up so I posted a request for a Hall Tree and that afternoon there was a post from Ana with Mimi's Hall Tree, so I figured that was a sign I HAD TO BUILD IT! So I took the lists went to the local Home Depot and bought all the wood, plus a Jig Saw, Kreg Jig, Sliding Compound Miter Saw, Circular Saw, Clamps.... a few weeks later just in time for her birthday this is what I had. I have to admit its flawed but we love it!

I can't thank Ana and company for turning me on to my new hobby and I am looking forward to my next build!

PS I will be putting the hooks on tonight, I will post more photos when the hooks are on and there is stuff on the Hall Tree

Estimated Time Investment
Weekend Project (10-20 Hours)
Recommended Skill Level
Beginner

Comments

Guest (not verified)

Fri, 02/24/2012 - 06:38

The stain is minwax mahogany.

Guest (not verified)

Fri, 02/24/2012 - 09:18

I BET YOUR FIANCE LOVED IT...GOOD JOB KEEP BUILDING!

Rustic x coffee and end table

Submitted by Brad Wills on Sat, 12/28/2013 - 16:53

My sister n law and her family were moving and sold a lot of their furniture, so I built these as a Christmas gift. They came out great and I think they really appreciated it!

Estimated Cost
150.00
Estimated Time Investment
Weekend Project (10-20 Hours)
Finish Used
Varathane golden pecan and American walnut on the tops and the "X's". For the bases I used golden pecan and then painted flat cottage cream behr paint over. The whole project was topped with varathane satin finish polyurethane.
Recommended Skill Level
Intermediate

Comments

Doll Bunk for Raffle

Submitted by Anonymous (not verified) on Thu, 03/10/2016 - 18:32

Built this bunk for a school fundraiser raffle. Hope it will be a hit! Followed the plans as written with only one change. I cut the tops and bottoms of the vertical ladder rails at 45 degree angles so they slant in towards the bed.

Estimated Time Investment
Weekend Project (10-20 Hours)
Recommended Skill Level
Beginner

OLD ENGLISH FARMHOUSE WRITING DESK

Submitted by kwildman on Mon, 10/21/2019 - 11:59

I modified the Small Old English Style Farmhouse Dining Table plan to build a writing desk.   

I used five 1x6 boards for the top for a width of 27.5 inches.   I made my desk 56 inches in length.  I put the drawer on the long side like a pencil drawer.   I did use the legs that Ana recommended in the plan.   

I watched the video Ana posted on how to make the drawers for this table and it was so helpful.  I just made it like Ana did in the video but on the long side instead of the short ends.

I love how it turned out.  I used Watco dark walnut danish oil and Minwax dark wax for the finish.  

Estimated Cost
225
Estimated Time Investment
Day Project (6-9 Hours)
Finish Used
Watco dark walnut danish oil and Minwax dark wax for the finish.  
Recommended Skill Level
Intermediate
Back