Search Results
… What's the Big Secret? It's simple. We build the drawer box in place. Instead of measuring and building a drawer box and hoping it fits, we simply build it in place, measuring … try. This method is designed to work with the most popular type of drawer slide, the "full extension" or "ball bearning" drawer slide, …
Read More
Blog Post
… the face frame. Simply cut and nail and glue the four 1x3s inside the drawer side of the cabinet. … Figuring the Drawer Size and Building the Drawer Box Measure the inside width between the 1x3s installed in the …
Read More
Project Plan
… so the diagonals match. Because the front frame is supporting the drawer slides, it is super important that it is square. … Add the center … and nail and glue in place. … Drawers - I recommend building one drawer first, to make sure it slides right, and then build the … remaining. It is better to build slightly smaller in width as the drawer slides do have some adjustment if the drawer is small, but a too …
Read More
Project Plan
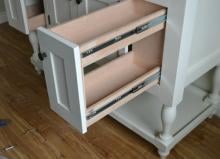
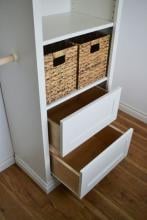
… to slide perfectly, but that should be a last resort. 2. Where the drawer slides are going to be mounted (on this cabient, it's the inside … of the sides) needs to be flush to the face framing. This is so the drawer slide can slide all the way out without hitting your face … out flush. 3. For this type of installation, with the side mounted drawer slides for a pull out drawer, it's best to have an opening that …
Read More
Project Plan
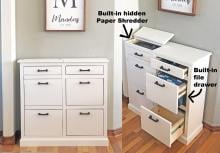
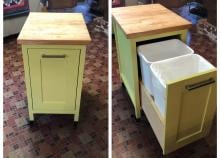
… could be alot more resourceful and build Mom drawers for the cost of drawer slides. So guess what we've been up to? You already knew that … should custom tailor to your project. There's nothing worse than a drawer that just doesn't quite slide right! The width measurement is super important because most drawer slides need a specific clearance for installation (usually 1/2" …
Read More
Blog Post
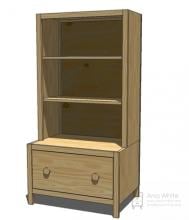
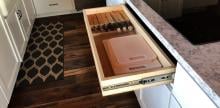
… I love this! So simple, yet functional. I love the nice big roomy drawer too! Like all of the plans that I design, this collection is … Then simply use 1x16s instead of 1x18s. How cool is that? Even the drawer bottom works with this idea - it's a 1x18. And because the drawer is deeper, you will need to use side mount drawer slides. … Bench …
Read More
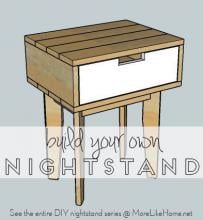
Project Plan
… This completes the carcass build. … Now it's time to work on the drawer. Draw a level line, 8-1/2" up from the base. Separate out the drawer slides cabinet member from the drawer member. Position the cabinet member in the cabinet so the line is …
Read More
Project Plan
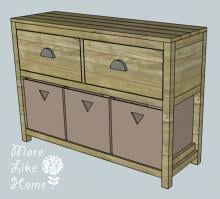
… and they are supposed to!! We need a little extra clearance for the drawer fronts.**) The first one should be flush with the top and outside … will leave 2"of space at the bottom of the legs. … Next install the drawer divider (F). This should be centered in the drawer opening with 19 1/8" on either side. Make sure you measure this …
Read More
Project Plan
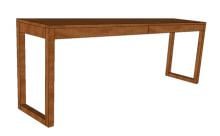
… flush with Desk Top; screw from outside leg into aprons. … Assemble Drawer: (1) Attach Drawer Back to Drawer Base with 1 1/4" screws, ensuring Drawer Back is flush with …
Read More
Project Plan
… side. Try to get at least one screw in each board. … Next build the drawer box. Start by attaching a drawer side (H) on each end of the drawer bottom (G). Use a Kreg Jig or drill through the drawer bottom …
Read More
Project Plan