Search Results
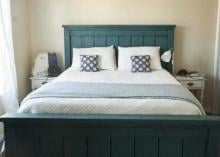
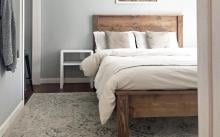
… Front of Headboard Panel. Lay out the panel pieces on a clean level surface. Take … and glue. Attach from the back to hide your nail holes. … Back of Headboard Panel. In the same manner as step 1, fasten the back trim pieces to the headboard. This is shown above. Use glue and 2″ nails. This will be the …
Read More
Project Plan
… top trim piece, E, as shown below. Keep the top edges flush with the headboard, and the sides. The diagram shows this. Use 2" nails and glue. … shown below. … Add the outside trim piece, I, on either side of the headboard, as shown below. Keep the front edges flush. There will be a … nails and glue. This is shown below. … Add piece J to the top of the headboard. Keep front edges flush. Use glue and 2" nails. This is shown …
Read More
Project Plan
… Headboard Construction Lay out headboard panel as shown in diagram. Glue and nail from the back side to … should be cut to fit for a perfect fit. NOTE: If you plan to join the headboard panel to the legs with pocket holes, carefully place nails at …
Read More
Project Plan
… … Attach top with the shorter screws or nails and glue. … Top of Headboard Finally, screw the top of the headboard to the headboard, centering on the headboard. You only need 2 screws and glue …
Read More
Project Plan
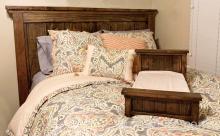
… substitute screws for nails throughout this plan. … Layout the two headboard legs. Mark a line all the way down each 2x4 leg, 2-1/4" in from the outsides. Dryfit the panel boards for the headboard on the legs. Then attach the top 1x8 to the legs, with glue … the 1x8 boards as you go. … Apply glue to all top edges of the headboard. Place 1x3 on top, even overhang on ends, flush to the back …
Read More
Project Plan
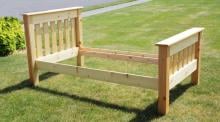
… 1x4) and adjusting so the opposite diagonals match. … Attach the headboard panel to the 2x2s on the legs with 2-1/2" screws. Only screw to the headboard panel at the top and bottom portion backed by the 1x4s. Also … 2x6 top, leaving a 1" overhang on all four sides. This completes the headboard build. … The footboard is constructed exactly as the …
Read More
Project Plan
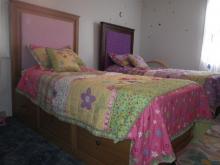
… fun, and ask for help if you need it. Good luck! … Attach 1x3s to the headboard panel. You can also do the same with the footboard panel. If … prior to attaching the 1x3s. Rebecca also added the wood shims to the headboard at this step rather than waiting until the end - it's up to … and a flush to the front. So there is a little disconnect between my headboard and the legs. That is a personal decision though. My husband …
Read More
Project Plan
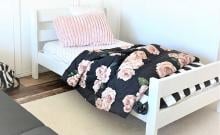
… level surface with straight boards (especially important for the headboard panel). Predrill and countersink yours screws. Use glue for … the scraps and use them to draw the pattern on the other side of the headboard. Cut the other side of the headboard to match. … BED FRAME You can click images for a larger view. …
Read More
Project Plan
… You can also prefinish at this step, or after building the headboard and footboard. … FOOTBOARD To build the footboard, work from … the lower rail in the footboard. Attach with two screws per end. … HEADBOARD Repeat the same steps for the headboard, starting at the top and working down. … PREFINISH the …
Read More
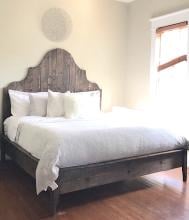
Project Plan
… a fancy sleigh bed here. Just cut the legs at 22 1/2" and make the headboard symmetrical to the footboard. Dimensions are shown above. … holes before beginning to build. Be safe, work smart, and have fun. … Headboard Begin by attaching all the headboard boards together as shown above with pocket hole screws and …
Read More
Project Plan