Search Results
… be cut at 76 1/2″ x 40″ 1. Back. Cut or have cut the back of the headboard. Overall dimensions are 76 1/2″ x 40″ … Please note that the … the fronts of the legs. Also fasten the top of the leg fronts to the headboard as shown above. … Frame. Measure and cut your frame from the … stapling on the back. Using the 1″ screws, screw from the back of the headboard into the center panel, holding the panel in place. You will …
Read More
Project Plan
… C, the 1×4 trim pieces. Begin by lining up the panel pieces for the headboard, A, on top of the 2 trim pieces, C, as shown above. Use glue … the HOW-TO section to learn how to check for square). Nail all 11 headboard pieces to the back side of C. Do the same for the footboard, … the panel pieces B, and two more of the 1×4 trim pieces, C. … Your Headboard and Footboard panels should look like the above diagram. Make …
Read More
Project Plan
… Use 2″ screws or nails to the frame, as shown here. Square up your headboard first. Keep outside edges flush. … Sides of Headboard. Finish the sides of the headboard by adding the 1x3s to the sides, as shown above. This also …
Read More
Project Plan
… backs. Use 1 1/4" finish nails and glue. … Now it's time to build the headboard. First we must make a decision. If you have a table saw, rip … it's really okay. You will just need to subtract an inch from the headboard/footboard panels and trim. This is noted in the diagram. Once … the footboard first, to match the clearance under the benches. The headboard is really not necessary, as you can barely see this. … Use 2" …
Read More
Project Plan

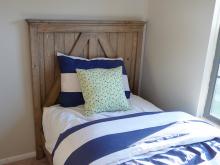
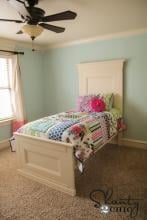
… that you can, and the ends of the 1x4s. … If you need to attach the headboard to the wall, you can do that by screwing a 2x4 @ 92-5/8" to the wall, 48" above the floor, where you want the headboard placed. Then screw the headboard along the top edge to the 2x4. … Modern Geo Headboard …
Read More
Project Plan
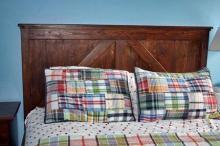
… trim to the panel boards, keeping outside edges flush. … Mark the headboard as shown in the diagram. Use glue and 1 ¼” finish nails to … … As shown in the diagram, attach the 1x3 top trim to the top of the headboard. … Attach the 1x4 top trim to the 1x3 top trim, with a ½” … storage bed frame plans are available here. … Rustic Farmhouse Headboard (Twin) …
Read More
Project Plan
… to prioritize adding at least the queen size. We'll start with the headboard. Isn't it beautiful? For lots more photos and details about … You can also see all the plans in the Brookstone Collection here. … Headboard Panel Start by lining all the 1×4 panel boards up, rotating … (see above diagram). Cut this line. Attach the cross supports to the headboard with 1 1/4″ finish nails and glue, nailing into all of the …
Read More
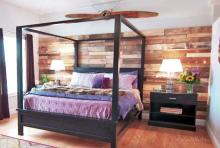
Project Plan
… top and sides about 8" apart (but not the bottom) back side of the headboard panel. Attach with a 1" space behind (and 1-1/2" space in front) to the 4x4 legs. This means the headboard panel is set up from the back edge of your 4x4 legs by 1". Use … … Use 1-1/4" brad nails and glue to attach 1x4 trim piece to top of headboard panel. … Repeat steps to build the footboard. … Paint or …
Read More
Project Plan
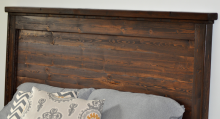
… top, and also screw to 1x4 boards. … Next, attach header to top of headboard. … Add crown moulding around top of headboard. … Build frame for footboard as shown above, using 3/4" pocket … on your mattress/box spring size. IMPORTANT: Due to the size of this headboard, it is recommended that you attach to a stud in the wall …
Read More
Project Plan