

How to build a blind corner base kitchen cabinet - step by step plans from Ana-White.com
Moving down the line of cabinets today!
You got a little sneak peek of how we built a base cabinet for the other corner of the Momplex Vanilla kitchen in our drawer installation post -
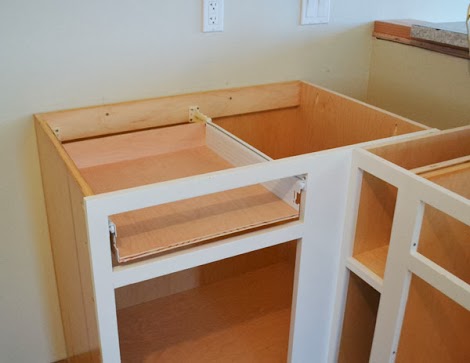
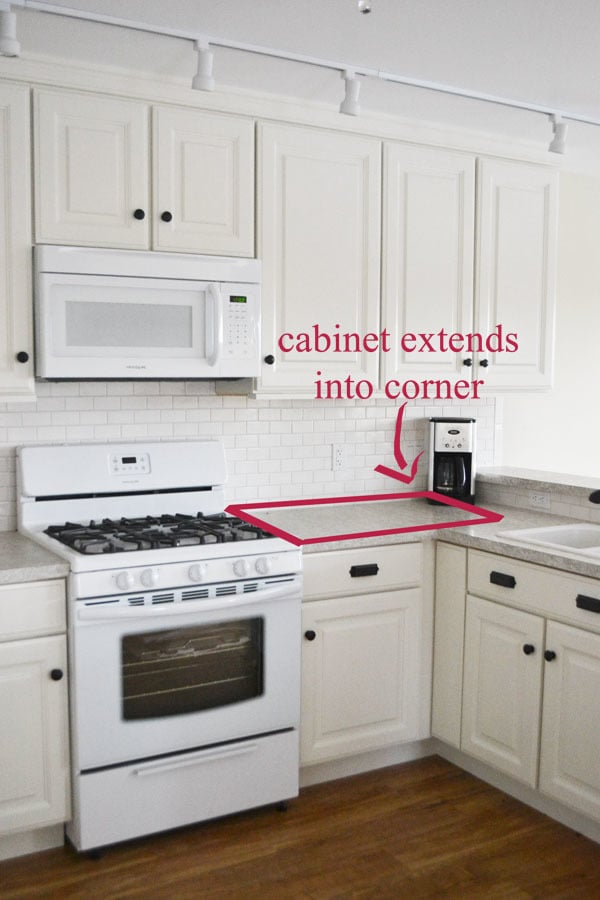
Unlike the other side where we had lots of room for a big 36" pie cut lazy susan base cabinet, on the right side of the range, there really wasn't room for much of anything in that corner.
But we didn't want to waste any precious storage space either ...
But at the same time, we wanted the two cabinets flanking the range to be symmetrical in appearance.
What to do???
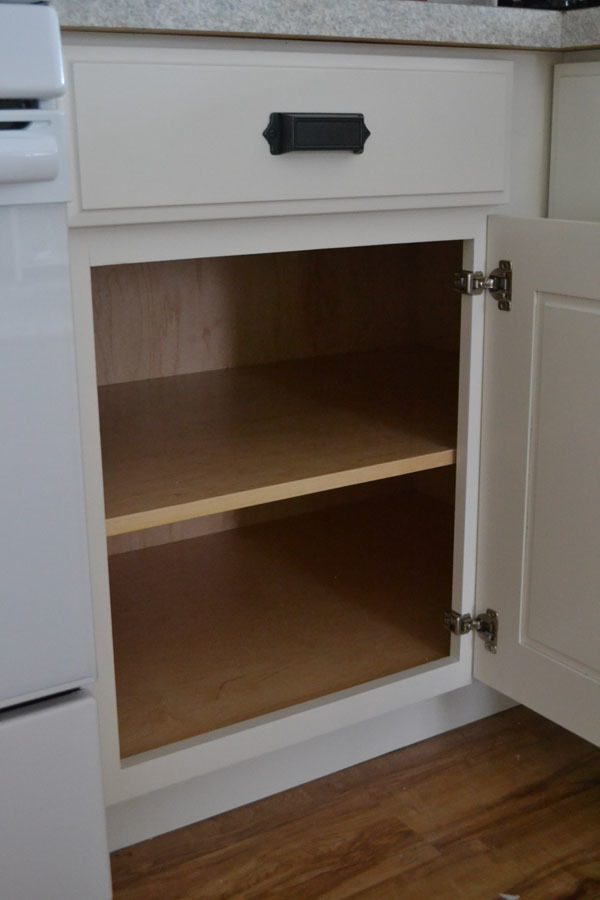
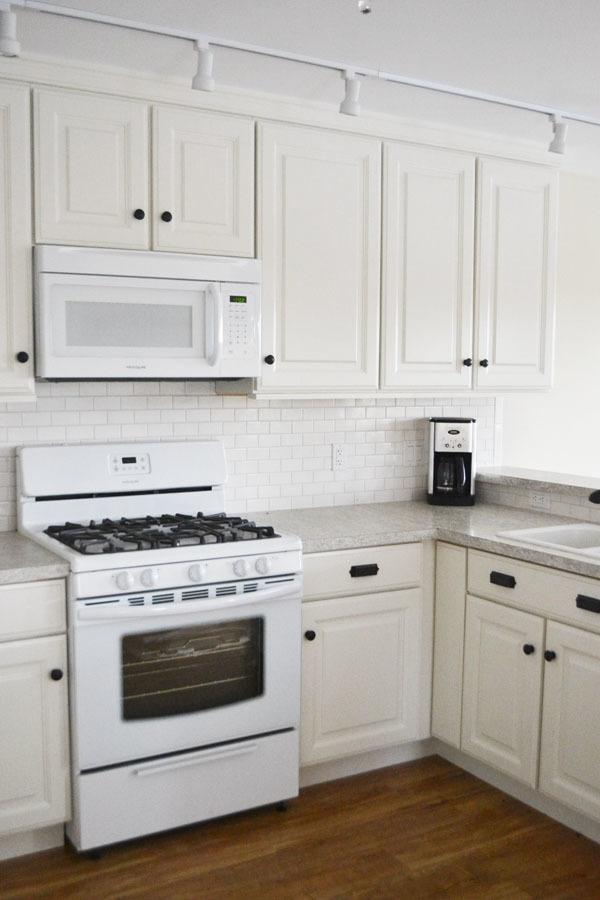
We built a blind corner kitchen cabinet, of course! That has the same drawers/doors as the 21" base cabinet to the left of the range for symmetry,

But is NOT the same on the inside -

It's actually double the size inside!
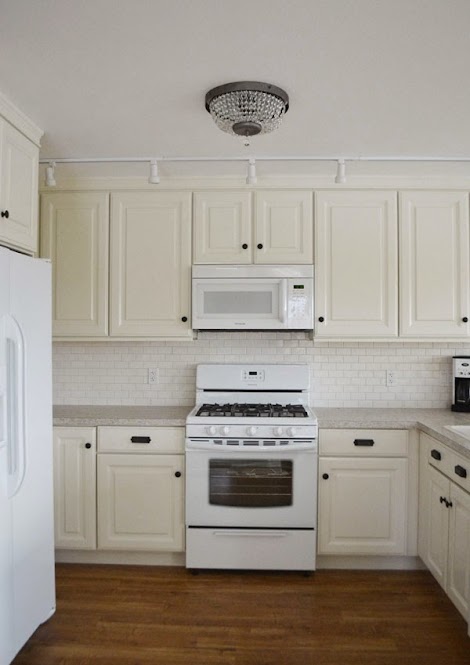
SIDE NOTE: Don't you love that prefinished PureBond plywood inside? Yep, no reaching inside to paint!

It is in fact so big, you will need a pint sized helper to adjust the shelves.
That is, if you are looking "ready to pop" (yes, that's a direct quote) preggers.
Otherwise, I'm sure you'd fit just fine.

We could have actually went even bigger inside, but I started stressing that too deep of a blind corner would become a black hole for all the appliances and gadgets that looked so life changing on tv ... and then really only got used once.
You know what I'm talking about.

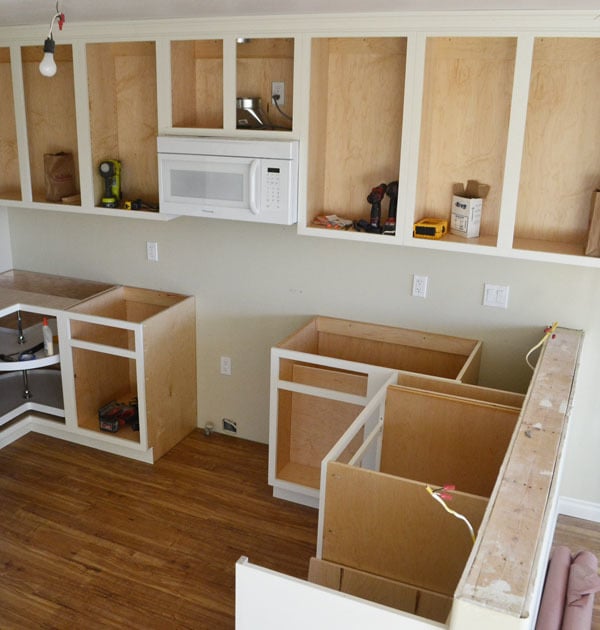
The blind corner cabinet is really just a base cabinet with a funny face frame. But there are a few things to consider when building:
- Depending on the way your doors will swing or if you have any drawers, you will need filler strips (recommended at least 3" on either side of the corner). For the blind corner itself, we built the filler strip in by using a 1x6 in the center of the face frame. This also gives us quite a bit of wiggle room for adjusting the overall run of the cabinets.
- Shelves start sagging (depending on the material it could be more or less) at about 36" in span. So if you are building a 48" blind corner, you'll need to reinforce that shelf somewhere in the center.
- If you are using a blind corner hardware shelving kit, order it first and build your cabinet to suit the kit.
- If your blind corner doesn't extend all the way to the wall, make sure you add a cleat to support the countertop on the wall itself.
- Because walls in kitchens aren't always perfectly square and because walls aren't normally a factor of 3" exactly, use the blind corner as an adjustment cabinet so you don't have to throw filler strips in later. When we installed the cabinets, we started at the other corner, worked our way down, and whatever was leftover was left blank in the corner. A word of caution though - make sure your cabinets on the other side cover the blind corner opening.

So let's dive in and get building on that blind corner cabinet!!!
RECOMMENDED: Please read this post on building base cabinets before tackling this plan.

Preparation
3/4" plywood ripped into strips 22 1/4" long (for sides and shelves) 3/4" plywood scrap from ripping sides and shelves (for top supports) 3/4" plywood ripped into strips 5" long (for base supports - use cheaper plywood here) 1x2s for face frames 1x6 (or other wide width board) for the center stile (27" length) 1/4" plywood (for backs) 1-1/4" pocket hole screws 3/4" finish nails edge banding for shelves
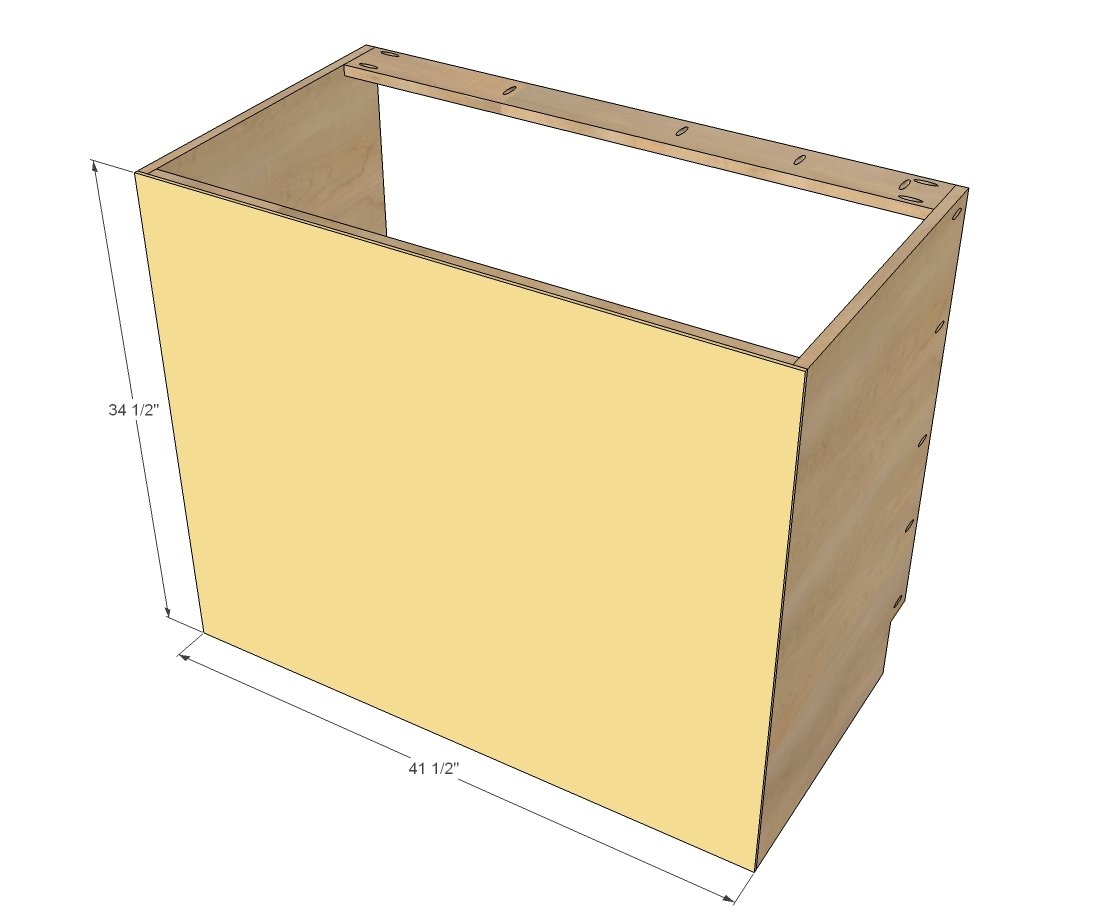
CARCASS 2 - 3/4" plywood @ 22-1/4" x 34 1/2" (side panels - same on ALL BASES) 1 - 3/4" plywood @ 22-1/4" x 40" (bottom shelf) 2 - 3/4" plywood @ 5" x 40" (bottom supports) 2 - 3/4" plywood @ 3-1/2" (can vary in rip width) x 40" (top supports) 1 - 1/4" plywood @ 32" x 41-1/2" (back) FACE FRAME 2 - 1x2 @ 27" (side stile - same on ALL BASES) 1 - 1x6 @ 27" (center stile) 2 - 1x2 @ 42" (top/bottom rails - always overall width of cabinet) 1 - 1x2 @ 18" (drawer/door rail) SHELVES 3/4" plywood @ 22" x 39-3/4" (measure and adjust to fit shelf pins) DOOR/DRAWER FACE for FULL OVERLAY (1-1/4") 5 1/2" x 20-1/2" (drawer face) 22-1/2" x 20-1/2" (door)


Please read through the entire plan and all comments before beginning this project. It is also advisable to review the Getting Started Section. Take all necessary precautions to build safely and smartly. Work on a clean level surface, free of imperfections or debris. Always use straight boards. Check for square after each step. Always predrill holes before attaching with screws. Use glue with finish nails for a stronger hold. Wipe excess glue off bare wood for stained projects, as dried glue will not take stain. Be safe, have fun, and ask for help if you need it. Good luck!
Instructions
Step 1

For all the base cabinets, make sure the side panels are cut exactly the same as the other cabinets. Make sure you create the two sides for each cabinet in mirror - meaning the toekicks are on the bottoms, pocket holes for attaching face frames are on the outsides, and shelf pin holes are on the inside for adjustable shelves.
Step 2

We used cheaper plywood (unfinished off the shelf oak) for these pieces because they are hidden underneath the cabinet. We ripped a bunch at 5" widths. All pocket holes are drilled on the 3/4" setting, and we used fine threaded pocket hole screws. Note that the toekick is cut 1/2" less than the front - see next diagram.
Step 3
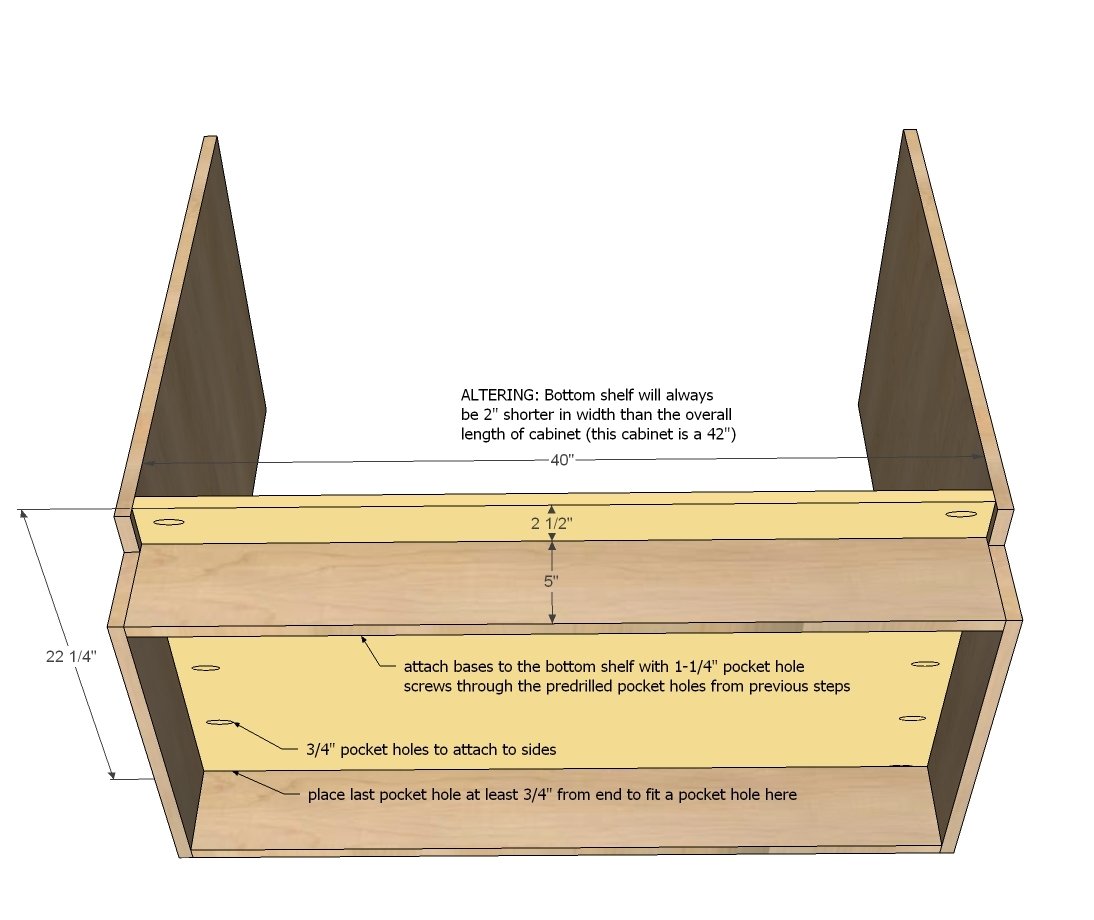
On top of the base supports, attach the bottom shelf.
Step 4
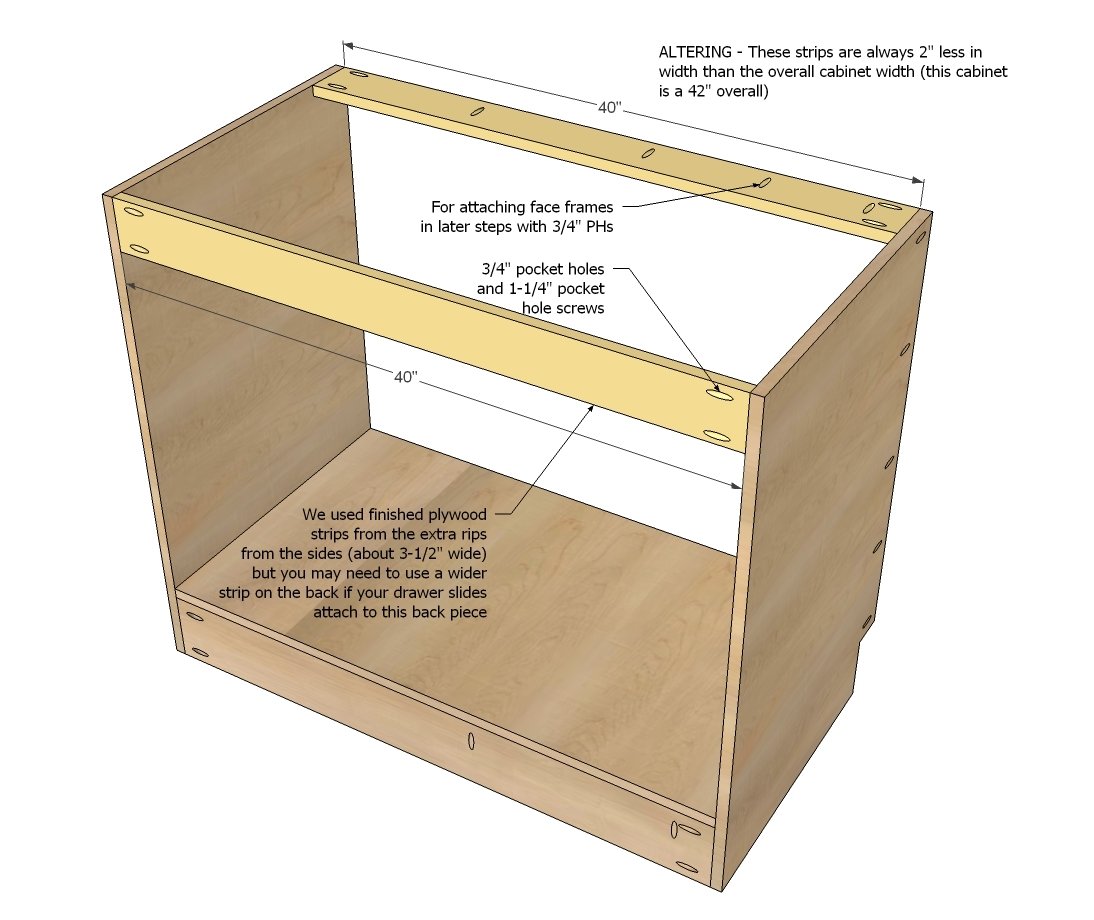
For the top, we supported the front and back with strips of plywood leftover from ripping the sides. The width doesn't really matter of the boards, just getting the length right on. NOTE: Depending on how you mount your drawers, you may wish to add extra support to the back.
Step 5
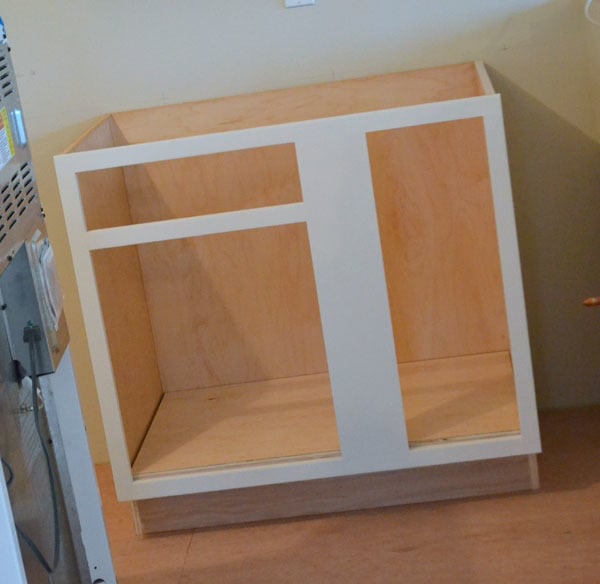
Step 6

The face frame overextends the sides by 1/4", but is flush to top and bottom (of toekick cutout) but overextends bottom shelf by 1/2". This leaves a 1/4" lip on inside of cabinet. I recommend building the face frame first with 3/4" pocket holes and 1-1/4" pocket hole screws, and then attaching the whole face frame to front with 1-1/4" pocket hole screws through holes predrilled on outsides of sides and top. On the bottom, you won't be able to get a drill in between the face frame and the bottom support board, so we nailed on the bottom with glue.
Step 7
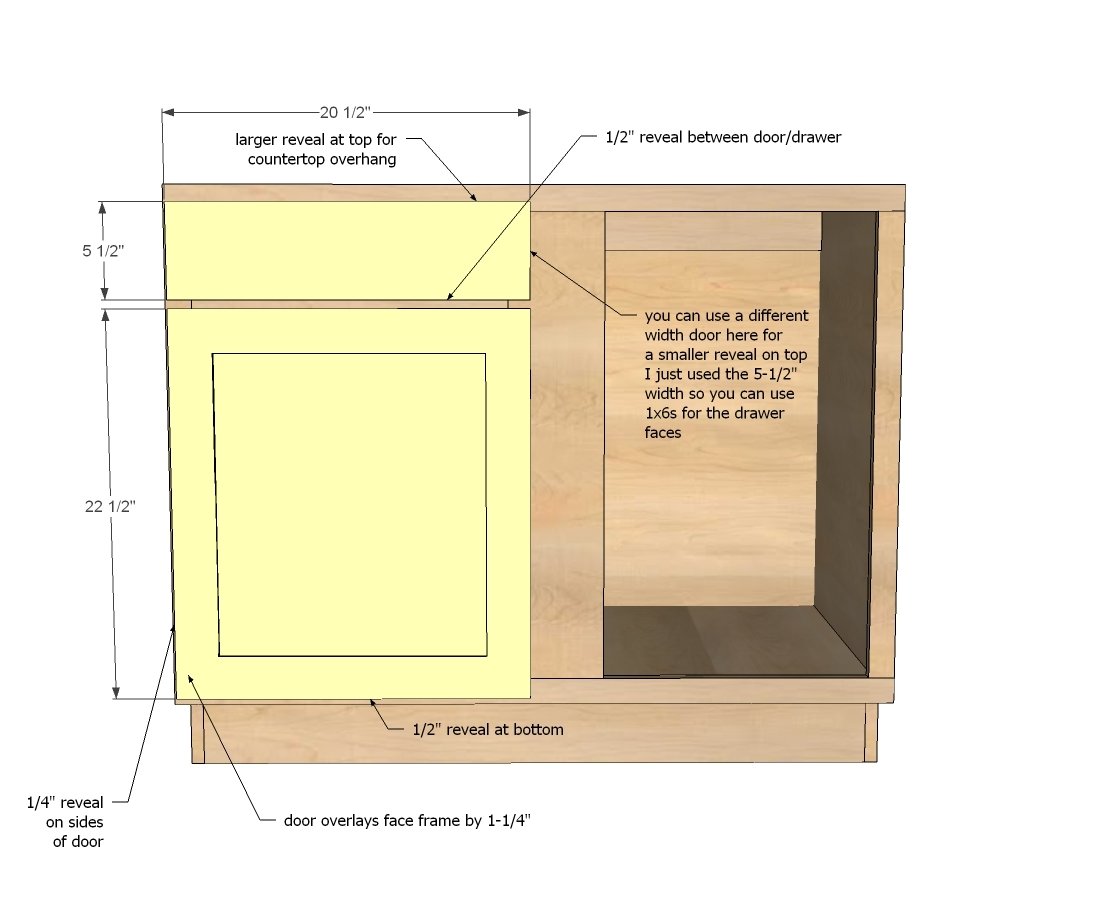
These are the size drawers/doors we ordered from Cabinet Now using 1-1/4" overlay concealed hinges (will do a post on hinges soon).
It is always recommended to apply a test coat on a hidden area or scrap piece to ensure color evenness and adhesion. Use primer or wood conditioner as needed.

Comments
Mrs B
Wed, 12/04/2013 - 15:42
Blind Cupboard hardware
Thanks for all of the kitchen cupboard plans. When I do my work room I will be using this piece of hardware to make that hard to reach back a little better.
http://www.leevalley.com/en/hardware/page.aspx?p=43657&cat=3,43722,43723
JoanneS
Thu, 12/05/2013 - 16:25
Vanilla kitchen :)
Love the title you gave this kitchen! When we use these colors in our home we call them “ice cream” colors, because they make you think about ice cream sundaes – white (appliances) for the whipped cream, creamy white (cabinets) for the vanilla ice cream, and browns and blacks (floor and hardware) as the toppings. The whole room is yummy! :)