

How to build a 6" filler base cabinet for tray storage - step by step plans from Ana-White.com
Well, this is it! The final base cabinet we built for the Momplex Vanilla kitchen.
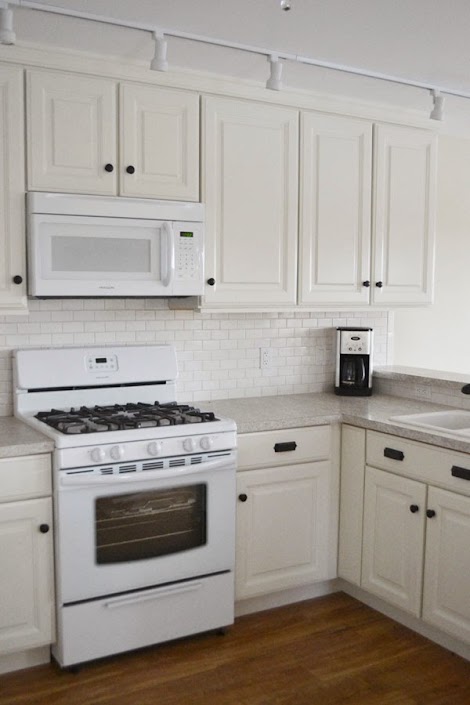
And if our plan works, most people (unless you are a DIY dork like us or just as cabinetry obsessed) may never even know it's a cabinet!
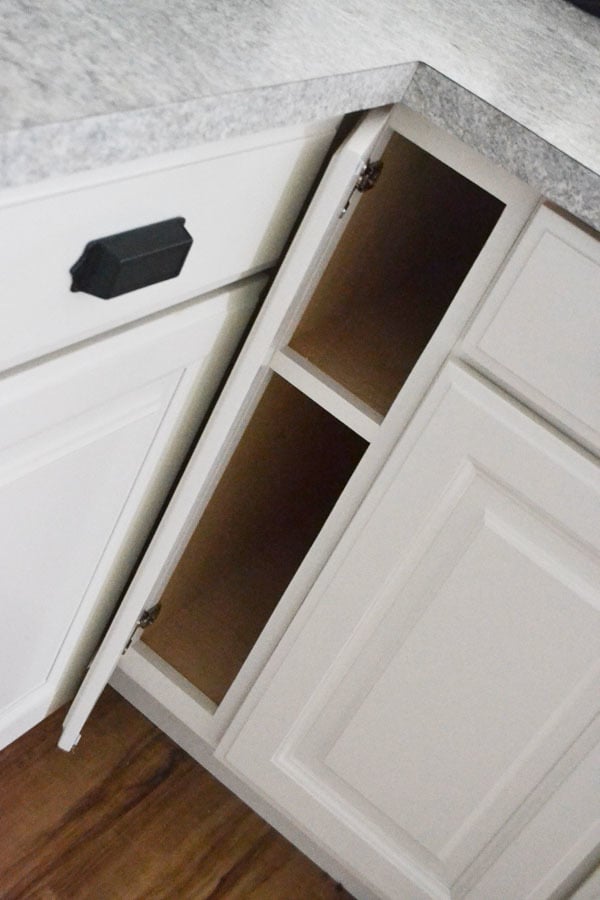
After building the blind corner cabinet and the sink base cabinet, and positioning all the cabinets in place, we ended up with a 6-3/4" gap between the sink base and the corner.
What to do? Filler strip?
I can promise you this. If we had put a filler strip in, it would have bugged me for The. Rest. Of. My. Life.
I would have lost endless nights of sleep over the wasted space that could have been ....
There would have been terrible regrets, nightmares ....
Oh, the things that could have been stored in there!
So to prevent such hardships, the Ram and I build a little cabinet, exactly 6-3/4" wide,
Designed for tray son the bottom, lids or cutting boards on top,

But being that it's cornered literally in the corner, we couldn't put a normal door with knob on it. The knob would hit the blind corner cabinet. And because it's so narrow, a standard door with raised panel is impossible to build.
(Or do what I really wanted, which was a pull out filler cabinet .... )

So we ordered with our doors a flat drawer face and hinged it on, crossed our fingers it would work ...
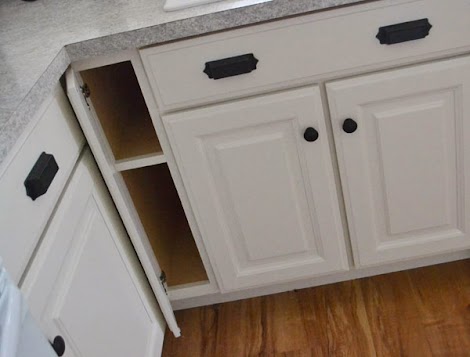
And what do you know?

I'll definitely be sleeping at night.
Well, at least until our new baby decides to arrive.
Read on below, I'm sharing the plans for a 6" filler tray storage base cabinet - just add to it to get the exact size you need for your kitchen!
Happy Building!
XO Ana
PS - just have to share a sunset picture from the Momplex with you!

Taken at 3:30 in the afternoon of course! Gotta love Decembers in Alaska.
Preparation
3/4" plywood ripped into strips 22 1/4" long (for sides and shelves)
3/4" plywood scrap from ripping sides and shelves (for top supports)
3/4" plywood ripped into strips 5" long (for base supports - use cheaper plywood here)
1x2s for face frames (only need about 1 foot)
6 feet of 1x1 hardwood in matching species (we ripped ours on the table saw)
1/4" plywood (for backs)
1-1/4" pocket hole screws
2" wood screws for attaching shelves
3/4" finish nails
edge banding for shelves
2 - 1/2" Overlay Frameless Concealed Hinges
NOTE: We used PureBond Formaldehyde Free Plywood in Prefinished Maple for the interiors of these cabinets and built face frames out of poplar. Then all we had to do was paint the face frame and attach and the enitre cabinet was finished.
CARCASS
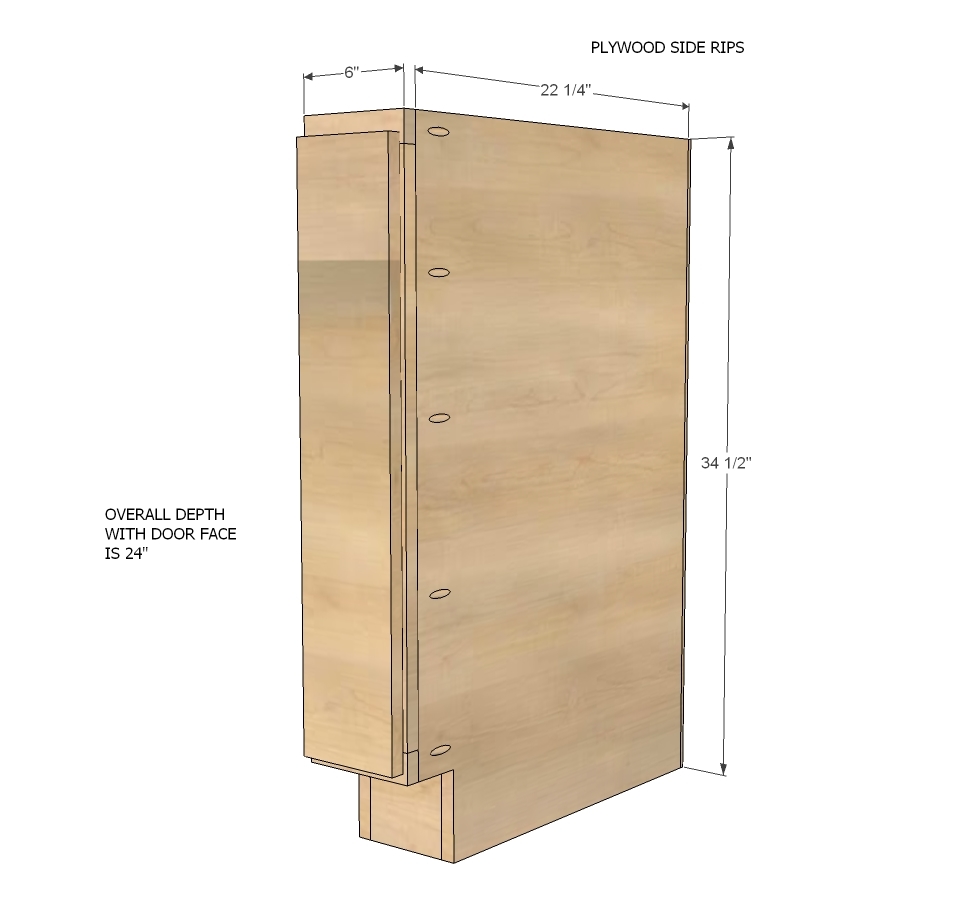
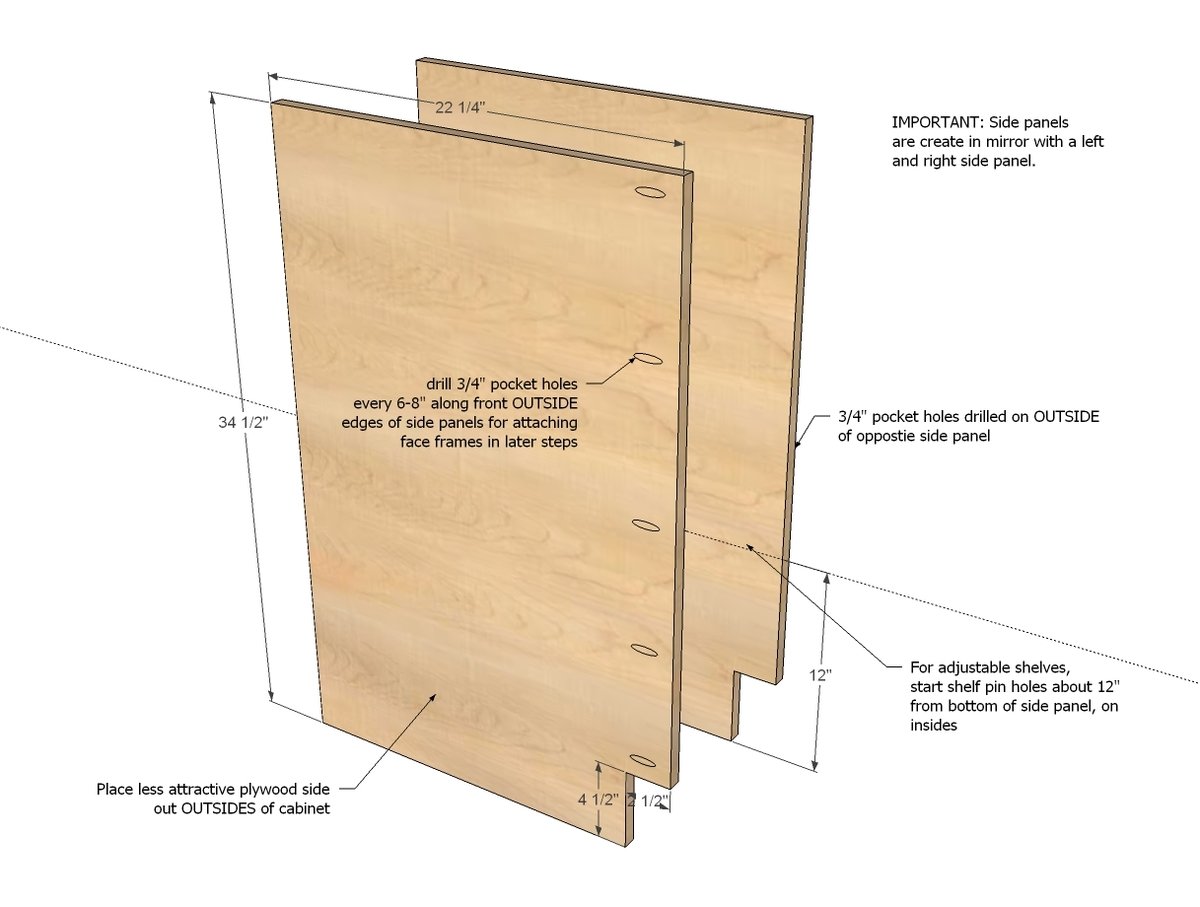
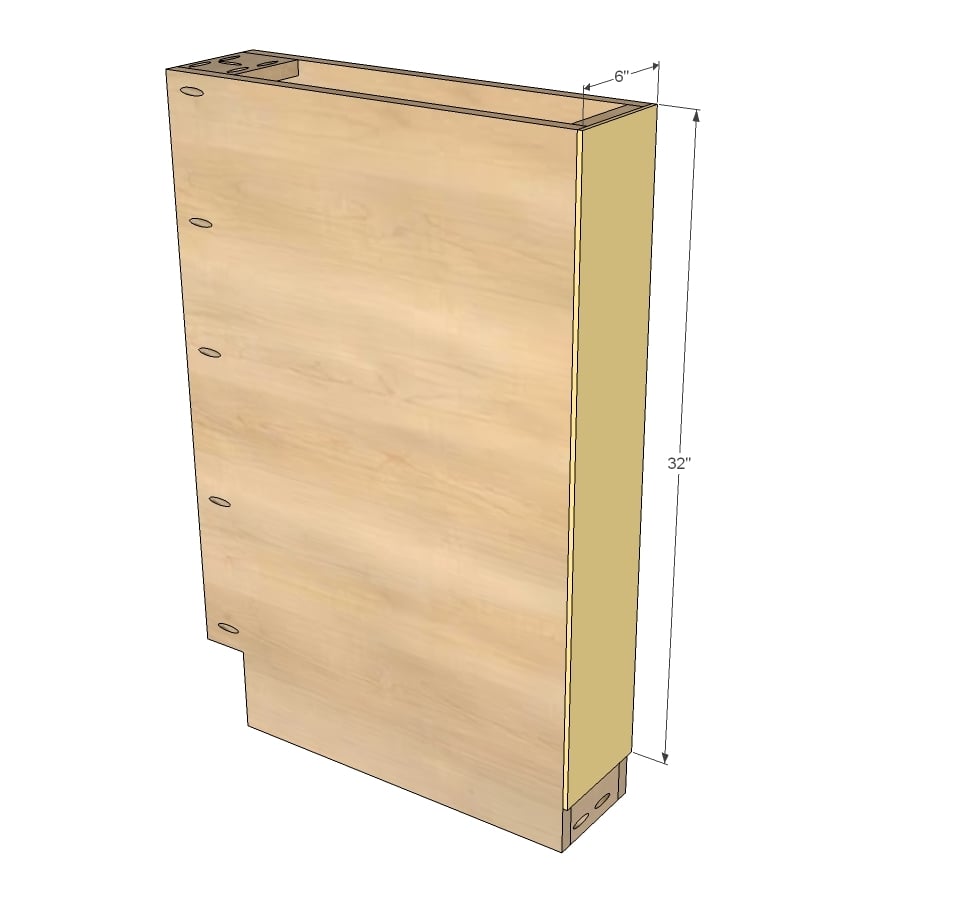
2 - 3/4" plywood @ 22 1/4" x 34 1/2" (side panels)
2 - 3/4" plywood @ 22 1/4" x 4-1/2" (bottom shelf and optional center shelf)
2 - 3/4" plywood @ 5" x 4-1/2" (bottom supports)
2 - 3/4" plywood @ 3 1/2" (can vary) x 4-1/2" (top supports)
1 - 1/4" plywood @ 32" x 6" (back)
FACE FRAME
2 - 1x1 @ 27"
2 - 1x2 @ 6"
1 - 1x1 @ 4-1/2"
DOOR/DRAWER FACE for 1/2" but appears as FULL OVERLAY (1/2" for this cabinet because the stiles are only 3/4" wide)
5 1/2" x 28 1/2" (drawer face)
NOTE: When ordering doors/drawers, make sure the overall height matches the rest of your cabinets. The goal is 1/2" reveal between all doors/drawer faces with full overlay doors/drawers. On the sides, 1/4" is revealed per cabinet, adding to the total 1/2" reveal.


Please read through the entire plan and all comments before beginning this project. It is also advisable to review the Getting Started Section. Take all necessary precautions to build safely and smartly. Work on a clean level surface, free of imperfections or debris. Always use straight boards. Check for square after each step. Always predrill holes before attaching with screws. Use glue with finish nails for a stronger hold. Wipe excess glue off bare wood for stained projects, as dried glue will not take stain. Be safe, have fun, and ask for help if you need it. Good luck!
Instructions
Step 1
IMPORTANT: There are lots of different cabinet plans on this site - if you are building a full kitchen, make sure you use the same collection of plans throughout - where the sides of each base match exactly. This plan belongs with the Momplex Vanilla Kitchen collection of plans.
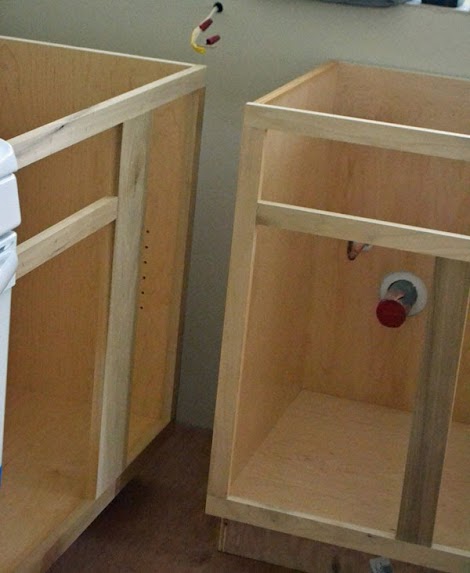
Start with the sides - they must be indential to all the sides in your base cabinets for the cabinets to line up. However, this cabinet is designed without adjustable shelves, so no need for shelf pins.
Remember that the two sides are made in mirror, with the pocket holes on the outsides of the sides for attaching the face frame in later steps.
Make sure your toekicks are all cut consistently.
Step 2
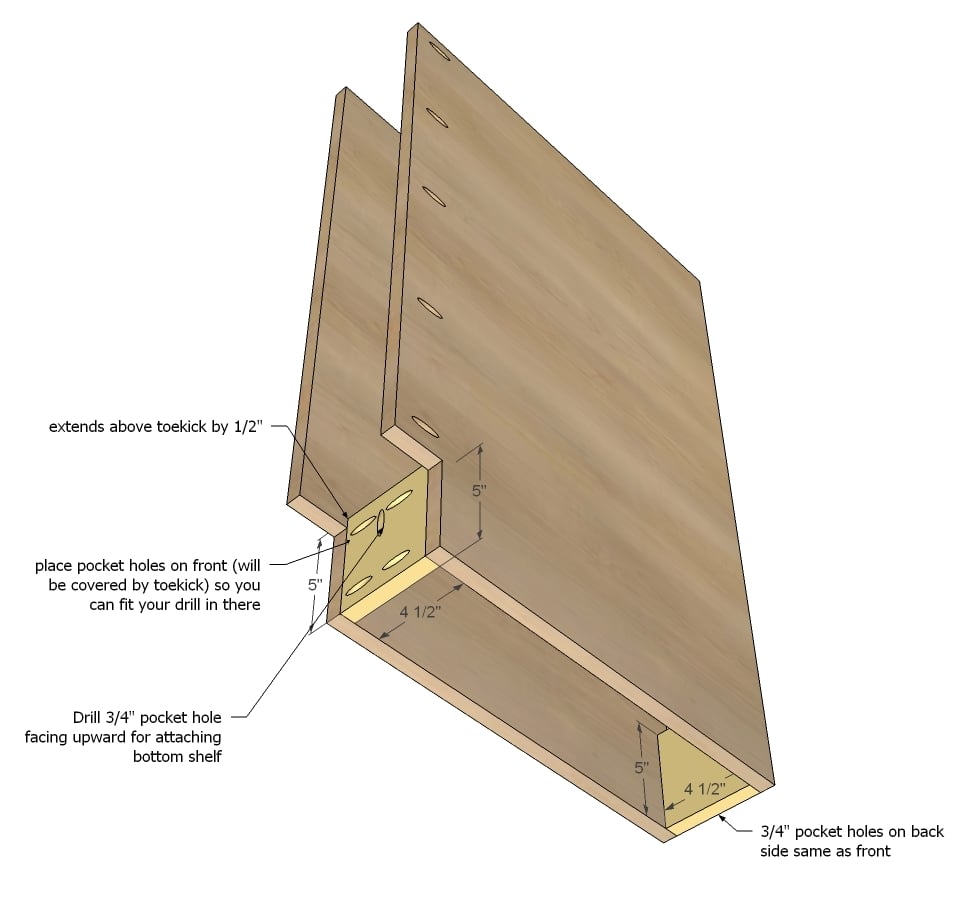
We used cheaper plywood for the bottom bases just because it all gets covered up. We ripped strips 5" wide, and then cut those down to the needed lengths per cabinet.
Place 3/4" pocket holes on the outsides so it's easy to get your drill in there.
Also, drill 3/4" pocket holes facing upward for attaching bottom shelf.
Attach through 3/4" pocket holes with 1-1/4" pocket hole screws.
Step 3
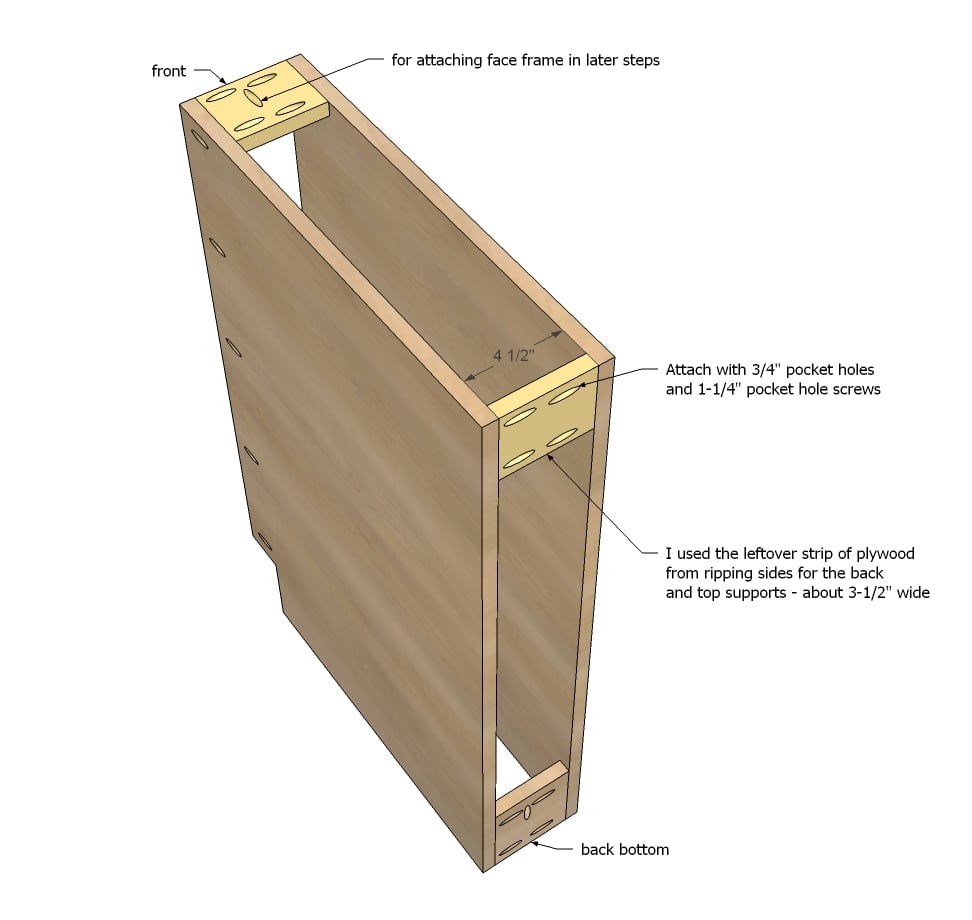
Because you may be able to see the top support boards, we used the excess strip of 3/4" finished plywodo for the top supports. It ended up being about 3-1/2" wide. You could also use 1x boards - the width can really vary here.
Step 4
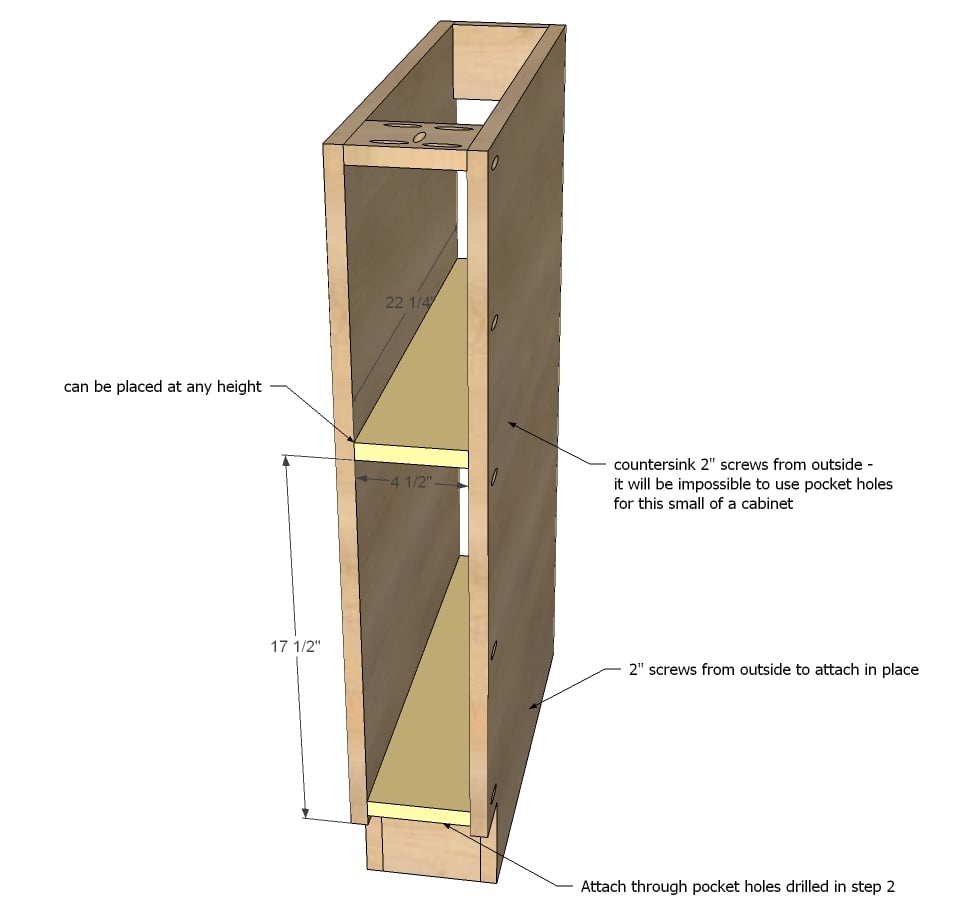
The shelves have to be attached from the outside - we countersunk 2" wood trim screws.
Step 5
Step 6
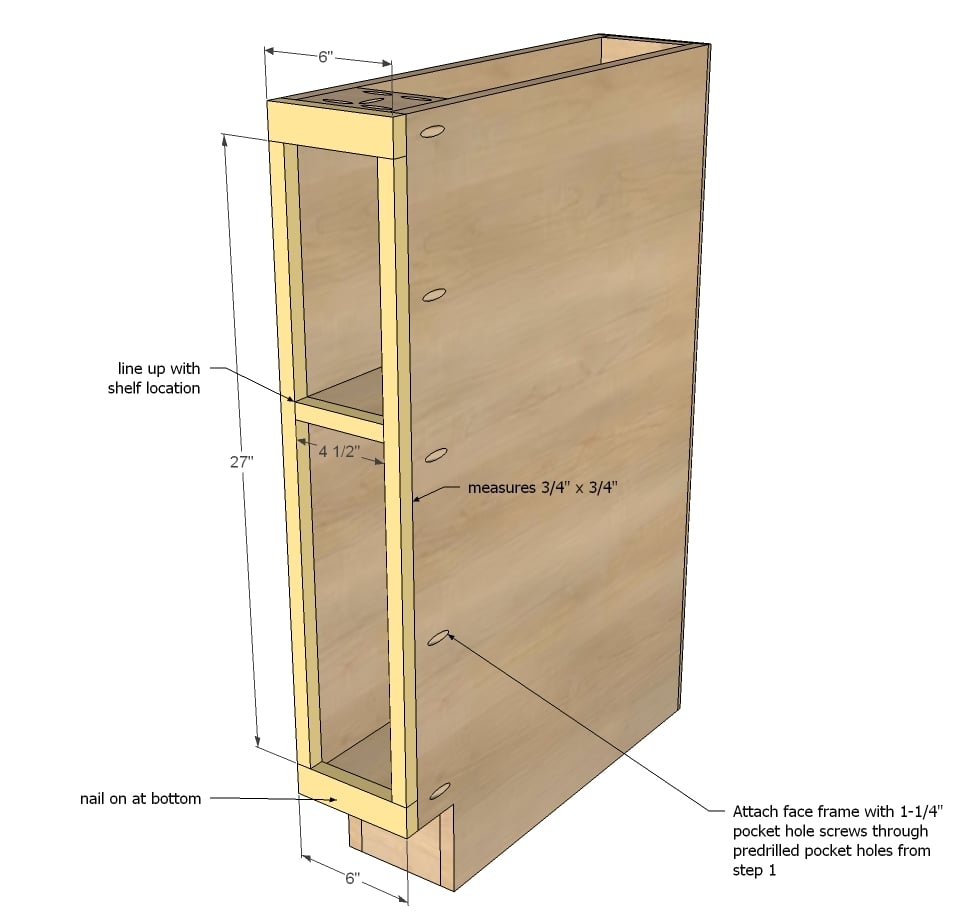
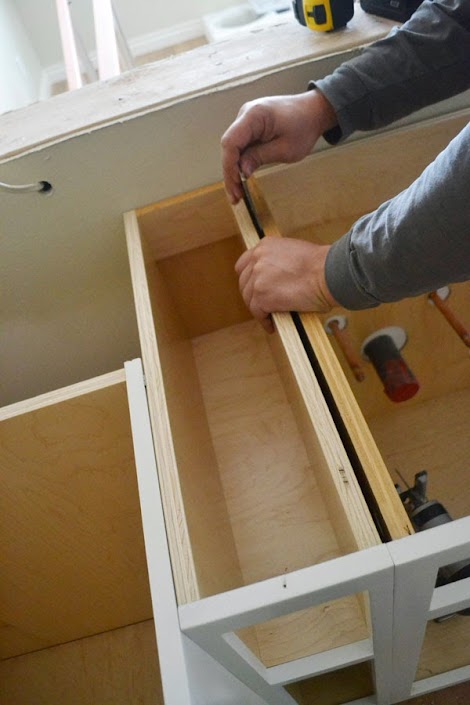
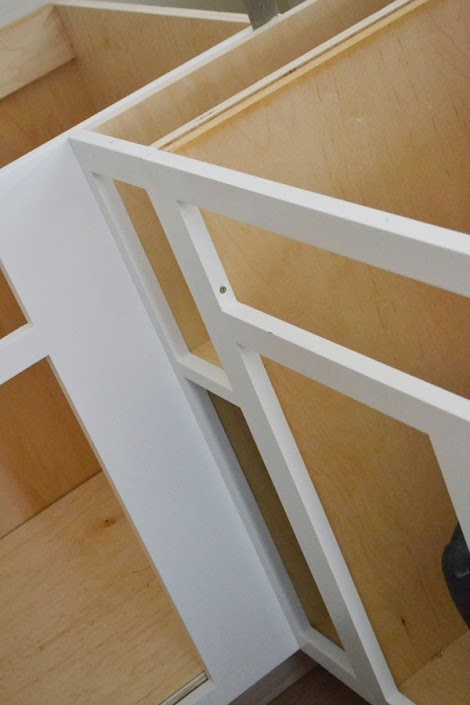
Because this cabinet is so narrow, we did not want to loose valueable storage space with a face frame that overextends the sides (as the other bases do) and inside of cabinet. Instead, we ripped poplar down to 1x1 sizes (3/4" x 3/4") and used the 1x1s as stiles and trim for the shelf. The top and bottom are consistently 1x2s to match the rest of the cabinets.
We built the face frame first using 3/4" pocket holes (just one per end of each 1x1) and 1-1/4" pocket hole screws and glue.
The face frame then gets attached through the pocket holes drilled in step 1 in the sides and step 3 in the top support.
Step 7

Because the face frame changed on this cabinet, we then had to use a 1/2" overlay on the door (as opposed to standard 1-1/4" overlay for face frame cabinets). The hinge also should be for frameless cabinets as the cabinet mounting bracket will differ - specifically a 1/2" Overlay Frameless Concealed Hinge.
It is always recommended to apply a test coat on a hidden area or scrap piece to ensure color evenness and adhesion. Use primer or wood conditioner as needed.

Comments
JoanneS
Sun, 12/15/2013 - 18:42
Love this!
This is brilliant - what an excellent use of space, cleverly disguised as a filler! I'd love to have something like this in my kitchen!
Kim Wester
Tue, 03/03/2015 - 12:31
Thank you! (and typo)
This is exactly what we need for a 6" gap between the cabinets we're building. I'll modify the plan to fit into our space. Ana -- I found a typo. "We nailed our backs on with 3/4" plywood and glue." You must type 3/4" plywood a lot! I'm sure this is supposed to say "finish nails" instead.
Huffy
Tue, 07/28/2015 - 05:51
This would have to be a pull out for me.
I converted my sheet pan cabinet to a pullout spice rack. Best thing ever done in my kitchen. Fillers should be called wasters
TiberiusF
Fri, 12/29/2017 - 06:36
combining projects
I have a similar space in the cabinet layout I've planned for my Tiny Home, and I am going to combine this project with your pull out drawer project and make myself a pull out spice rack for that otherwise lost space!
Thank you so much for your wonderful project ideas and plans!