


This barn door cabinet will create instant entryway organization! Features hooks on one side, and lots of shelving on the other. Hide the mess, show the best! Free plans include step by step diagrams with shopping and cut list.
Built by Woodwork By Toni Wood
Do you need more functionality in your entryway, but want your home's first impression to be a great one? This barn door cabinet with hook storage is beautiful and functional AND it hides half the stuff!

It's a mini mudroom on one side.
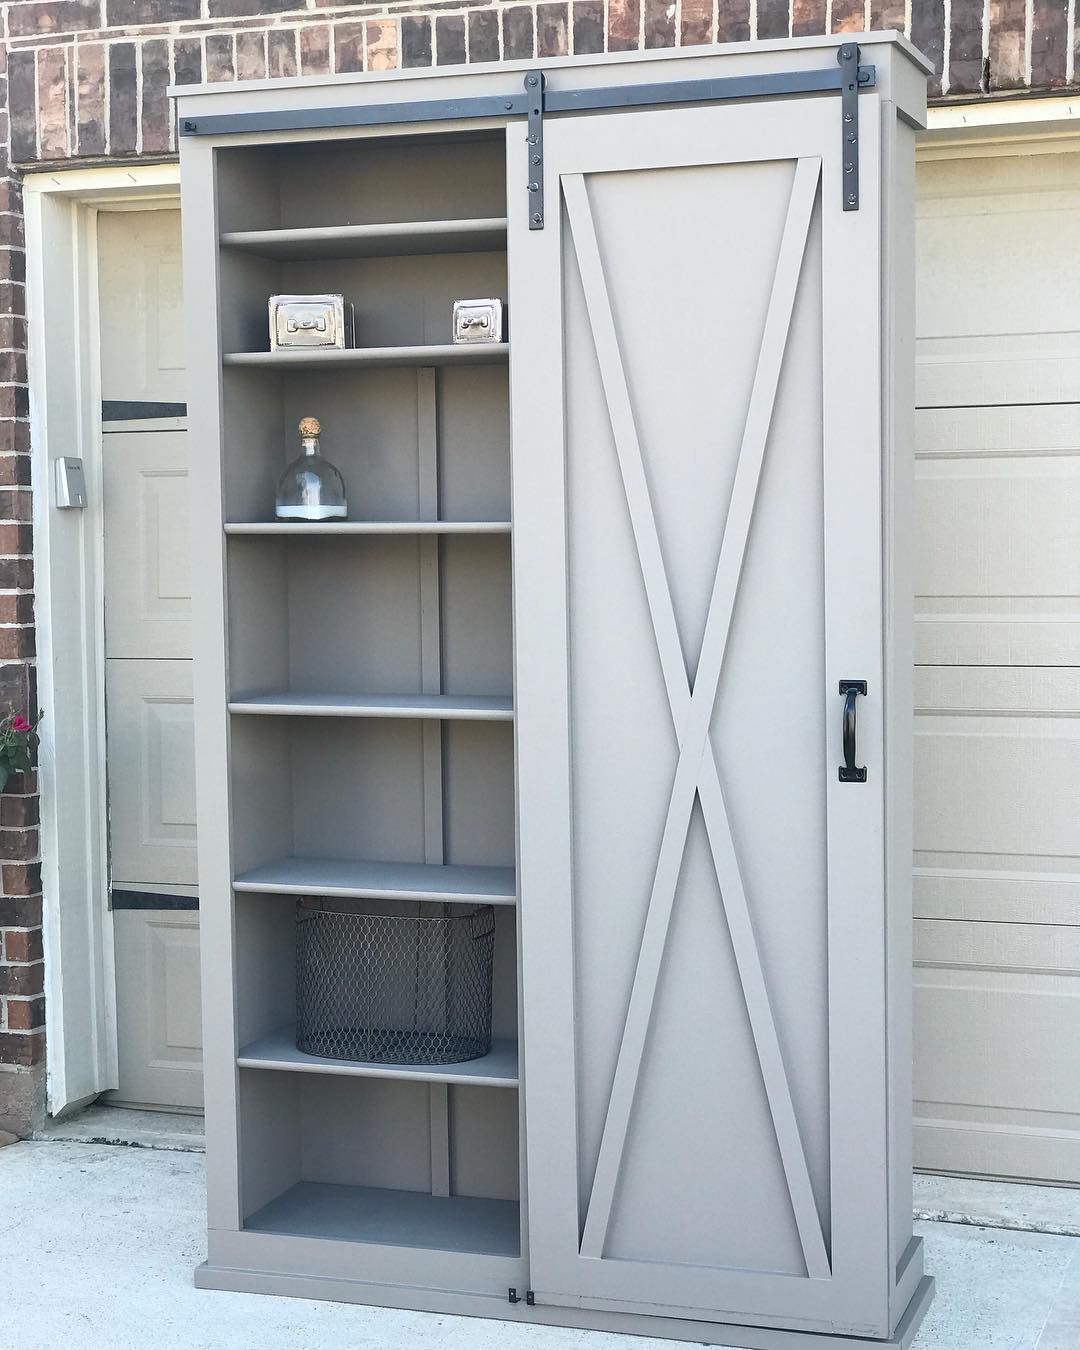
And a massive storage center on the other! Oh the stuff you could hide in there! Mittens, hats, homework, lunch boxes, umbrellas, sunglasses, the mail ... all within easy reach but out of sight.
This clever cabinet was designed and built by Woodwork by Toni Wood - make sure you take a second to follow her on Instagram for lots more inspiration and project ideas.
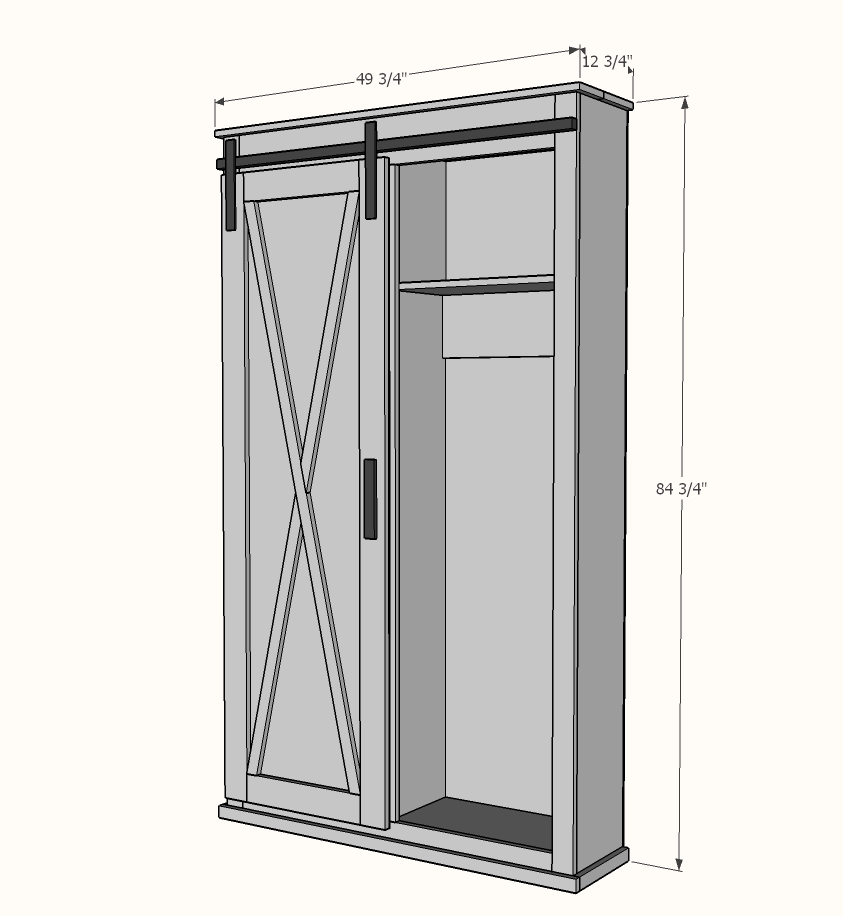
Barn Door Cabinet with Hooks Plans
You can't buy this cabinet - it has to be built! The free plans are following, enjoy and please share your finished projects when done!
Preparation
5 - 1x12 @ 8 feet long
1 - 1x8 @ 8 feet long
1 - 1x6 @ 8 feet long
3 - 1x4 @ 8 feet long
2 - 1x3 @ 8 feet long
4 - 1x2 @ 8 feet long
2 - sheets of 1/4" plywood for back (4x8 full sheets)
48" barn door hardware kit or make your own
Carcass
- 3 - 1x12 @ 84" - sides, divider
- 8 - 1x12 @ 23" - shelves
- 2 - 1x4 @ 23" - top supports
- 1 - 1x8 @ 23" - hook support
- 1 - 1/4" plywood @ 48" x 84" - back
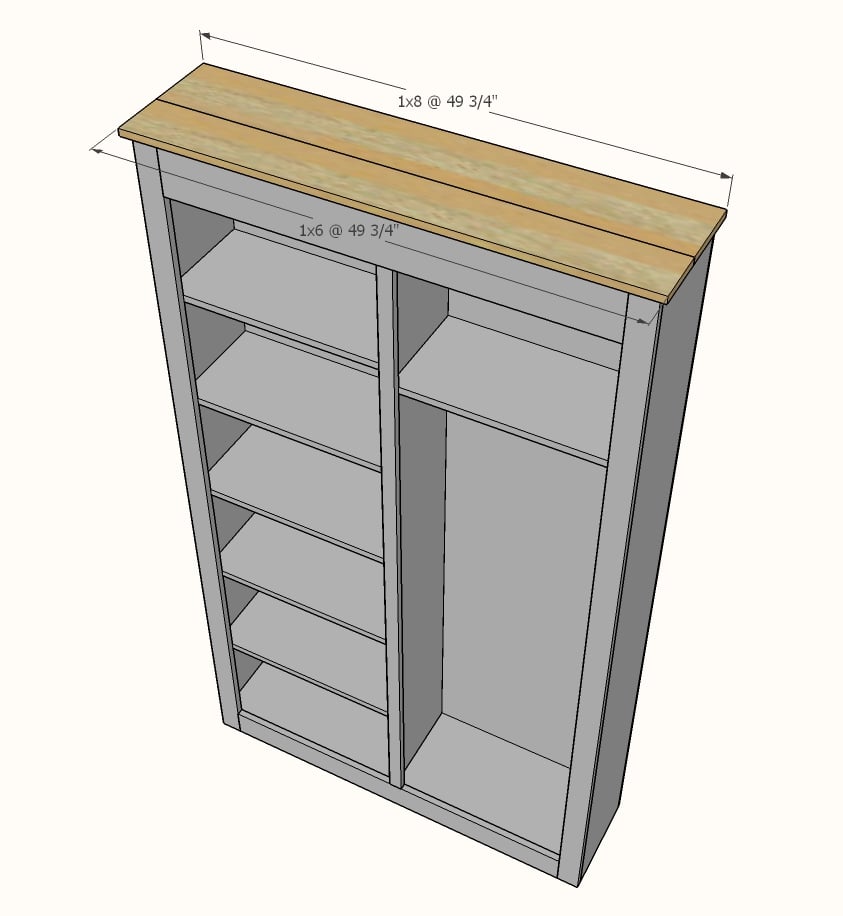
- 1 - 1x8 @ 49-3/4" - top
- 1 - 1x6 @ 49-3/4" - top
- 2 - 1x2 @ ~12" footer sides
- 1 - 1x2 @ ~49-3/4" - footer front
Face Frame
- 2 - 1x3 @ 84"
- 1 - 1x4 @ 43-1/4"
- 1 - 1x6 @ 43-1/4"
- 1 - 1x2 @ 75"
Barn Door
- 2 - 1x4 @ 76-1/2"
- 2 - 1x4 @ 17-1/4"
- 1x2 cross pieces scribe cut to fit
Cut the 1x boards using a compound miter saw (preferred) or a circular saw with a guild - straight square cuts are very important to the success of your project.
Back plywood should be cut with a circular saw.


Instructions
Step 1
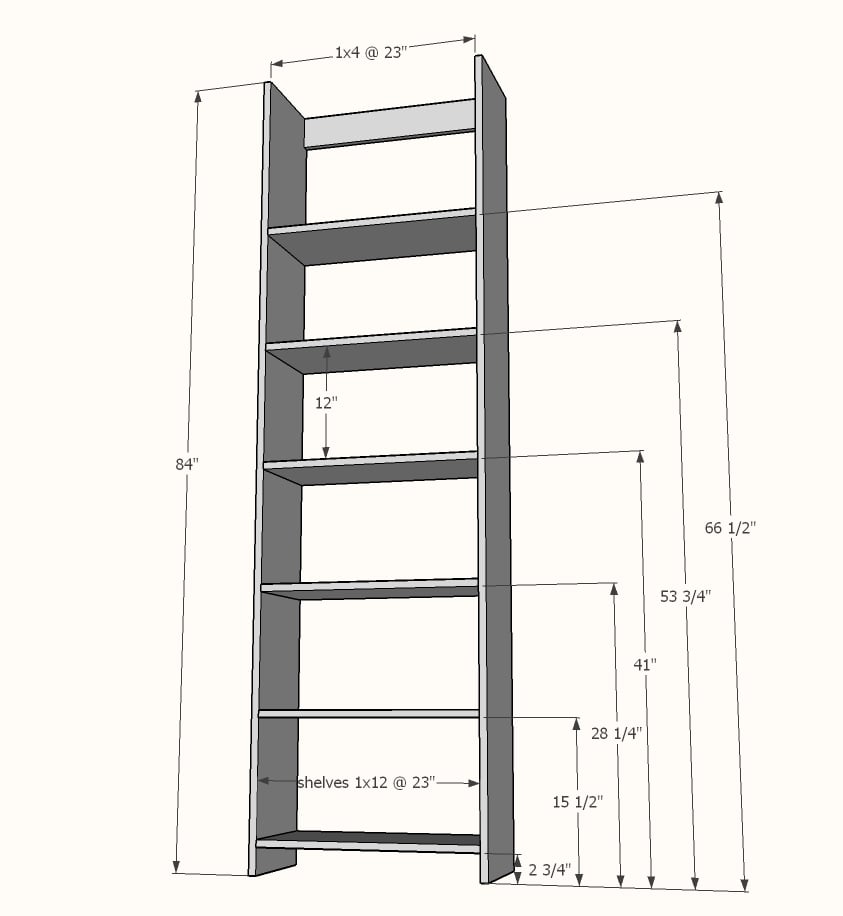
Drill three 3/4" pocket holes on each end of all the shelf boards and the 1x4 boards for top.
Attach to the 1x12 side and divider to create a shelf.
Distance between shelves can be customized to suit your storage needs, but at least one fixed shelf need to be placed in the center, and the bottom and top 1x4 need to be secured with screws.
Attach with 1-1/4" pocket hole screws.
Step 2

Add the hook side storage as you did in step 1.
Also pocket hole screw the 1x8 to the underside of the shelf above for added support.
Step 3

Build the face frame first with 3/4" pocket holes and 1-1/4" pocket hole screws.
Use 1-1/4" brad nails to secure to the front of the project with glue.
All outside edges should be flush.
Step 4
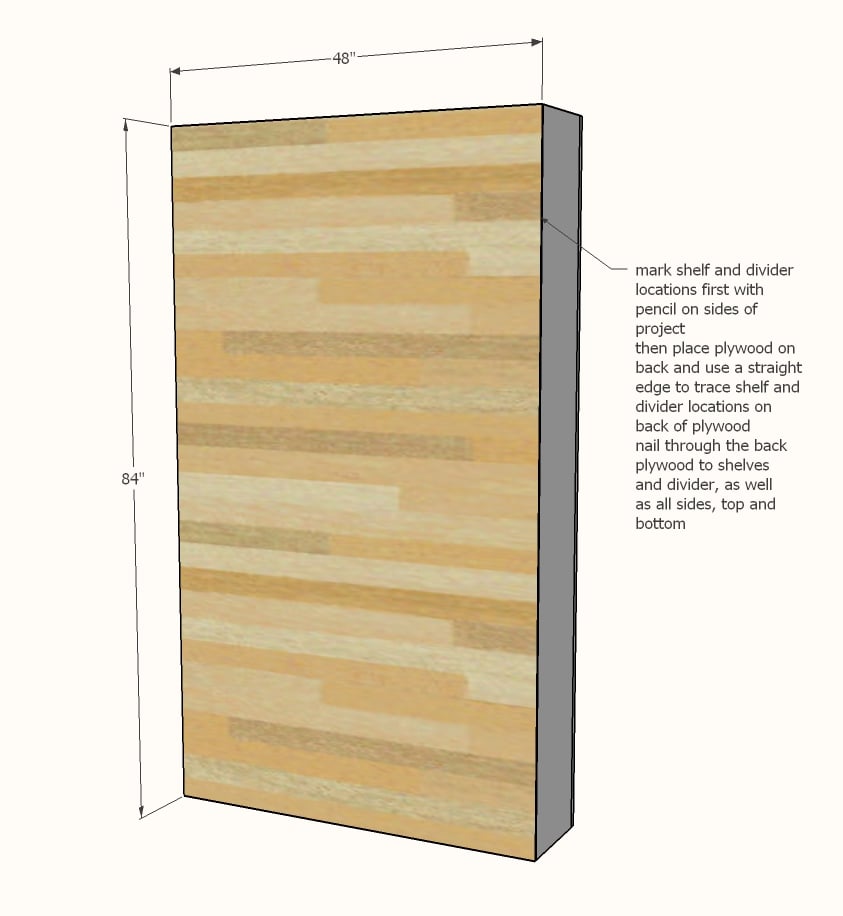
Attach 1/4" plywood back to back, nail on with 3/4" brad nails and glue.
Step 5
Attach 1x6 and 1x8 together at long edge with glue and 1-1/4" pocket hole screws.
Then attach to top of project with glue and 1-1/4" nails. A few screws are recommended to further attach top top - in case the wood decided to warp on you.
Step 6
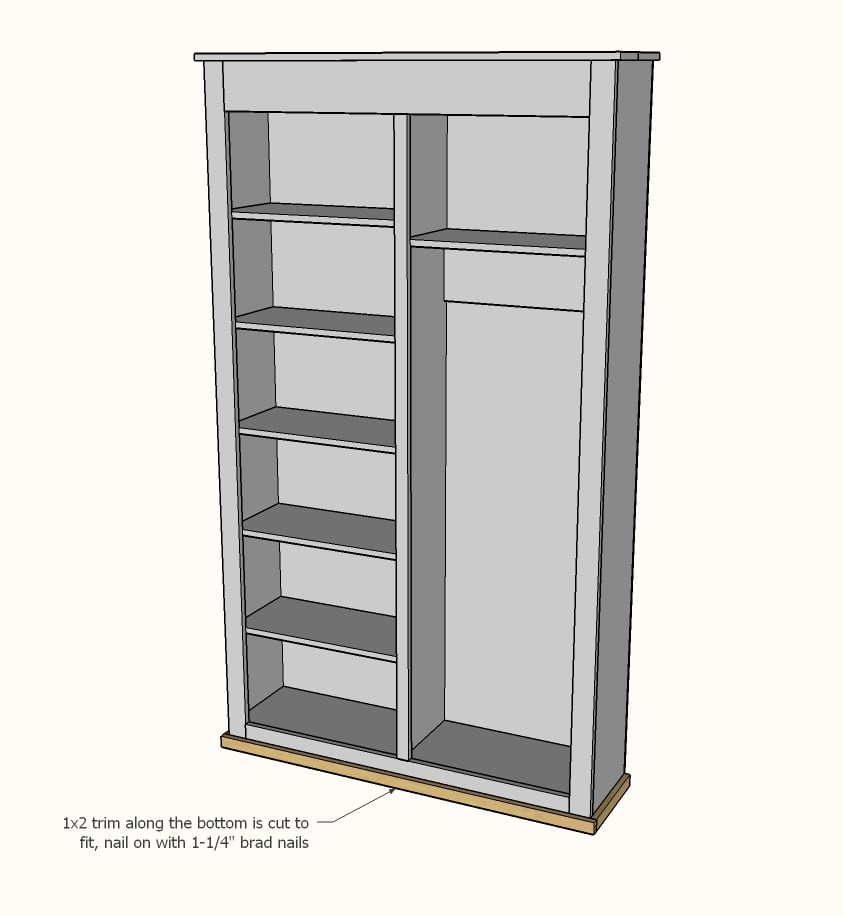
Cut 1x2 boards to fit the base, and nail and glue with 1-1/4" brad nails.
Step 7
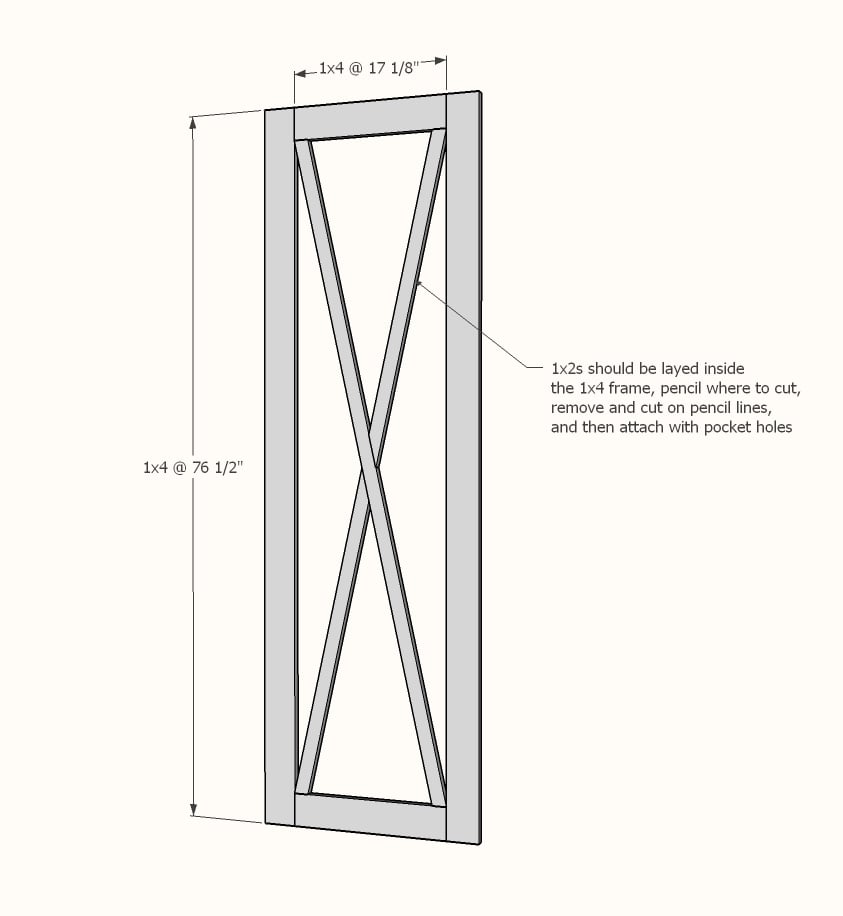
Build the barn door frame with 3/4" pocket holes and 1-1/4" pocket hole screws.
Lay the 1x2 under the finished frame, and trace where it meets the 1x4 frame. Cut on your pencil lines. Attach inside the frame with pocket holes.
Step 8
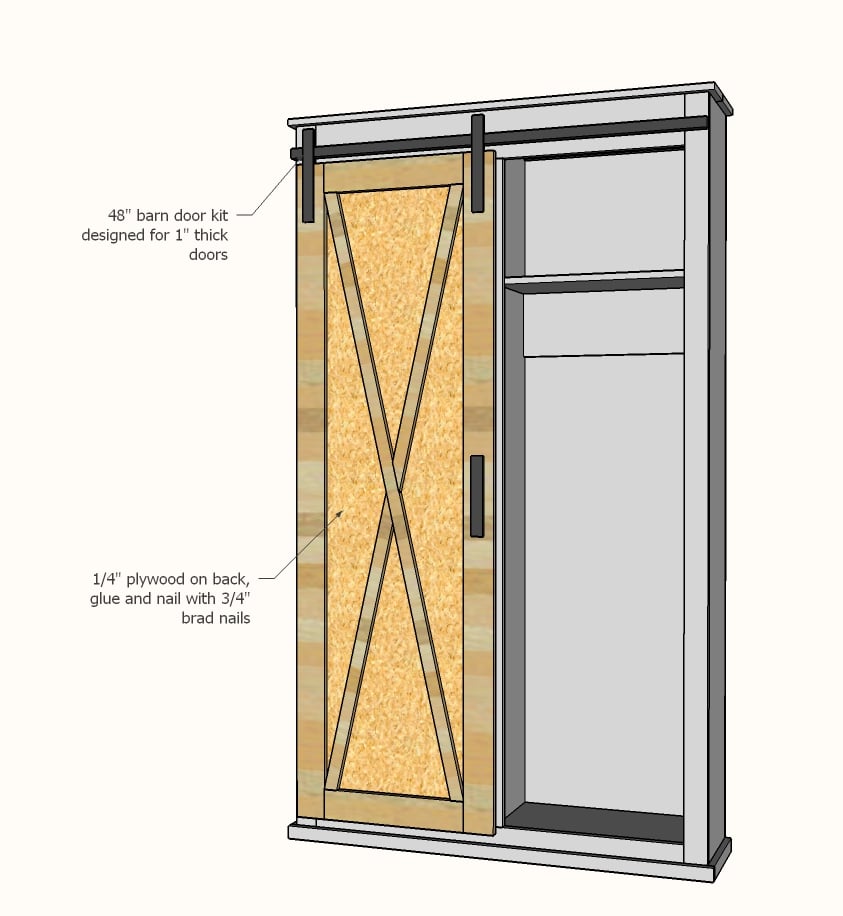
Cut 1/4" plywood to fit the back of the door.
Use 3/4" brad nails and glue to secure.
Install on the cabinet with barn door hardware.
You can make your own barn door hardware following this tutorial.
