
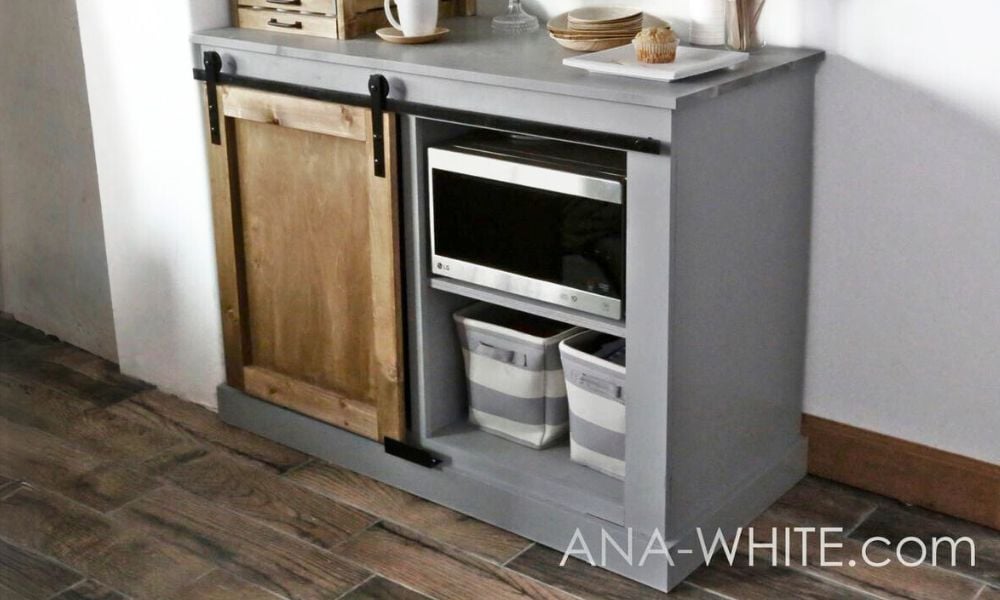

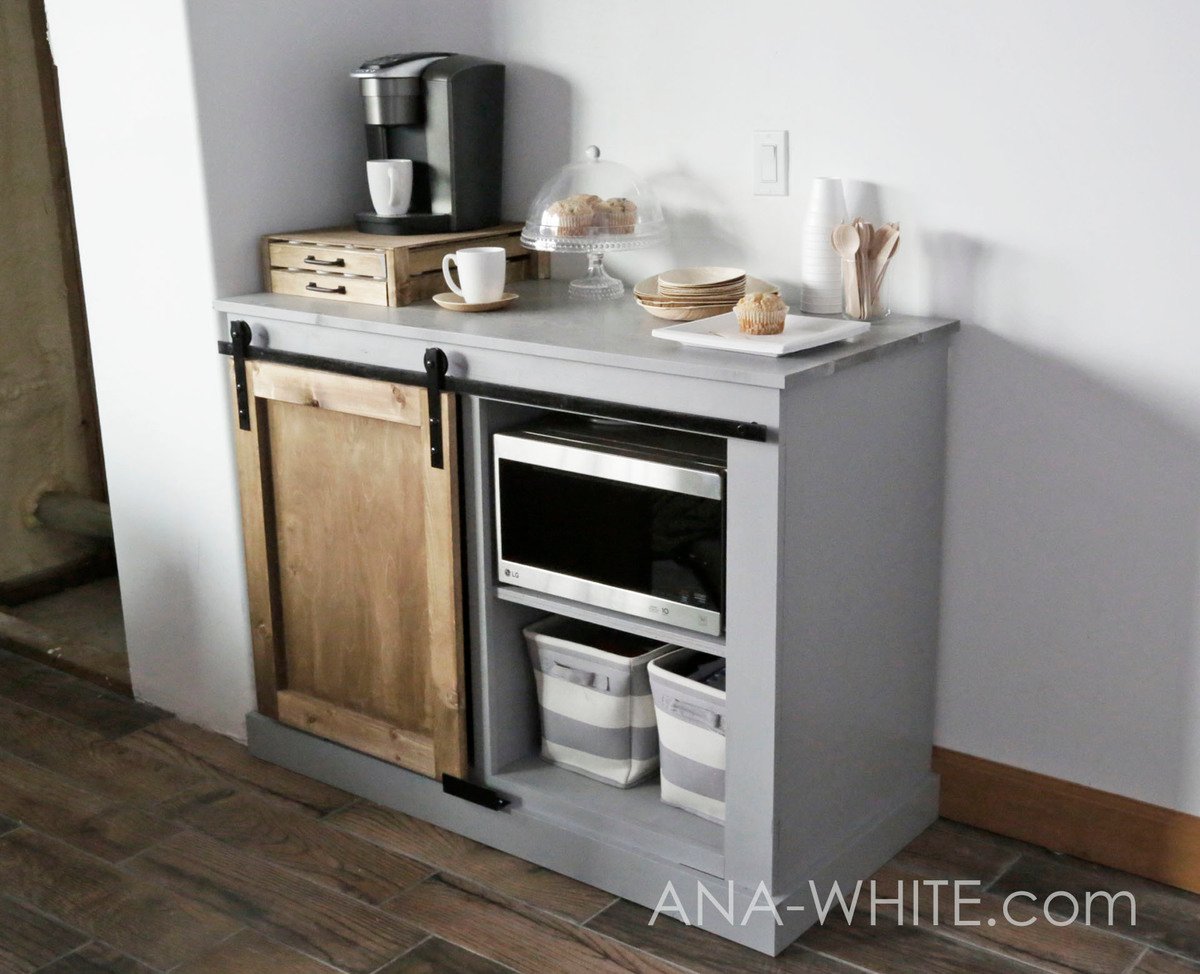
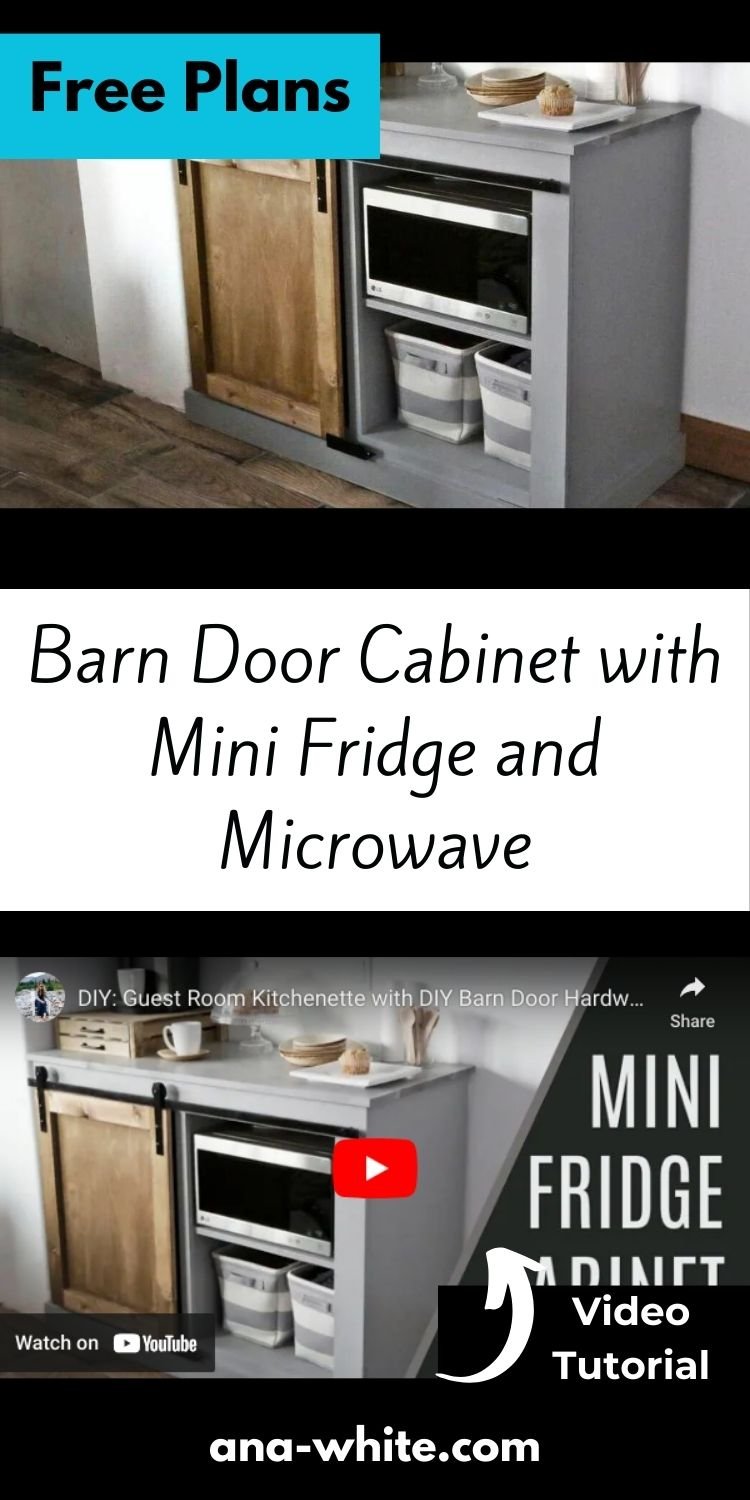
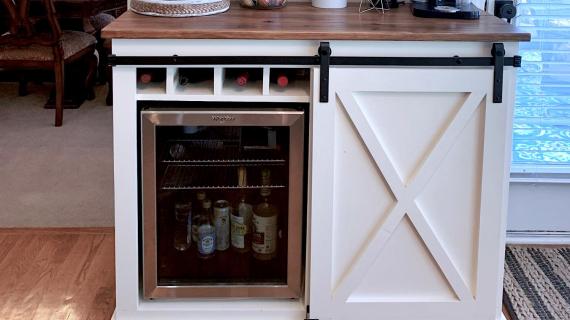
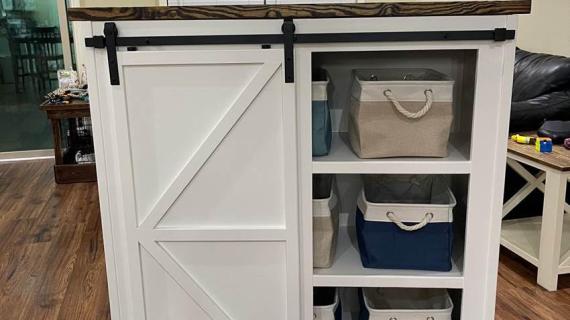
This barn door cabinet holds a mini fridge and microwave! It's perfect for dorm rooms, guest rooms, rec rooms, airbnbs, lobbies, or break rooms! Free plans by ANA-WHITE.com

Want to upgrade your guest room, dorm room, break room, airbnb rental by adding a microwave, mini fridge and coffee maker? And also happen to love barn door anything?

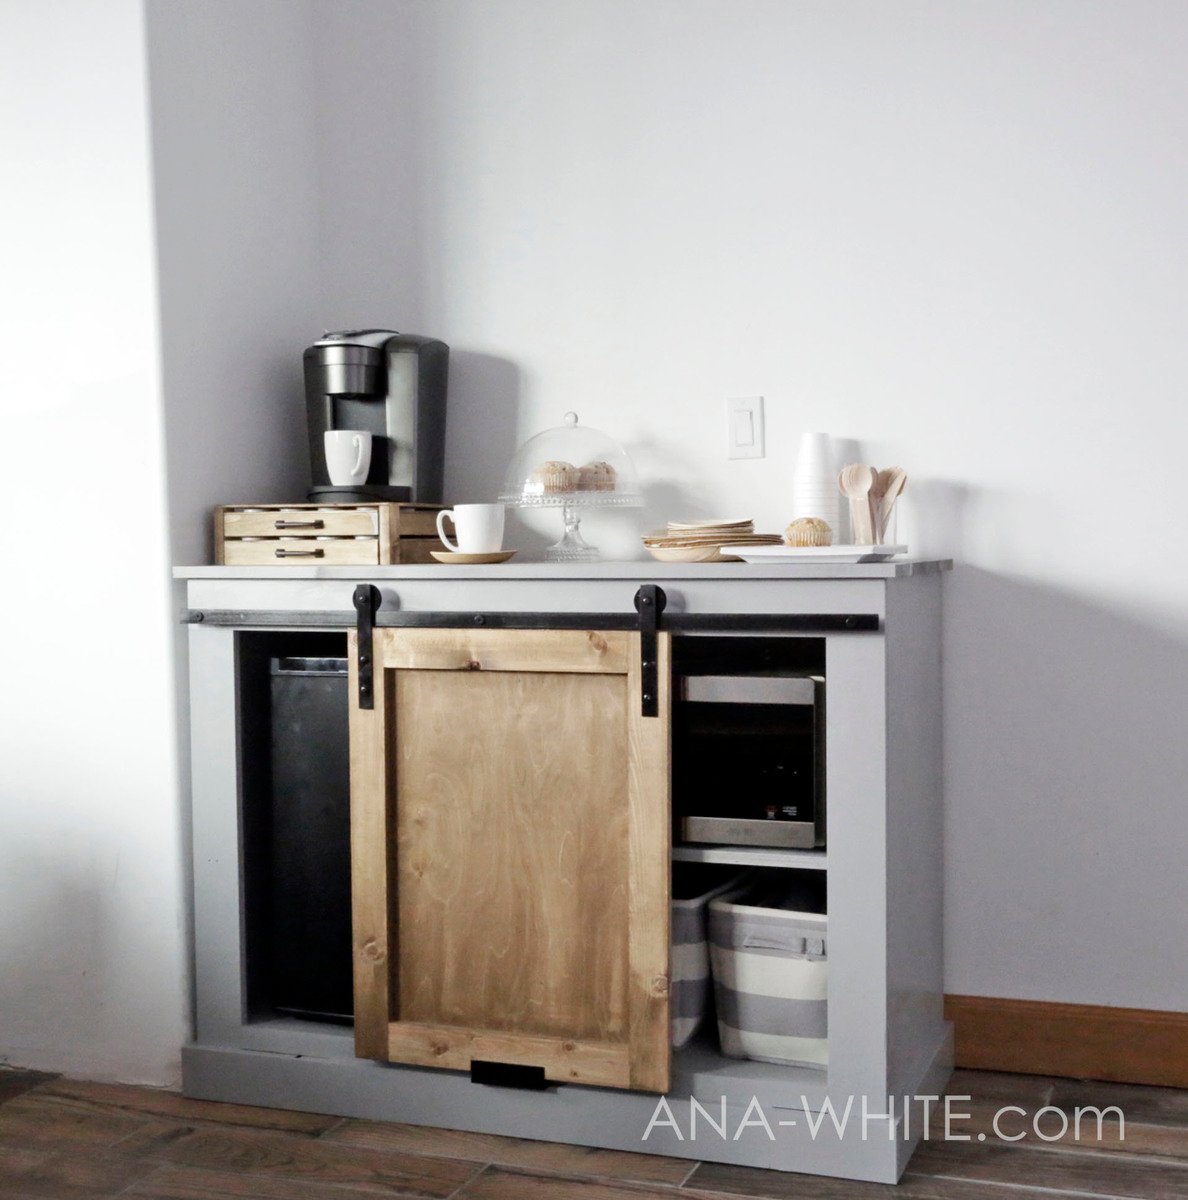
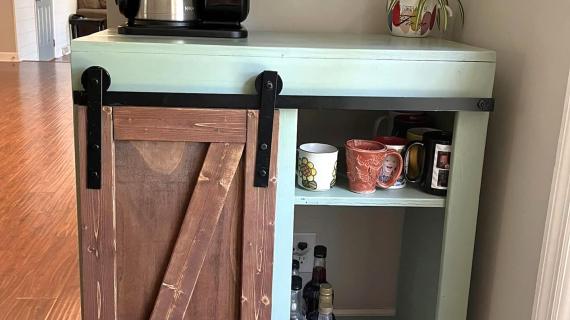
Well, how about a barn door cabinet, with mini fridge microwave snack cabinet (that also holds the coffee maker)?

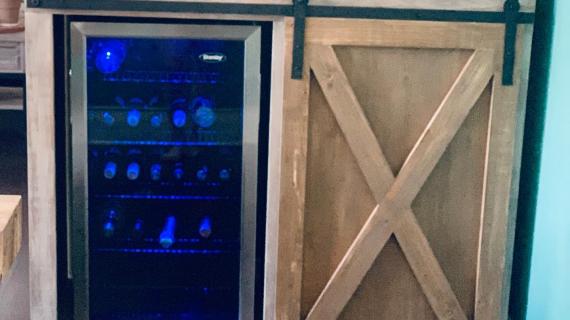
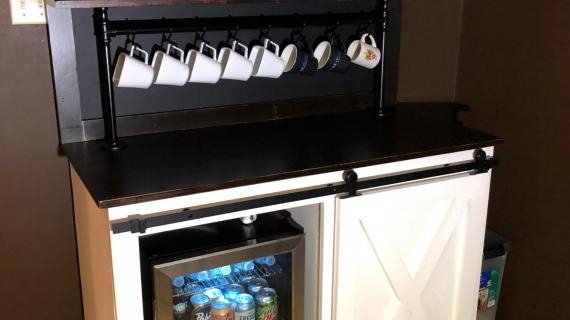
Not only is the mini fridge cabinet totally gorgeous, but oh so functional too! It's sized just right for a mini fridge (we got the 2.6 cubic feet one) and a small microwave, with still lots of room for snacks or dinnerware. And the top is nice and big for a coffee maker and serving snacks from.
We spent about $100 on this barn door cabinet - including the barn door hardware! - and it was a very easy build!
You can watch us build it - and DIY the barn door hardware - in this video -
Yep, we DIYed the barn door hardware. Out of WASHERS.

And it worked!
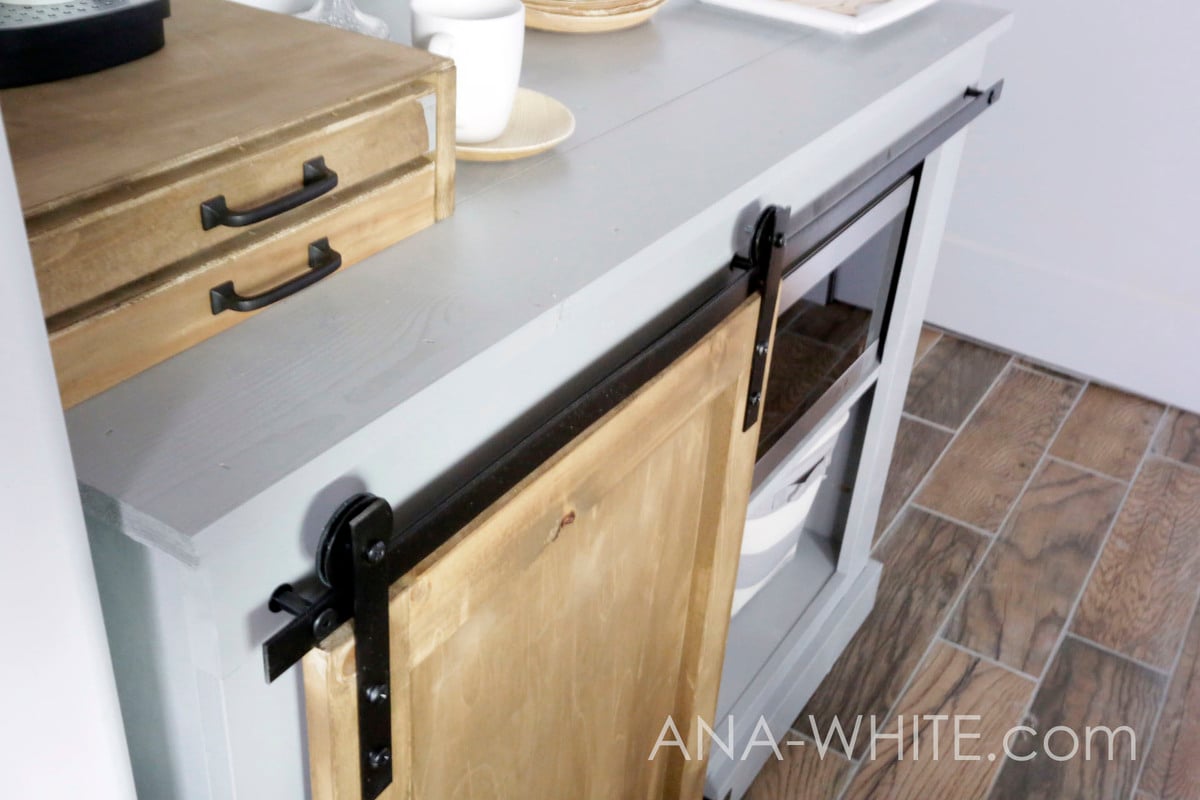
I'll get working on the barn door hardware tutorial right away, so you can hack your own for about $15. UPDATE: I've posted the tutorial for this DIY Barn Door Hardware with supply list here.
We stained our door with Varathane Aged Wood Accelerator in Rustic Brown Look-
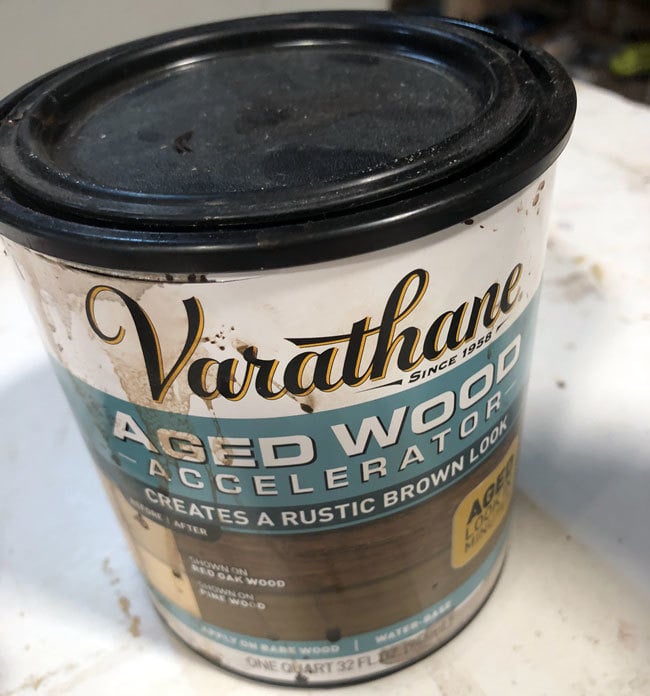
Such a great color!
Are you ready to have your own barn door snack cabinet? Start spoiling those guests? You can get building on the barn door snack cabinet right now, the plans are below.
Enjoy!
Ana
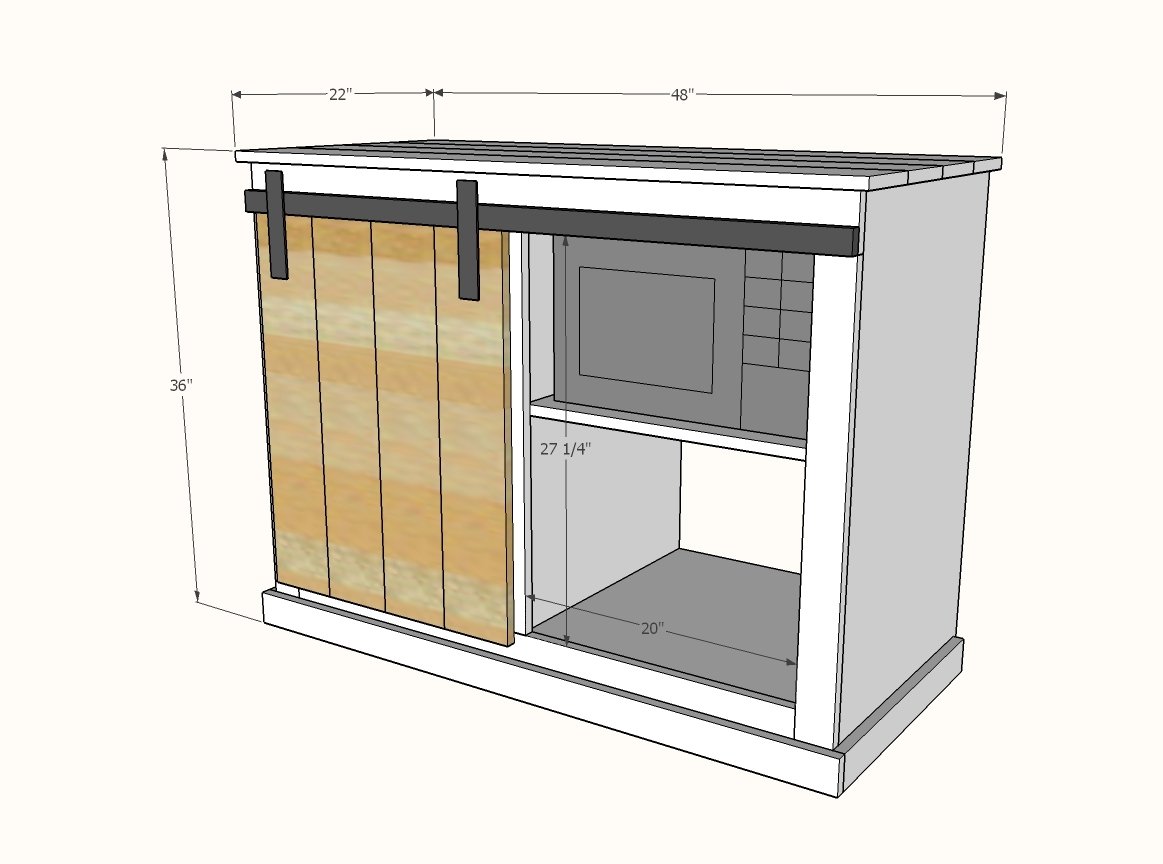
DIY Mini Fridge Barn Door Cabinet Plans
Pin For Later!
Preparation
4 - 1x3 @ 8 feet long
1 - 1x2 @ 8 feet long
2 - 1x6 @ 8 feet long
1 - 3/4" plwyood 48" x 96"
1 - 1/4" plywood 24" x 24"
48" barn door hardware
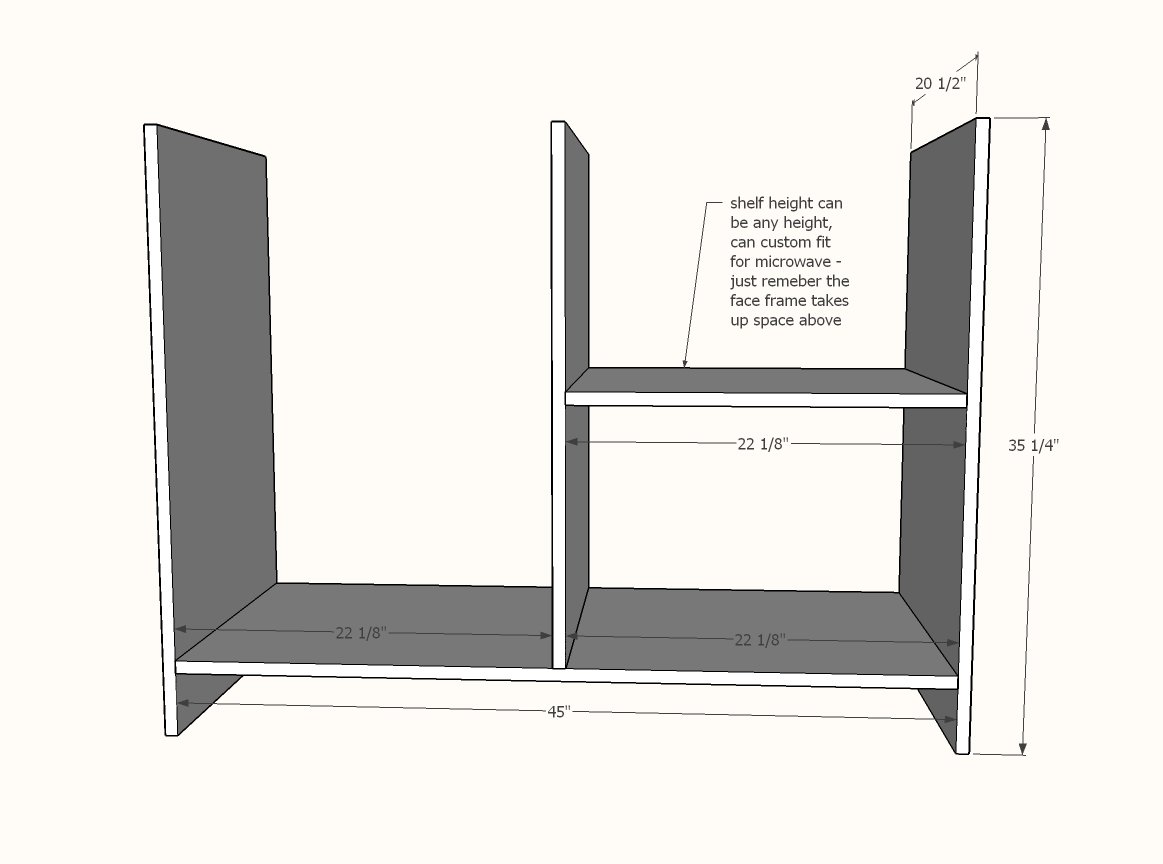
1 - 3/4" plywood @ 20-1/2" x 45" - bottom
2 - 3/4" plywood @ 20-1/2" x 35-1/4" - sides
1 - 3/4" plywood @ 20-1/2" x 30-3/4" - divider
1 - 3/4" plywood @ 20-1/2" x 22-1/8" - microwave shelf
2 - 1x2 @ 22-1/8" - back supports
1- 1x2 @ 27-1/4" - face frame center
2 - 1x3 @ 31-3/4" - face frame legs
1 - 1x3 @ 41-1/2" - face fame bottom
2 - 1x3 @ about 21-1/4" - cut to fit - footer sides
1 - 1x3 @ about 48" - cut to fit - footer front
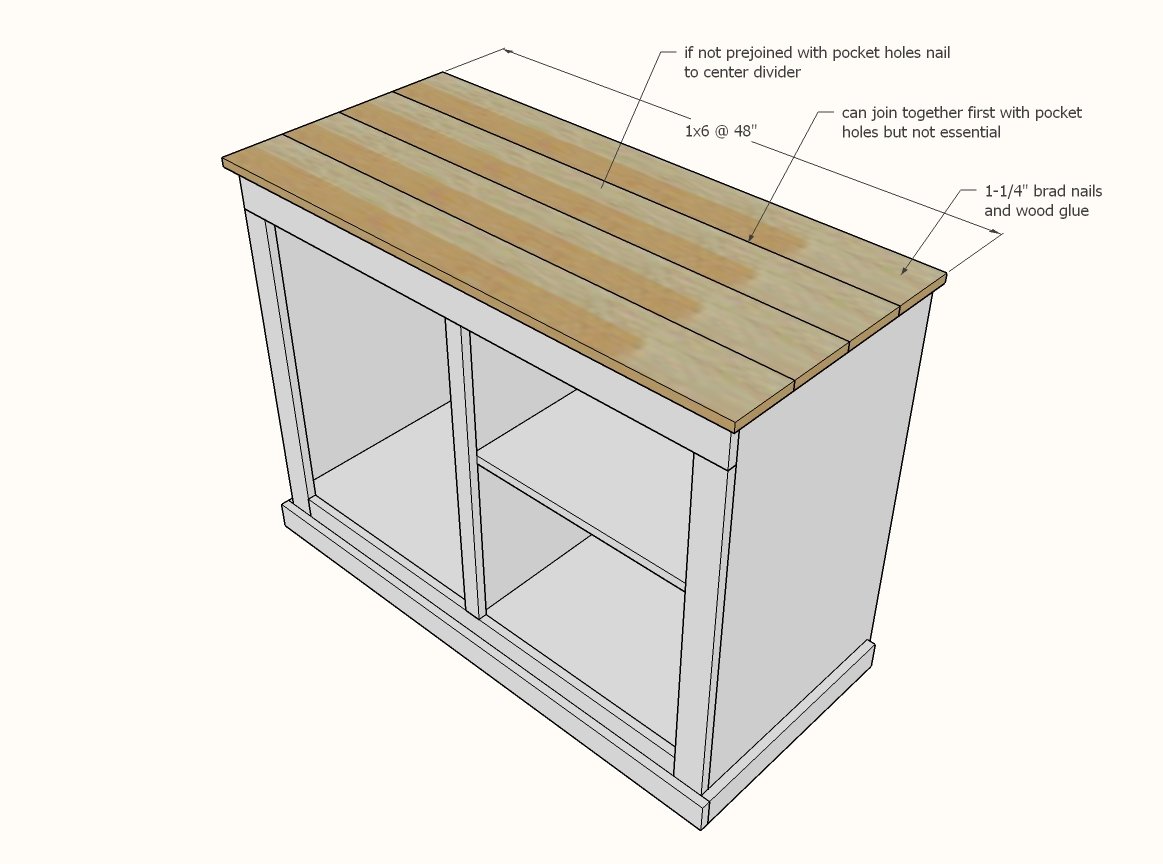
4 - 1x6 @ 47-7/8" - top (cut 1x6 boards in half)
Door should be cut to fit, approximately 2 - 1x3 @ 28" and 2 - 1x3 @ 17" and Back Plywood 24" x 19"
All the plywood can fit on one sheet. First rip the plywood into two strips, 96" long by 20-1/2" wide.
From the 20-1/2" strips, cross cut as shown below.
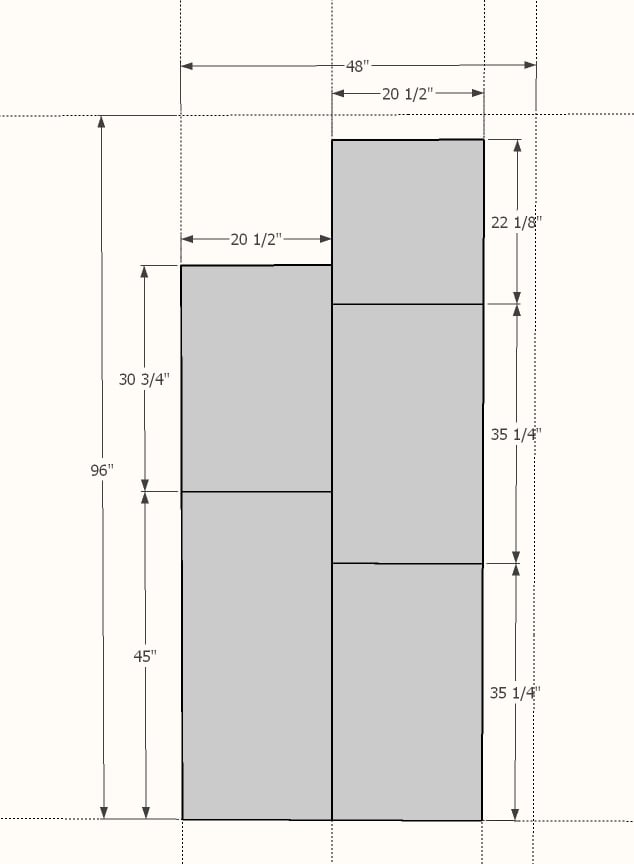
A table saw is preferred but a circular saw will work, especially with a track system (Kreg sells a nice easy to use one) or if you clamp a board and use it as a guide. Another alternative is to have your home improvement store make the plywood cuts, or at the very least, the initial rips - this will make transporting and working with the plywood much easier.


Instructions
Step 1
Build the carcass using a Kreg Jig set for 3/4" thick material. Drill three pocket holes at each joint and attach with 1-1/4" pocket hole screws.
Leave 3-3/4" space underneath the bottom shelf (or simply use the divider as a spacer when placing the bottom shelf).
You can wait to add the shelf (after next step) so the microwave is perfectly placed in the face frame, or add now too.
Step 2
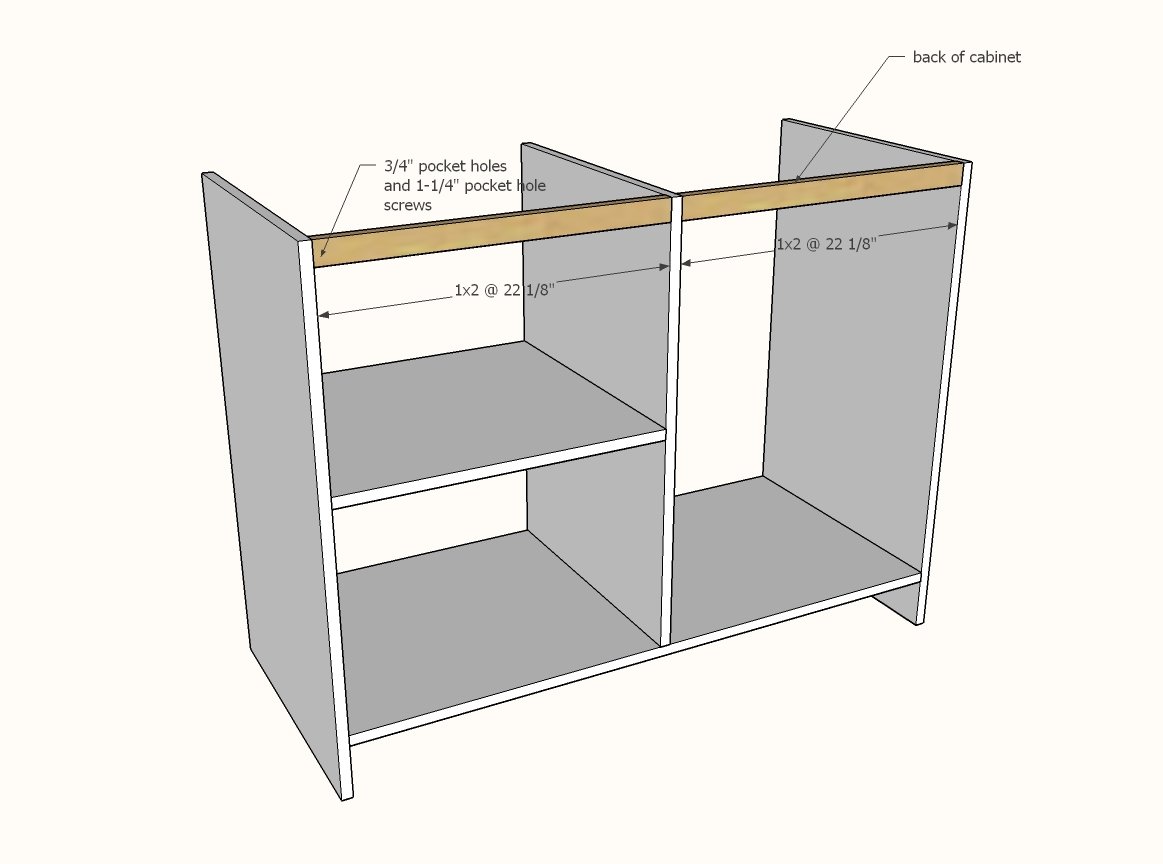
Drill two 3/4" pocket holes on each end of the 1x2 back supports. Attach at back top with 1-1/4" pocket hole screws.
Step 3
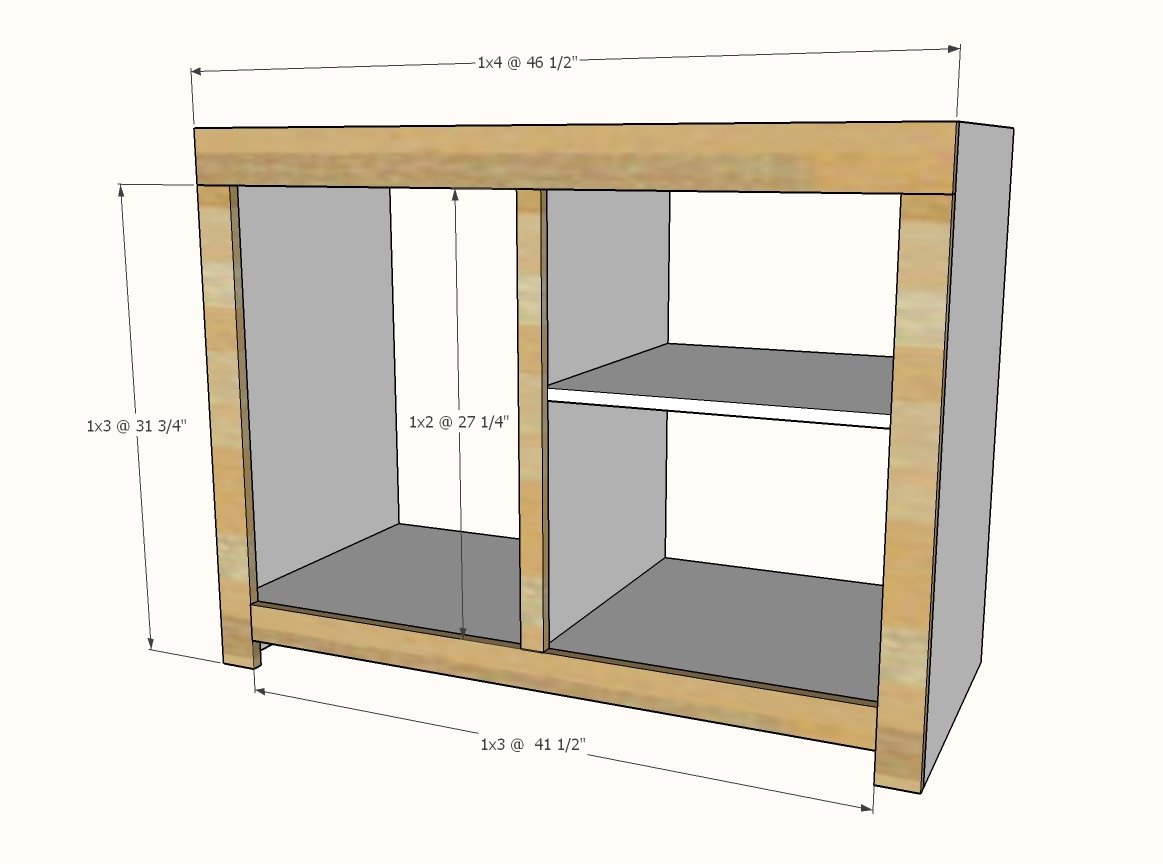
Build the face frame with pocket holes first on your tabletop.
Then attach to front of cabinet with 1-1/4" brad nails and wood glue.
Alternatively, you can attach face fram with pocket holes on inside of cabinet as we did in the video.
Step 4
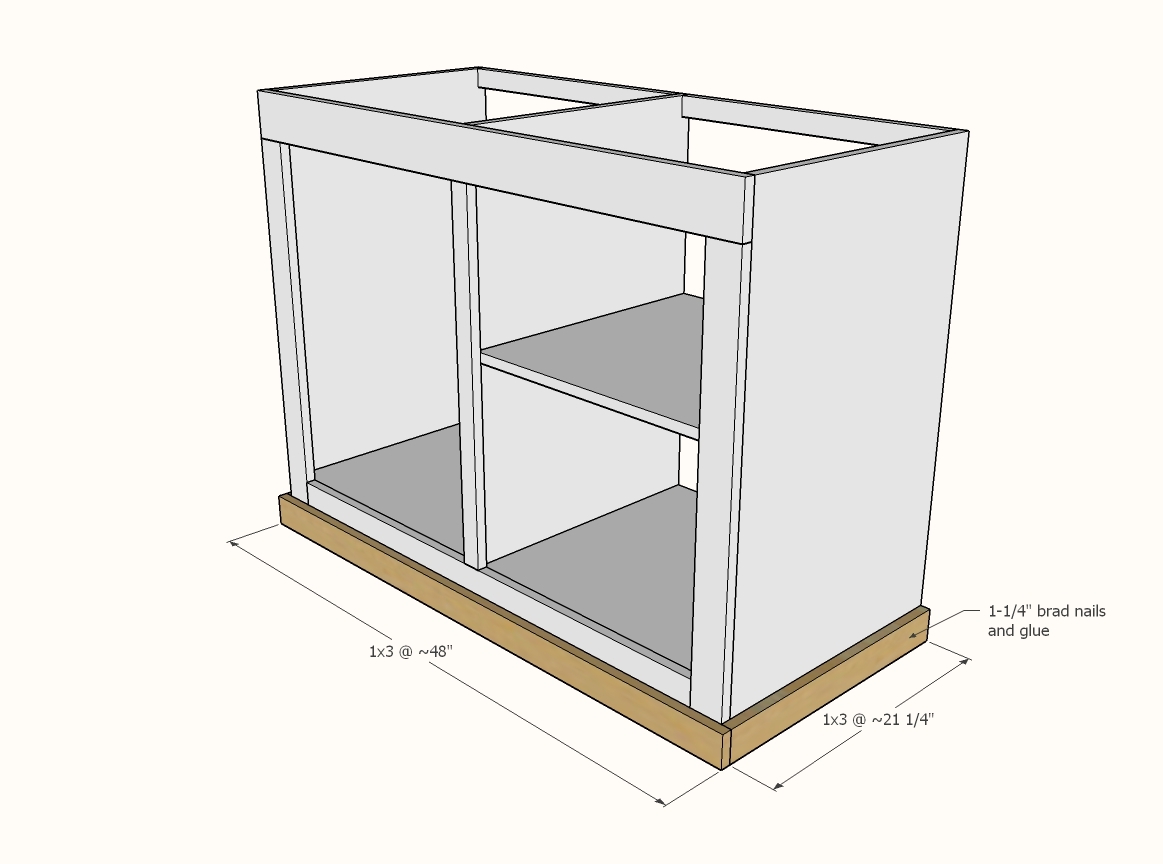
Measure and cut the footer sides. Nail and glue on with 1-1/4" brad nails.
Measure and cut the front. Nail and glue the front piece on.
Step 5
Step 6
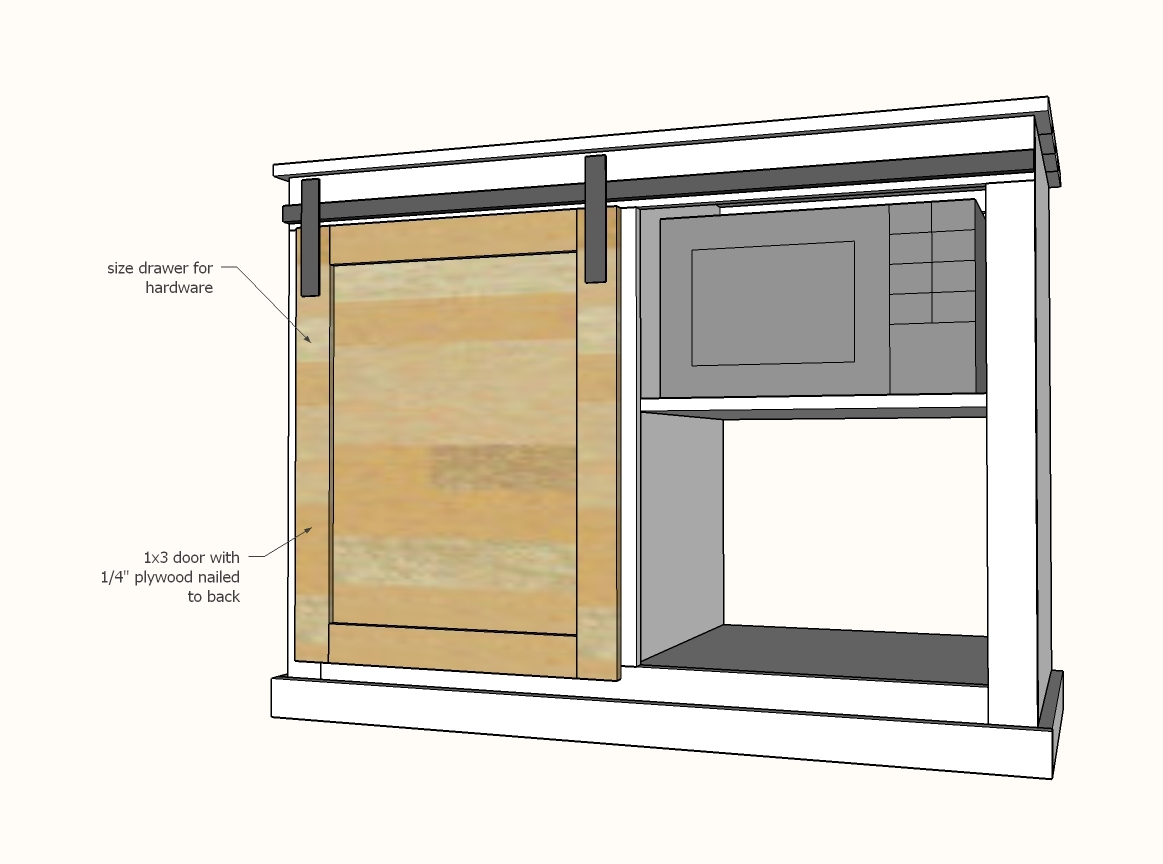
The door should be built to fit the barn door hardware. This is the dimensions that we used for our door with our homeade hardware (tutorial coming soon!)


Comments
rust0r
Thu, 02/14/2019 - 05:55
Plans are incorrect
Heads up anyone building this, plans (and thus material list) is incorrect.
If using 1x3 for the face frame as suggested, you will run into spacing issues with the rail and washers, note that even in the video she is using 1x4 for the top, sides and bottom trim of the face frame.
pdarosa
Sun, 01/05/2020 - 12:17
I was just about to go buy…
I was just about to go buy the stuff to make this and then saw your comment. Can you tell me whether the directions and shopping list are accurate as listed above? If not, would you mind helping me with what needs to be swapped out and why? Thank you
pdarosa
Thu, 01/30/2020 - 16:08
Now I see where this comment…
Now I see where this comment came from. The 1x4 for the top of the face frame is not included in the shopping list. Make sure to add that if you’re building it like she does.
suz122984
Thu, 05/09/2019 - 23:35
Help ,need more info
Ana
what about the black thingie at the bottom of the cabinet that keeps the door aligned? It shows in your pictures but not in your plans
sgravanda
Sat, 07/20/2019 - 07:12
I was wondering this as well!
I was wondering this as well!
pdarosa
Fri, 01/31/2020 - 08:42
Bottom Door Guide
Any advice on what you ended up using for the door guide at the bottom?
LunaTick
Tue, 04/21/2020 - 09:34
Angle Iron
It's just a piece of angle iron. Around 17:00 into the video, they explain that.
jacknonko@hotm…
Thu, 05/16/2019 - 14:19
Door hardware
Where can I get the bottom door guide or what can I use to keep the door from flopping as it is being moved ?
maeschen0518
Fri, 04/24/2020 - 18:18
Mounting hardware instructions
We have followed the plan to the letter, but there are no instructions on where to mount the hardware to the door or the track to the cabinet...can you help???
Dredaybmore
Sun, 04/26/2020 - 22:57
Just Finished this Project!
I just got done building this and it turned out pretty good! It was my first wood project so with me being a beginner I was still able to get through this. To anyone wanting to build this, it was really helpful to watch the video first. I did use 1X4’s for the top of the face and for the foot trim not the 1X3 in the plans. If you use 1X3’s there will be spacing issues and there will be a small gap between the face frame and the foot frame! This was fun to build and can’t wait until the next project!
KimmieAnn
Tue, 07/07/2020 - 11:53
Anna, I absolutely love this…
Anna,
I absolutely love this piece and I am about to start on it this week! But, I was hoping you could clear up the confusion for me. Some people on here are saying that it’s 1x4’s on the top and not 1x6’s.
🙂
Soccer99
Thu, 08/06/2020 - 23:23
Paint colour
What colour is the paint that you used for this project? I couldn’t see the paint colour name anywhere in the plans. Thank you!
stephan bevan
Mon, 11/09/2020 - 08:56
Bigger Bar fridge.
Hi Ana, I want to build this for my sister, but her fridge is 30" high. I was thinking of either making the sides and center 3" higher, or removing the base and front trim on the left side, but I was a little concerned about the strength of the left wing while transporting it. Which would you do?
HannahLucio
Wed, 02/03/2021 - 07:23
Were you able to make the…
Were you able to make the space for the bigger fridge? I need to build one for a 3.2 cu fridge.
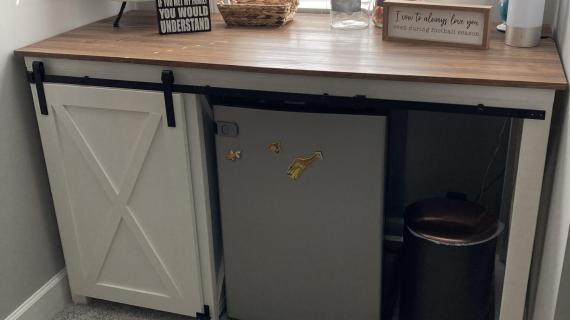
mckaylia
Fri, 02/12/2021 - 16:34
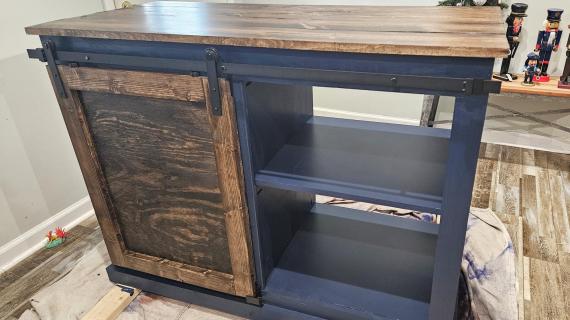
Love our new mini fridge cabinet!
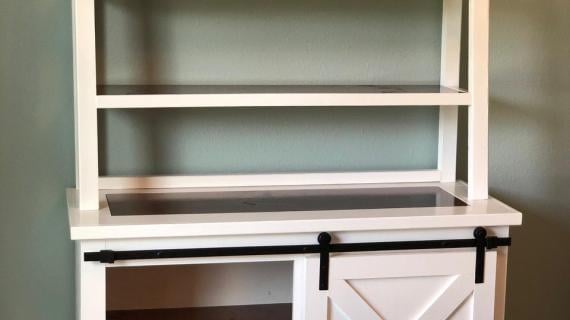
We changed some things to customize it to our space but loved the ideas and helpful video!
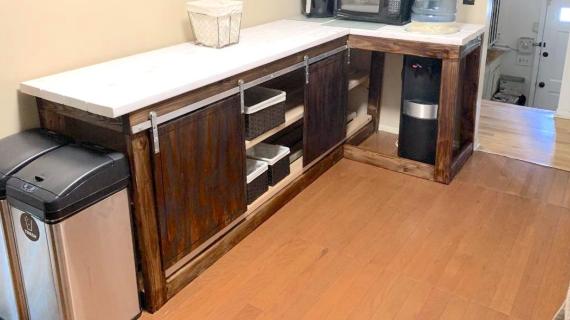
rachelcb
Sat, 07/31/2021 - 12:31
Changed up plan but great guideline for beginner
Great plan. I used as guideline and changed it up quite a bit. Used a door glide to make a modern sliding door