
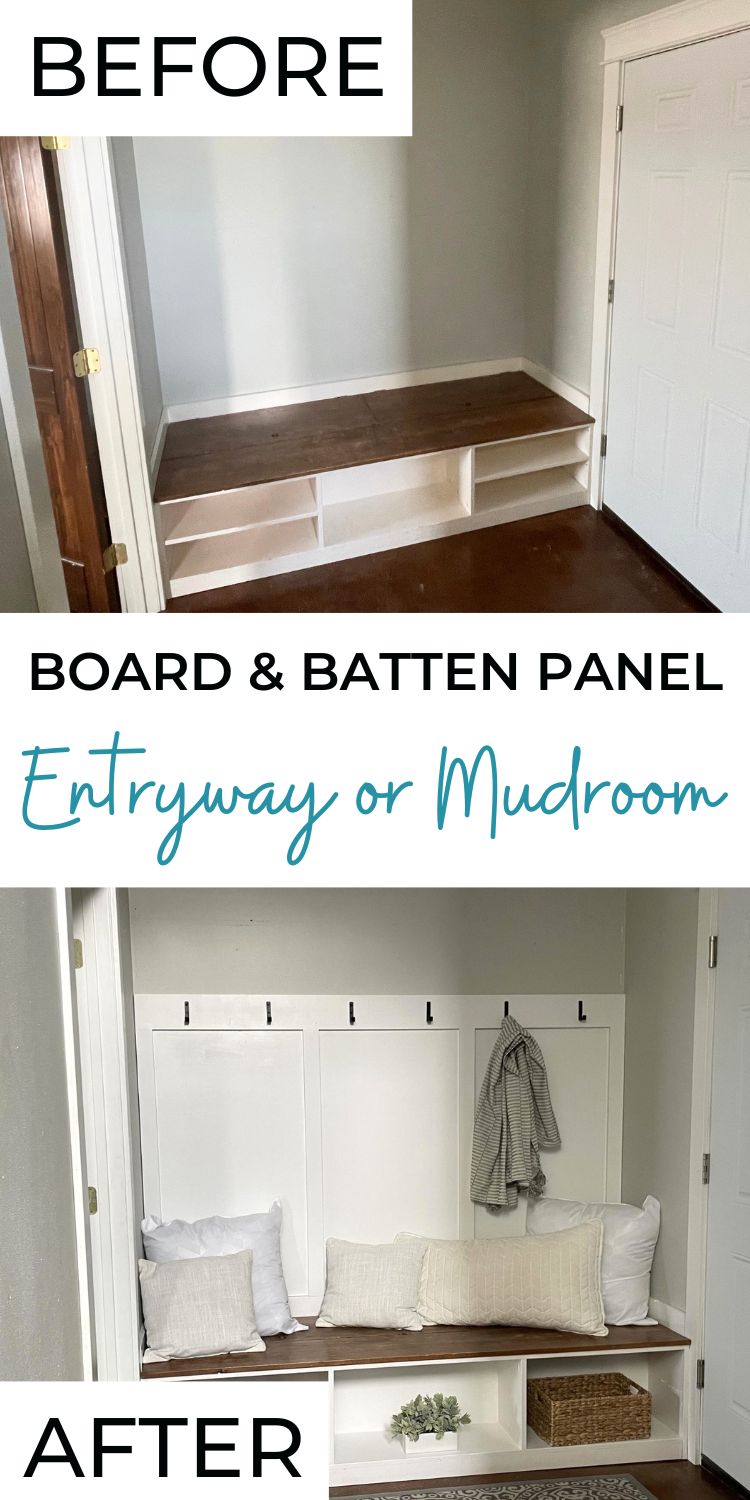
Build this easy board and batten panel, then hang it all on the wall for an instant hook rail in your entryway or mudroom. Since this is an standalone project, you can remove it easily to. Free plans and video tutorial from Ana-White.com
RELATED: Mudroom Bench Plans with Hidden Storage Compartment
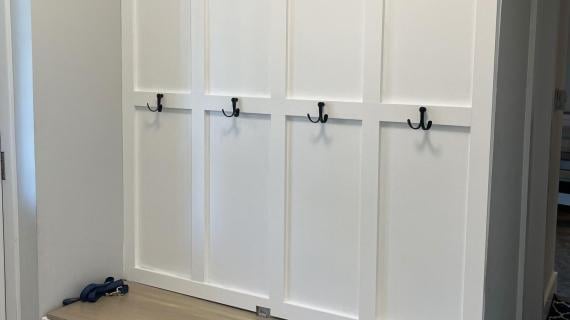
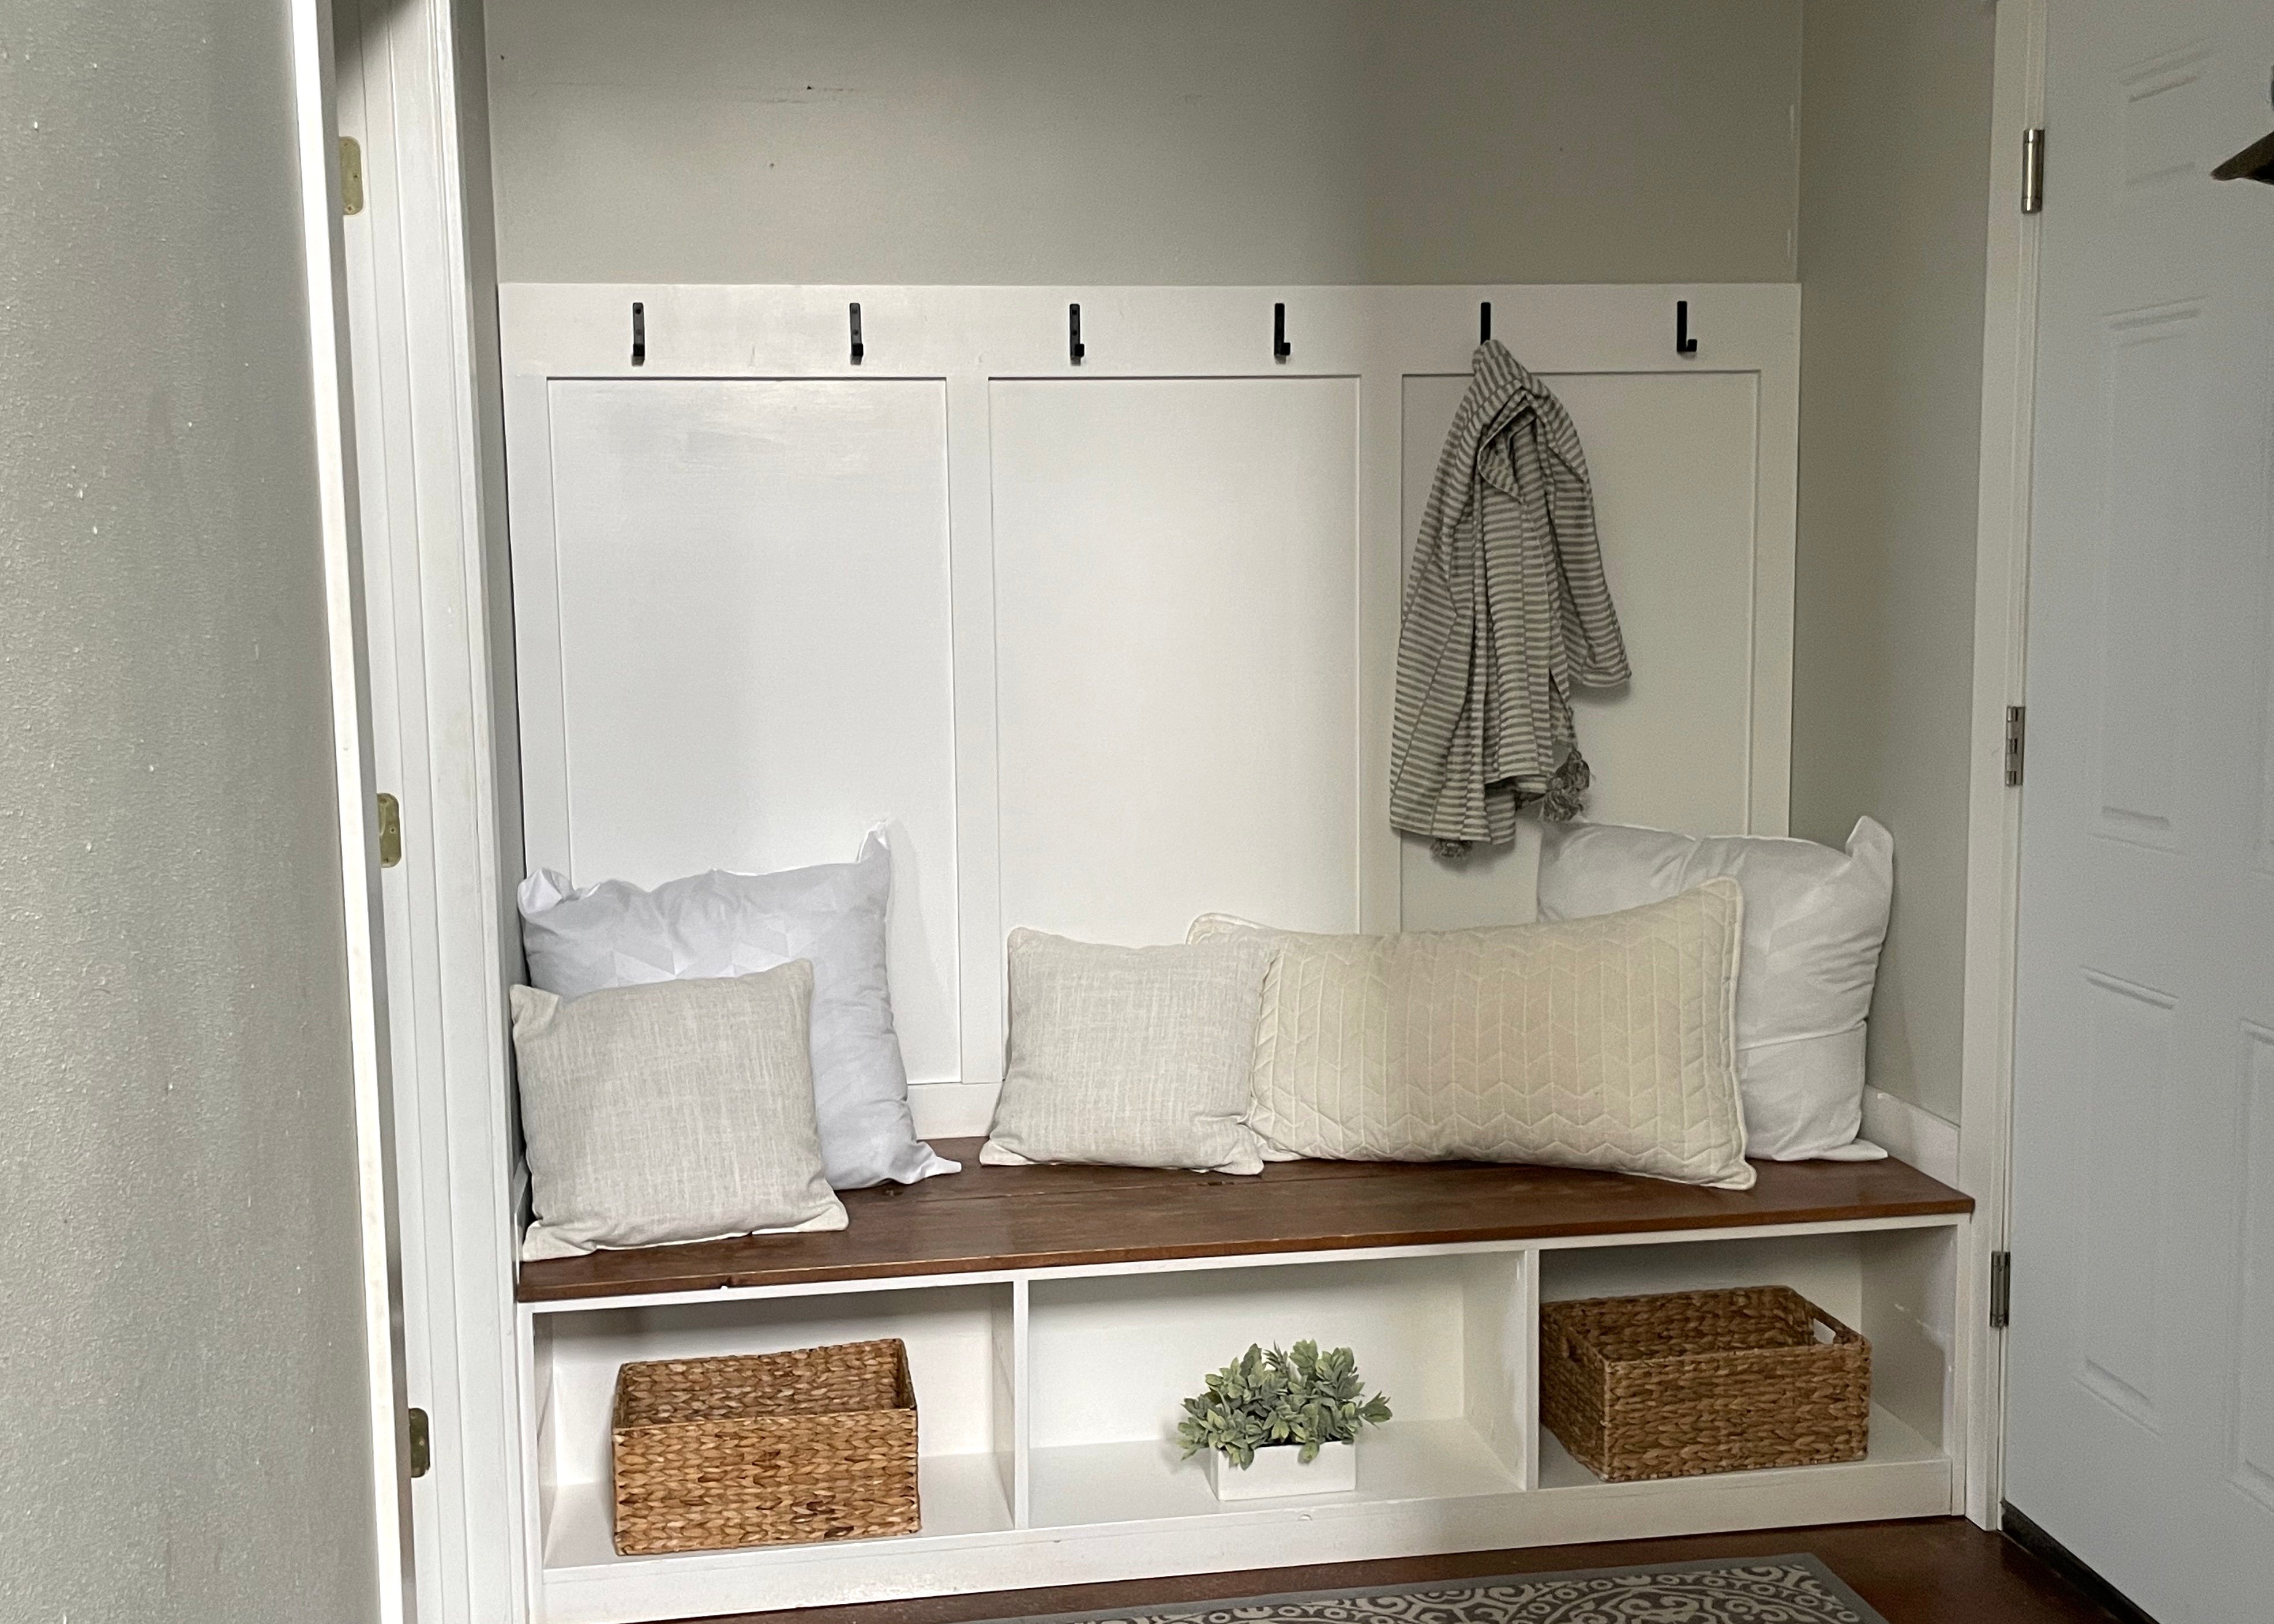
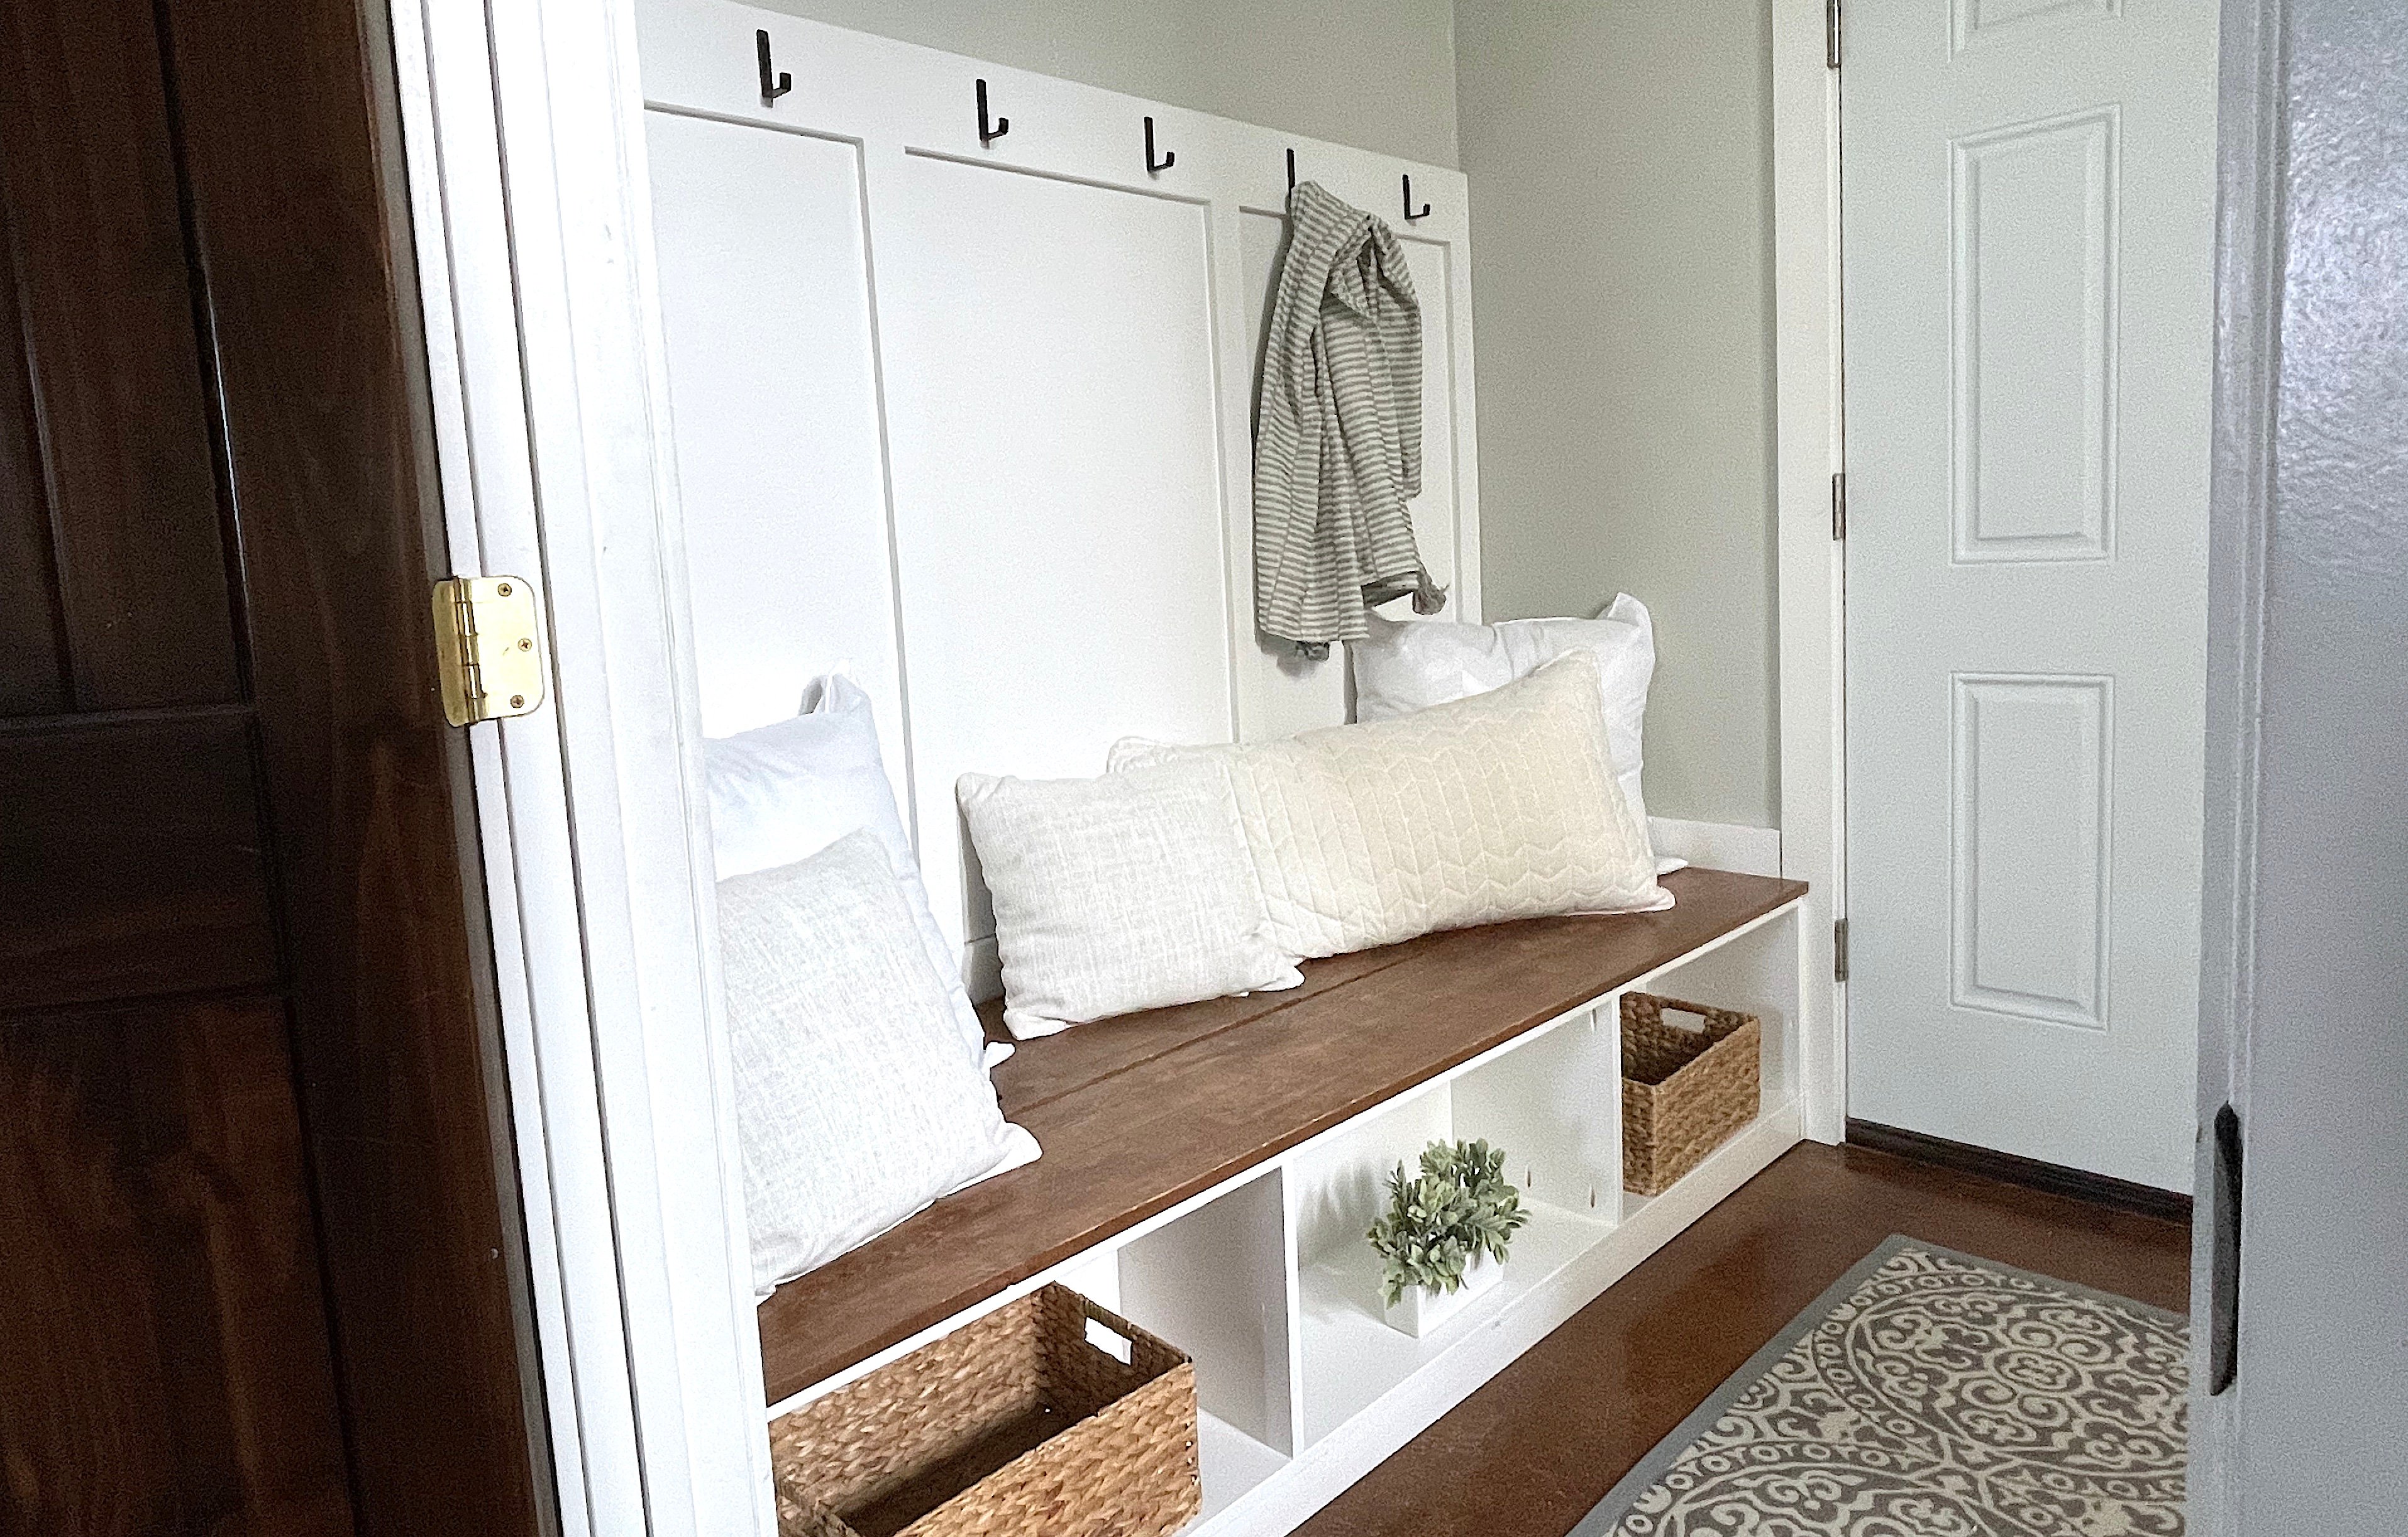
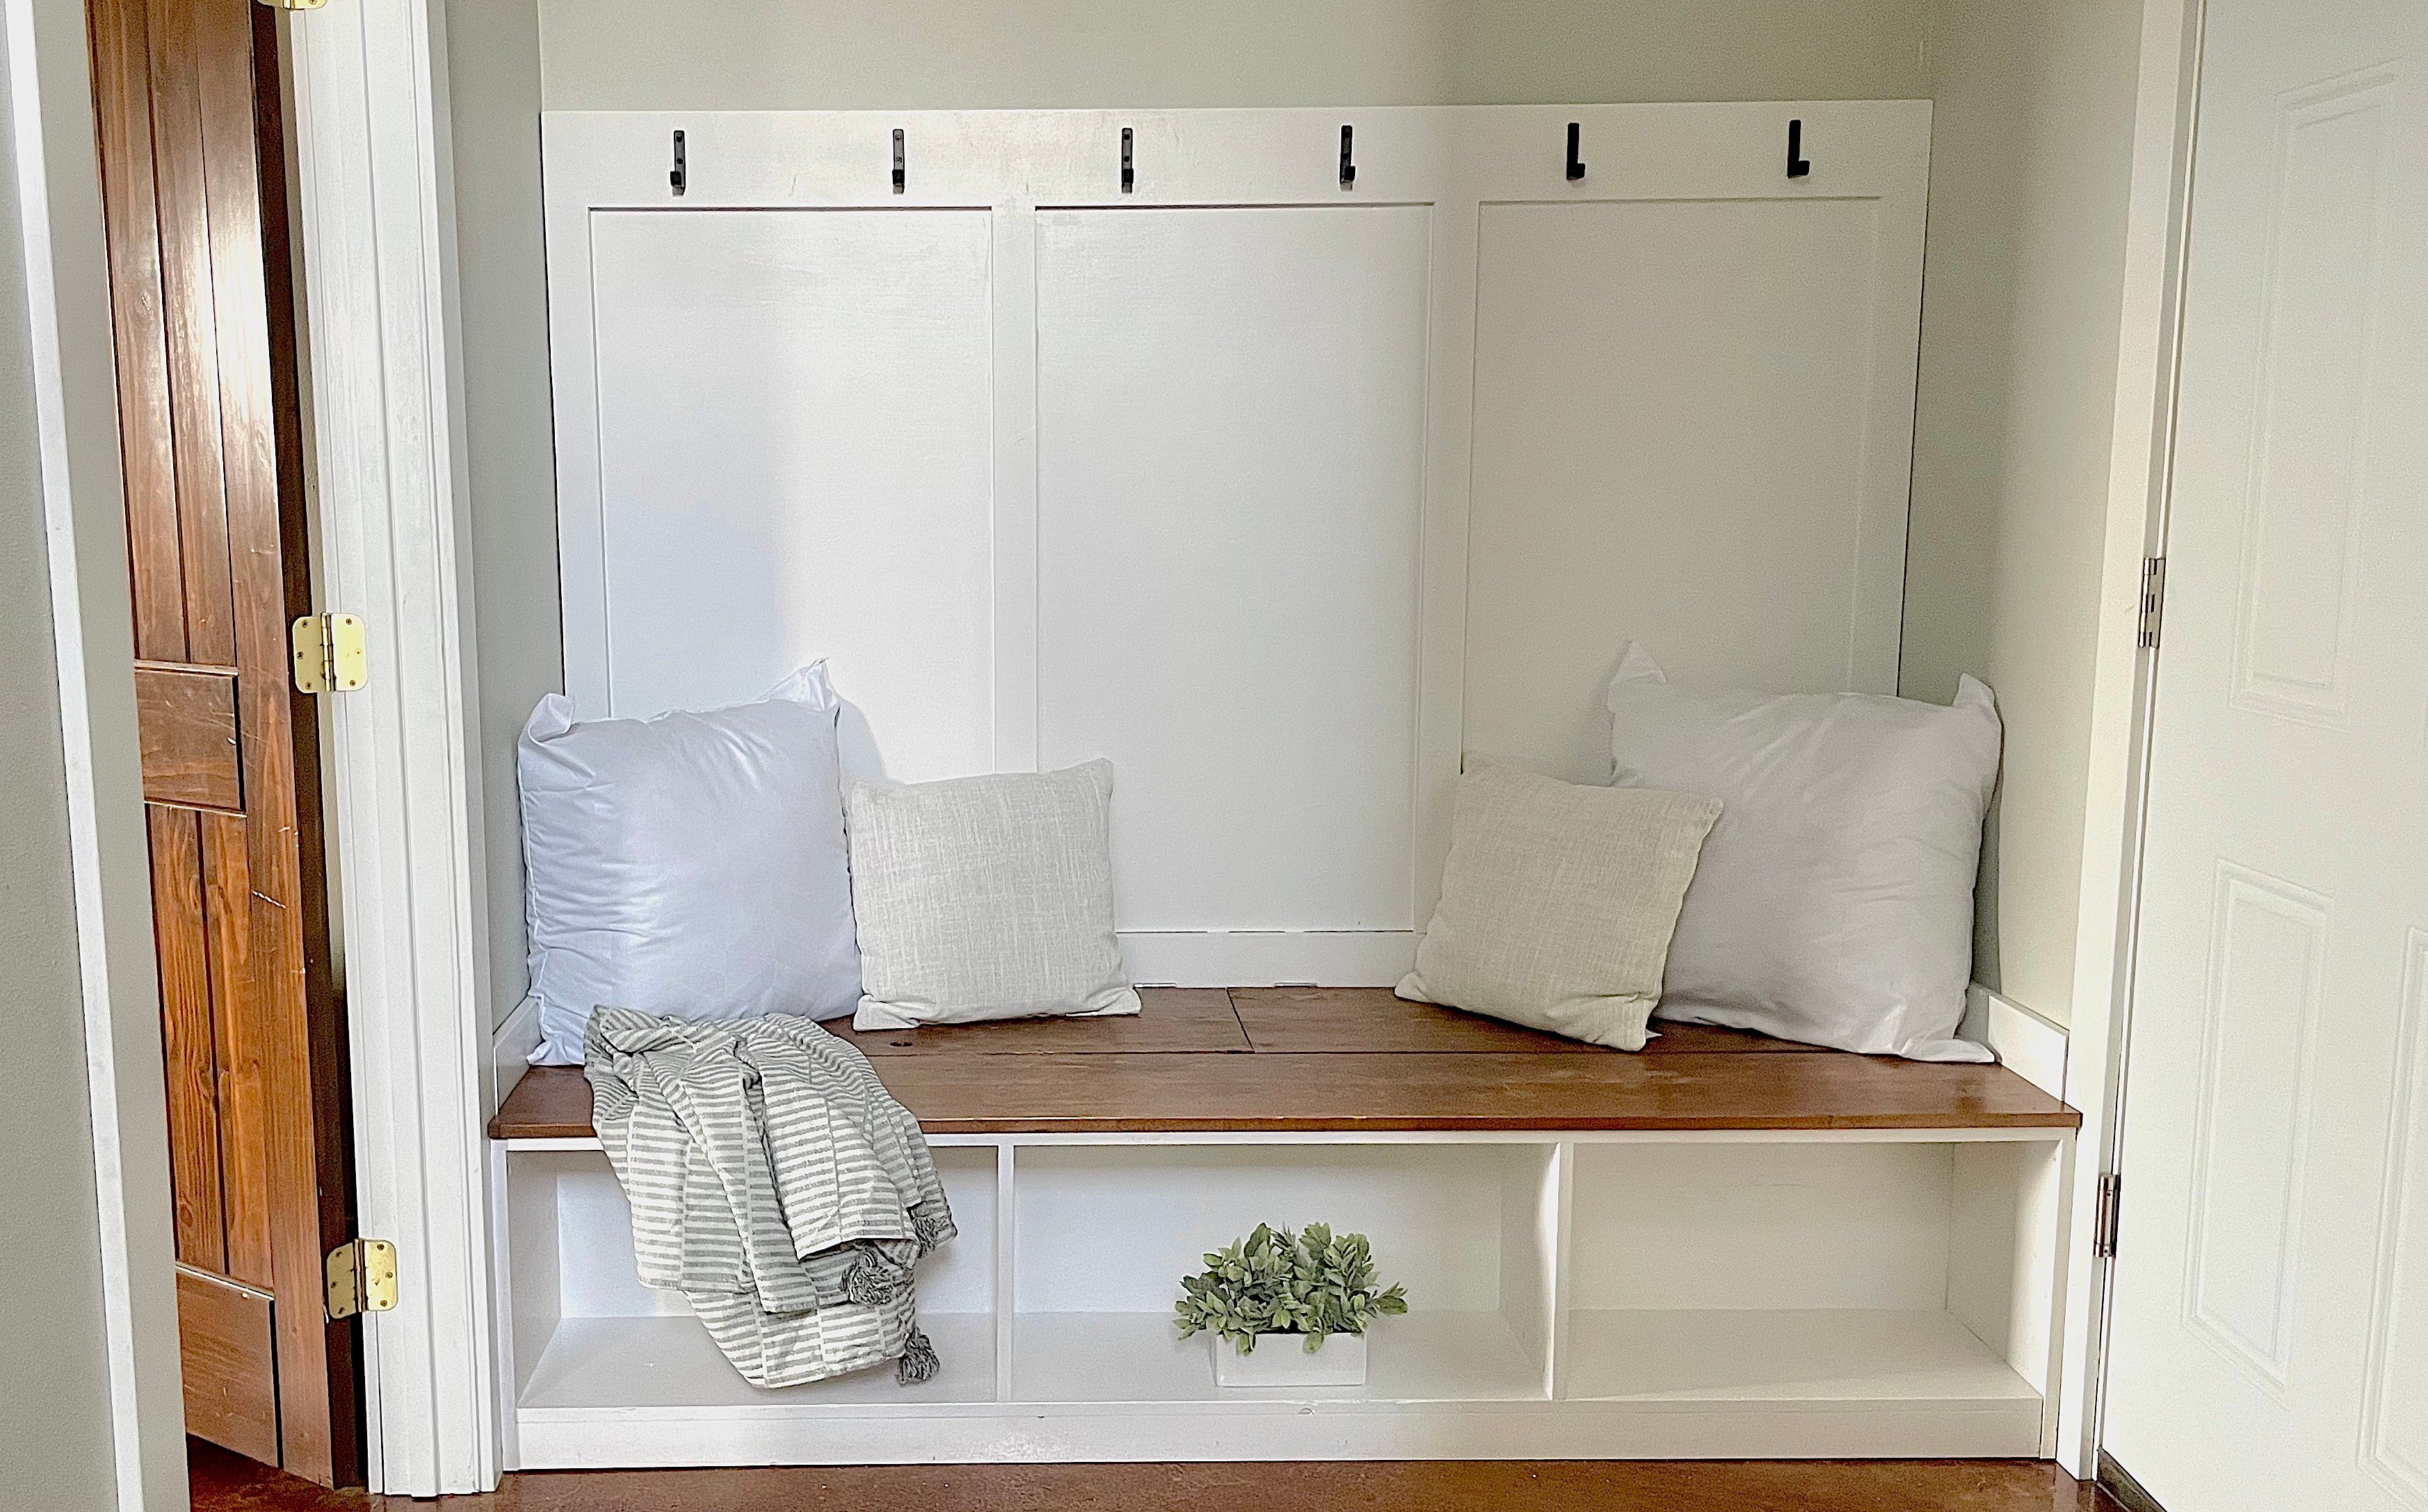
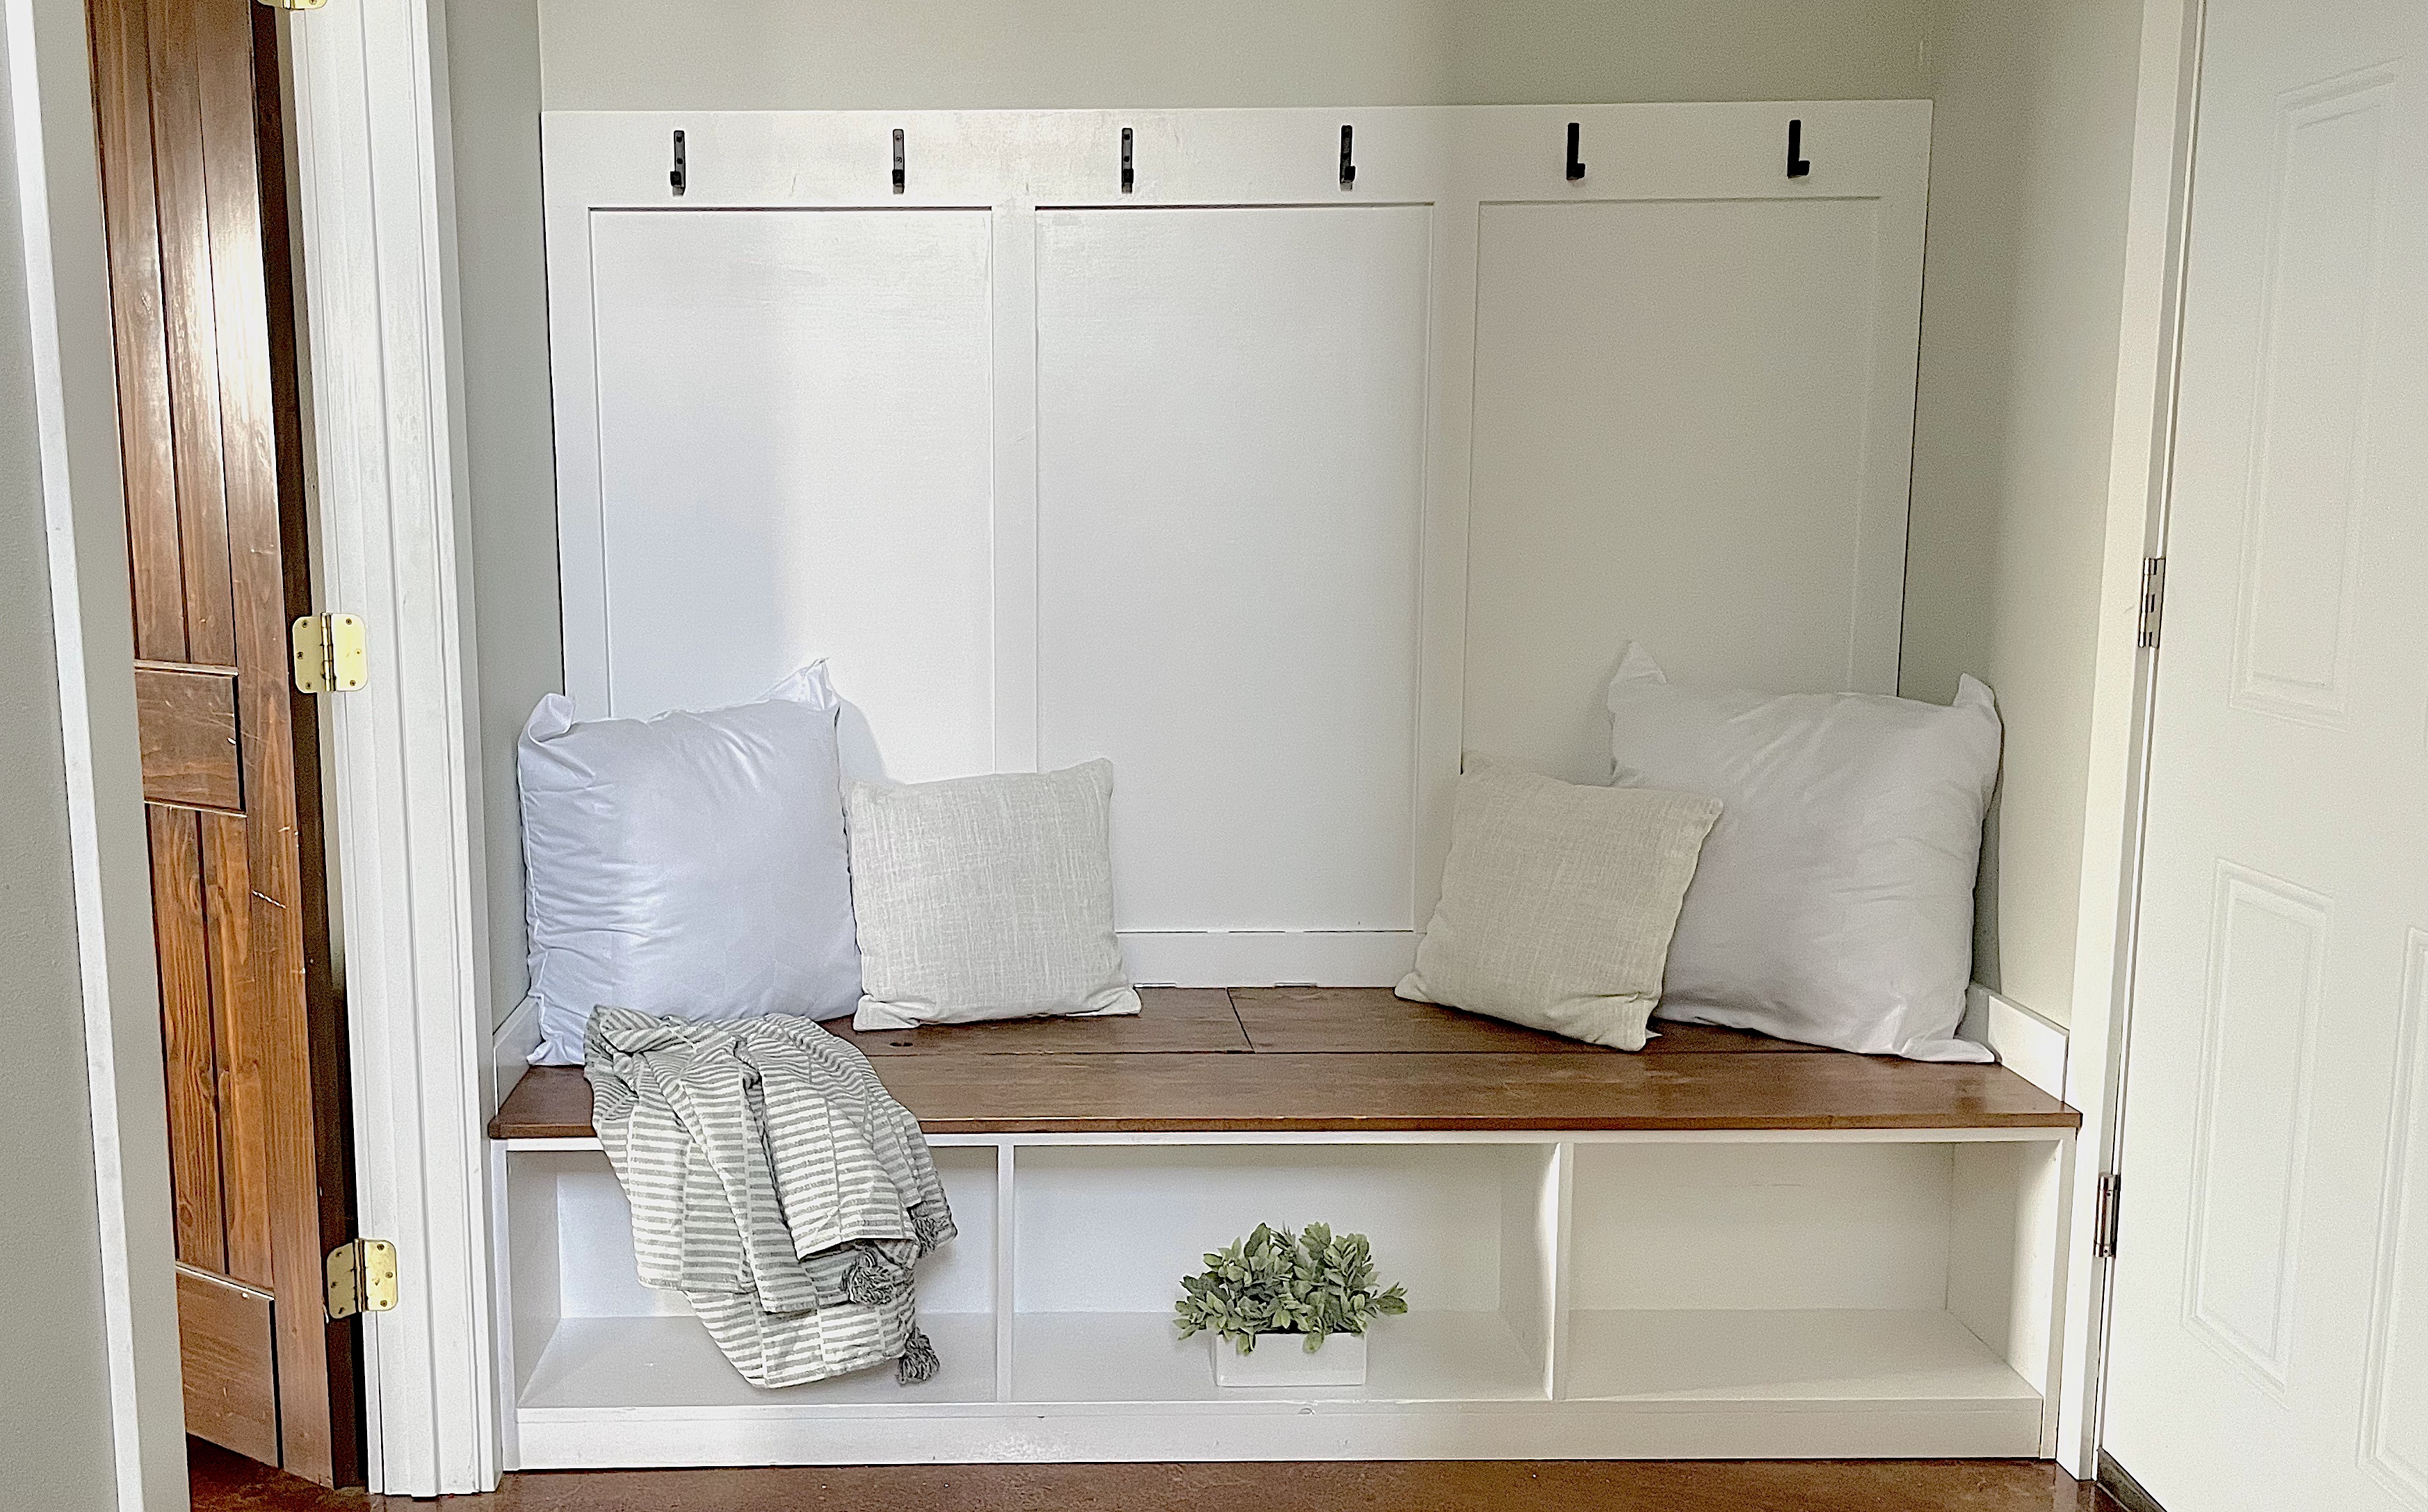
A board and batten wall panel in the entryway or mudroom can add tons of storage and beauty, as well as durability.
Here's how you can make this happen without a home remodel hassle: Build it first in the garage or outdoors, and install it as a completed panel.
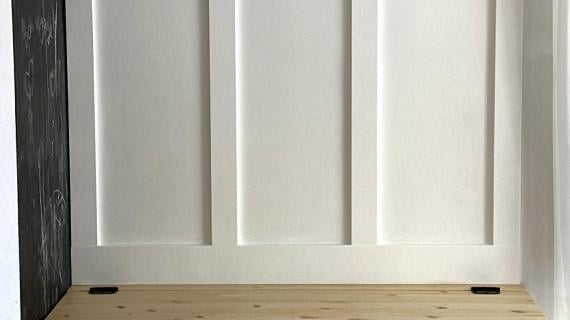
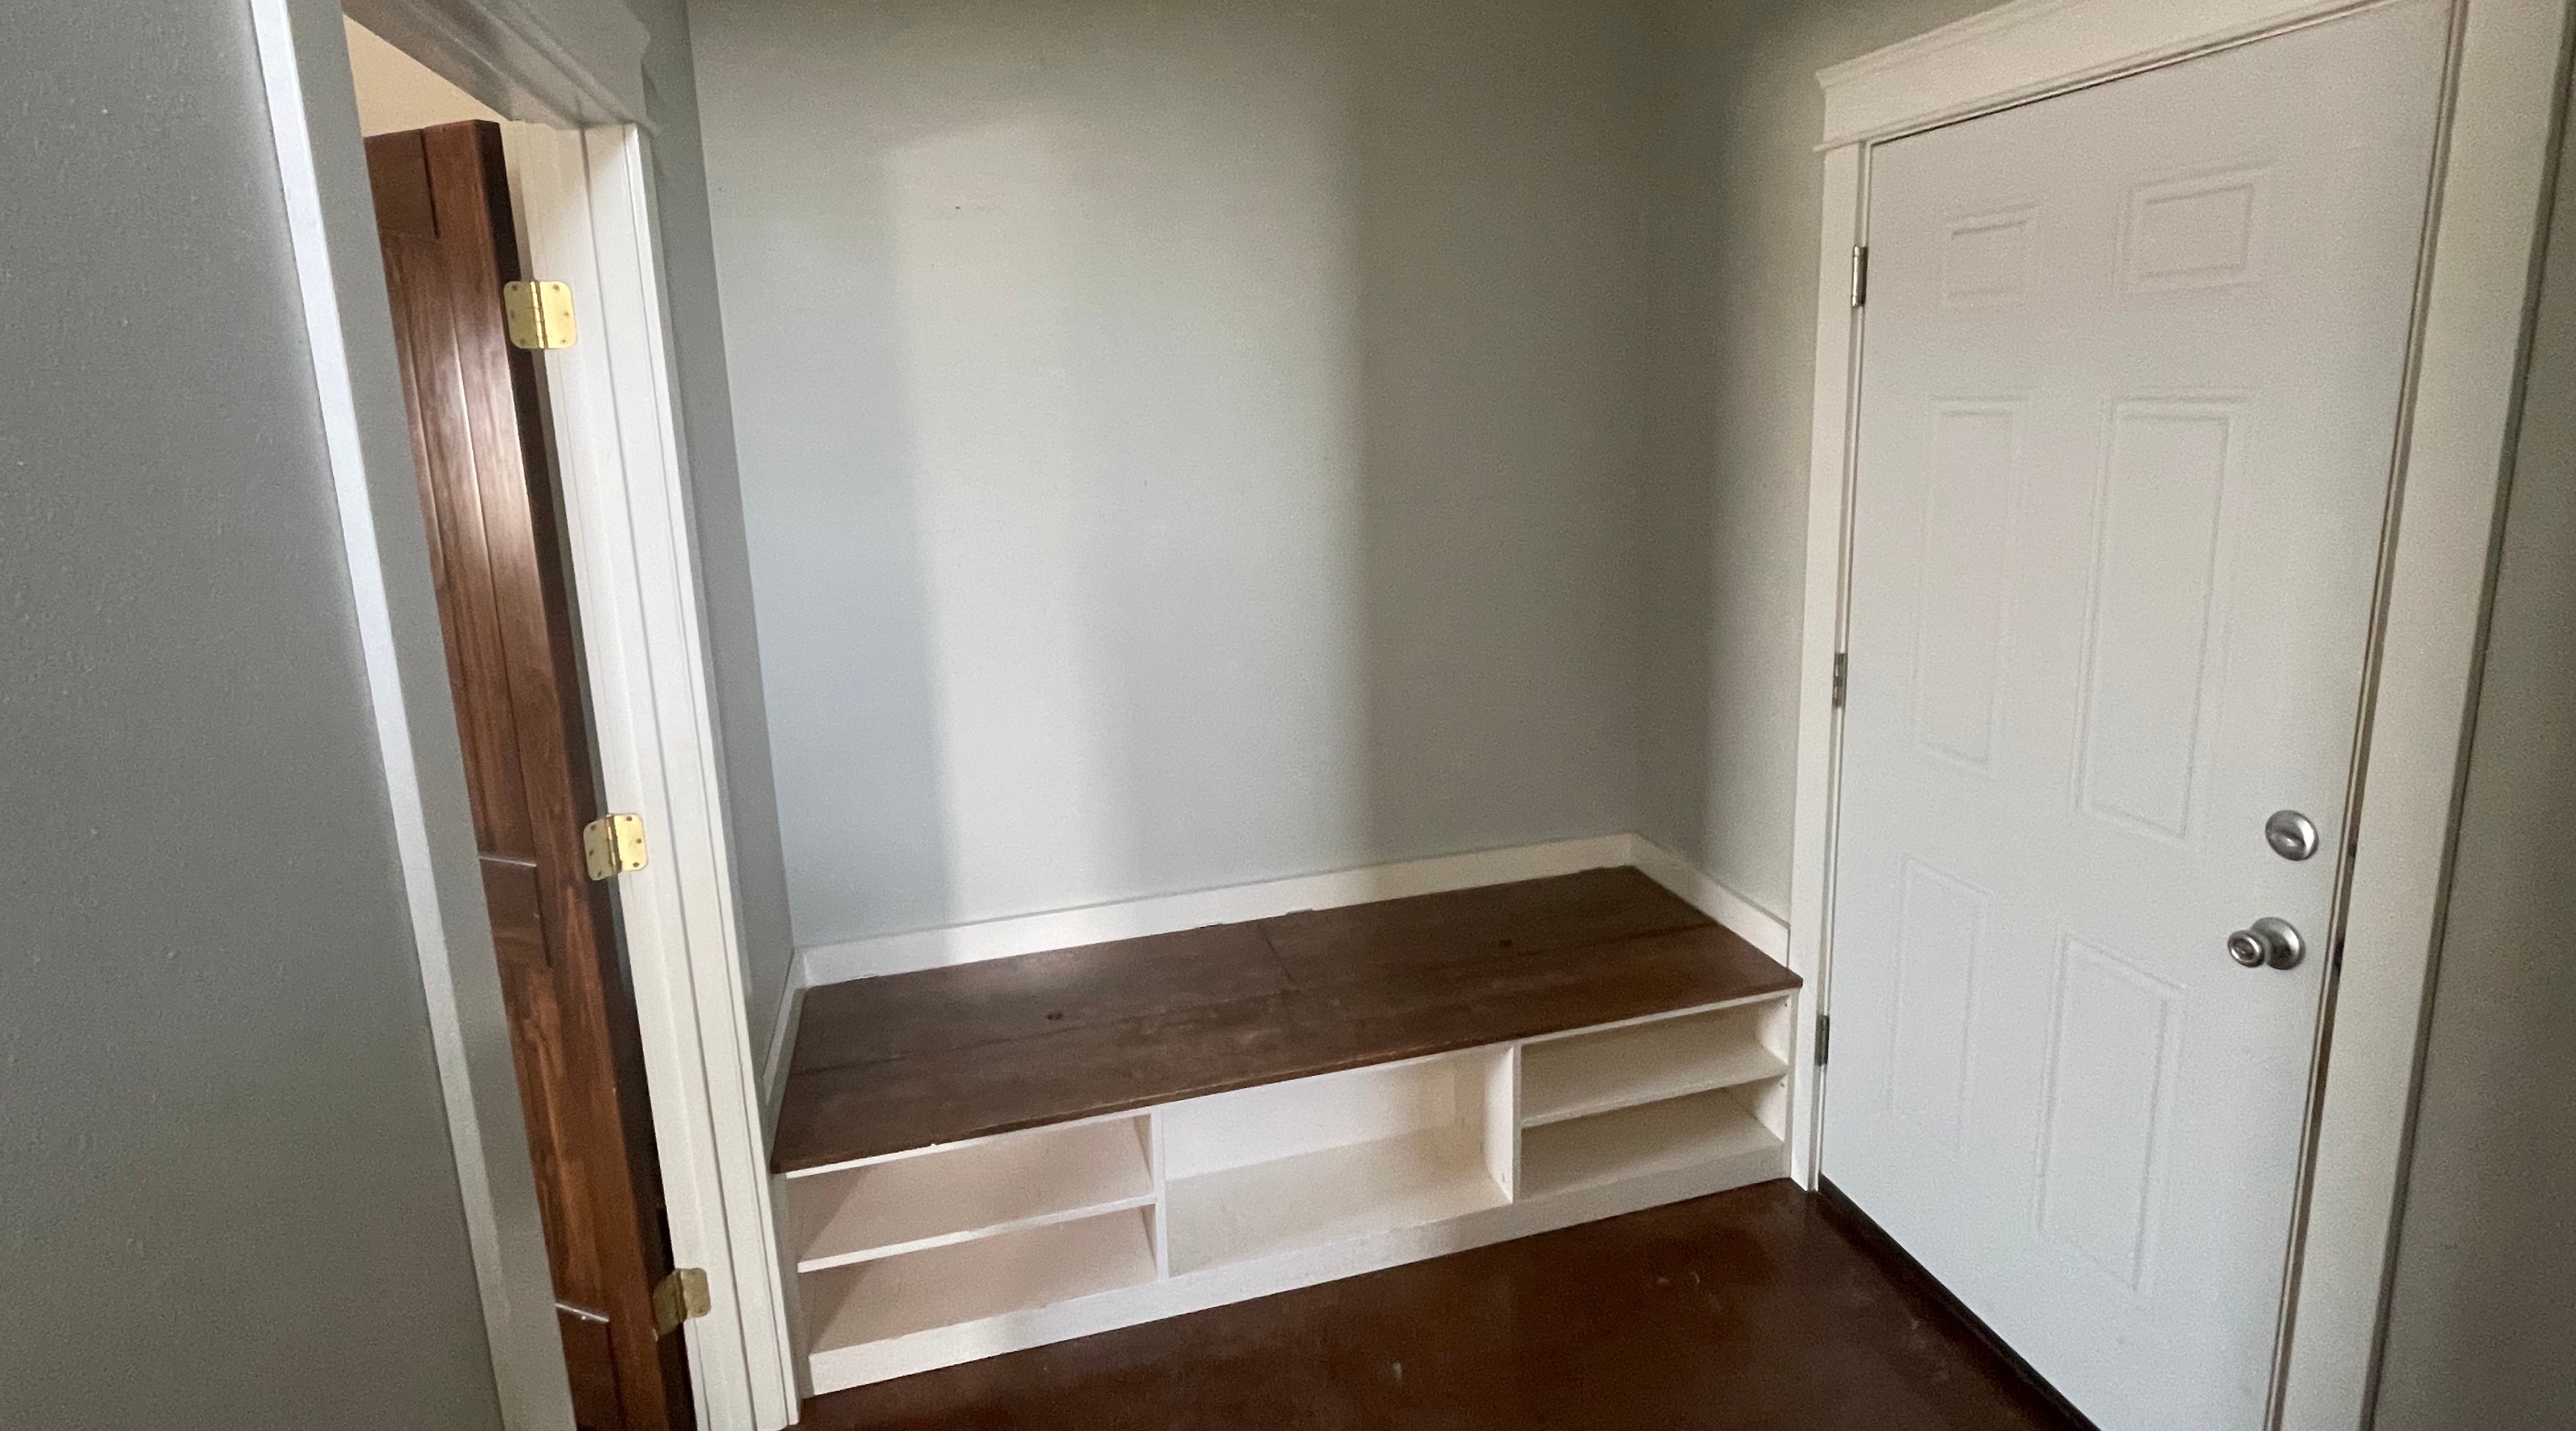
Before
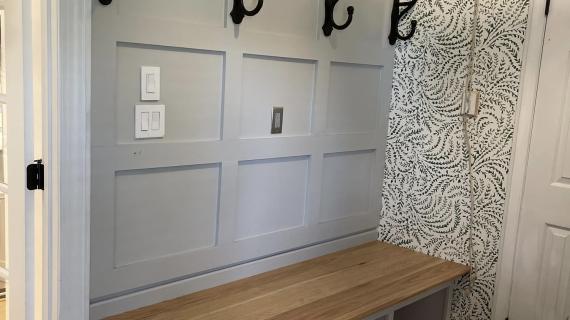
Pre-Built Panel in Garage
Quickly Installed on the Wall in Entryway
Build Video of Me Building This
I did a VERY quick video showing how I built this project, for those of you who like to see a project come together on video. Please take a moment to watch:
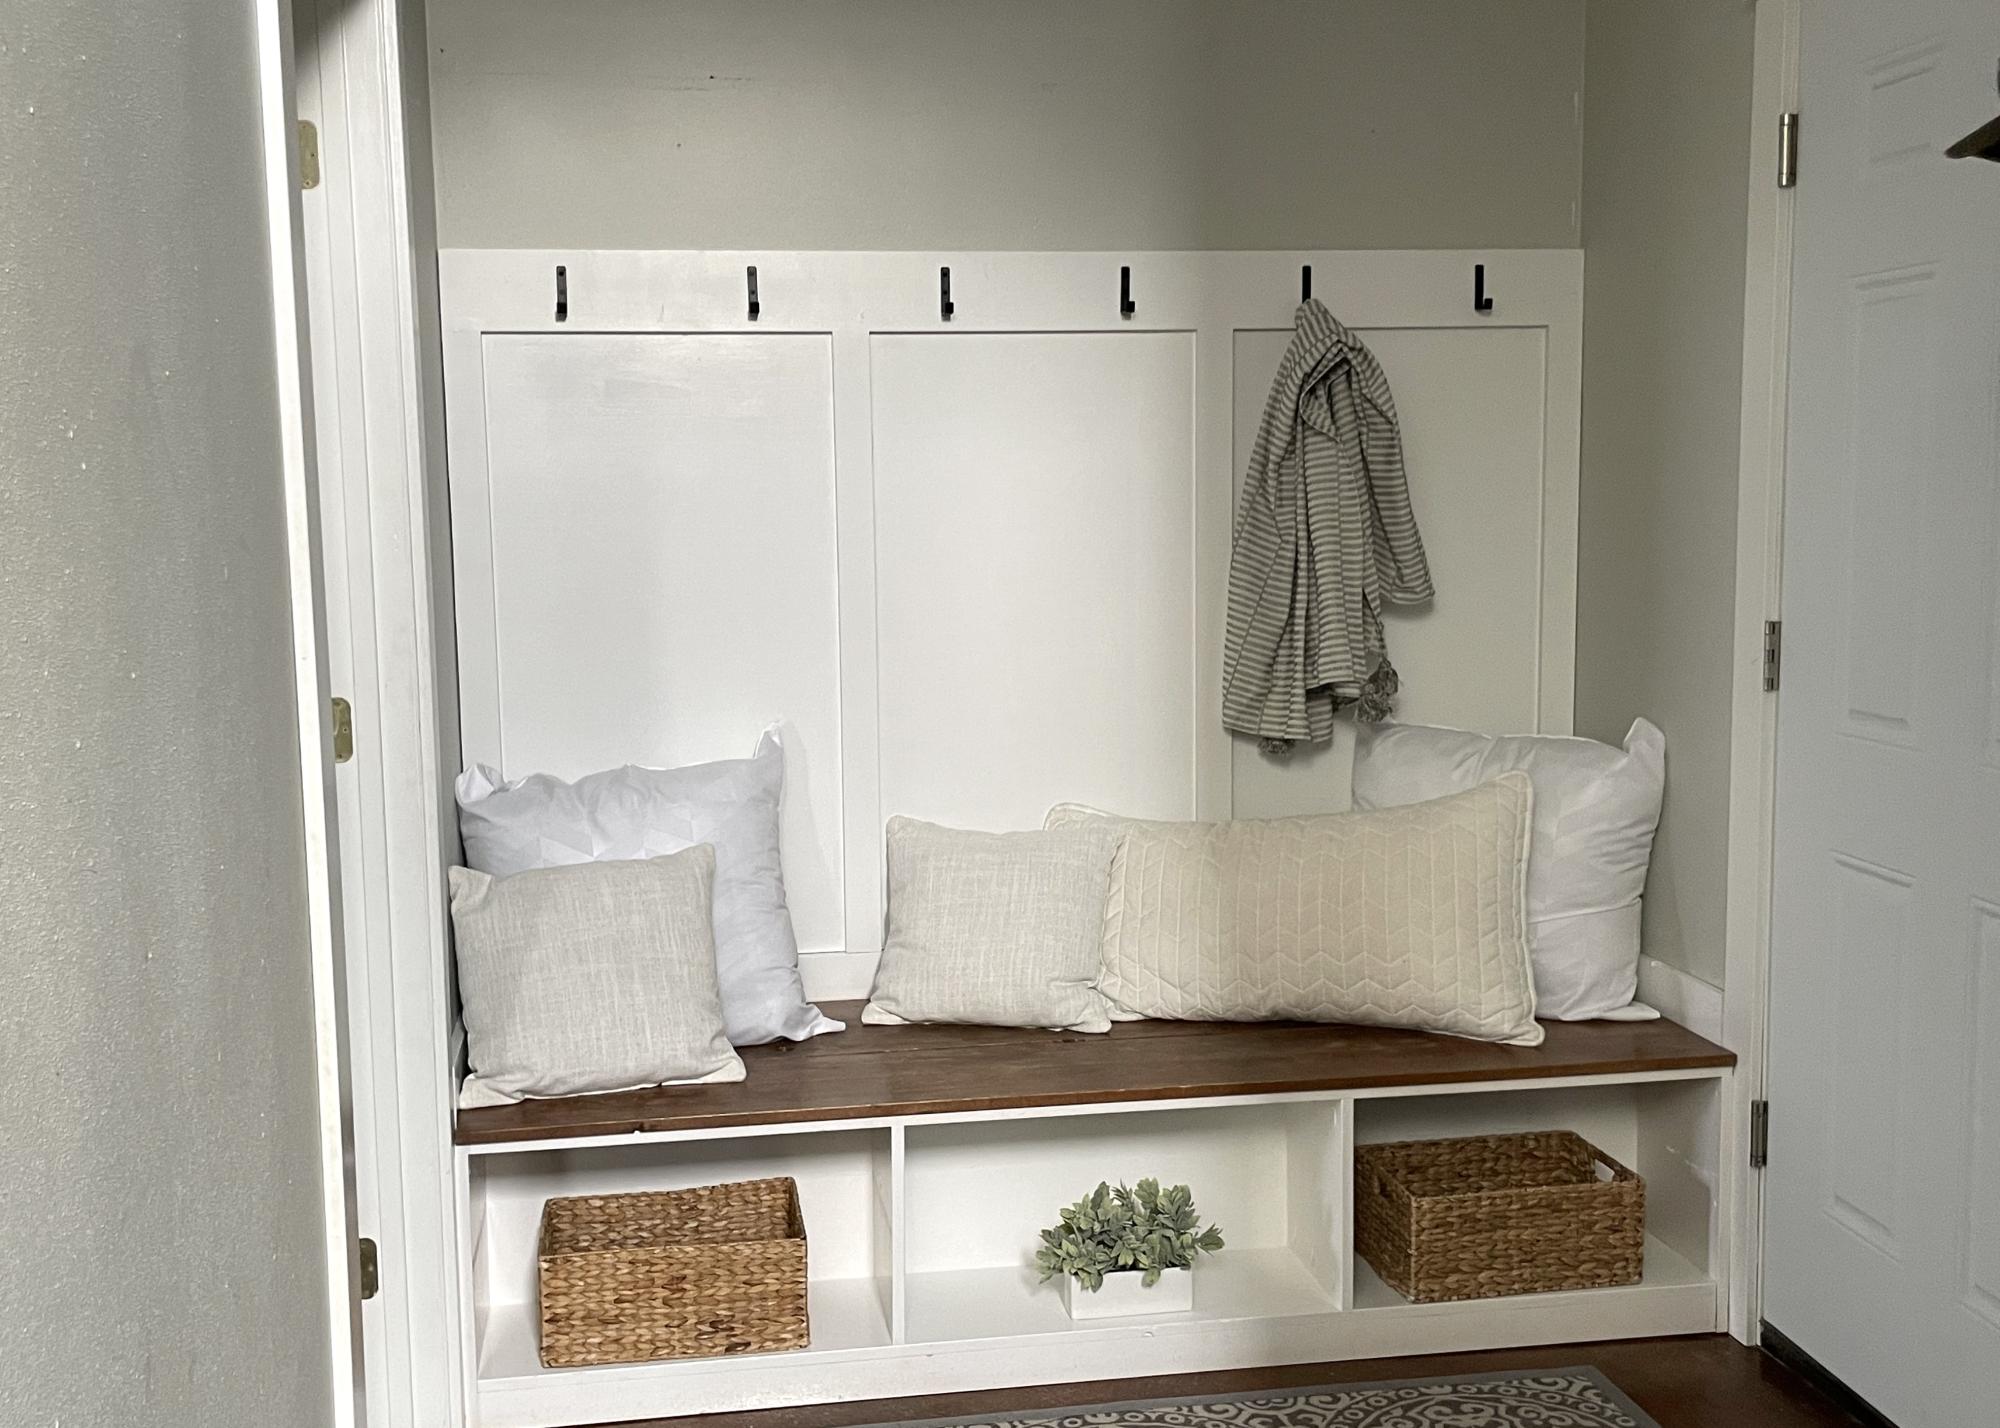
Tutorial for Entryway or Mudroom Board Batten Panel
This project is designed for you to make it your own for your space. Here's how I built it, and some tips to consider.
Planning
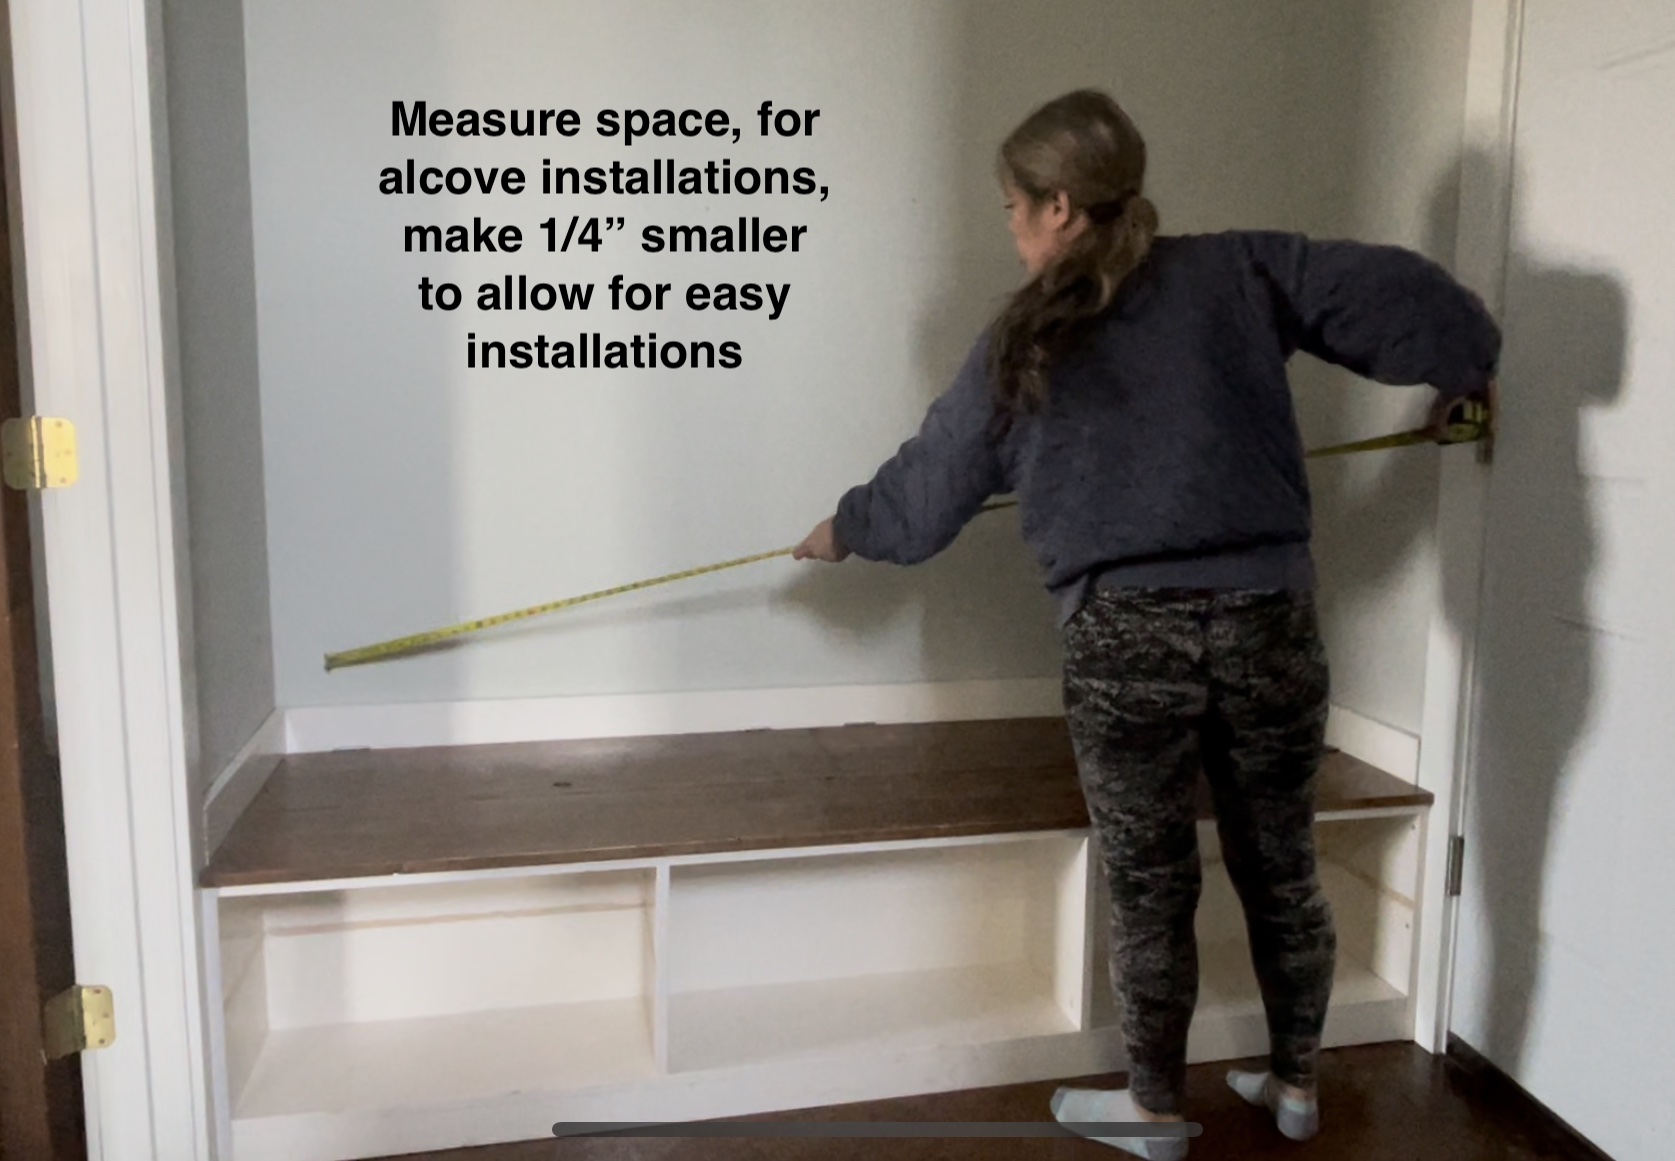
Before starting this project, measure the space. Measure out any electrical or obstacles.
- Avoid placing a 1x3 over an outlet, so on install, all you have to do is cut the 1/4" plywood out with a jigsaw around the outleet, and not the 1x3.
- Consider plywood runs in 4x8 sheets - if you go taller than 48", you'll need to run the plywood vertical. You'll want to splice different plywood sheets behind 1x3s.
- Smooth walls - if your walls are smooth, you may not need the 1/4" plywood on the back. My walls are textured, so I opted for the plywood panel at the back.
Pin For Later!
Preparation
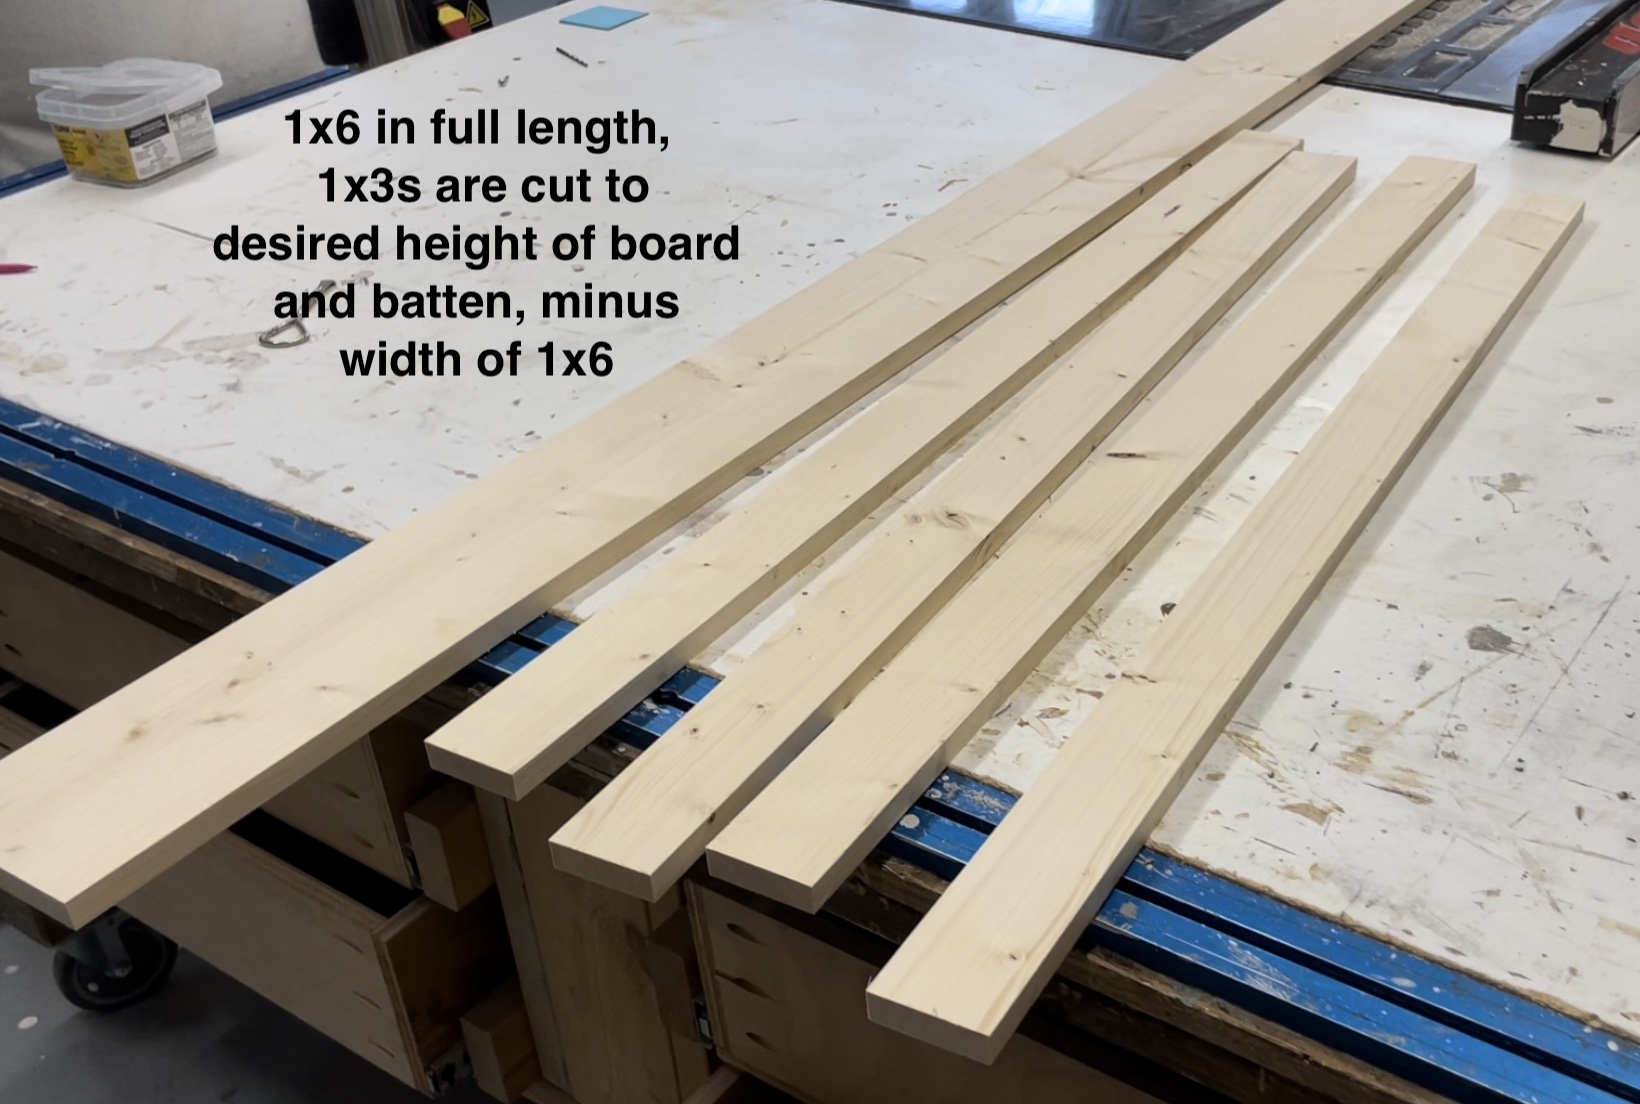
- 1x6 @ length of board and batten panel
- 1x3 @ height of board and batten panel, as shown 42-1/2"
- 1/4" plywood for the back
- 1-1/4" pocket hole screws for building the frame
- 3/4" brad nails for attaching plywood to the back
- 2" self tapping star bit screws for hanging on the wall
- wood filler
- 120 grit sandpaper
- primer and paint
Cut the 1x6 to the overall desired length, if in alcove installation, cut 1/4" shorter to allow for easy installation
Figure the overall height and cut the 1x3s to fit
NOTE: Plan how you will add the 1/4" plywood to the back. The easiest method is to keep the overall piece less than 48" tall x 96" wide. You can make it larger, you will just need to splice multiple pieces of plywood to the back, hiding joints behind 1x3 boards.


Instructions
Step 1
Measure the space and plan out your board and batten panel.
Since mine is on top of an existing bench, I decided to make it right at 48" tall.
Step 2
For materials, I used a 1x6 at the top to give me lots of room for hooks.
I used 1x3s for the vertical boards.
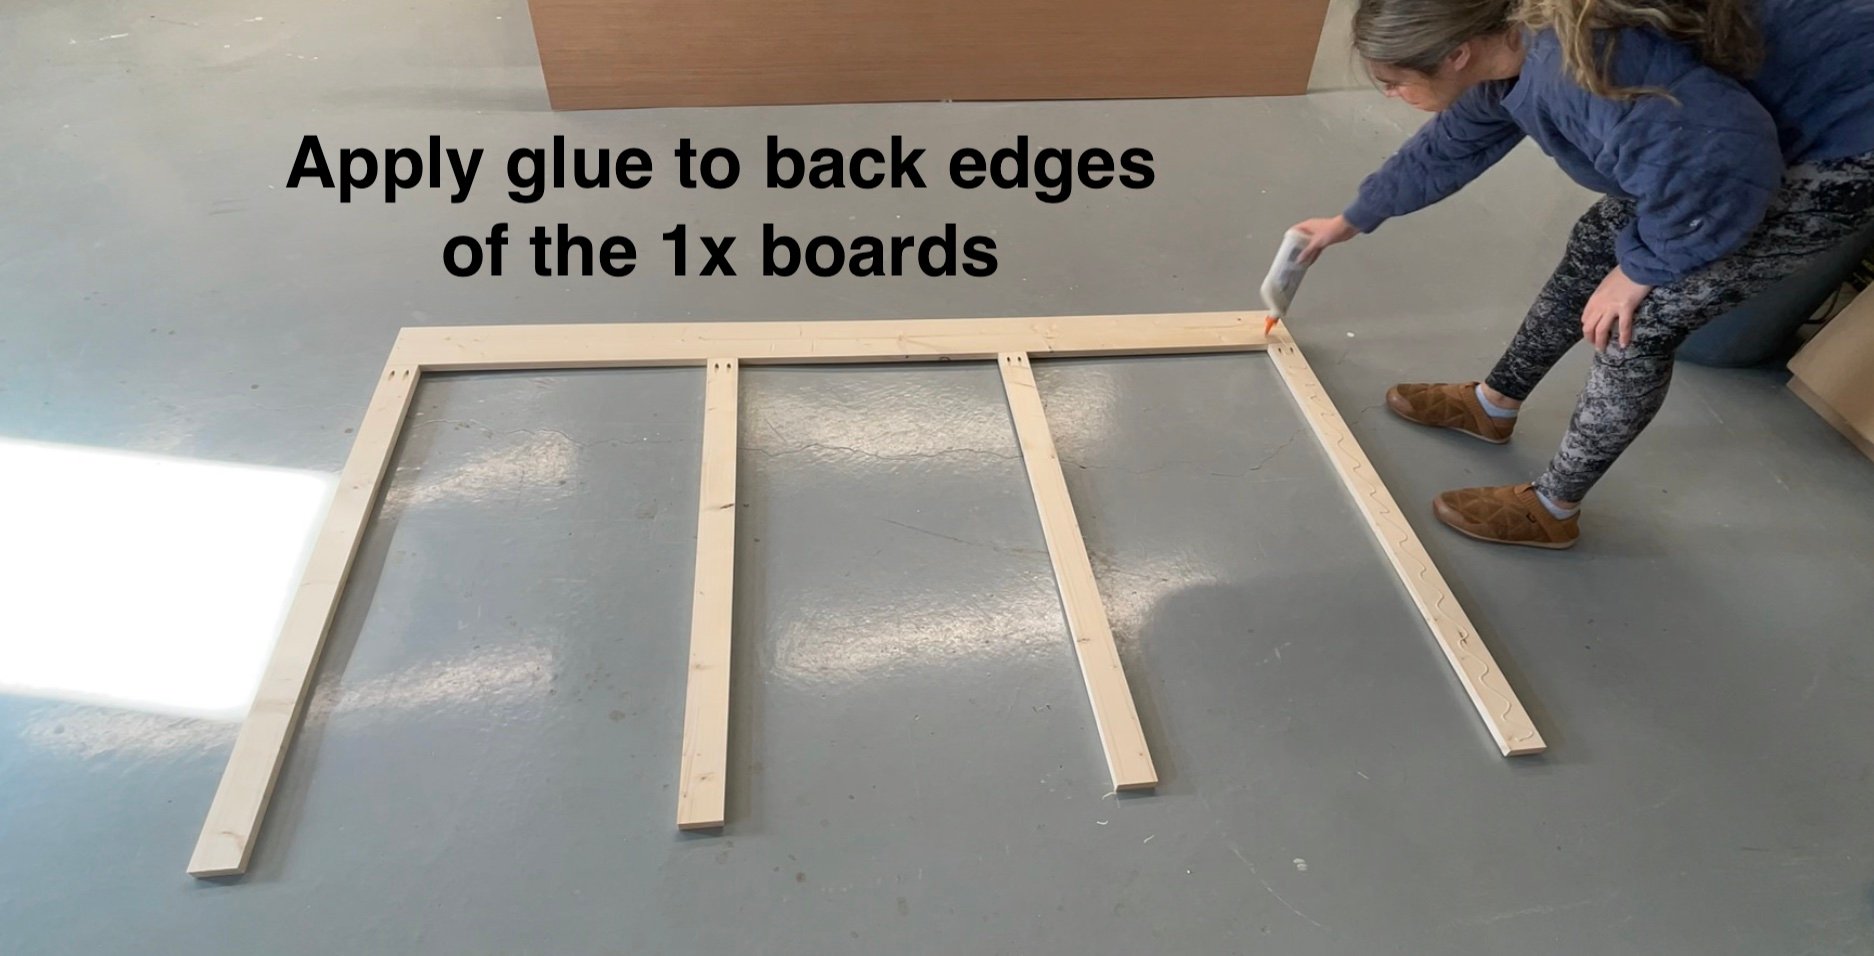
Step 3
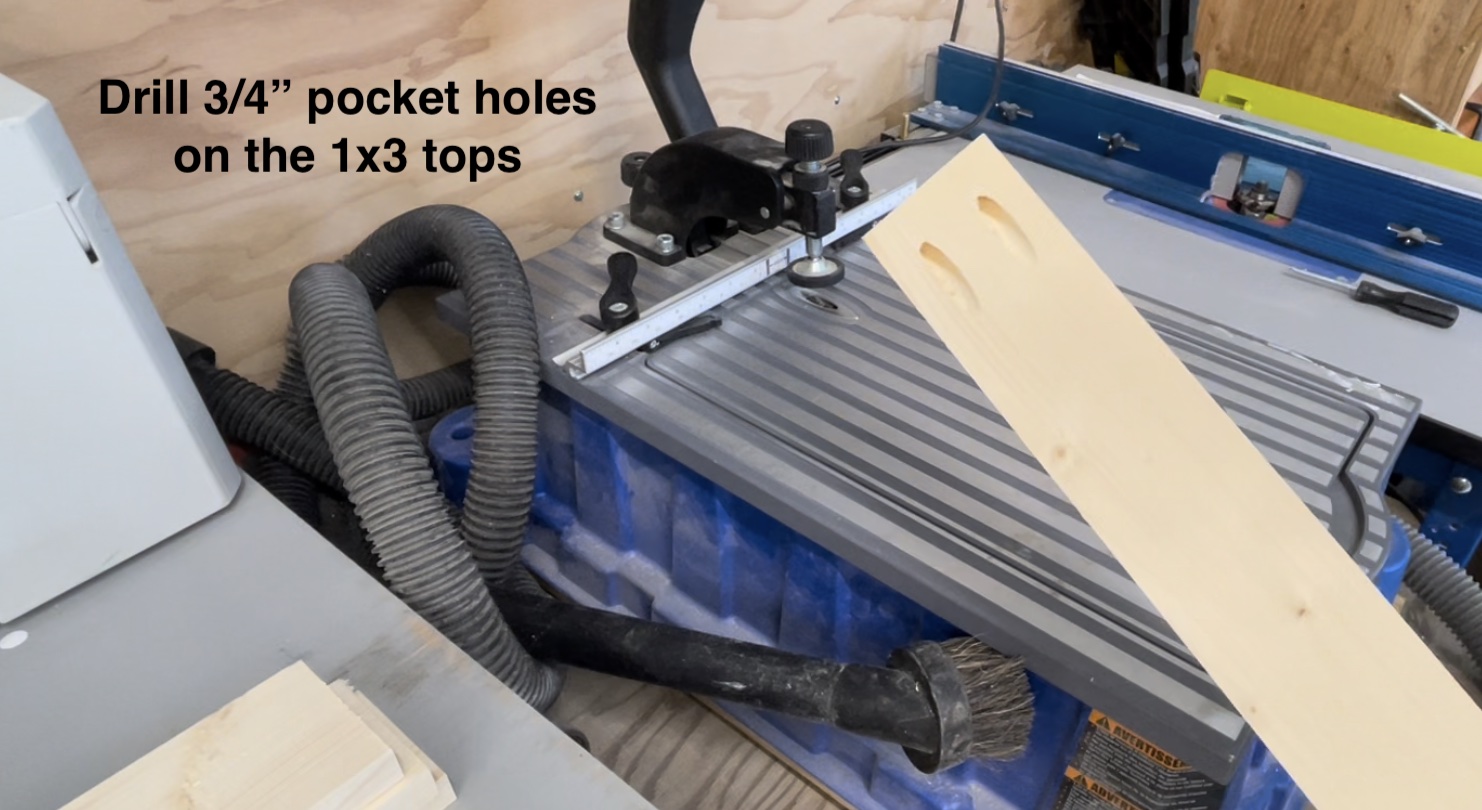
On all 1x3s, I drilled two 3/4" pocket holes at the top.
Step 4
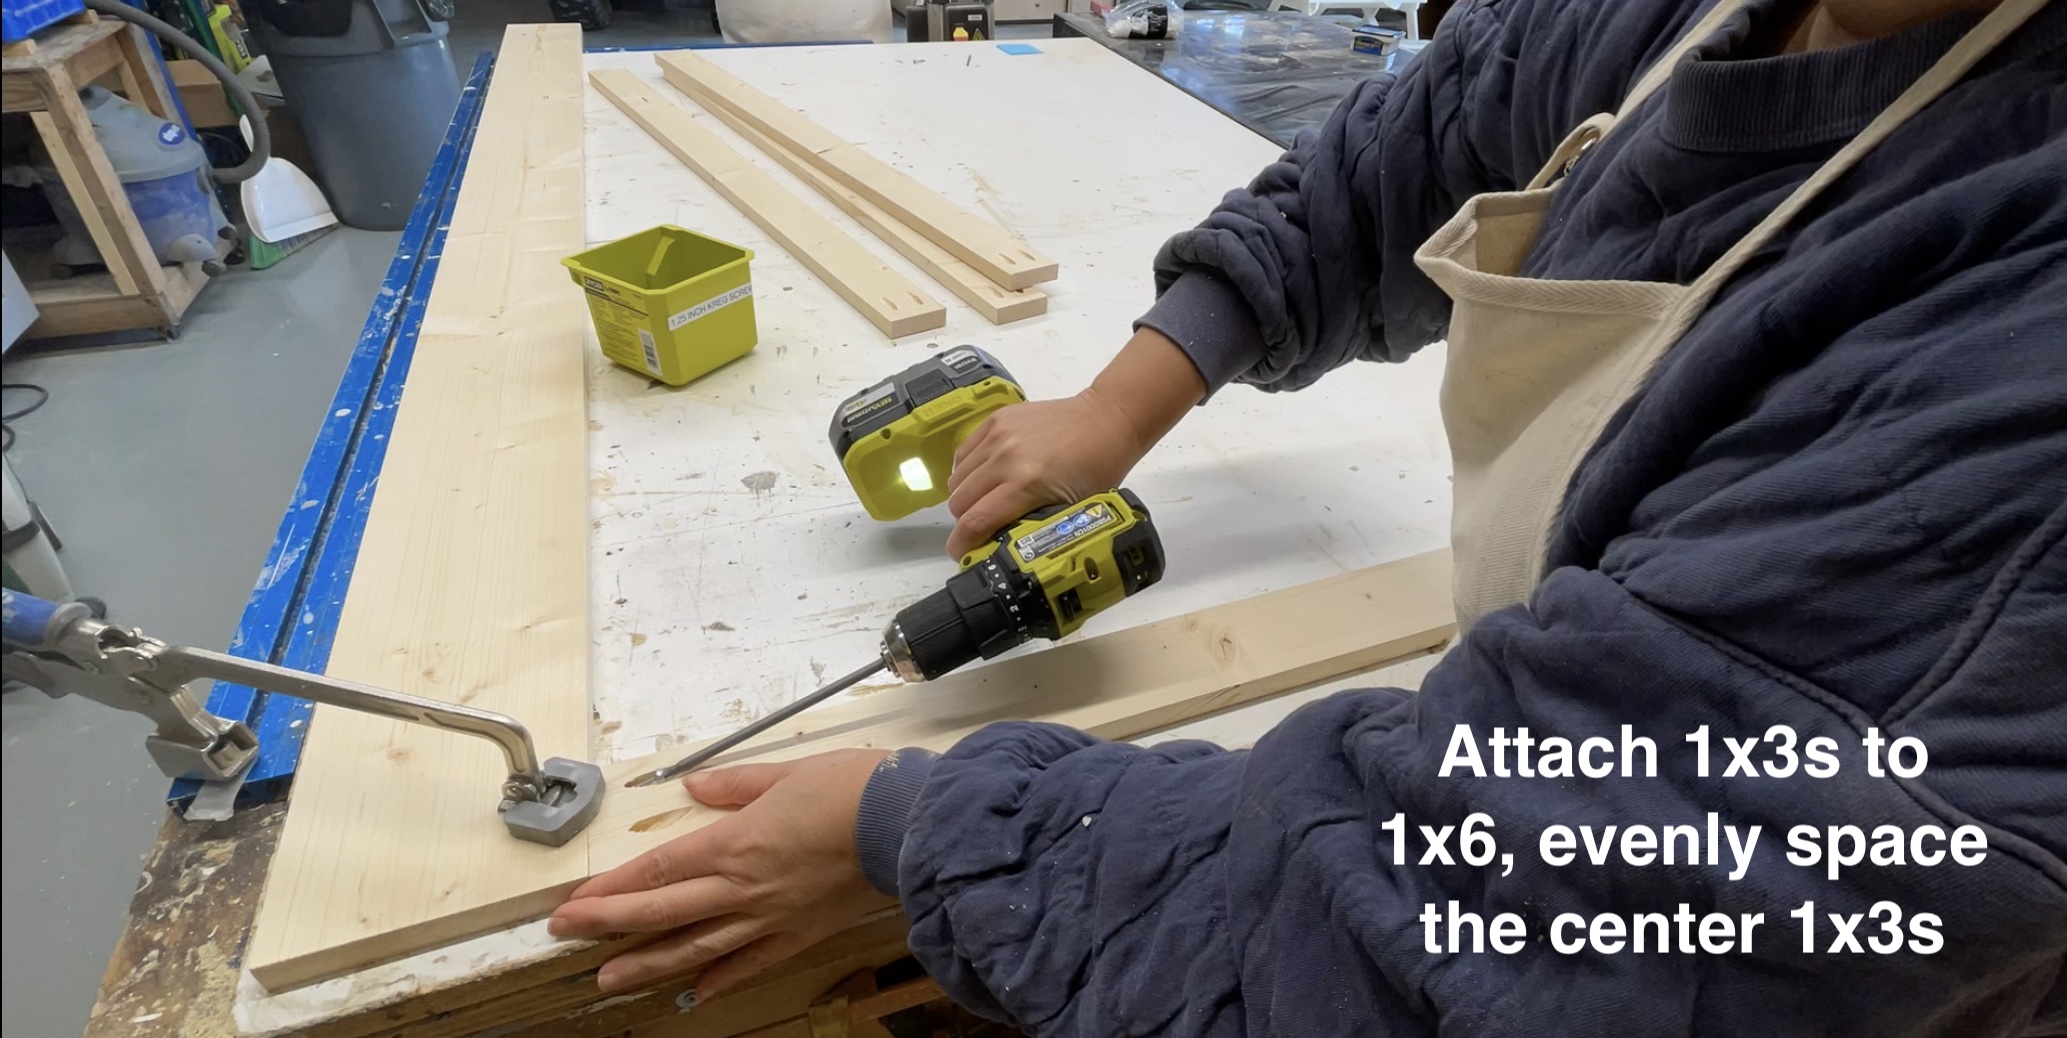
I built the frame by attaching the 1x3s to the 1x6 top board with 1-1/4" pocket hole screws.
The center 1x3s are measured and places so the spacing is even in between.
Step 5
Here is the completed frame.
If you don't have a baseboard to work around, adding a second 1x4 at the bottom (same length as the 1x6) is recommended.
Step 6
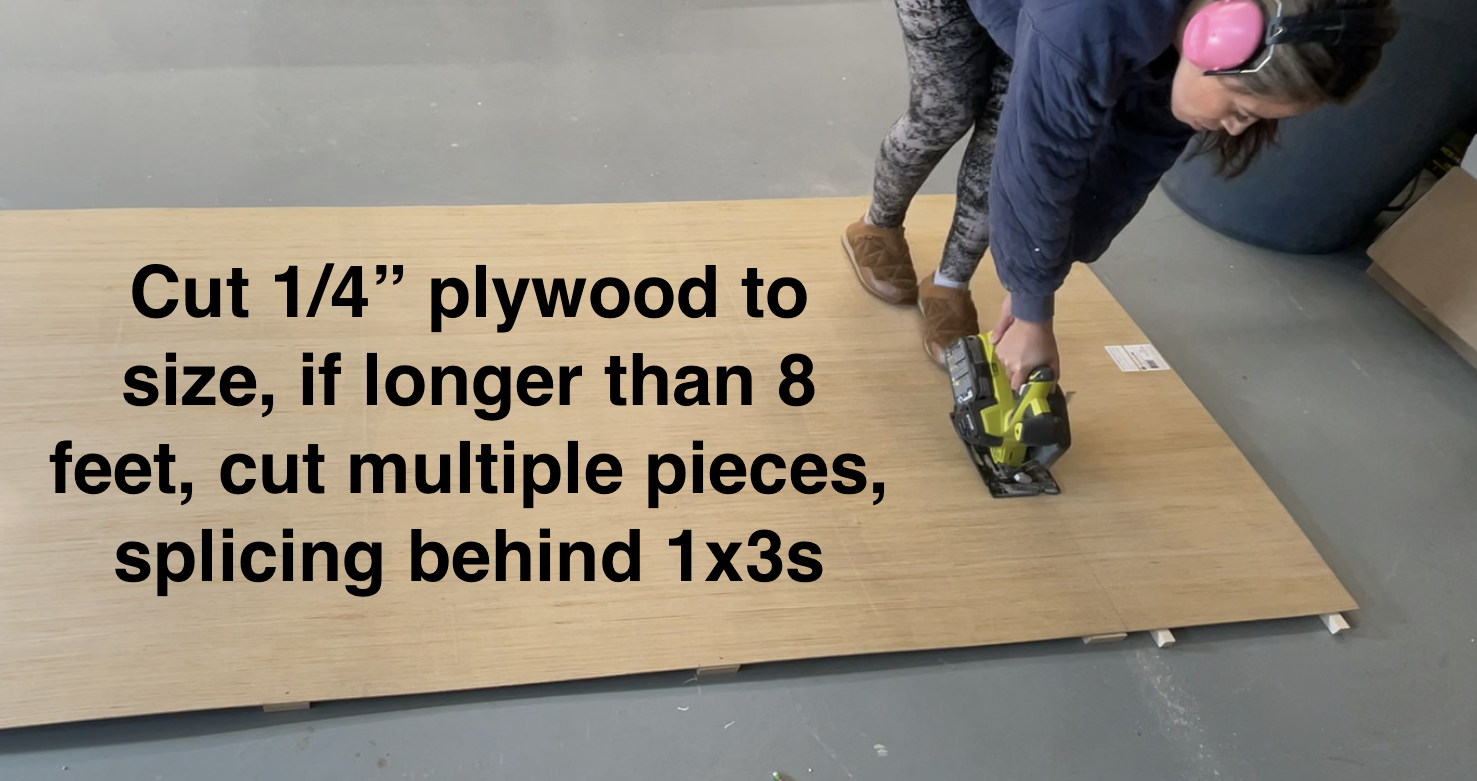
Cut the back 1/4" plywood to fit. If you need to use multiple pieces, hide the cut splices behind the 1x frame boards.
Step 7
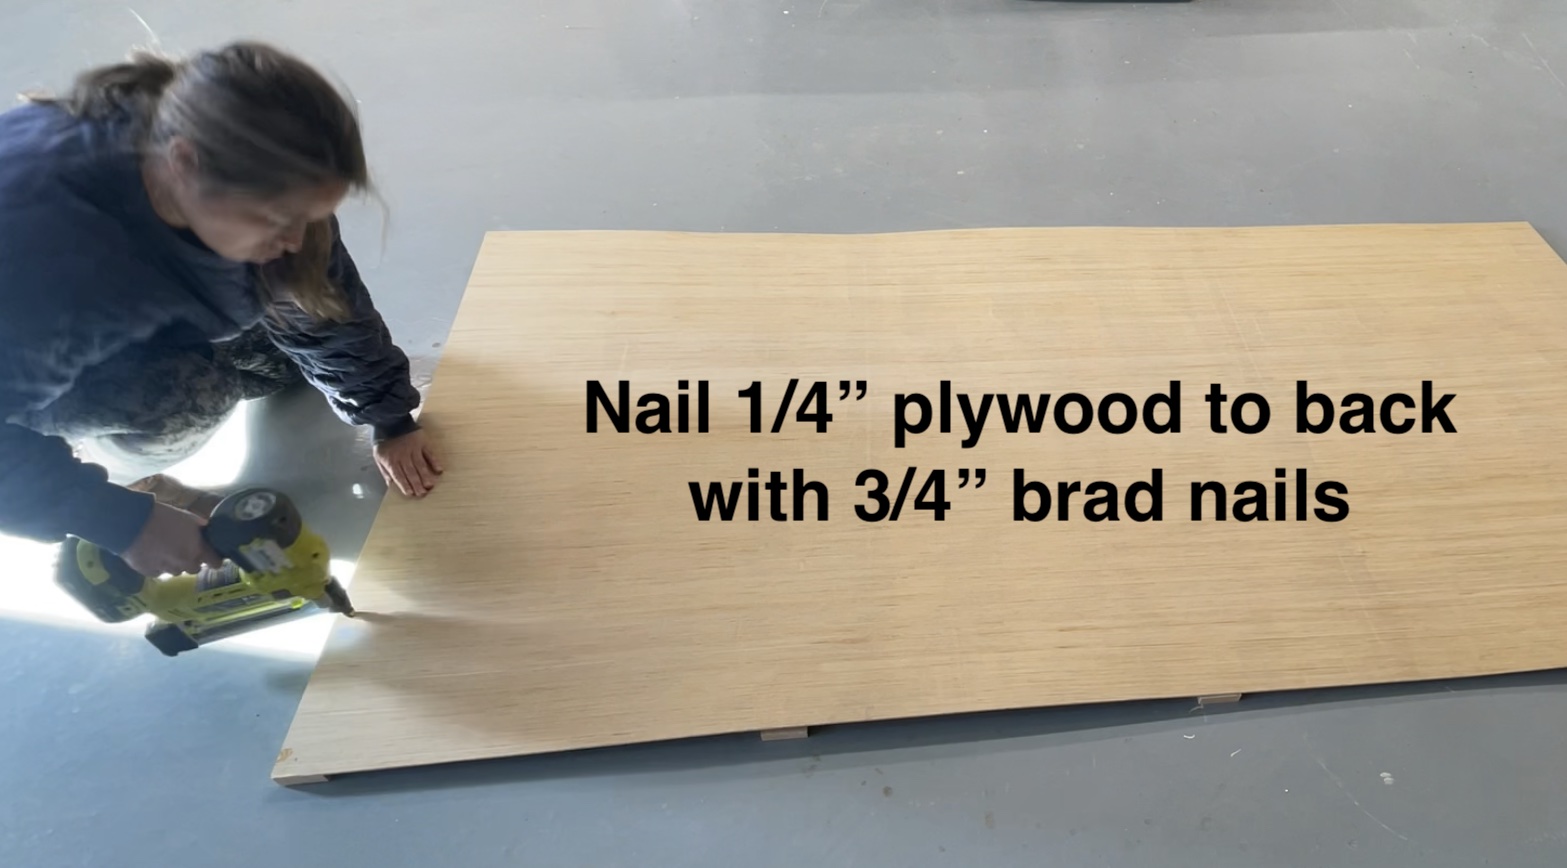
Nail the back plywood on with 3/4" brad nails.
Step 8
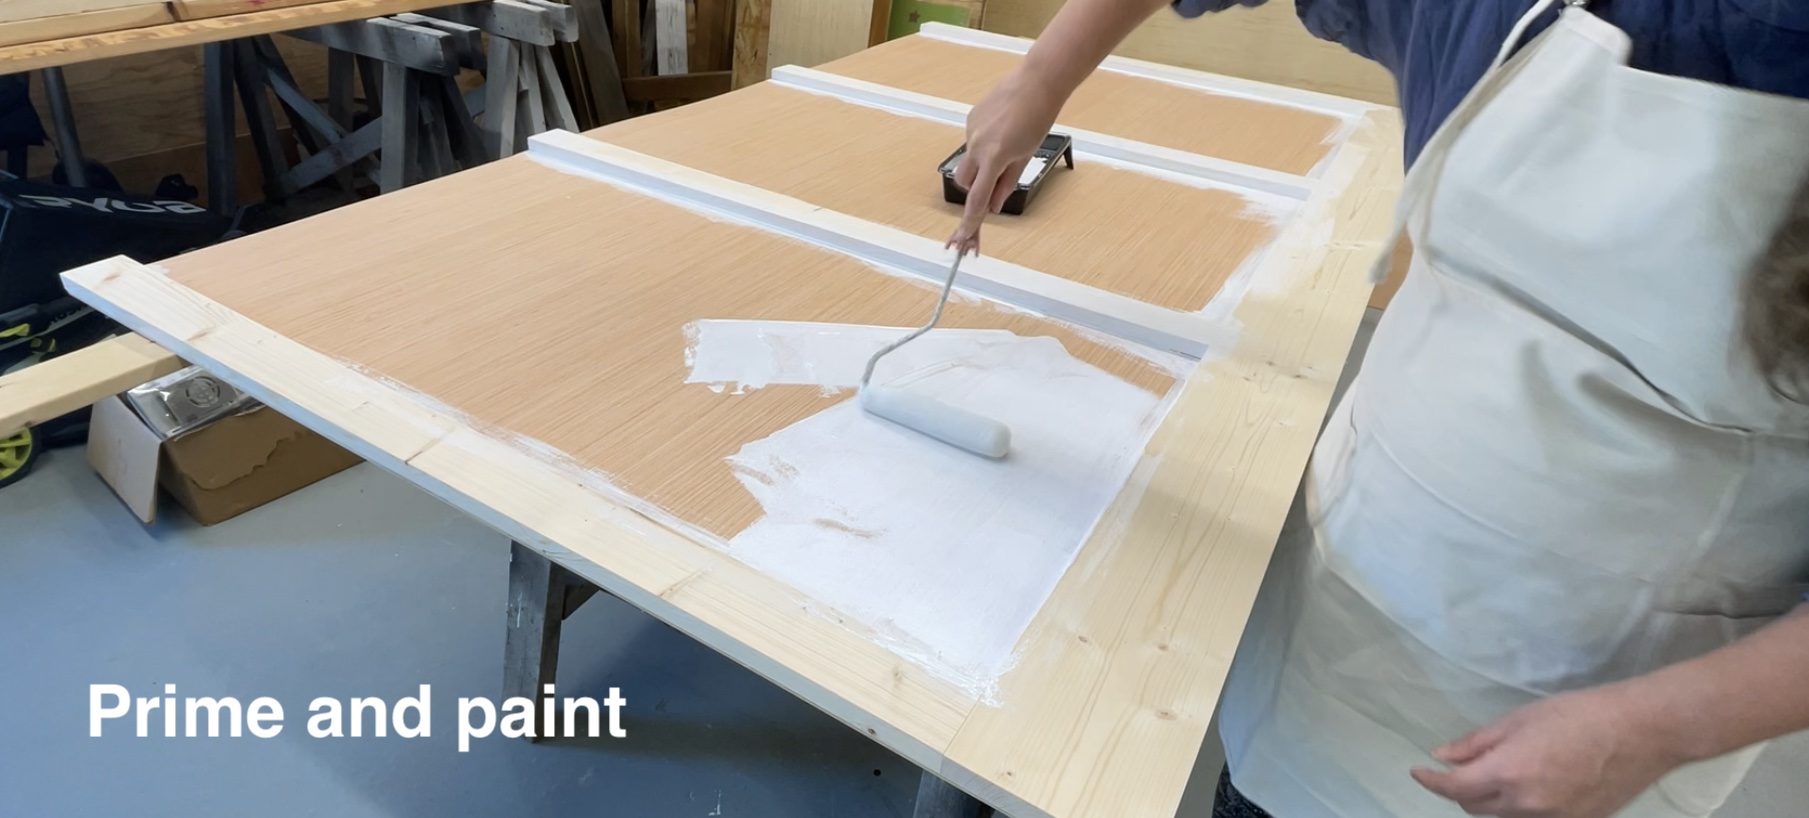
It's easier to paint as a panel outside or in the garage, without worrying about a home remodel mess.
Sand well with 120 grit sandpaper.
Remove all sanding residue.
Brush the inside corners with a brush.
Then roll paint with a foam roller.
Step 9
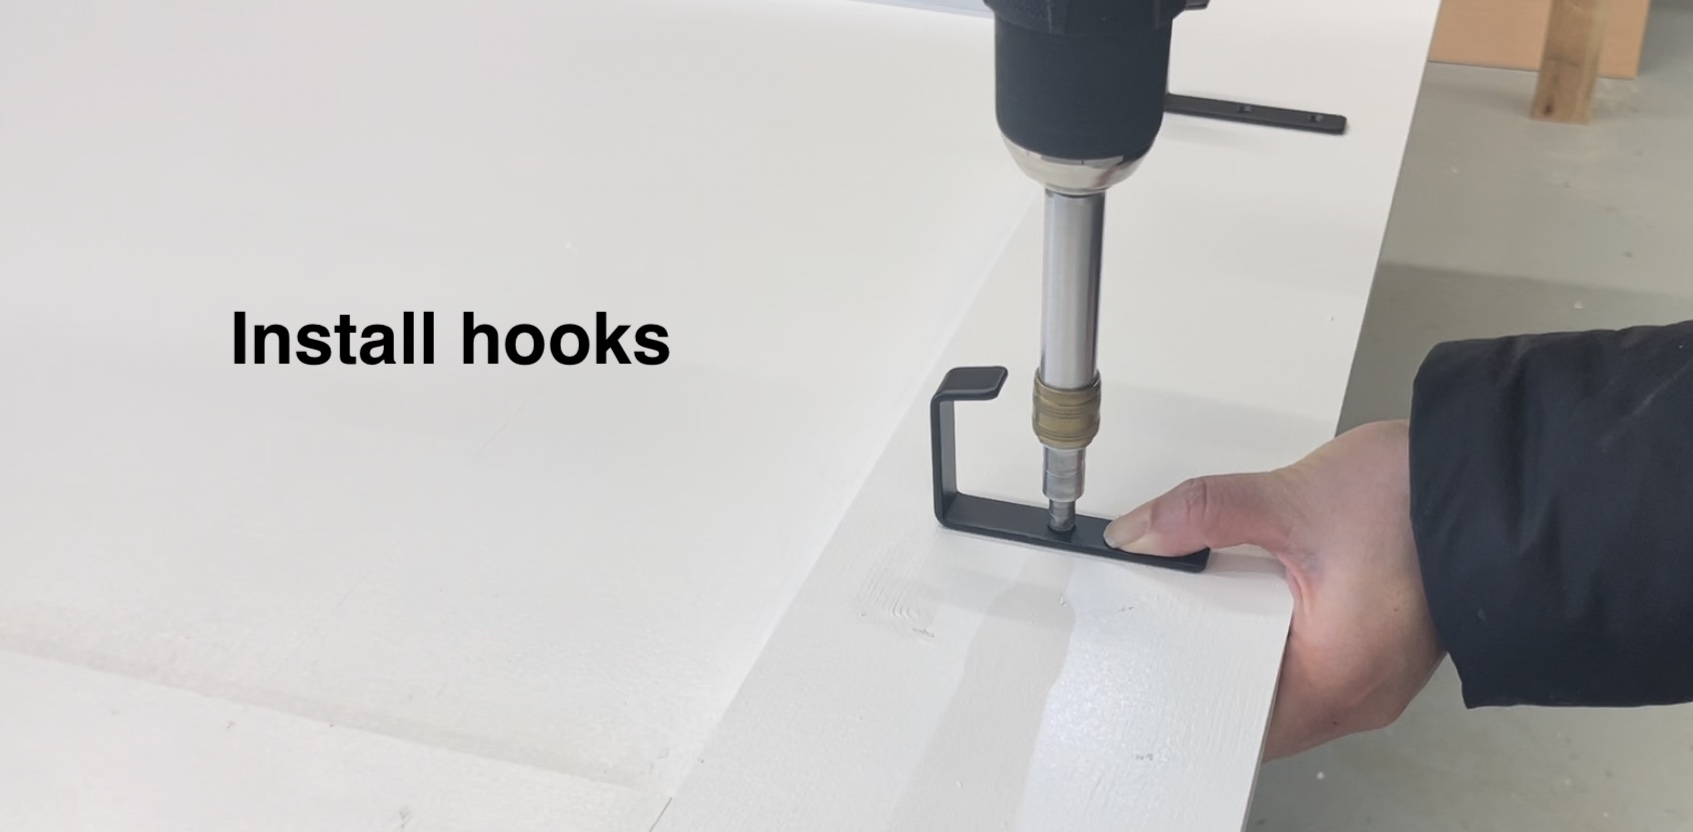
It's easier to install hardware flat in a workshop, than on a wall.
Measure out placement and install.
Step 10
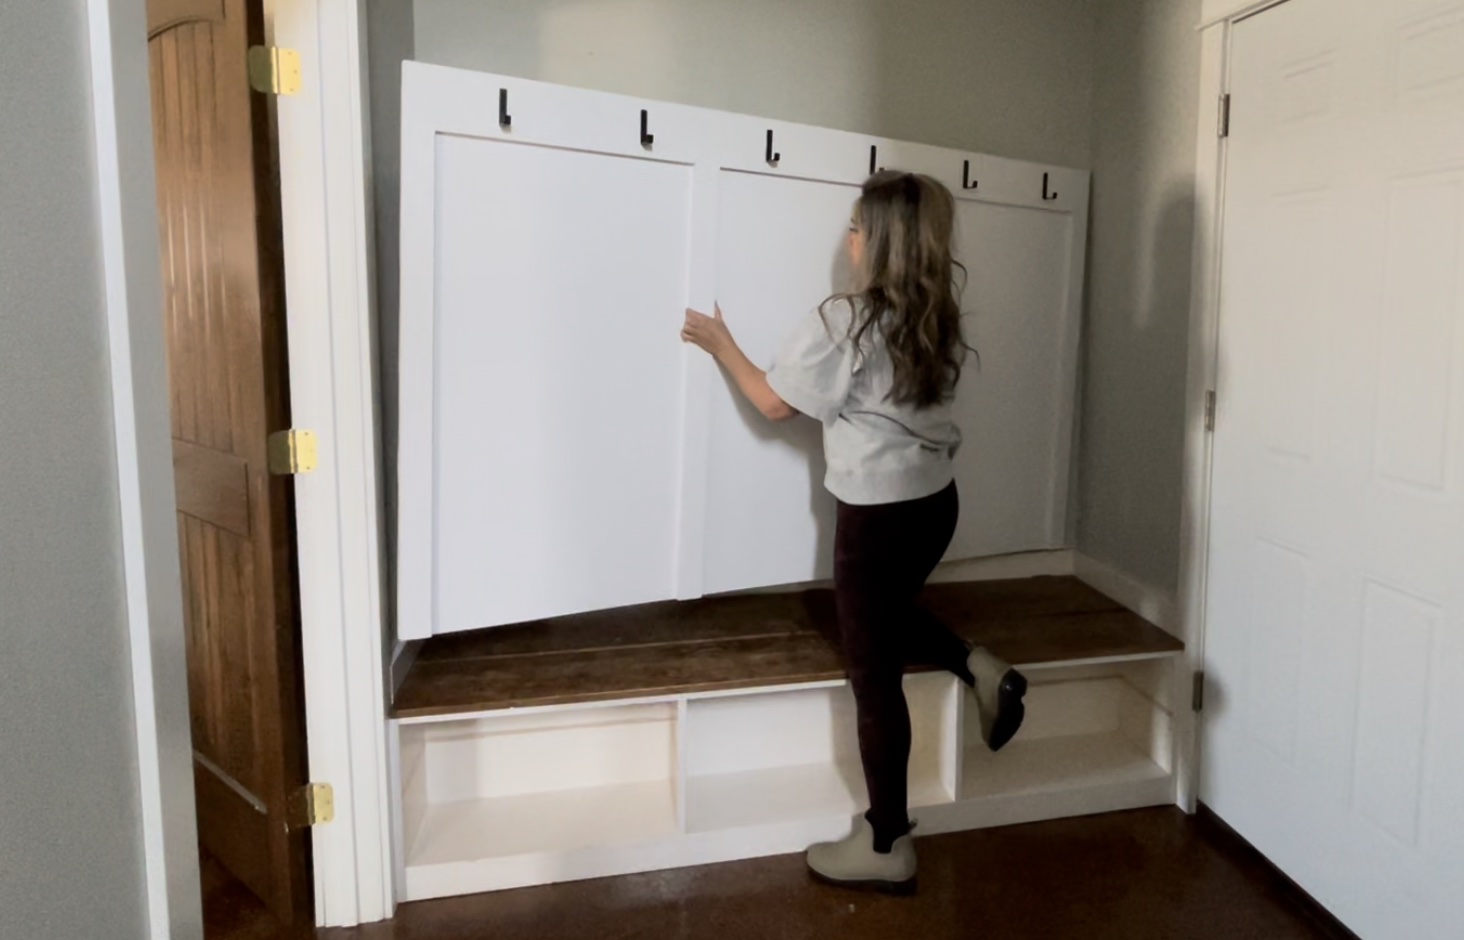
Set the panel in place.
Step 11
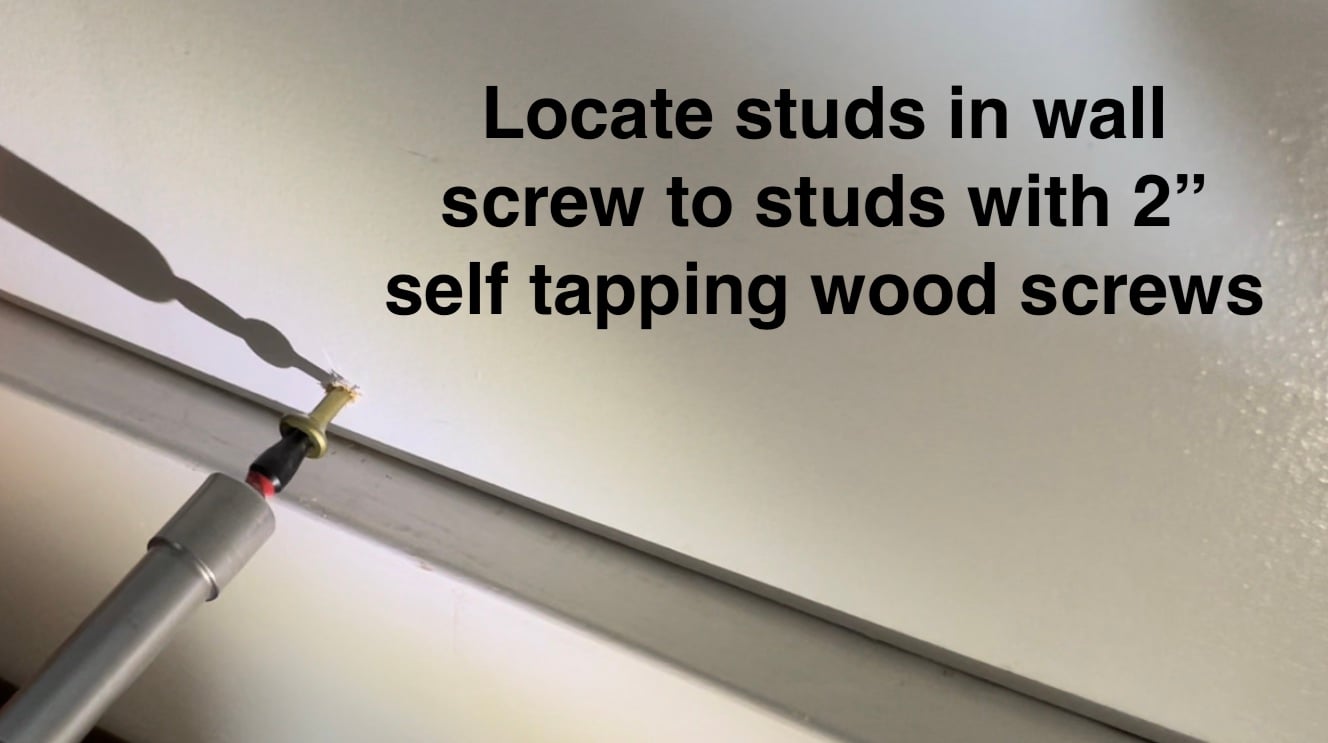
Locate studs in wall and attach through the panel into the studs in the wall.
Step 12
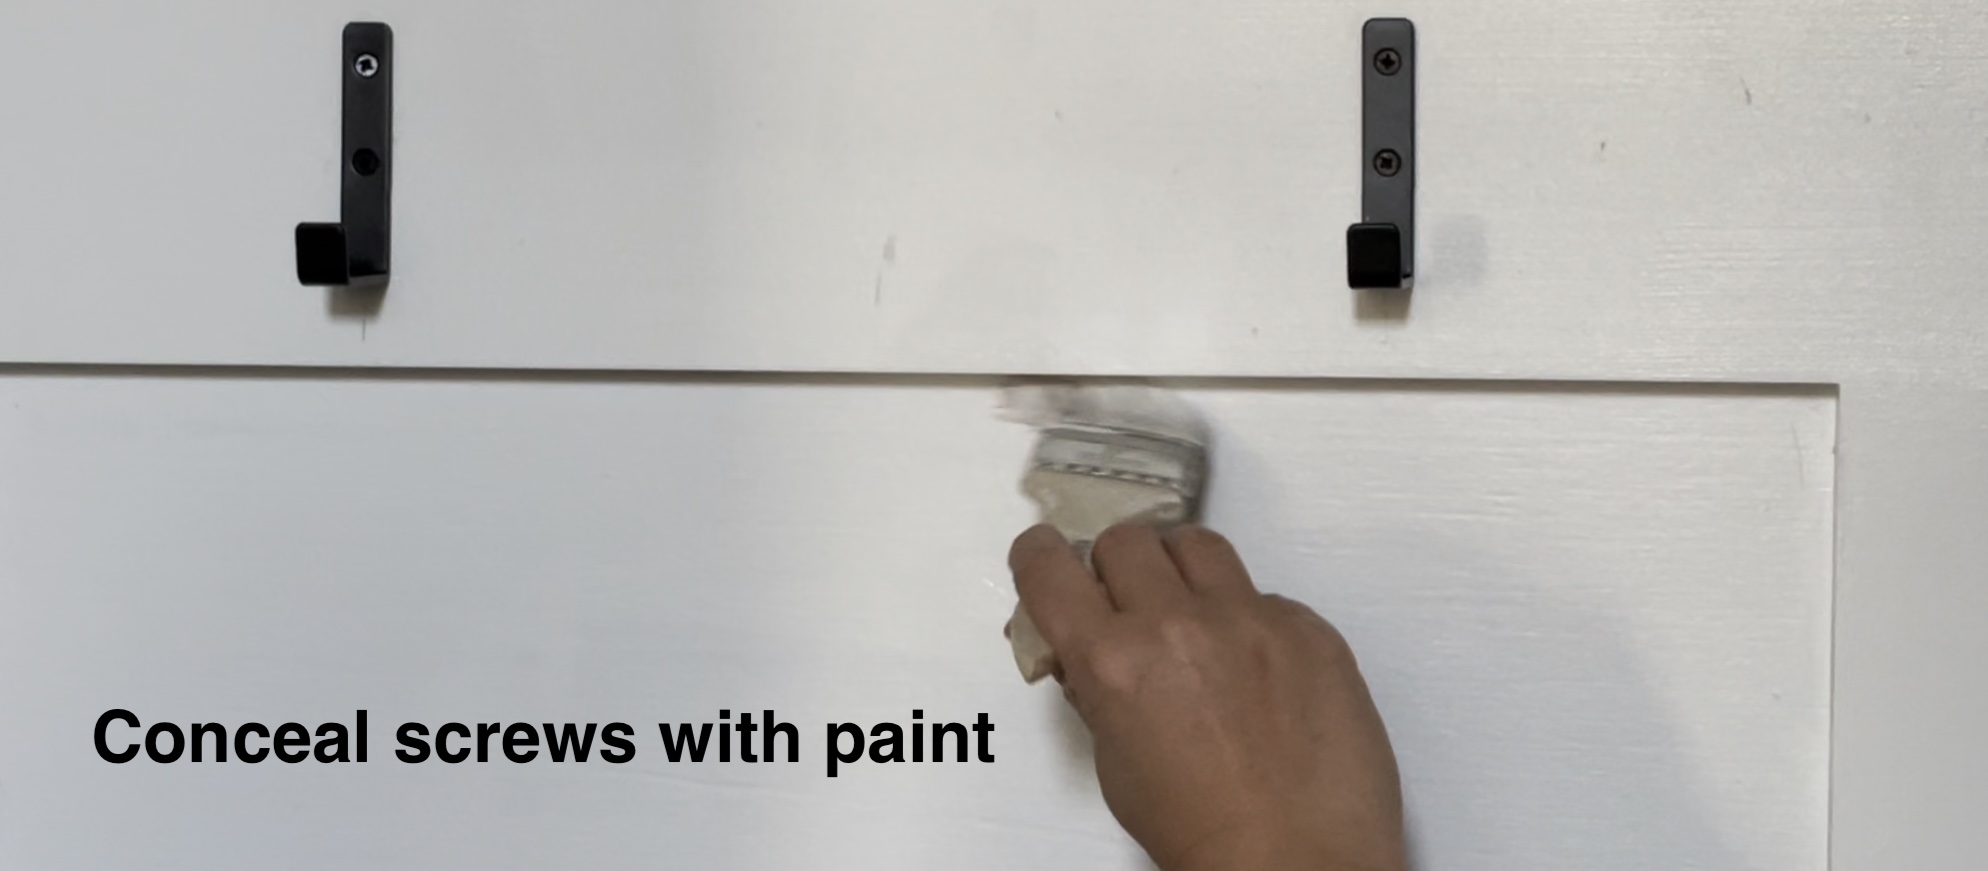
The screw holes can be filled with wood filler, but this will make them very difficult to find in the future.
Covering with paint does disguise them, but the panel is still removeable.
Step 13
This panel was perfect paired with this simple to build bench with hidden storage (plans are here).