
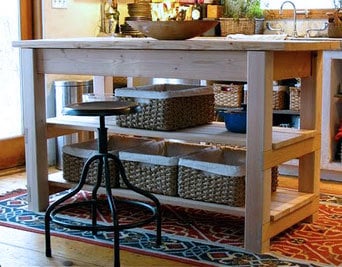

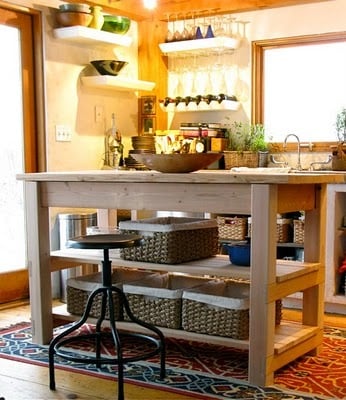
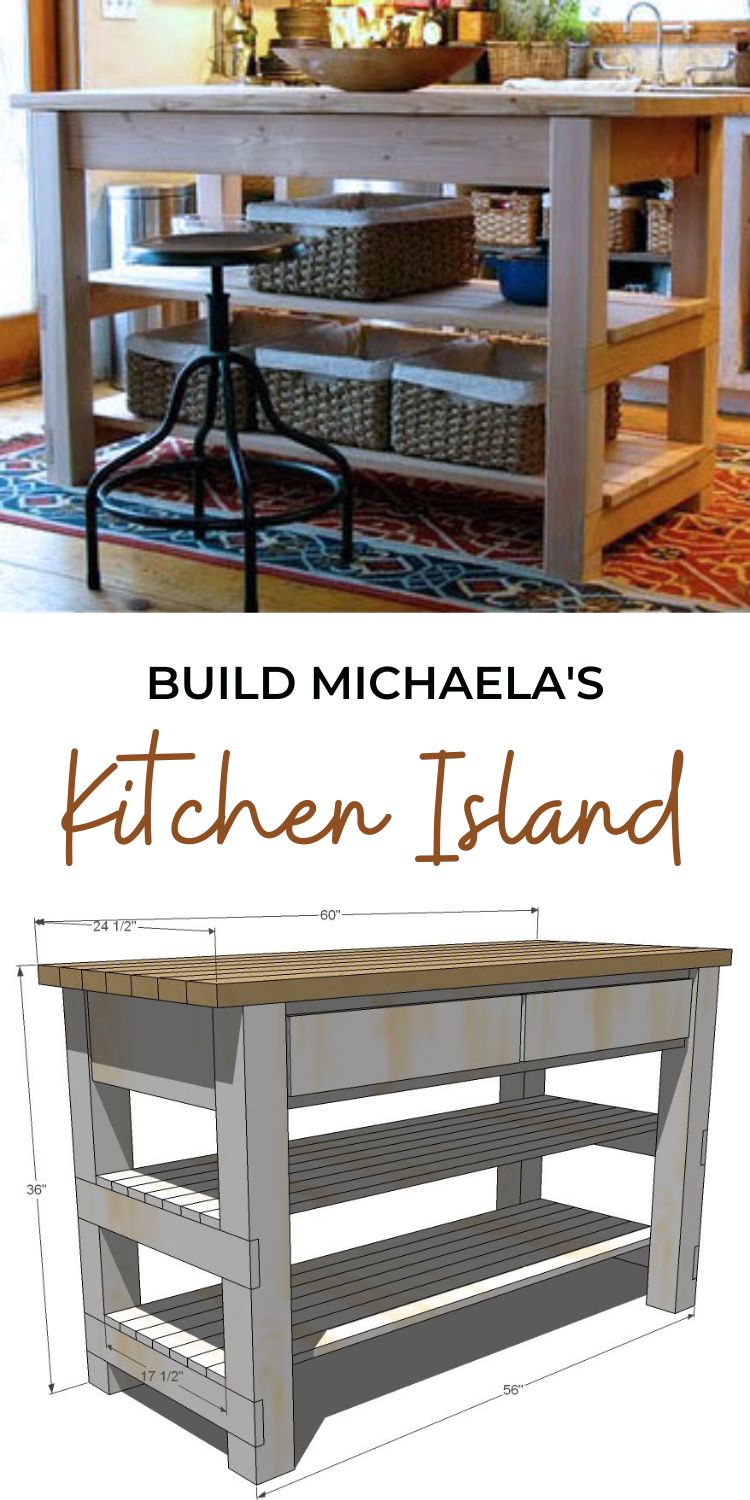
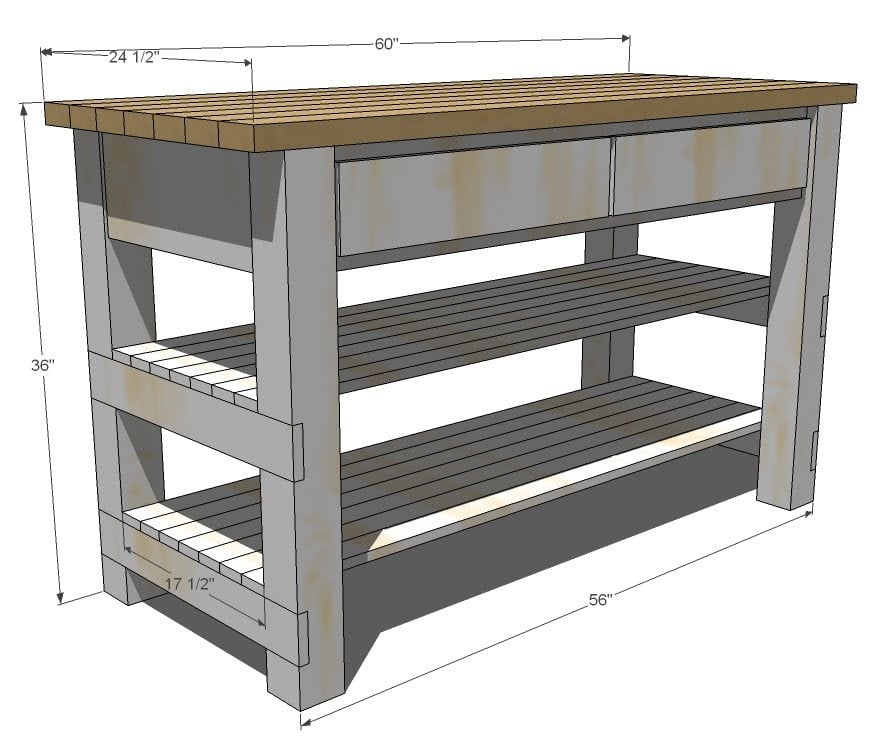
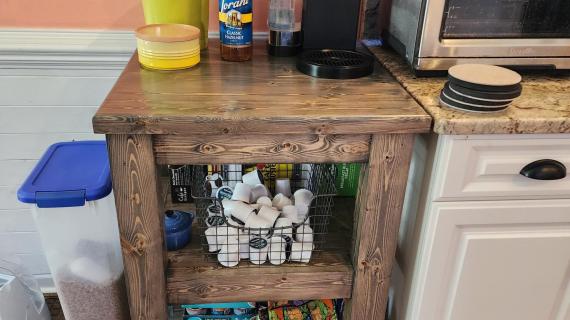
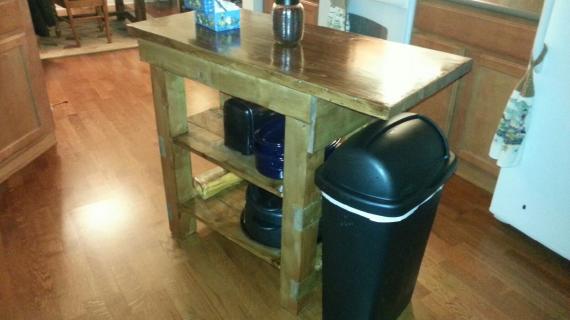
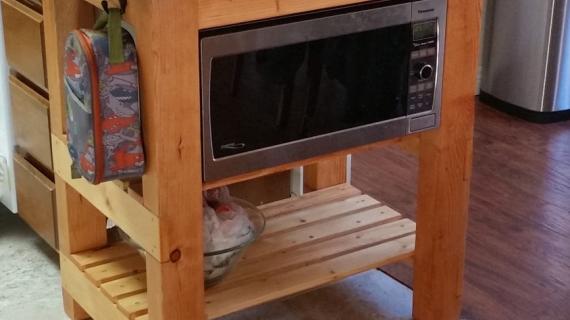
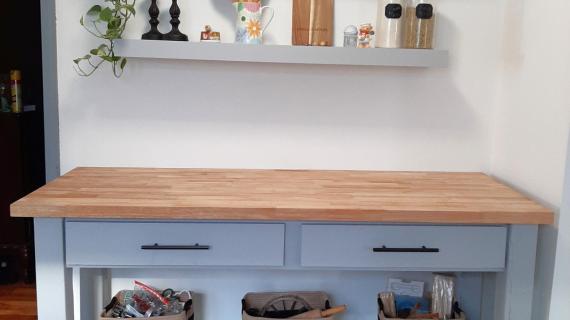
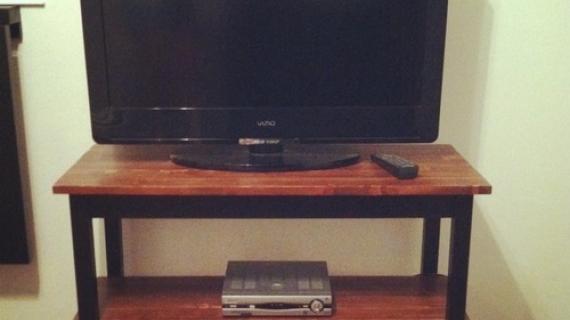
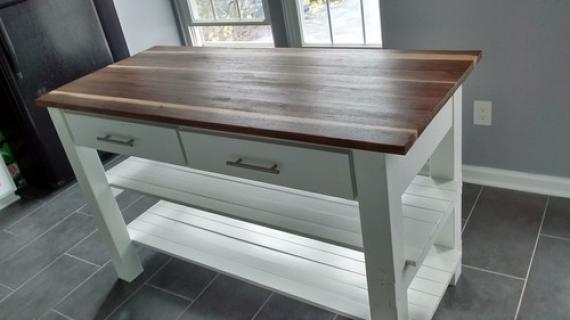
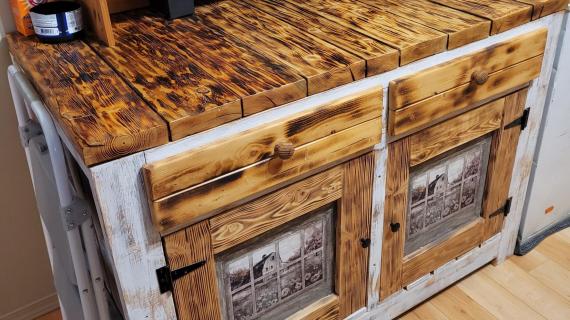
Michaela's Kitchen Island is the perfect blend of functionality and rustic beauty. Featuring added shelves, two large drawers, and a wood top, this solid wood kitchen island was built by Michaela at The Garden's Eden.
Pin For Later!
Preparation
1 – 10′ 4×4 Post, Should be cheap, Untreated (you can also modify by using 2 2x4s laminated, remember the dimensions will be 3″ x 3 1/2″ as opposed to the dimensions of a standard 4×4 of 3 1/2″ x 3 1/2″ so you will need to make modifications) 14 – 1×3 Boards (About $1.50 Each) 7 – 2×4 boards, stud length or 8′ Length 1 – 1×8 board, 8′ Long (About $8.00 Each) 1 – 2×8 Board, 8′ Long (About $7.00 Each) 2 – 1×2 Boards, 8‘ Long (About $1.00 Each) 3 – 1×4 Boards, 8′ Long (About $4.00 Each) 1 – 1×6 Board, 4′ Long (About $3.00) 1/4 Sheet 1/2″ Plywood 21″ Drawer Slides Handles or Knobs for 2 Drawers
Cutting List 4 – 4×4 Posts @ 34 1/2″ (Notched out for shelf stretchers) 4 – 1×3 @ 7 1/2″ (Spacers) 2 – 1×8 @ 17 1/2″ (Side Aprons) 1 – 1×8 @ 49″ (Back Apron) 3 – 2×8 @ 21 3/4″ (Sides of Drawer Housing) 2 – 1×2 @ 49″ (Face Frame Top and Bottom) 3 – 1×2 @ 4 1/2″ (Measure to fit exactly, space trim on face frame) 4 – 1×4 @ 24 1/2″ (Shelf Supports) 14 – 1×3 @ 58″ (Shelf Tops) 6 – 2×2 @ 21 3/4″ (Top Supports) 7 – 2×4 @ 60″ (Countertop) Cut List for Drawers 2 – 1/2″ Plywood @ 21″ x 21 1/4″ (Drawer Bottoms) 4 – 1×4 @ 21″ (Drawer Sides) 4 – 1×4 @ 19 3/4″ (Drawer Fronts and Backs) 2 – 1×6 @ 23 3/4″ (Drawer Faces)
It is always a good idea to measure your finished drawer opening before constructing drawers. Most side mount drawer slides need 1/2″ clearance on each side for a total of 1″ clearance.


Work on a clean level surface. Use proper safety equipment and precautions. Always take a square after each step. Use straight and dimensionally sized lumber. Predrill and countersink your screw holes. Use glue unless otherwise directed.
Instructions
Step 1
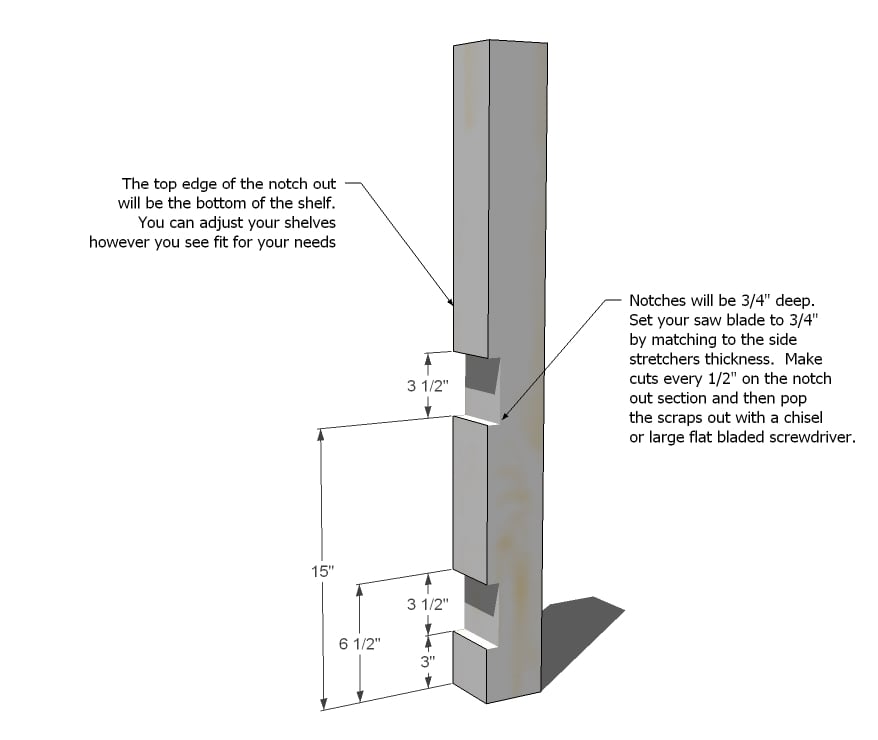
1. Legs. Notch out your legs as shown above. You can modify the notches to the needs of your kitchen. For example, if you have baskets or bins that are taller, you may wish to have only one shelf. There is a video here of me notching out legs on my table.
Step 2
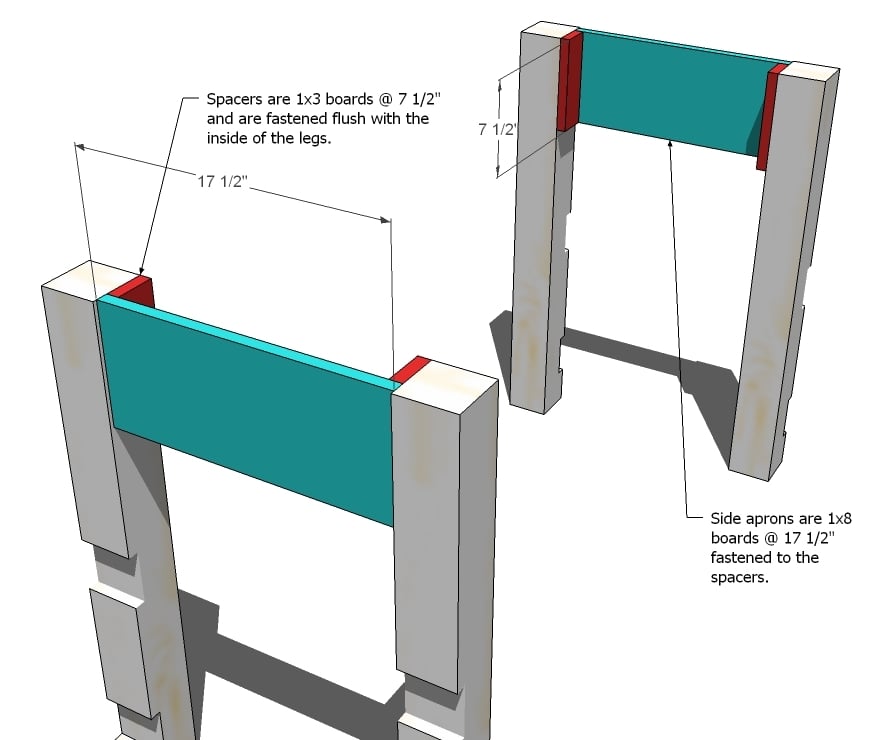
2. Spacers. Begin by attaching a spacer to each of the insides tops of the legs, as shown above. Notice how the spacers will be in different positions depending on the leg. The easiest fastening method is to use your 2″ finish nails, but if you do not have a nailer, you can use 2″ screws and glue. Keep the top inside corner flush.
Side Apron. Also shown in the above diagram is the side apron (in blue). Use glue and 2″ nails to fasten the side apron to the spacers.Keep top edges flush. Check for square.
Step 3
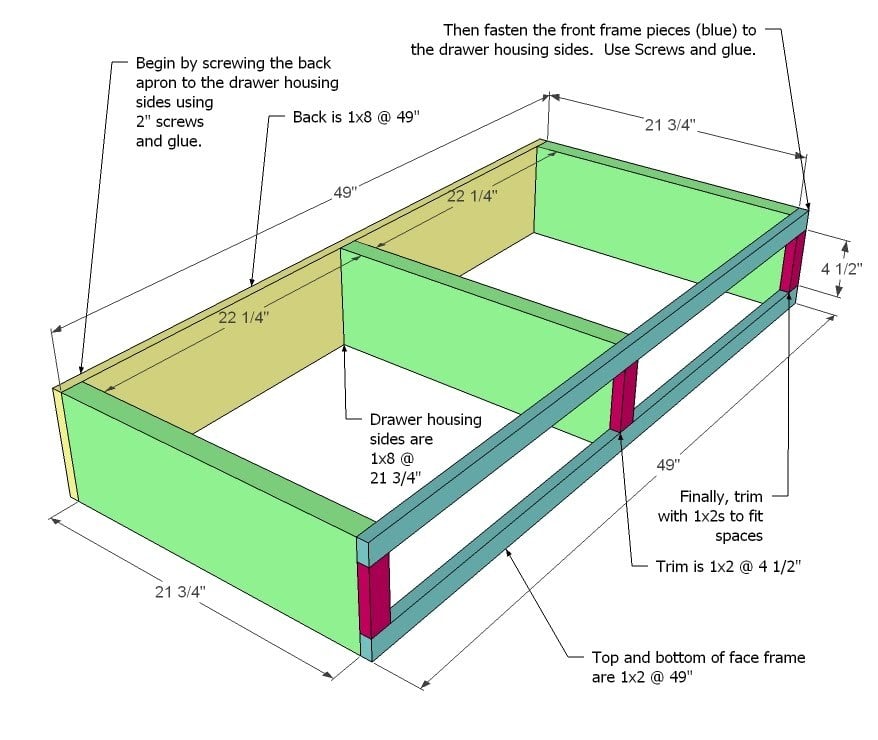
Drawer Housing. As shown above, build the drawer housing. Start by fastening the back apron to the drawer housing sides. Use the measurements above to guide you. Then attach the face frame pieces. Finally, measure and fill in the spaces between the face frame with 1x2s. You must build this housing perfectly square or your risk your drawers not sliding properly.
Step 4
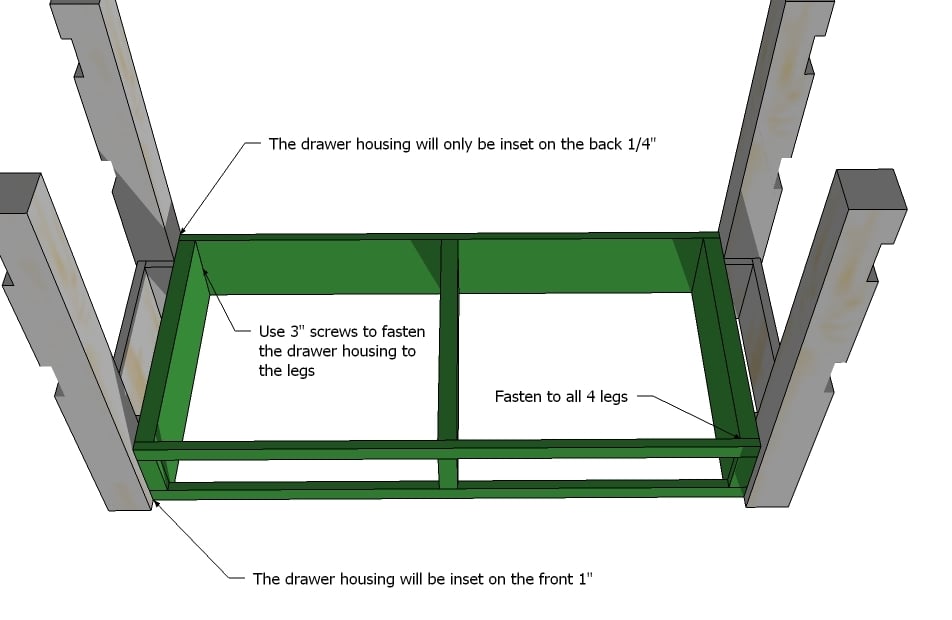
Fastening the Drawer Housing to the Legs. Turn everything upside down on a clean level surface. Attach the drawer housing to the legs 1″ inset from the front and 1/4″ inset on the back. Use glue and 3″ screws. Check for square. Get some help flipping it all over after the glue dries.
Step 5
Step 6
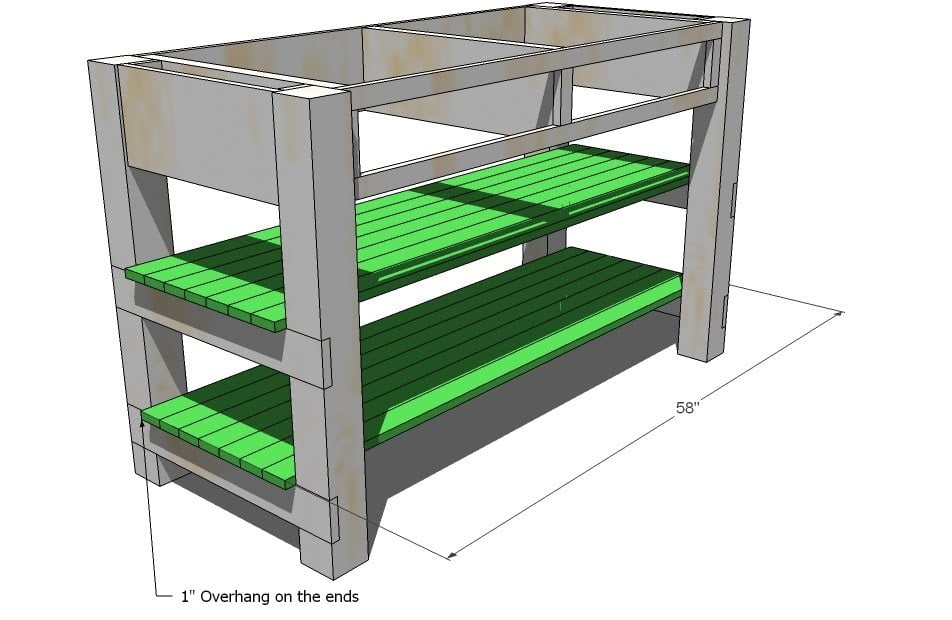
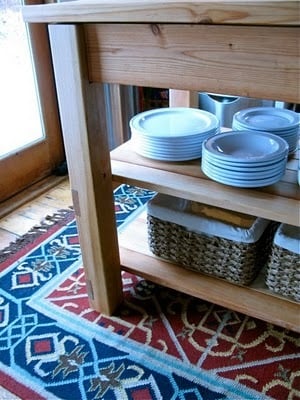
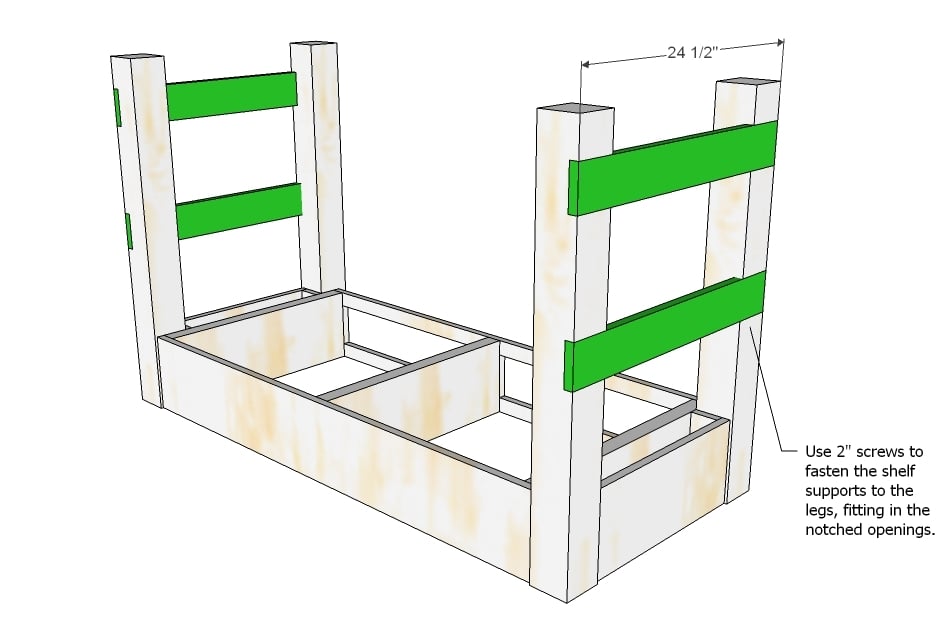
Shelf Tops. Fasten with 2″ screws the shelf tops to the shelf supports. Check for square. There will be a 1″ overhang on the ends. Please note that you can use other types of boards for the shelf.
Step 7
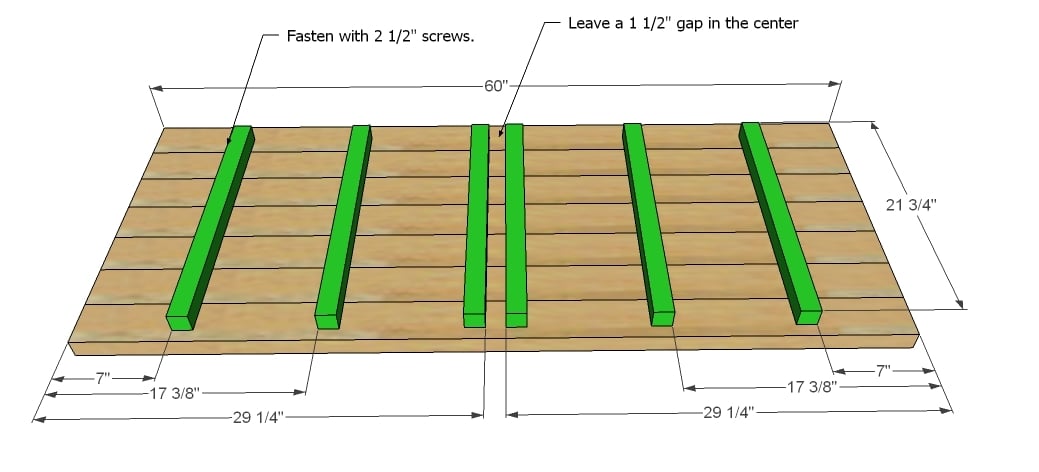
Top. One a clean level surface, lay out the tabletop boards. Then position the supports on top as shown above. Take great care to be exactly square, fasten the spacers to the tabletop pieces. Minimize the gaps between the tabletop pieces as you go. Leave a 1 1/2″ gap on the center, wide enough to accommodate the 2×8 drawer housing sides.
Step 8
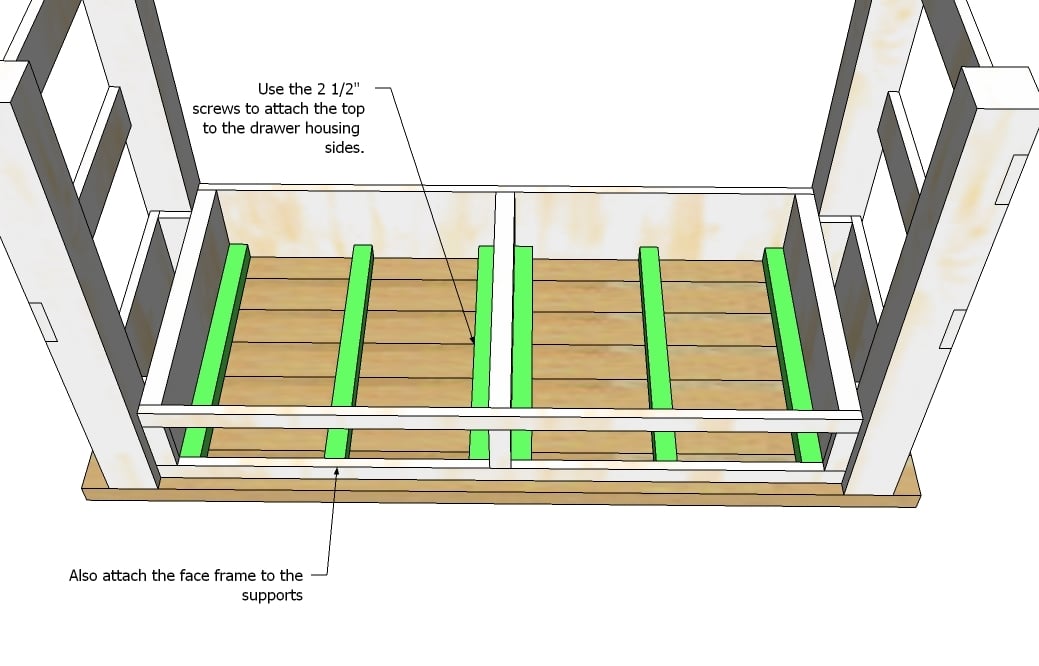
Attaching the top. To keep the top free of screw holes, lay the top on top of the island. The drawer housing sides should sit flush with your supports. Fasten through the supports into the drawer housing sides. Also fasten through the tops of the face frame into the supports. You will not see these screw holes because the drawer face will cover it. If you do not use glue, this gives you freedom to remove the top and replace or refinish if desired.
Step 9

Drawers. Begin building the drawers by cutting the bottoms of the drawers out of the 1/2″ plywood. You must cut your drawer bottoms very square or they will not fit properly in your drawer housing. Then fasten the red boards, sides to the bottoms using 2″ screws and glue. Then fasten the fronts and backs to the sides and bottoms. NOTE: Check your drawer slides before constructing the drawers. Different drawer slides need different clearances, and you may need to adjust your drawer size for the slides.
You can also use any scrap 1x3s to create drawer partitions at this stage. Drawer partitions will strengthen your drawer and save you tons.
Step 10

Inserting the Drawers. Using the drawer slides, fit the drawers without the faces into the drawer housing. When completely inserted in the drawer housing, the fronts of the drawers will be flush with the face frame.
Step 11
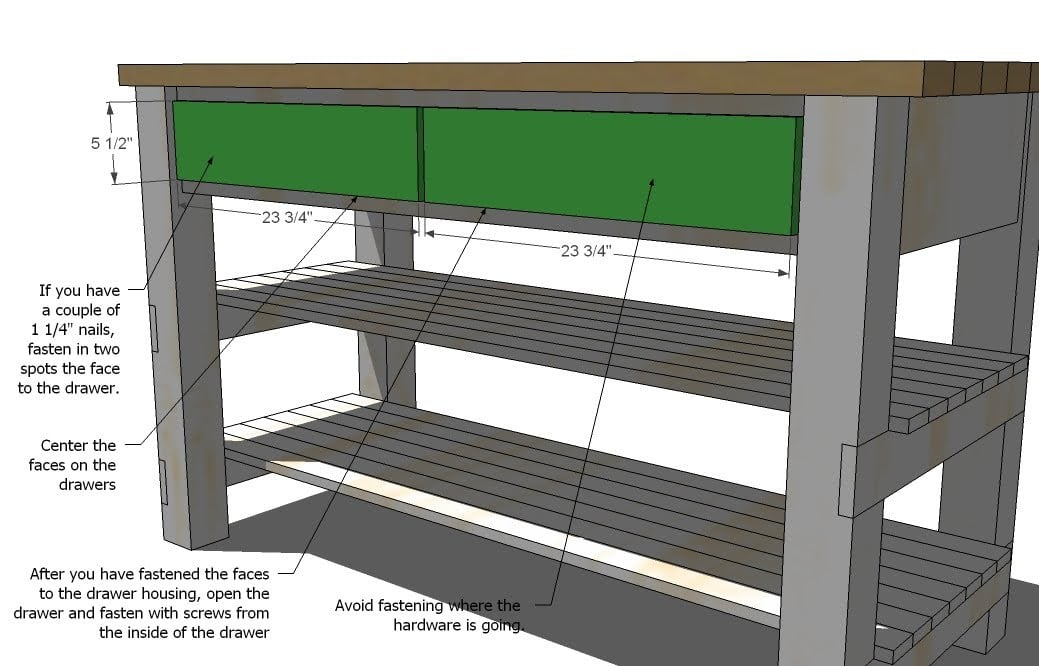
Drawer Faces. So you want your drawers to be perfectly lined up. Here’s my trick. With the drawers inserted into the housings all the way, position your faces on the drawer fronts. Leave a 1″ gap on the tops and bottoms of the faces, and a 1/2″ gap between the drawers. Then with your nailer and 1 1/4″ nails, fasten the faces to the drawers. You only need just a couple of nails. Avoid where your hardware will be placed. Then carefully open the drawer and from the inside of the drawer, use your 1 1/4″ screws to secure the face to the drawer front.

Comments
shavit
Sat, 06/08/2013 - 14:26
re: Julie, for those concerned.
For those that don't know: Wood "moves" because it is hygroscopic. That means it will absorb (expand) and release (shrink) water molecules depending on humidity. Unfortunately, wood does not do this uniformly, which causes warping. In an effort to control this, woodworkers of old used an assortment of techniques in the design process to allow the wood to "move" freely. For an example, google "table buttons." (a bit hard to describe in brief). Many people still use these techniques, and turn a hefty dose of self-righteous criticism toward any of us that don't have $20,000 worth of tools, a full wood shop, and ample time.
The problem with this criticism is G-d saw fit to provide us with Polyurethane (or just plain old Urethane). When applied, polyurethane places a plastic like, nonporous, water-proof seal between the air (where the water molecules are) and the wood. If you are concerned with warping, cracking, etc. then it is probably a good idea to put a coat (or three) of poly on all surfaces of the wood, including those parts you can't see like the underside of a table. Note: this may mean you need to deviate from Ana's plans in the final construction (like putting the top on after finishing it) or design (like forgoing the spaces between the boards in the top). Also note: staining and painting also works, but there's no reason you can't go ahead with the poly as a top coat.
Is it perfect? No, but nothing is! Is it more perfect than spending thousands of dollars on tools and building an addition on your house to house those tools so you can do the occasional woodworking? I think so ...
Ana's plans are fine. (by the way, thank you Ana!) You may still have the occasional issue, but it's not the end of the world. Feel free to ask questions.
p.s. do not use green (not dried) wood. Most likely, the wood you picked up at the lowes/home depot was kiln-dried. It will say so on the sign.
robertson411
Sat, 10/03/2015 - 16:00
Sizes?
The first thing I noticed is the legs are supposed to be 34 1/2 in height. But the list only calls for 1 4x4 @ 10' (120")....the total length of the legs will be +/- 138"....are all of the sizes off like this?
dryphi
Thu, 03/22/2018 - 23:17
Instructions on table top
Build looks great. I'm referencing it for something similar.
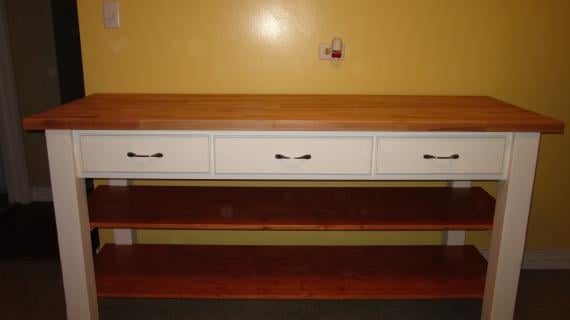
Something is a little unclear to me though. The cut list calls for 14 1x3 boards for the top at 58" long, yet the images show seven boards side-by-side and the total table is 60" long. How does that work? Please add more description on how you assembled the table top. Thanks!
In reply to Instructions on table top by dryphi
Brian Famous
Fri, 03/23/2018 - 20:30
Shelves vs. Tops
The 14 1x3's at 58" are the Shelf Tops.
There are an additional 7 2x4s at 60" for the Counter Top in the cut list:
Hope this helps
christidz
Wed, 08/15/2018 - 16:59
Drawer slides
What kind of drawer slide are needed for this project? Bottom mount or side mount?
In reply to Drawer slides by christidz
Brian Famous
Fri, 08/17/2018 - 05:05
Side mount drawer slides
Given the design uses drawer housings (steps 2 and 3), to me that would infer side mount drawer slides. Step 10, where the drawers are being fitted, also seems to infer side mount slides.
vickyniki
Sat, 07/27/2019 - 12:58
What circular saw size should I purchase for the fist time?
Hello Mrs. Ana. I am ready to purchase my first circular saw to build this beautiful kitchen island. Even tho I'm think I'm pretty sure what I want, I'm not so sure if my choice is the right one. I wanted to ask you about the size. What would you suggest for a newbie? One with a big blade or small blade? Thanks.
SoFun
Tue, 06/09/2020 - 08:48
Michael's Kitchen Island Medication Question
Would like to build Michael's kitchen island with slight modification to 3' x 4', including an overhang for stools. How wide could I make the overhang with supports at each end? Thank you!