
Easy to build farmhouse style nightstand - free step by step plans with detailed diagrams and shopping list and cut list by Ana-White.com
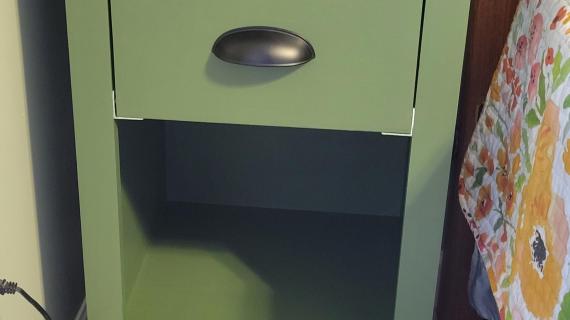
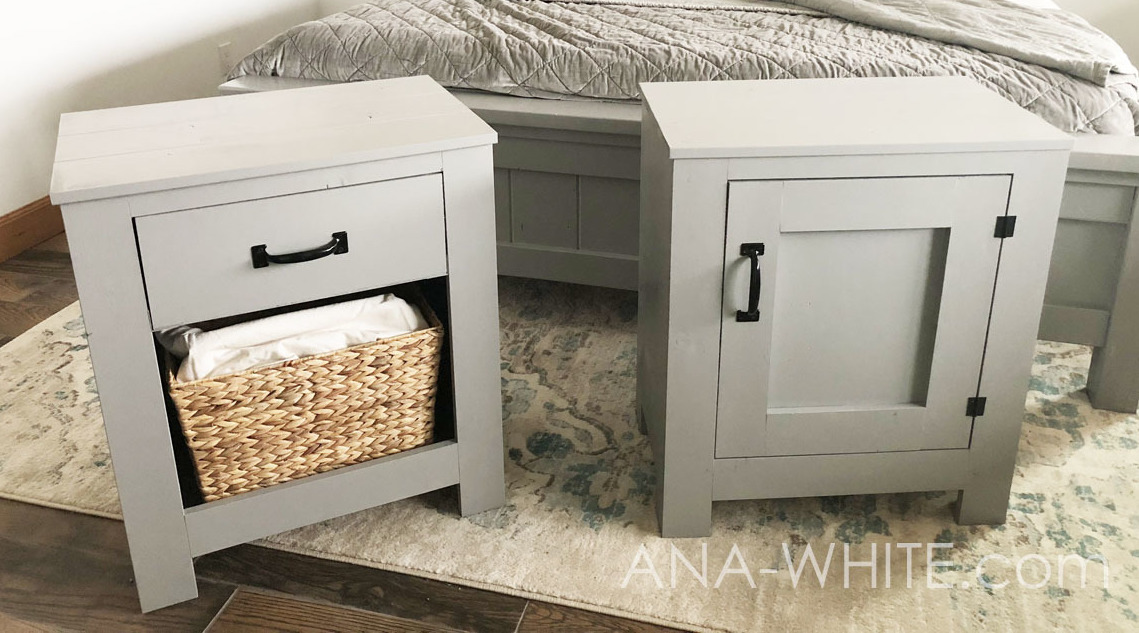
UPDATE: We've added a second Farmhouse Nightstand with Door Plan here.

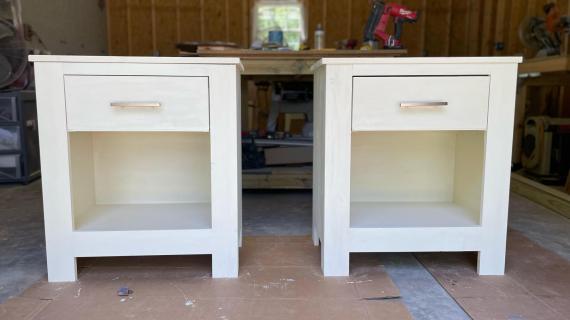
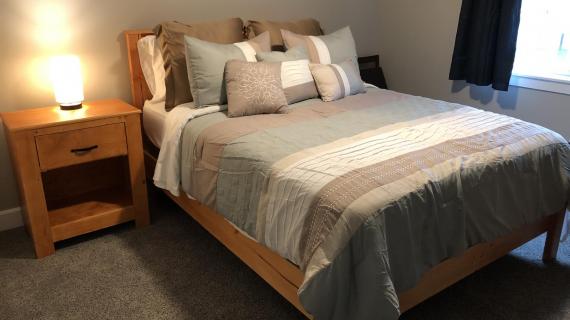
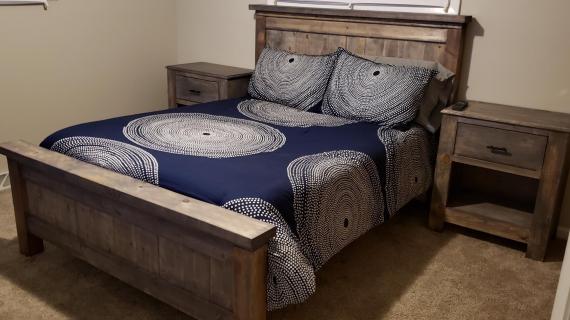
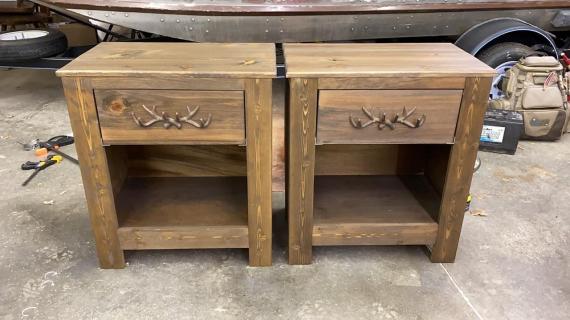
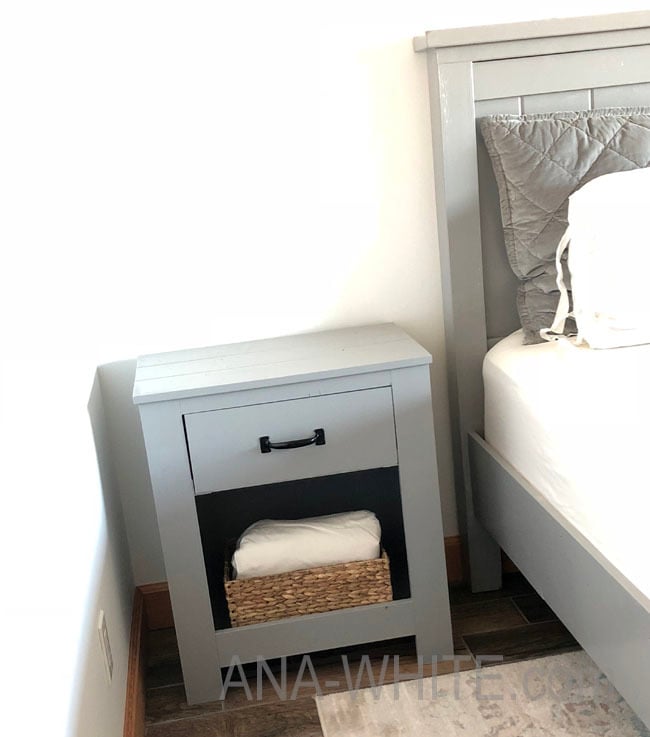
Are you looking for the perfect nightstand to compliment your Farmhouse Bed?

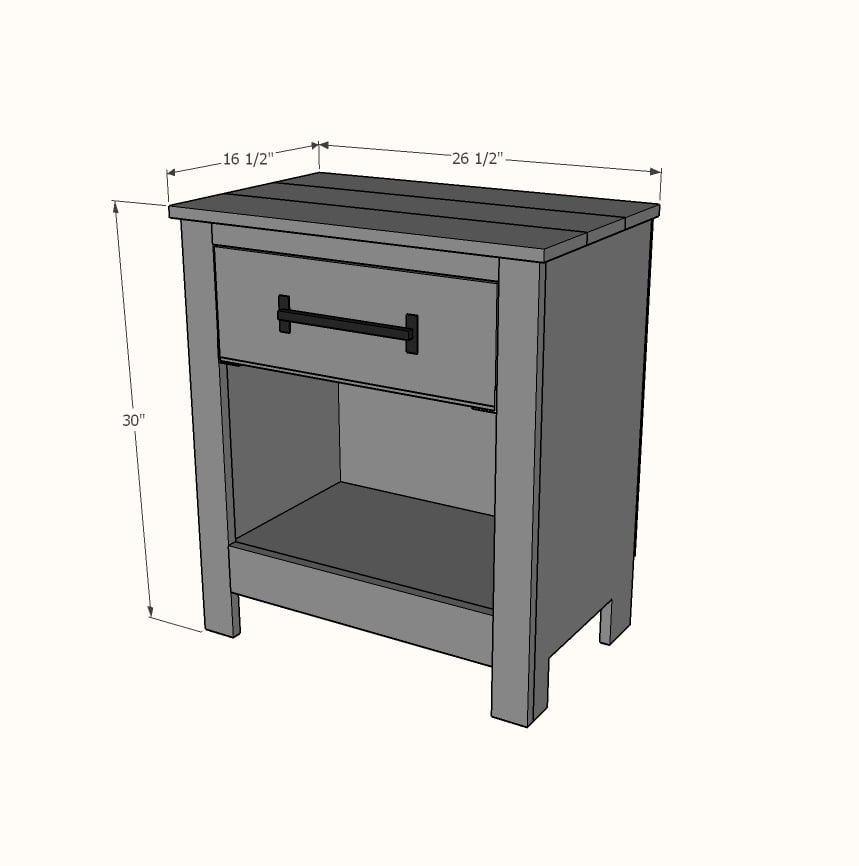
I recently built this bedside table or nightstand for our guest room to match our DIY farmhouse bed. I used a chunkier leg design to match the farmhouse bed legs, and sized the entire nightstand up so it is rightly proportionate to the bed.
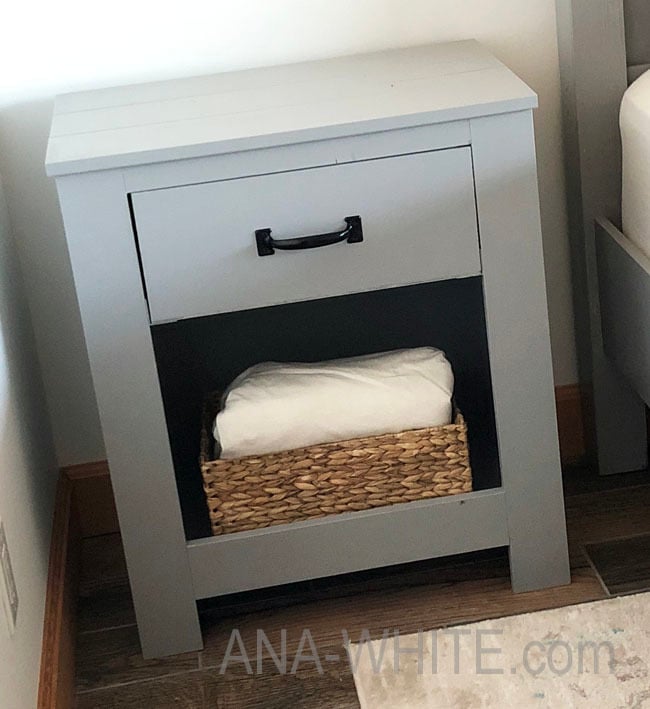
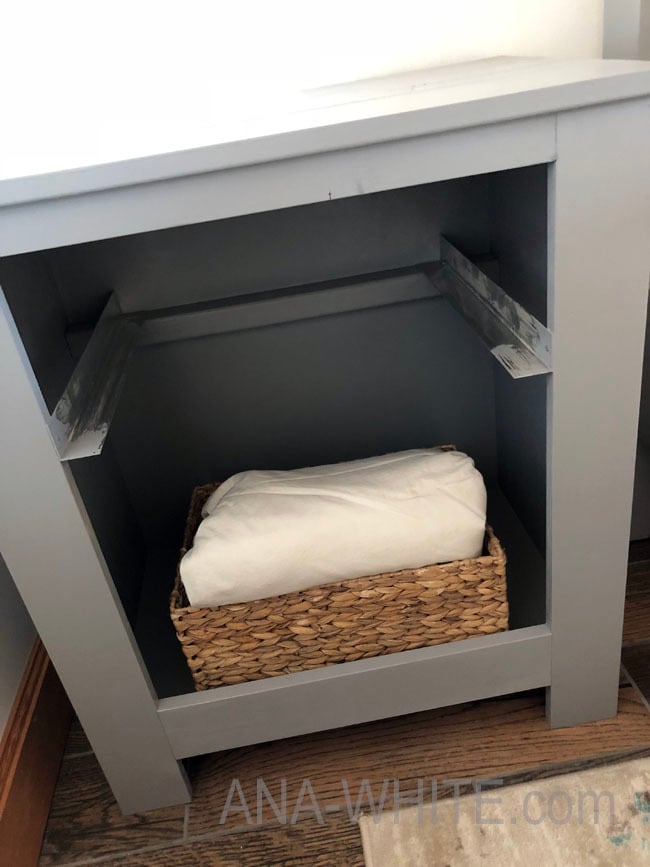
The storage area is HUGE since the legs aren't real 4x4s - perfect for storing extra blankets or even pillows!
This nightstand is a very easy build - I managed to tackle in just an afternoon - in between feeding a four month old baby, homeschooling a junior higher, and keeping a four year old busy.
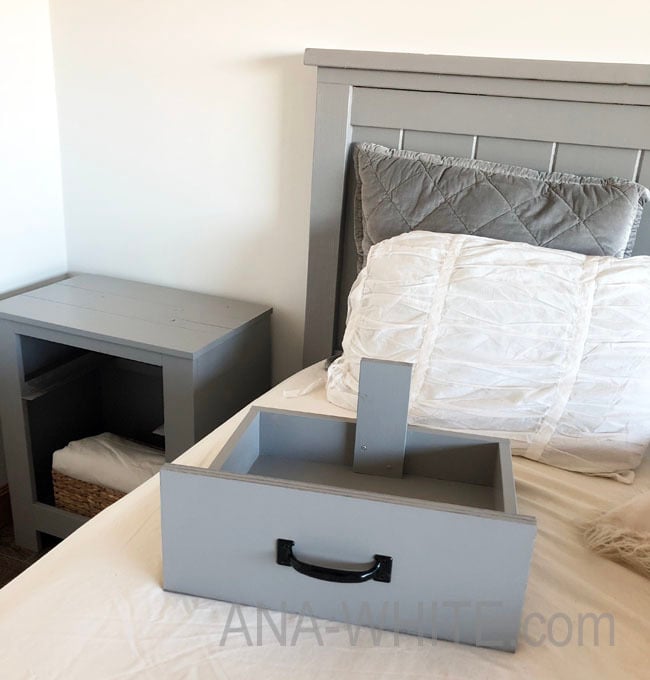
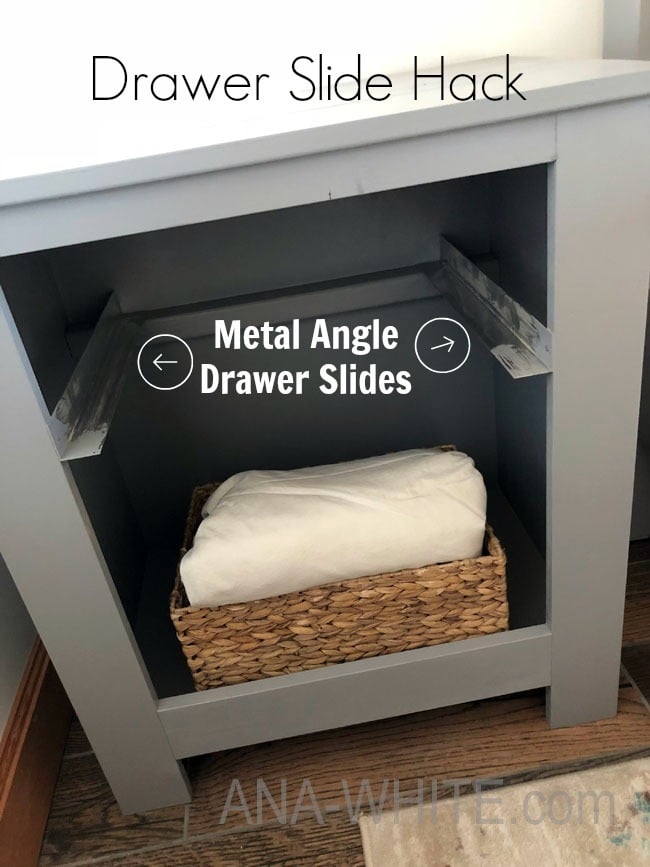
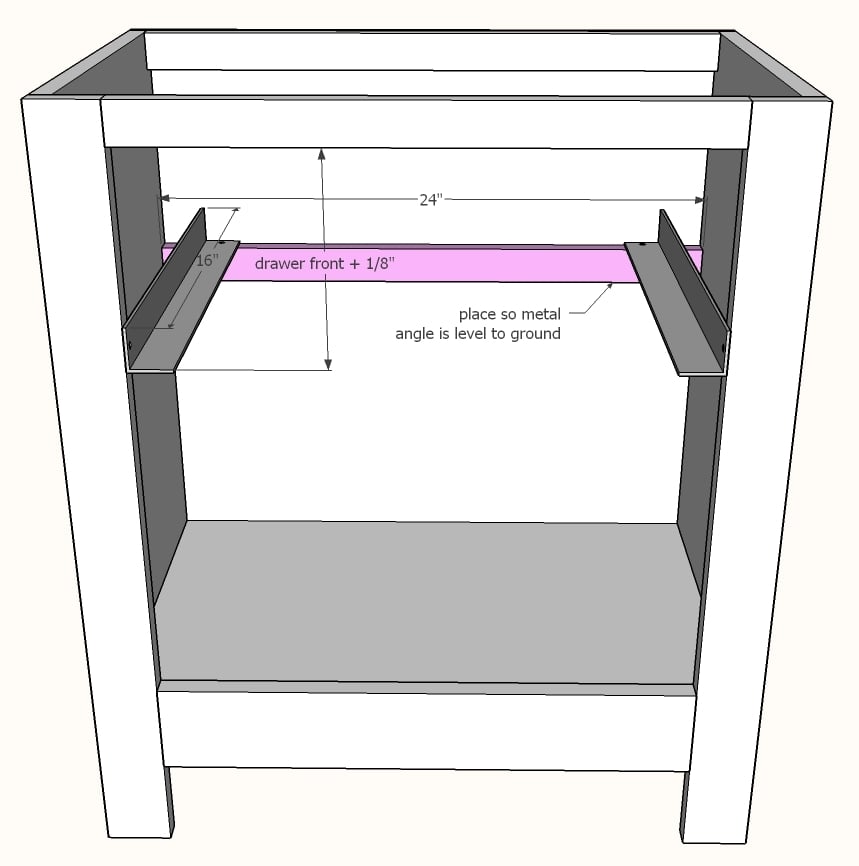
Drawer slides can be time consuming. Since this is a nightstand in a guest room that will be rarely used, I thought using inexpensive and easy to cut metal angle could work for drawer slides -
We were surprised at how well this worked, and the drawer actually slides pretty good!
UPDATE: Prefer drawer slides? The free Shelf Help template show you how to add framing for drawer slides quickly and easily!

We simply installed the metal angle in the drawer box, then sized the drawer box to fit in between the angle. I also added the back kicker piece so the drawer won't tip out on our guests.
If you want to see this build happen, do check out our latest YouTube episode "Food and Furniture" -
And to build, grab the free plans below.

Please share if you build - we love seeing your projects and it helps other people too!
Thanks for everything!
Ana
Preparation
48" x 48" piece of 3/4" thick plywood - I used paint grade birch
- 24" x 48" piece of 1/4" thick plywood
- 1 - 1x4 @ 8 feet long
- 1 - 1x2 @ 6 feet long
- 2 - 1x6 @ 6 feet long
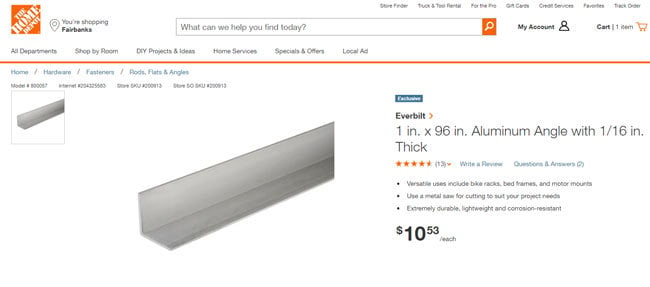
- 1 - 1" alumninum metal angle @ 6 feet long (no thicker than 1/8") like this
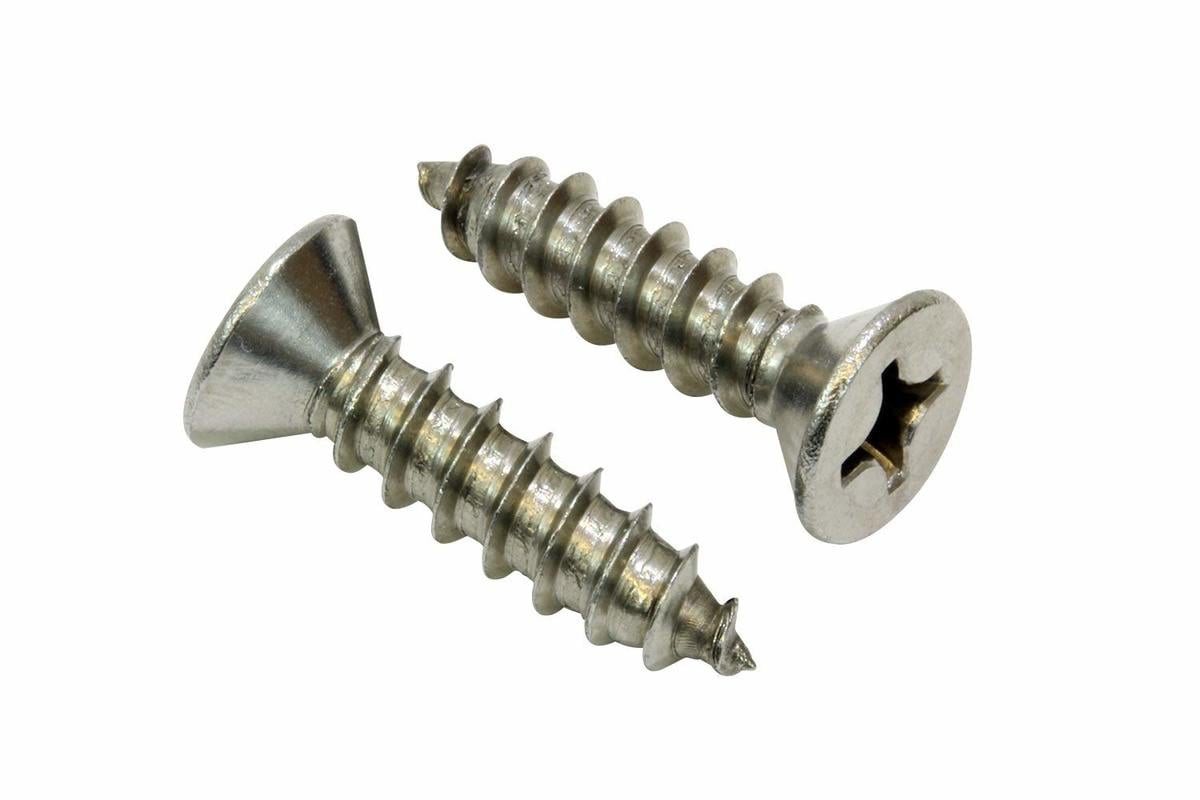
- 4 - 1/2" long flat head screws like shown below -
- 2 - 3/4" plywood @ 15-1/4" x 29-1/4" - Sides
- 1 - 3/4" plywood @ 15-1/4" x 24" - Bottom
- 2 - 1x4 @ 29-1/4" - Face Frame Legs
- 1 - 1x4 @ 18-1/2" - Face Frame Bottom
- 1 - 1x2 @ 18-1/2" - Face Frame Top
- 2 - 1x2 @ 24" - Back Supports
- 1 - 1/4" plywood @ 25-1/2" x 24" - Back
- 2 - 1" Metal Angle @ 16" - Drawer Slides
- 1 - 1x8 @ ~18-1/4" OR 1 - 3/4" plywood 7-1/4" x ~18-1/4" - Drawer Face
- 2 - 1x6 @ 14-1/4" - Drawer Sides
- 1 - 1x6 @ ~18-1/4" - Drawer Back
- 1 - 1/4" plywood @ ~18-1/4" x 15-3/4" - Drawer Bottom
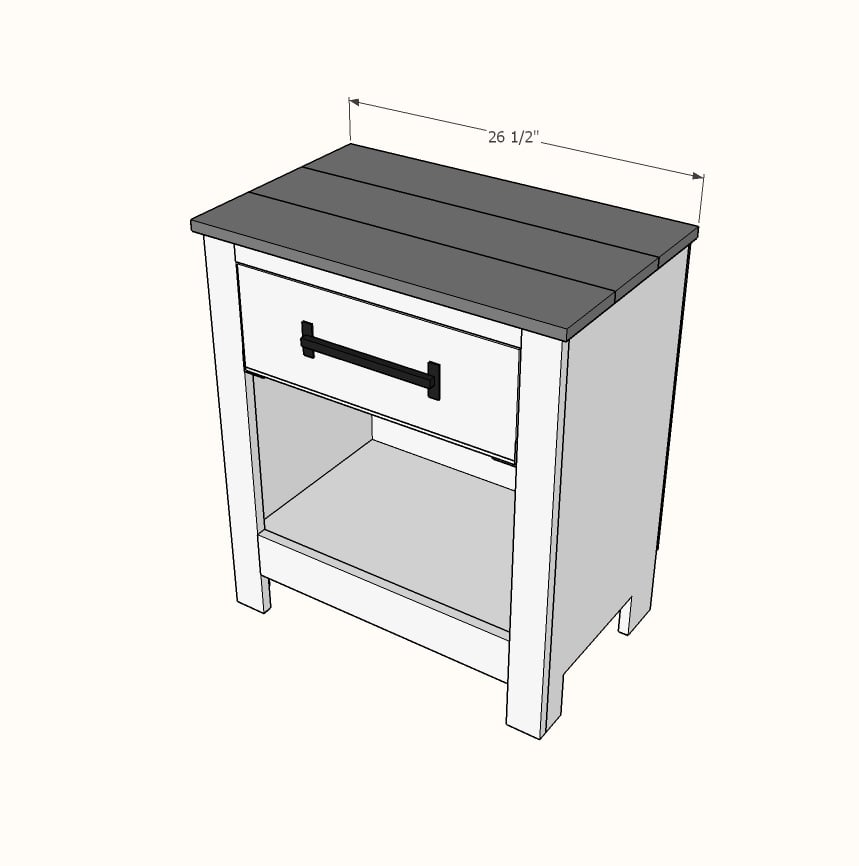
- 3 - 1x6 @ 26-1/2" - Top


Instructions
Step 1
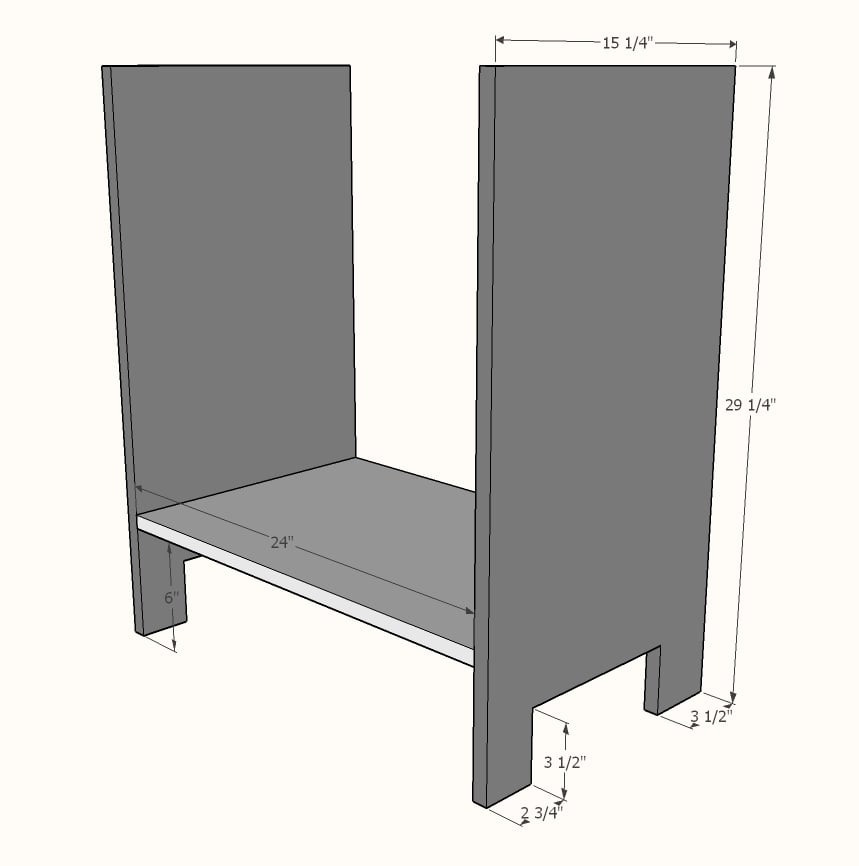
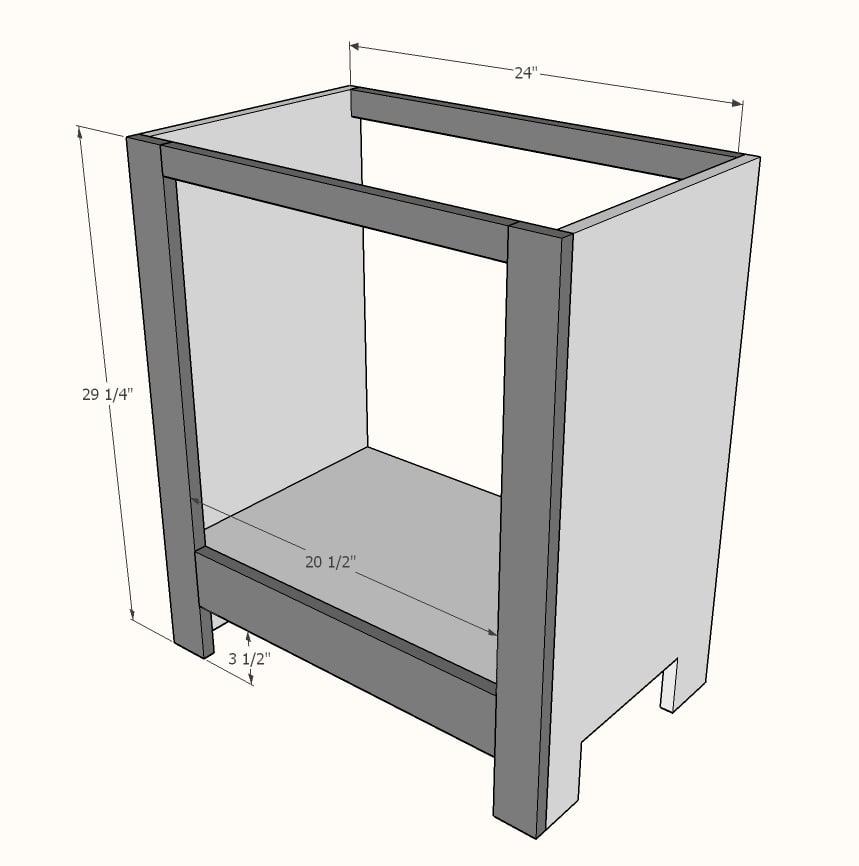
Cut bottom and sides from 3/4" plywood. If using a full sheet of plywood, simply rip one strip 15-1/4" wide - then cross cut from that strip the side and bottom pieces.
Mark out bottoms of sides as shown in diagram and cut out with a jigsaw.
Drill three 3/4" pocket holes on both ends of bottom piece. Attach to sides with 1-1/4" pocket hole screws and glue.
Step 2
NOTE: Face Frame top and bottom are 18-1/2" long, not 20-1/2"
Cut 1x pieces on miter saw.
Drill 3/4" pocket holes on ends of 1x2s and the 1x4 bottom trim piece.
Build the front face frame first, attaching 1x2 and 1x4 pieces 20-1/2" long to the legs with 1-1/4" pocket hole screws. Attach face frame to the carcass with glue and 1-1/4" brad nails.
Attach back support piece to carcass back with 1-1/4" pocket hole screws and glue.
Step 3
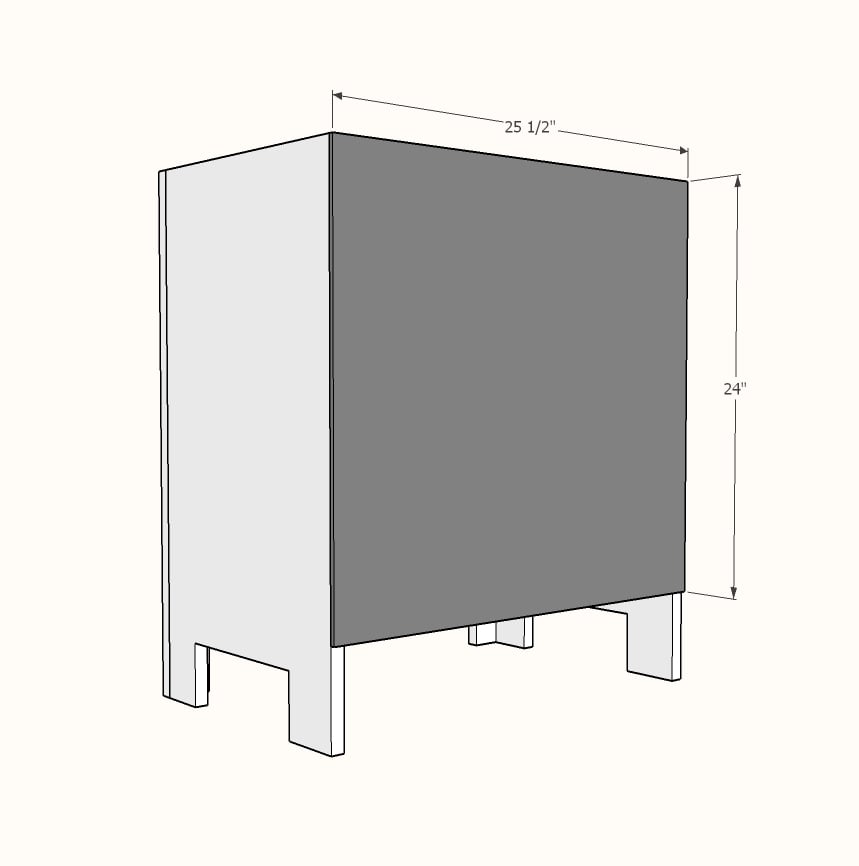
Cut back plywood piece with either table saw or circular saw. Attach with glue and 3/4" brad nails.
Step 4

NOTE: Drawer width should be approximately 18-1/4" - not 20-1/4"
Measure opening on cabinet and confirm it is 18-1/2" wide. Drawer width should be 1/4" less than opening.
Cut drawer pieces with miter saw. Drill two 3/4" pocket holes on each end of the drawer sides. Attach to drawer face and back with 1-1/4" pocket hole screws.
Cut drawer bottom with circular saw. Attach to bottom of drawer with 3/4" brad nails and glue, making sure drawer box is square.
Step 5
Step 6
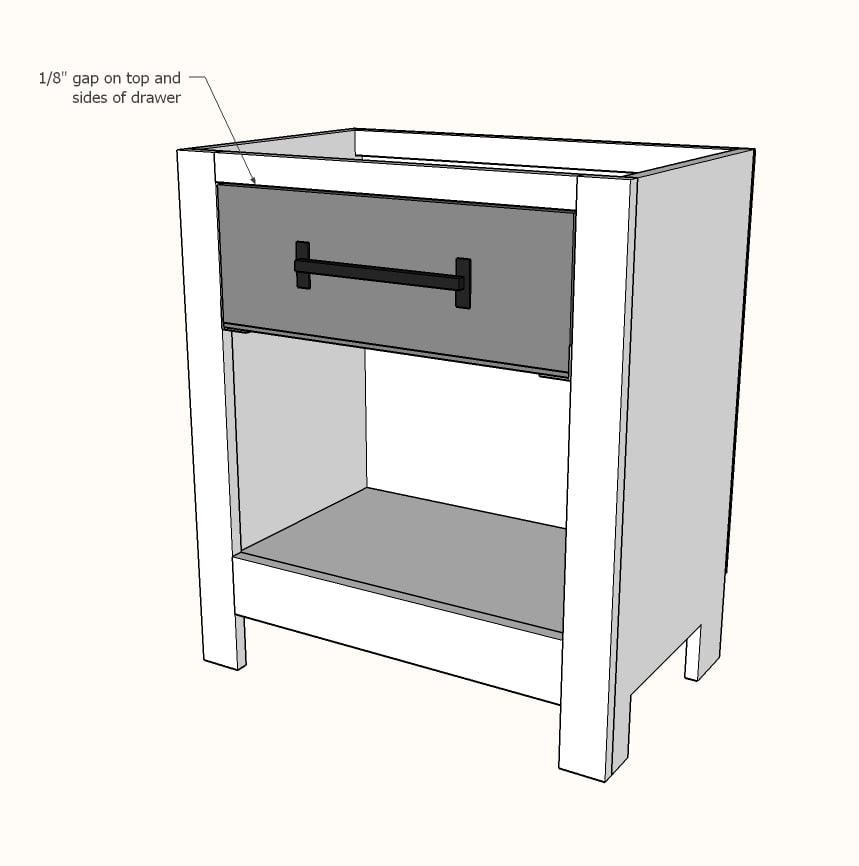
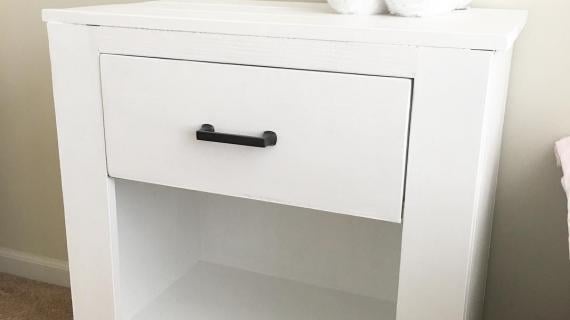
The finished drawer should have an 1/8" gap on top and sides.
Candle wax applied to the bottom of the drawer box will help the drawer slide easier.
Step 7
Build the top with 3/4" pocket holes and 1-1/4" pocket hole screws and glue.
Attach to top with glue and 1-1/4" brad nails.