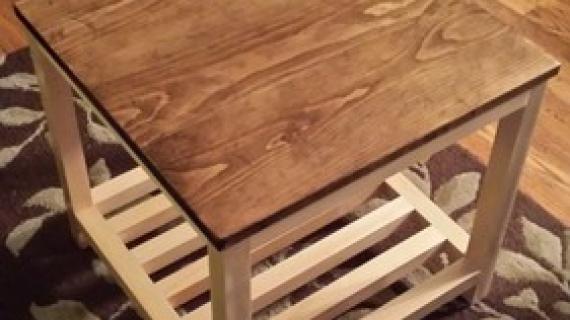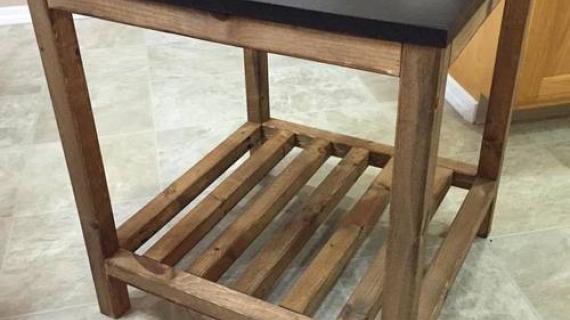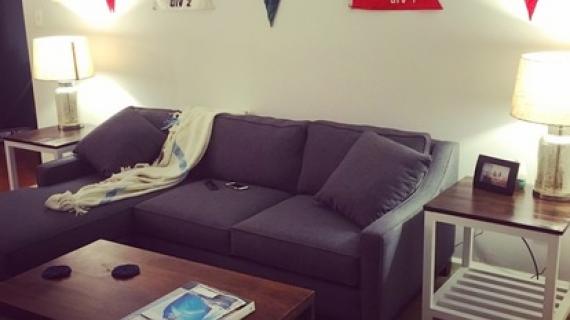

Amazingly easy side table for around $30
 Hey everyone it's Jamison from RogueEngineer.com
again. I've got another great plan that is just to easy and cool not to share.
So after our baby Madison was born my wife asked me to haul the glider downstairs from the nursery to our master bedroom so she would have a relaxing place to nurse the baby. Right away we discovered that we needed a side table to accompany it for drinks, books, and what not.

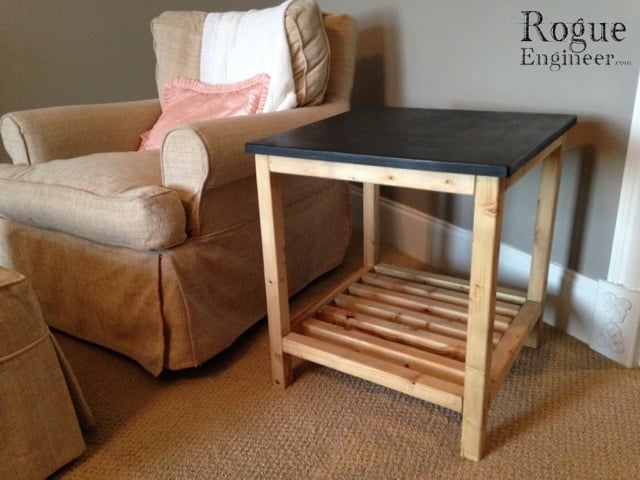
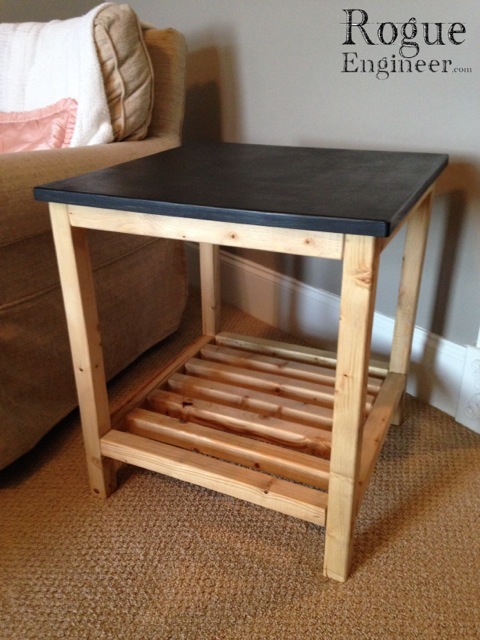
So we decided on this lovely $400 Connor Side Table from Pottery Barn. Well that’s an easy one to build. Consider it done.
Here are the DIY end table plans that I created and built too myself.
Preparation
4x 2 x 2 x 8'
1x 1 x 8 x 6'
13x 2 x 2 x 18.5″ Note: If it looks to big just decrease the length of these.
4x 2 x 2 x 23.25″
3x 1 x 8 x 22.25″


Please read through the entire plan and all comments before beginning this project. It is also advisable to review the Getting Started Section. Take all necessary precautions to build safely and smartly. Work on a clean level surface, free of imperfections or debris. Always use straight boards. Check for square after each step. Always predrill holes before attaching with screws. Use glue with finish nails for a stronger hold. Wipe excess glue off bare wood for stained projects, as dried glue will not take stain. Be safe, have fun, and ask for help if you need it. Good luck!
Instructions
Step 1

Assemble the TWO sides by drilling pocket holes at each end of the 2 x 2 x 18.5″ pieces as shown. Then, screw the 2 x 2 x 18.5″ pieces to the 2 x 2 x 23.25″ pieces as shown in the picture.
Step 2

Assemble the shelf by first drilling pocket holes in each end of the seven 2 x 2 x 18.5″ pieces. It’s always best to choose wisely which side you drill pocket holes on since the opposite side will be most visable.
Using 2 inch pocket hole screws, then screw the middle slat in place making sure center is center of the ouside piece. Screw in the four remaining slats (two per side) while maintaining 1-7/8 inch gap between each slat.
Step 3

Drill pocket hole screws in each end of the remaining two 2 x 2 x 18.5″ boards, as shown in the picture.
Now assemble the table base by attaching the shelf (pink), sides (blue) and the remaining two 2 x 2 x 18.5″ boards using 2 inch pocket hole screws.
Step 4

Drill three pocket holes in two of the 1 x 8 x 22.25″ boards. Make sure to adjust your jig to accommodate the 3/4″ material thickness.
To form the tabletop, assemble the three boards by screwing and gluing the joints using 1-1/4 inch pocket hole screws. Make sure to clamp the joints to assure a nice even top.
Step 5

It is always recommended to apply a test coat on a hidden area or scrap piece to ensure color evenness and adhesion. Use primer or wood conditioner as needed.