
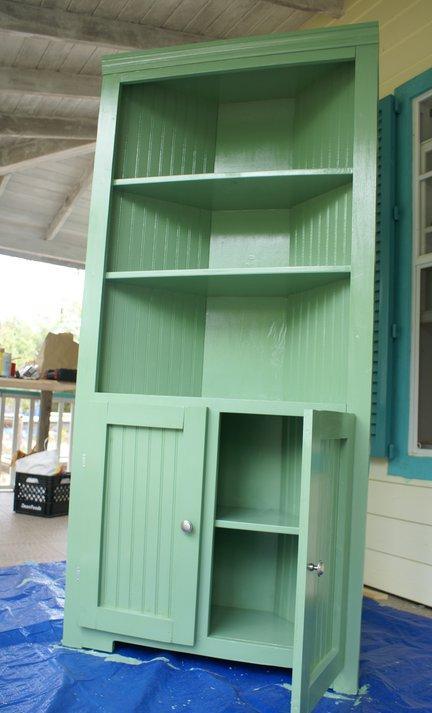

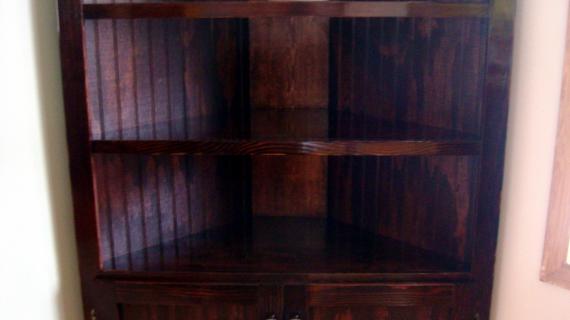
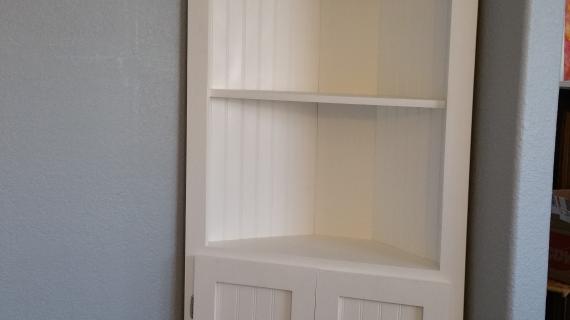
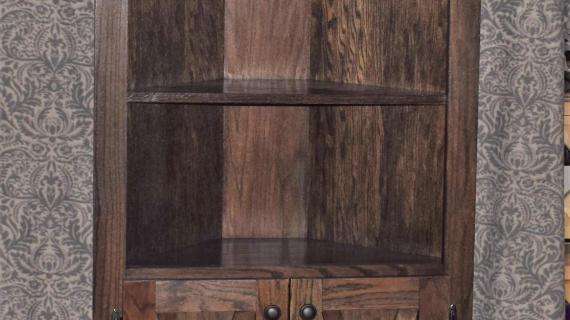
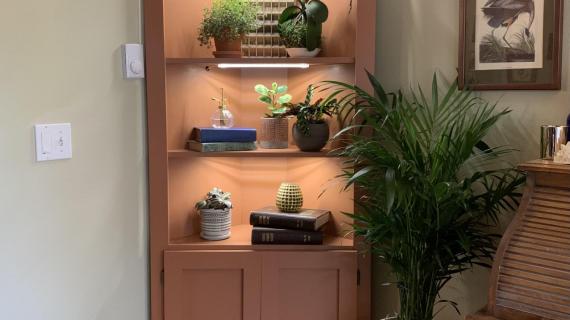
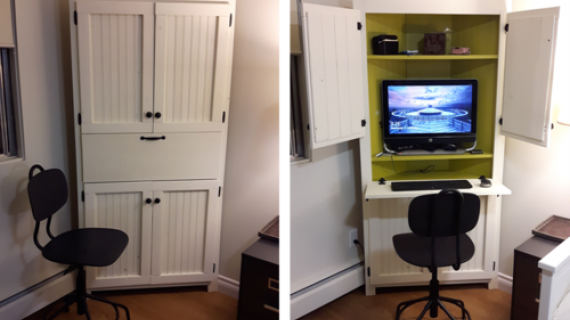
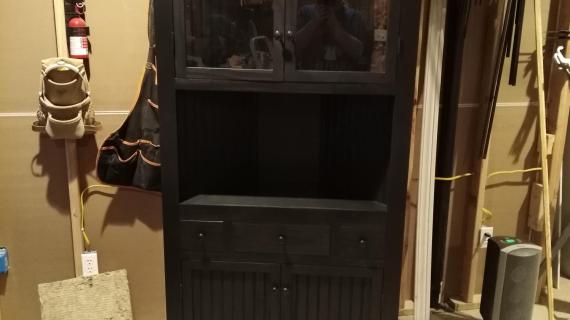
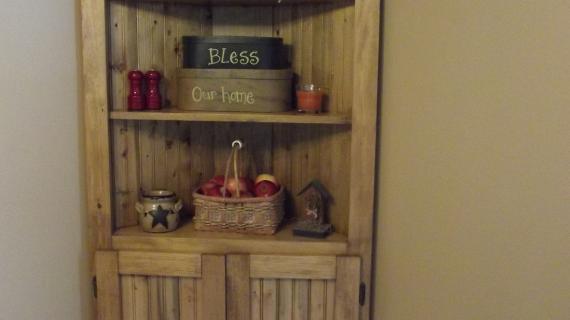
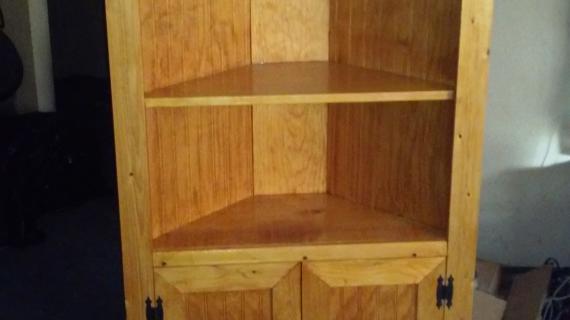
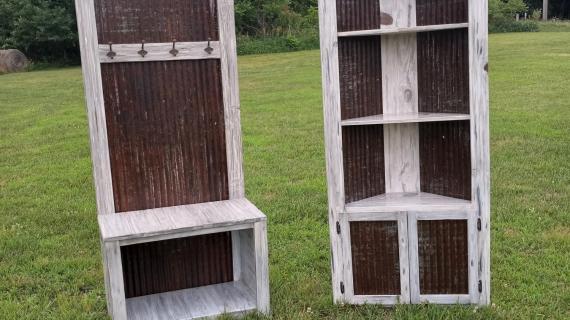
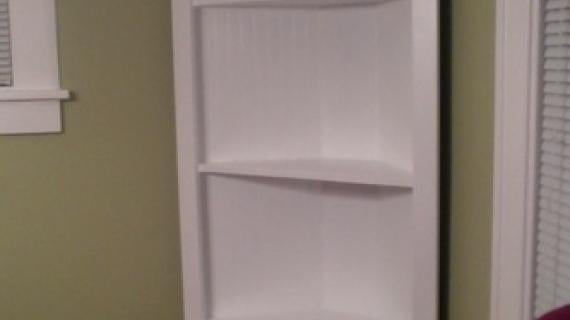
This corner cupboard can turn an empty corner into a storage and display spot. Cleverly designed to minimize board waste and to be easy to build. Special thanks to Tamara for sharing her photos with us.

Thank you Mamma_joy for not only requesting this plan, but actually believing that I might have the ability to come up with a simple way to build it. So many of you have requested corner cabinets, and I've been listening. But like Erin says in her project suggestion, how would we build this one without beveling the sides, requiring a table saw? Definitely required some deep thinking, and I'm so proud to publish this plan AND also say, it's pretty simple, totally buildable, and you don't have to have a table saw at your disposal.
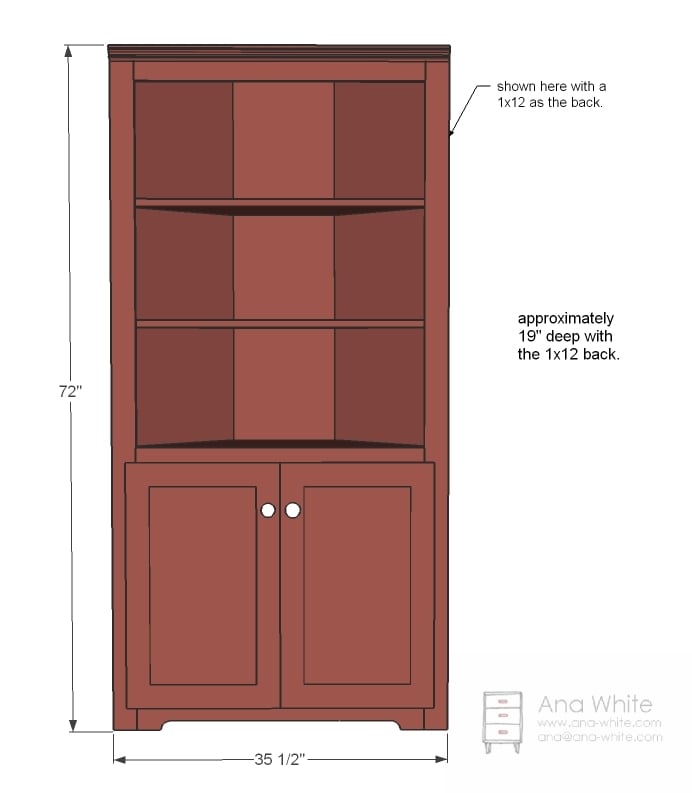
I tried to keep the dimensions close to Erin's suggestion for the plan

But it's a no brainer to modify the corner cupboard to be a little wider
 Just use a 1x12 for the back instead of a 1x8 as the plan calls for. For both plans, the shelves are made of 1x12s, so the shelves will only be approximately 11 1/2" deep.
 So go measure your corner. Do you have 21 1/2" of space? Then the question is, do you have some beadboard?
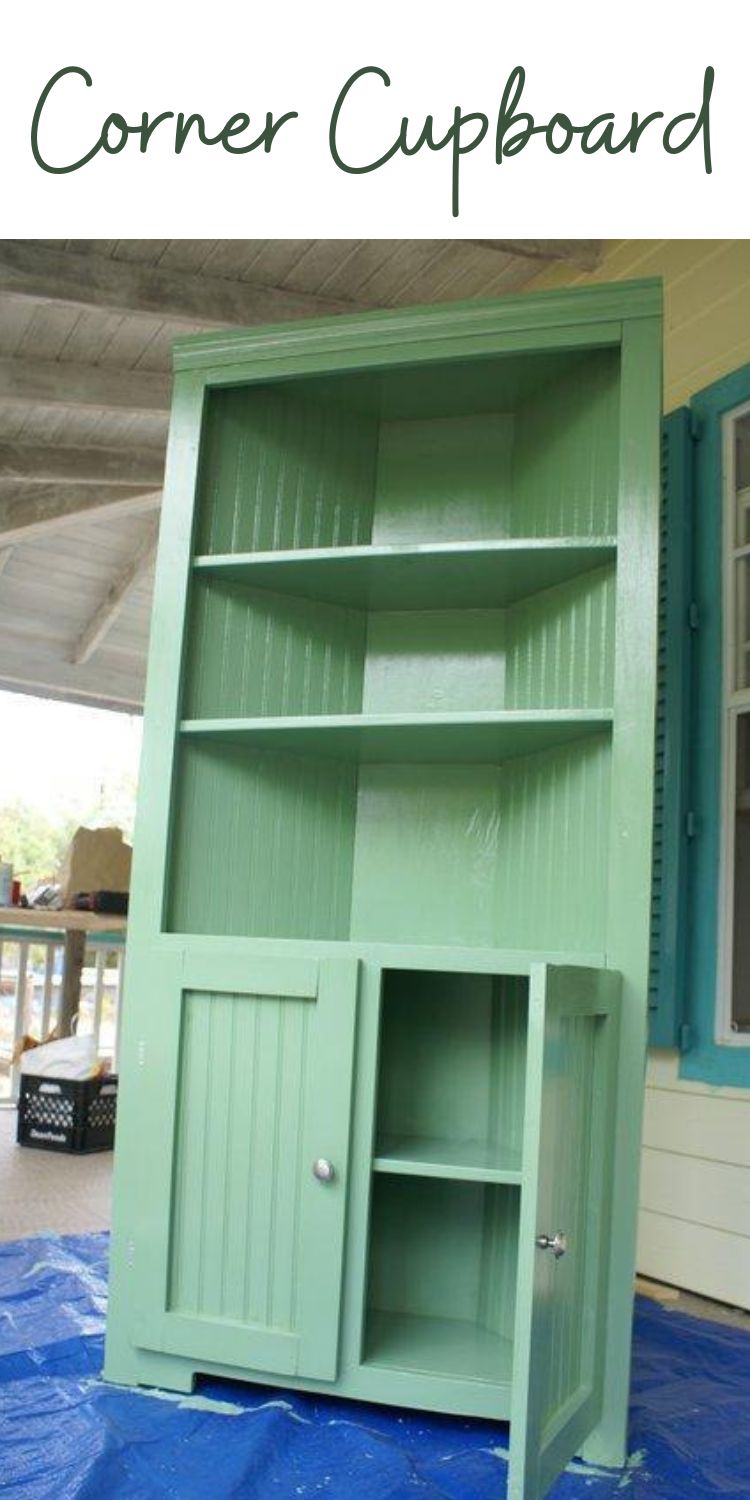
Pin For Later!
Preparation
2 – 1x12s, 6 feet long 1 – 1×8, 6 feet long 1 – 1×4, 6 feet long 1 sheet of beadboard, preferably 1/4″ to 3/8″ thick 3 – 1x3s, 8 feet long 1 – 1×2, 3 feet long 1 – 36″ long crown moulding or other moulding
1 – 1×8 @ 72″ (Back) 6 – 1×12 @ 30 1/2″, both ends cut at 45 degrees off square (see step 1) 2 – 1×3 @ 72″ (Front Side Trim) 2 – Beadboard @ 16 1/4″ x 72″ (Measure for exact fit) 2 – 1×4 @ 26 1/2″ (Top and Bottom Trim, measure for exact fit) 1 – 1×2 @ 26 1/2″ (Tabletop trim, measure for exact fit) top moulding – measure to fit Doors – see step 6.
Instructions
Step 1

Cut Shelves
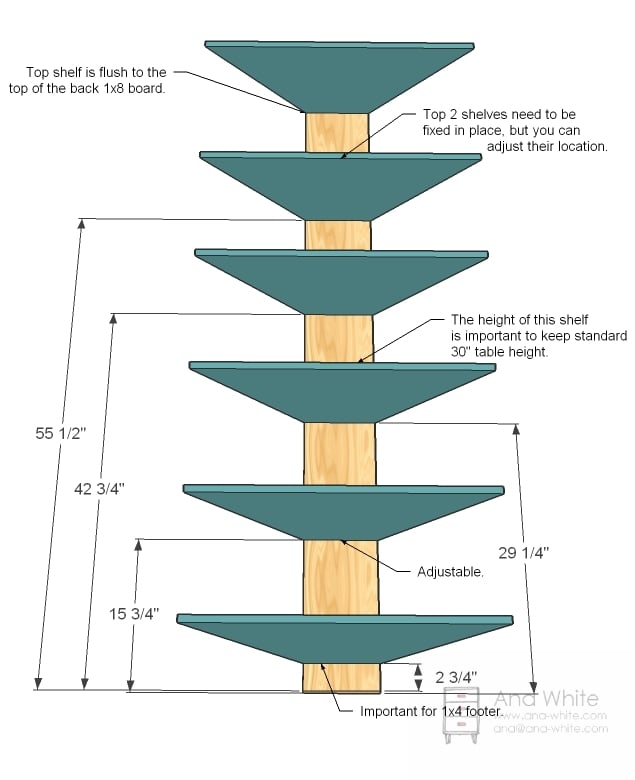
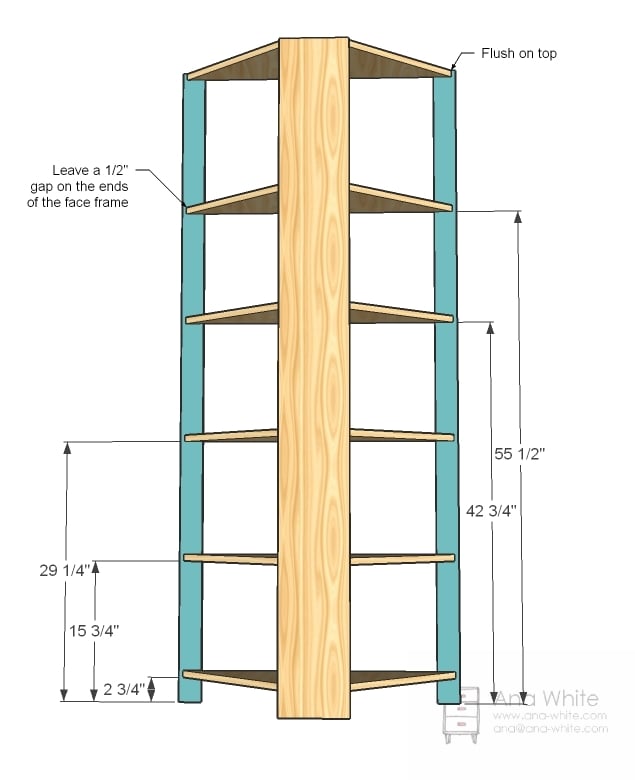
This step would be really straight forward if widths of boards didn’t vary so much depending on where you live. So take your 1×8 pine boards and measure how wide they are. Can be anywhere from 7″ to 7 1/2″. Note this then start cutting your shelves by cutting one end of the 1×12 at 45 degrees. Then measure the width of the 1×8 (in the example above that is 7 1/2″) and a 45 degree cut PERPENDICULAR to the first cut. Then continue making cuts to make all your shelves. In this manner you can easily adjust the width of your back to the width of a 1×12 or 1×10. You will need to cut six shelves totally.
Step 2
Back
Now mark the back as shown in the diagram above. All shelves need to be fixed. Predrill your holes or pocket holes and apply glue. Attach back to shelves with 2″ screws and glue.
Step 3
Front Side Trim
Mark the front side trim 1/2″ in all the way down the length of the back side of the side trim. Then mark all shelf locations as indicated in the above diagram. Predrill holes. Consider the depth of your screws and the angled shelf cuts as you place your screws – 2″ screws on the inside and 1 1/4″ screws on the outer edge, 2 screws per shelf. Use glue. Don’t stress this one too much, the sides are going to get beadboard (super strong) over them. The main thing is to get these lined up just right.
Step 4
Beadboard
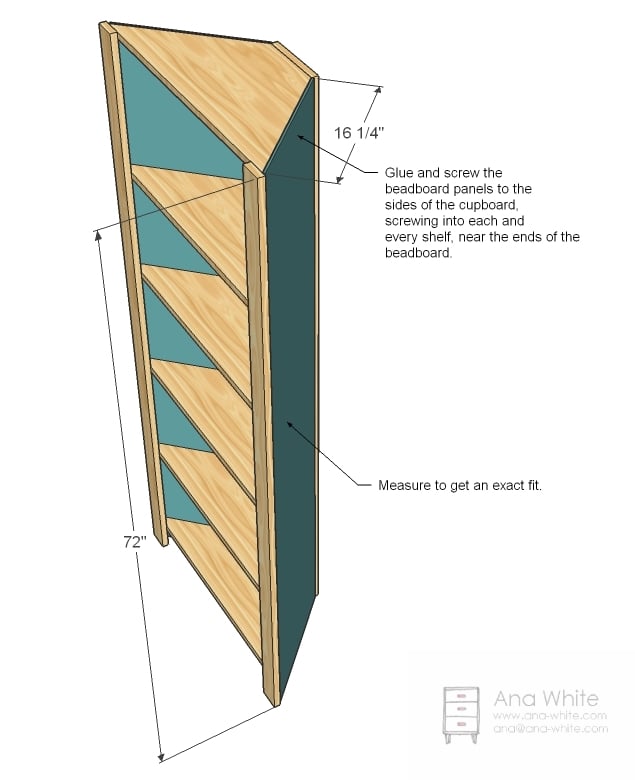
Measure the width of the open spaces on the back sides, and cut your beadboard to fit. Shown above is the perfect dimensions for 1x12s that measure 11 1/2″ wide. Try to get a nice tight fit. Apply glue to the shelf edges that are exposed and use 1 1/4″ screws to attach the beadboard to the shelves. Keep the beadboard first and foremost flush to the back 1×8, as this is the seam that will be most visible. The front seams are hidden behind the front side trim.
Step 5

Step 6
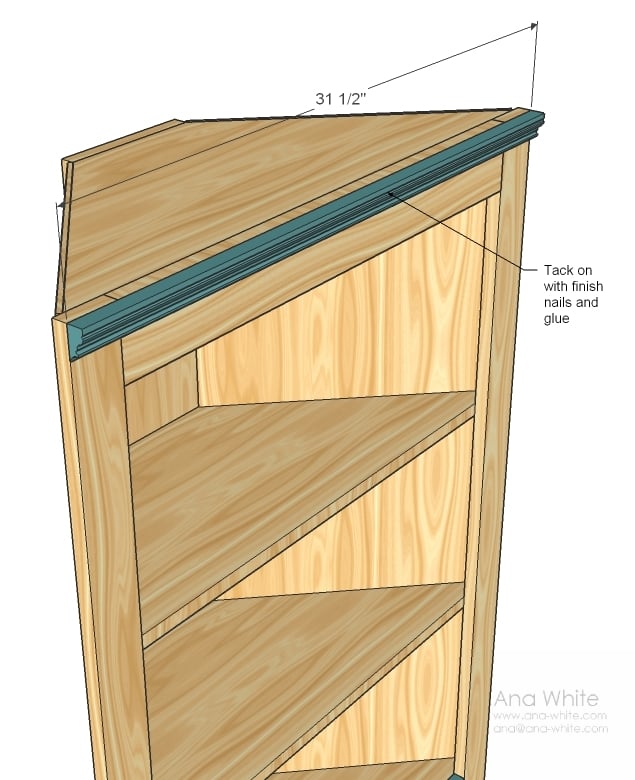
Top Moulding
Measure the top and tack the crown o
Step 7
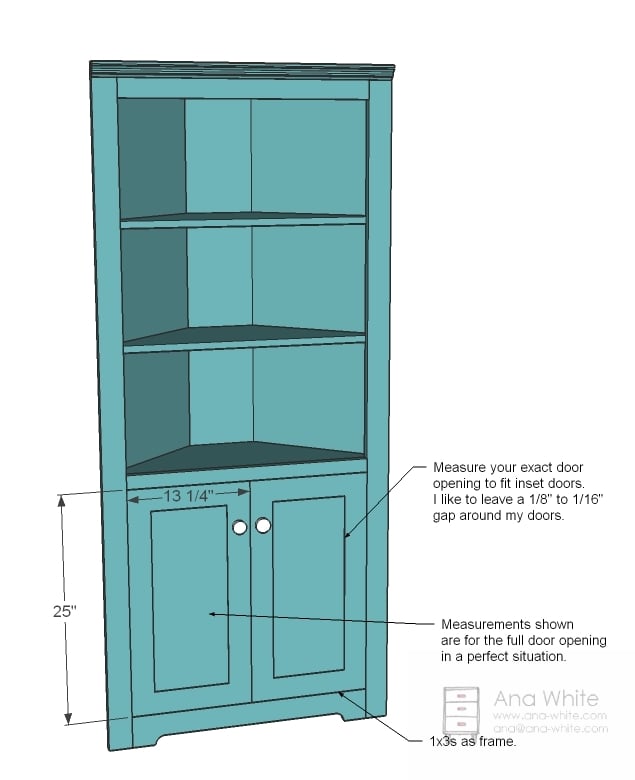
Doors
The doors are the most difficult part because most of us don’t have routers or tablesaws. If you do have a router or table saw, you can build your doors inset as shown above. because of the shelf behind the doors, the doors must be no more than 3/4″ thick, so you will have to inset the panel in the frame of the door. There are other options.
Step 8
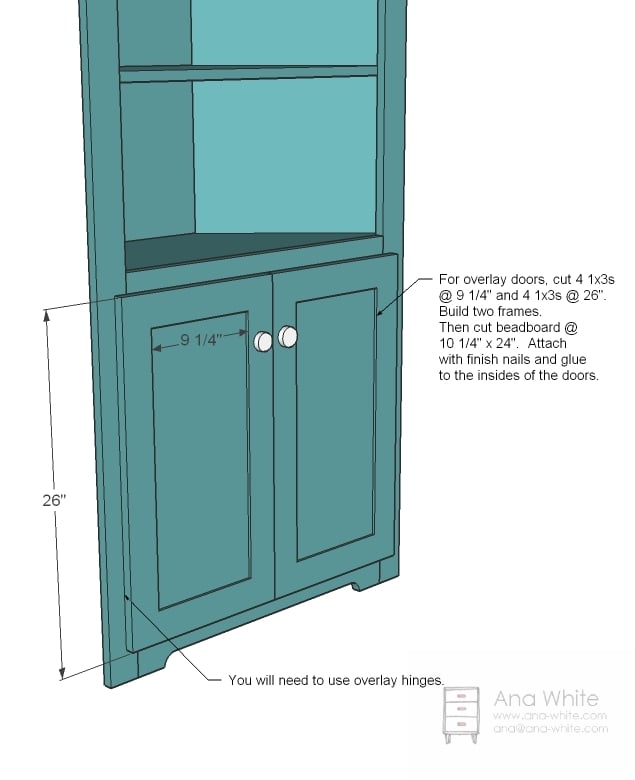
You can build an overlay door. Simply build a frame out of 1x3s, either using a Kreg Jig™ or 3″ fine screws to build the frame. Then tack beadboard to the back, but make sure the beadboard would fit in the opening in the shelf.
Step 9
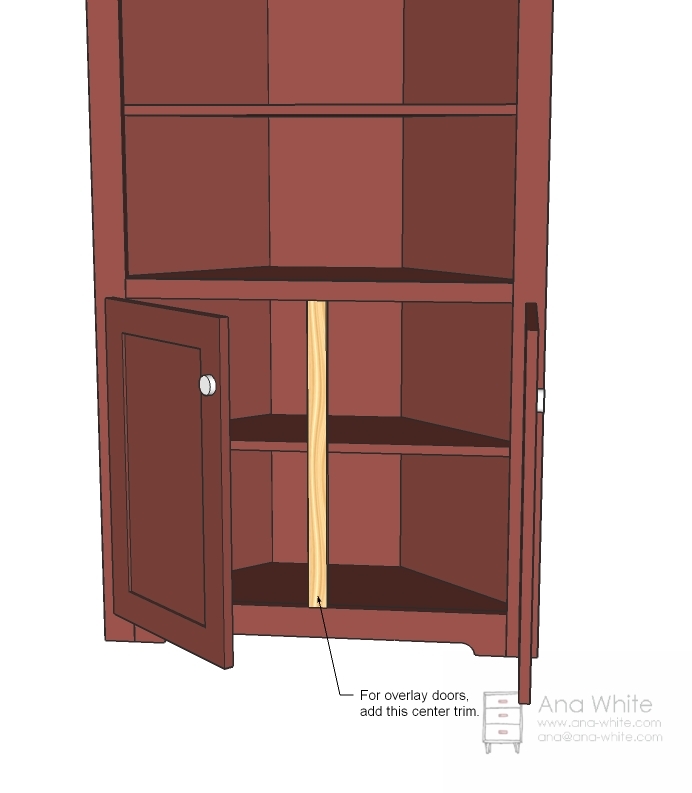
And you would want to add the center post to remove any gaps between the doors.

Comments
Guest (not verified)
Sun, 03/18/2012 - 18:56
Confused on Steps 3 and 5
Hello, all. To Ana or anyone else having experience building this piece, I am confused on a couple of the steps. I already have the shelves, two front trim pieces and main back piece cut.
Step 3: Says place 2" screws on the inside and 1-1/4" screws on the outer edge, 2 screws per shelf. Wouldn't this be 4 screws per shelf or am I reading into this wrong? I've used some scrap to try this out with the 1/2" overlap and drilling 2 pocket holes into the angled edge of one of the scrap shelves. I used 1-1/4" screws and they actually just came through the front trim piece (there is no way 2” screws would work, the way I am doing this). Furthermore, I am concerned that the joint will not be that strong with the holes so close together and not having much to "bite" into in the angled shelf edge. Should pocket holes be used here to fasten the trim pieces to the shelves, or would finish nails be safer (no splitting)? I have considered using a pneumatic trim nailer with 2” brads, also. Thoughts?
Step 5: Says if you have a Kreg Jig (I do) to build the entire face frame first. Does this essentially take the place of step #3 for me, if I do in fact use a pocket hole system? If I went ahead and built the entire face frame first, what is the best way of attaching it to the rest of the assembly? (Goes back to my above question).
Overall, I am concerned with strength and stability. I intend to house glasses and mugs on the top shelves and I just want to make sure the unit is as rigid as possible. I’ve been mulling over these couple of steps, trying to come up with the best way to attach the side trim to the shelves. Any help (verbal or pictures or other) would be greatly appreciated to keep my project rolling along!
Ana, very cool design, I’m hoping I can do it justice and pull it off! Will post pics if and when I do!
Thanks,
Justin
Bas (not verified)
Fri, 09/28/2012 - 16:44
Great first project
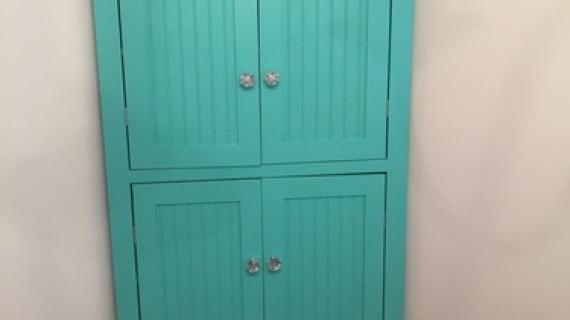
I just finished making this cupboard and it looks awesome.
It took me three nights in a dark garage and it's my first succesfull woodwork project.
Thanks for the great instructions and pictures.
I'll post pictures as soon as I completed it with a fresh paint.
Thanks again for the instructions, it was a great project to work on.
Cheers,
Bas
Hello Sunshine! (not verified)
Sat, 11/10/2012 - 08:04
How to downsize it?
Love, Love, Love this! I always wanted a cupboard like this but didn't want to spend $300-$500 for it! My question is how do I downsize it...at least the width? to 25 1/2 in width instead of 35 1/2 in?
Alphabet Es
Mon, 11/12/2012 - 14:42
Sort of wobbly?
We got ours built and have had it a few months. My issue now: it's a little wobbly. Anyway to steady it up?
Jake
Tue, 01/08/2013 - 18:51
Brag Posts
What happened to all of the brag posts? I noticed that all of mine no longer are linked to their originating projects. I know this project had several brags.
Renee1784
Sat, 11/15/2014 - 22:35
Built In??
Any ideas for how to make this flush to the wall? look more built in?
lizjanuary
Sun, 02/22/2015 - 14:28
Modification for baseboard heat
The corner I would like to put this in has a baseboard heat cover that is about 7 inches tall and 3-4 inches out from the wall on one wall of the corner. I'm planning on making the bottom shelf higher from the ground (maybe 8"). Would it be acceptable to remove the back "leg" (or cut it flush with the bottom shelf) and modify the right "leg" so it is cut around the baseboard? I plan on screwing the back board to studs to help compensate for the missing rear leg. Would this work or am I setting myself up for a disaster?
Thanks for any advice!
Liz
Dennisv
Wed, 05/25/2016 - 10:09
Nails instead of screws?
To hold the front trim to the shelves could you use an 18 gauge Brad nail instead of screws?
bigbrobob
Fri, 05/10/2019 - 10:11
How can I print this out for…
How can I print this out for me?
Soni_max
Sat, 05/09/2020 - 05:58
How many hours to build this, on average
This is awesome. What are the average hours to build?
Thanks,
Soni Max
jcombs0530
Sun, 08/02/2020 - 11:38
Made a few changes, came out amazing!
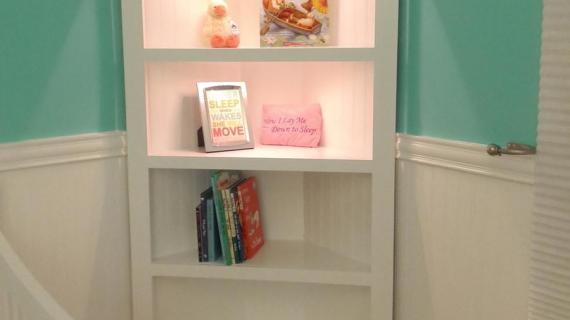
Thank you for providing a starting point for my project! I was looking everywhere for something like this, but didn't want to spend the extreme $$$ that I found. I wound up altering the design a bit to fit my need, but all-in-all this proved very useful to me. I get compliments any time someone sees it for the first time.
Not sure if this will show up properly, but a link to a photo of mine (https://ibb.co/6R0fTSK)... hopefully that can be seen properly - I would be happy if someone else uses my alterations as inspiration for their own as well.
Thanks again!