
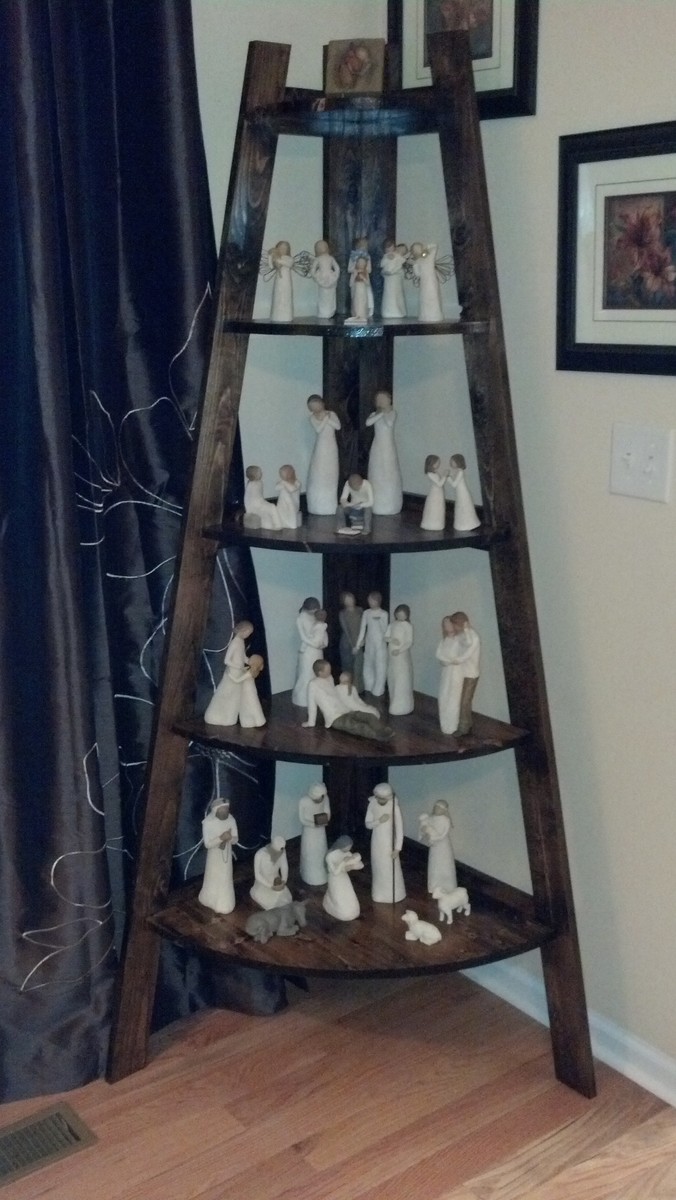

My wife requested a corner shelving unit to be able to display her Willow Tree collection, after looking through your website I noticed you didn't have one. So after designing and building this one I wanted to give back and donate my plans to your site. I am not fluent in Sketchup so I attached my plans if you wanted to recreate them. The entire unit is made from common boards 1x4 from Home Depot. For the shelves I glue laminated them together and then used a router with a circle jig I made to cut the from radius. The shelves are held in place with #8 x2" wood screws predrilled from the back. The horizontal supports are attached with pocket screws. The finish is minwax dark walnut and 4 coats of high gloss polyurethane.
Preparation
(10) 1"x4" x 96" common boards from Home Depot
#8 x 2" wood screws
1-1/4" Kreg pocket screws
(2) 1x4 @ 72"
(2) 1x4 @ 73-9/16" with 12 degree angle at each end
(6) 1x4 @ 68" to be glued together. (I actually did this in (3) separate pieces due to not having enough clamps, 1 @ 15", 1 @ 30" and 1 @ 22") Make sure to use cleats to keep boards from buckling)


Please read through the entire plan and all comments before beginning this project. It is also advisable to review the Getting Started Section. Take all necessary precautions to build safely and smartly. Work on a clean level surface, free of imperfections or debris. Always use straight boards. Check for square after each step. Always predrill holes before attaching with screws. Use glue with finish nails for a stronger hold. Wipe excess glue off bare wood for stained projects, as dried glue will not take stain. Be safe, have fun, and ask for help if you need it. Good luck!
It is always recommended to apply a test coat on a hidden area or scrap piece to ensure color evenness and adhesion. Use primer or wood conditioner as needed.

Comments
moosmani
Fri, 01/17/2014 - 15:18
This is so beautiful! I
This is so beautiful! I would love to make this but unfortunately I wouldn't be able to figure it out with only the material and cut list. I can't find that any plans have been attached. So sad. The attached PDF has only the same information as the post. But, anyway this is very beautiful and you did a great job!
nateleejohnson
Tue, 03/31/2015 - 08:55
Plans ??
Are there step by step plans for this project? I did not see any.