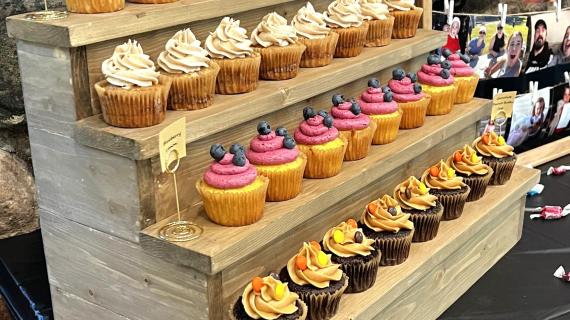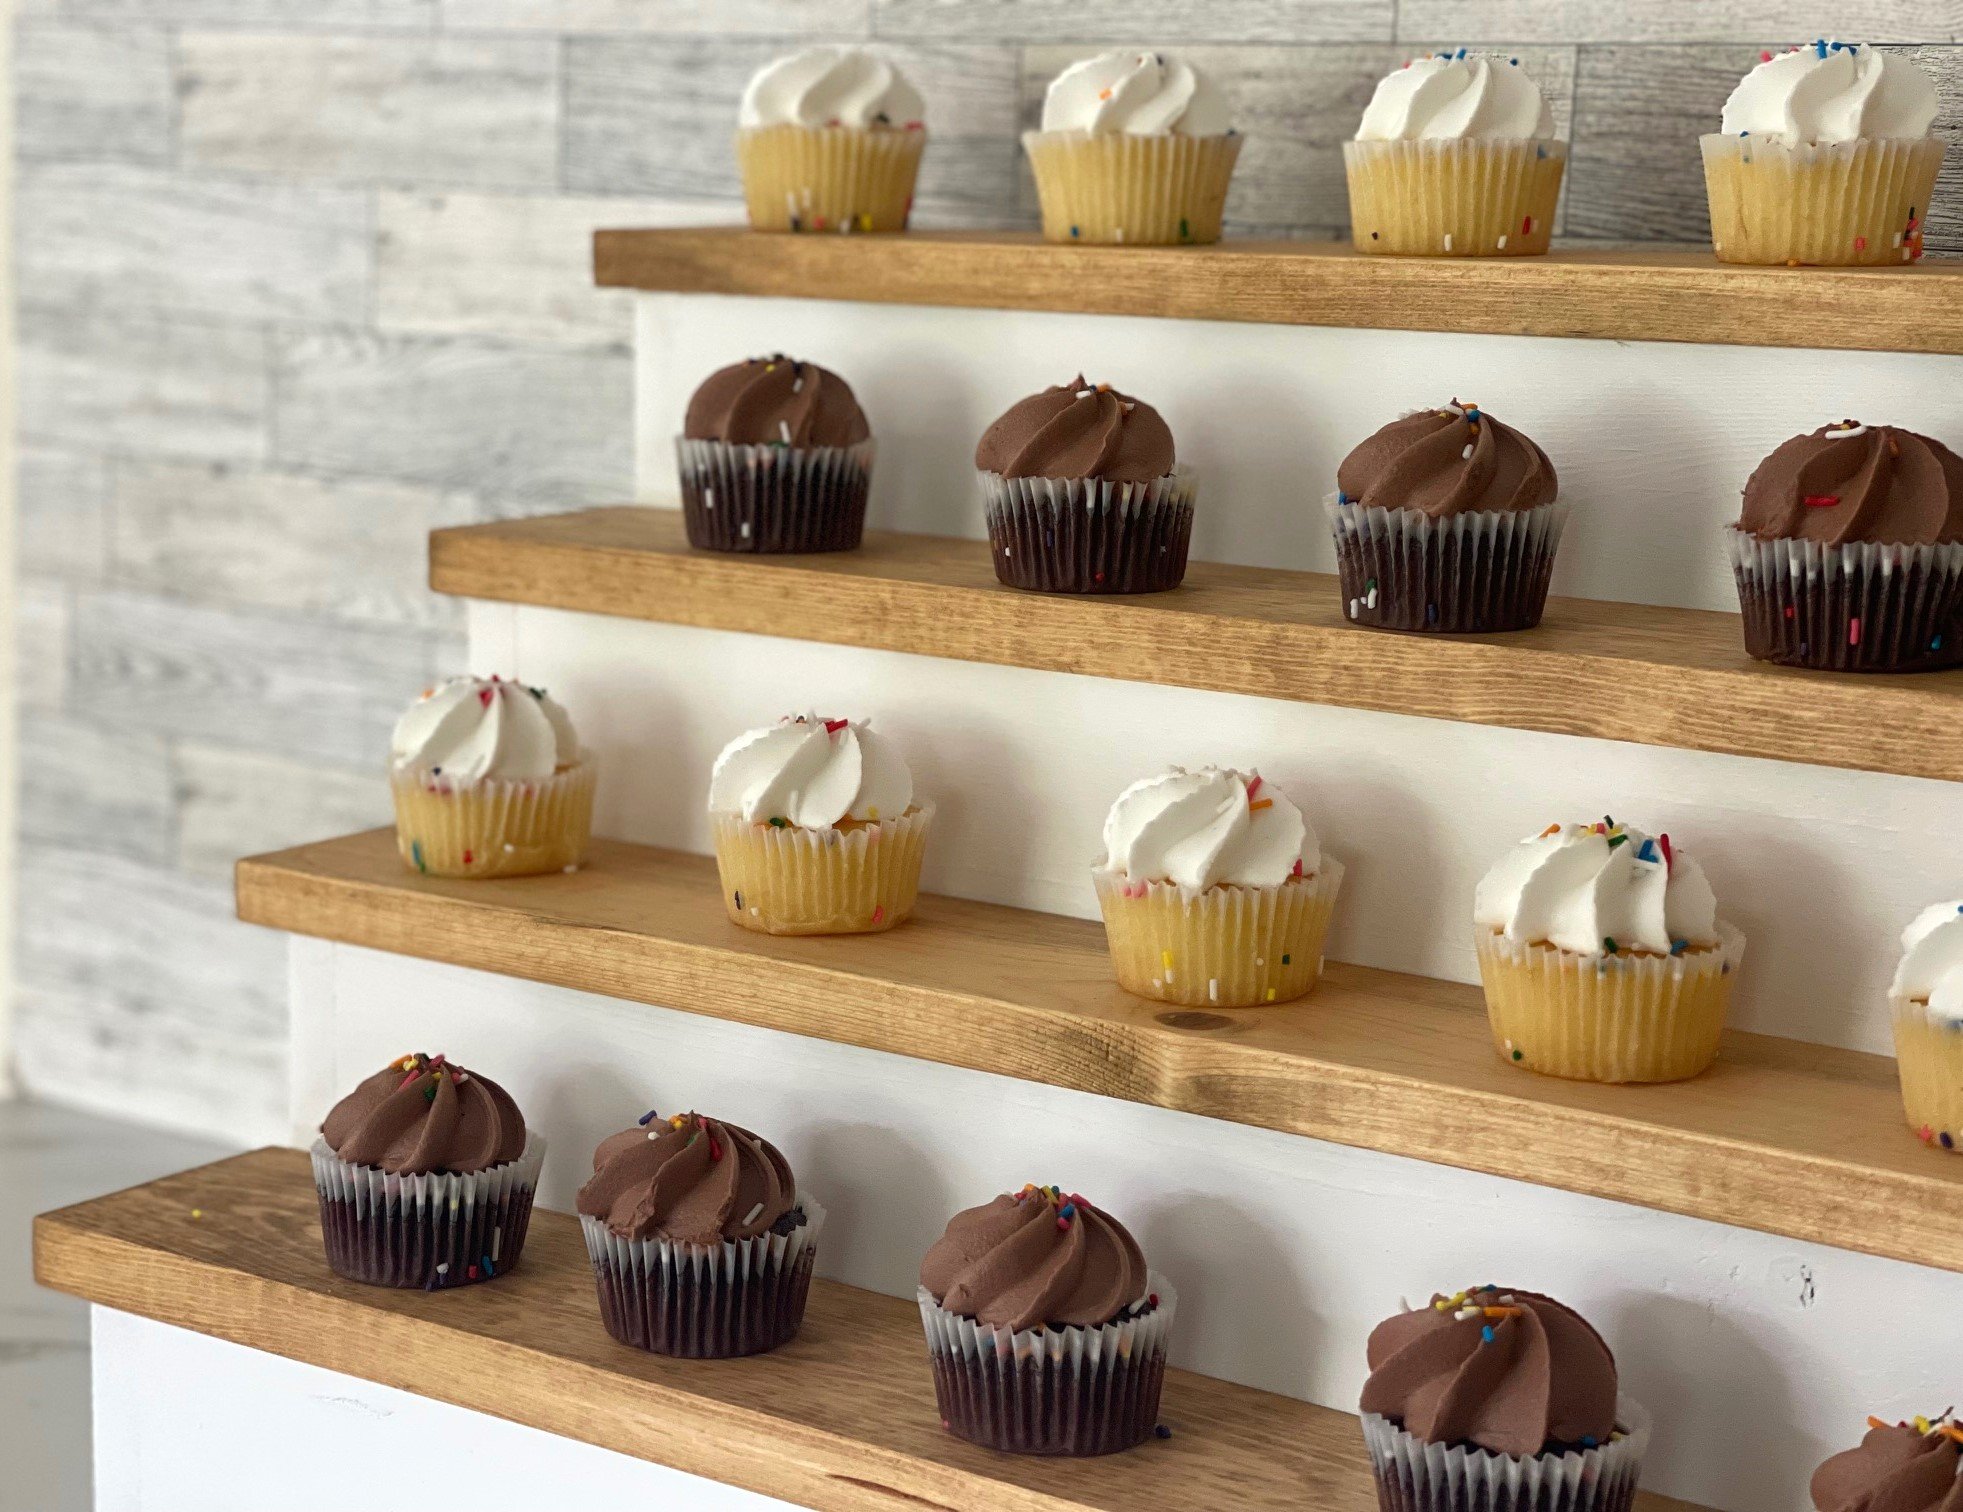

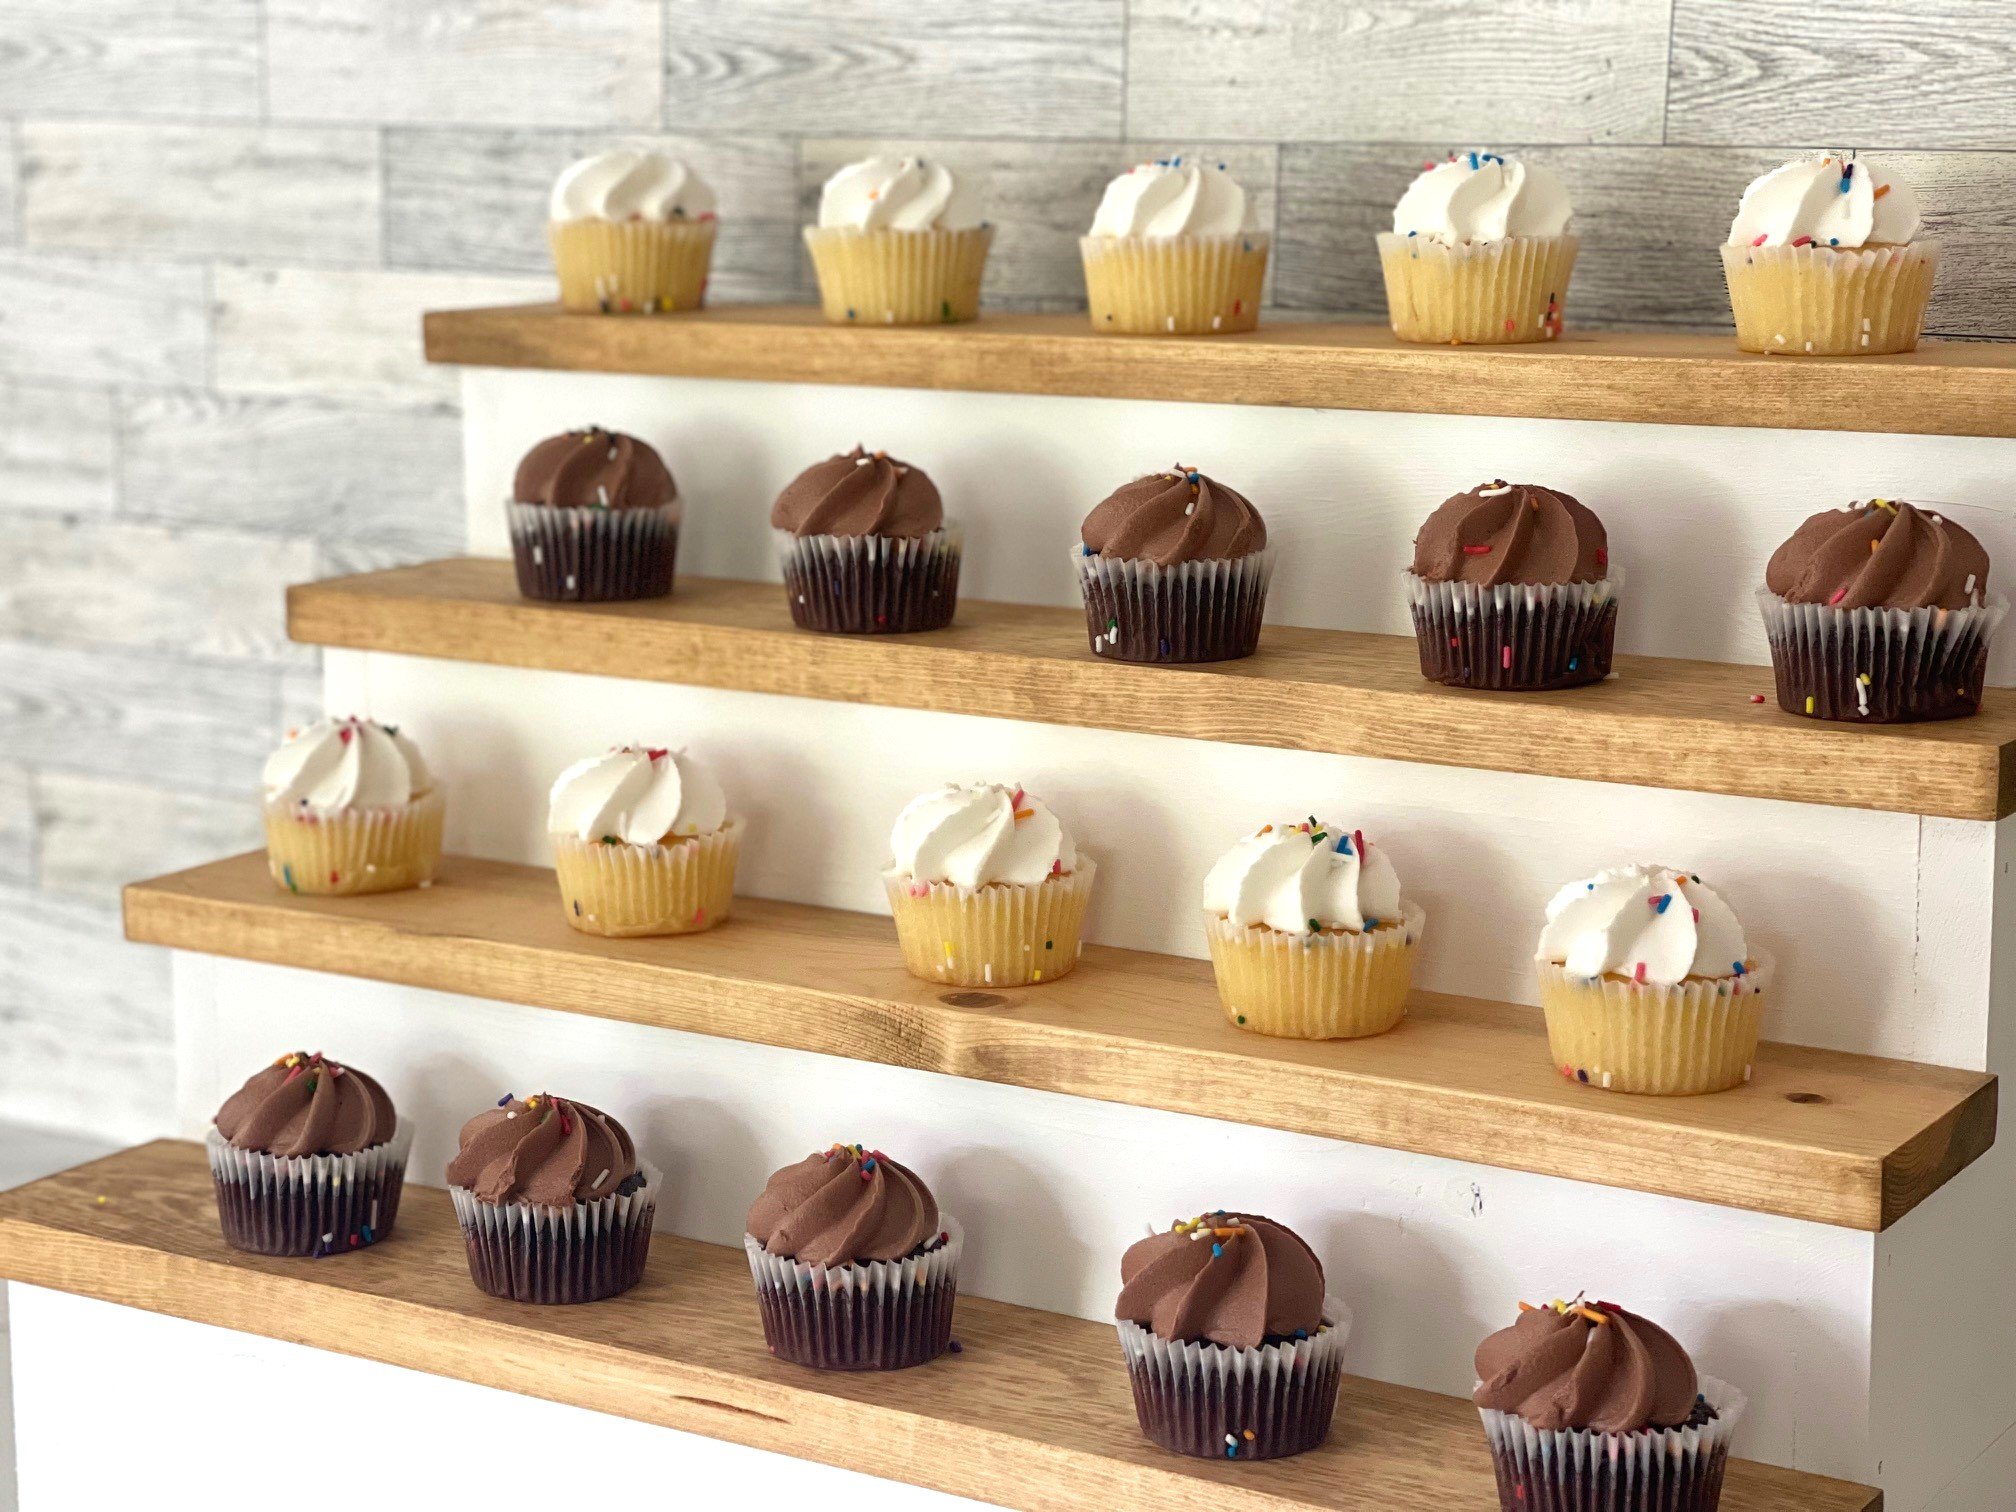
Free plans to build your own cupcake display stand. This cupcake stand featured a stepped design, serving as both a beautiful wood grained backdrop for your desserts and a functional serving center. Can be made in any length.
Free step by step plans from Ana-White.com
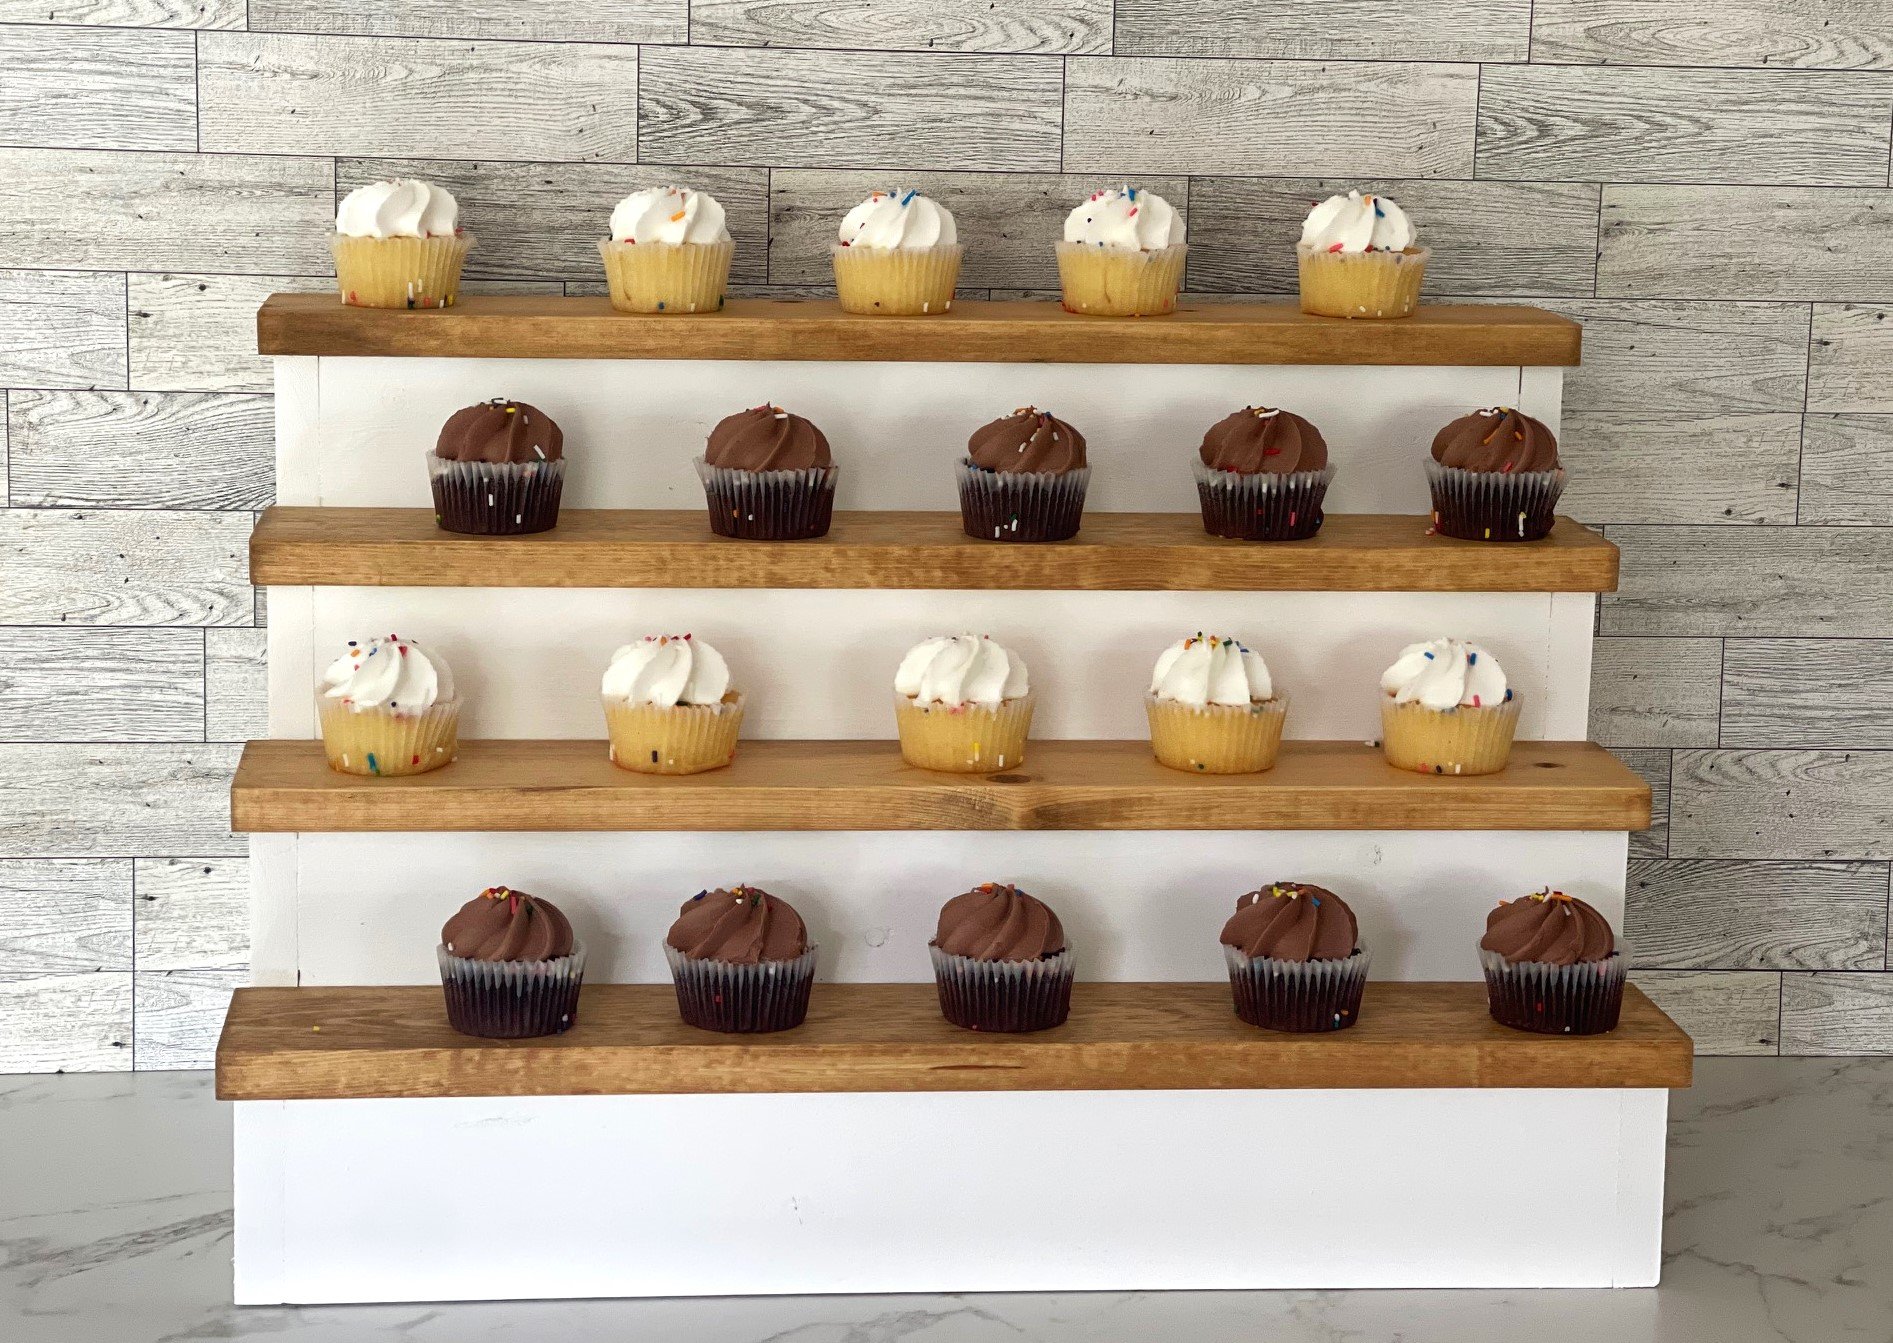
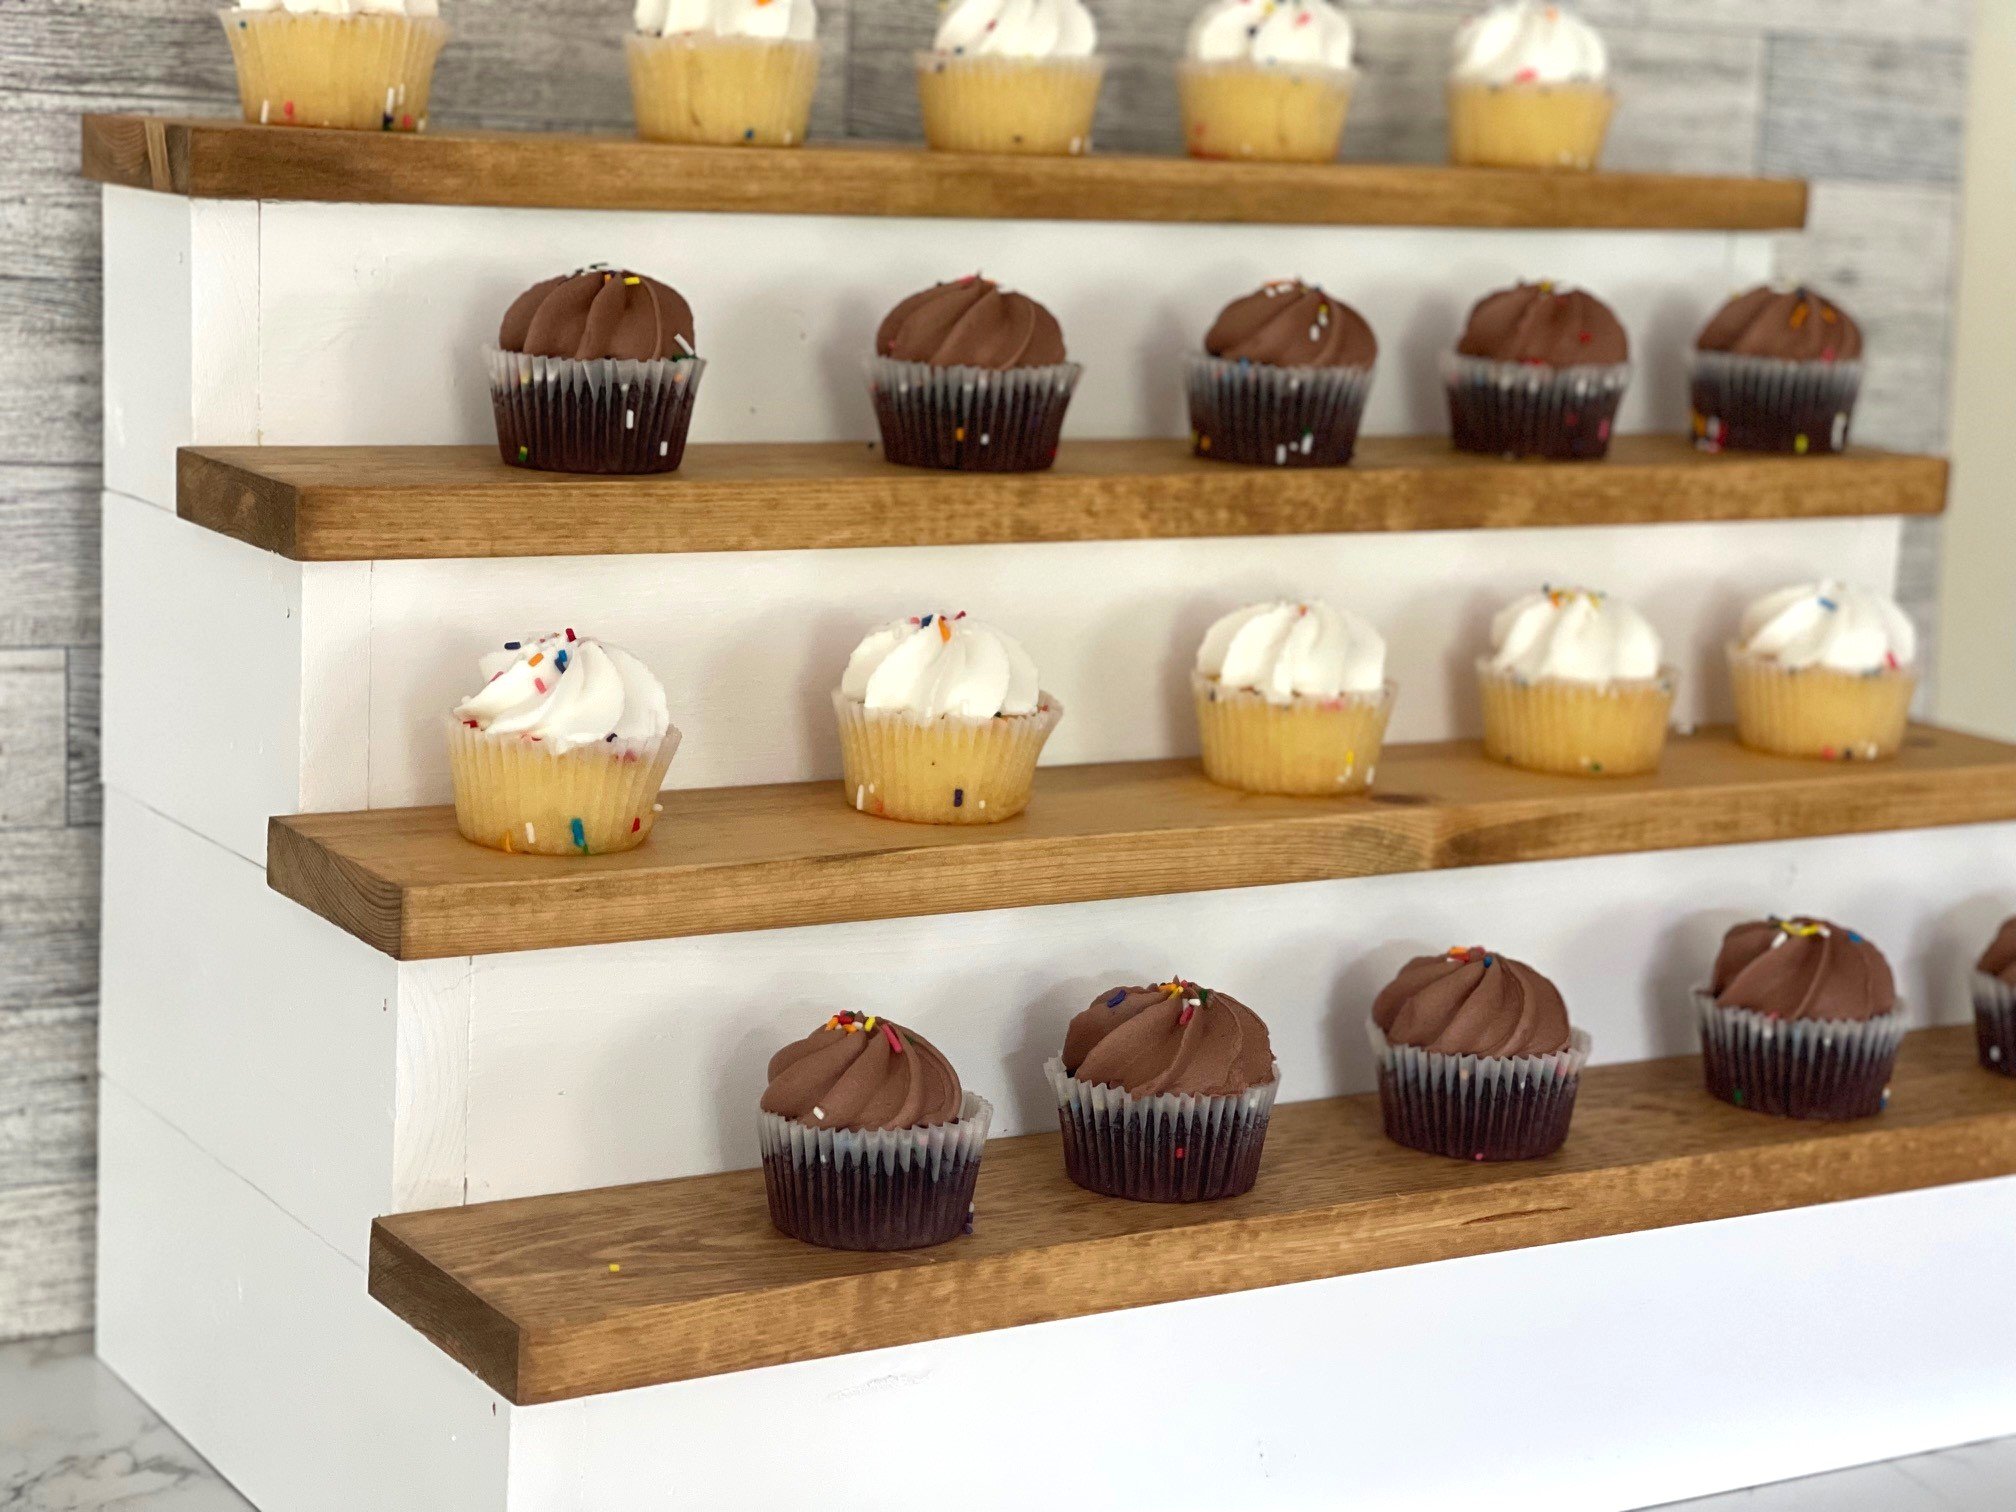
Make an easy and inexpensive cupcake display in just a couple of hours!
How I Built this Cupcake Stand
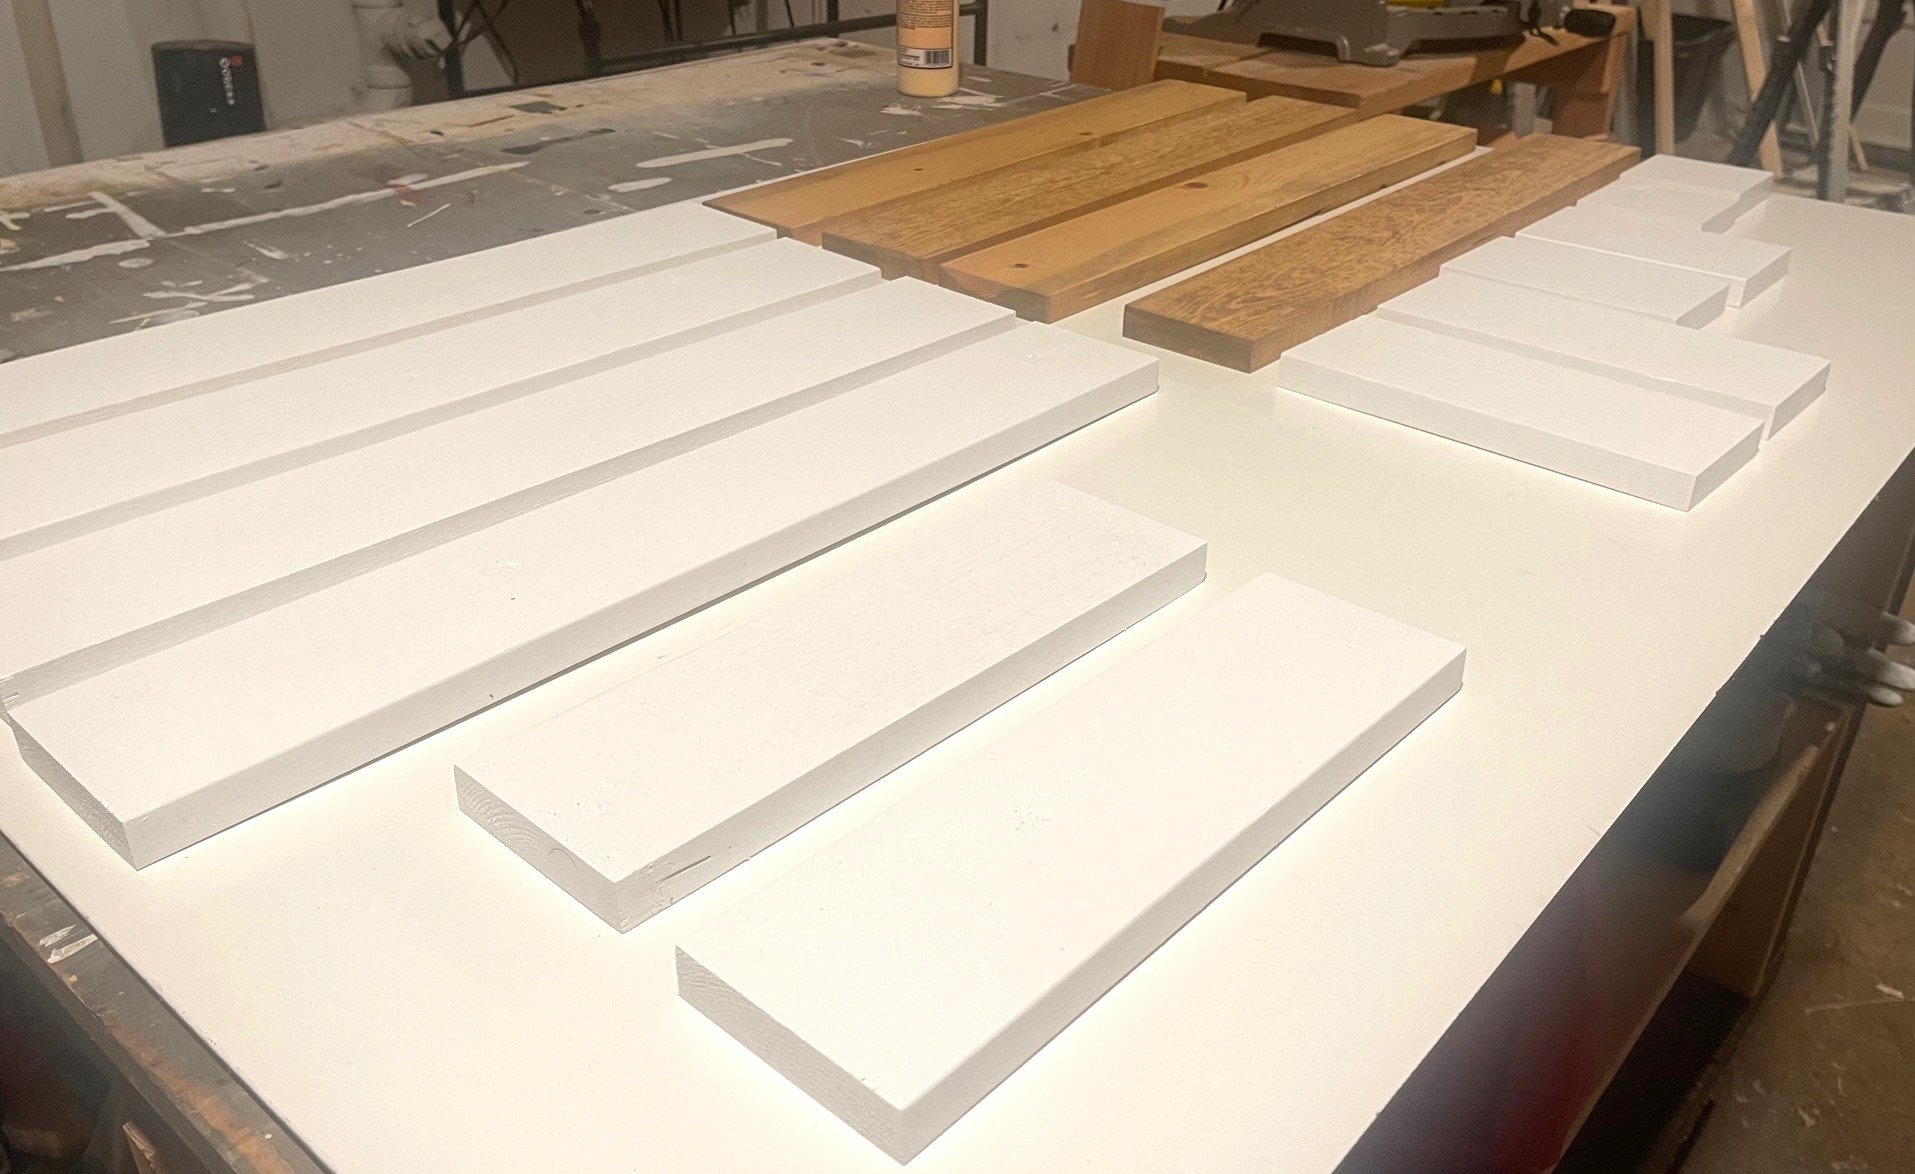
I recommend prefinishing all of the boards.
After letting them dry time to assemble.
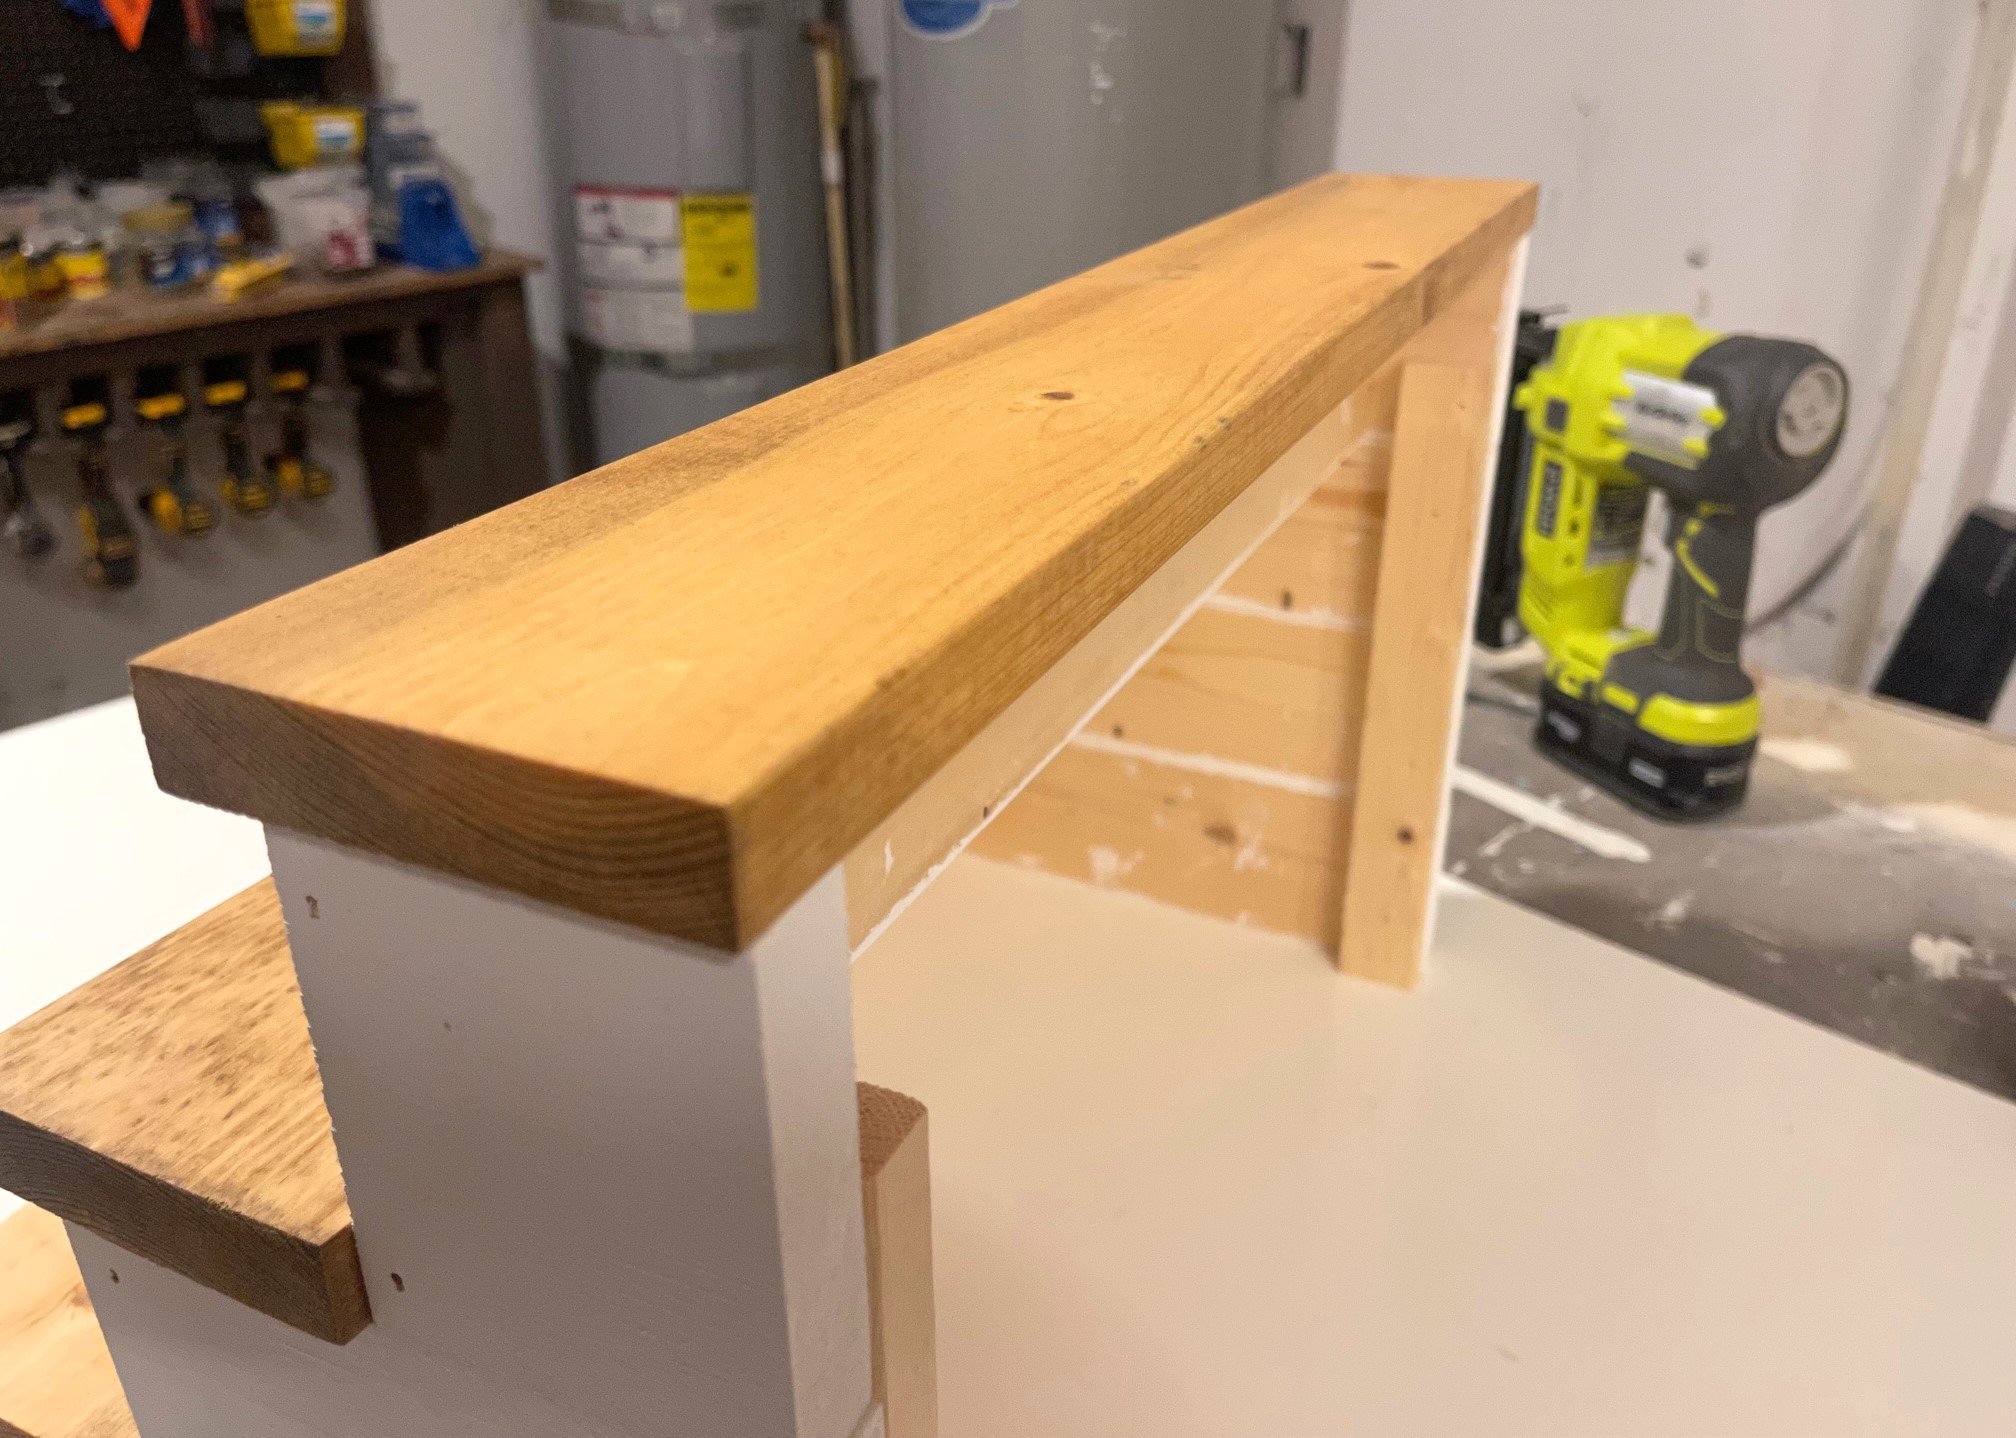
Using a nailer and glue repeat this process for all 4 "U" shaped pieces.
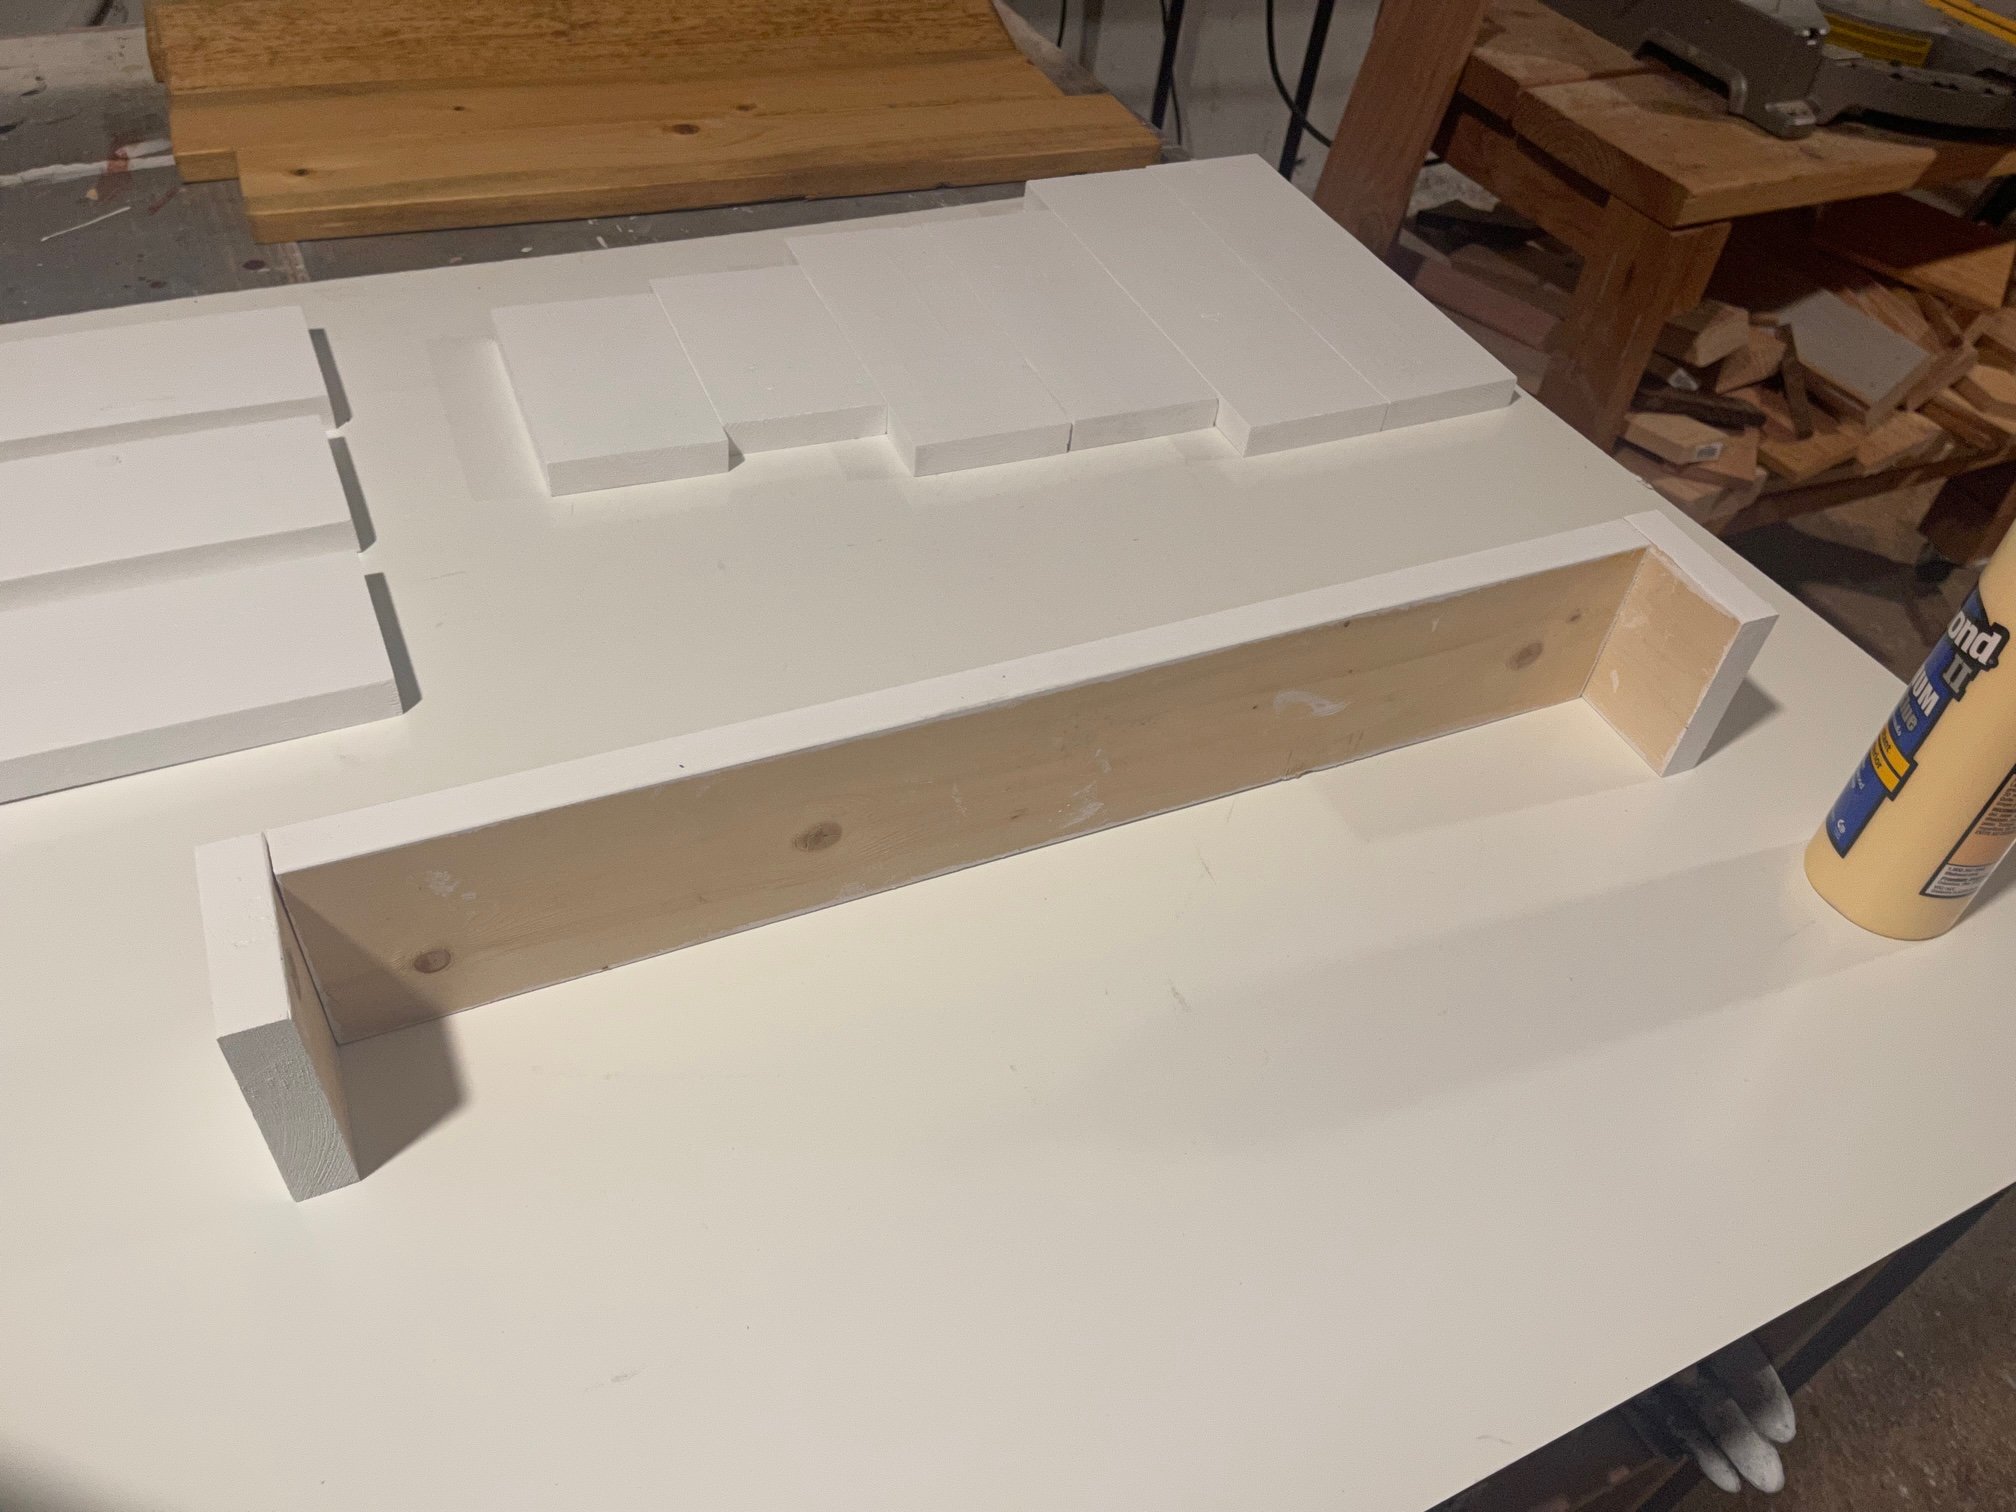
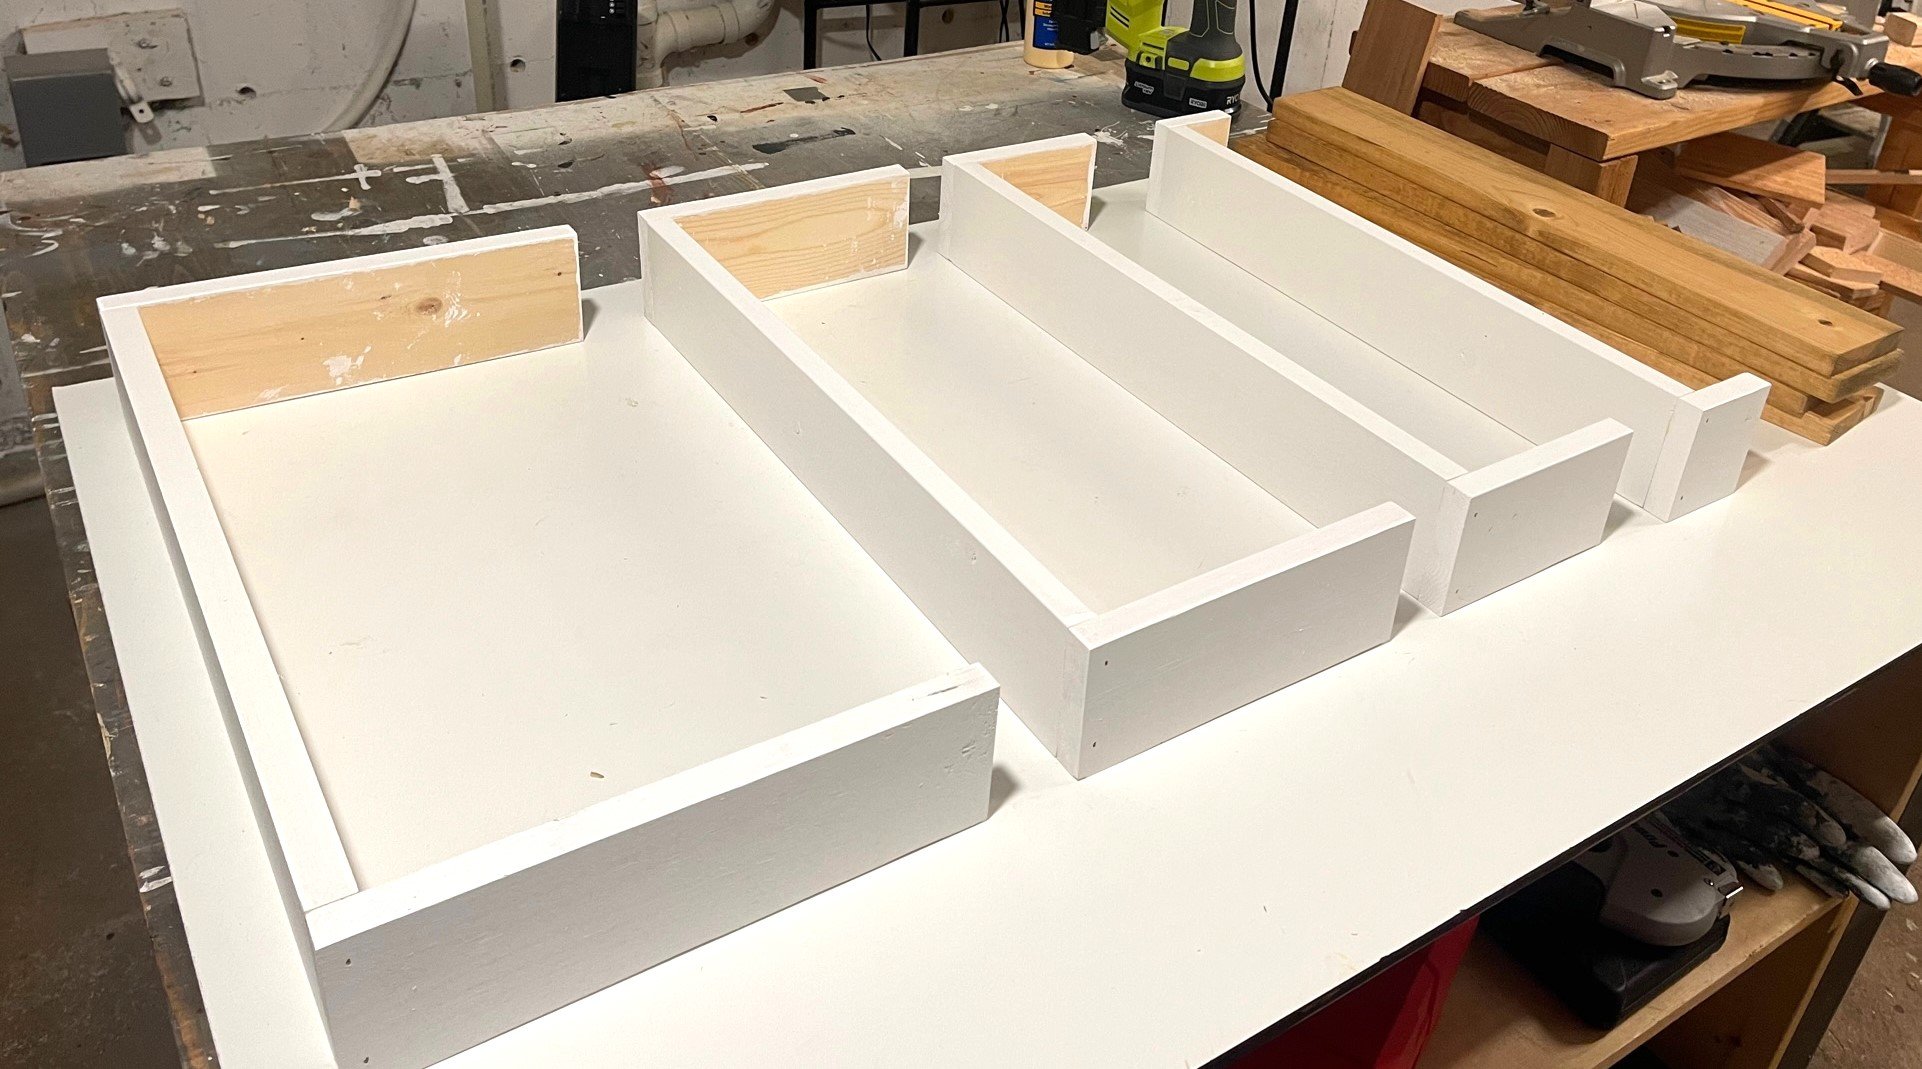
Once all the pieces are nailed, it's time to glue and stack them.
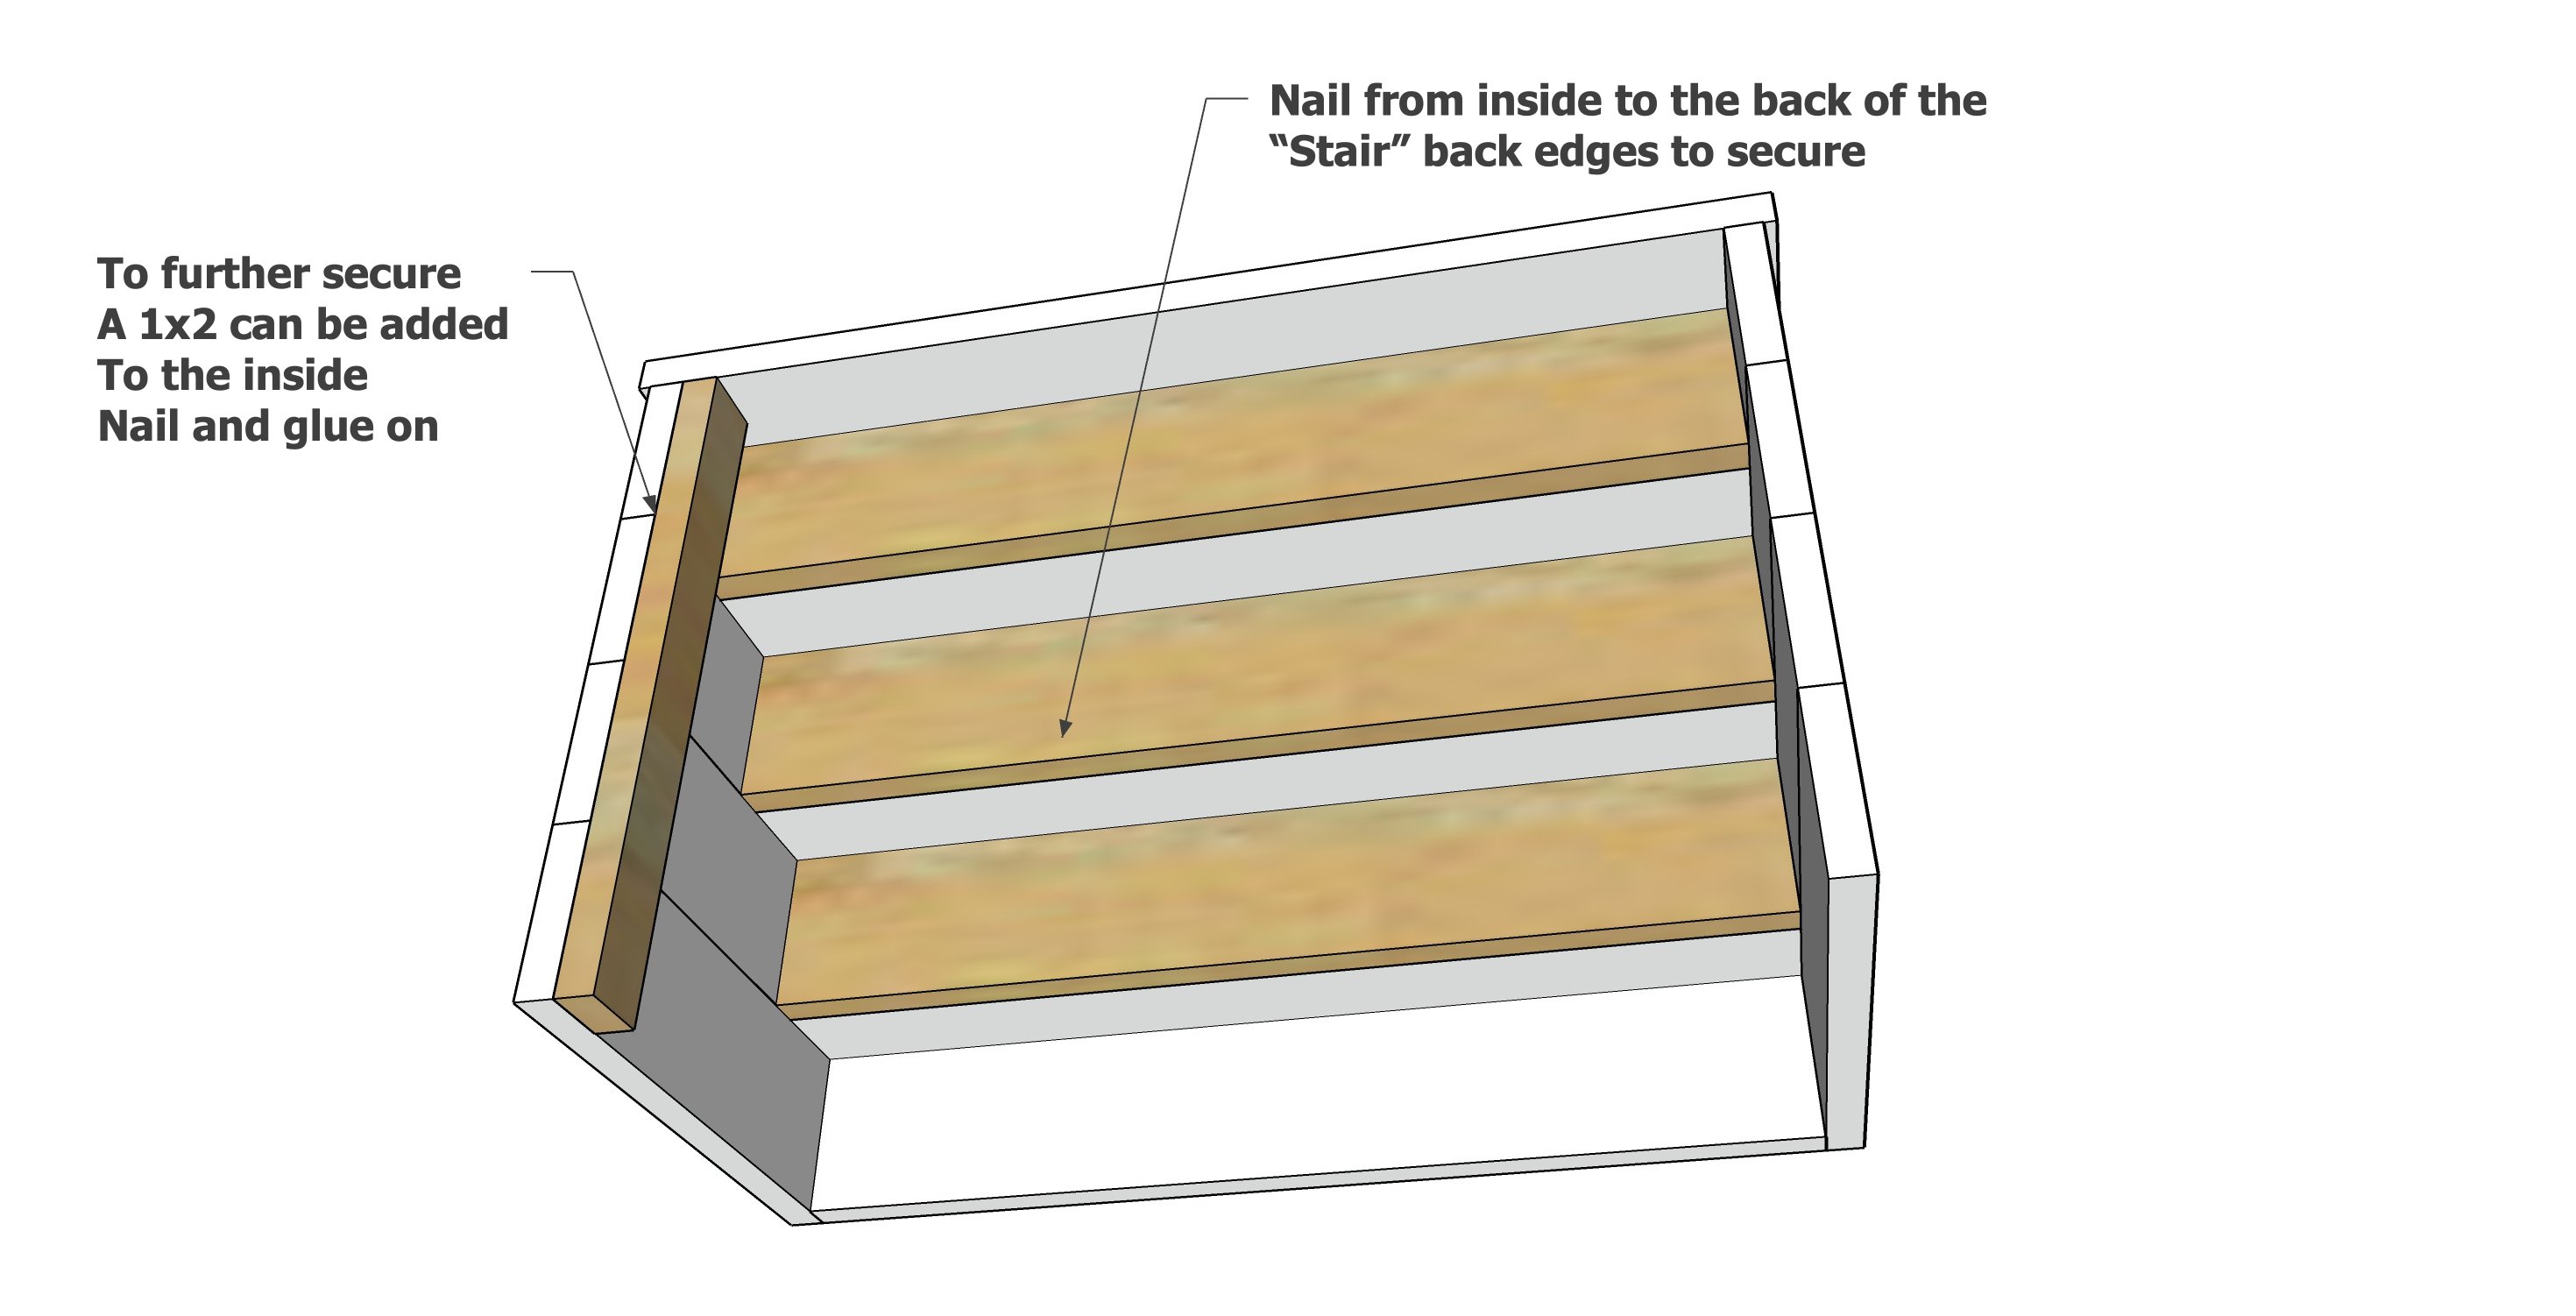
I recommend taking the extra step of further securing the stacked boards with a scrap 1x2, it made it much stronger and secure.
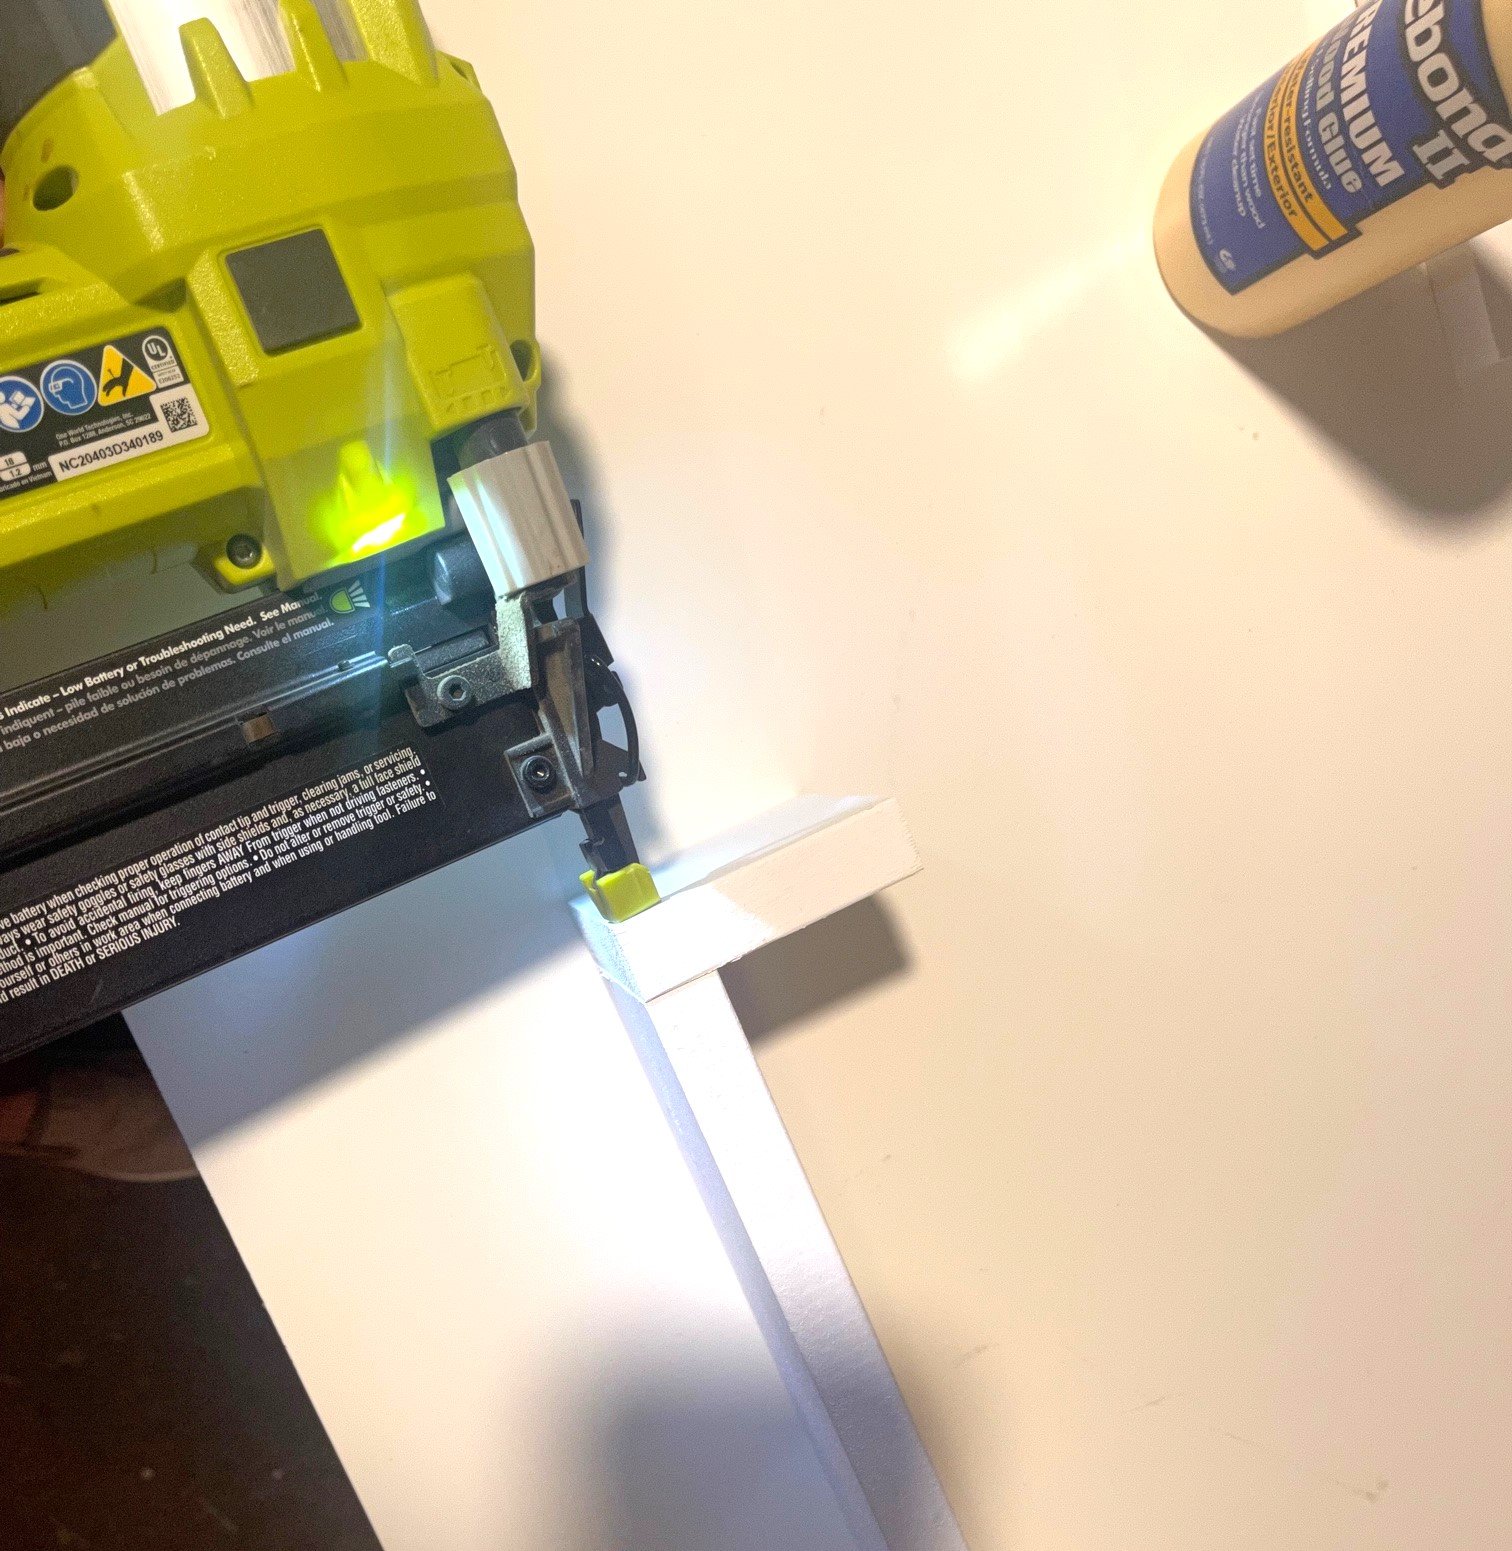
Now add the treads with more glue along the side and back. If you need to secure it more, nail to side edges.
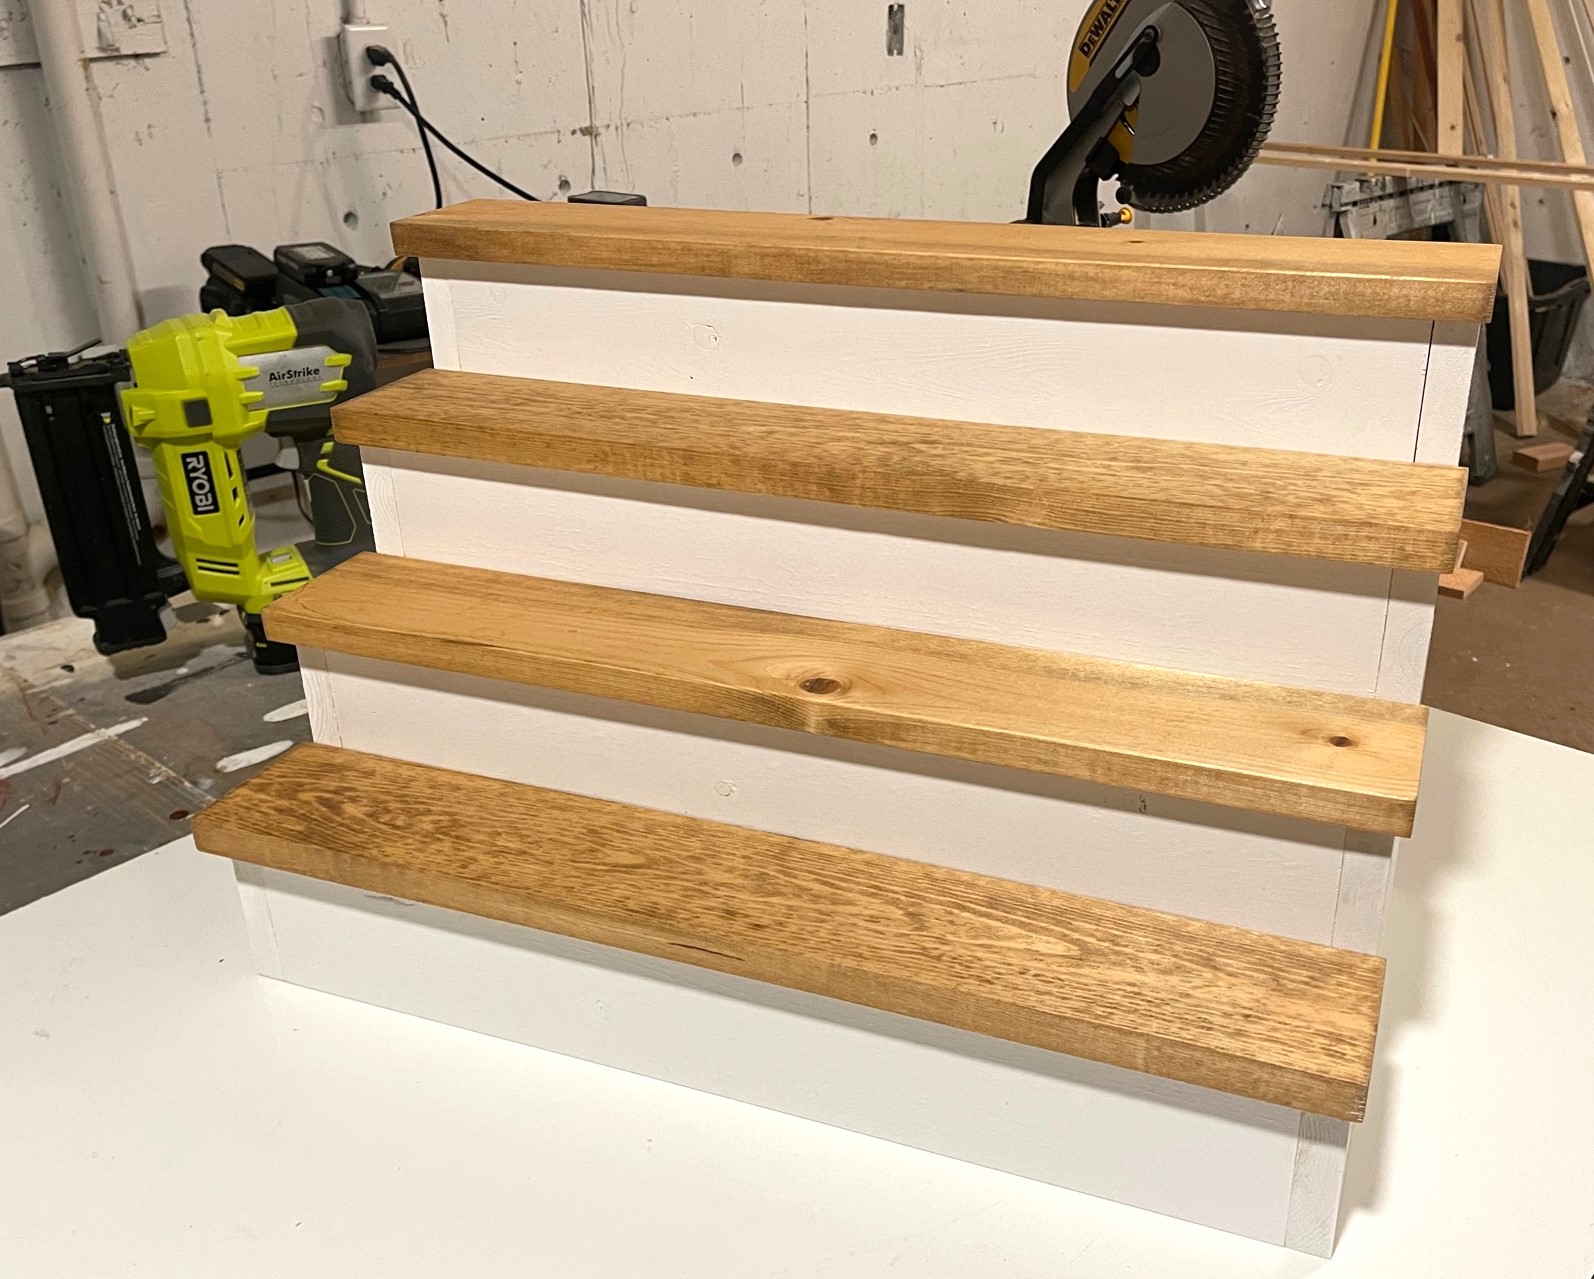 I touched up the paint after assembly and love how it turned out! I think it would also work to transport easily if you omit the glue and just reassemble each time with the 1x2 on the underside and just set the treads. Happy Building!
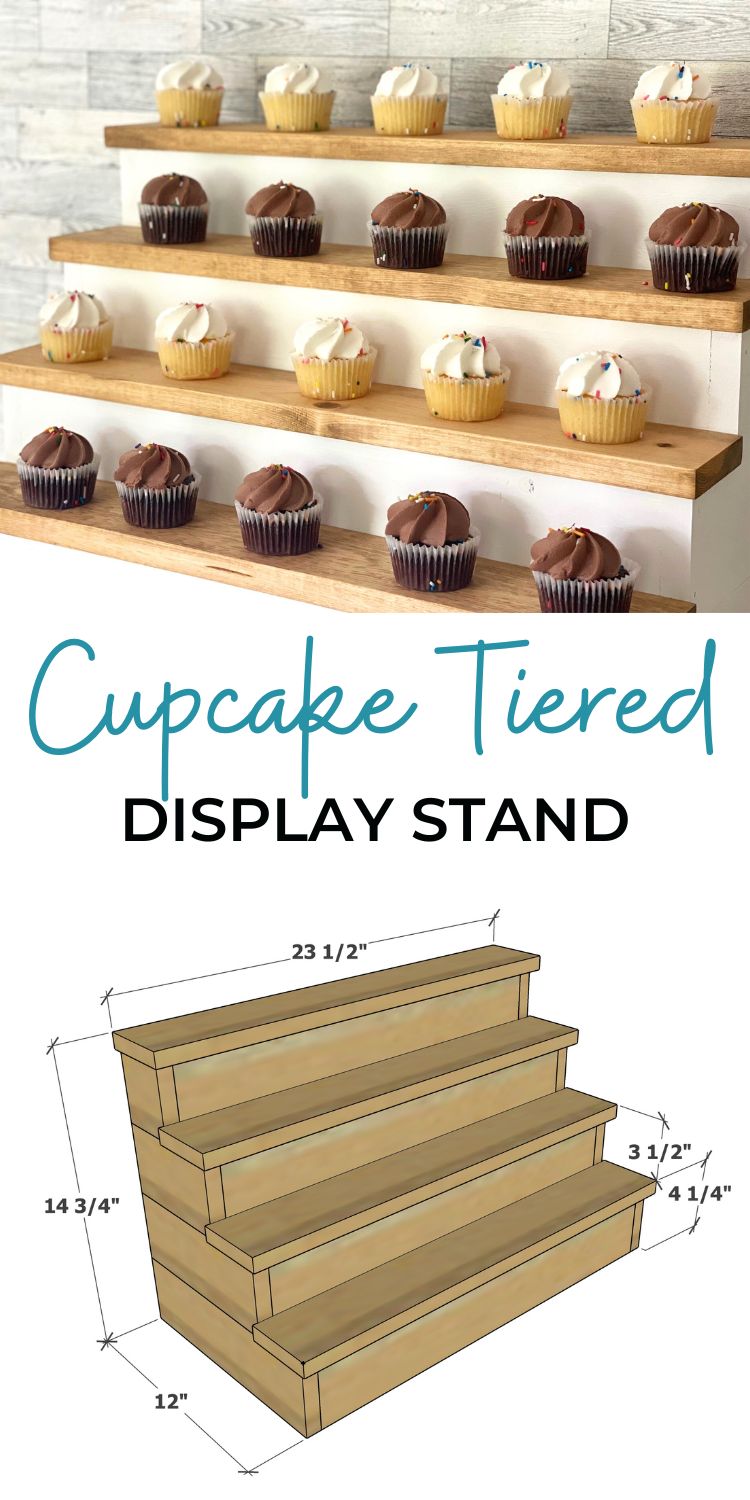
Free Plans to Build Your Own Cupcake Display Stand
Ready to build your own? The free plans for this cupcake display stand follow.
Pin For Later!
Preparation
3 - 1x4 @ 8 feet long
1-1/4" brad nails
wood glue
wood stain
wood filler
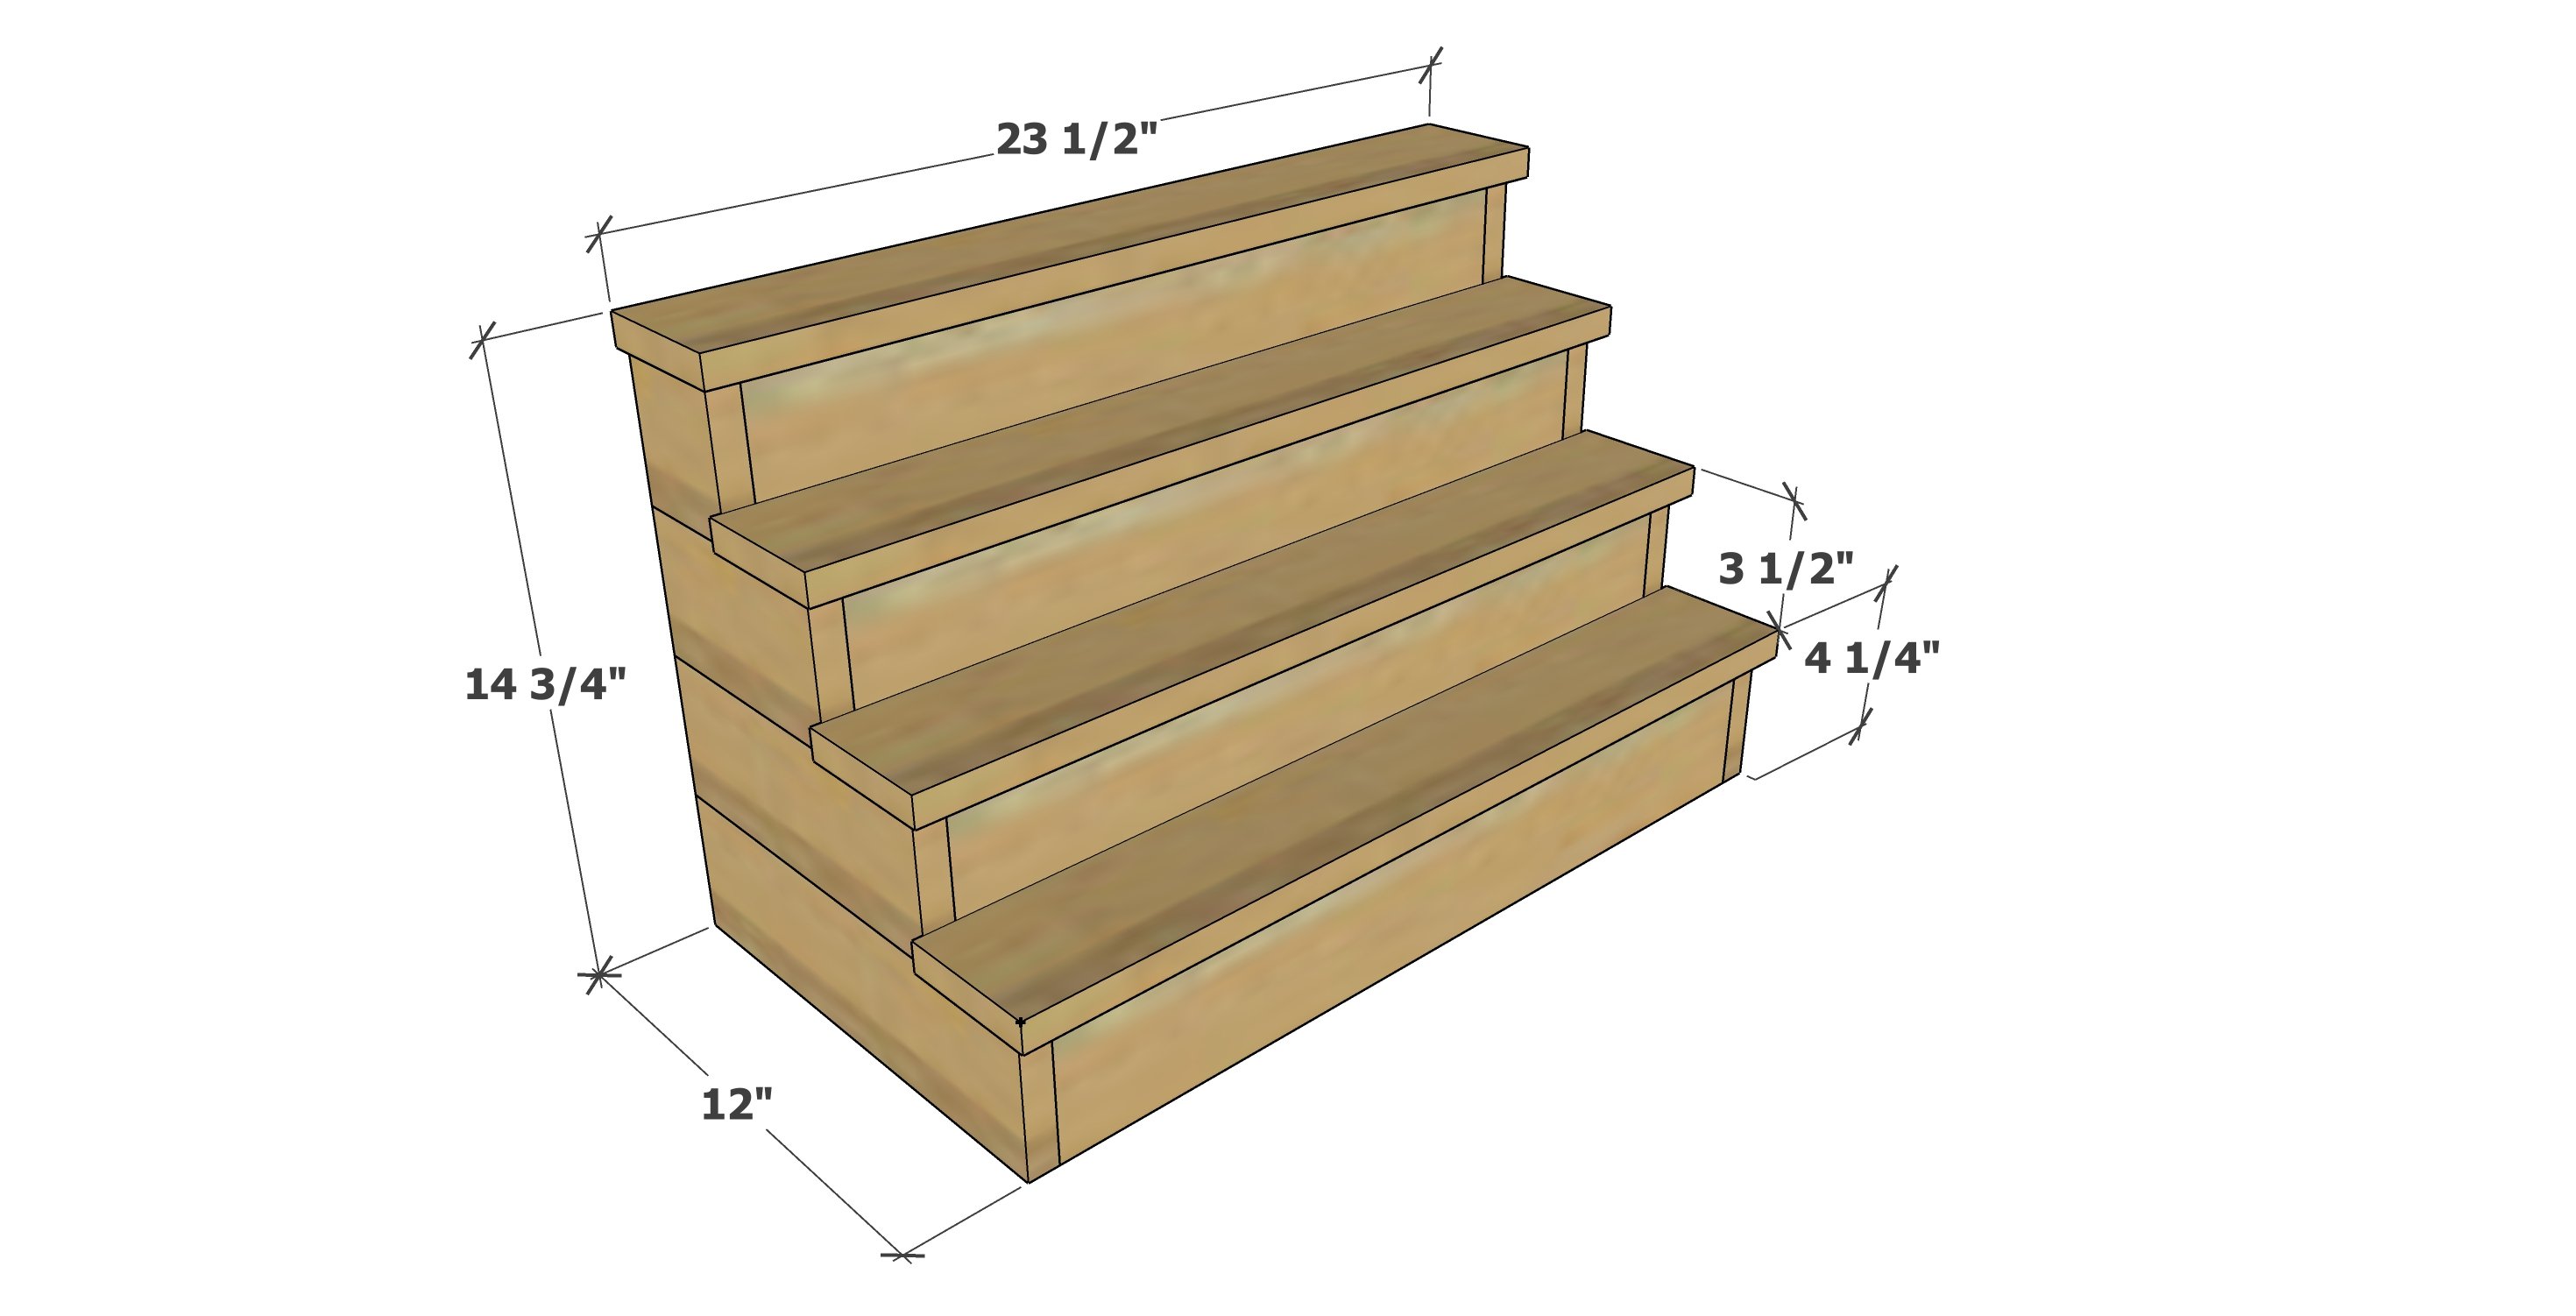
2 - 1x4 @ 3"
2 - 1x4 @ 6"
2 - 1x4 @ 9"
2 - 1x4 @ 12"
4 - 1x4 @ 21-1/2"
4 - 1x4 @ 23-1/2"
Cut with a miter saw.
Avoid cutting super small pieces - instead cut a small piece off a larger piece.


Instructions
Step 1
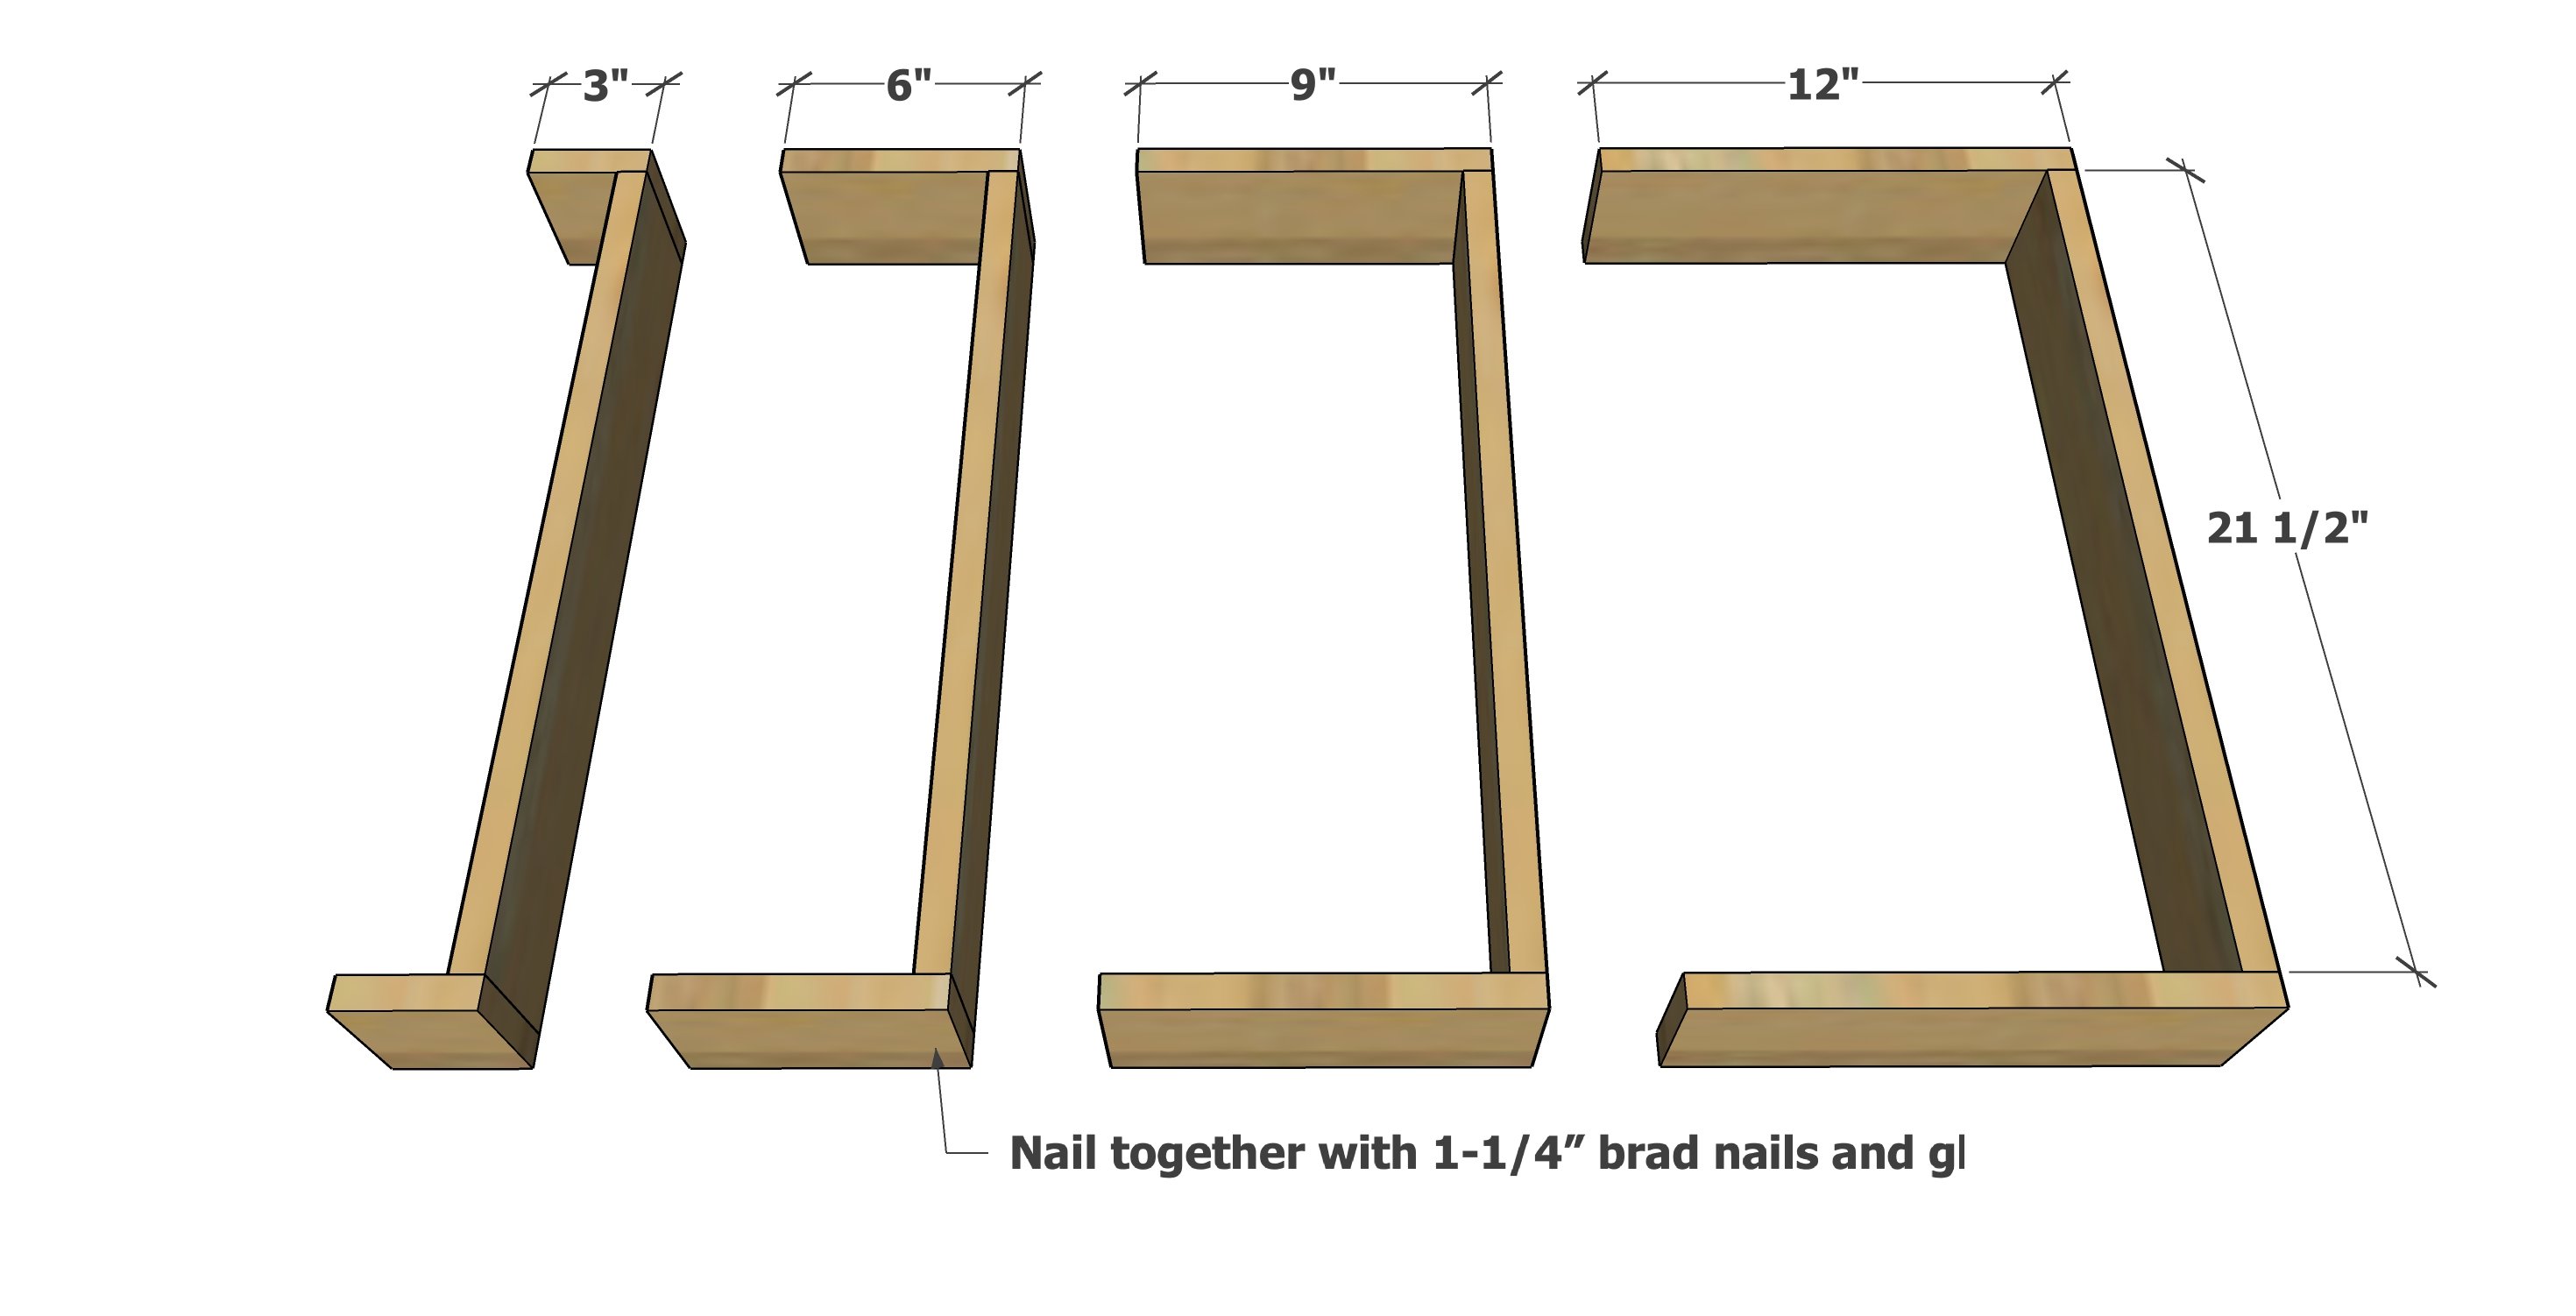
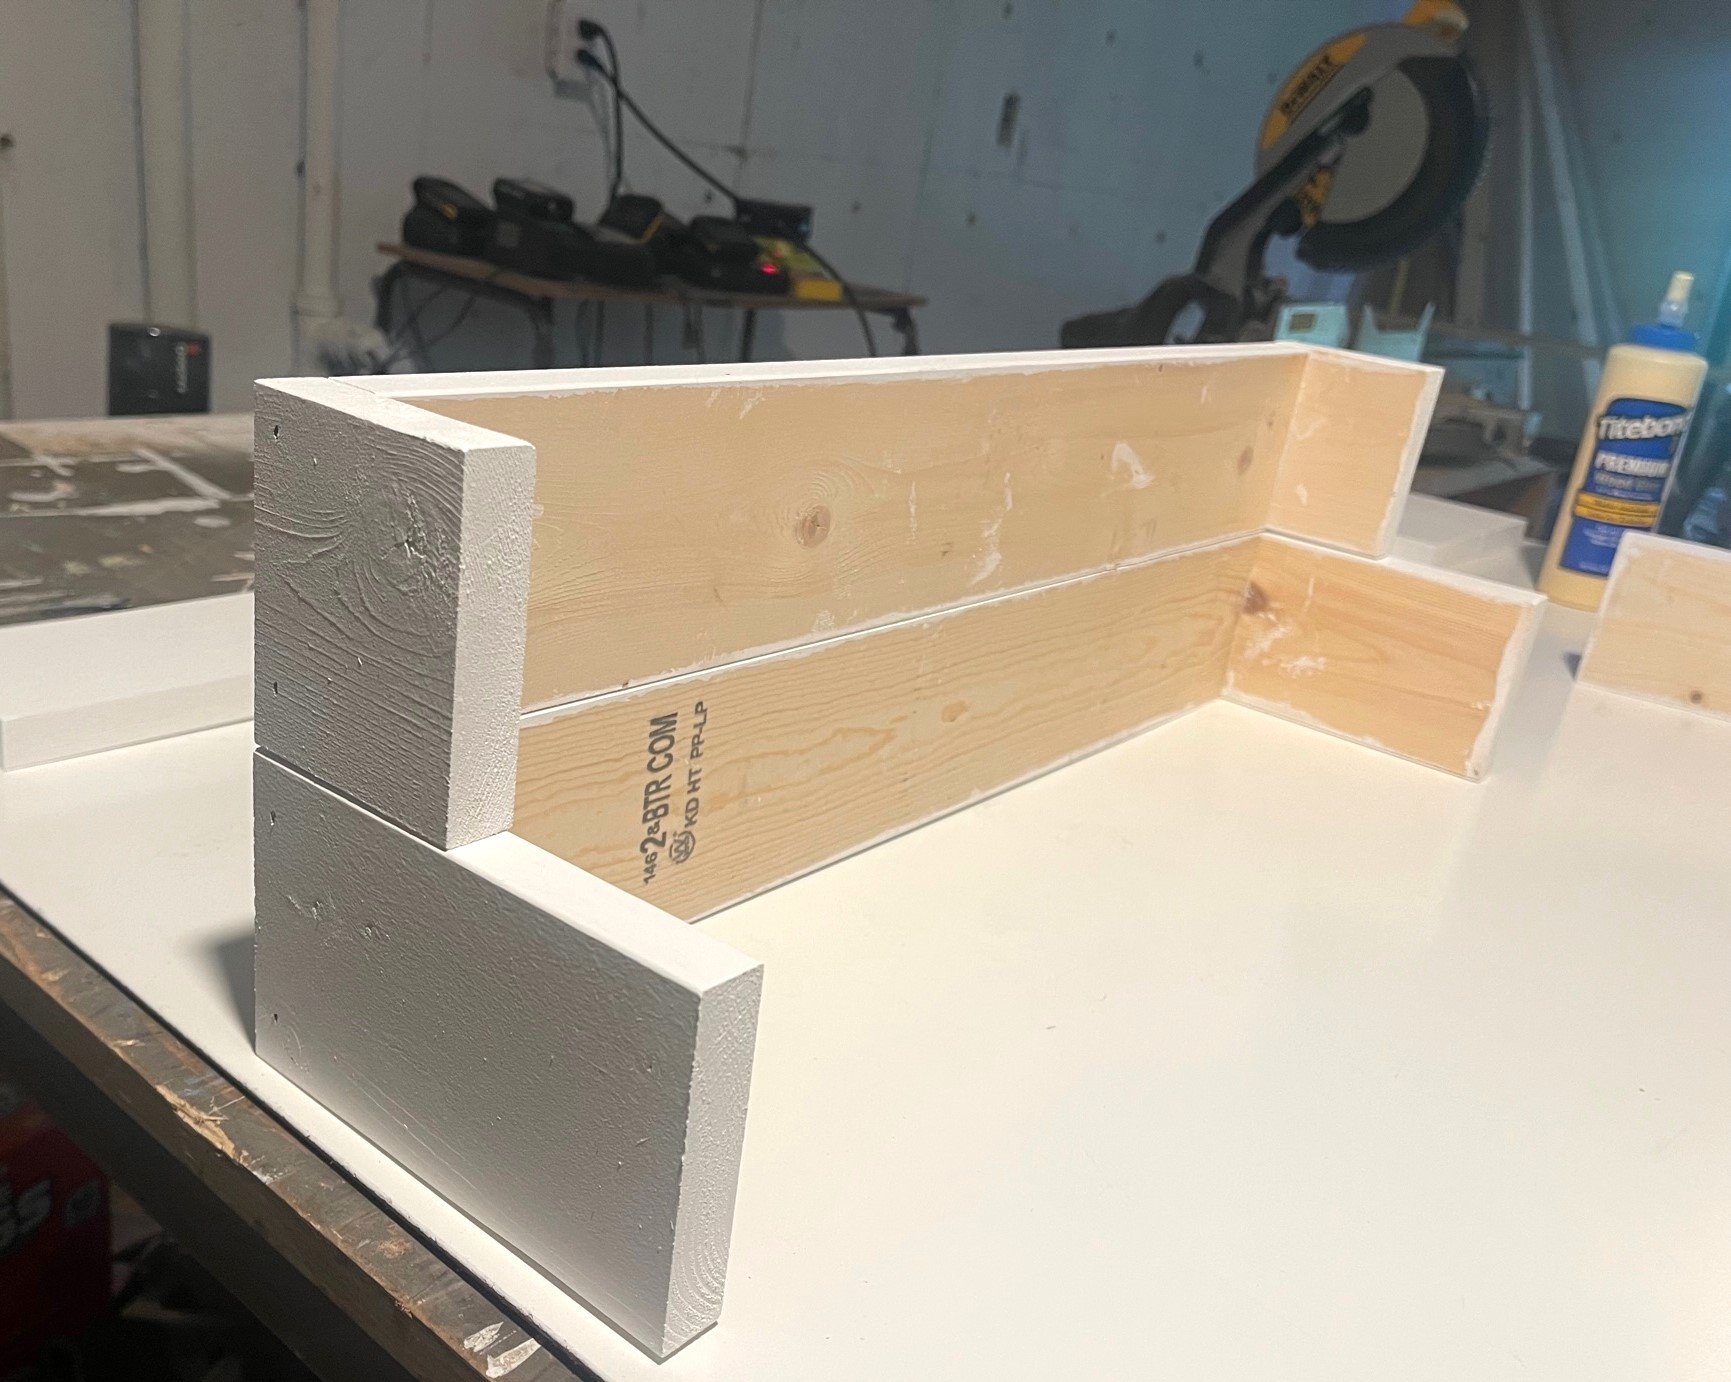
Attach the bases together with three 1-1/4" brad nails and glue per corner.
Adjust for square.
Step 2
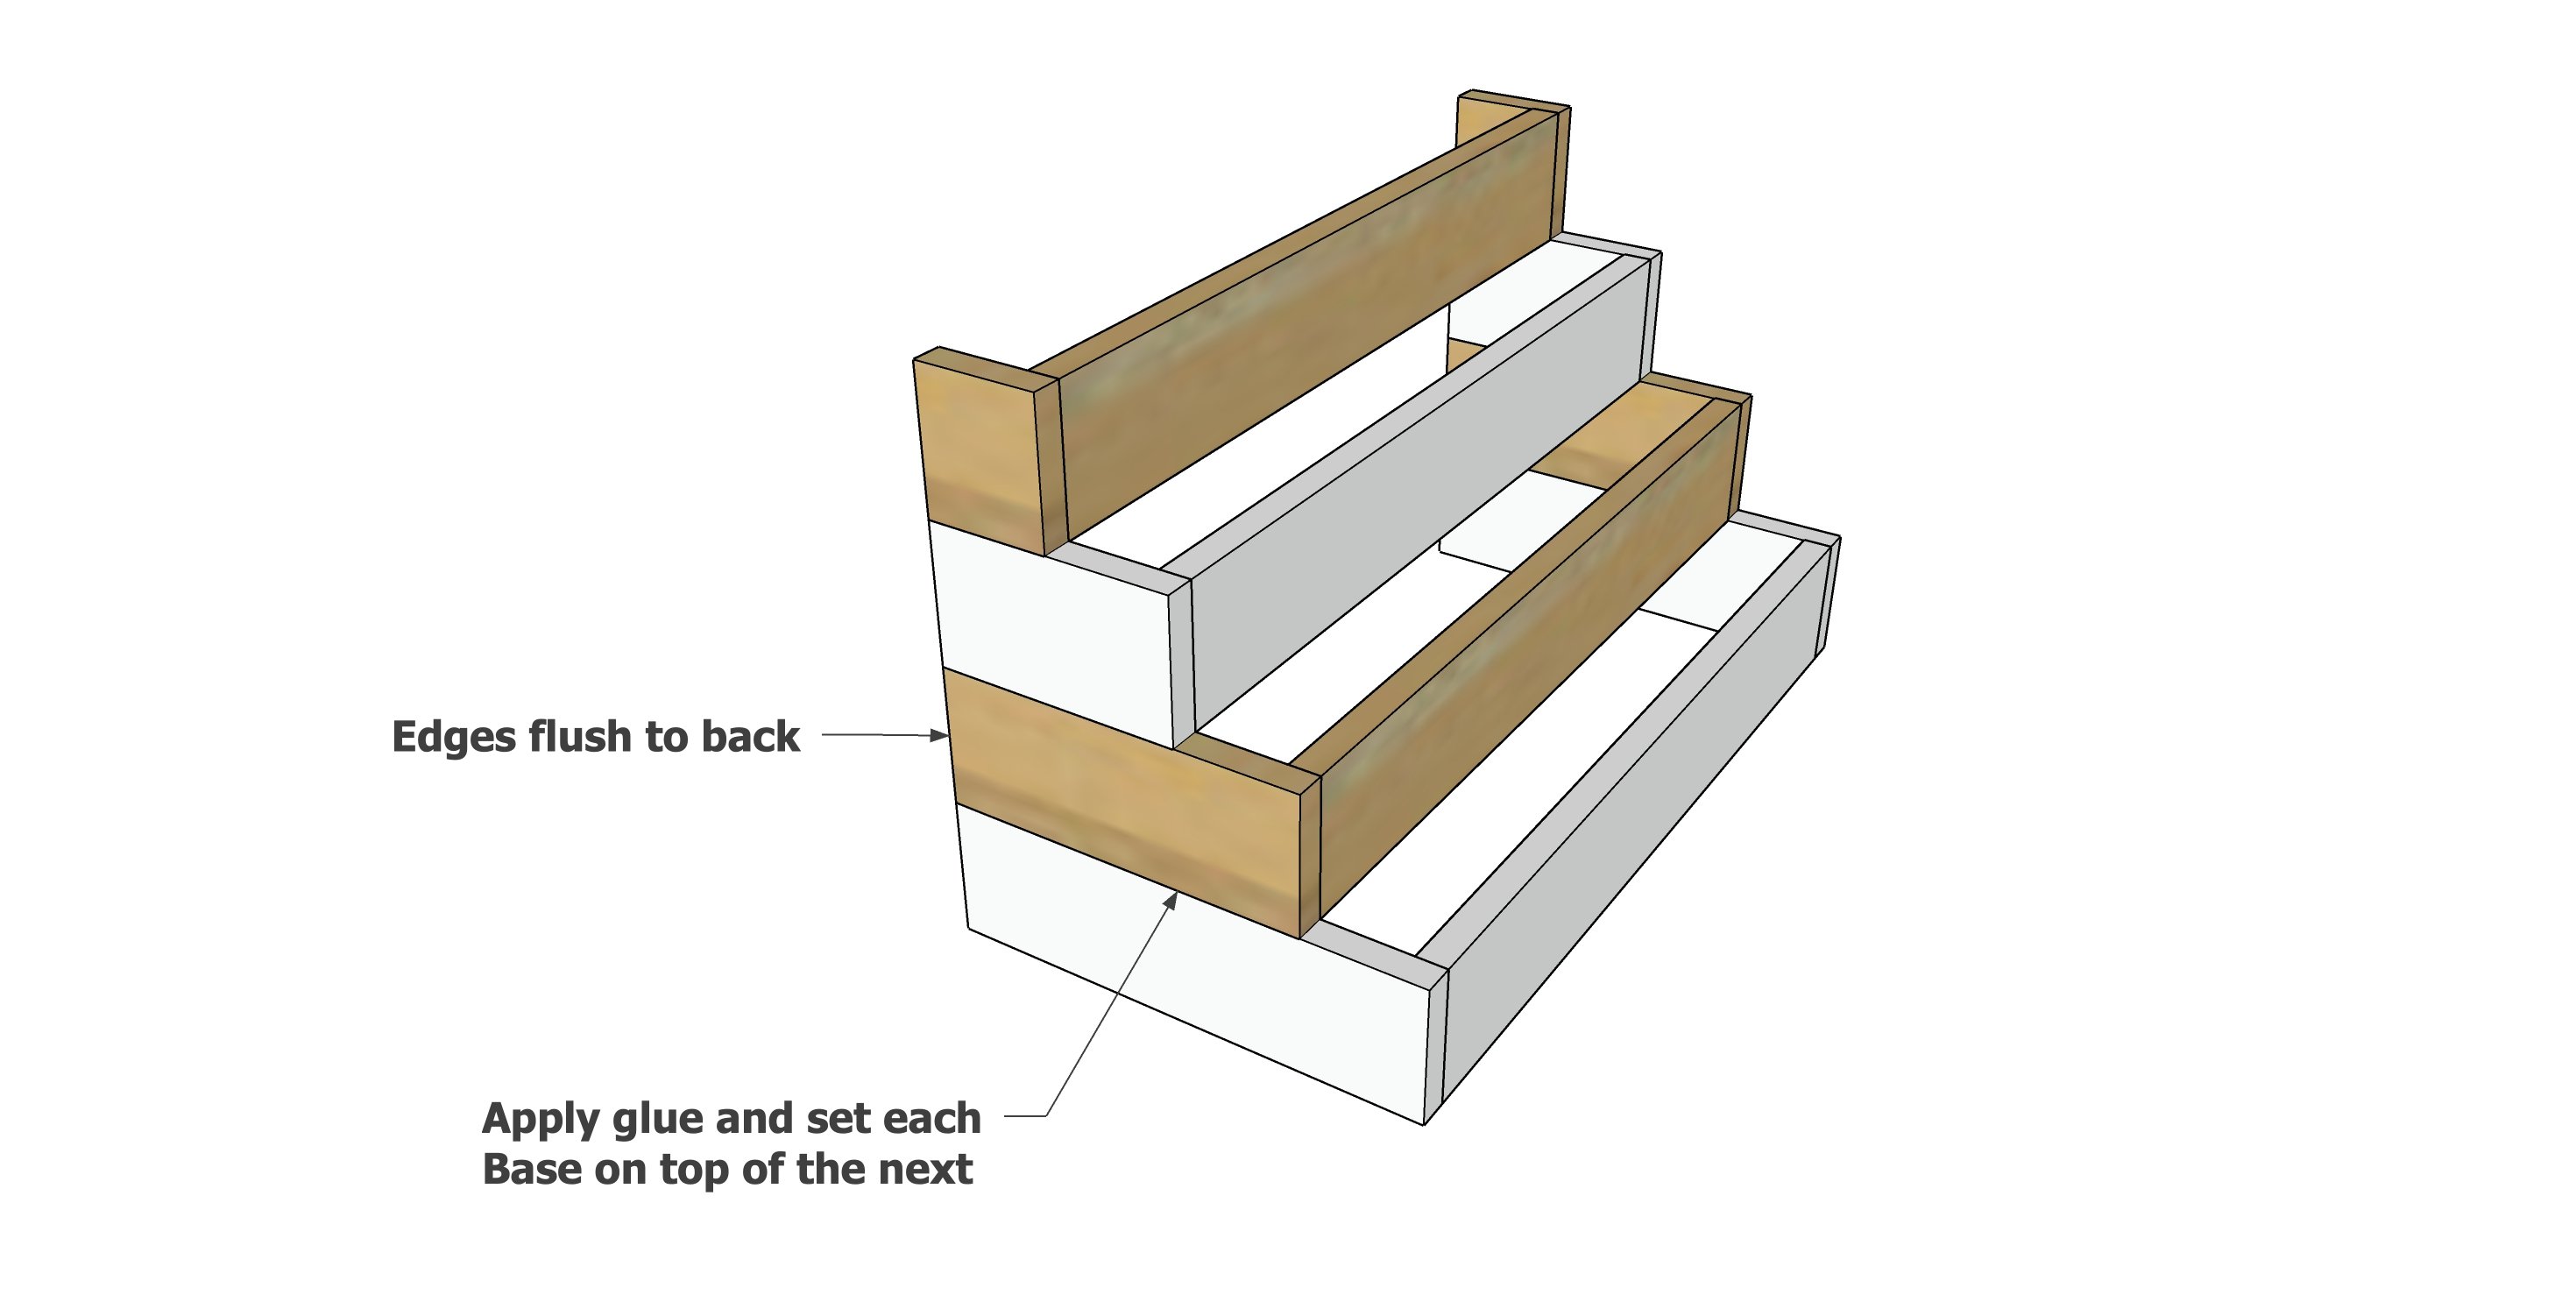
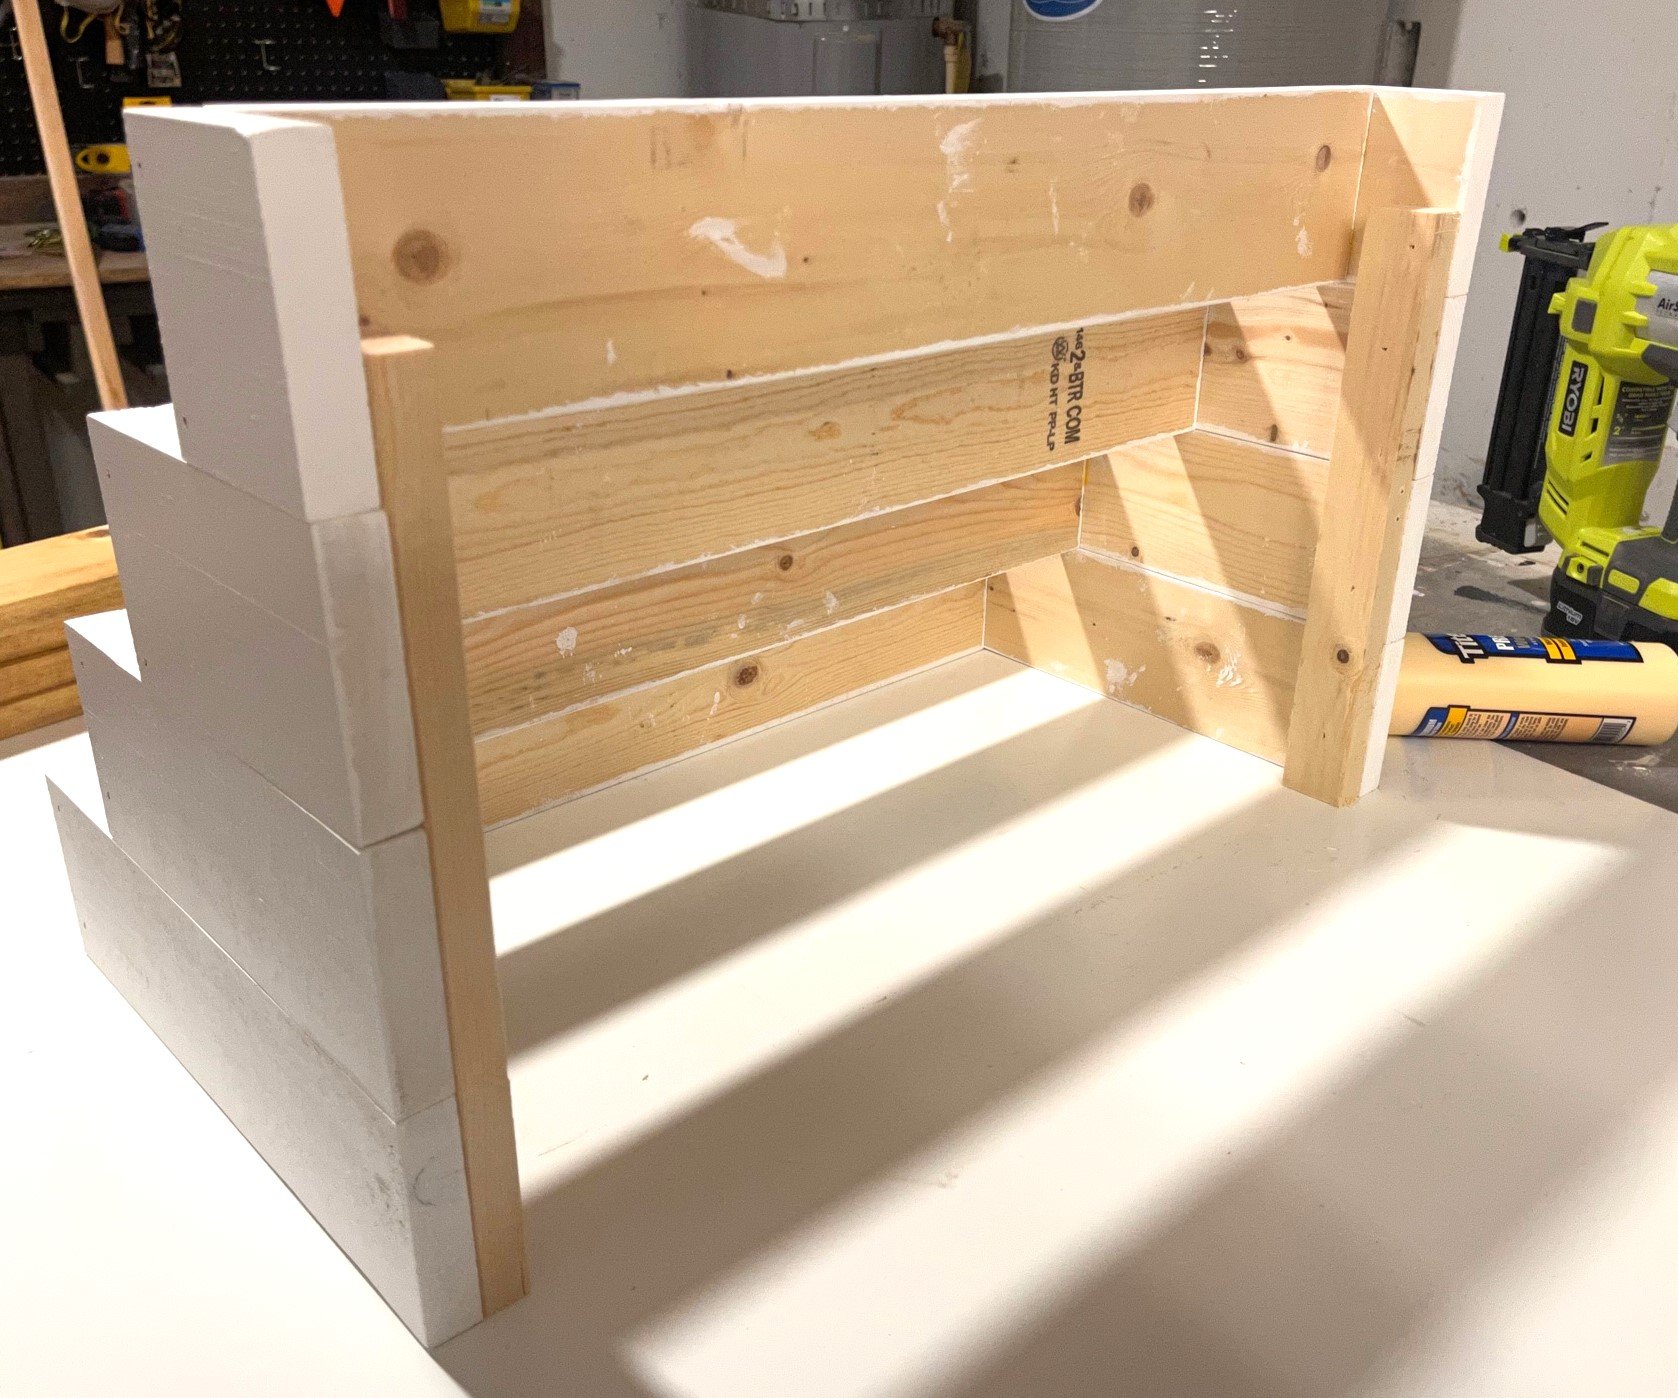
Apply glue to the top edges of the biggest base.
Set the next biggest base on top.
Repeat for the next two bases.
Make sure the sides are flush at the back and lined up.
Step 3
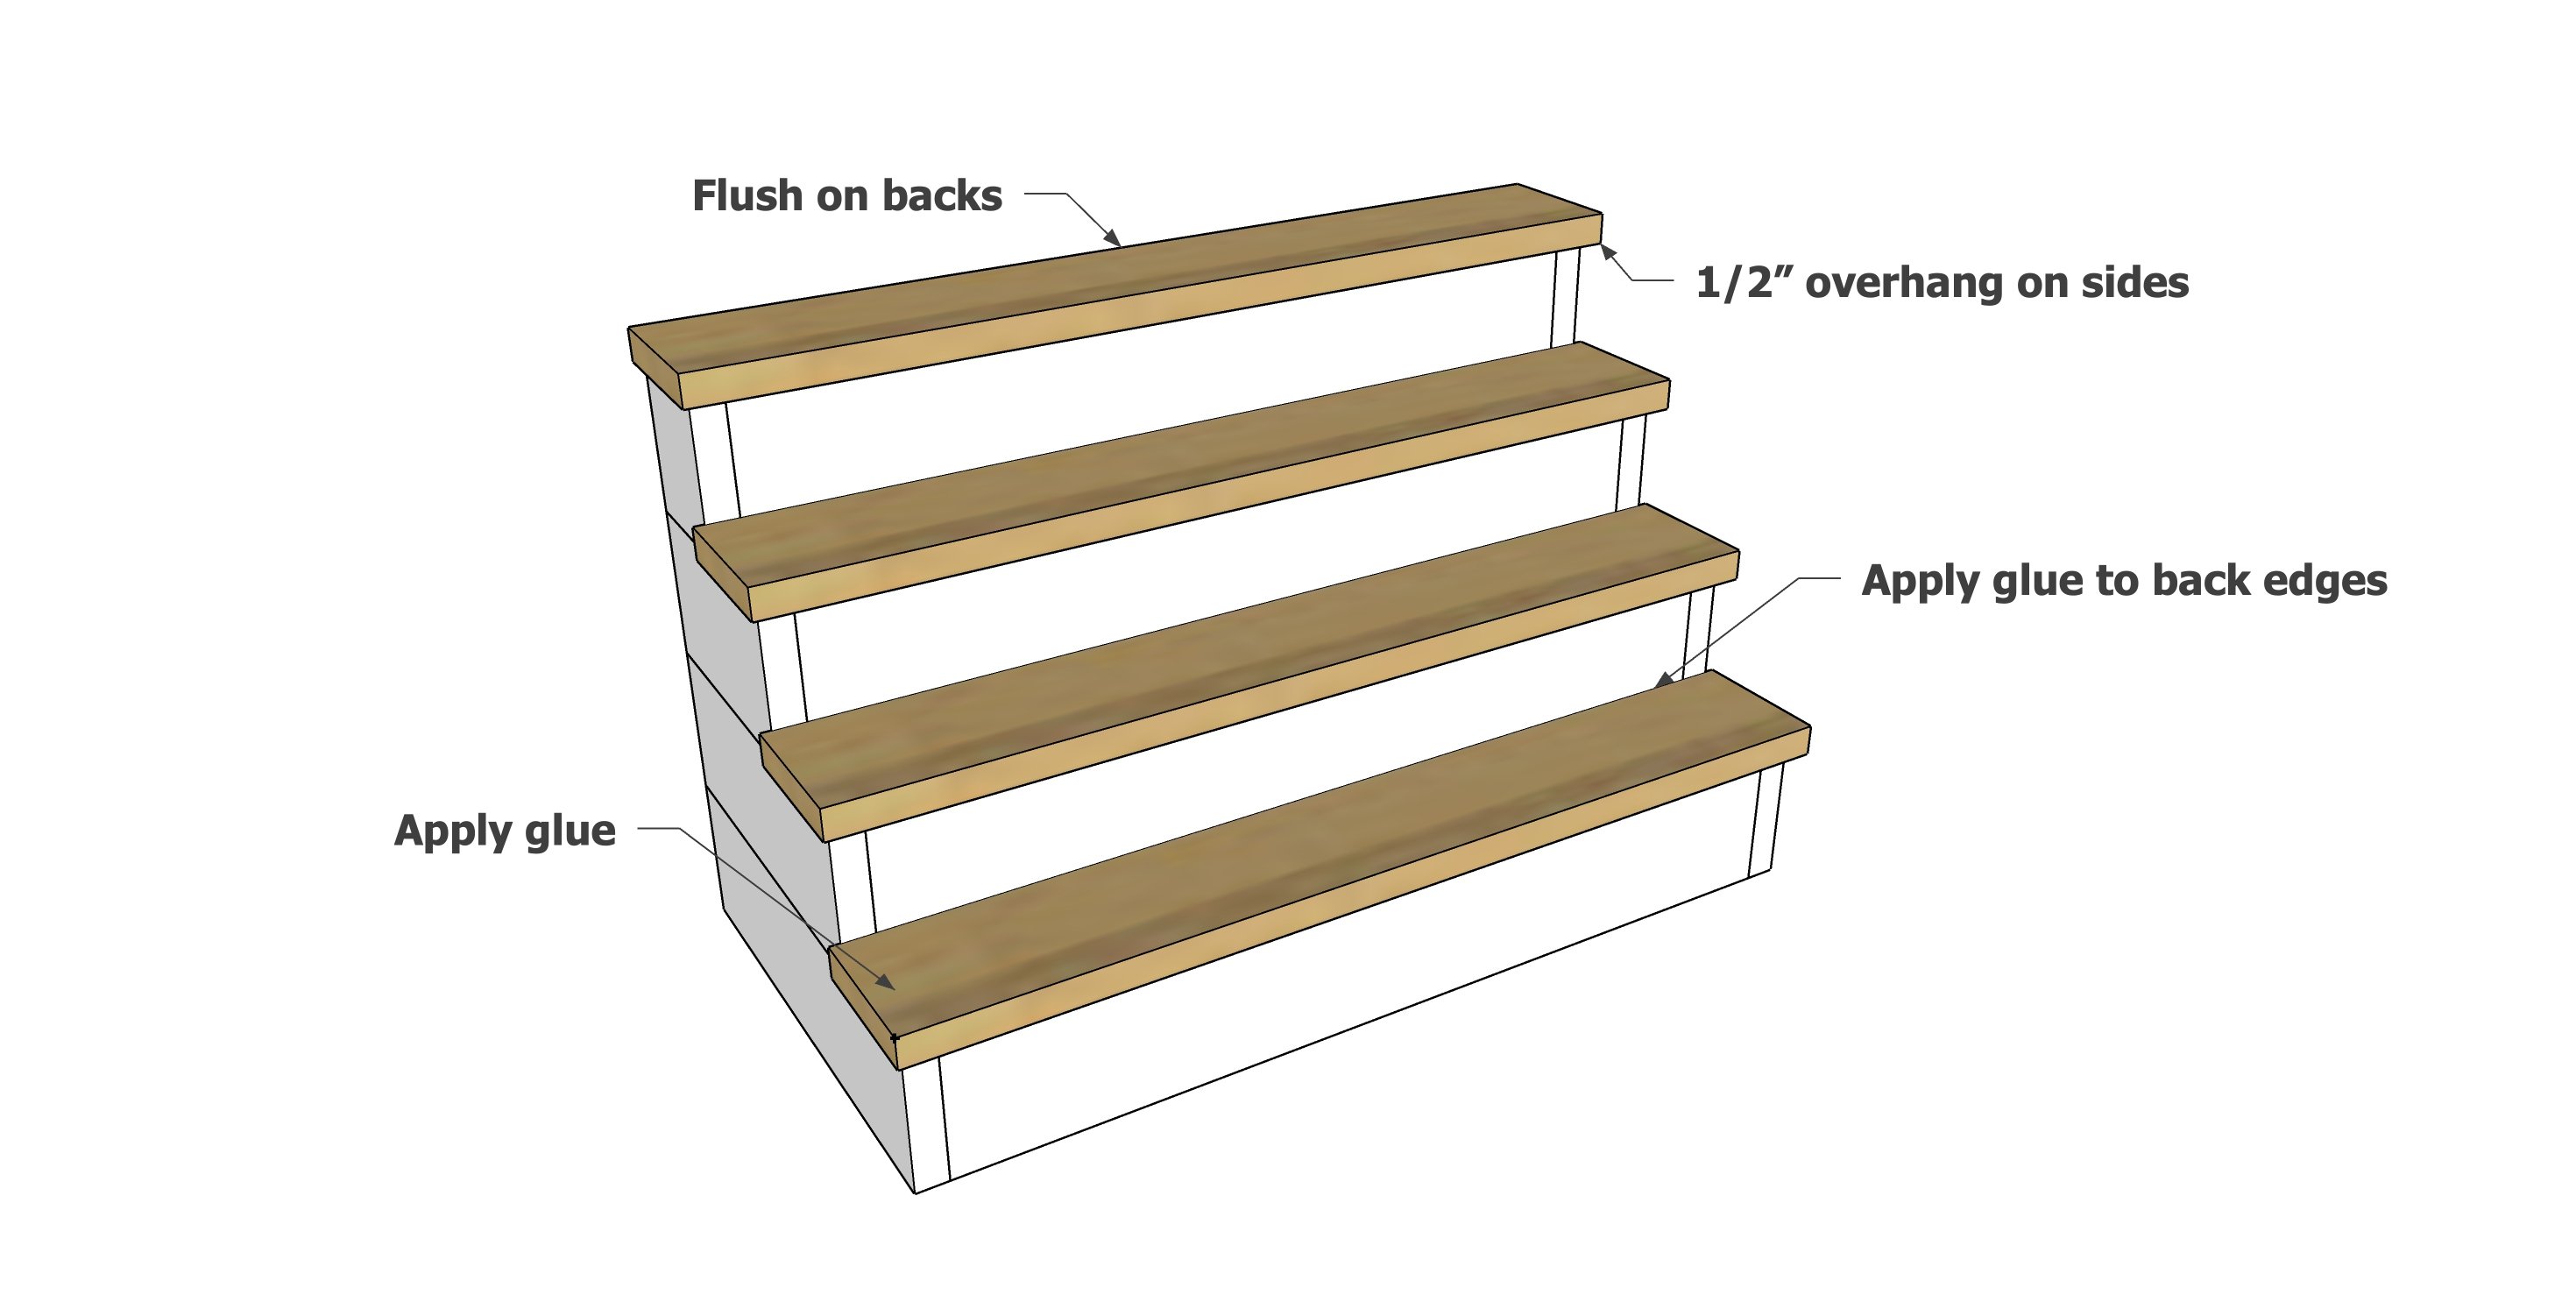
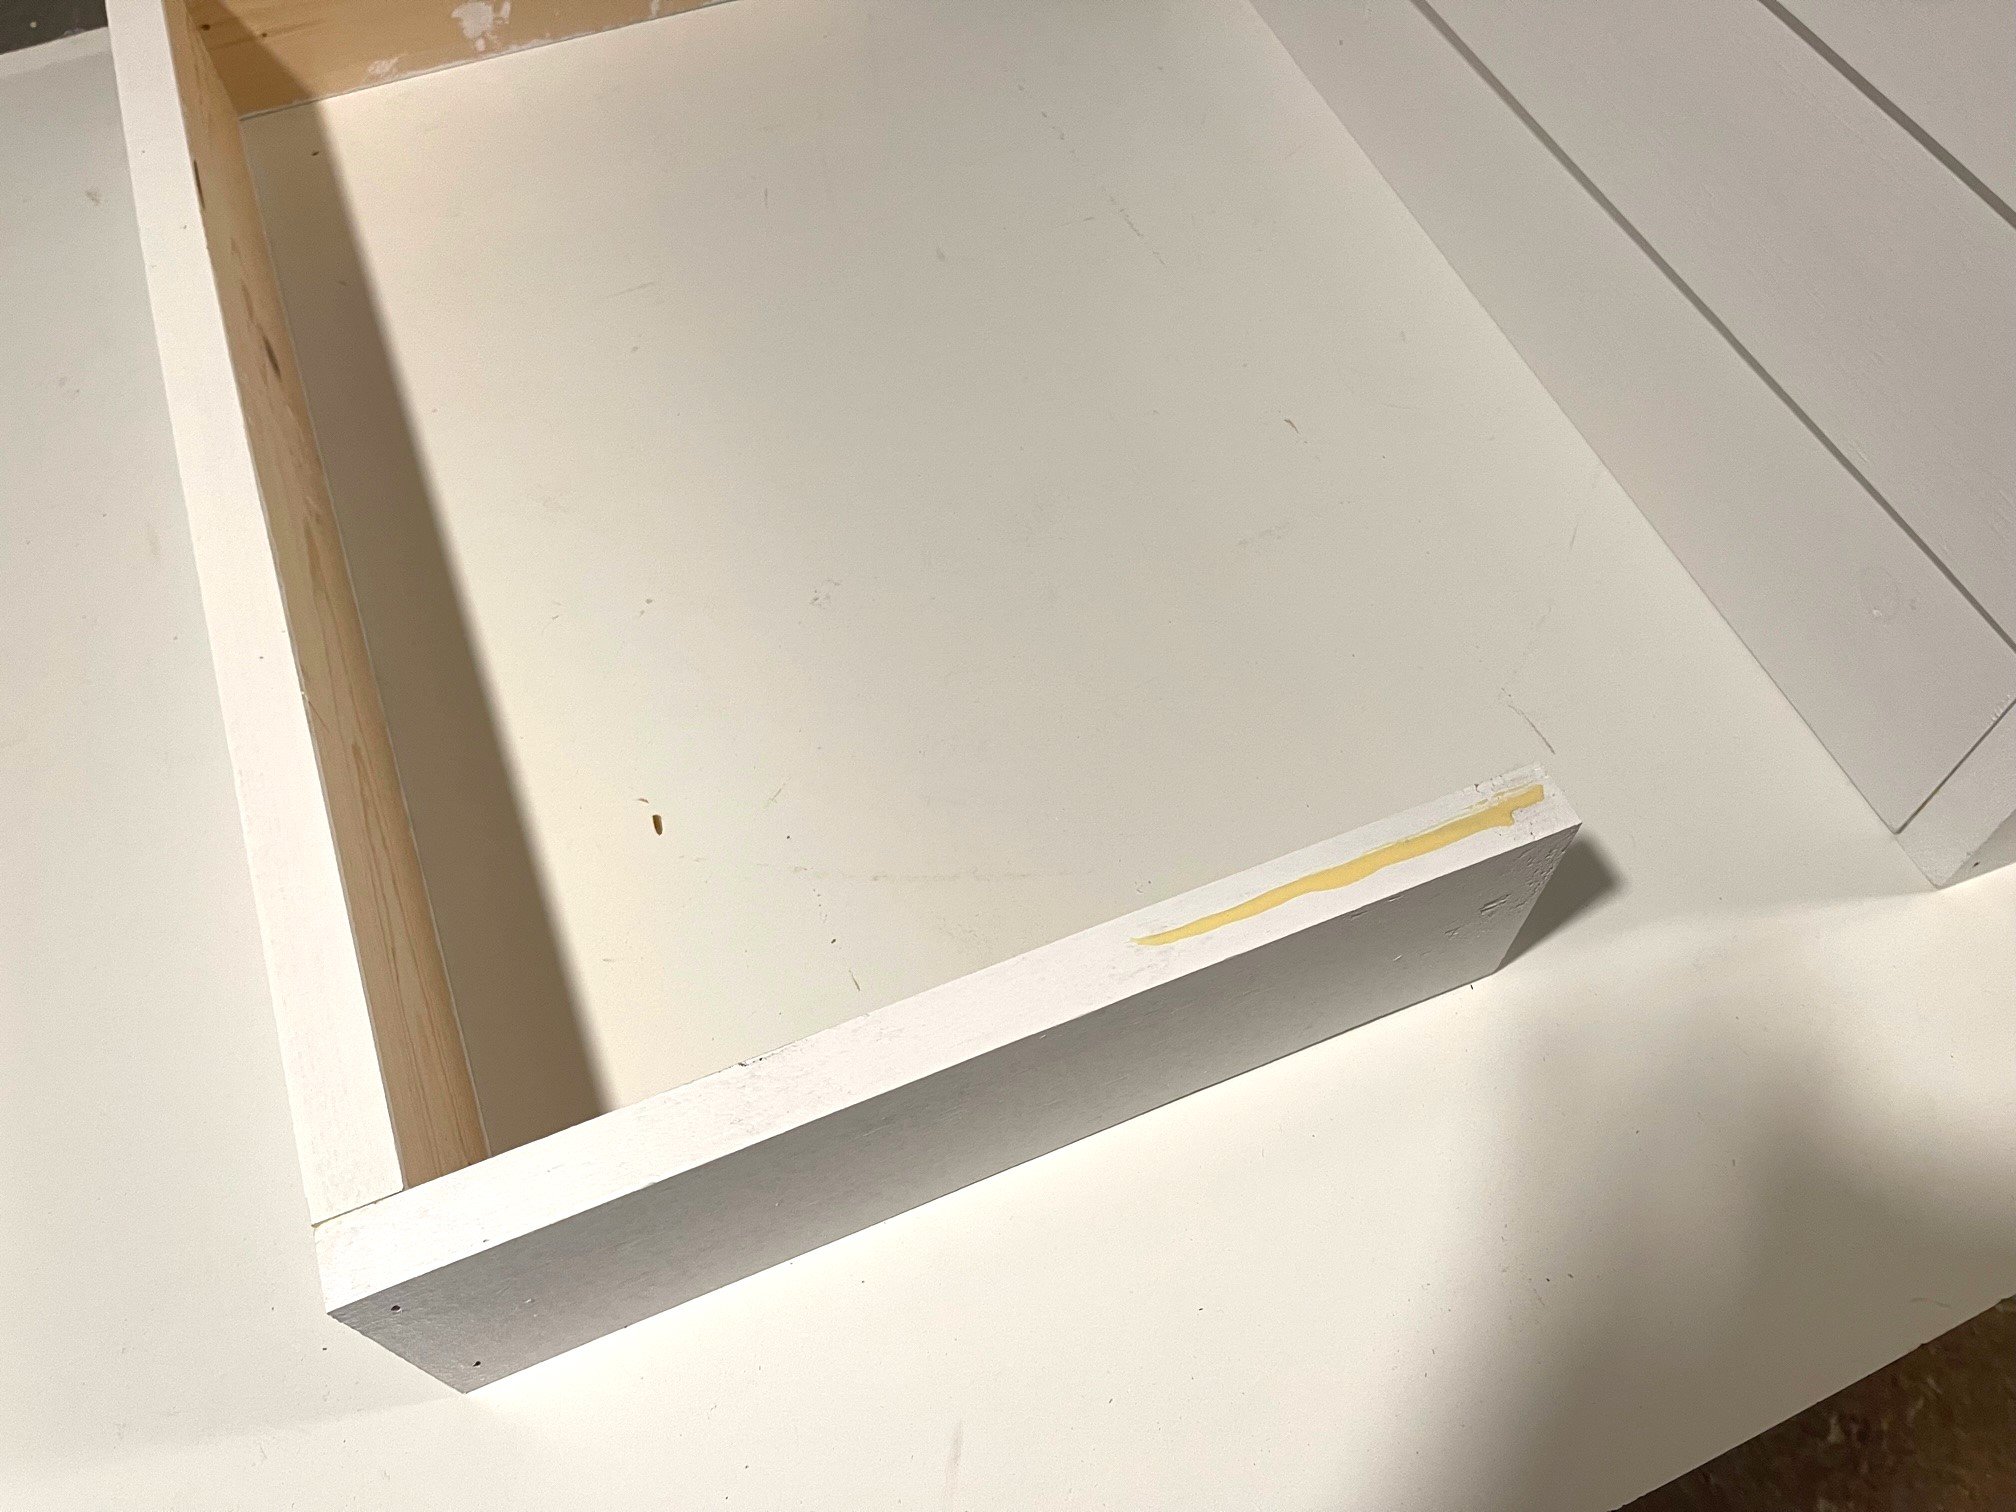
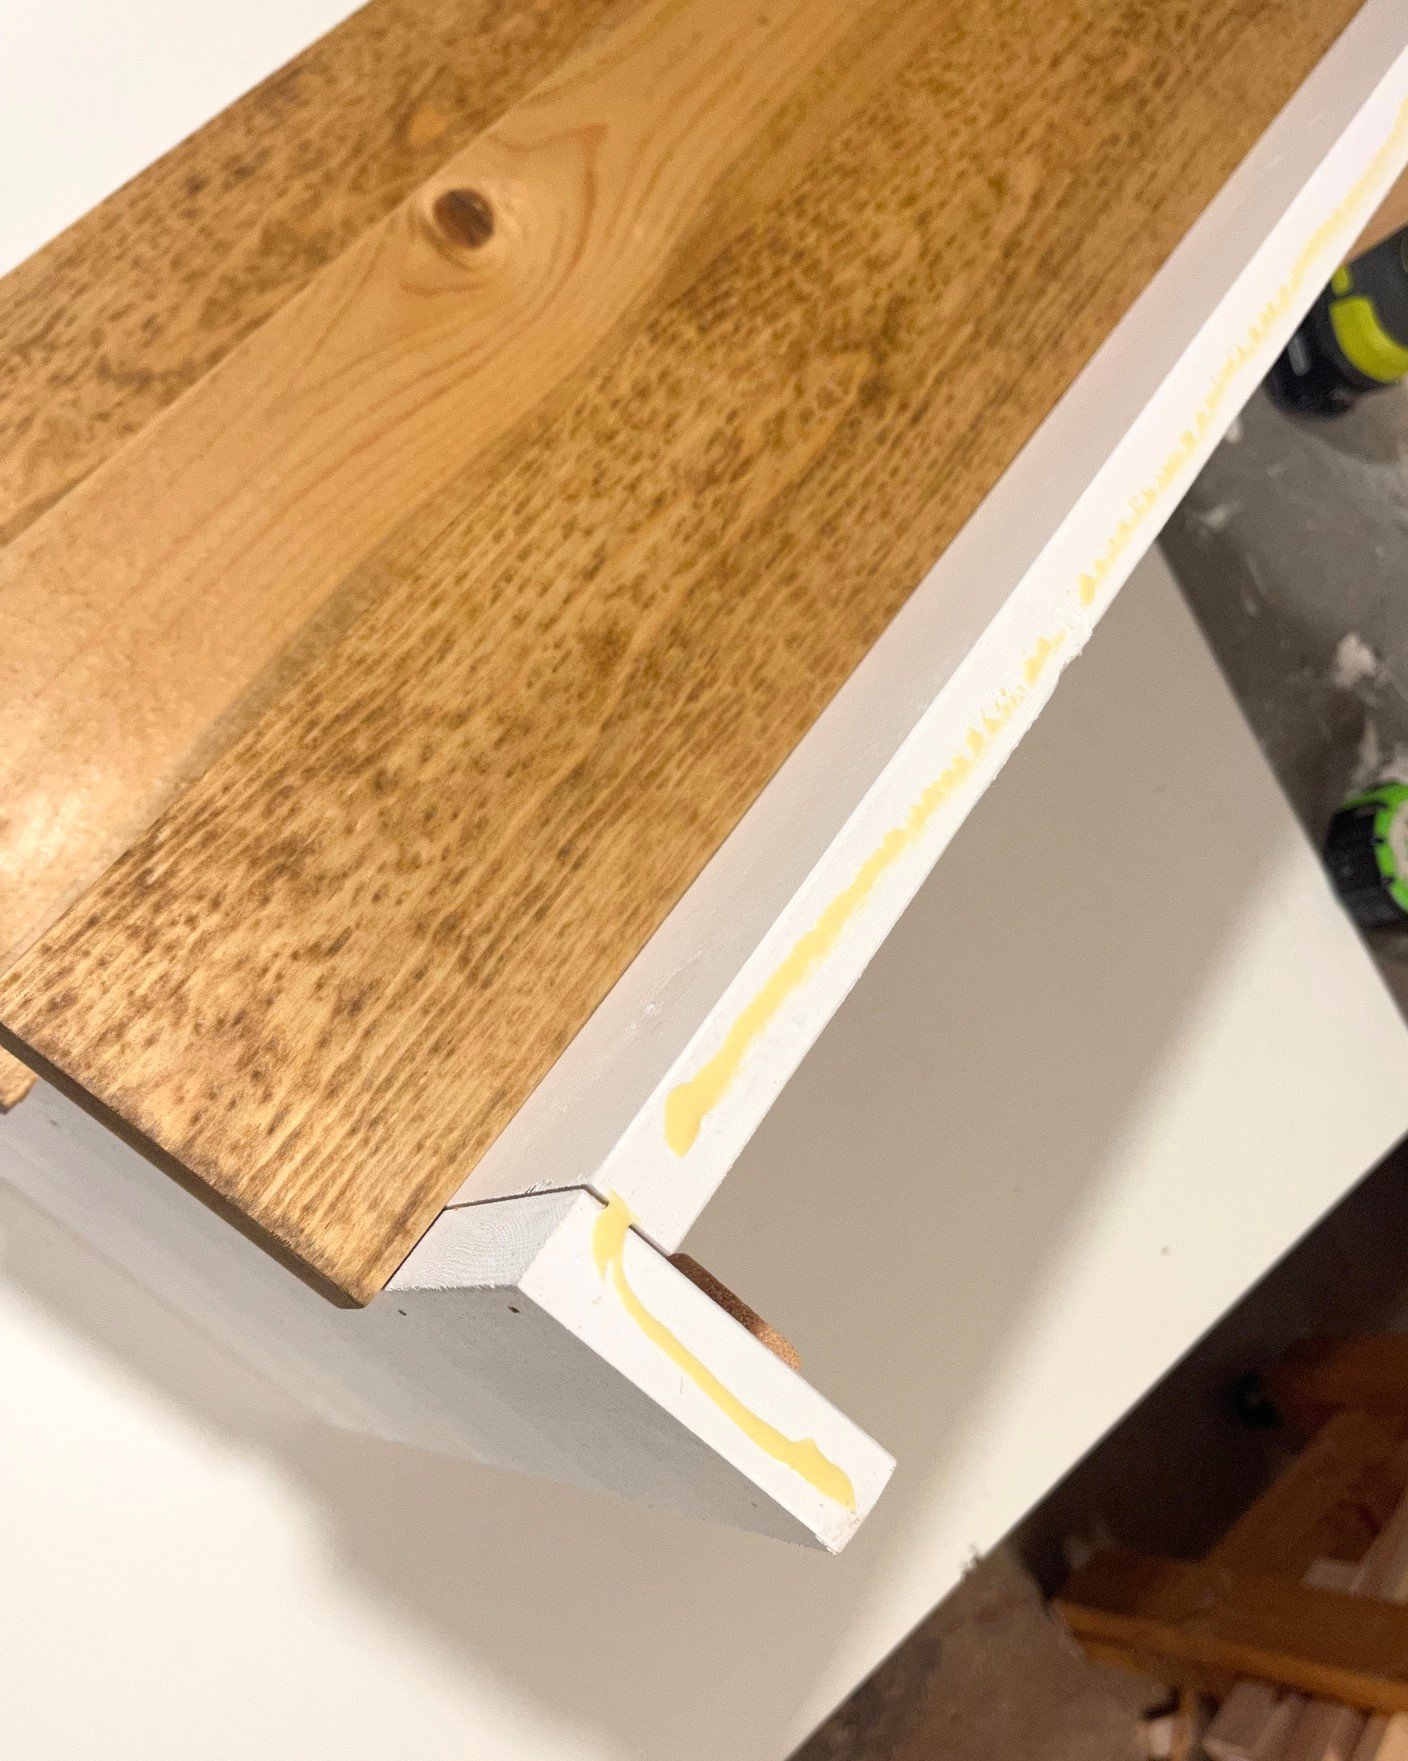
Apply glue to the back edges of the "treads"
Set treads on top of the bases, with even overhangs on the sides and flush to the backs.
Attach treads with 1-1/4" brad nails and wood glue.
Step 4
From the back, further secure the treads with 1-1/4" brad nails and wood glue.
An optional 1x2 can be added for additional support.