
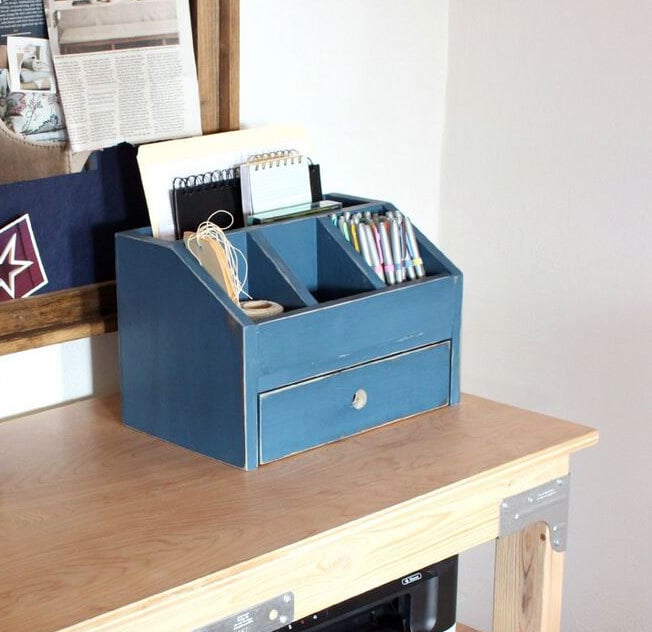

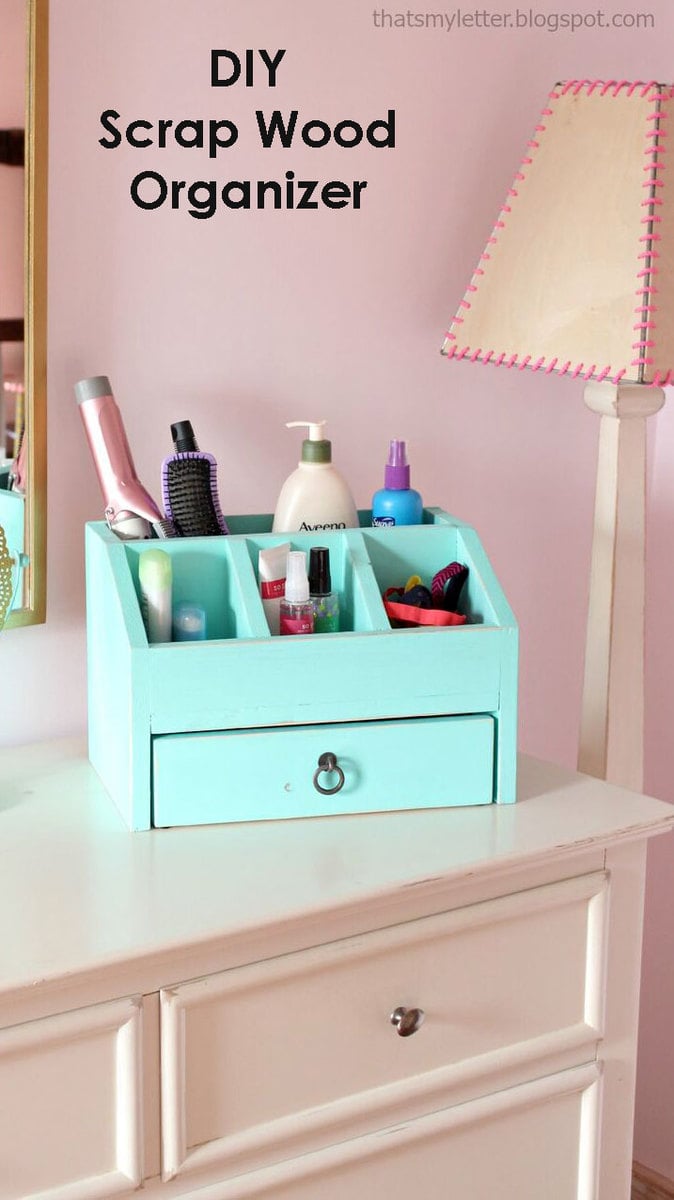
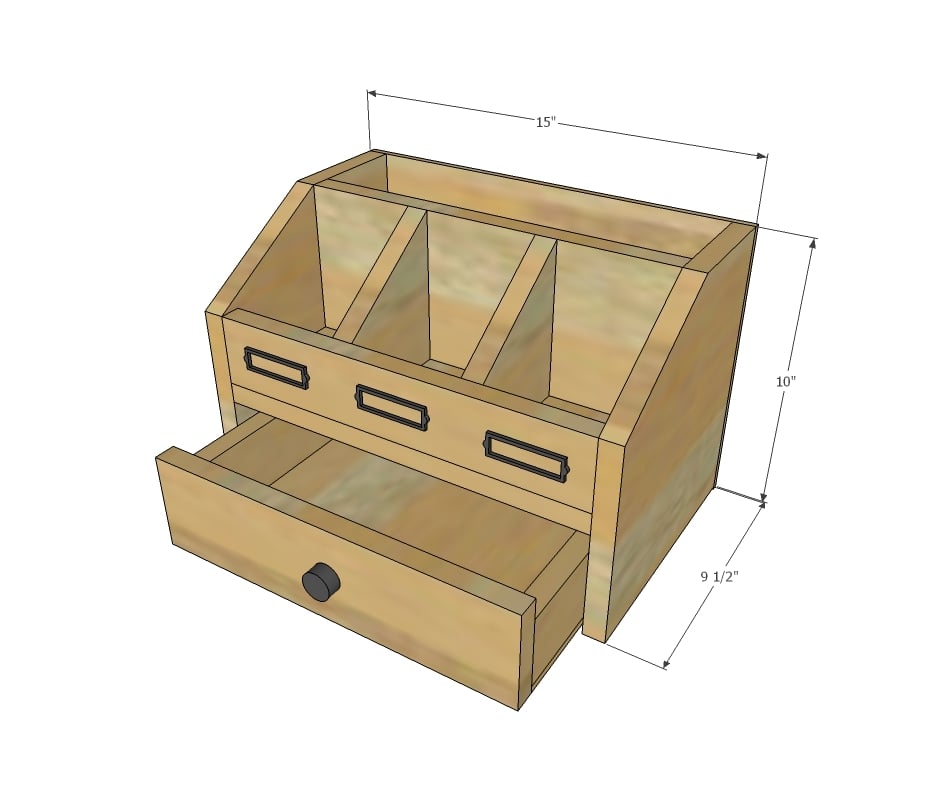
Use scrap wood to build a desktop or vanity organizer with cubbies and a drawer!
Hello, Happy Friday. Happy Handbuilt Holiday 2015!

Jaime from That's My Letter and I have been having the time of our lives getting you new gift plans each week. Don't judge, everyone's gotta have something they are giddy excited about, and for us, it doesn't get any better than creating projects that we hope you love, and most importantly, make and give.
I love that today's project can be gifted to such a wide range of friends and family!

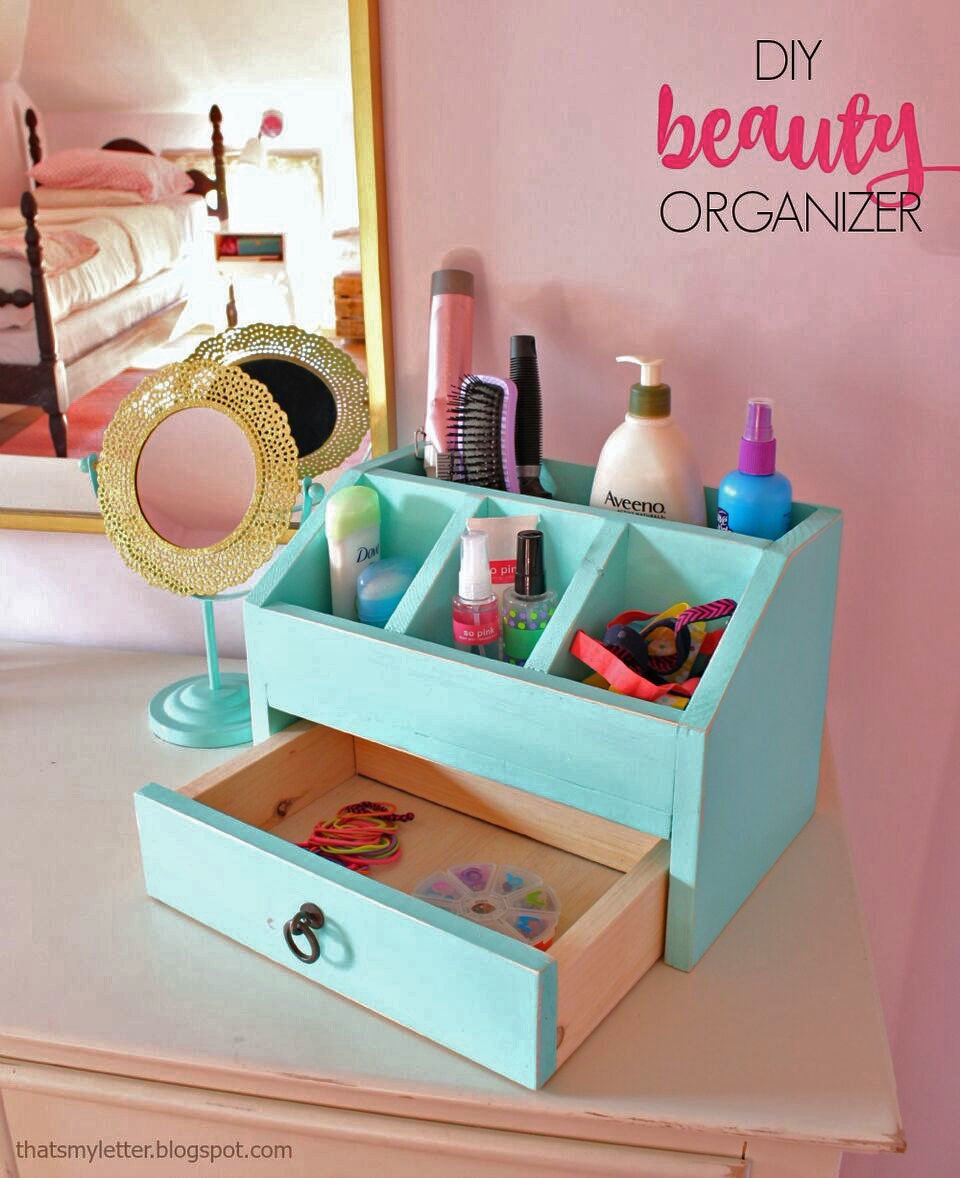
Our original intention was to create a beauty organizer for hair tools and accessories.

You could add a 1x4 to the top back and drill holes out for your curling iron and hair dryer too (It's sized 3-1/2" wide just for that reason).
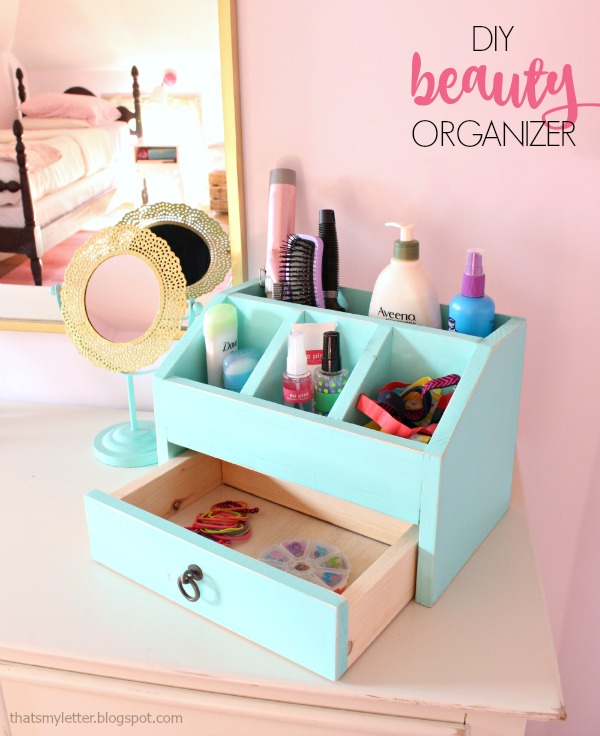
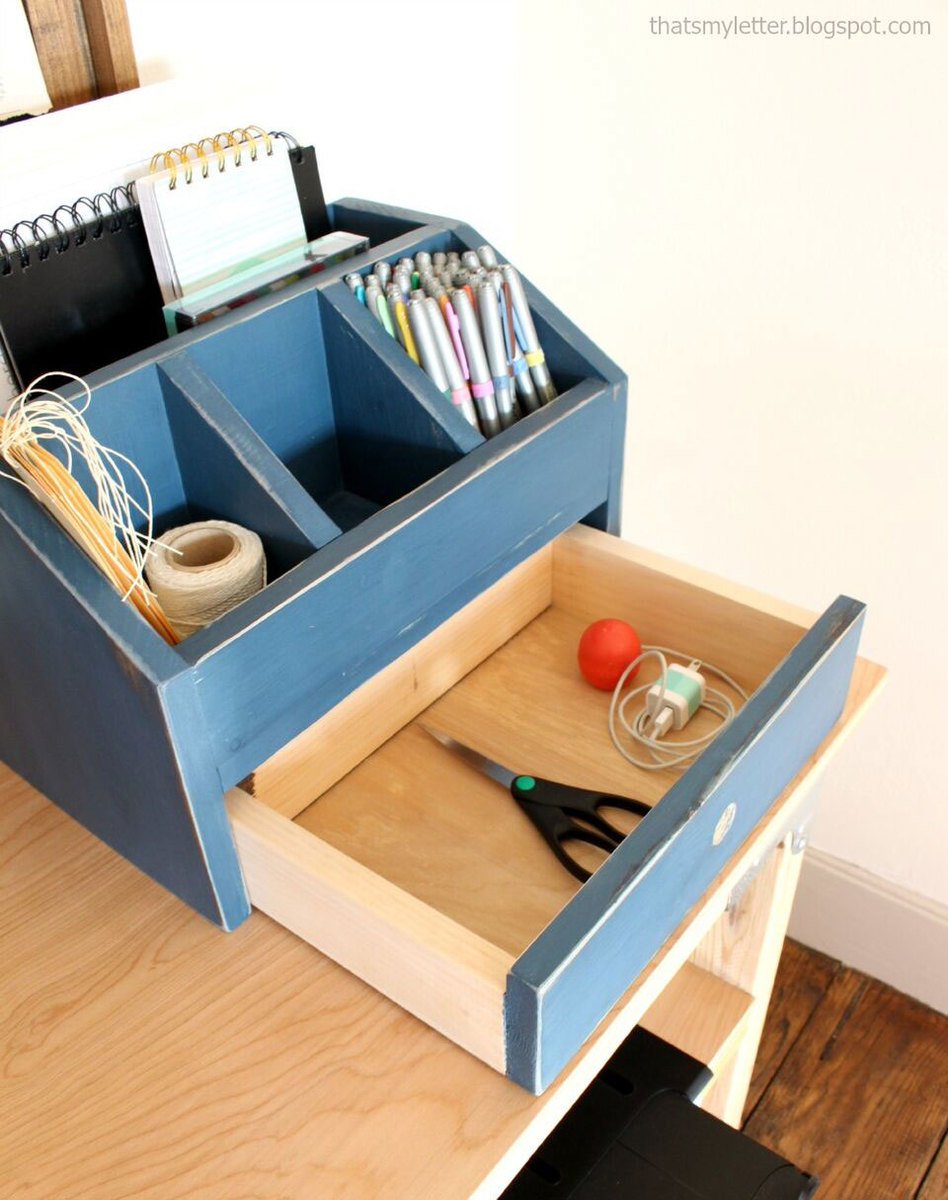
And the drawer is perfect for hair ties and headbands and clips and more.

But you could also use it as an office organizer, with the hair tool slot now becoming the perfect mail sorter or magazine file.

And the drawer could keep other things within easy reach but out of sight. You all are so crafty - you could even wire in cell phone chargers into the cubbies.

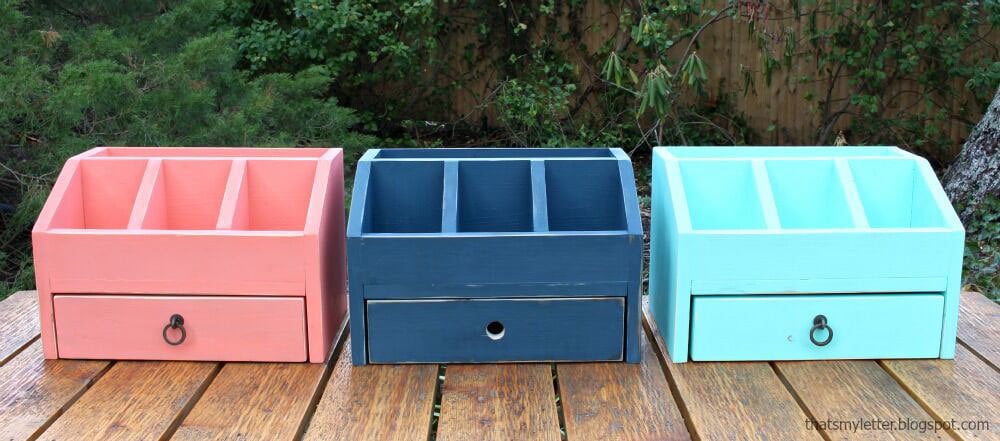
Jaime loved this project so much, that she made three! And then two more are in the works!
So what do you say? Want to make it too? It's all simple building with 1x boards.
Go visit Jaime now to check out her building post with more pictures and details.
Then get the free plans below (if this is the homepage, click READ MORE below).
Thank you and Happy Holidays!
XO Ana
CLICK HERE TO READ JAIME'S BUILDING POST
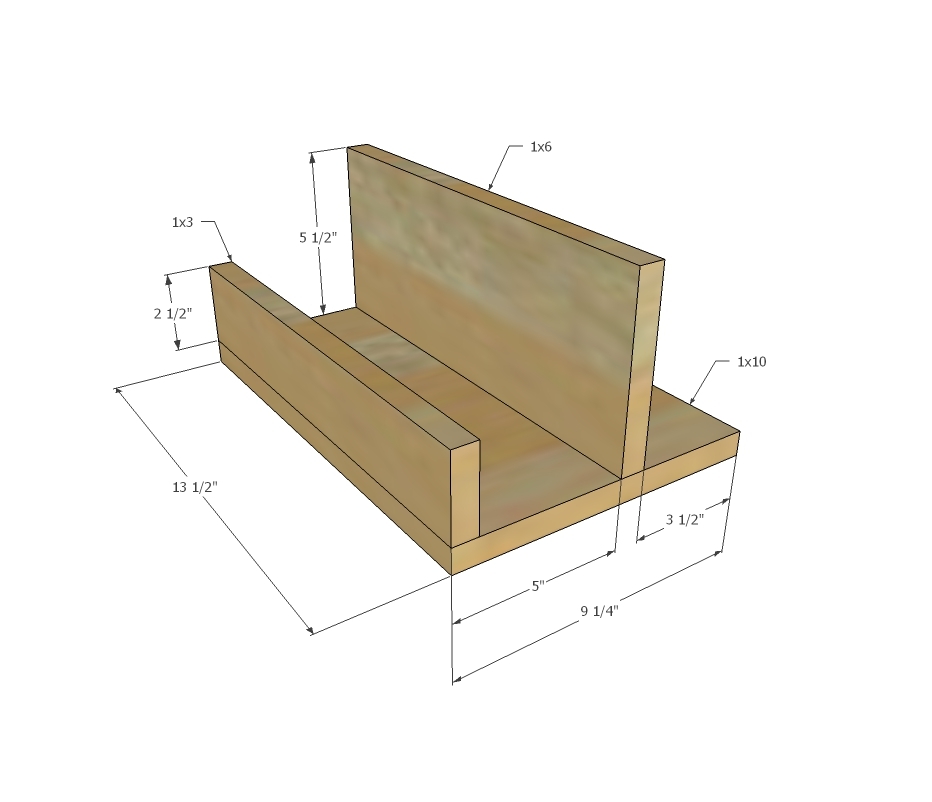
Preparation
34" of 1x10
45" of 1x3
18" of 1x6
14" of 1x4
1/4" plywood scraps 8-1/2" x 13-1/4" and 15" x 10"
1 - 1x10 @ 13-1/2" (middle shelf)
1 - 1x3 @ 13-1/2" (front trim)
1 - 1x6 @ 13-1/2" (center divider)
2 - 1x10 @ 10" (sides)
2 - 1x6 @ 4-1/4" (angled dividers cut down in later steps)
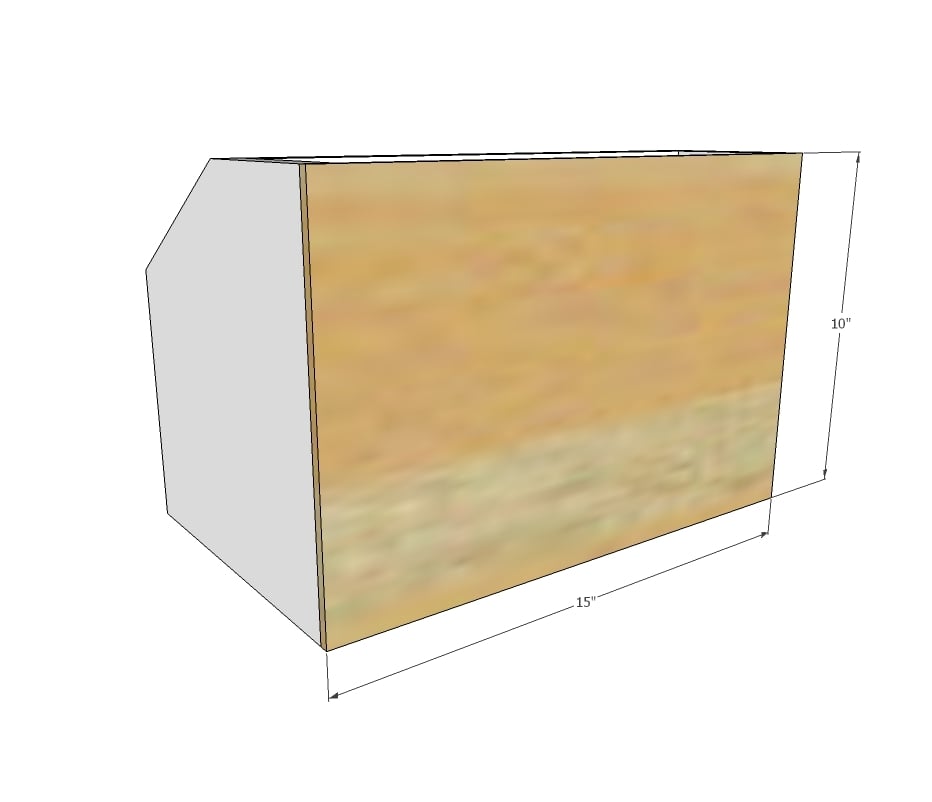
1 - 1/4" plywood @ 15" x 10" (back)
2 - 1x3 @ 8-1/2" (drawer sides)
1 - 1x3 @ 11-3/4" (drawer back)
1 - 1/4" plywood @ 8-1/2" x 13-1/4" (drawer bottom)
1 - 1x4 @ 13-1/4" (drawer front)


Please read through the entire plan and all comments before beginning this project. It is also advisable to review the Getting Started Section. Take all necessary precautions to build safely and smartly. Work on a clean level surface, free of imperfections or debris. Always use straight boards. Check for square after each step. Always predrill holes before attaching with screws. Use glue with finish nails for a stronger hold. Wipe excess glue off bare wood for stained projects, as dried glue will not take stain. Be safe, have fun, and ask for help if you need it. Good luck!
Instructions
Step 1
Use 1-1/4" nails and glue to attach divider and front trim to shelf bottom.
Step 2
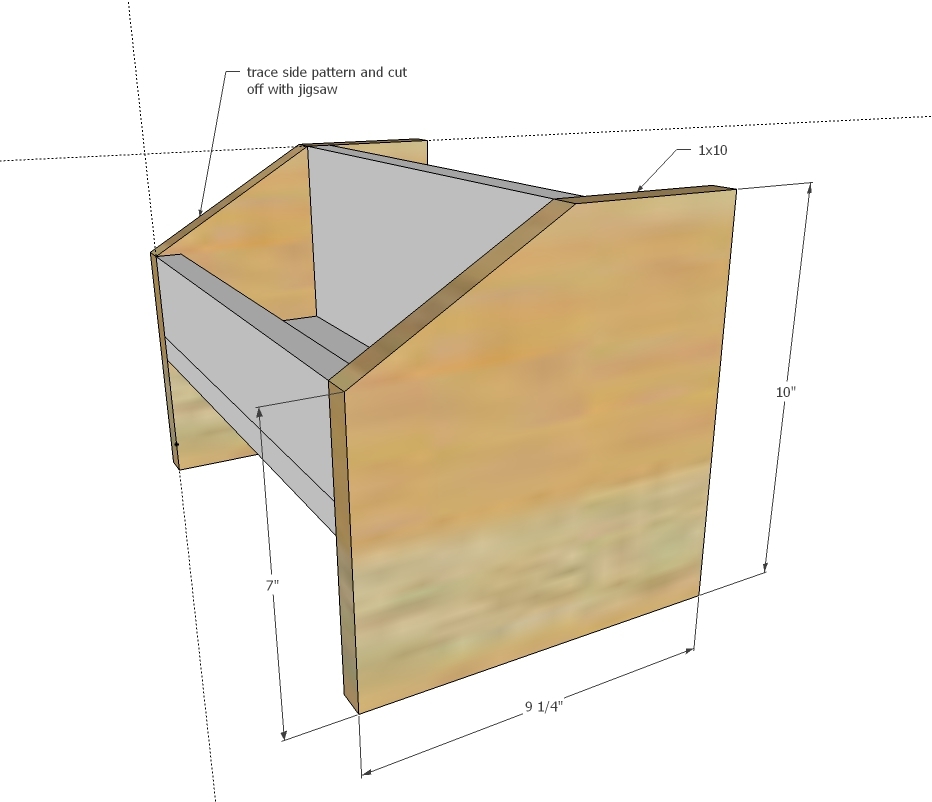
Cut sides off the sides to match the divider piece and attach with 1-1/4" nails and glue.
Step 3

Carefully cut angle off divider pieces, clamping to workbench and cutting. Attach with 1-1/4" nails and glue.
Step 4
Attach back with 3/4" nails and glue.
Step 5

Step 6
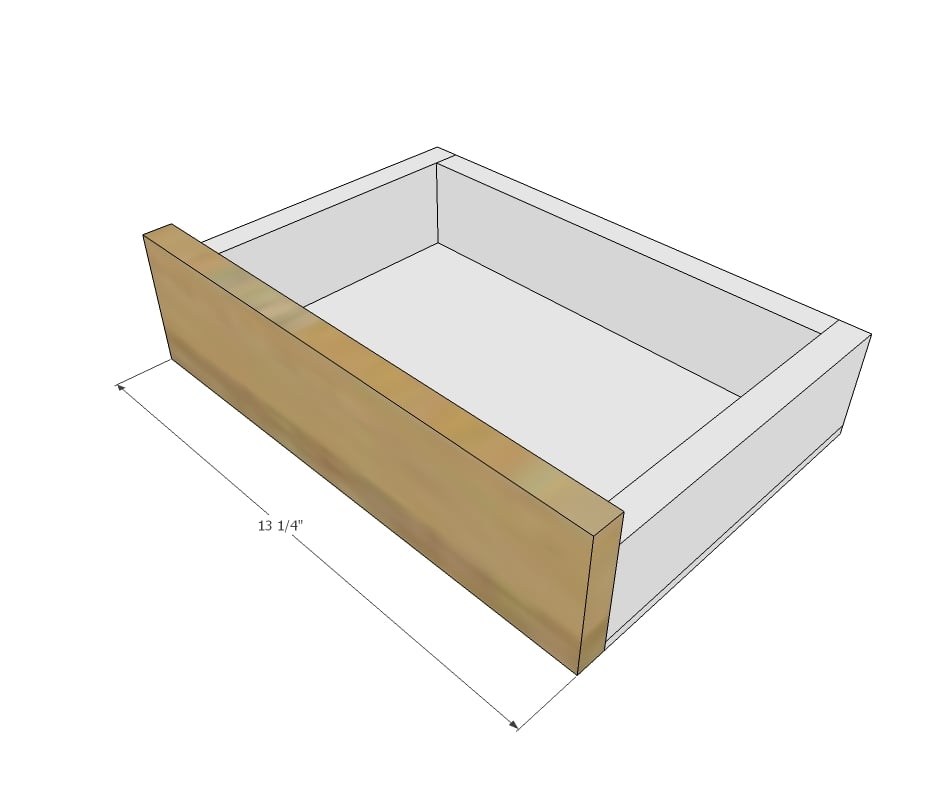
Attach drawer face to drawer sides with 1-1/4" nails.
It is always recommended to apply a test coat on a hidden area or scrap piece to ensure color evenness and adhesion. Use primer or wood conditioner as needed.

Comments
xbcraunx
Sat, 12/30/2017 - 17:21
Depth dimension discrepancy in plan diagrams
In the first diagram, the depth of the right-side organizer side panel is labeled as 9-1/2" while every other subsequent diagram specifies a depth of 9-1/4" for the organizer. I assume it's the latter, but just want to confirm and save myself a headache. Thanks.
xbcraunx
Sat, 12/30/2017 - 17:27
Depth dimension discrepancy in diagrams
The first diagram showing the depth (i.e. front-to-back) of the organizer's side panels is labeled as 9-1/2", while every other diagram shows the depth dimension as 9-1/4". I assume it's the latter, but want to save myself a headache. Thanks.