Easy Wall Mail or Magazine Bin Shelf

wall bins scrap wood
Difficulty
Beginner Projects
| Print this plan

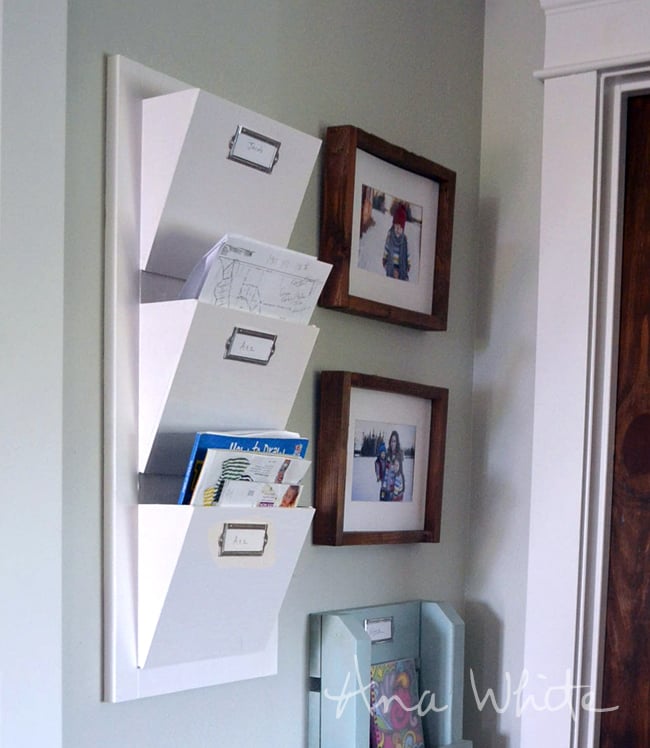
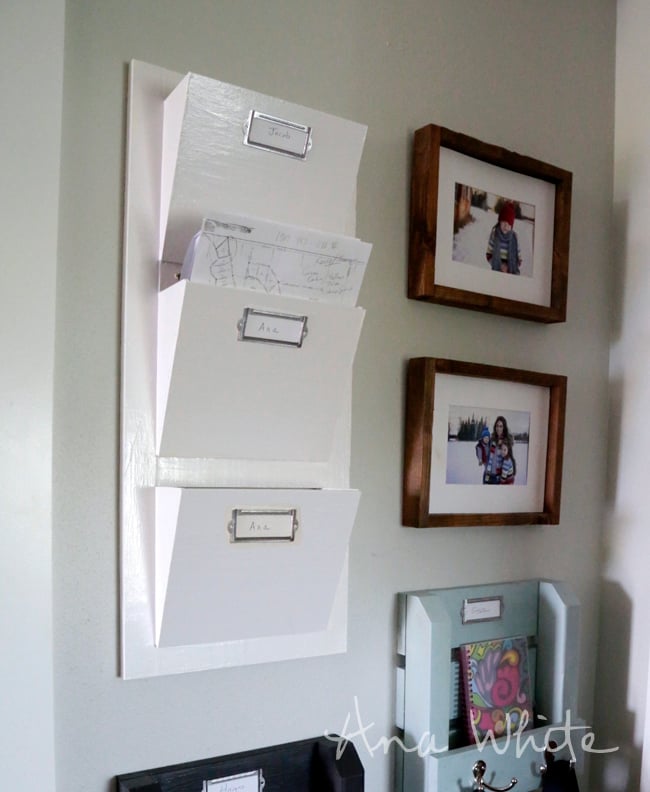
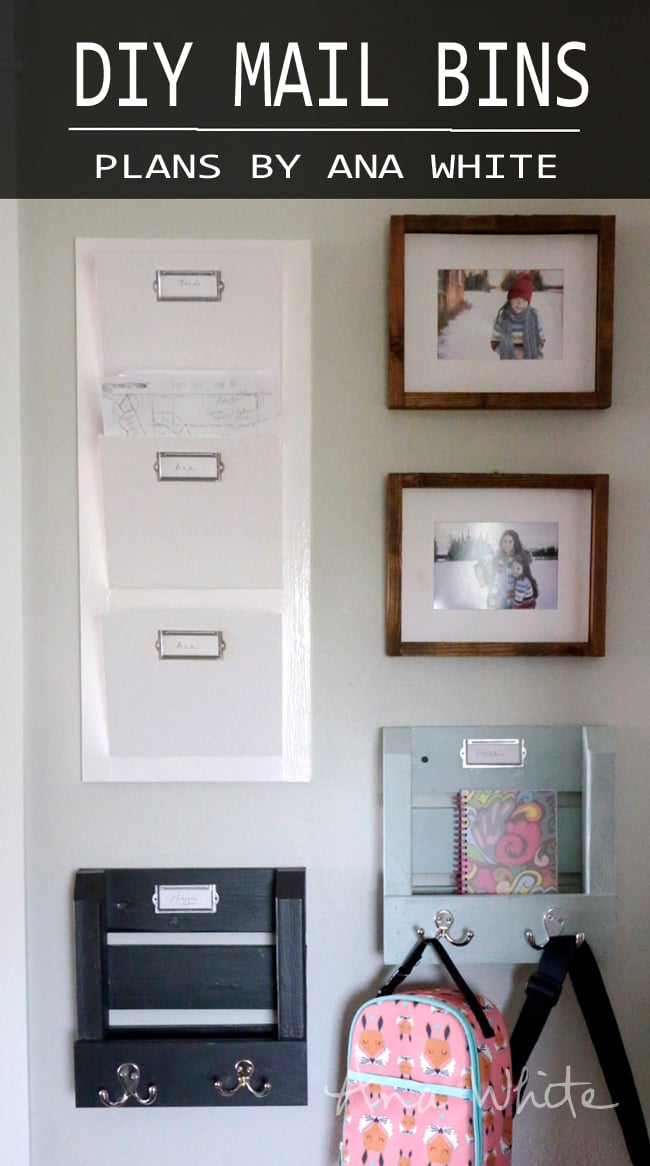
How to build a wall shelf for magazines or mail.  Bins are sized perfect for mail.  Make out of 1x2s and 1/4" plywood!  Super inexpensive and easy to build!

wall bins scrap wood

Hi everyone!!!

Thanks so much for all the love on the new back2school shelves I made for my kiddos!

So exciting seeing some of you make them already too!!!  Thank you so much for sharing your photos - totally made my day!

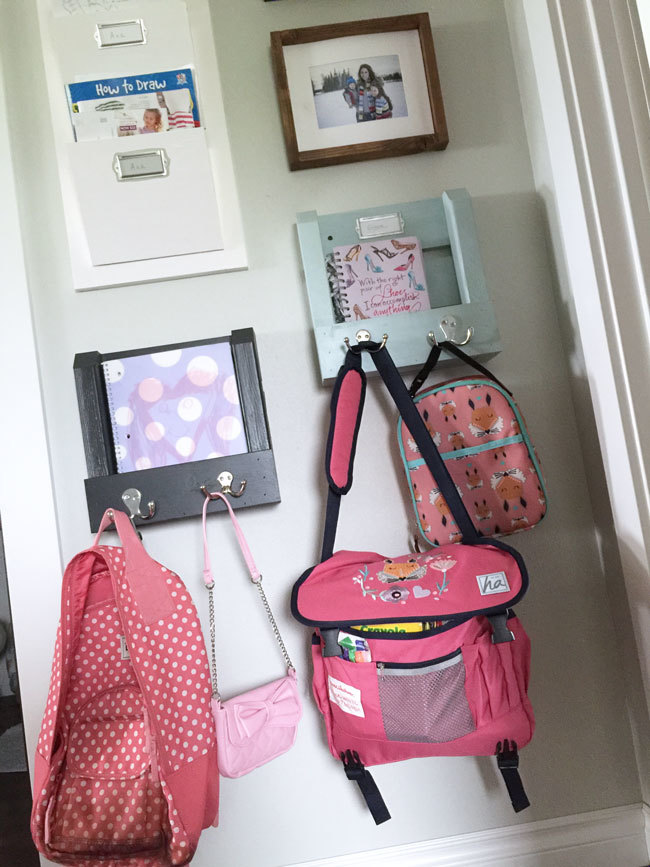
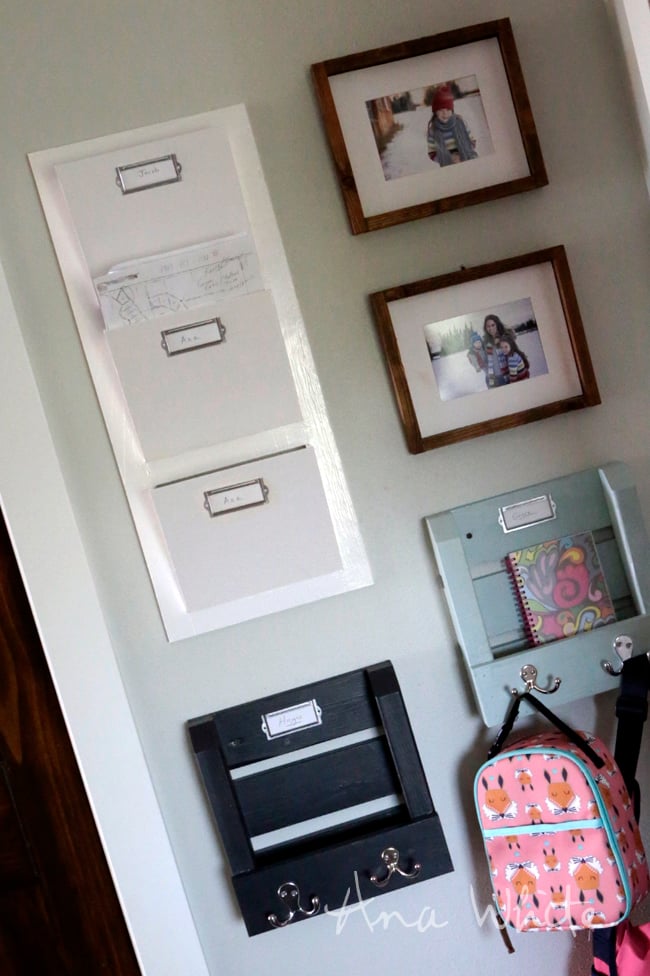
Here's what our shelves look like this morning - loaded with school supplies, taken over by sister.  All ready for school next week!  It sure feels good to make something that is loved by my family!

She's even taken over the wall bins that I made!  At least the shelves that she can reach!

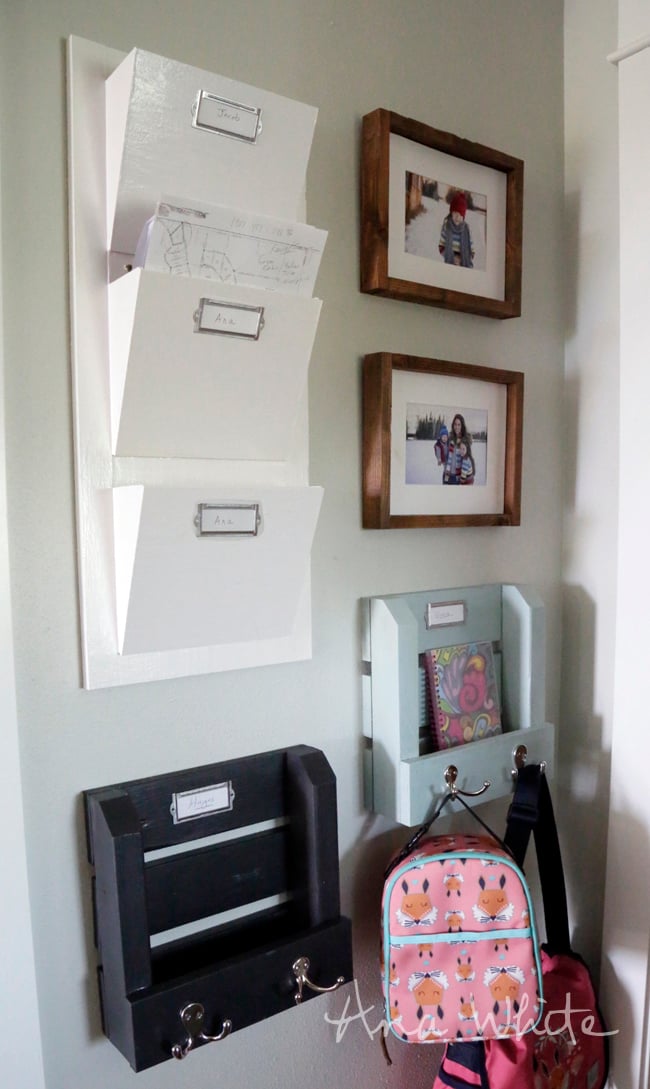
Yep, those are, of course, DIY too!  And in this post, I'm going to share how I made them with you and the detailed plans!  Check it out ....

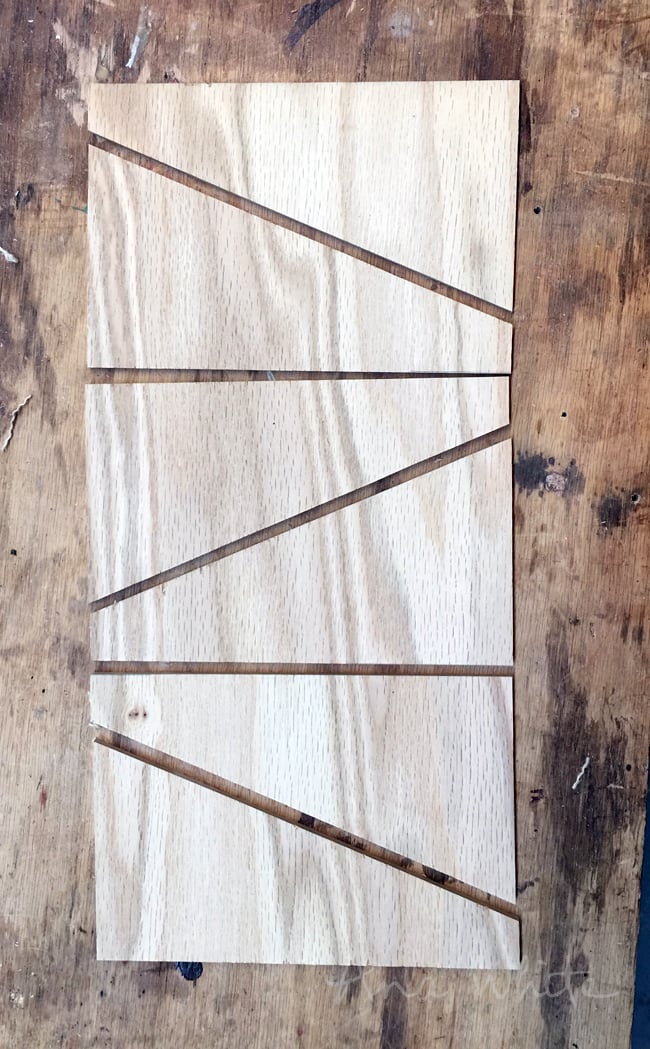
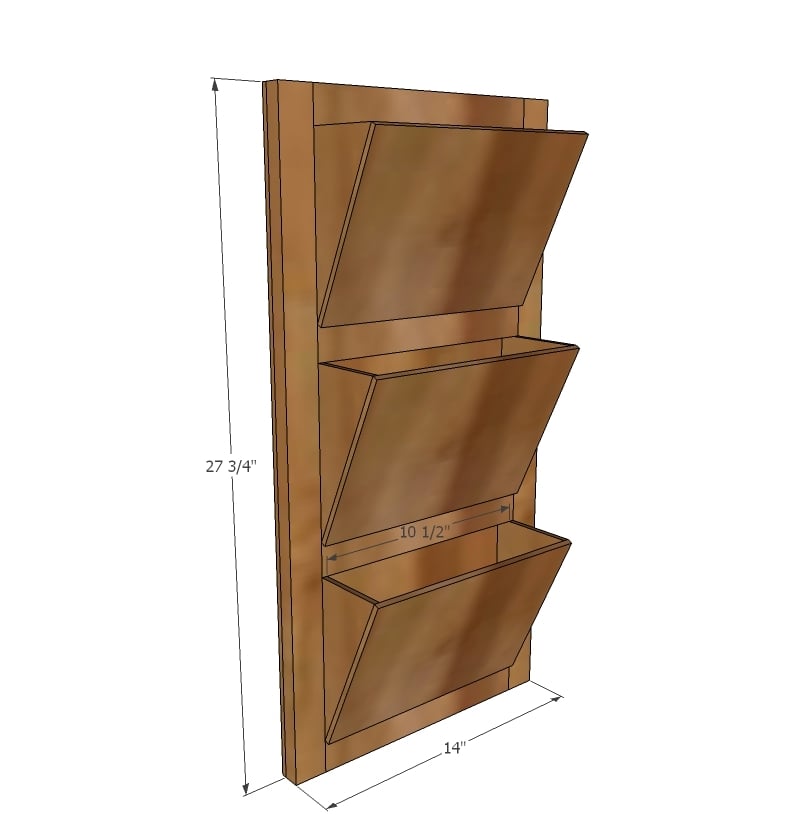
This project is made of 1/4" plywood and 1x2s.  The 1x2s are simple enough to cut, but the plywood can be a bit more of a challenge.  What I did was cut a piece of plywood 7-1/4" wide by 16" long, and then set my mitersaw at a 25 degree angle, and then made all the angled cuts that way.  This saved a ton of time and helped me get nice straight cuts.  Be careful making these cuts - might I suggest clamping the plywood to the saw deck - especially when cutting the smaller pieces.

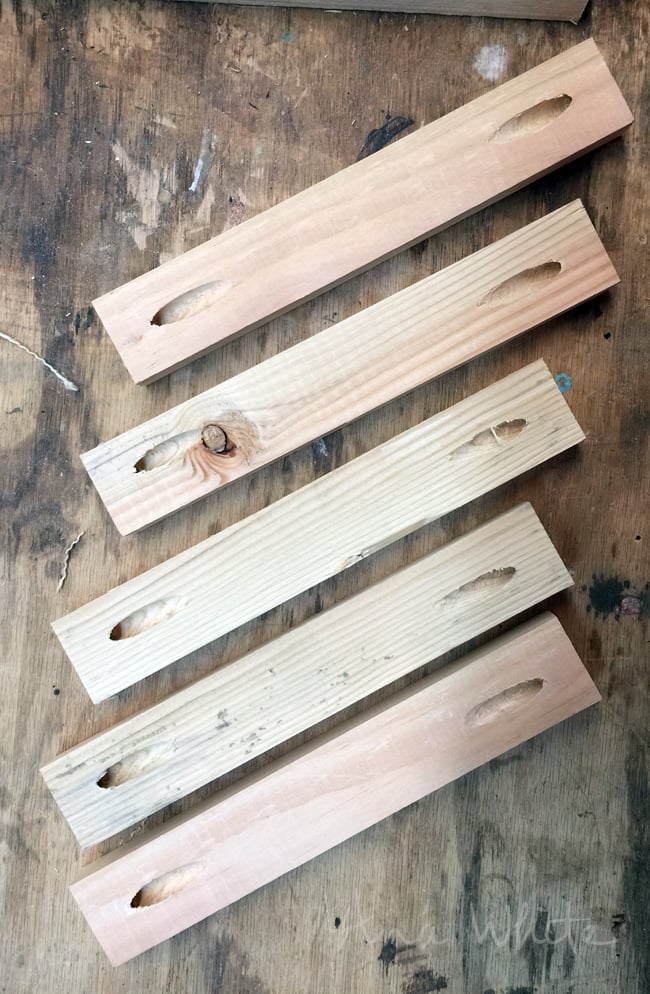
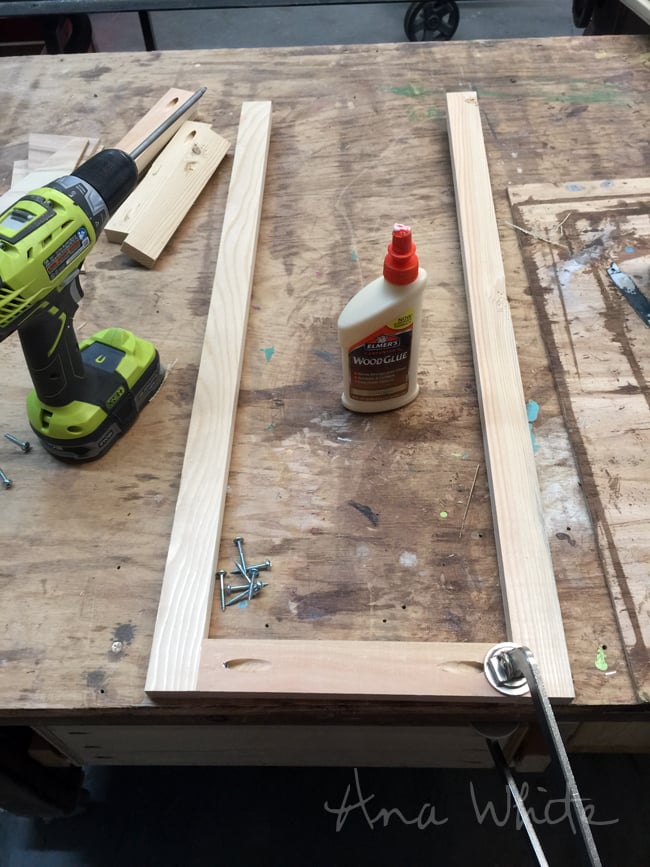
For the frame part, it's just 1x2s.  I drilled a single pocket hole with my Kreg Jig on each end of the shorter 1x2 boards.

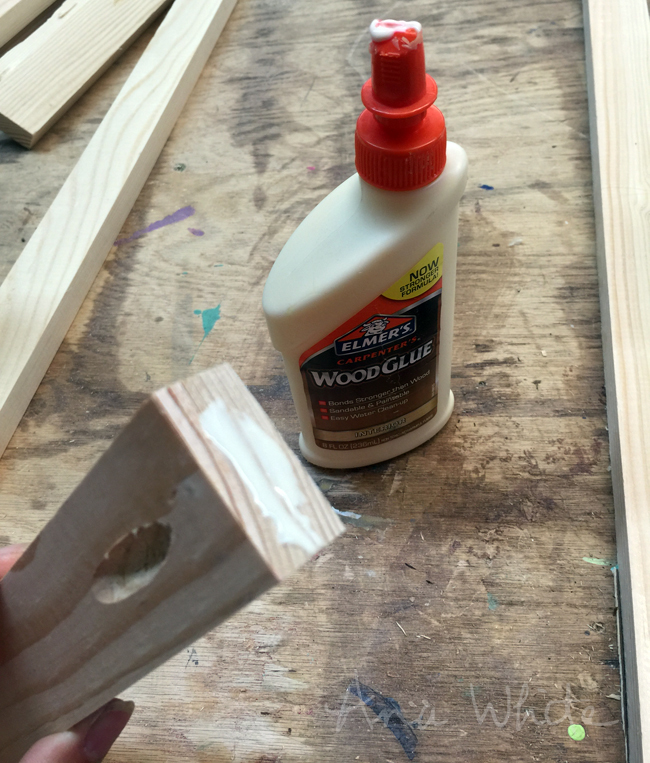
With the single pocket hole, you have to use glue so the joint won't twist on you. 

Then I just clamped and screwed the joints.  I then added more of the shorter 1x2s to make up the frame.

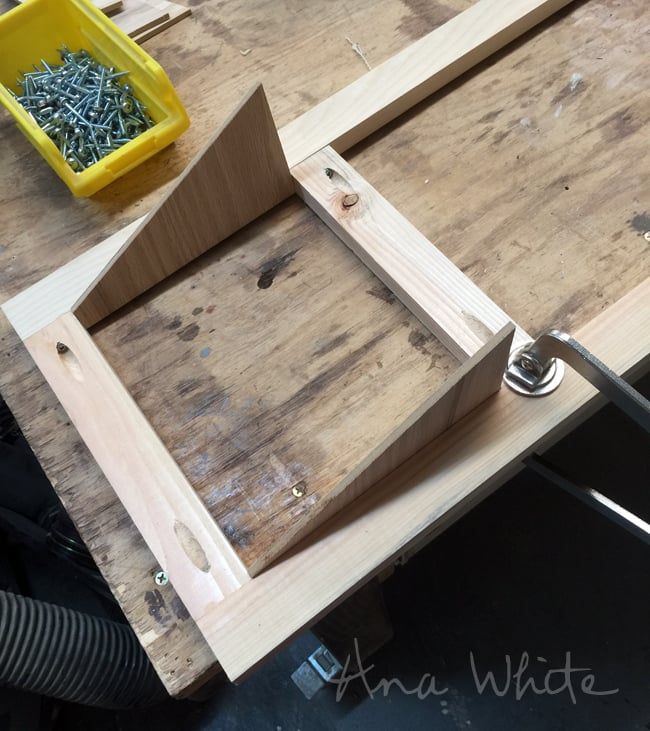
I used the side 1/4" plywood pieces as spacers to help guide the placement of the 1x2s.  This saved time measuring.

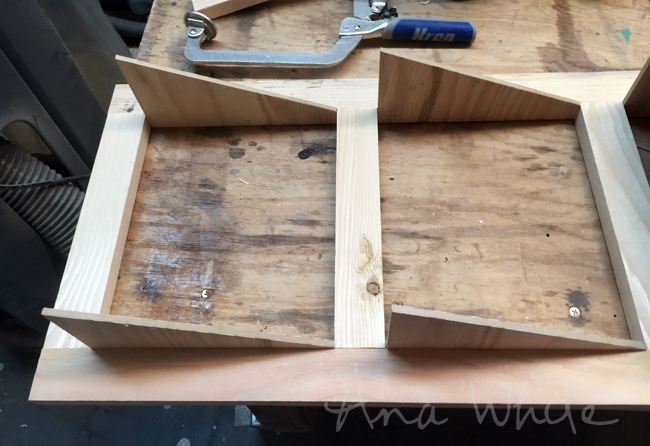
After I made the frame, I flipped it over so the pocket holes are on the back side.  Then I glued and nailed (1" brad nails or staples) the side pieces to the insides of the frame.

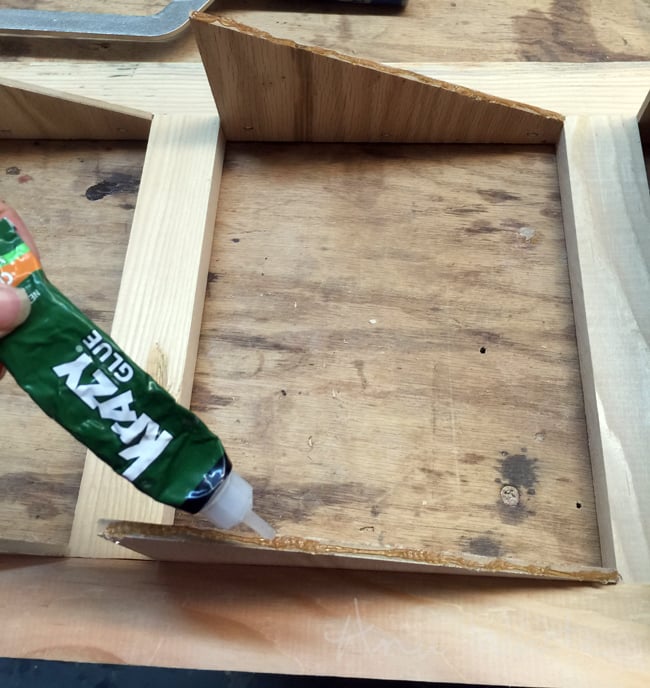
For the fronts of the mail bin pieces, I used Krazy craft glue to add the front.  

That's it!

Very useful and functional, all made for free with scrap wood!

Your turn!

Please pin, share, and build!

PS - This project was very similar (and inspired by) this mail bin chalkboard organizer with pin board I did a little while back -

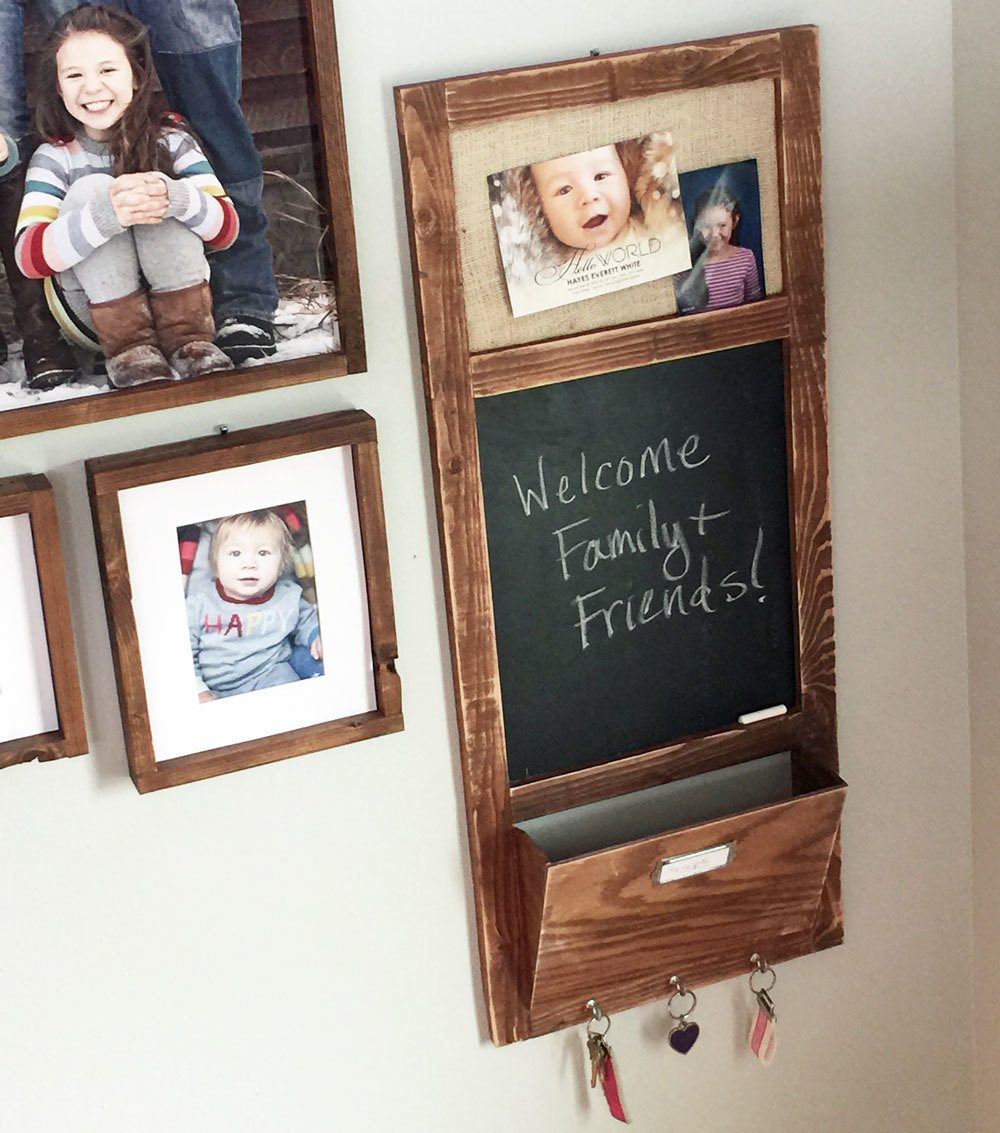
It follows alot of the same steps - so take a look at this video tutorial too!

Can't wait to see how you build yours!

XO Ana

Dimensions
wall bins scrap wood
Dimensions shown above

Preparation

Shopping List

1 - 1x2 @ 10 feet long

24"x48" piece of 1/4" plywood, MDF or other hardboard (available off the shelf at the Home Depot in this size)

Common Materials
Cut List

2 - 1x2 @ 27-3/4"

4 - 1x2 @ 11"

6 - 1/4" plywood @ 7-1/4" x 4-1/8" (cut back to 3/4") (tip: cut a piece of plywood 7-1/4" wide x at least 16" long, then set saw to 25 degree angle and cross cut to size, leaving 3/4" on short end)

3 - 1/4" plywood @ 11" x 8" (tip: Rip into 11" or 8" strip first, then cut into the individual pieces next)

Cutting Instructions

Be careful when cutting small pieces of 1/4" plywood - clamp to saw top for added security

Tools
Tape Measure
Speed Square
Safety Glasses
Hearing Protection
Kreg Jig
Drill
Miter Saw
Table Saw
Brad Nailer
General Instructions

Please read through the entire plan and all comments before beginning this project. It is also advisable to review the Getting Started Section. Take all necessary precautions to build safely and smartly. Work on a clean level surface, free of imperfections or debris. Always use straight boards. Check for square after each step. Always predrill holes before attaching with screws. Use glue with finish nails for a stronger hold. Wipe excess glue off bare wood for stained projects, as dried glue will not take stain. Be safe, have fun, and ask for help if you need it. Good luck!

Instructions

Step 1

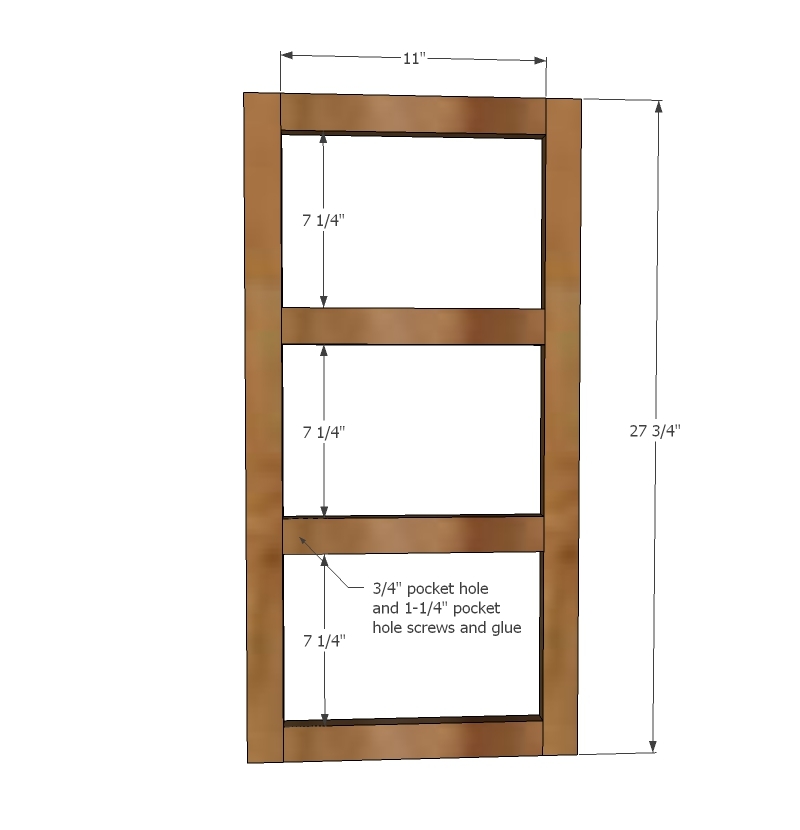
Build the frame with 3/4" pocket holes and 1-1/4" pocket hole screws.  You can use the sides of the mail bins as spacers so you don't have to measure out the spacing of the middle 1x2 rails.

Step 2

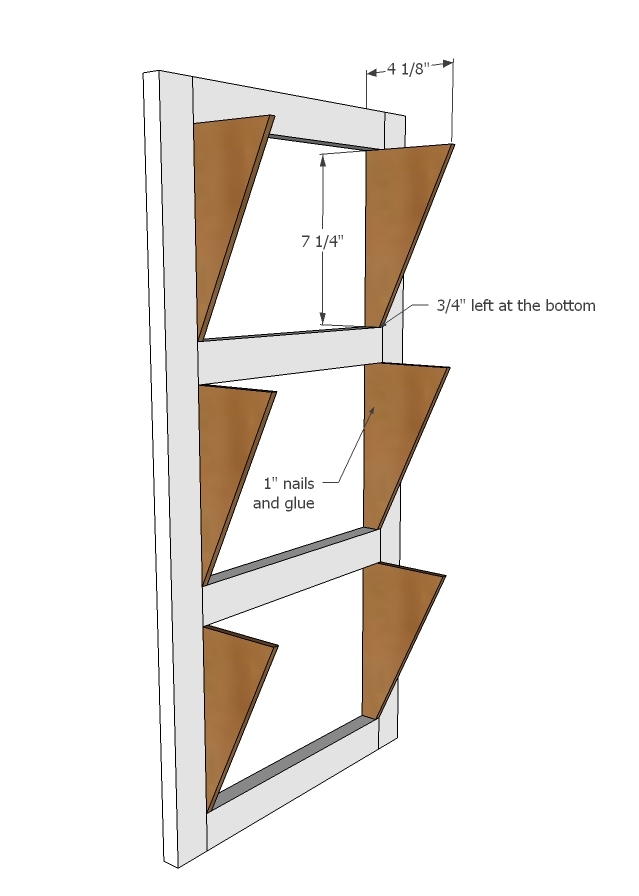
Glue and nail with the 3/4" or 1" staples or nails the sides of the mail bins, so they are flush to the back.

Step 3

Glue the fronts on the bins with Krazy glue.  Allow to fully dry before moving project.

You can use scrap 1/4" plywood to add a back to the project as well.  Just glue and nail on with 1" or shorter nails (or staples).

Finishing Instructions
Preparation Instructions
Fill all holes with wood filler and let dry. Apply additional coats of wood filler as needed. When wood filler is completely dry, sand the project in the direction of the wood grain with 120 grit sandpaper. Vacuum sanded project to remove sanding residue. Remove all sanding residue on work surfaces as well. Wipe project clean with damp cloth.

It is always recommended to apply a test coat on a hidden area or scrap piece to ensure color evenness and adhesion. Use primer or wood conditioner as needed.

Frequently Asked Questions

Wood Questions

What kind of wood should I use?
Most of our plans use standard construction lumber like pine or fir. It's affordable, easy to work with, and easy to find. It's also rapidly renewing and biodegradable, so a great eco friendly choice!

Can I use hardwoods instead?
Yes—just keep in mind they're heavier, cost more, and can be tougher on tools and harder to join together and finish. I recommend not tackling a hardwood project until after you have built several softwood projects.

What if my boards are warped?
Choose the straightest boards at the store. You can often work around slight warps by cutting them into shorter pieces.

What wood should I use for outdoor furniture?
Use red-toned or pressure-treated 2x lumber for framing, and cedar or cedar fence pickets for the decking. Outdoor furniture should be built like a deck—your local home center can help recommend the right wood for your climate.

Will my wood move or warp after I build?
Potentially, especially in humid climates. Let your wood acclimate indoors before building. Once acclimated and kept in a stable environment, movement should be minimal. Remember, most houses are built using framing lumber - it's all about keeping moisture down indoors.

Cutting Questions

Do I need a miter saw?
A miter saw is great, creating fast, safe, and precise cuts, even for beginners. But most plans can be built with a circular saw and a straight edge. If using a circular saw to cut, take time to practice, and get good at making cuts, before cutting your project boards.

How do I get clean cuts with a circular saw?
Clamp your board, measure twice, cut slow, and use a sharp blade. This takes practice, so spend some time making cuts. I go through becoming proficient at freehand cutting in my course, it is worth taking if you want to master this skill.

Will the store cut my wood?
Yes—most stores will do rough cuts to help you transport your materials home. But from store to store, the quality of cuts could greatly vary.

Joinery Questions

What screws should I use?
We recommend star-head self tapping screws for framing, most common sizes are 2-1/2", 1-3/4". Pre-drill if close to the edge or you find your wood is splitting.

Do I have to use pocket holes?
Pocket holes are the cheapest, easiest and fastest way to do some joints - like edge to edge or a hidden fastener joint. There are other methods, but these can be time consuming and expensive. We recommend using pocket holes as indicated in plans for best results.

How do I keep things square?
Use a speed square and measure diagonals after each step. Always clamp joints before screwing to keep them tight and flush.

Finishing Questions

Stain or paint before or after building?
A quick sand before and a full finish after gives the best results. Pre-finish if you're doing two-tone or detailed finishes.

What type of finish?
Use oil-based or water-based stain. For paint, cabinet-grade latex or enamel works great. High use surfaces on indoor projects should get a coat of polyurethane, I recommend a Helsman or Spar or other flexible poly that won't crack or peel with wood movement. For exterior projects, use a finish suitable for exterior fences.

How to get a smooth finish?
Start with a well sanded project. Sand between coats (220 grit), wipe clean, and apply light coats with a foam brush or roller.

Plan Questions

Can I change the size?
Many people do, and that's the great thing about building your own furniture! But do keep in mind going bigger might mean more supports are required, and often plans are optimized for minimal material waste.

Are these beginner-friendly?
Yes—plans are written with simple tools and clear steps in mind, with every effort to make plans as simple as possible.

Can I sell what I build?
Absolutely! Just don’t resell or repost the plans themselves.

General Questions

What tools do I really need?
A drill, circular saw, tape measure, square, and a few clamps will get you through most projects.

Do I need a workshop?
Nope! A driveway or small patio is plenty to get started, just make sure you have a level place to work. If you find you are building several projects a year, creating a small workbench is a great way to store tools and have a dedicated workspace.

What if I mess up?
Wood filler, sanding, or flipping boards goes a long way. Mistakes are part of the process!

What can I do to make my projects look more professional?
Start with straight boards, make accurate cuts, clamp all joints, and line up everything neatly. Sand thoroughly, use a neutral finish, and apply it in light coats for a clean look.

I've never built anything before. Where should I start?
Start with a few smaller softwood projects to get hands-on experience. Or if you're tackling a big project, buy a little extra lumber and practice your cuts and joints first. If possible, work with someone who has a bit of experience.

Care & Maintenance

How long will my furniture last?
With good joinery and regular care, your DIY furniture can last for decades. I have pieces in my own home that are over 20 years old and still going strong! One of the best parts about DIY furniture is that it’s easy to repaint, refinish, or repair—so your projects can grow and adapt with you.

How should I care for outdoor furniture?
Lightly pressure wash or hose it down once or twice a year. Tighten screws and reapply finish as needed to protect it—just like a deck or fence. A little upkeep goes a long way in extending the life of your furniture.

How about indoor furniture?
Regularly dust or wipe with a damp cloth. If it starts to look worn, a light sanding and touch-up paint or stain can refresh it in no time. DIY pieces are meant to be durable and fixable—so don’t be afraid to give them some love now and then.

Want to Build with Confidence?

Check out my ebook: 12 Skills to Build Your Own Furniture
It walks you through the core skills every builder needs—measuring, cutting, joinery, and finishing—so you can build beautiful furniture that lasts.

Still Have Questions?

Email us anytime at [email protected] and we’ll be happy to help!