

Build an extra long buffet cabinet with tons of storage! Free plans by ANA-WHITE.com

Hello there! I'm still traveling this week, wrapping up a super fun an exciting project with Ryobi - I can't wait to share this next project with you!!!
If you follow the Ryobi folks on Instagram, you knew this already though!

Thanks for not commenting on my white hairs, BTW!
I'll be sharing this project with you as soon as I can, so stay tuned!
And of course, I do have a super awesome plan to share with you today.
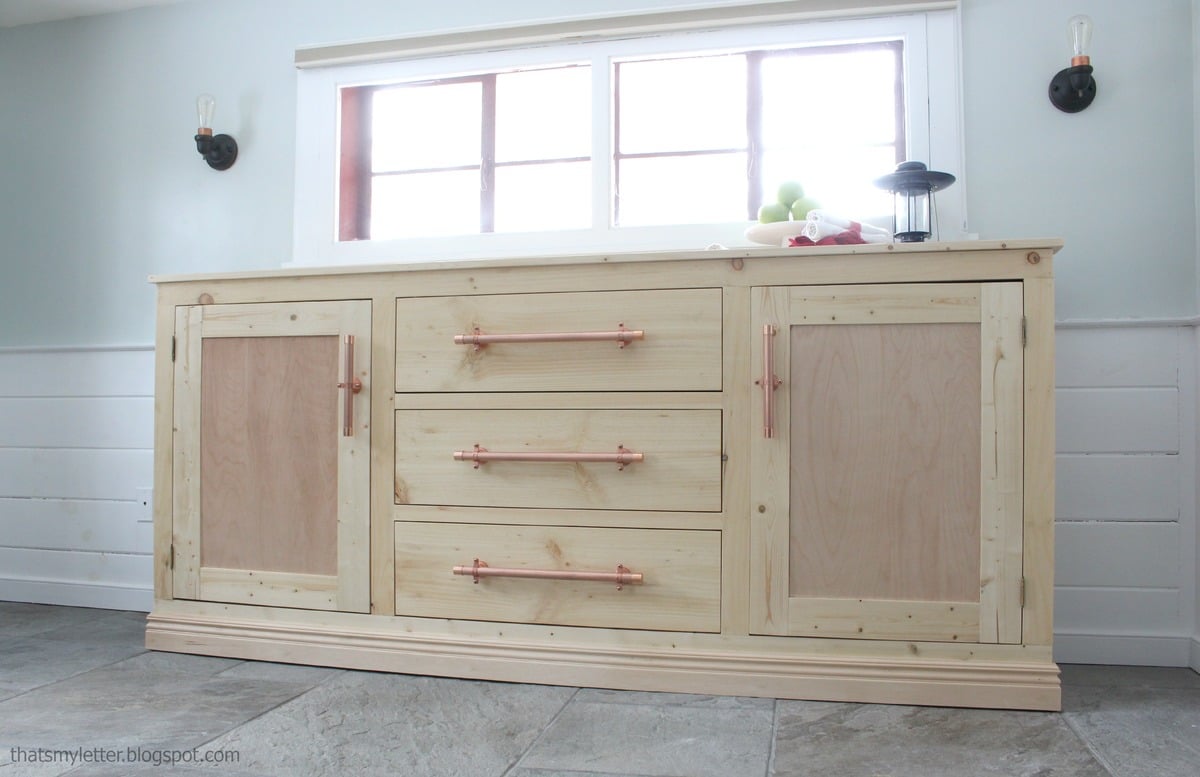
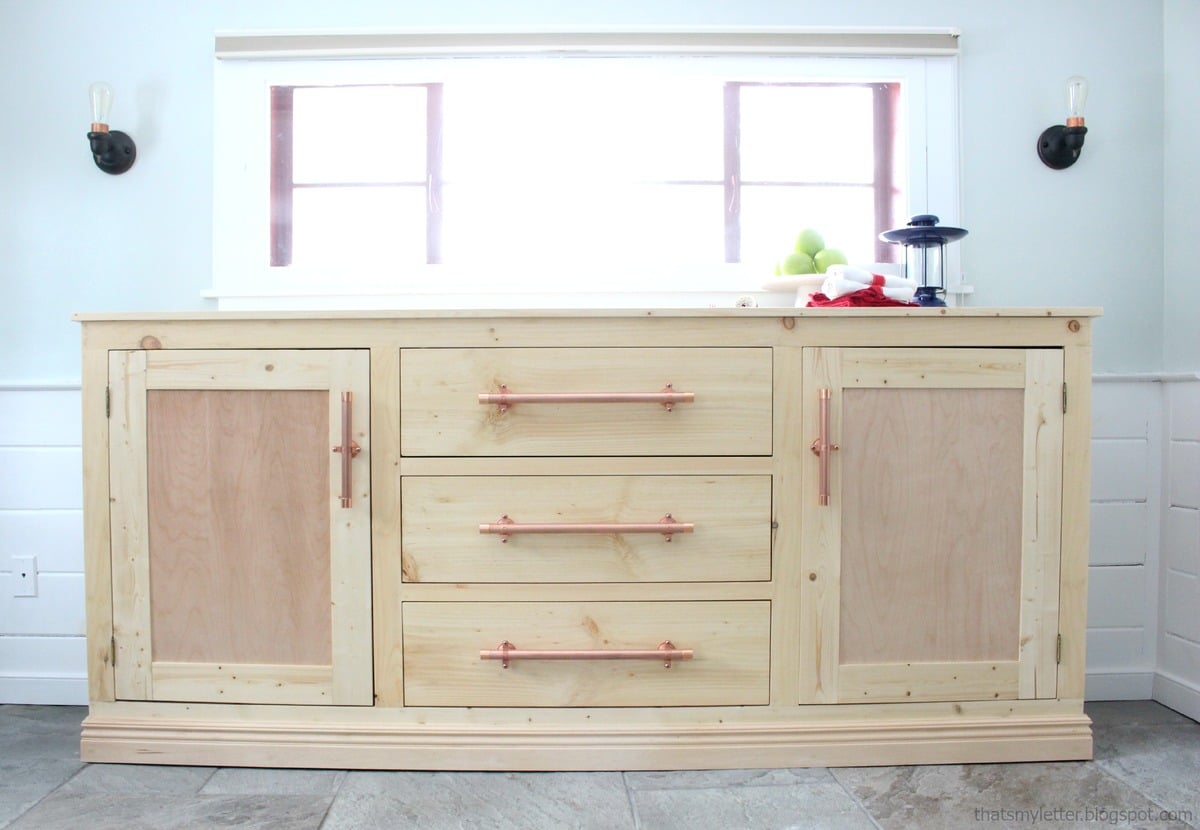
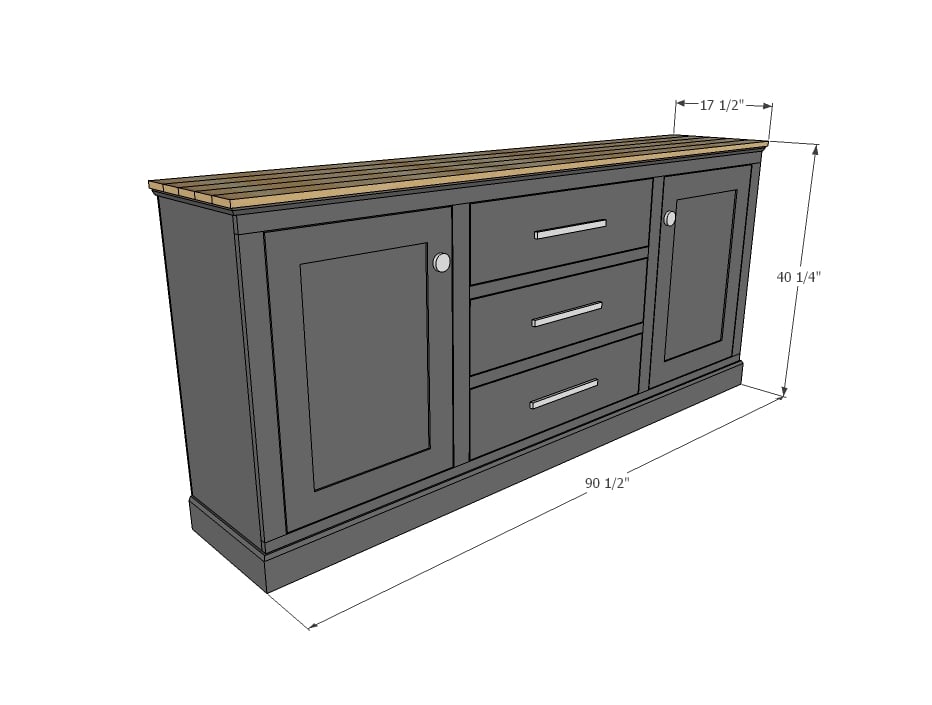
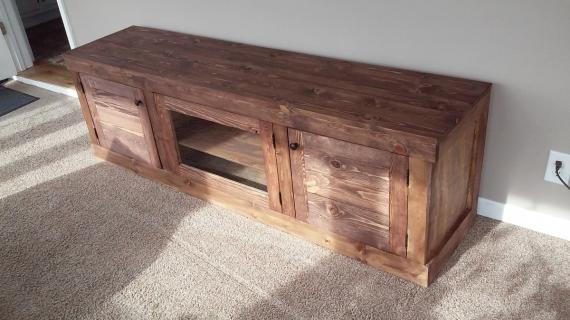
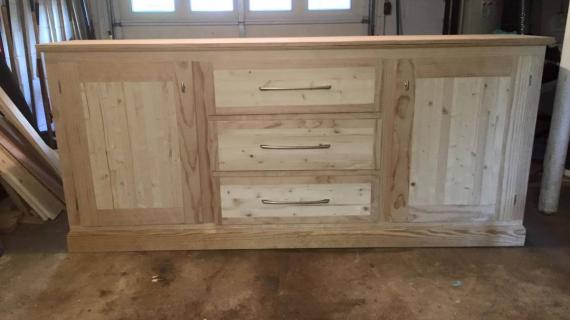
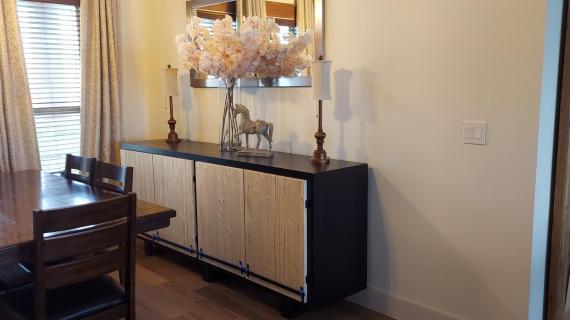
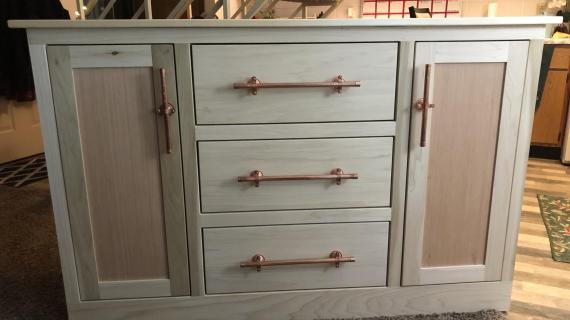
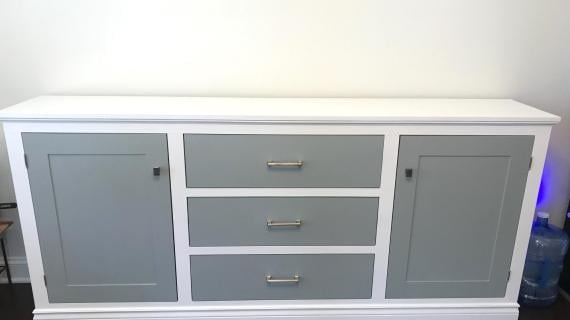
My dear friend Jaime from That's My Letter is doing some projects for her church. One of the big projects she wanted to tackle was an extra long buffet to provide more storage and functionality to their dining area. Something a little more simplified and modern, but not loosing that one-of-a-kind handmade just for you feel.
 I love how this project turned out!

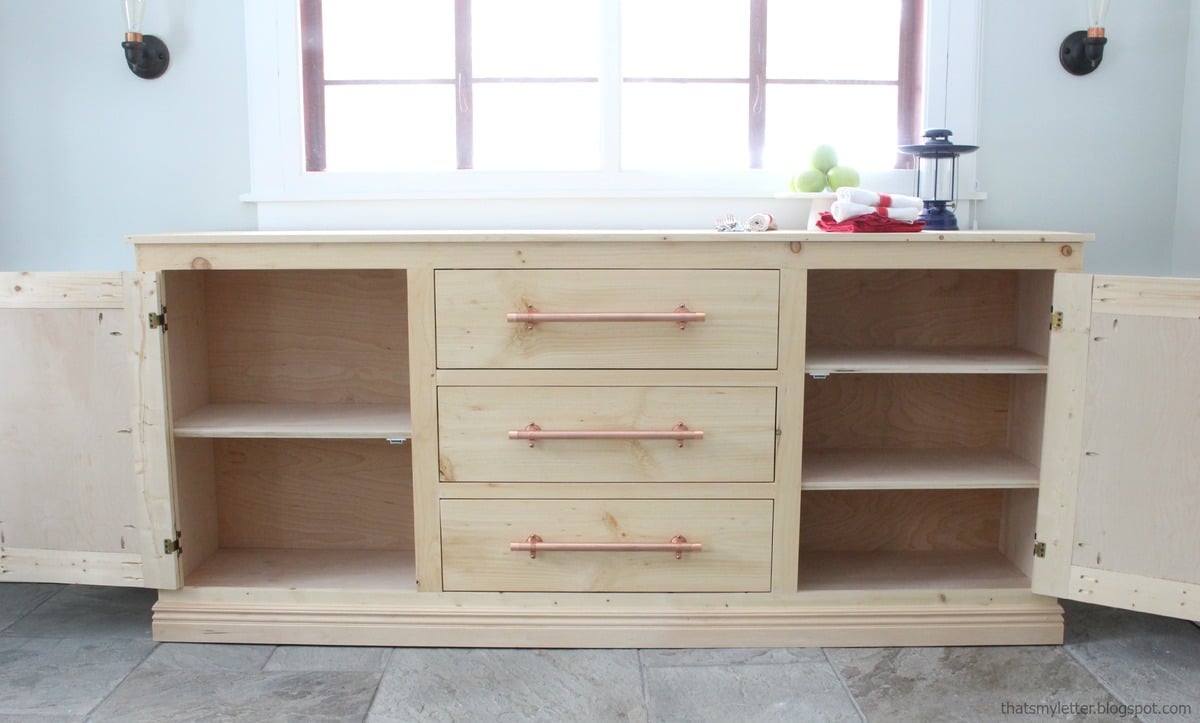
Look at all that storage behind the doors!

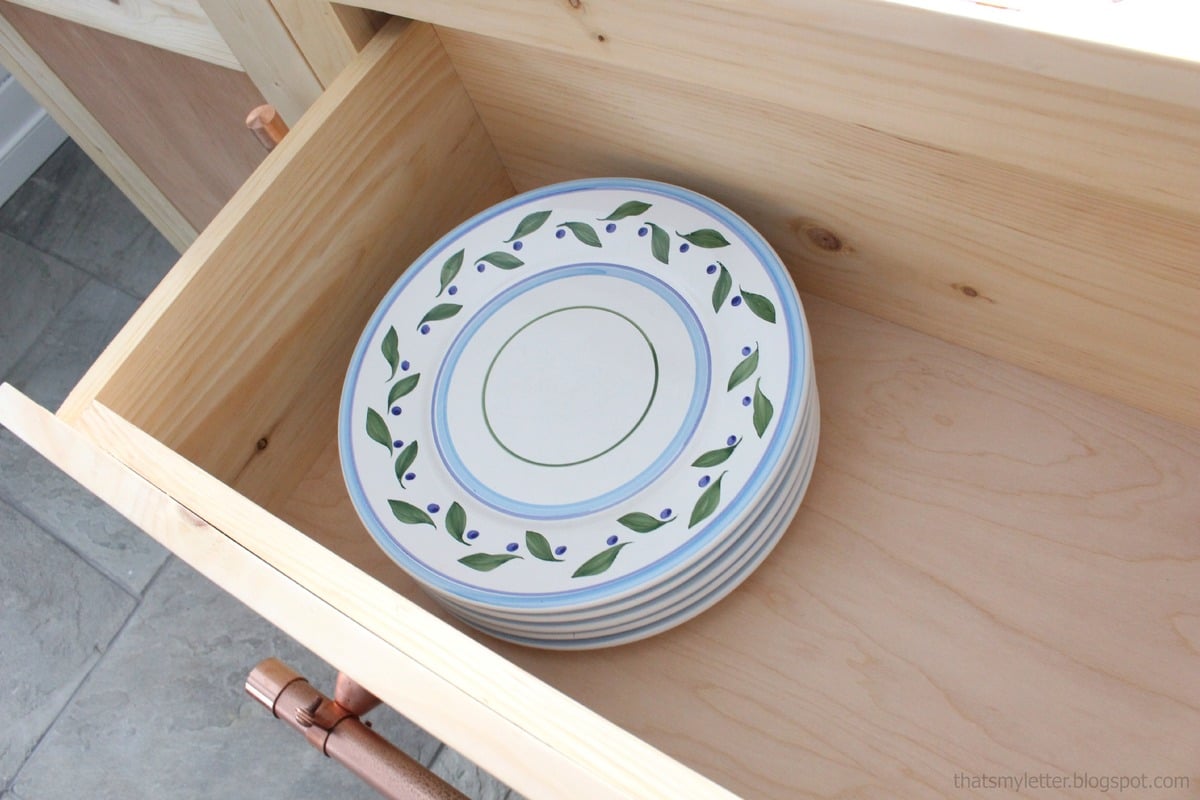
Those are dinner plates. And there are three of those drawers!
And did you notice the hardware? Jaime made that too!
You can get all the details from Jaime on how she built this cabinet and lots more photos in her building post here. Please take a second to hop over and check it out.
And of course, plans follow.
Enjoy!
Ana
Preparation
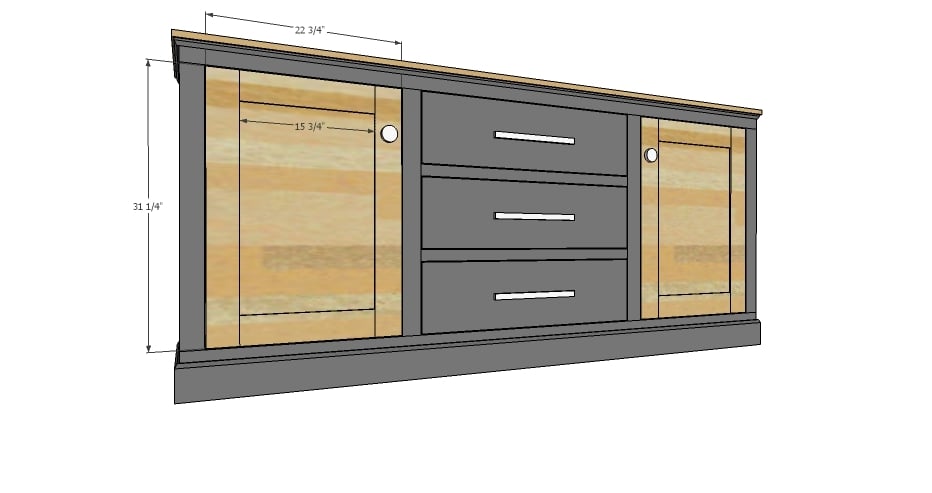
2 - sheets of 3/4" plywood cut into strips 15-3/4" wide (for a total of 6 strips)
1 - 1/4" plywood or other hardboard for the back
3 - 1x3 @ 8 feet long
1 - 1x6 @ 8 feet long
1 - 1x2 @ 8 feet long
8 - 1x4 @ 8 feet long (includes 1x4s for the doors)
3 - 1x8 @ 8 feet long (could also use 1x6 for smaller drawers)
1 - 1x10 @ 10 feet long
4 inset hinges
3 sets of 14" drawer slides
3 handles and 2 knobs
12 feet of 4-1/4" base moulding
12 feet of 3/4" moulding (for top)
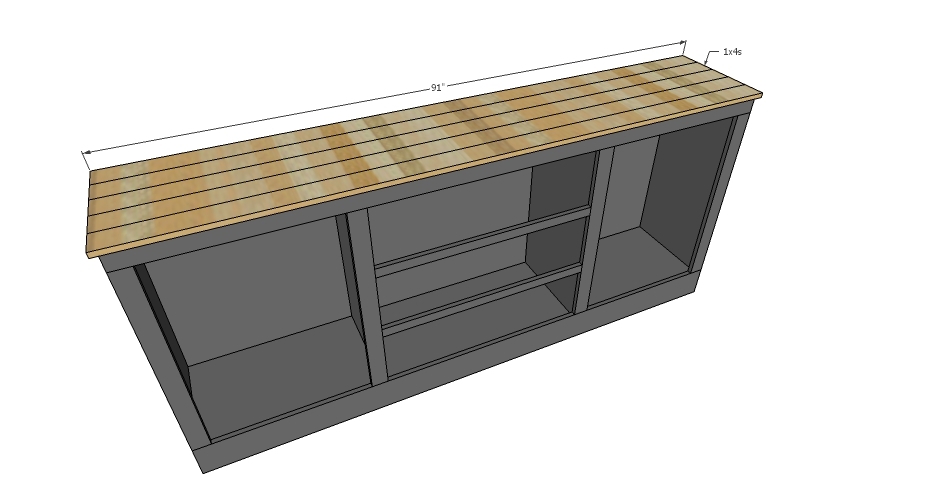
2 - 3/4" plywood @ 15-3/4" x 88" (top and bottom)
2 - 3/4" plywood @ 15-3/4" x 39-1/2" (sides)
2 - 3/4" plywood @ 15-3/4" x 34" (dividers)
1 - 1/4" plywood @ 89-1/2" x 39-1/2" (back)
1 - 1x3 @ 89-1/2" (face frame top)
1 - 1x6 @ 89-1/2" (face frame bottom)
4 - 1x3 @ 31-1/2"(face frame stiles)
2 - 1x2 @ 33-1/2" (face frame drawer trim)
5 - 1x4 @ 91" (top)
4 - 3/4" plywood @ 26-1/2" (shelves)
6 - 1x8 @ 31" (drawer front/back - could also use 1x6)
6 - 1x8 @ 14" (drawer sides - could also use 1x6)
3 - drawer bottoms inset fit are 12-1/2" x 31" or for lighter loads 1/4" plywood could be used on the drawer bottoms (outset is 32-1/2" x 14")
3 - 1x10 @ 33-1/4" drawer faces
Doors are made to fit with 1x4s (see last diagram)
If you have the plywood cut at the hardware store on a track saw, the top priority is to make sure all of the rip widths are the same. Have the plywood cut horizontally, pushed through the saw (as opposed to vertically) with the saw set only ONCE for all the cuts.


Please read through the entire plan and all comments before beginning this project. It is also advisable to review the Getting Started Section. Take all necessary precautions to build safely and smartly. Work on a clean level surface, free of imperfections or debris. Always use straight boards. Check for square after each step. Always predrill holes before attaching with screws. Use glue with finish nails for a stronger hold. Wipe excess glue off bare wood for stained projects, as dried glue will not take stain. Be safe, have fun, and ask for help if you need it. Good luck!
Instructions
Step 1
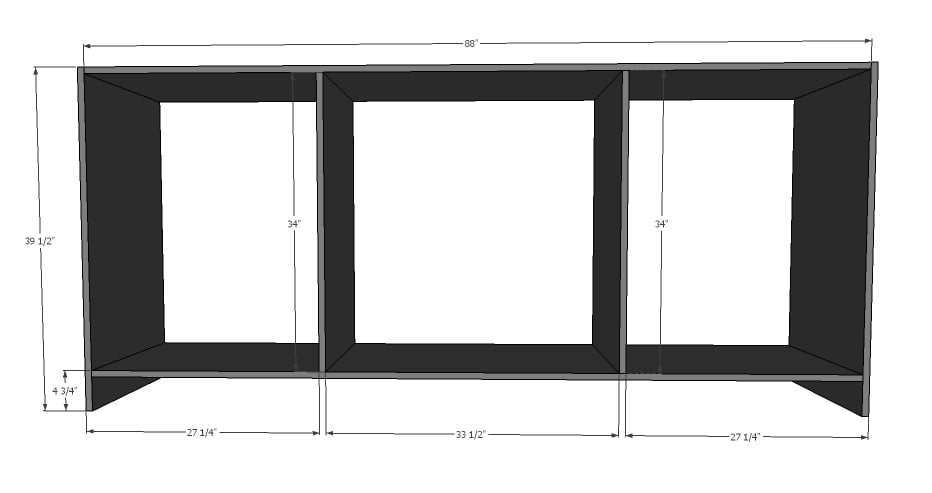
Build the basic frame for the cabinet. This is a much bigger task than it looks because this project is so big. Take your time, use clamps, use glue.
Adjust for square by taking opposing diagonal measurements of the outside corners and checking to see if they diagonals are the same. Adjust until the diagonals match and your project is square.
Step 2
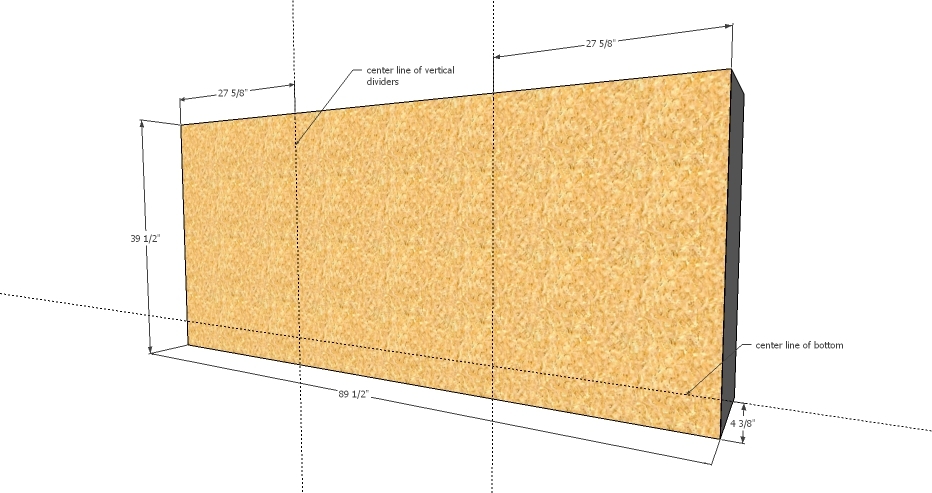
Let's get the back on while the project is square. Attach with glue and 3/4" nails or staples.
Step 3
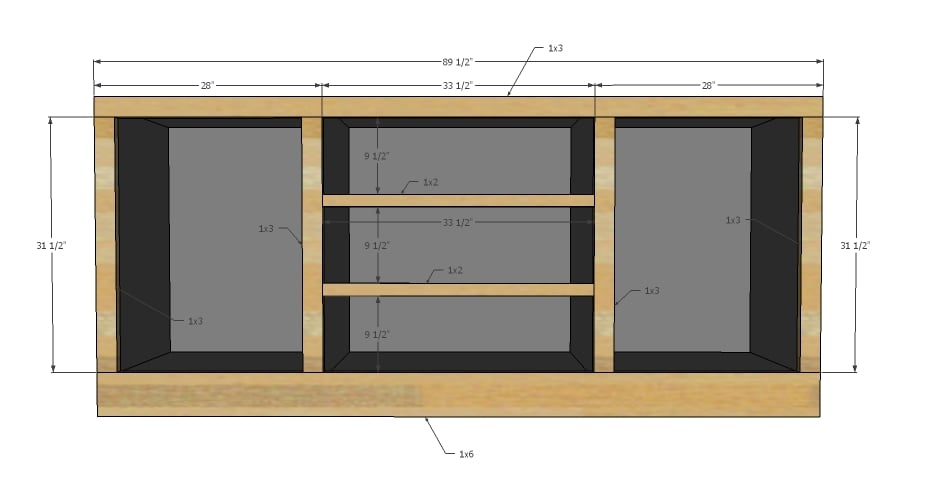
Build the face frame first, separately. The attach the face frame to the front of the cabinet with 1-1/4" nails and glue.
Step 4
Cover the top with wood planking - this will add to the overall look and make the top solid wood. You can nail and glue down with 1-1/4" nails (the nail heads will show) or use 1-1/4" screws from the underside.
Step 5

Step 6
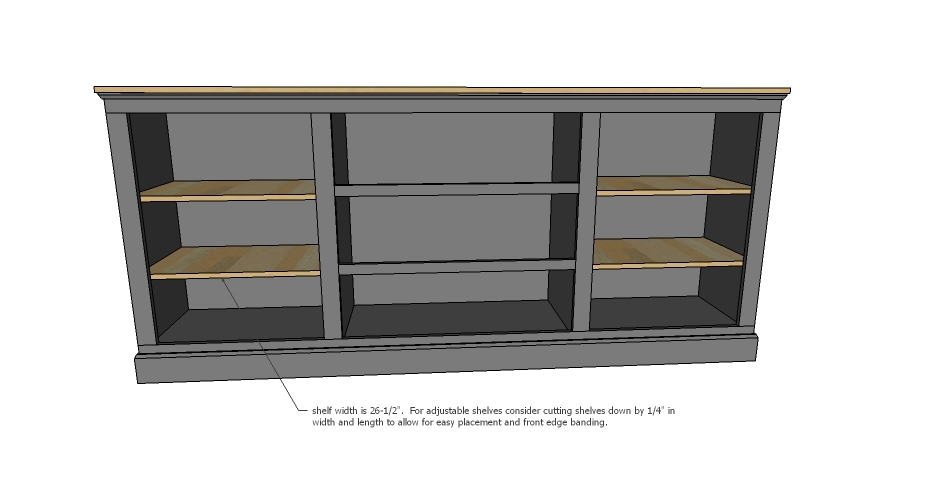
Add shelves either fixed, or with a Kreg Shelf Pin Jig.
Step 7
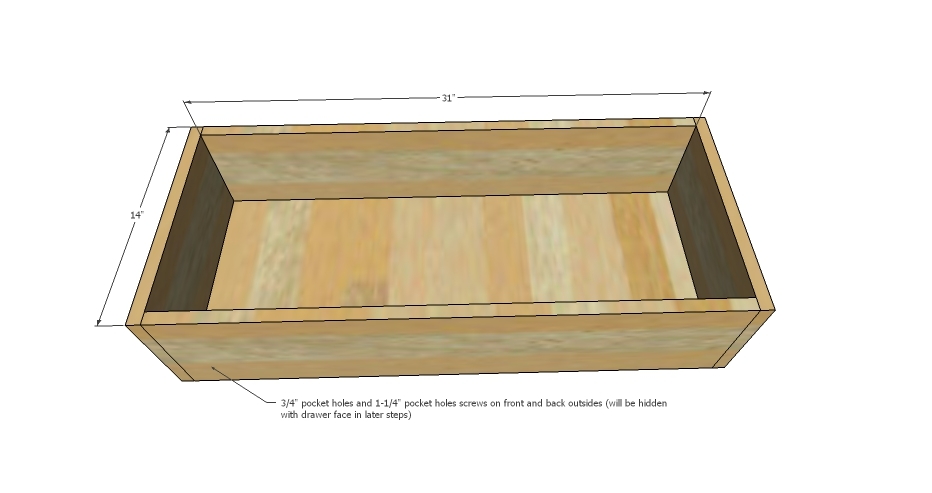
Build drawers to fit inside of cabinet and your drawer slides. Measurements shown are for drawer slides that require 1" clearance total.
Step 8
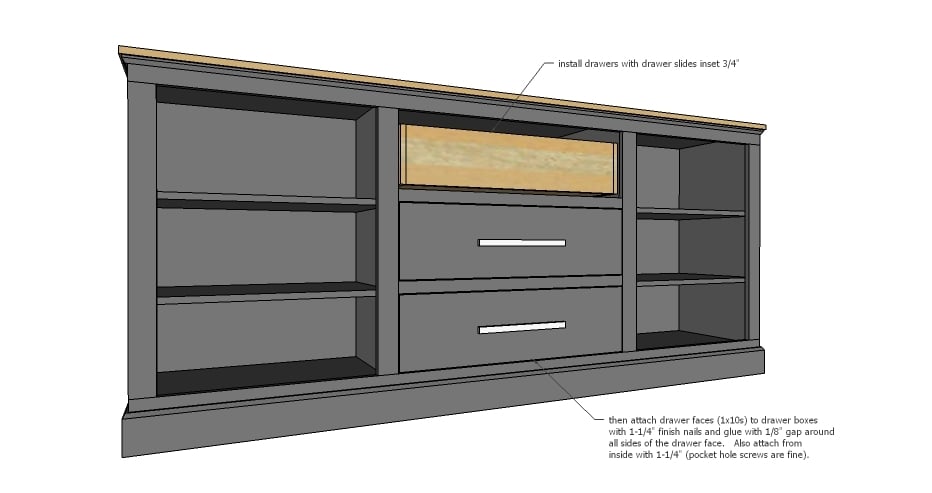
Install drawers inside the cabinet, inset 3/4" to allow for the drawer faces.
Attach drawer faces to drawer boxes with 1-1/4" nails and glue. Avoid nailing where you will place hardware. Pull drawer out and add a few screws from the back side.
Step 9
Build doors to fit openings - as shown it's just a 1x4 frame with 1/2" plywood inset (here's a simple tutorial on how to build simple frame and panel doors)
Attach with inset hinges or surface mount exposed hinges. Check out how Jaime attached her door hinges here and what type she used. You may also need to add a magnetic clasp to keep the doors closed.
It is always recommended to apply a test coat on a hidden area or scrap piece to ensure color evenness and adhesion. Use primer or wood conditioner as needed.


Comments
roadtripmom
Wed, 02/11/2015 - 17:45
I just planned out a buffet
I just planned out a buffet almost exactly like this last week. This will help me so much !! Thank you
akn8ive79
Mon, 02/23/2015 - 21:12
Looks AMAZING!
Looks AMAZING!
bcahall
Sat, 11/14/2020 - 02:18
drawer
What do the drawers slide on?