
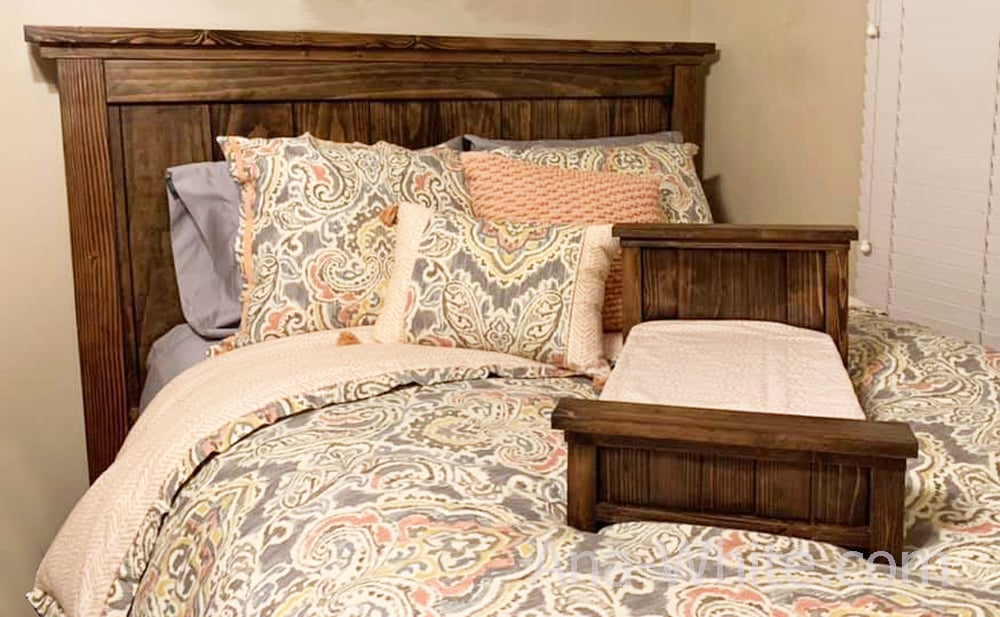

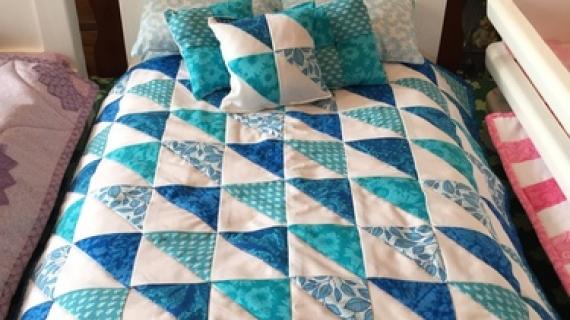
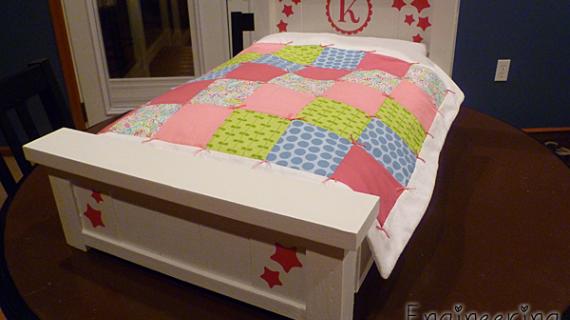
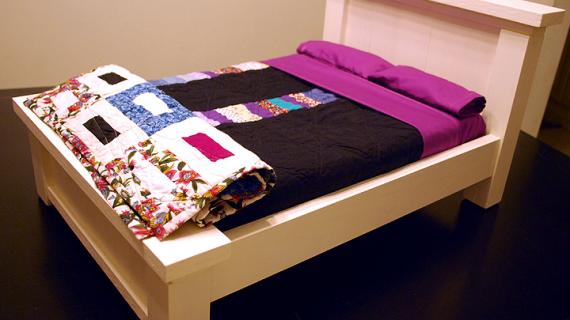
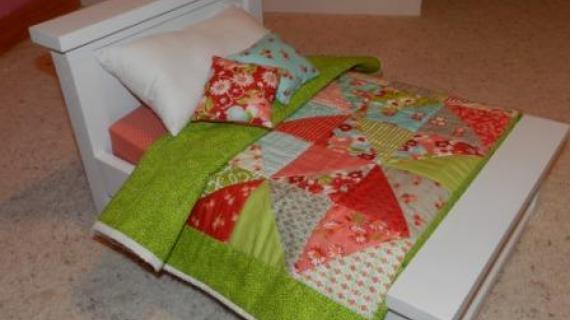
Build your own American Girl doll bed to match our Farmhouse Beds, suitable for 18" dolls. This bed is slightly wider than traditional doll beds, to look more like our Farmhouse Beds. Free step by step plans from Ana-White.com
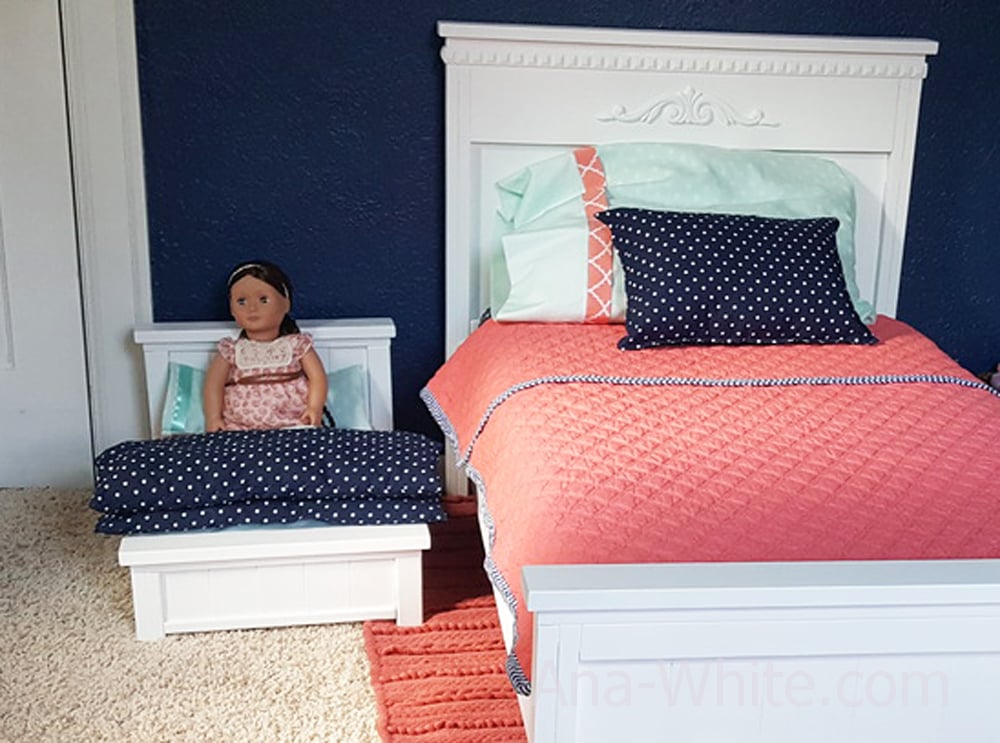
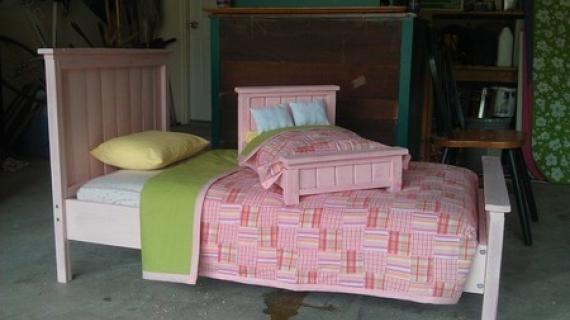
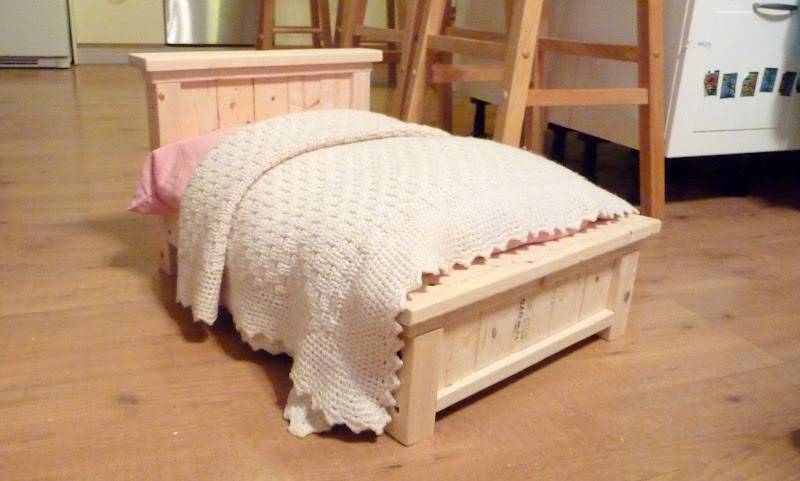
Photo by CPEEPLES
American Girl doll beds can be so expensive! Have you thought about building your own? For about $10 you can DIY your own doll bed, and paint or stain it any color you like!
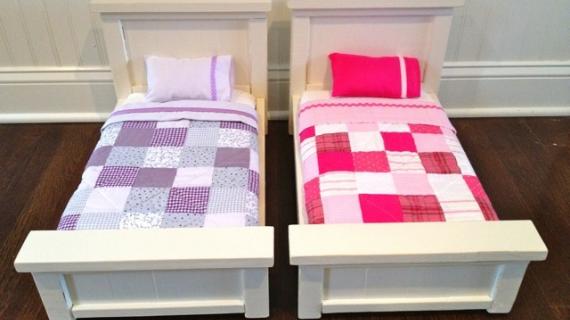
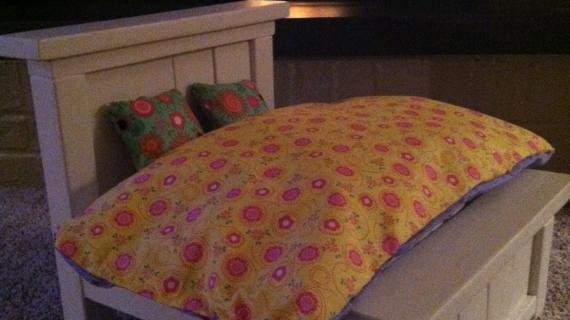
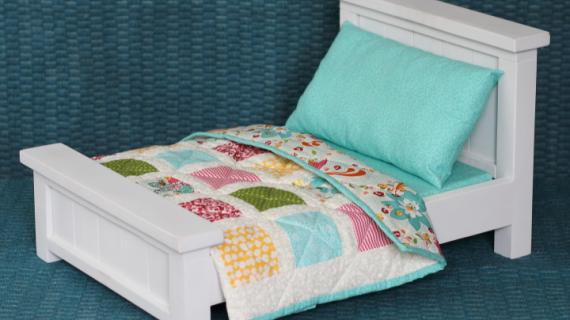
Here's a few DIY photos from our amazing readers:
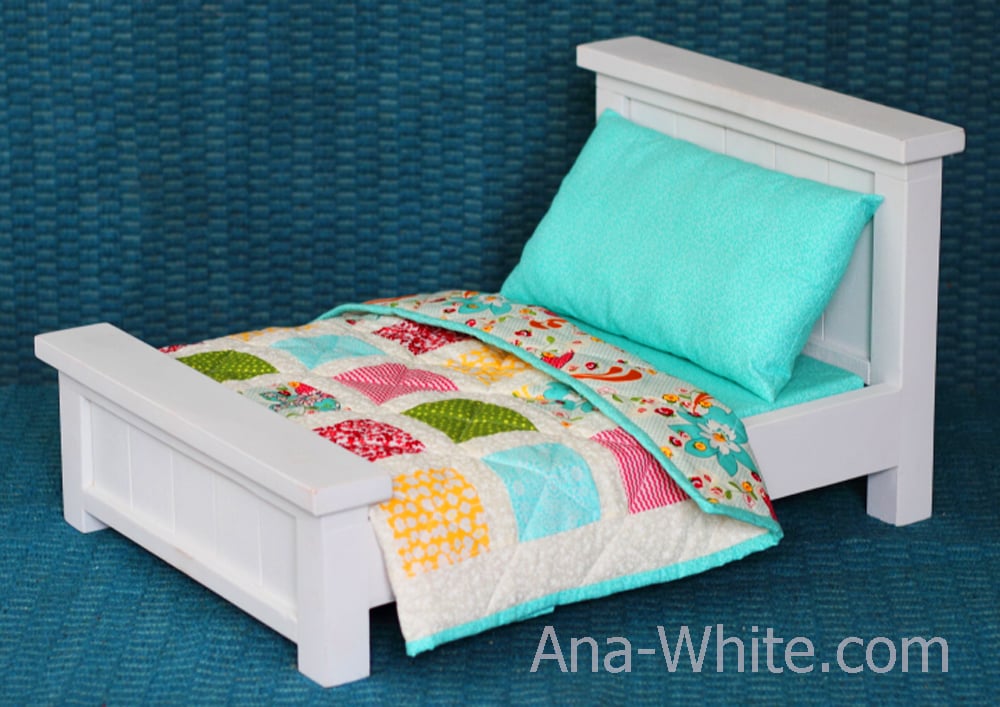
Photo by LBROWN
This project has been a reader favorite for over a decade! It's such a fun and easy project with big results!
Our free plans make it simple!
American Girl Doll Bed Tutorial
Preparation
- 2×2 (3 feet total)
- 2 – 1x3s (10 feet total)
- 1 – 1×2 (8 feet total)
- scrap 1/4″ plywood (you could even use sturdy cardboard here)
- 1 1/4″ self tapping wood screws (SPAX brand or similar) OR brad nails (if you have a brad nailer)
- 2″ self tapping wood screws (SPAX brand or similar) OR brad nails (if you have a brad nailer)
- Wood Glue
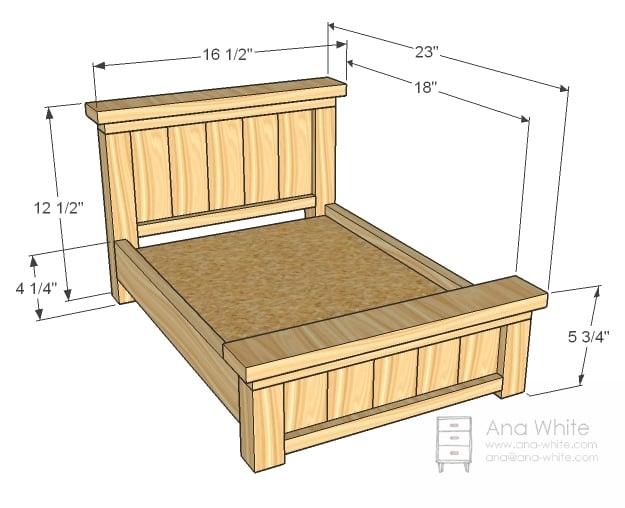
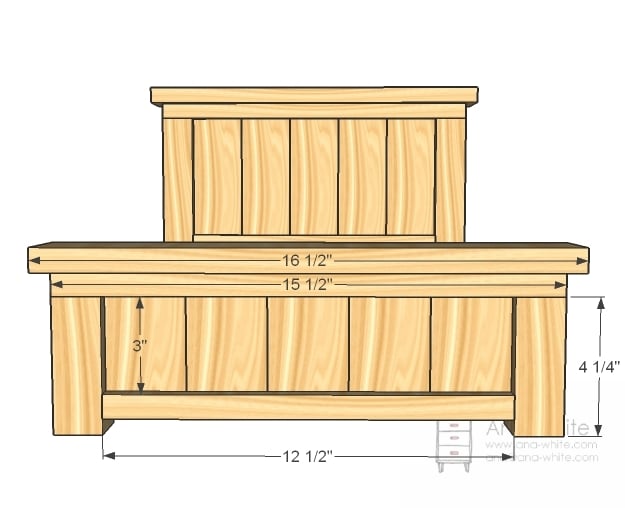
- 5 – 1×3 @ 6″ (Headboard Panel)
- 5 – 1×3 @ 3″ (Footboard Panel)
- 2 – 2×2 @ 4 1/4″ (Footboard Legs)
- 2 – 2×2 @ 11″ (Headboard Legs)
- 2 – 1×2 @ 12 1/2″ (Bottom of Panels)
- 2 – 1×2 @ 15 1/2″ (Top of Panels)
- 2 – 1×3 @ 16 1/2″ (Top of Headboard and Footboard)
- 2 – 1×3 @ 19″ (Siderails) 2 – 1×2 @ 14″ (Bed Frame)


Instructions
Step 1

Panel Line out your panel boards as shown above. Notice how I rested the panel boards on a piece of 3/8″ plywood?
Step 2
That’s so you can easily line up the panel bottom board on center. Mark and predrill holes with a countersink bit into the bottom panel boards.
Step 3

And screw the bottom panel boards to the panel, as shown above. Use glue and 1 1/4″ screws.
Step 4
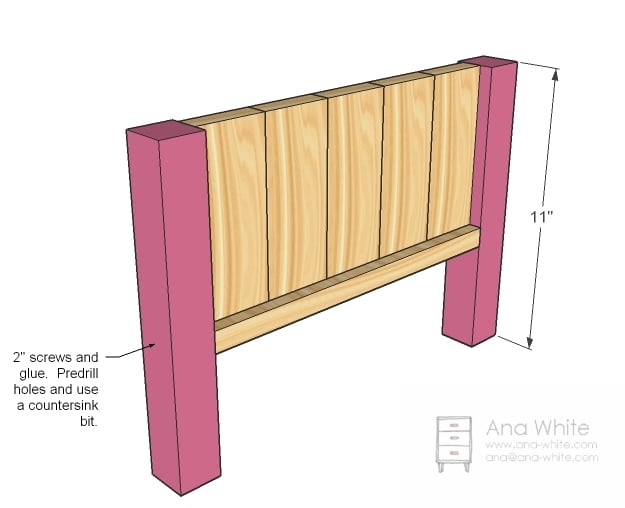
Legs Now attach the legs to the panel with 2″ screws and glue. Be careful to screw into the panel boards and the bottom.
Step 5

Attach top with the shorter screws or nails and glue.
Step 6
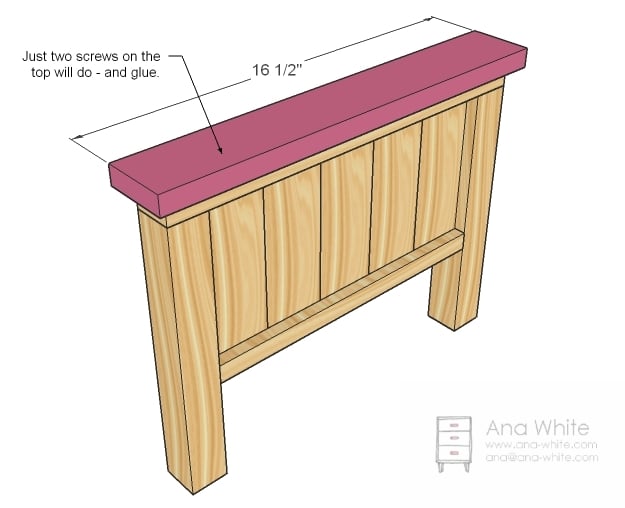
Top of Headboard Finally, screw the top of the headboard to the headboard, centering on the headboard. You only need 2 screws and glue here.
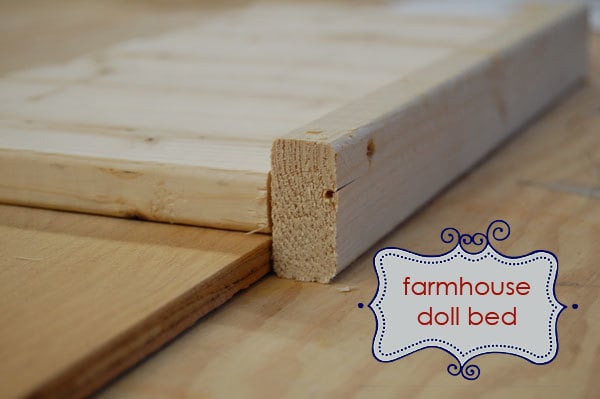
Step 7
See the size compared to the glue? It’s so cute!
Step 8
Footboard Now build the footboard just like the headboard.
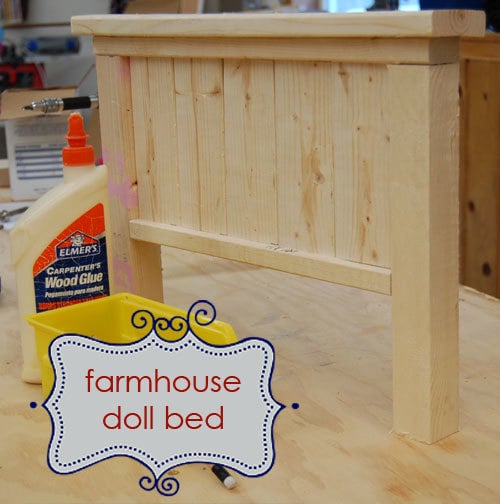
Step 9
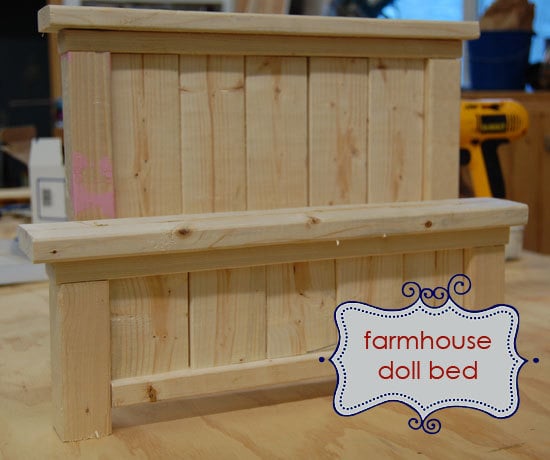
Here is both my footboard and headboard. I used scraps, and that’s why you see some pink paint on the legs. I’m not a big fan of waste.
Step 10

Frame Now screw the siderails to the frame as shown above. If you have a daughter anything like mine, a third support should be placed in the center. Place more supports if you are using flimsy material (ie cardboard) for the top.
Step 11
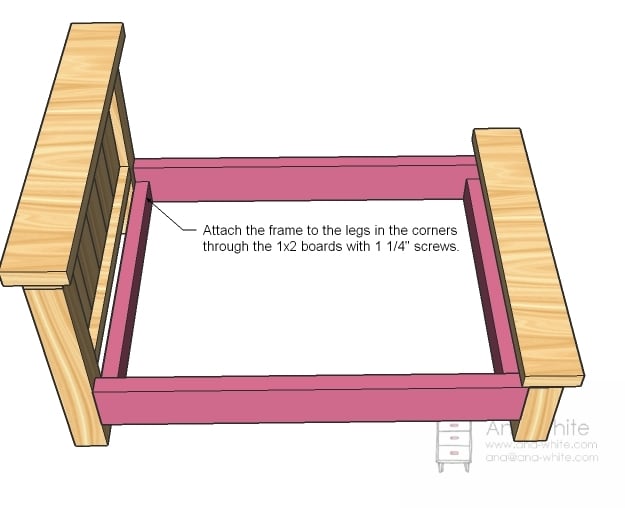
Assembly Now simply predrill holes and screw the frame to the headboard and footboard.
Step 12
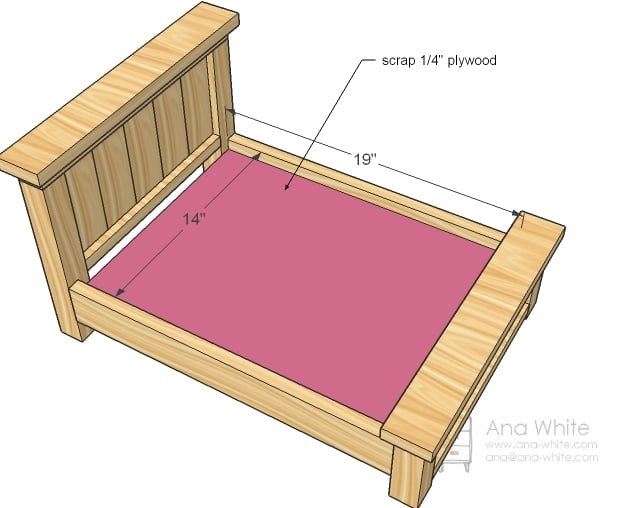
Platform And just lay plywood on top.


Comments
Ronda (not verified)
Thu, 11/18/2010 - 18:13
This is very cute! I make
This is very cute! I make porcelain French dolls. I am looking for
Victorian era reproduction doll beds, cradles, etc to make and or buy. You did a wonderful job with this tutorial. I will ask Home Depot about cutting
my required pieces as I do not have a saw that does accurate cutting. I think the store would cut the pieces for me as I buy them. I do have a drill, however.
PinkGranny (not verified)
Thu, 11/18/2010 - 18:18
I like this bed very much!
I like this bed very much! I am a big fan of American Girl Dolls and have bought several for gifts, including one for myself. I want to make this for my Ruthie Doll!
Jody (not verified)
Thu, 11/18/2010 - 18:34
I can't decide what I like
I can't decide what I like more, the bed or the bedding!!! I plan on making my daughter the twin farmhouse soon and she will definitely be getting one of these to go with it! Thank you:)
Morgane @ Bear… (not verified)
Fri, 11/19/2010 - 05:29
thank you for sharing your
thank you for sharing your plan and construction. I am going to get some wood today and my daughter (6) and I will work on it together this week end, it will be different of the sewing and crafting we usually do together.
I think you bed will turn out a lot better than the bunk bed I made last year....better planning and directions!
I also enjoy your post with the other doll furniture, more interesting idea!
Laura (not verified)
Fri, 11/19/2010 - 12:34
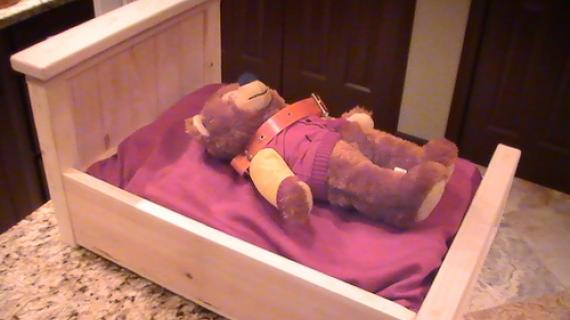
Just "finished" this, though
Just "finished" this, though it's not painted yet. Very happy with the design - Molly brought the pillow over for a makeshift mattress, and has been lounging ever since.

I had to kick her out to take the picture.
http://picasaweb.google.com/lh/photo/xevdizw-8Xpn1qeHUxUvkVJD36mpn4zBEF…
Yes, she has whiskers and a pink nose.
Laura (not verified)
Fri, 11/19/2010 - 12:38
http://lh6.ggpht.com/_sJHUuA1
http://lh6.ggpht.com/_sJHUuA1WqXI/TOb7IfMaYOI/AAAAAAAAF9g/iZRnuRcIVRc/s…
Laura (not verified)
Fri, 11/19/2010 - 12:39
http://lh5.ggpht.com/_sJHUuA1
http://lh5.ggpht.com/_sJHUuA1WqXI/TOb6E7zj-7I/AAAAAAAAF9Q/yd7nxLdih1g/s…
Tiffany (not verified)
Fri, 11/19/2010 - 14:41
Love it! This is just what I
Love it! This is just what I was looking for. I've looked for doll bed plans and didn't like any that I found. One of my daughters just walked by and gasped, "Mommy, who is that for?!"
I refuse to pay the prices for AG doll accessories, so I sew their clothes, and this year for Christmas we are building some doll furniture. You are awesome as always!
isalu (not verified)
Sat, 11/20/2010 - 04:10
I'm giving this to a friend
I'm giving this to a friend to custom finish for her daughter, so I'm done with it. It is super sturdy and cute, as I suspected.
Brooke (not verified)
Sat, 11/20/2010 - 18:23
Ok, I have to make this for
Ok, I have to make this for my daughter who is getting her first AG doll for Christmas......but I have never made anything like this before. FIrst question I have is, can I just nail and glue it together instead of screws and contersinking (which I cannot do, I bet!). And will Home depot cut all of these things for me? I just really don't even know when or where to start?! I would love some advice, thanks for the plans they are beautiful!
Brooke (not verified)
Mon, 11/22/2010 - 07:38
I swear I posted the other
I swear I posted the other day but I looked today to see if there was a reply and my comment is no where to be found. So, I'll post again! I was just saying I LOVE THIS BED!!! I am getting my daughter her first AG doll for Christmas and have to make this bed. I have never done anything like this before and don't have the saws or countersinking tools and so I was wondering if I could use nails and glue and would it work as well? Also, would Home Depot do all those cuts for me? Thanks in advance!
jennie (not verified)
Mon, 11/22/2010 - 08:43
um wow! My girls have
um wow!
My girls have American Girl Dolls, and our oldest has her dolls bed. But the younger needs a bed for her doll, but I cannot get over the $118 pricetage. OUCH!
I think we are going to give this a go! Thanks so much for posting!!
Shannon (not verified)
Mon, 11/22/2010 - 10:47
quick question. on the
quick question. on the "shopping list" for the farmhouse doll bed it says you need 2- 1x3s at 10' tall - which would be 120" each right? because when i add up the total 1x3s that you use I only got 116", so would you be ok only getting 1 @ 10'tall?? sorry for the random question. i want to make a few of these and don't want to go overboard buying wood.
April (not verified)
Mon, 11/22/2010 - 12:40
I'm so excited about these
I'm so excited about these plans! My three year old will be getting two for her new dolls this Christmas! My Dad is going to make the beds and my Mom and I will be making the bedding. She's getting two of the Target version of the AG dolls since they are far above what I can pay for a doll.
Thank you so much!
Ana White (not verified)
Mon, 11/22/2010 - 22:34
Shannon, I believe you are
Shannon, I believe you are correct. I would go for 2 - 8' 1x3 pine boards - should be about $1.50. That way you can cut any knots or cracks out and use the good parts. Ask away, I try really hard to answer as many questions as possible, but when I can't, there are so many good smart people that chime in too!
Randi (not verified)
Tue, 11/23/2010 - 05:08
I'm so excited to have found
I'm so excited to have found this! My daughter is getting a Farmhouse Bed for Christmas and an American Girl Doll. Looks like she's getting a matching doll bed! Thanks so much Ana! I will make sure to post some pics after Christmas!
Morgane @ Bear… (not verified)
Tue, 11/23/2010 - 05:20
I did it, I made the bed this
I did it, I made the bed this week end! My daughter helped me a little, but I think she is more excited about painting it that building it. It still need some TLC: filling the holes, sanding, paint and bedding, but I am proud of my work.
Thank you so much for this bed, the explanations were great.
http://beardollyandmoi.blogspot.com/2010/11/not-so-perfect-doll-bed.html
Brooke (not verified)
Tue, 11/23/2010 - 11:55
I swear I posted the other
I swear I posted the other day but I looked today to see if there was a reply and my comment is no where to be found. So, I’ll post again! I was just saying I LOVE THIS BED!!! I am getting my daughter her first AG doll for Christmas and have to make this bed. I have never done anything like this before and don’t have the saws or countersinking tools and so I was wondering if I could use nails and glue and would it work as well? Also, would Home Depot do all those cuts for me? Thanks in advance!
Ana White (not verified)
Tue, 11/23/2010 - 14:54
Brooke, thanks for checking
Brooke, thanks for checking back, and I'm so sorry if your comment got spammed . . . we get thousands (4261 this month to be exact) of spam comments, and it's unfortunate that well meaning people like yourself get grouped in. One of the issues with using nails is the boards might split on you as you nail. If you choose an extra fine trim or finish nail and glue, the bed should hold together, but be very careful when nailing to avoid splitting boards. And depending on your local home improvement store, they may cut boards for you. I would call ahead and ask first. Make sure you read this post, Christine got all the lumber for under $6 and blogged the receipt!
Chiniot Furniture (not verified)
Tue, 11/23/2010 - 22:17
Thanks for sharing such
Thanks for sharing such information just have a look at chiniot furniture and you can found much more as we are only doing the local marketing but want to export some for like your company so please read this comment so we can have some more business
Courtney (not verified)
Wed, 11/24/2010 - 06:26
Our little girl is getting
Our little girl is getting the Easy Loft Playhouse bed with Stairs for Christmas. I was just wondering if I could convince my hubby to make a matching mini for her doll after seeing this post. Then I saw your comment - love it!
VickiT (not verified)
Wed, 11/24/2010 - 13:37
OH MY GOSH! This is THE most
OH MY GOSH! This is THE most adorable thing ever. THANK YOU SOOOO MUCH! My granddaughter just got her very first American Girl Doll for her birthday two months ago so this I HOPE can be completed in time for Christmas.
Jaime (not verified)
Sat, 11/27/2010 - 01:47
I just made this bed and it
I just made this bed and it is VERY WIDE, more like a queen version. But I love still love it so I made another with one less slat (about 2 1/2" narrower), more like a twin version. You can see the difference here:
http://thatsmyletter.blogspot.com/2010/11/b-is-for-bed-1.html
http://thatsmyletter.blogspot.com/2010/11/b-is-for-bed-2.html
Pam Martin (not verified)
Sat, 11/27/2010 - 11:13
Hi. I am making this bed
Hi. I am making this bed right now. My changes are that I used 1/2" x 3 and I created a dado versus screwing all of the slats in. Am thrilled with the results.
Erin (not verified)
Wed, 12/01/2010 - 14:20
What did you use for the
What did you use for the mattress?
Liz (not verified)
Thu, 12/02/2010 - 07:10
SOOO adorable! My daughter
SOOO adorable! My daughter is getting her long awaited American Girl doll for Christmas. I'm going to precut and prime the pieces and put them in a box with the directions and wrap it up as a present. It's a present AND a fun project we can do together - she loves making things! thanks so much!
Chelle (not verified)
Sun, 12/05/2010 - 14:06
I think this may be my go-to
I think this may be my go-to gift for little girls from now!
Brooke (not verified)
Mon, 12/06/2010 - 06:38
Ana,Thanks, maybe I'll just
Ana,Thanks, maybe I'll just stick to the screws as intimidating as that is to me! Don't want to split the wood! Thanks again!
Kiama (not verified)
Tue, 12/07/2010 - 05:23
What a perfect gift idea for
What a perfect gift idea for any little girl! I made one (I couldn't help myself) and linked to your blog! Thanks for the awesome ideas; it is good to know that I will NEVER run out of projects on my "need to build" or "want to build" list. :)

Brooke (not verified)
Wed, 12/08/2010 - 10:07
Just wanted to thank you
Just wanted to thank you again.....my husband made this last night! I love it and can't wait to see my daughter's face on Christmas morning! I still have to sand and paint but it is beautiful already! Thank you!
Q (not verified)
Wed, 12/08/2010 - 17:37
I am no expert, but have
I am no expert, but have built a few things and since no one else has replied I will try to help since you're running out of time! Home Depot should cut those for you, especially if you find the right person and talk sweetly. Sometimes they charge but it will probably be worth it. As far as using nails and glue, screwing is much easier. You need a drill but you probably have one, if you have a husband or dad or brother or uncle. While you're at Home Depot ask them for a drill bit that will countersink screws. I would print your lists take them with you, when you get to Home Depot walk around a bit and find the person most likely to be the most helpful, hand them your print out and take as much help as they will give. Get an extra board or two to practice drilling a few holes and putting in screws. Then give it your best shot. You will also need sand paper and I've found it super helpful to sand before assembling, if you feel like investing in a hand sander they are also a lifesaver.
Amy Brown (not verified)
Fri, 12/10/2010 - 10:40
Thank you so much for your
Thank you so much for your instructions! I made two beds for my two younger girls. One is pink and one is green. I also posted instructions for a mattress for the beds on my blog here: http://theprojectprincess.blogspot.com/2010/12/farmhouse-doll-beds-and-… if anyone is interested.
I can't wait for the girls to unwrap these on Christmas morning! :)
Greta (not verified)
Sun, 12/12/2010 - 17:44
My husband, son and my son's
My husband, son and my son's friend worked on making three of these today! My girlfriend had a teenage son so he was here helping to make one for his little sister and my husband and son were making them for my two younger daughters. My husband got them all together and is priming them tonight. I will likely paint them once tomorrow and again the next day. They are bigger than I pictured in my head but oh so cute! I plan on making sheets and pillows and a quilt for the beds for the girls too. I can't wait to see their faces Christmas morning! Thanks so much for doing this and sharing with the rest of us!
Did you happen to use 2" foam for the mattress? I am trying to figure out what I need for that. Thanks!
jill (not verified)
Mon, 12/13/2010 - 09:01
jillandcharlieb.blogspot.com

i love this!! this was my very first project! thanks ana!!
Natali (not verified)
Mon, 12/13/2010 - 17:55
Thank you so much for
Thank you so much for sharing! My daughter has had an AG Doll for a few years and we have never bought a bed (too pricey) so this year for Christmas she wants one and we were going to make one up. I LOVE this one and thanks for sharing the plans :) That will make it so much easier and it is DARLING!!
Sara (not verified)
Fri, 12/17/2010 - 18:49
Ana, I adore this bed and
Ana,
I adore this bed and these plans! I built the toddler-sized bed for my little guy for Christmas and now built the doll-size for my daughter. Since she's getting an American Girl doll (18" tall) I made the bed longer (most AG beds are 22-24" long) and more narrow so it's "full" size dimensions by using 6 1x2s instead of 5 1x3s. Details and pics here: http://alwayscreatingsomething.blogspot.com/2010/12/saras-workshop.html

Best of all, I used 100% scraps - lumber, paint, fabric, everything! For a few hours of my time and ZERO dollars, my daughter will be very happy on Christmas morning thanks to you!
Amme (not verified)
Sat, 12/18/2010 - 17:55
Ana, thank you so much! This
Ana, thank you so much! This was my first project, or should I say my first 3 projects. By the end I was starting to feel like a factory but I loved every minute of it. You are so inspiring.


Jaime (not verified)
Thu, 12/23/2010 - 02:01
I made another bed - the
I made another bed - the 'twin' version again which is one slat less in width than Ana's plans here. These beds are fast and easy Definitely recommend.
http://thatsmyletter.blogspot.com/2010/12/b-is-for-bed-3.html
Tasha (not verified)
Sun, 12/26/2010 - 15:52
When my daughter (3) saw
When my daughter (3) saw these plans, she said "mommy you bid (build) it, I paint it!" How could I turn that down?!
It went together so easily, and I love the finished product. Thank you Ana!!
http://eightmuddyfeet.blogspot.com/2010/12/natalies-doll-bed.html
Kylie (not verified)
Sun, 12/26/2010 - 21:59
I've just built this bed and
I've just built this bed and it's gorgeous! Had to make a few adjustments because I couldn't buy the same size wood here (Australia) but it has turned out very cute. Thank You!
Jen (not verified)
Wed, 12/29/2010 - 11:41
I used left over 2" foam from
I used left over 2" foam from a head board I made for my kids. It was a little tight though. I glued it to the plywood and stapled the fabric around it.
Audrey (not verified)
Wed, 12/29/2010 - 18:16
A friend of mine asked me if
A friend of mine asked me if I could make bunk beds for her daughter's American Girl dolls. I had just seen these plans and LOVED them so this is what I came up with. Thank you for these plans!

Audrey (not verified)
Wed, 12/29/2010 - 18:24
sorry...I cannot figure out
sorry...I cannot figure out how to get my picture up on this site.
atlgeorgiegirl.net (not verified)
Sat, 01/01/2011 - 10:37
I was so thrilled to come
I was so thrilled to come across your website when looking for plans to make a doll bed for my 6 year old. She received her first AG doll on her 6th birthday in October and wanted a bed for Lanie. When saw the prices for AG beds I was FLOORED! I have never done ANY wood working, but deided that the cost of those beds made it a necessity. The pans and instructions were so user friendly and made the process very enjoyable. The bed turned out AMAZING! have been asked by friends and famly to make beds for their girls. I am hooked. I am trying to decide which Ana White to do next!!!
Jennifer (not verified)
Tue, 01/04/2011 - 08:24
Thank you so much for these
Thank you so much for these plans!!! My father in law mentioned he was making a doll bed for my niece's American Girl doll for Christmas. I asked if he had any plans and he said no, he was just winging it. A day or two later, I came across this post in my Google Reader and immediately sent it to him. He called to say he LOVED it and had scrapped what he had already started in favor of this one. In fact, he had already gone out and bought the wood for it. He put it together and finished it in no time at all and it was just lovely when it was done. He even personalized it by signing and dating it on the bottom of the bed. My 8 year old niece was absolutely over the moon - thank you so much for posting this!!!
LuLu (not verified)
Tue, 01/04/2011 - 11:06
Hi Ana, I have followed your
Hi Ana,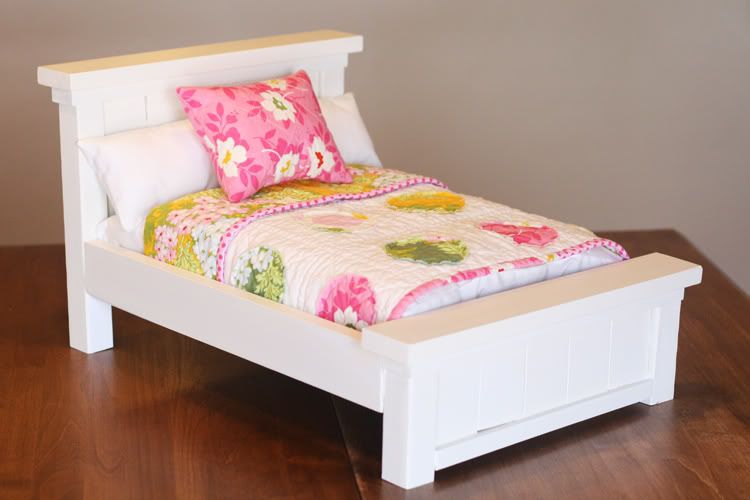
I have followed your blog for a very long time. I just completed my first project though. I'm thrilled with how it turned out! Thank you so much for the doll plans. I would love to outfit my whole doll house with your cute designs.
<a href=" "><img src="
 " width="100%" />
LuLu (not verified)
Tue, 01/04/2011 - 11:08
Oh no! I didn't mean to add
Oh no! I didn't mean to add 3 very large pictures. Sorry.
Heather (not verified)
Sat, 01/08/2011 - 18:25
I made this for my daughter
I made this for my daughter for Christmas....but she has 2 dolls & I wasn't up for making 2 beds. I just separated the slats & extended some measurements, and was able to make a "kig size" bed for her AG dolls! The bedding was a valance that came with my daugters bedding (that I hated...but perfect for the comforter)...and the pillows are made out of scrap fabric from decor in her room!

Ali Smith (not verified)
Sat, 01/22/2011 - 05:58
What would you use as a
What would you use as a mattress that would be flat looking like you have? I have never made anything like this and am so excited to try! :)
Amme (not verified)
Sun, 01/23/2011 - 03:56
Ali-I used a blue camping pad
Ali-I used a blue camping pad from Wal-mart because I was making 4 so needed to be very cost efficient. It is pretty thin, probably only a half inch or so. But, I got enough for 5 mattresses out of one camping pad for 5 bucks. You could also use a kitchen chair pad. Just cut them to fit and cover and you are set.