

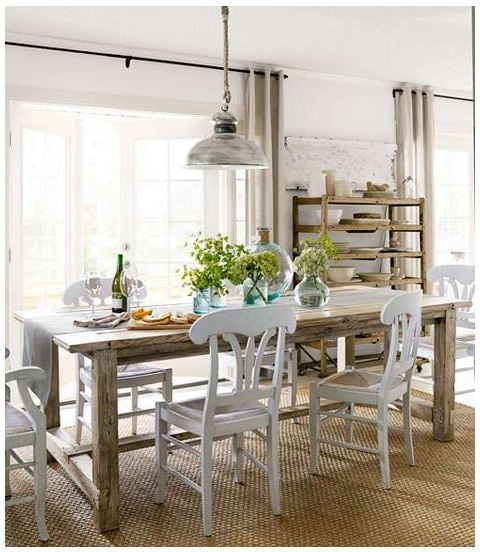
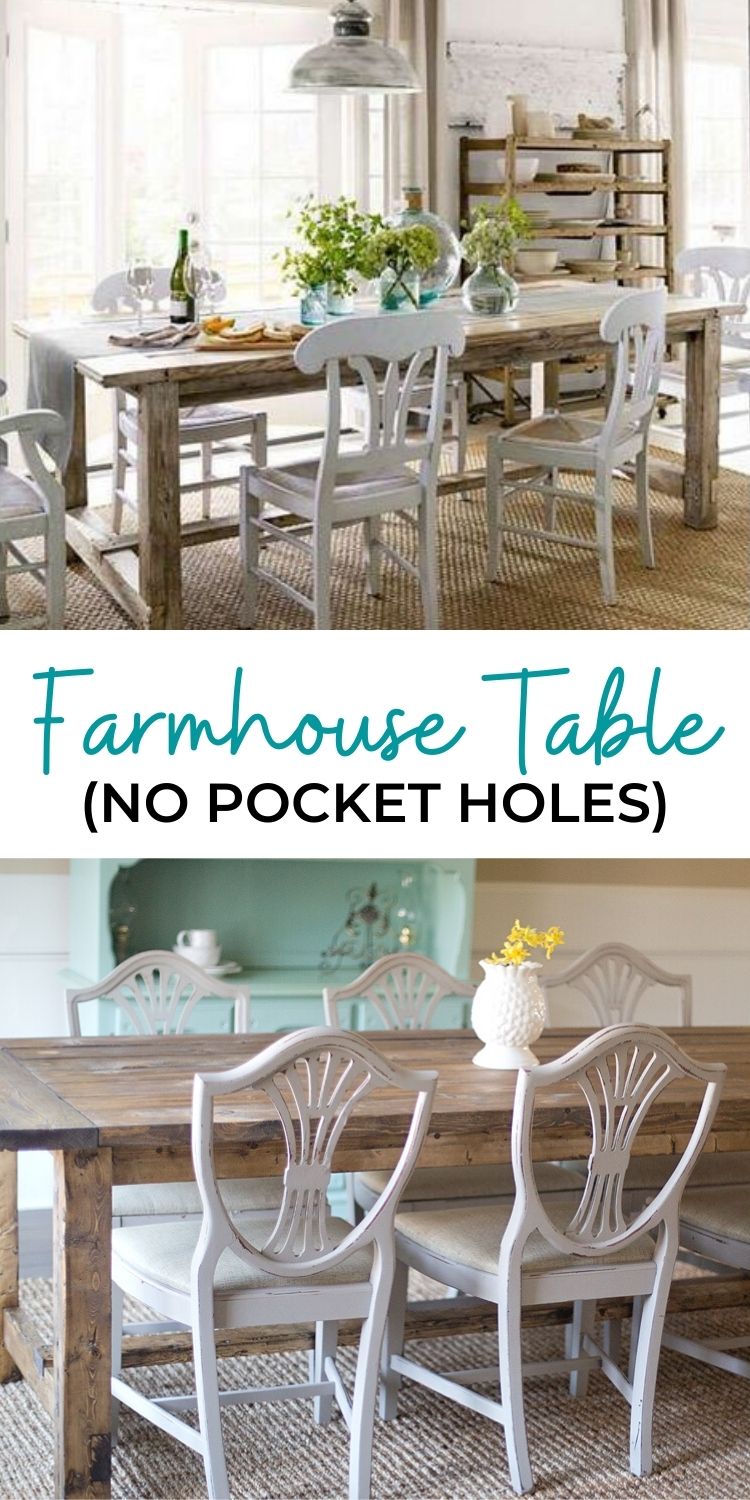
Do you want a farmhouse table, but don't want to spend thousands of dollars? Have you thought about building your own? Check out this free, step by step plan to build your own with basic tools. From Ana-White.com
The Farmhouse Table Story
Beloved for hundreds of years, the Farmhouse Table was usually made by the family that used it, from wood that was locally harvested, using basic tools. Soft woods were easier to use, but the soft wood dents easily, and the tables showed wear, creating that authentic distressed look.
Today, a true farmhouse table is just that - built by hand by the family that uses it, using soft woods, and finished by hand. The tables are meaningful, with each scratch and scuff having a story, each moment creating memory for the family that uses it.
Start your family's Farmhouse Table Story by building your own table, and gathering around it to share a meal, to fold laundry on and do homework on - to create the foundation of your family's home.
The Farmhouse Table Plans
Our Farmhouse Table plans have been built tens of thousands of times and are in homes all over the world. The extremely sturdy, rustic styling is easy to build and authentic to history.
Built out of all off the shelf lumber - builders spend between $50 and $100 making their farmhouse tables.
You just need a saw and a drill to make this farm table.
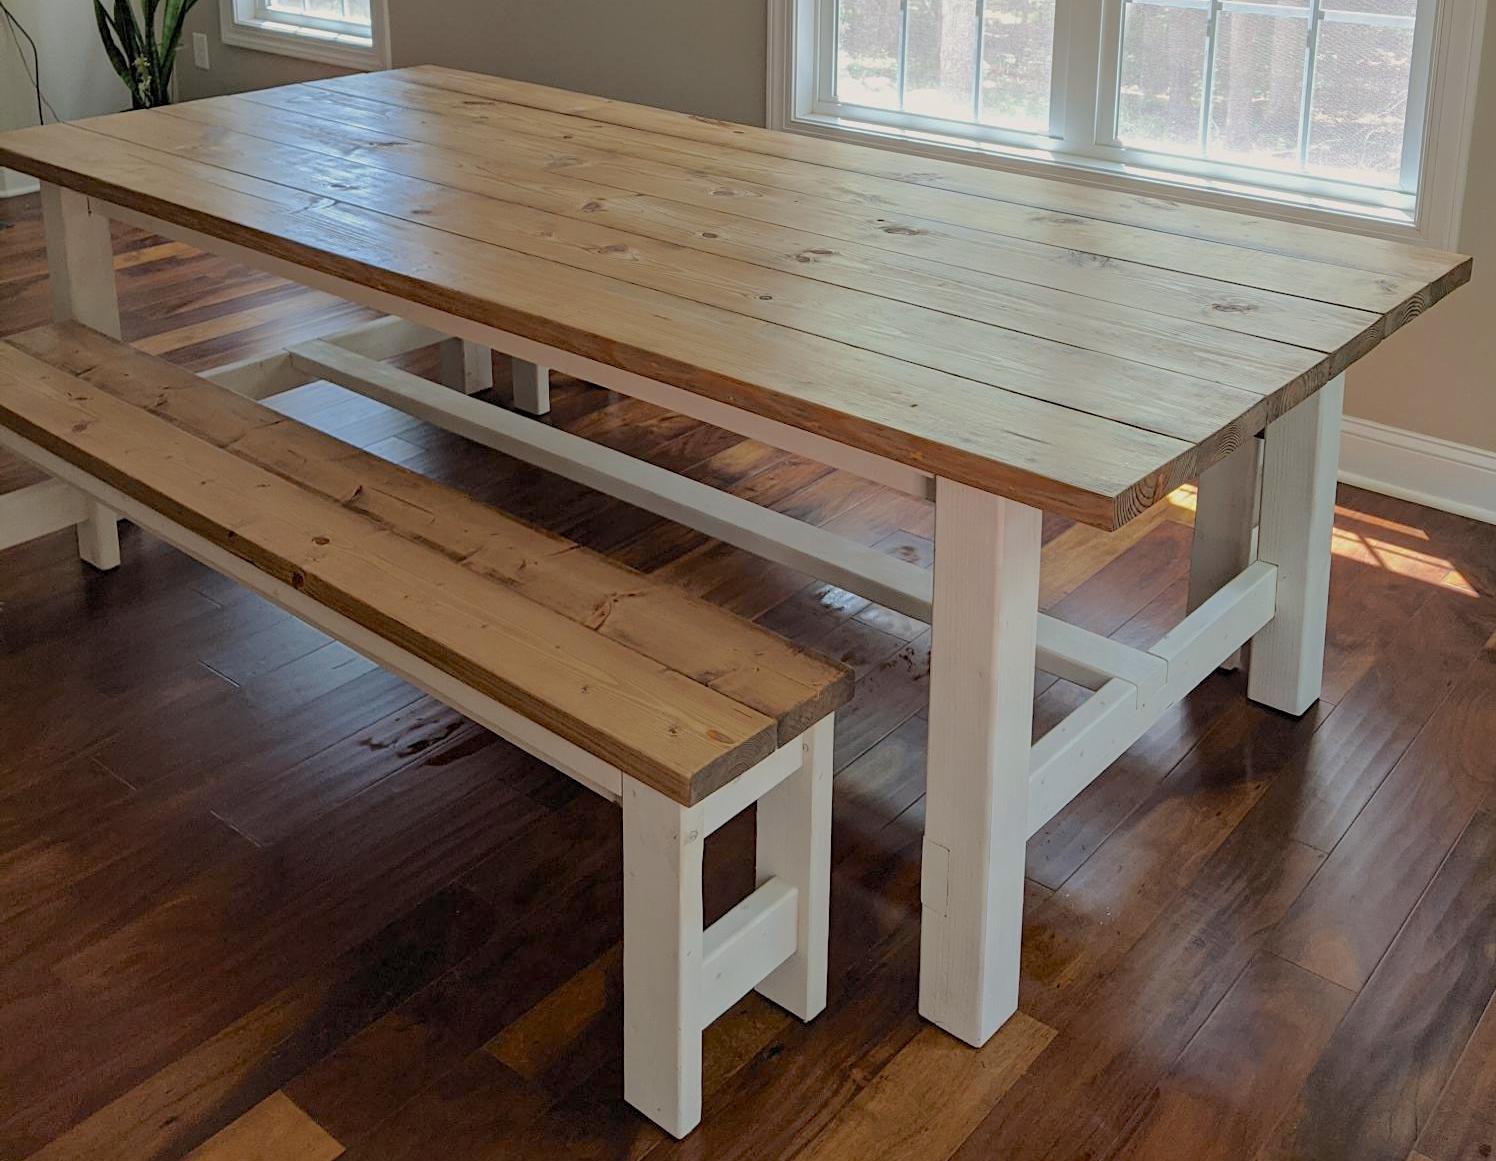
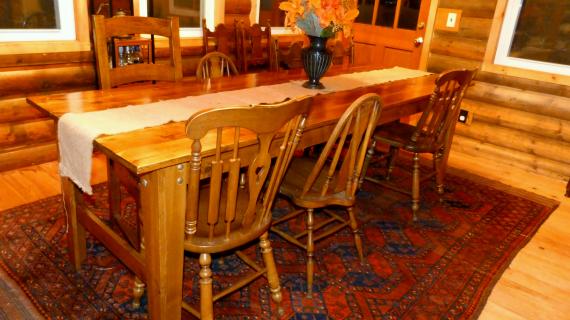
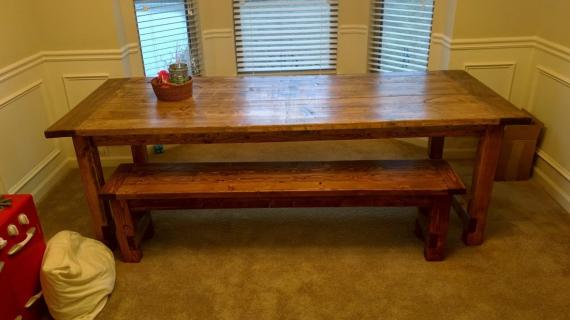
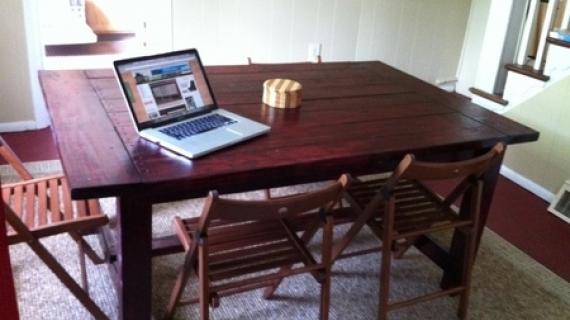
Special thanks to ssshindler for the featured photo.

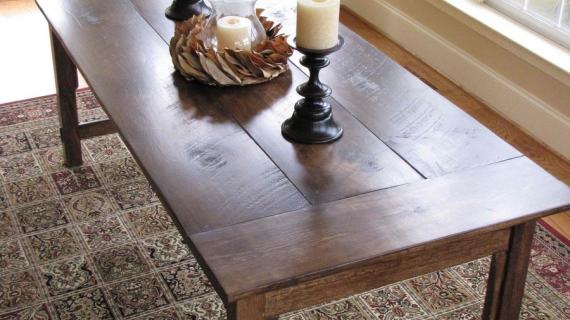
This table was also featured in Country Living Magazine! Built by Michael and Emily Knotts, photo by Lucas Allen
The plans for this farmhouse table follow. Also check out these other plans:
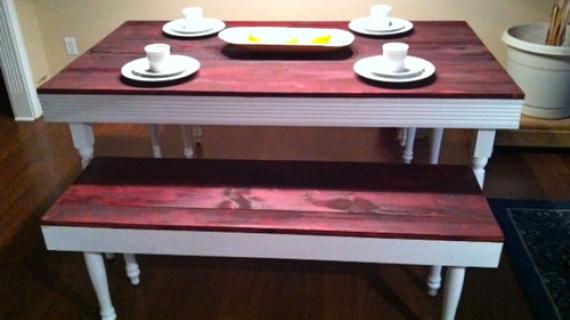
- Matching NO Pocket Hole Farmhouse Bench
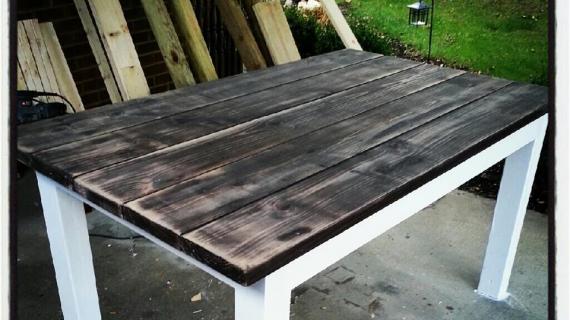
- Farmhouse Table built with Pocket Holes (no screw holes showing)
- $50 Farmhouse Table - The most beginner friendly table you can build
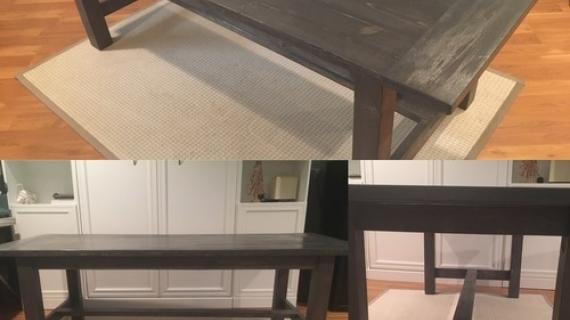
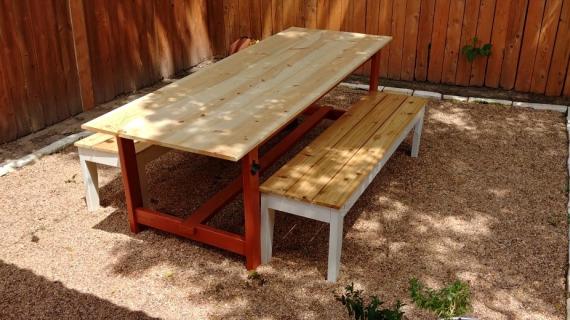
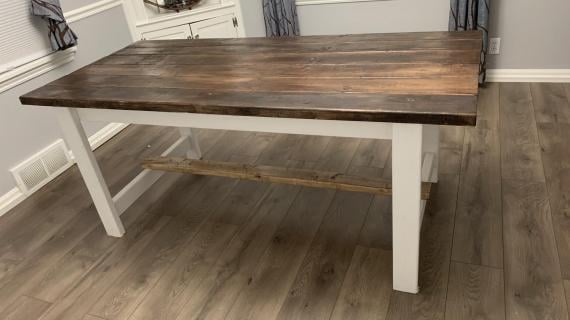
Thank you so much for using our plans. If you build, please share a photo and let us know how your build went in the comments or a brag post.
Pin For Later!
Preparation
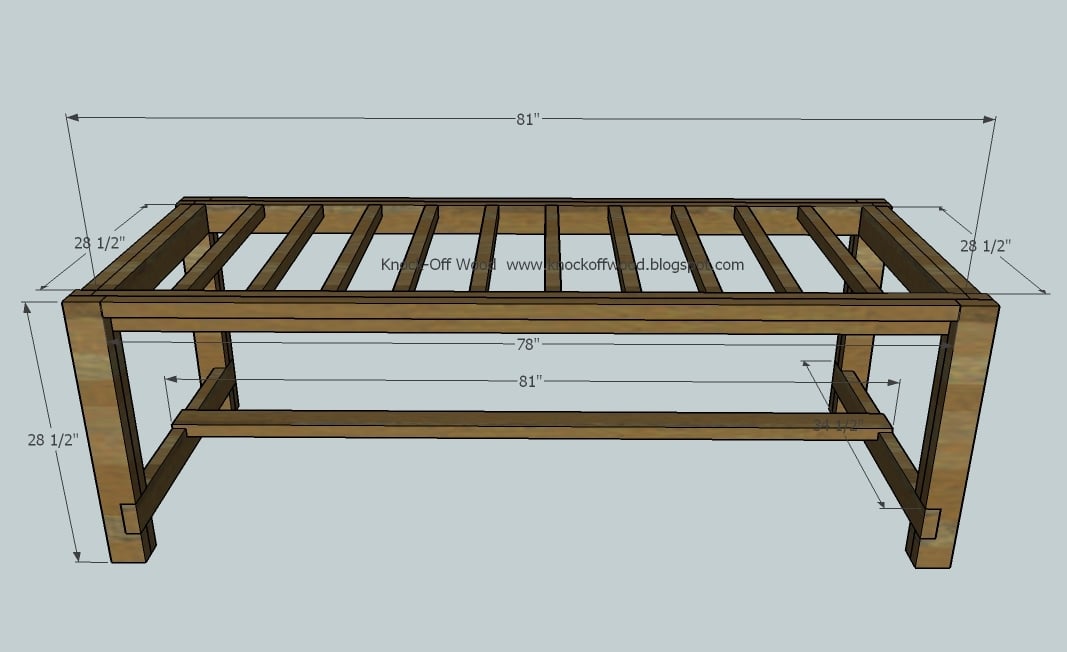
- 8 – 2x4 8 feet long
- 6 – 2x2s 8 feet long
- 1 - 2×8 8 feet long
- 7 – 2x6s 8 feet long
- 2 3/4″ Self Tapping Wood Screws (About 100) (try spax brand or similar)
- 4″ Self tapping wood Screws (About 20)
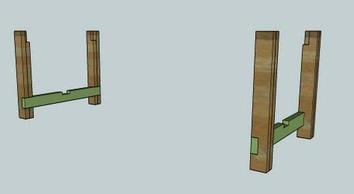
A) 4 - 2×4 @ 28 1/2″ (Outside Legs)
B) 4 – 2×4 @ 28 1/2″ (Inside Legs)
C) 2 -2×4 @ 34 1/2″ (Bottom End Supports for the Stretcher)
D) 1 – 2×4 @ 81″ (Stretcher)
E) 2 – 2×4 @ 81″ (Side Aprons)
F) 2 – 2×4 @ 28 1/2″ (End Aprons)
G) 2 – 2×2 @ 28 1/2″ (Overhang Supports, Ends)
H) 2 – 2×2 @ 78″ (Overhang Supports, Sides)
I) 10 – 2×2 @ 28 1/2″ (Under Tabletop Supports)
J) 2 – 2×8 @ 38 1/2″ (Breadboard Ends)
K) 7 – 2×6 @ 81″ (Tabletop Pieces)
Start by cutting all your boards. The best way to cut is with a compound miter saw. You can also use a circular saw with a guide - good square cuts are very important.


Always use glue. Use the longest possible screws, and predrill with a countersink bit to hide the screw heads.
Instructions
Step 1
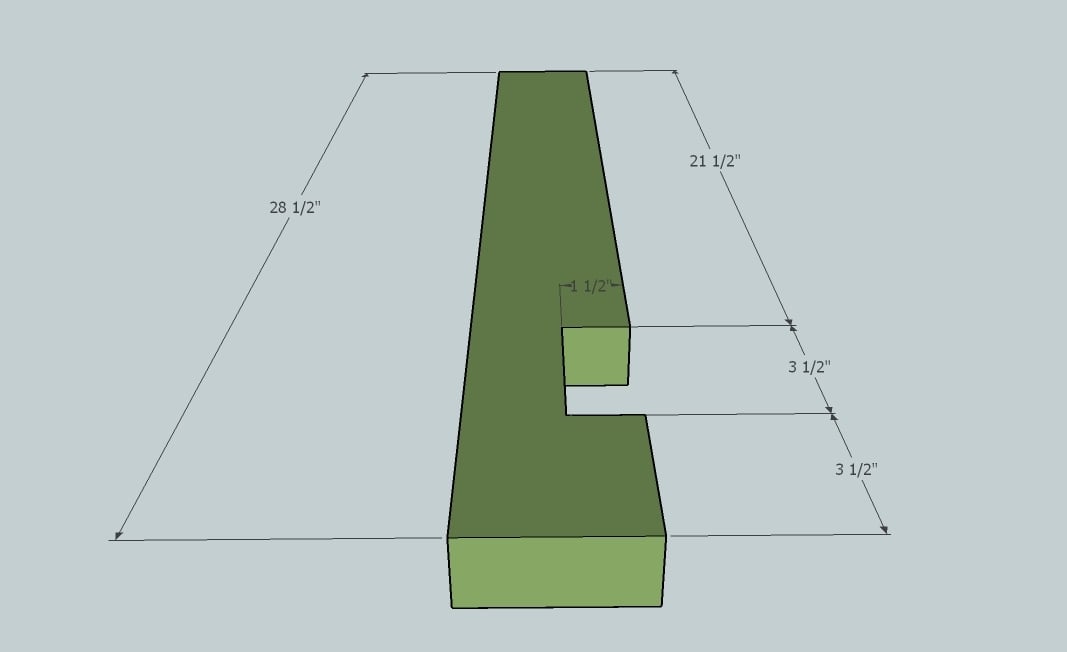
Notch out boards A, the Outside Legs, as shown above. If you do not know how to notch out boards, watch me notch the boards out for my table in my HOW-TO section.
Step 2

Notch out the inside leg as shown above. Make sure you notch both the top and the bottom as shown above. Use the measurements from step 2 to notch the bottom. See the below diagram for a closeup on notching the top.
Step 3
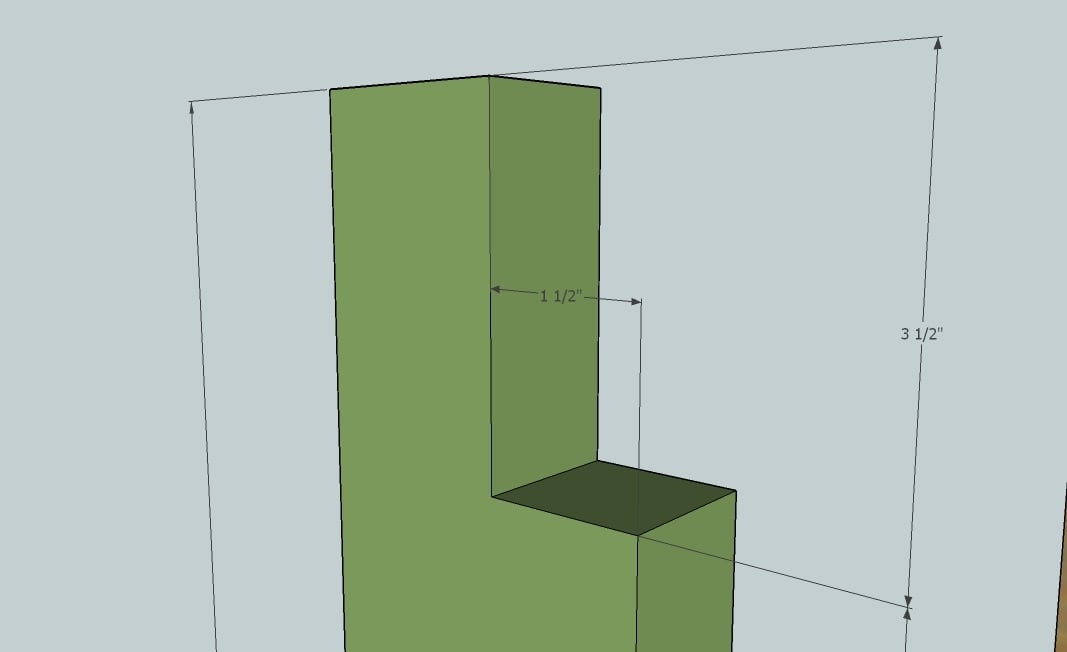
The above diagram show you how to notch out the top of the inside legs.
Step 4
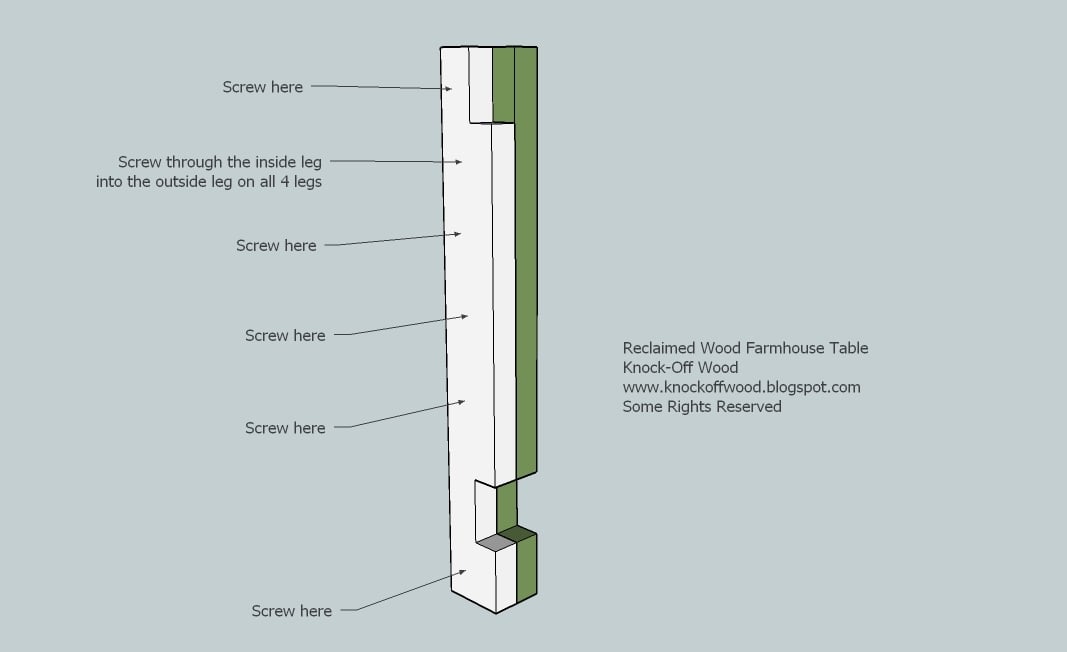
Now screw an inside leg to an outside leg, using glue and 2 3/4″ screws. Be aware of where each leg is placed – it does matter on what sides the inside leg sits. Also, screw through the inside leg into the outside leg to keep your screw holes on the inside.
Step 5
Step 6
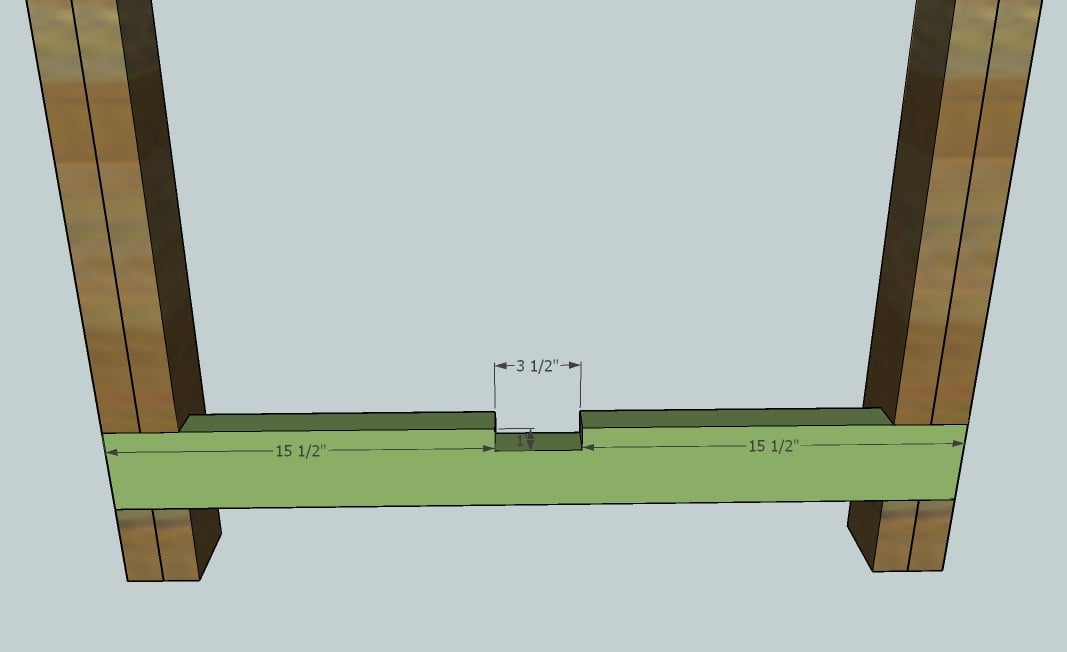
Screw the support, C, into the legs, as shown above. Make sure you use 2 screws on the inside leg and 2 screws on the outside legs per side of the end supports. NOTE: If you would like the support to be on the outside, rotate the legs, keeping the inside legs on the inside, and add 4″ to your stretcher, D. This will reduce your leg room for end chairs, but the notch out will be more visible, like my table and the Restoration Hardware table.
Step 7
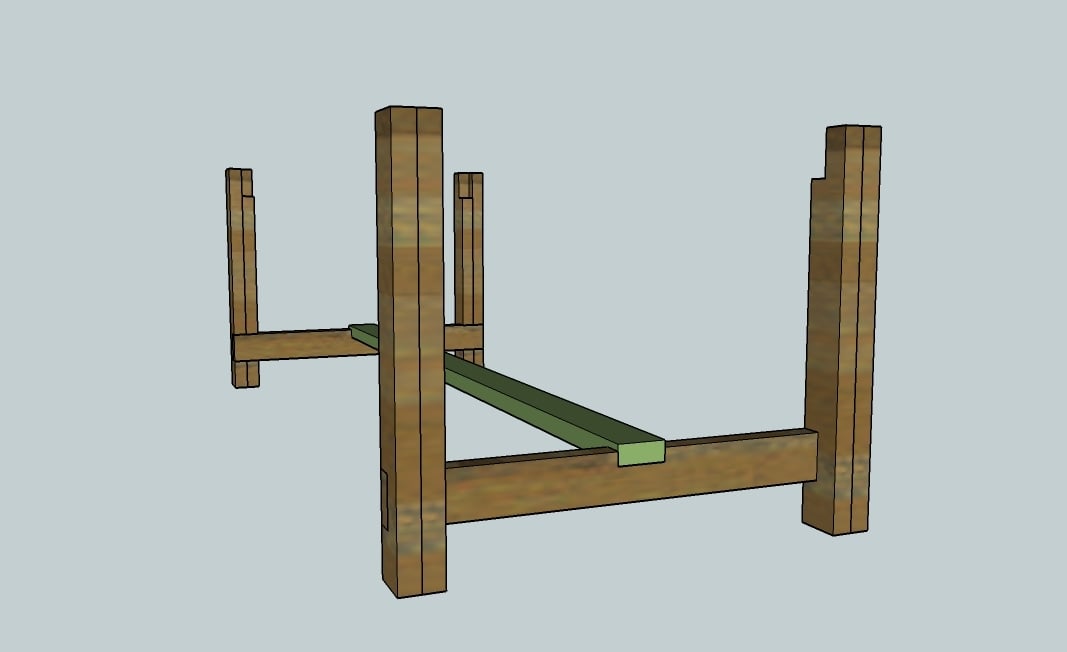
Put your stretcher in place and screw down.
Step 8
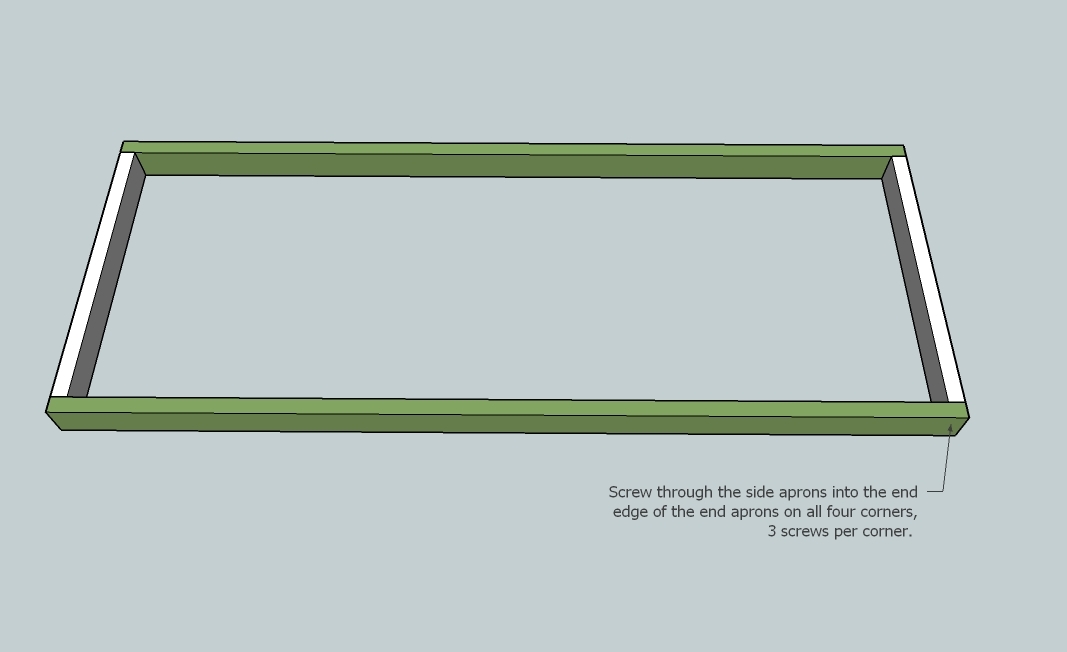
Build your apron on a level surface as shown above, using side apron boards E and end apron boards F.
Step 9
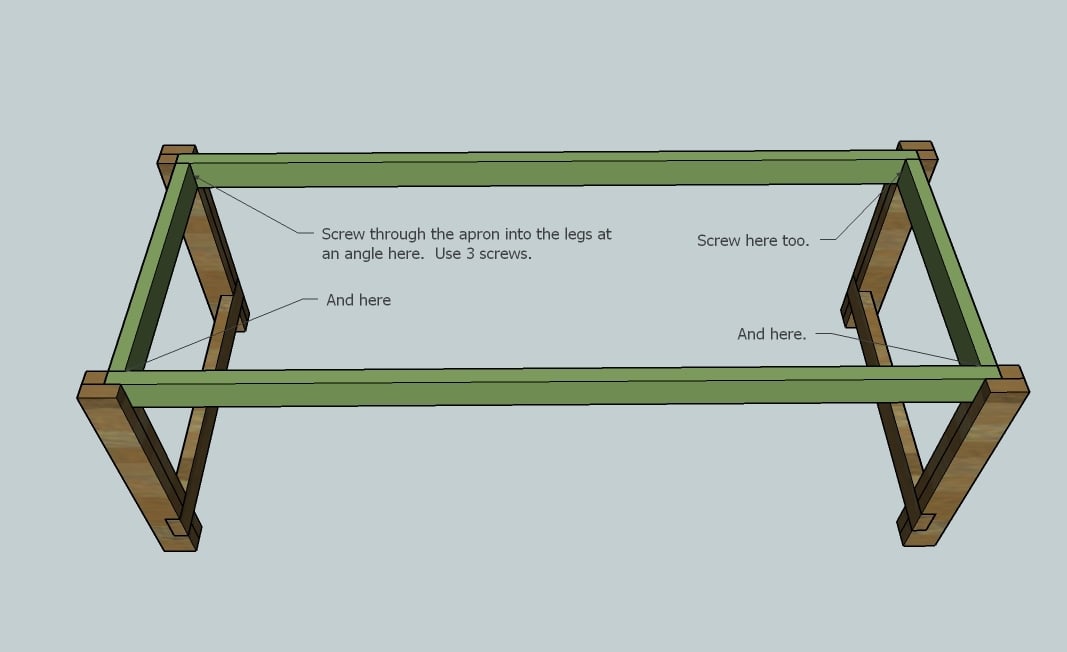
Fit the apron frame into the base of the table as shown above. Use the long screws to screw at an angle through the apron into the legs. Use 3 screws per leg on all legs. Lots of glue here. Now is a good time to check your table for square. Visit the HOW-TO section if you do not know how to check for square.
Step 10
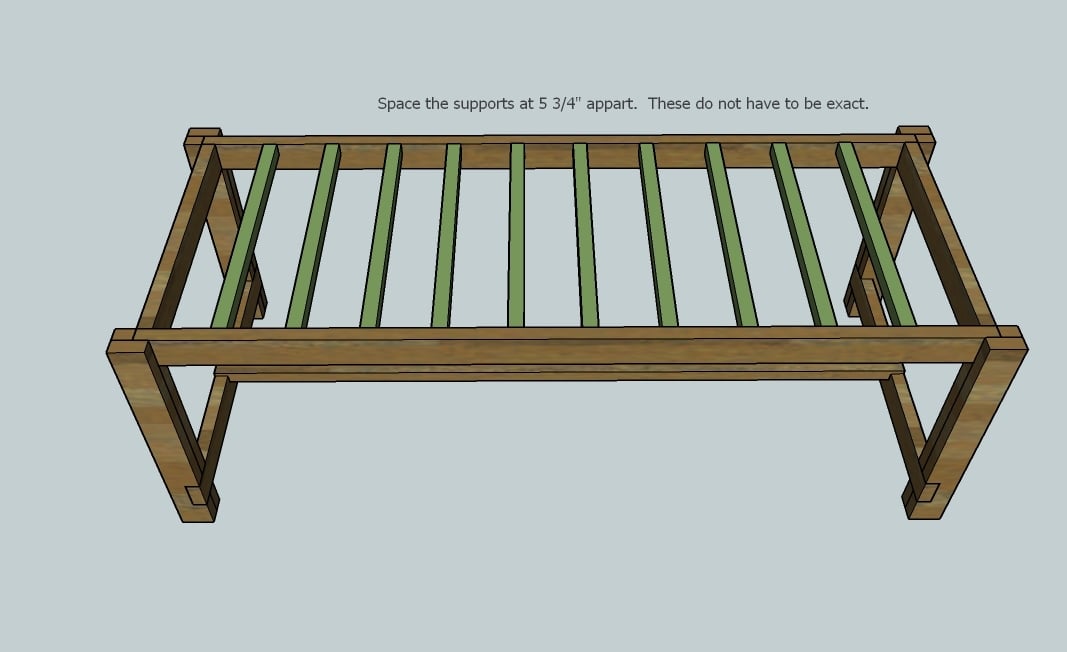
Mark the side apron every 5 3/4″ and place the 2×2 supports, I, as shown above. Remember that a 2×2 is 1 1/2″ wide. This does not have to be exact and the last support will not be exactly 5 3/4″ from the end. Use the 2 3/4″ screws here.
Step 11
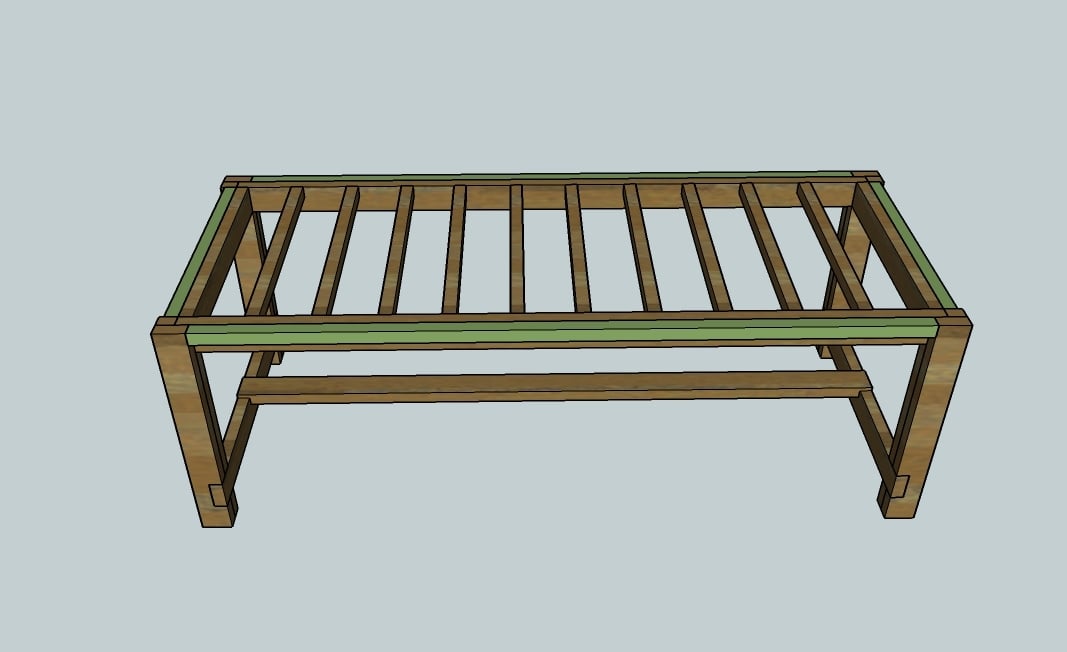
Add the overhang supports, G and H, as shown above. Keep the top edges flush, use the 2 3/4″ screws. Make sure you screw these in good.
Step 12
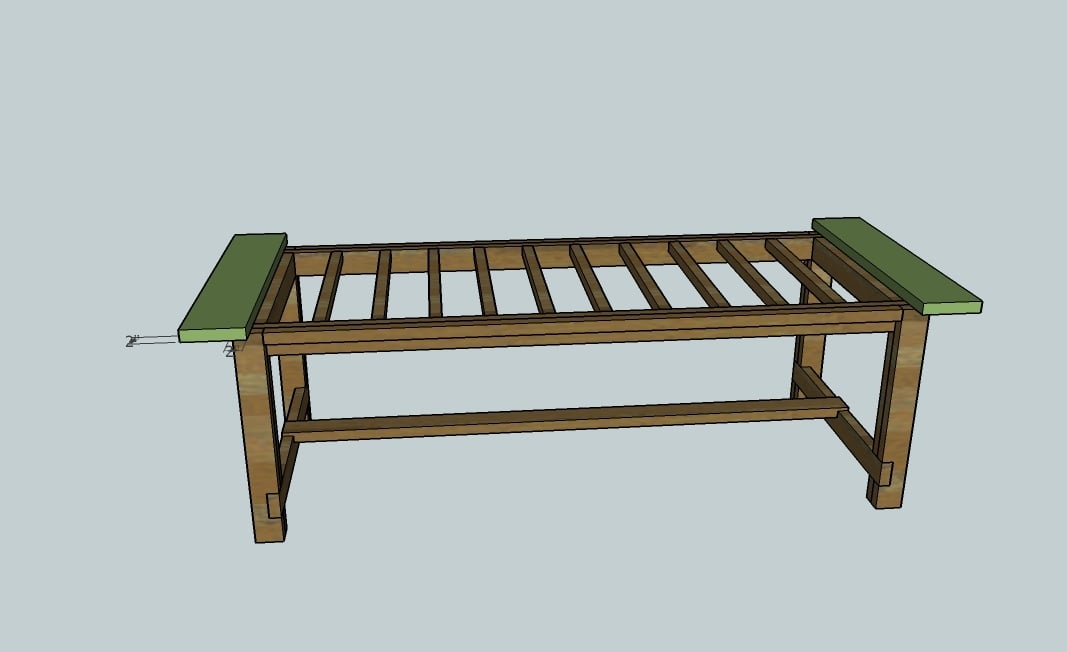
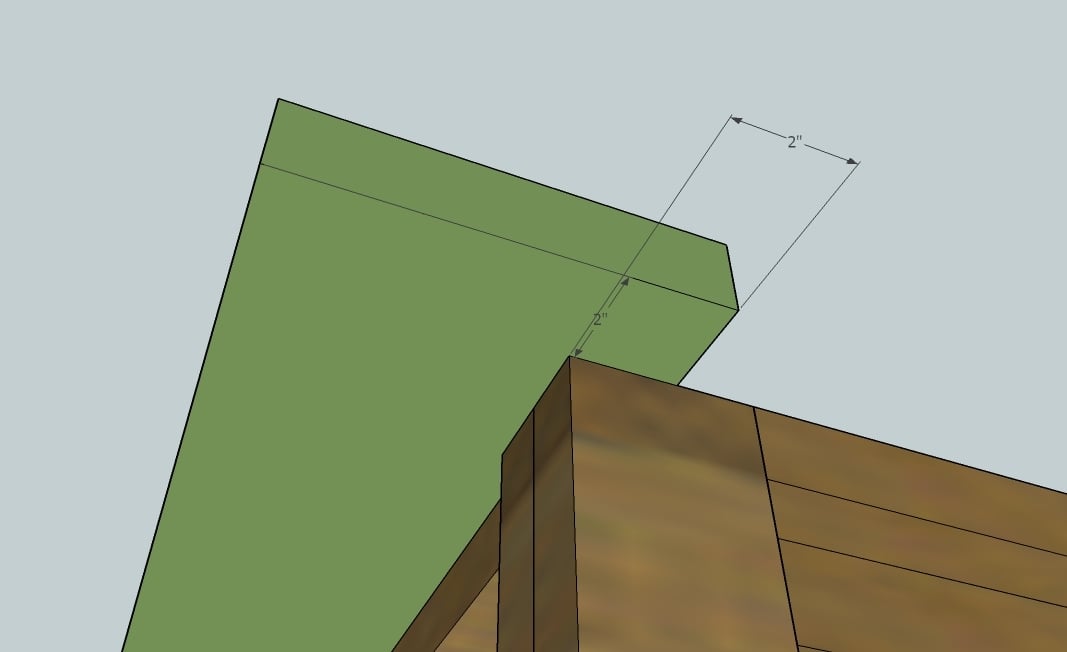
Now the breadboard ends, J. See the below diagram for measurements:
Step 13
Use the long screws to screw the breadboard end into the legs. Then screw from the underside of the overhang support, board G, into the underside of the breadboard end.
Step 14
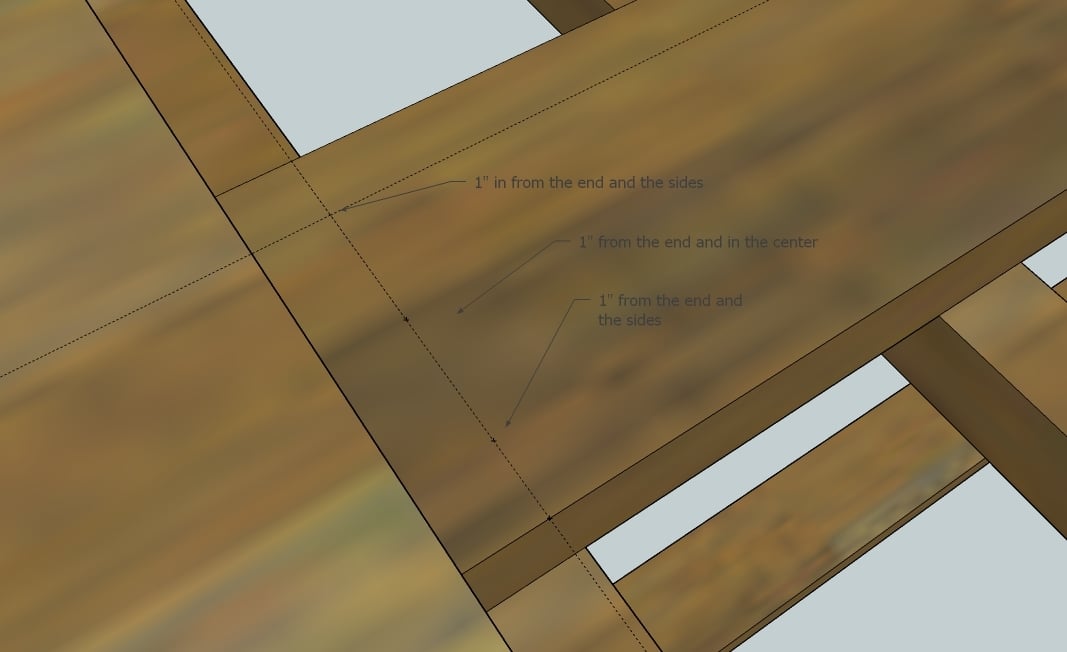
First mark all the ends of the tabletop boards, K, for the screw pattern. The screw pattern I used was 1″ from the end, and 1″ from each side and one in the middle. Predrill the ends on the marked pattern, as shown above.
Step 15
Then begin adding the tabletop pieces K, starting with the center piece. Screw the center board in place on the ends through the top, pre,drilled and marked in step 15. Then from the underside of the table, screw through the tabletop supports, I, into the underside of the tabletop boards, K.
Step 16
Add the next tabletop boards, K, as shown below. As you screw each board down, take special care to line up the edges with the existing boards. You do not want a gap between the boards on the tabletop. Remember to screw through the top on the ends and then screw through the bottom of the under supports to the underside of the tabletop boards.
After all the boards are screwed in place, then use the long screws to screw through the tabletop boards into the breadboard ends, as shown above.
Sand the entire table with 120 grit sandpaper, working in the direction of the wood grain.
Refill holes with wood filler if needed.
Sand table with 180 grit sandpaper.
Stain or paint. If the table feels rough between coats, lightly sand with 180 grit sandpaper.
A final coat of poly on the top can help keep the top easy to finish and wipe cleanable.


Comments
Sandy (not verified)
Tue, 12/28/2010 - 11:31
Can the breadboards be made
Can the breadboards be made from 2 x 10s or 12s instead of 8s?
Travis (not verified)
Fri, 06/29/2012 - 10:25
I'm going to make mine from 2
I'm going to make mine from 2 x 10s. I'm also planning to add removable extensions made out of 2 x 10s.
Amy (not verified)
Wed, 12/29/2010 - 09:50
We are making benches this
We are making benches this weekend. We are just modifying the plans to make matching benches. If we are successful I will post what we did to make it work.
Ana White (not verified)
Thu, 12/30/2010 - 13:04
Yes :)
Yes :)
Amy (not verified)
Sat, 01/01/2011 - 06:57
We made the benches and they
We made the benches and they turned out great! I posted pictures on the Knock Off Wood facebook page since I don't have a website to link to here.
I will do my best to describe what we did. Ana might have to help clarify since I am not that great at this. :)
What we did was cut 3 2x6 pieces to 33 3/4 inches. Then 2 2x8 pieces to 15 1/2 inches - basically we made it match the width of the 2x6's when lined up together. the legs were done the same way as the table but cut to 16 1/2 inches so that the bench would be 18 inches tall. We did the frame the same as the table just scaled it down to size. I hope that helps.
Greg Retherford (not verified)
Sat, 01/01/2011 - 11:02
Ana, I am interested in
Ana, I am interested in building benches to go with the Farmhouse Table w/stretcher... I have looked all over your site but can't find any, I notice others have asked you about plans and I am just curious if they on on your site and I simply can't find them, or if you haven't had a chance to post them yet?
retherford2 (not verified)
Sat, 01/01/2011 - 16:11
Ana, any luck with the bench
Ana, any luck with the bench plans for the farmhouse table w/ stretcher? I'm holding off on the table until I can build the benches first, don't want a table and no place to sit...
Build a Farmho… (not verified)
Tue, 01/04/2011 - 23:31
[...] Farmhouse Bench is
[...] Farmhouse Bench is designed to work with this Farmhouse Table, but there is no reason you could not modify the dimensions or use it as a coffee table or outdoor [...]
Steve Oswald (not verified)
Thu, 01/06/2011 - 07:10
Ana, To extend this table
Ana,
To extend this table to seat more people (I have a family of 10), would you put a set of legs in the middle (six legs total), or just increase the size of the apron boards from 2 x 4 to 2 x 6to carry the extra length?
I dislike the idea of a six-legged table!
Hope (not verified)
Thu, 01/06/2011 - 09:05
Do you have to include the
Do you have to include the stretcher? I would like to omit it so that I can have chairs on the ends of the table as well as on the sides.
My Kitchen Tab… (not verified)
Fri, 01/07/2011 - 05:37
[...] I found building plans
[...] I found building plans from ana-white.com for the Farmhouse Table (pictured above) and for a matching Farmhouse Bench. It’s [...]
Ana White (not verified)
Mon, 01/10/2011 - 10:11
You are in luck! Bench plans
You are in luck! Bench plans are here: http://ana-white.com/2011/01/farmhouse-bench.html
Ana White (not verified)
Mon, 01/10/2011 - 10:29
The 2x6s should do the trick.
The 2x6s should do the trick. Even a 2x4 with the 2x top would probably work :) but I can't guarantee it.
Greg Retherford (not verified)
Mon, 01/10/2011 - 11:22
Ana thankyou so much for
Ana thankyou so much for you're prompt response...my wife is very excited for me to get busy on this project!
RockChic (not verified)
Thu, 01/13/2011 - 17:43
I would like to know this
I would like to know this too. I need to build this by next month because I have a lot of family coming over and need to use the ends of the table too.
I Love My New … (not verified)
Wed, 01/19/2011 - 05:17
[...] the end of the year I
[...] the end of the year I hope I can build this kitchen table. I drool just a bit when I imagine it sitting in my dining [...]
Jany Claire (not verified)
Thu, 01/20/2011 - 02:58
I LOVE IT! Thank you so much
I LOVE IT! Thank you so much for posting this! I have so, so, so wanted a Restoration Hardware-like farm table but don't have $3K to spend one either. And even if I did I think I'd try to somehow find one or make one for less. I'm one of those people who always think "I can make that" when I see something. Sometimes it works out and sometimes I just end up buying the real deal but it's always fun going through the process of trying! I am bookmarking this and sending it to my husband right now! :) Thanks!
Preston Schaefer (not verified)
Sat, 01/29/2011 - 05:03
I really like the chairs that
I really like the chairs that are in Tina’s Farmhouse Table picture. Are there plans for those?
max (not verified)
Sat, 02/05/2011 - 15:49
Can anyone recommend a
Can anyone recommend a specific stain (i.e., from say home depot) for the "weathered stain" look? Is the Restoration Hardware table stained? Thanks!
Rich (not verified)
Mon, 02/07/2011 - 04:59
Wondering what type of wood
Wondering what type of wood putty would be best to use on the table. Which one will hold a stain or a coat of paint best? My wife prefers there not to be visible screws on the table top, so I need to fill in the screws and stain/paint. I've heard that some of the more inexpensive wood puttys will not hold a stain or a coat of paint.
Thanks!
34 things befo… (not verified)
Tue, 02/08/2011 - 17:02
[...] a new kitchen table
[...] a new kitchen table and [...]
elei (not verified)
Thu, 02/10/2011 - 22:44
yes...i'd like to know too!
yes...i'd like to know too!
jenney (not verified)
Fri, 03/25/2011 - 22:45
This is a fabulous table!
I love the shape of this table. It's exactly what I've been looking at for my family. Our antique table is a little rickety after so many years of use. We have eight kids and looking at tables big enough for ten people I can't believe how expensive they are, or how hard to find. After paying a nice Amish man to make us eight chairs and a bench, I realized that hand made furniture is WORTH it, but if those hands could be MINE, what a great sense of accomplishment. I'm still happy to pay Eli his due, but I think I want to try making this just to have done it. Thank you for sharing this!!!
christyireland
Sun, 03/27/2011 - 10:23
How To Question
I can't find a How To section. I'm am looking to find out how to notch out for the farmhouse table.
CaliforniTexan (not verified)
Wed, 03/30/2011 - 23:42
Using 4x4 without stretcher
Hi Ana, You mentioned this table can be made without the stretcher and using 4x4 posts. Would I simply notch out the tops of the 4x4 posts to fit in the apron frame? Or would you suggest using joiners similar to the Tryde collection?
kellie girl
Sun, 04/10/2011 - 19:05
Hi Ana I was interested in
Hi Ana I was interested in making the square farmhouse table but the link with those instructions isn't working. I'm not sure if I'm doing something wrong but it tells me the page doesn't exist :/ Please help. Thanks
Guest (not verified)
Fri, 05/13/2011 - 12:33
4X4's for legs?
I was thinking of using 4x4's for legs instead of two 2x4's...I don't see a specific reason for the two 2x4's. Does anyone think that would be a problem?
Becca W (not verified)
Fri, 05/13/2011 - 15:39
Modifications?
I LOVE YOUR SITE!!! My husband and I really want to make this table! We are wondering how hard it would be to modify this to make the table legs removable? We do a lot of cross-country moving, so we need something that travels well. With a family of 8, we need something big, durable, and inexpensive also! Thank you so much!
tatekidsmom
Thu, 05/19/2011 - 06:53
I LOVE my new table!!!!
I just built this table, and while it was not my first building project ever, it was my first one without my dad! I waited years to buy a new table because I never could find one that met my needs, we have 8 children, and company frequently. I did make it longer simply by omitting the bread board ends and extending the 2x6's, then I glued and used finishing nails to add a 1x2 over the rough ends. I looks great and will seat 12 adults comfortably. I built 2 benches to match. The plans were easy to follow and very easy to understand, it wasn't hard at all! THANK YOU for this website, I have many more projects on my to do list now!
Mark (not verified)
Fri, 06/17/2011 - 14:06
Nailer required
Why is there a nailer required as part of the tool list? I dont see any nails being used.
lori-marie
Thu, 07/07/2011 - 03:56
Am I missing something?
First, let me say that this site is absolutely amazing. I actually started to cry when I discovered it. I've been living as an expat in Asia for 8 yrs & getting furniture I really like has proved impossible. Just the logistics of buying this kind of thing from US stores like Pottery Barn, not to mention the whopping price tag, are frightening. So, thank you, thank you, thank you for providing this information and, even more so, for doing it for free!
However, it seems like there are some errors in the math. For example, if the 7 tabletop pieces are each 6" wide, how can the table be 38 1/2" wide? 7x6=42, no? Likewise, if the 2 breadboard pieces are 8" each & the tabletop pieces are 81", how is the table 96" long, when 8+8+81= 97?
But I am not a carpenter [yet! :)], so maybe I'm not reading the plans correctly. Is there something I'm missing?
In reply to Am I missing something? by lori-marie
donno
Tue, 09/27/2011 - 16:11
Am I missing something?
The measurements of the boards are nominal. A 2x6 is actually 1 1/2" x 5 1/2", so 7 of them side by side is 38 1/2" wide.
Guest (not verified)
Sat, 07/09/2011 - 17:36
grooves
I LOVE this look. Any advice or recommendations on keeping the crumbs from collecting in the grooves? Thinking of this as an everyday table. Thanks!
Don G (not verified)
Wed, 07/13/2011 - 18:54
Breadboards...
Are the breadboards necessary? I kind of like the look without them, but I don't want to sacrifice the integrity of the table. Great plans.
Guest (not verified)
Mon, 07/18/2011 - 05:41
Weight
Any idea how much this table weighs? I am planning to build but have concerns about moving it once completed.
Also, Avi, I like the idea of a wider table ... which makes it heavier of course. Did all of your cuts work?
ltl_lisa
Fri, 07/22/2011 - 10:08
fill between 2x4s?
Hi Ana,
I just finished the bench but am wondering what you did to fill the gaps between the 2x4s on the legs. It looks like they are 4x4s. Did you use wood filler or glue and sawdust? I am planning on staining them and would like it to look more finished.
I love your site and can't tell you how happy I am to build. I too am a stay at home mom and building is my new "job". I have recently refinished all my cabinets and put up chair rail and beadboard. The farmhouse furniture is going to look amazing in my "new" kitchen.
Thanks again for your amazing work
LovelyPigeon
Sun, 08/07/2011 - 16:32
That bench!
When my Daddy was 80 he built me a country dining table like this one from Alabama heart pine. Now I'm building a new house and have feared that the dining area is too narrow for the chairs I have. The bench is the perfect solution!! Thanks so much for the plans and all the inspiring ideas at this site!
jsahifer
Mon, 09/05/2011 - 09:05
How-to frustration
I'm frustrated searching this site. Step one of the farmhouse table tells me to "Notch out boards A, the Outside Legs, as shown above. If you do not know how to notch out boards, watch me notch the boards out for my table in my HOW-TO section." I was ready to bravely move ahead and notch out the boards, then I noticed that I could see you do it. I spent 1/2 an hour looking and never did find the demonstration. can you help?
John
love2create
Sun, 09/11/2011 - 17:29
Cross beams for shorter version?
Hi Anna,
I love this table and would like to build it for our dining room. Since we like to have chairs on each end of the table I was thinking of building it without the cross beams so that they can slide easily underneath. Do you think it needs the cross beams?
I think I am going to shorten the length to about 66 inches long and then build 15" extensions for each end. Thanks!
ripvanwinkel12
Tue, 09/27/2011 - 13:50
Farmhouse Table
How do I get a set of plans for this table. Some of the dimensions of the web site are hard to read.
donno
Tue, 09/27/2011 - 16:05
HOW-TO section?
I found this site by Googling plans for a dining room table. I am amazed by what I've found here! So this table is going to be the first thing I build, but I'm having a little problem...
When you say, "watch me notch the boards out for my table in my HOW-TO section" where is this how-to section? Maybe I'm being a dope, but I can't find it!
Thanks,
D
Bill from PA (not verified)
Thu, 09/29/2011 - 12:27
Awesome Table
This is awesome!!
I am actually making this table now, thanks to your inspiration!
I have a question though, just because I am trying to be as detail oriented as possible to make it (rustically) perfect. In your step three, you have the width as 1 1/2 inches wide. Wouldn't that measurement actually only be 1/2 (the width of the 2x4? Step 9 seems to prove my point that the 2x4 butting up against it is flush with the edge of the longer 2x4. Thanks, I appreciate the work you put into this!
Regards,
Bill
Guest (not verified)
Sat, 10/01/2011 - 19:00
farmhouse table with bench
I am wanting to build a dining room table and I found the plans for your farmhouse table. I printed off the plans for the table and would like to know how to get the plans for the bench. This is exactly what we have been looking for! Thank you. Kyle
creemosoul
Mon, 10/03/2011 - 12:59
can't read all the measurements
I can't read all the measurements on the screen. They are too small / blury. Am I missing something? Is there another place to get them?
Guest (not verified)
Thu, 10/13/2011 - 08:42
Wish the drawings were larger
Wish the drawings were larger so you could read the measurements.
cressie (not verified)
Mon, 01/02/2012 - 15:54
arced legs
I would like to make this table but would like the legs to have an arc and cross at the ends. Any idea on how I would do this? What would the new dimensions be?
Thanks
Cressie
In reply to arced legs by cressie (not verified)
claydowling
Tue, 01/31/2012 - 07:56
Arcs and crossing legs
Getting the legs to cross isn't a major problem, and there are plans on here for benches and tables with similar designs. Sorry, don't know where, but you'll have fun cruising the plan catalog anyway.
As for putting an arc on things, I'm not sure what you mean. If the legs themselves have a curve to them, that's a much more advanced project and you'll need to learn how to do either a steam bend or a bent lamination. Both are considered advanced topics. Tage Frid Teaches Woodworking, Volume 2, covers this in depth and would definitely be worth your time and money.
An arc in the apron can easily be cut with a jig saw and cleaned up with a rasp and spokeshave.
Lee Wilkerson (not verified)
Sat, 01/28/2012 - 17:56
Farmhouse table
Me and my wife have been looking to build a table identical to the one you built but only square instead of rectangle. have you ever built a square one? if so do you happen to have plans?
dannie2g
Mon, 01/30/2012 - 22:03
farm table
I just found your blog and I love it. I signed up because your blog gives me hope that I can achieve building furniture. Thanks so much for the informatiion. I will be a followers forever.
dannie2g
Jay (not verified)
Fri, 02/17/2012 - 16:00
Can someone tell me how deep
Can someone tell me how deep the notches on the inner and outer legs should be?