
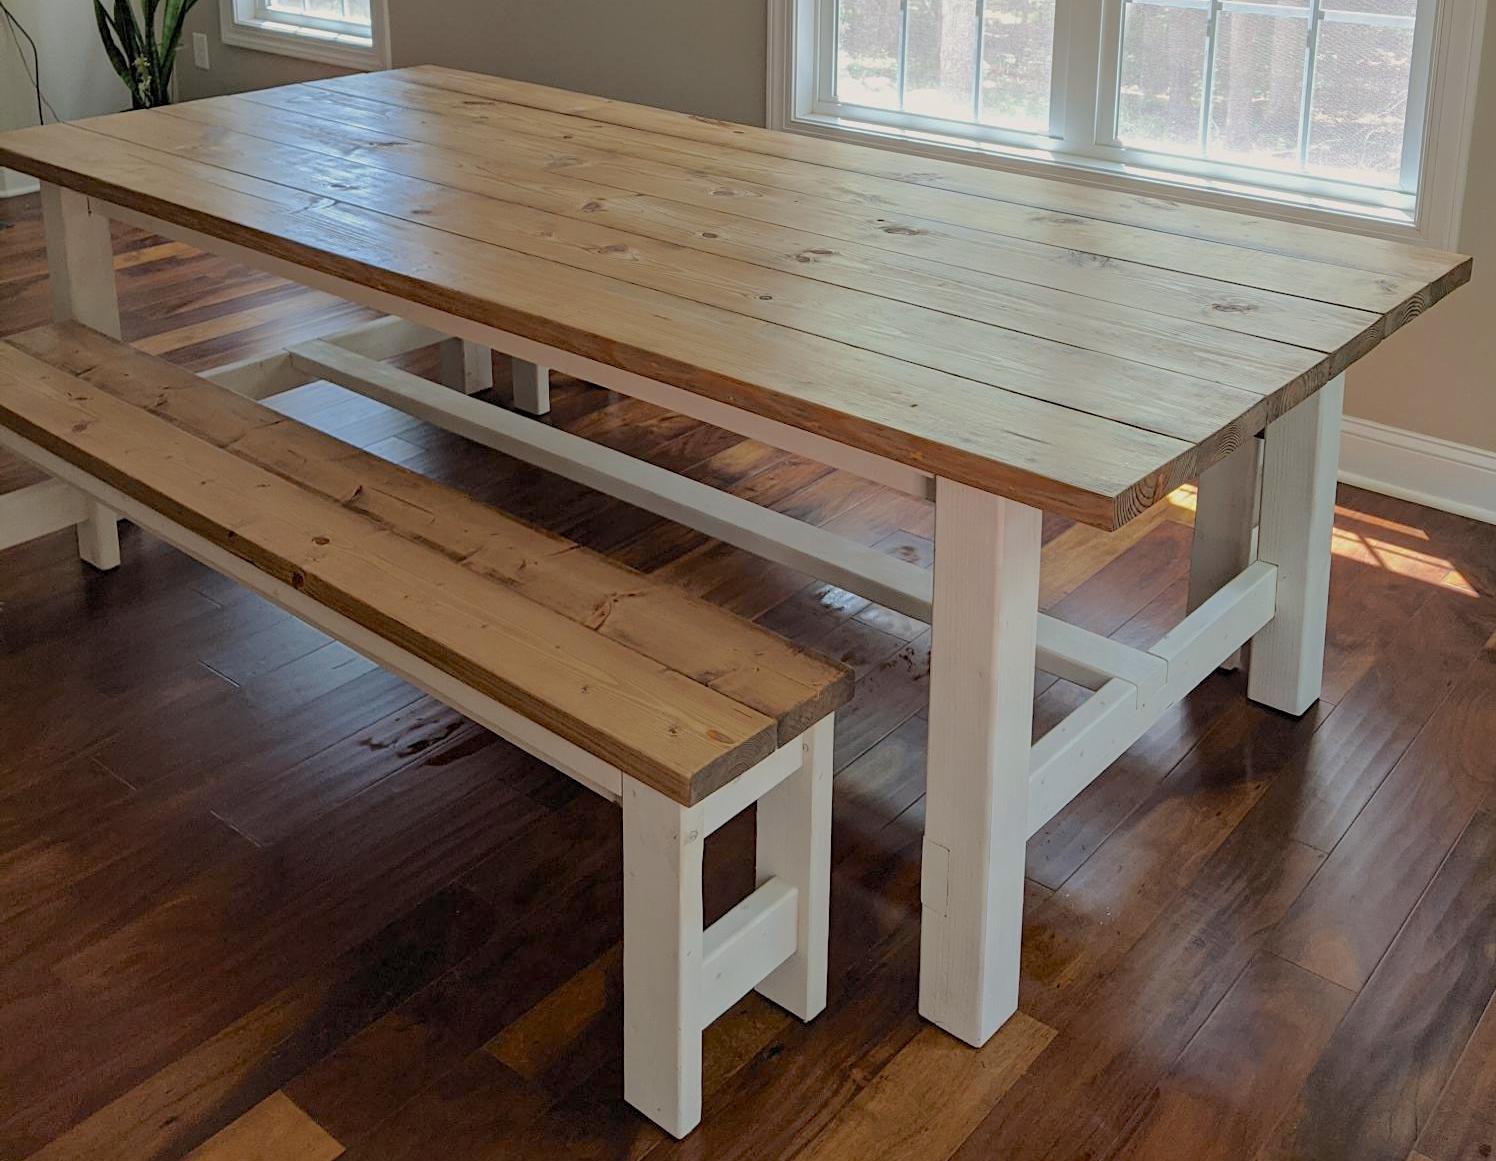

Do you want a farmhouse table, but don't want to spend thousands of dollars? Have you thought about building your own? Check out this free, step by step plan to build your own with basic tools. From Ana-White.com
The Farmhouse Table Story
Beloved for hundreds of years, the Farmhouse Table was usually made by the family that used it, from wood that was locally harvested, using basic tools. Soft woods were easier to use, but the soft wood dents easily, and the tables showed wear, creating that authentic distressed look.
Today, a true farmhouse table is just that - built by hand by the family that uses it, using soft woods, and finished by hand. The tables are meaningful, with each scratch and scuff having a story, each moment creating memory for the family that uses it.
Start your family's Farmhouse Table Story by building your own table, and gathering around it to share a meal, to fold laundry on and do homework on - to create the foundation of your family's home.
The Farmhouse Table Plans
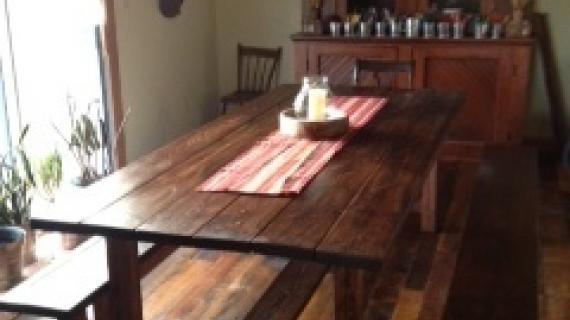
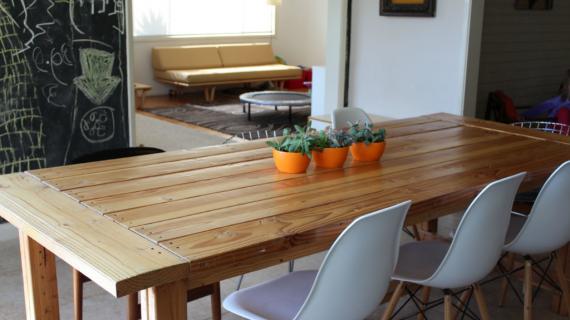
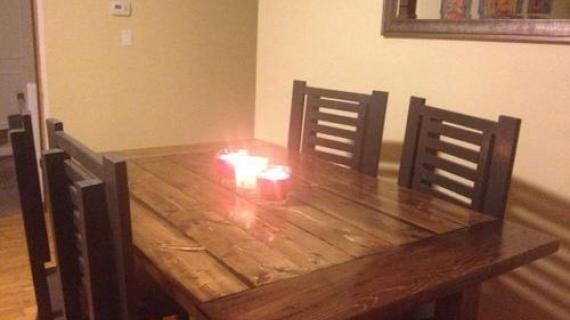
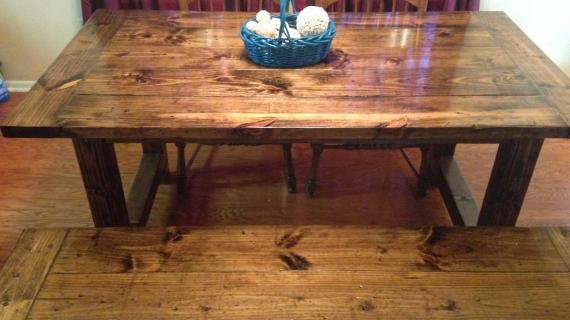
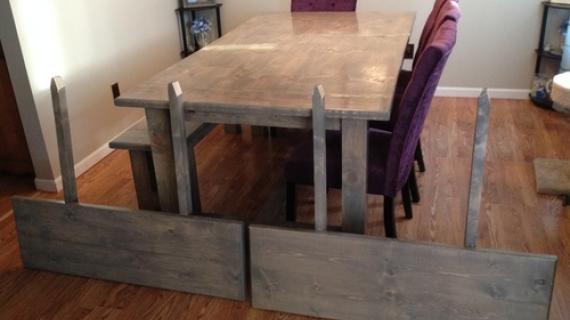
Our Farmhouse Table plans have been built tens of thousands of times and are in homes all over the world. The extremely sturdy, rustic styling is easy to build and authentic to history.
Built out of all off the shelf lumber - builders spend between $50 and $100 making their farmhouse tables.
You just need a saw and a drill to make this farm table.
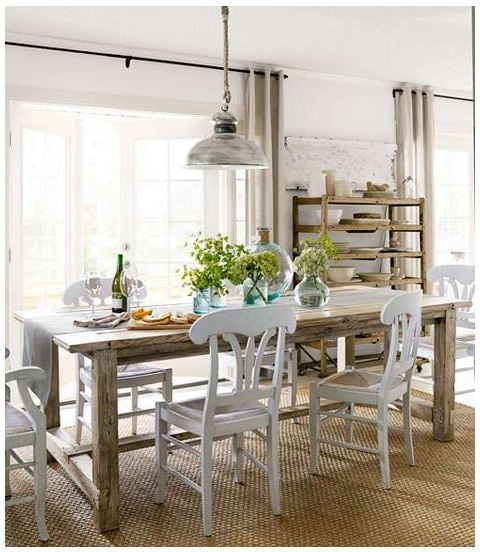
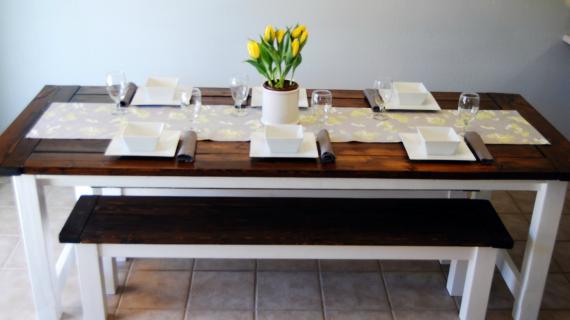
Special thanks to ssshindler for the featured photo.

This table was also featured in Country Living Magazine! Built by Michael and Emily Knotts, photo by Lucas Allen
The plans for this farmhouse table follow. Also check out these other plans:
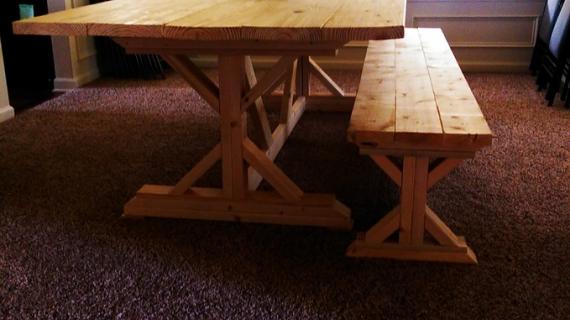
- Matching NO Pocket Hole Farmhouse Bench
- Farmhouse Table built with Pocket Holes (no screw holes showing)
- $50 Farmhouse Table - The most beginner friendly table you can build
Thank you so much for using our plans. If you build, please share a photo and let us know how your build went in the comments or a brag post.
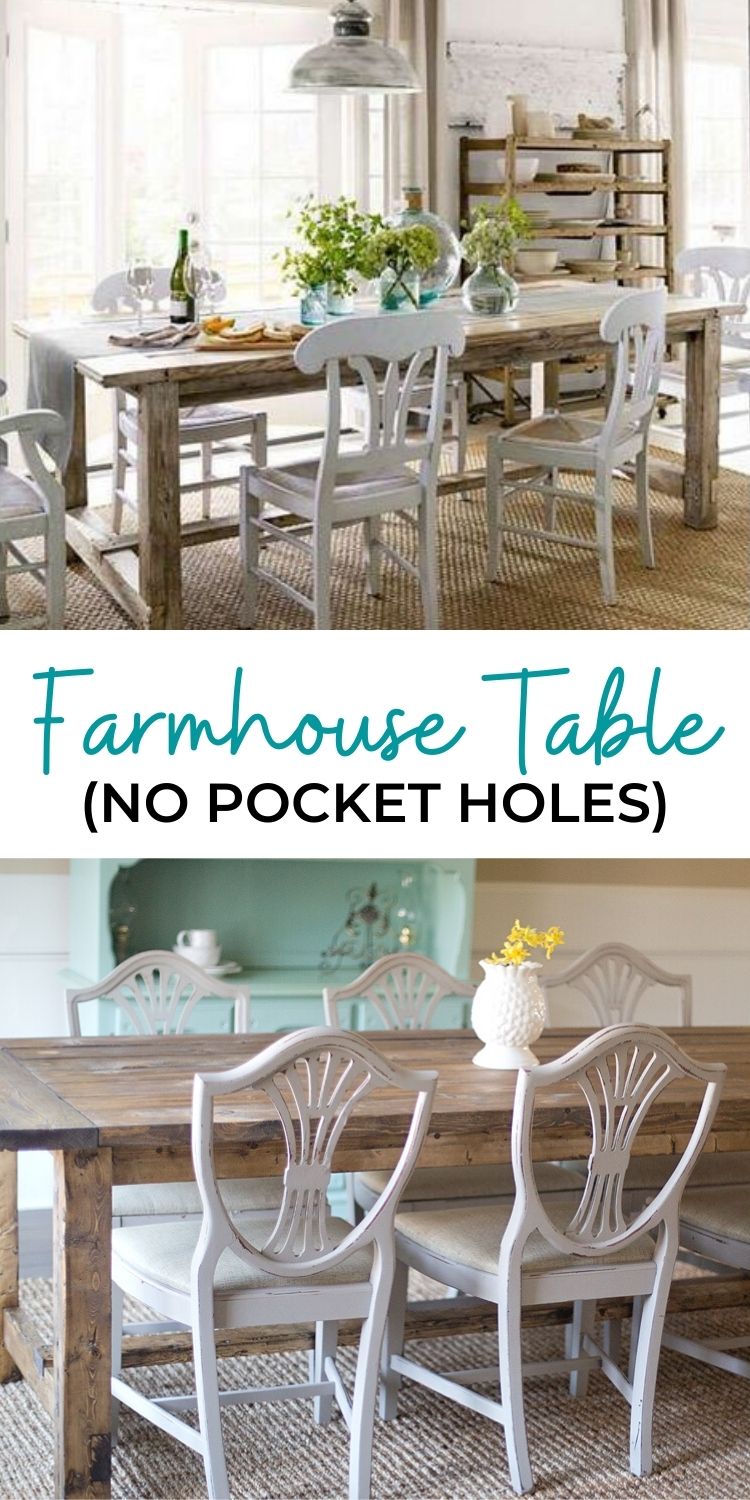
Pin For Later!
Preparation
- 8 – 2x4 8 feet long
- 6 – 2x2s 8 feet long
- 1 - 2×8 8 feet long
- 7 – 2x6s 8 feet long
- 2 3/4″ Self Tapping Wood Screws (About 100) (try spax brand or similar)
- 4″ Self tapping wood Screws (About 20)
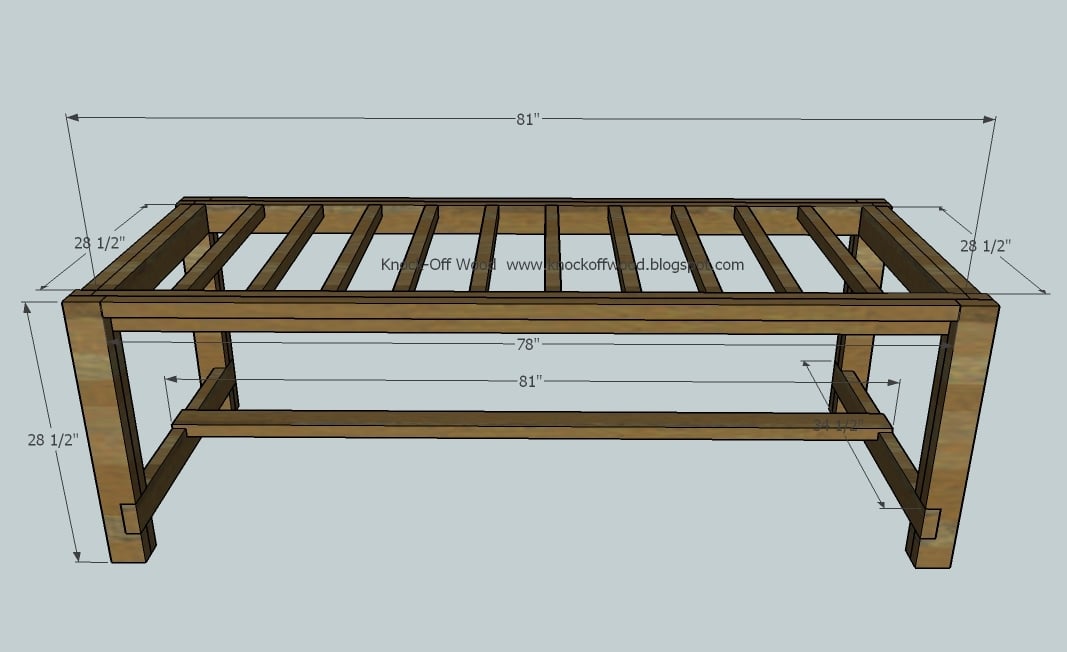
A) 4 - 2×4 @ 28 1/2″ (Outside Legs)
B) 4 – 2×4 @ 28 1/2″ (Inside Legs)
C) 2 -2×4 @ 34 1/2″ (Bottom End Supports for the Stretcher)
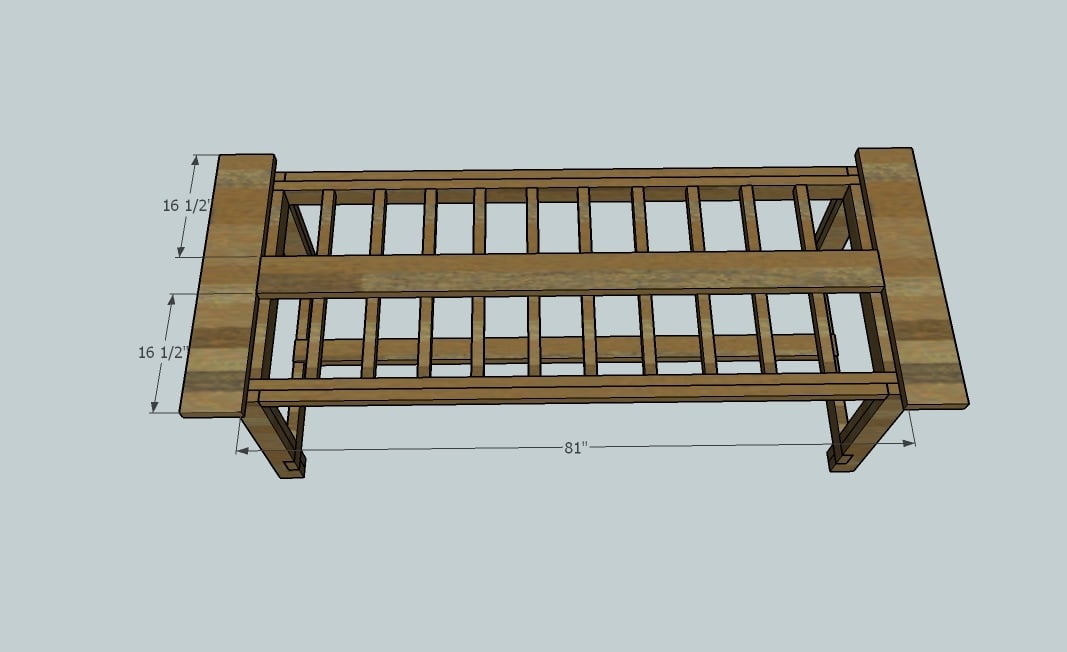
D) 1 – 2×4 @ 81″ (Stretcher)
E) 2 – 2×4 @ 81″ (Side Aprons)
F) 2 – 2×4 @ 28 1/2″ (End Aprons)
G) 2 – 2×2 @ 28 1/2″ (Overhang Supports, Ends)
H) 2 – 2×2 @ 78″ (Overhang Supports, Sides)
I) 10 – 2×2 @ 28 1/2″ (Under Tabletop Supports)
J) 2 – 2×8 @ 38 1/2″ (Breadboard Ends)
K) 7 – 2×6 @ 81″ (Tabletop Pieces)
Start by cutting all your boards. The best way to cut is with a compound miter saw. You can also use a circular saw with a guide - good square cuts are very important.


Always use glue. Use the longest possible screws, and predrill with a countersink bit to hide the screw heads.
Instructions
Step 1
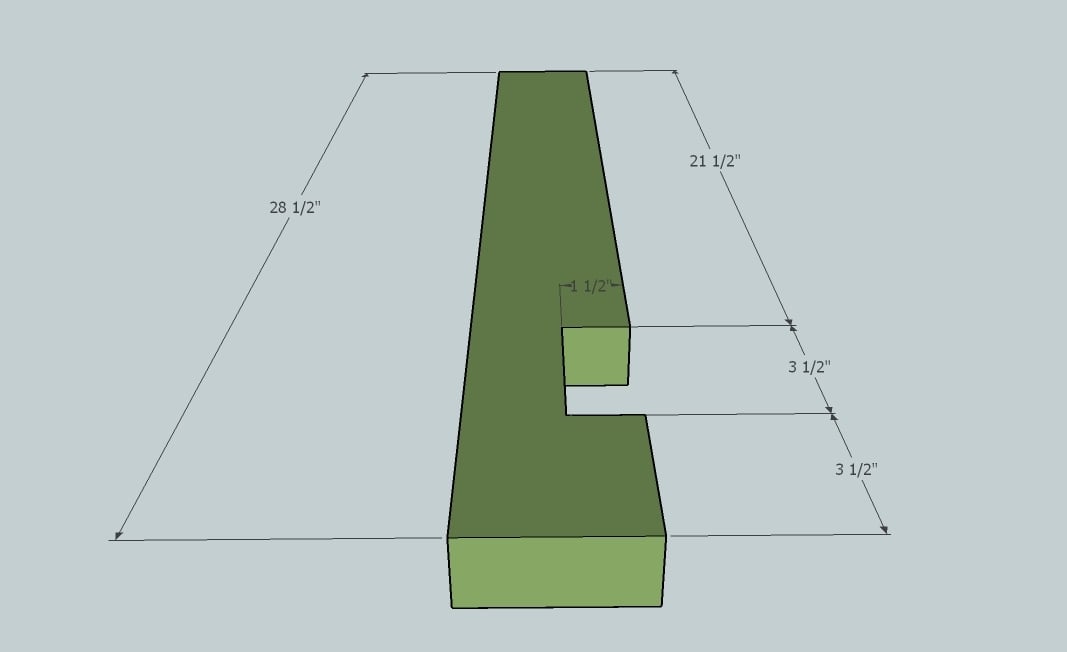
Notch out boards A, the Outside Legs, as shown above. If you do not know how to notch out boards, watch me notch the boards out for my table in my HOW-TO section.
Step 2

Notch out the inside leg as shown above. Make sure you notch both the top and the bottom as shown above. Use the measurements from step 2 to notch the bottom. See the below diagram for a closeup on notching the top.
Step 3
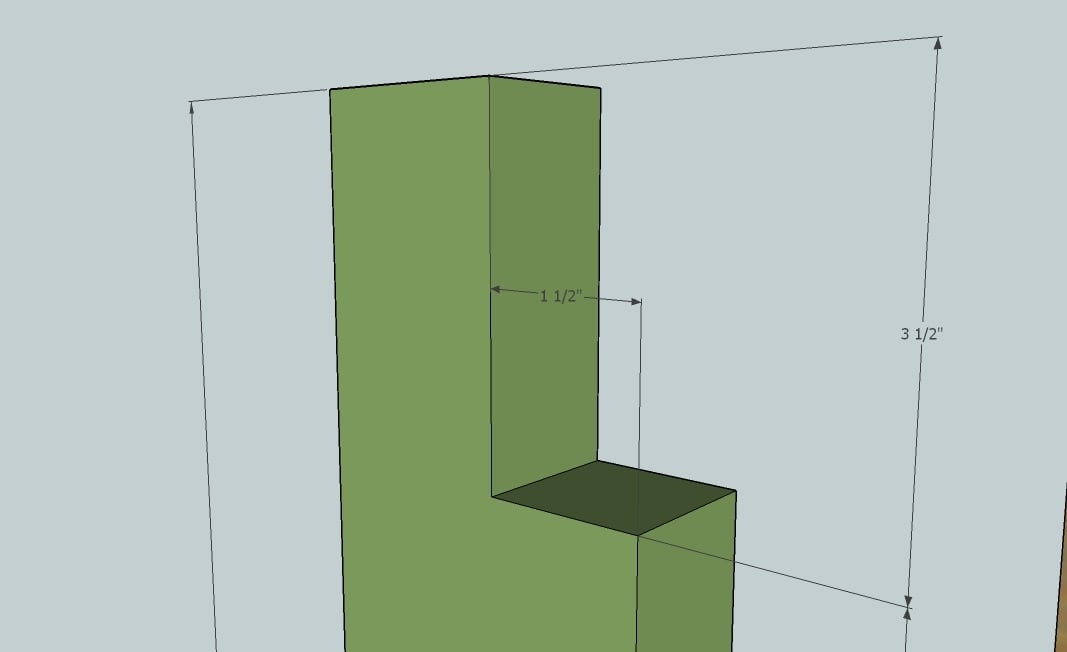
The above diagram show you how to notch out the top of the inside legs.
Step 4
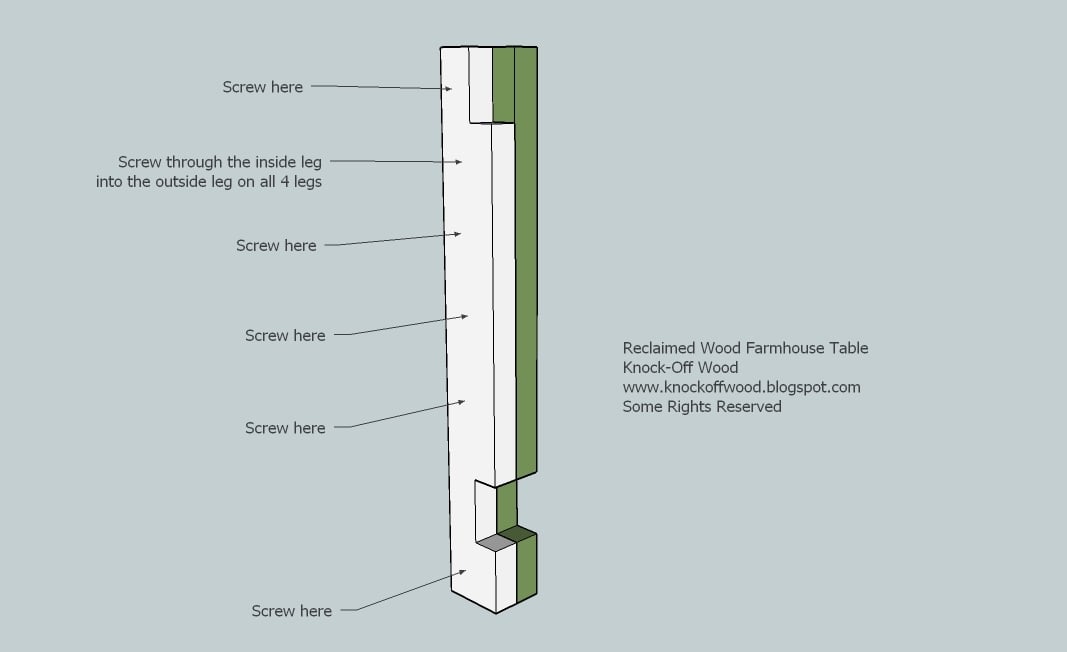
Now screw an inside leg to an outside leg, using glue and 2 3/4″ screws. Be aware of where each leg is placed – it does matter on what sides the inside leg sits. Also, screw through the inside leg into the outside leg to keep your screw holes on the inside.
Step 5
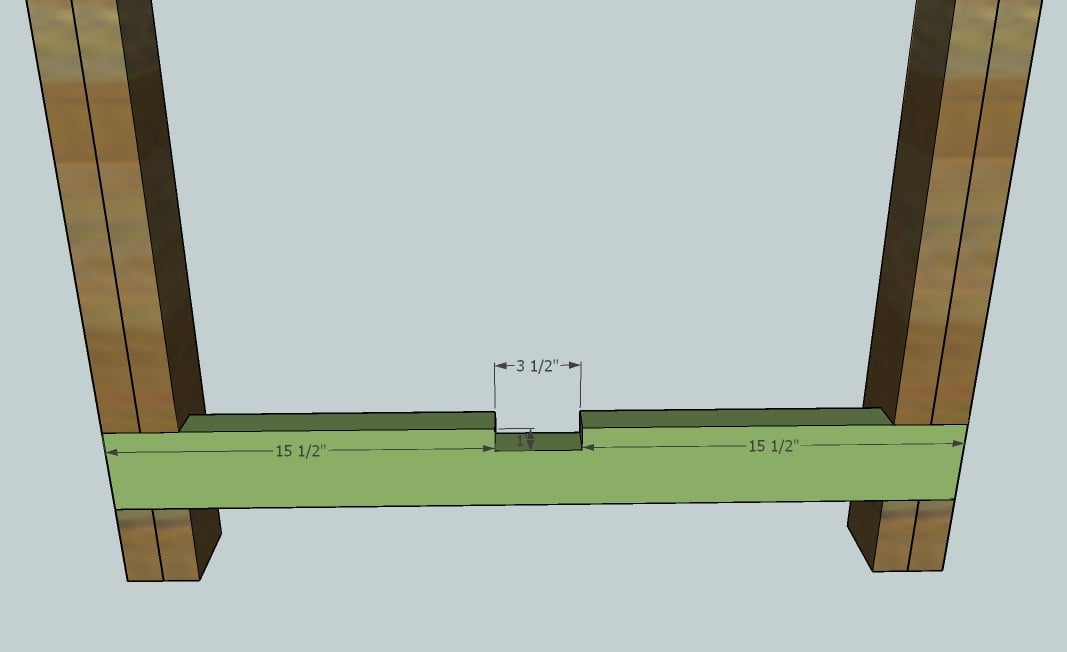
Step 6
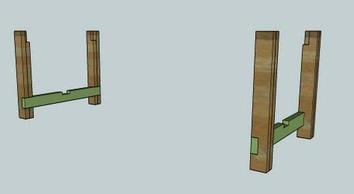
Screw the support, C, into the legs, as shown above. Make sure you use 2 screws on the inside leg and 2 screws on the outside legs per side of the end supports. NOTE: If you would like the support to be on the outside, rotate the legs, keeping the inside legs on the inside, and add 4″ to your stretcher, D. This will reduce your leg room for end chairs, but the notch out will be more visible, like my table and the Restoration Hardware table.
Step 7
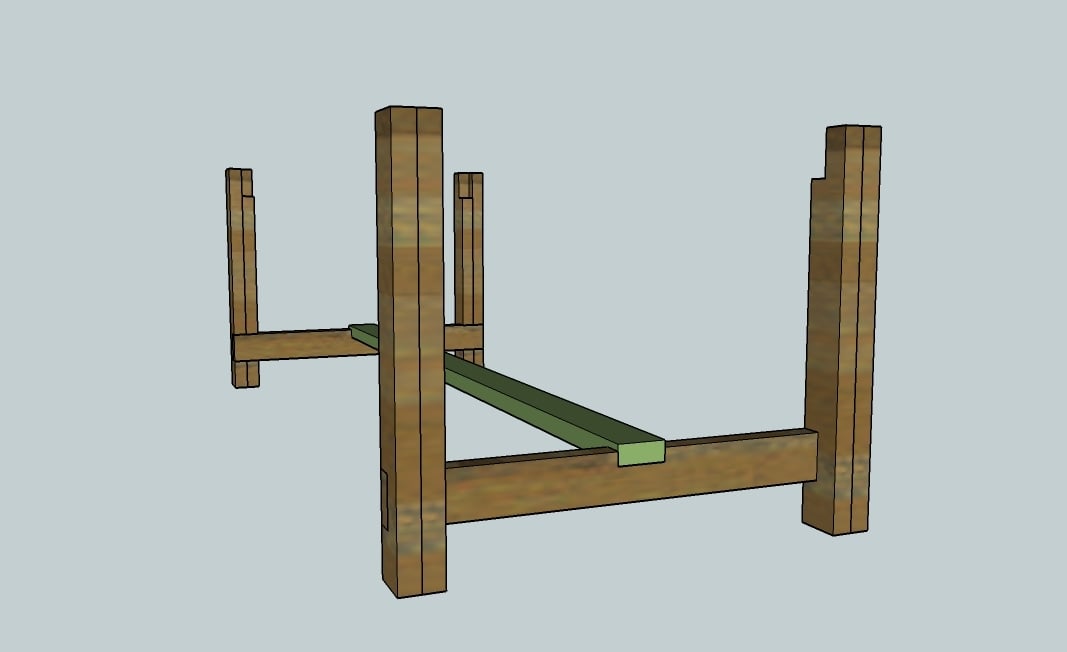
Put your stretcher in place and screw down.
Step 8
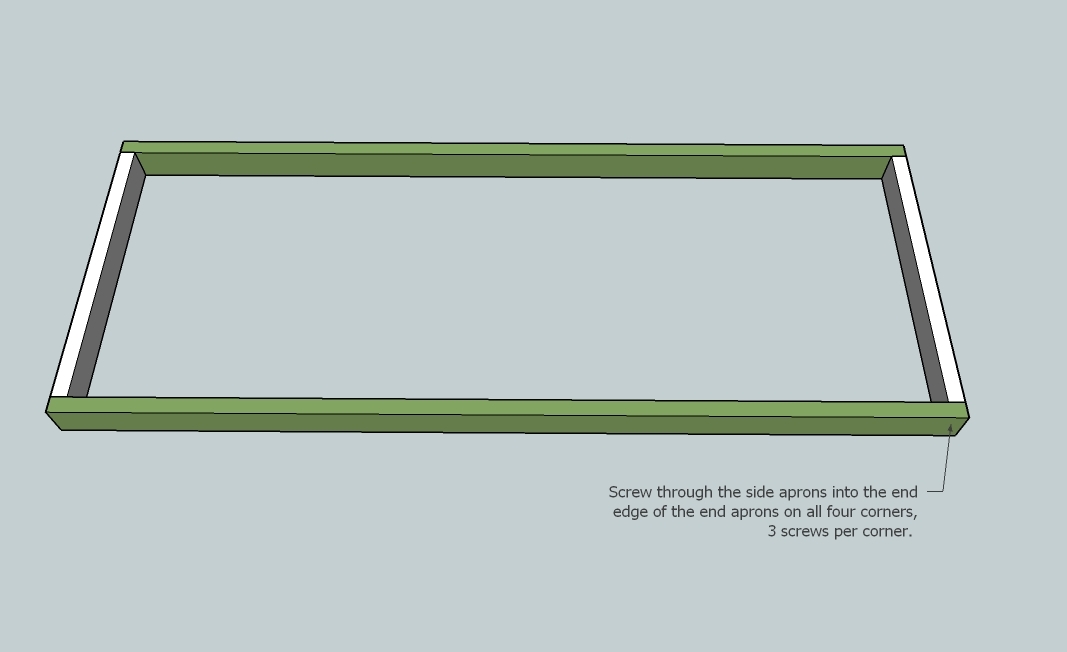
Build your apron on a level surface as shown above, using side apron boards E and end apron boards F.
Step 9
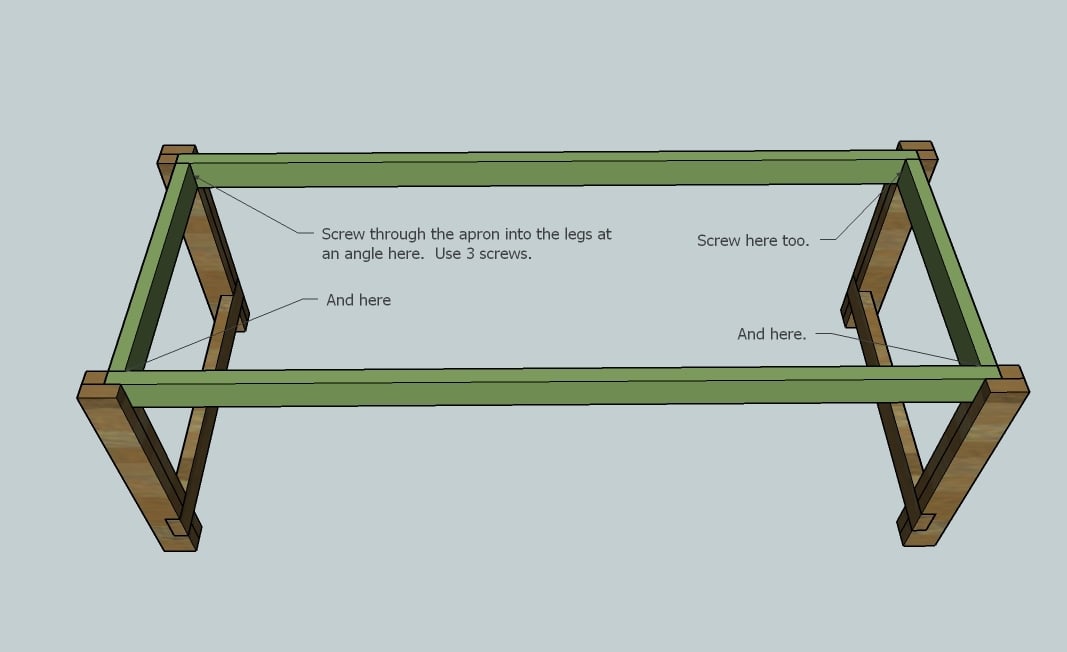
Fit the apron frame into the base of the table as shown above. Use the long screws to screw at an angle through the apron into the legs. Use 3 screws per leg on all legs. Lots of glue here. Now is a good time to check your table for square. Visit the HOW-TO section if you do not know how to check for square.
Step 10
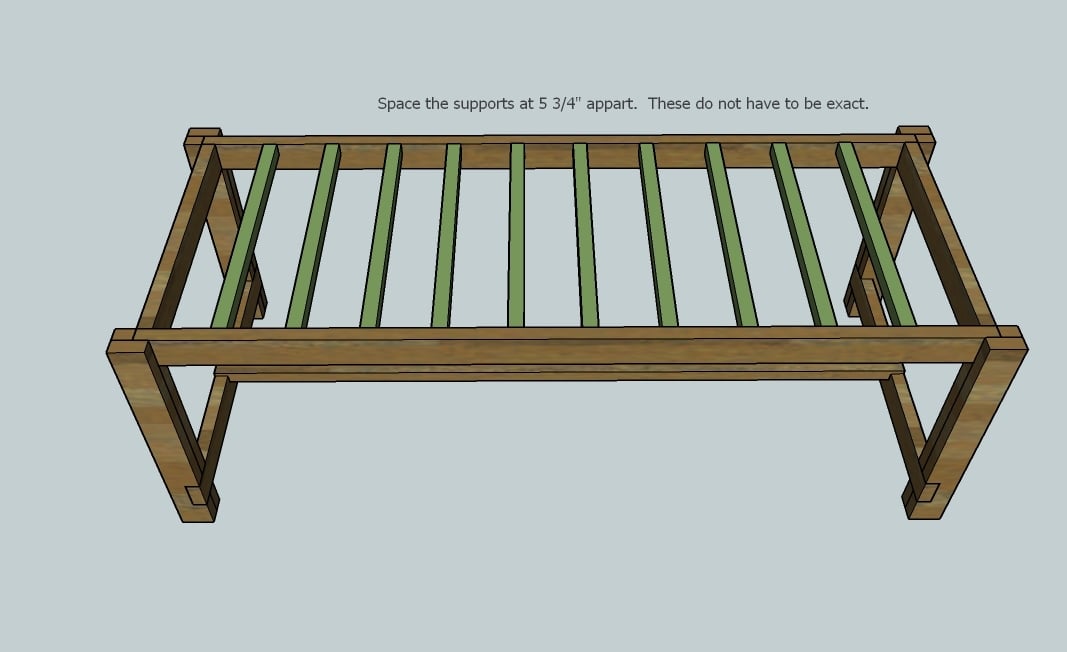
Mark the side apron every 5 3/4″ and place the 2×2 supports, I, as shown above. Remember that a 2×2 is 1 1/2″ wide. This does not have to be exact and the last support will not be exactly 5 3/4″ from the end. Use the 2 3/4″ screws here.
Step 11
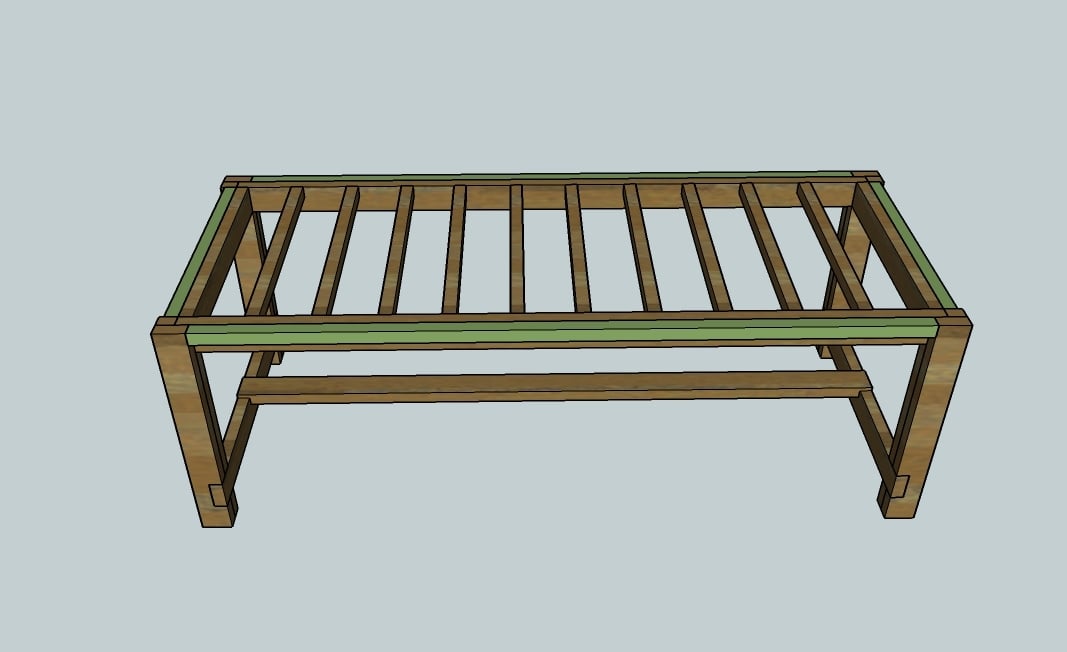
Add the overhang supports, G and H, as shown above. Keep the top edges flush, use the 2 3/4″ screws. Make sure you screw these in good.
Step 12
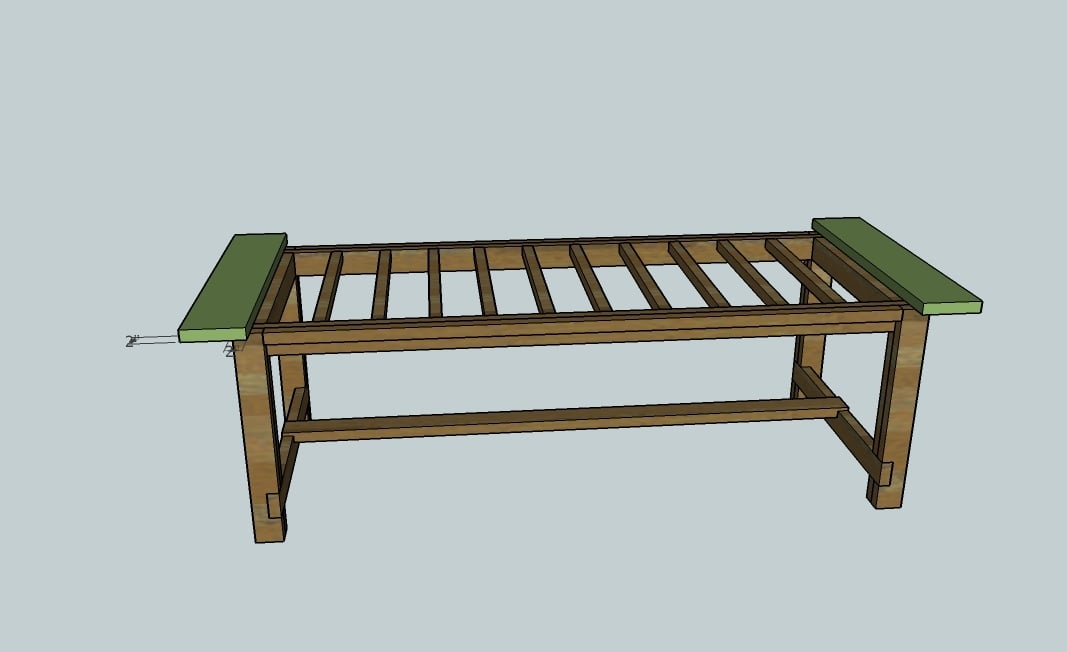
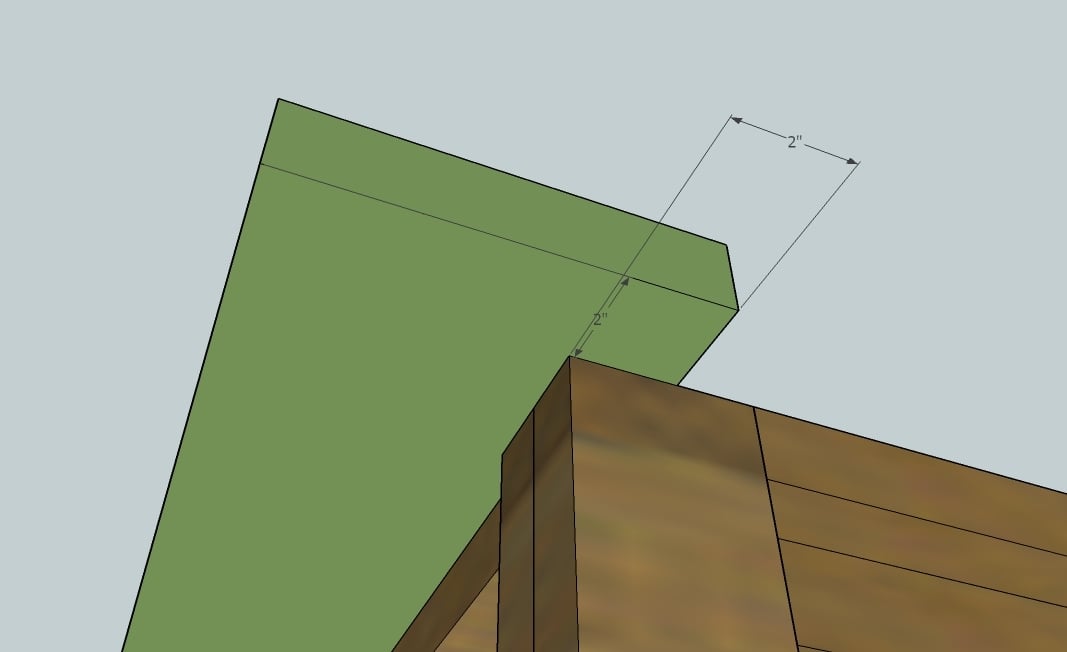
Now the breadboard ends, J. See the below diagram for measurements:
Step 13
Use the long screws to screw the breadboard end into the legs. Then screw from the underside of the overhang support, board G, into the underside of the breadboard end.
Step 14
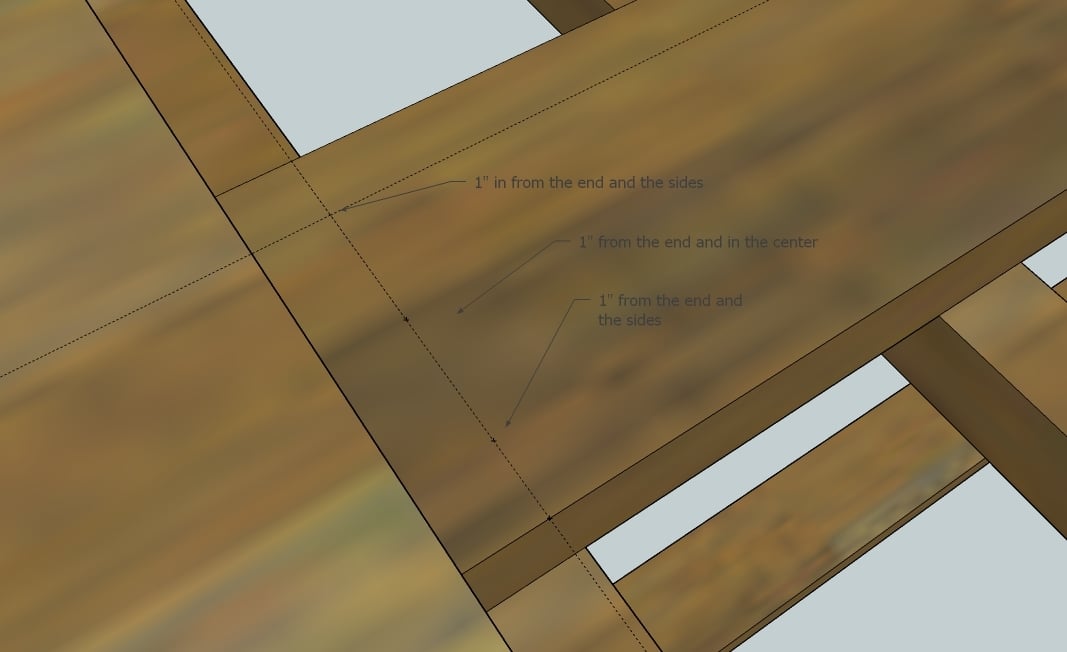
First mark all the ends of the tabletop boards, K, for the screw pattern. The screw pattern I used was 1″ from the end, and 1″ from each side and one in the middle. Predrill the ends on the marked pattern, as shown above.
Step 15
Then begin adding the tabletop pieces K, starting with the center piece. Screw the center board in place on the ends through the top, pre,drilled and marked in step 15. Then from the underside of the table, screw through the tabletop supports, I, into the underside of the tabletop boards, K.
Step 16
Add the next tabletop boards, K, as shown below. As you screw each board down, take special care to line up the edges with the existing boards. You do not want a gap between the boards on the tabletop. Remember to screw through the top on the ends and then screw through the bottom of the under supports to the underside of the tabletop boards.
After all the boards are screwed in place, then use the long screws to screw through the tabletop boards into the breadboard ends, as shown above.
Sand the entire table with 120 grit sandpaper, working in the direction of the wood grain.
Refill holes with wood filler if needed.
Sand table with 180 grit sandpaper.
Stain or paint. If the table feels rough between coats, lightly sand with 180 grit sandpaper.
A final coat of poly on the top can help keep the top easy to finish and wipe cleanable.


Comments
dankdodgers
Wed, 12/28/2016 - 17:44
Would love to if I can! :)
So what seems to have happened? Is the stain splotchy?
Jeanne624
Thu, 12/29/2016 - 08:09
Yes. It seems where I used
Yes. It seems where I used the wood filler. It is very blotchy.
Littlelady84
Wed, 02/15/2017 - 09:28
Lumber
Hi, I'm brand new to this site and fairly new to woodworking. I was wondering what kind of lumber is used for this project? Also, do you have any recommendations on where to purchase it?
tjaburke8
Tue, 02/21/2017 - 06:47
Make without the stretcher?
Would it still be sturdy if it was made without the stretcher support beam? My fiance is concerned about people hitting their shins on the stretcher, but I'm concerned about the table not having proper support. Any suggestions?
tjaburke8
Tue, 02/21/2017 - 06:52
Make without the stretcher?
Would it still be sturdy if it was made without the stretcher support beam? My fiance is concerned about people hitting their shins on the stretcher, but I'm concerned about the table not having proper support. Any suggestions?
Michele H
Thu, 11/21/2019 - 10:41
Spax requested screw size do not exist
HELP!!! Spax Screws in the size on the shopping list, are not available!!
Not sure where way I should change size -up or down??
Spax does not make a 2 3/4 size screw.
Please advise.
Thanks
Time
Fri, 01/03/2020 - 17:06
could you use a 4 X 4 for…
could you use a 4 X 4 for legs instead of 2- 2X4s ?
Clint
Mon, 01/27/2020 - 19:05
I’m close to the end on this…
I’m close to the end on this build, granted it’s one of my first big builds, but the Breadboard ended up being about 2 inches short. I.e the tabletop pieces together extend farther than the breadboard. Any thoughts around this?
mcronin
Sun, 07/19/2020 - 06:59
Great Plans
Thank you for offering these plans. They were easy to follow.
I just finished one and am very happy with the outcome. I made a few adjustments to the published plans so that it would fit the deck it will be placed on as well as the legs. I used 4x4s and notched accordingly. I prefer the solid look. I also capped the screw holes in the legs and supports rather than use wood glue. Finally, used pegs to secure the table planks from the top while also using screws from the bottom. Used Cabot's Australian Timber Oil on the framing and top.
If I was to build again the only change I would make would be to cut all the vertical table planks to length first and then place on the frame. Finally butt the breadboard ends to the planks. My cuts, despite using a strength edge still stink.
Moving in to the benches.
timh11263
Tue, 09/08/2020 - 08:10
Step 16
Saw several questions about Step 16 but didn't see any answers. Can you clarify how to use the long screws to screw through the tabletop boards into the breadboard ends?
STEP 16
Add the next tabletop boards, K, as shown below. As you screw each board down, take special care to line up the edges with the existing boards. You do not want a gap between the boards on the tabletop. Remember to screw through the top on the ends and then screw through the bottom of the under supports to the underside of the tabletop boards.
After all the boards are screwed in place, then use the long screws to screw through the tabletop boards into the breadboard ends, as shown above.
AmbassadorTim
Thu, 09/02/2021 - 15:40
First Build = Farmhouse Table
Thanks for these plans. I built this table as my first real adventure into DIY. I was very nervous. The plans were very easy to follow. I now have a great pace for the entire family to sit together and eat dinner. No more dinners where people are are all over the house. The bench was perfect for my two kids and two nephews to sit at.
chelwags
Sat, 09/11/2021 - 06:21
Farmhouse table
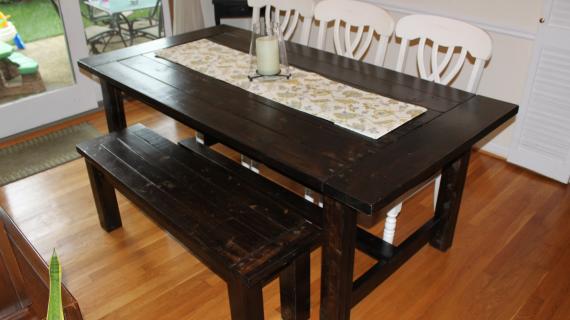
Where are the white chairs from in the second picture?!
tjlichat
Wed, 02/09/2022 - 14:58
farmhose table no pocket or screws from top
Great plans and instructions. I would recommend however to dry fit the cut pieces before gluing and fastening to avoid any problems with how to keep everything square and avoid missteps.
We chose not to drill and screw from the top but added a few extra supports for boards which seems to work well. Also added a support for the bread board to out side legs.
Would like to send a picture but could not figure that out here.