


DIY Flag inspired outdoor coffee table! Free step by step tutorial from Ana-White.com

Happy Flag Day!!!
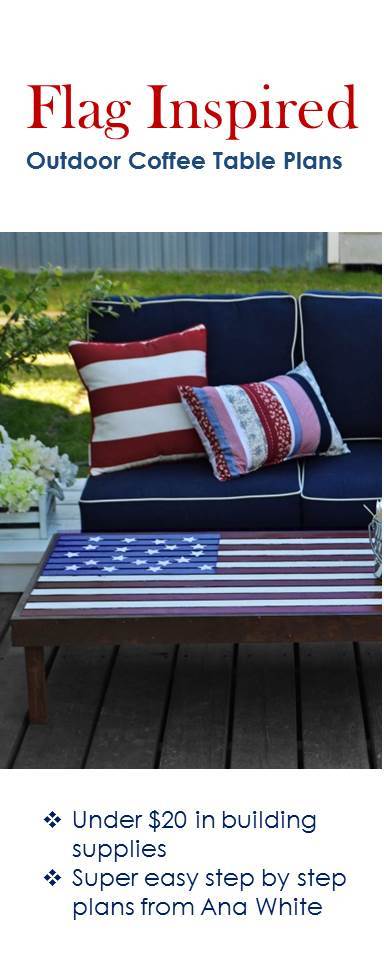
In celebration of Independance Day coming up, and because we love stars and strips, our family built an American Flag Inspired Outdoor Coffee table.
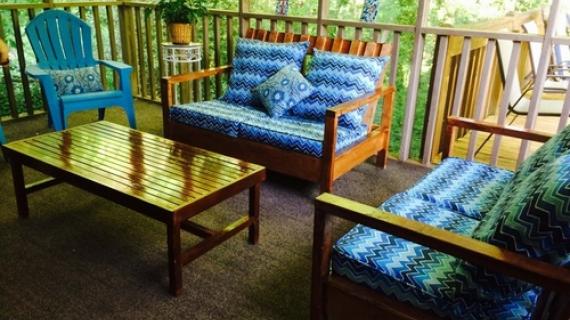
We love how this coffee table adds a vintage Americana feel to our back deck. I thought our new sectional (new plans on their way to you very soon!) would be the center of our deck .... but this new coffee table really is the most loved!

You'll be amazed at how easy it is to build this coffee table.

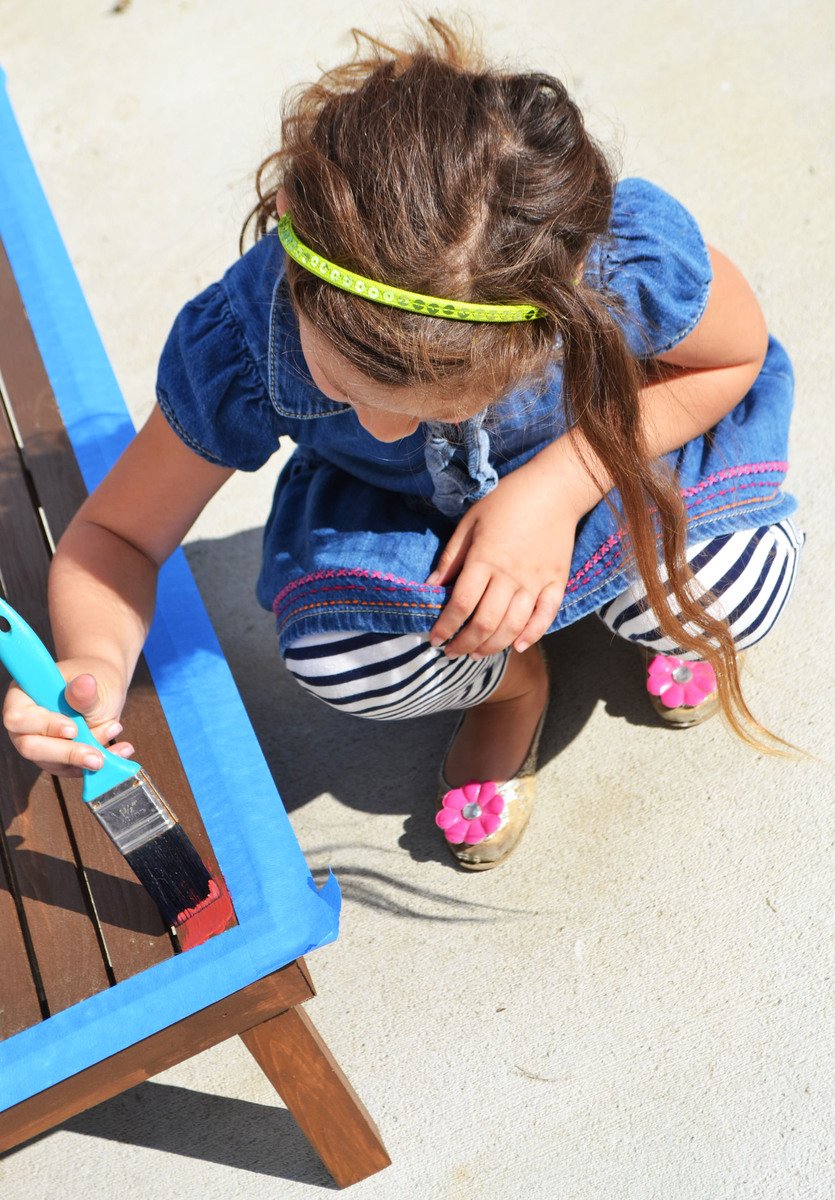
The top is made of slats for water drainage. But because there's a gap between the top boards, painting the top was so easy, my little helper could stay in the lines.
Next week, I'll share with you the step by step finishing tutorial so you can paint your own American Flag Inspired outdoor coffee table.
But first you have to build it!
Plans follow!
Have a great weekend!
XO Ana and Family
Love this? Hope you pin it!
Preparation
4 - 2x2 @ 8 feet long
7 - 1x2 @ 8 feet long
2 - 1x3 @ 8 feet long
2 1/2" exterior self tapping screws OR 2 1/2" Pocket hole screws
1 1/4" or longer galvanized finish nails
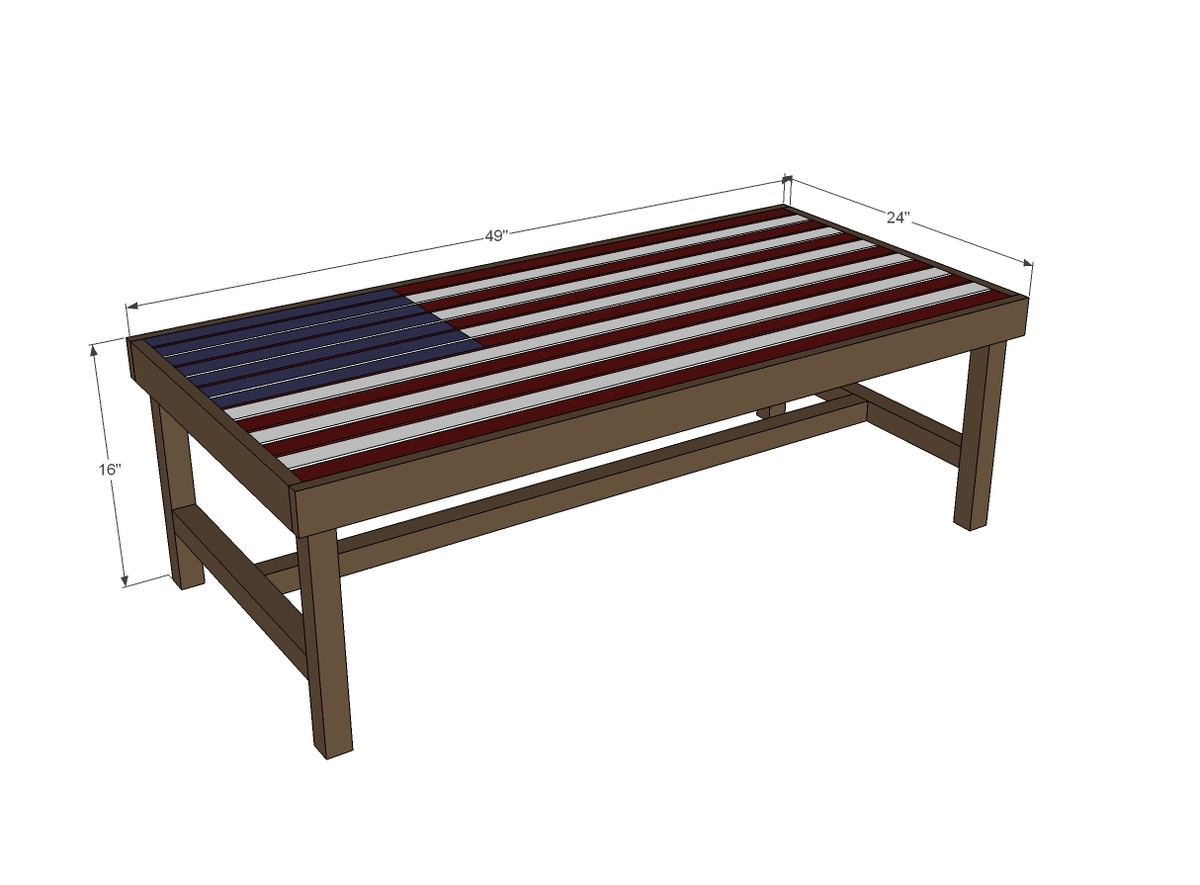
7 - 2x2 @ 19 1/2" long
4 - 2x2 @ 15 1/4" long (legs)
3 - 2x2 @ 44 1/2" long
13 - 1x2 @ 47 1/2" long
2 - 1x3 @ 22 1/2" long
2 - 1x3 @ 49" long


Please read through the entire plan and all comments before beginning this project. It is also advisable to review the Getting Started Section. Take all necessary precautions to build safely and smartly. Work on a clean level surface, free of imperfections or debris. Always use straight boards. Check for square after each step. Always predrill holes before attaching with screws. Use glue with finish nails for a stronger hold. Wipe excess glue off bare wood for stained projects, as dried glue will not take stain. Be safe, have fun, and ask for help if you need it. Good luck!
Instructions
Step 1
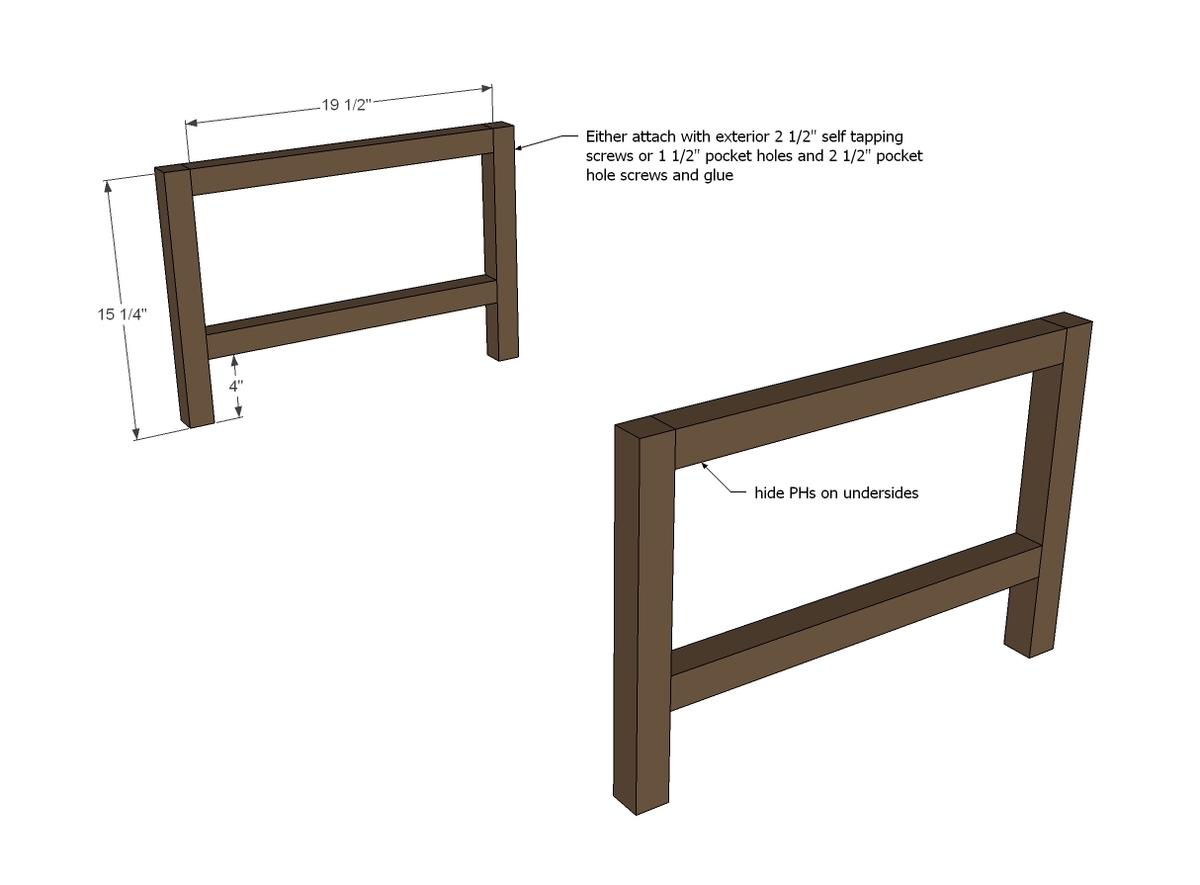
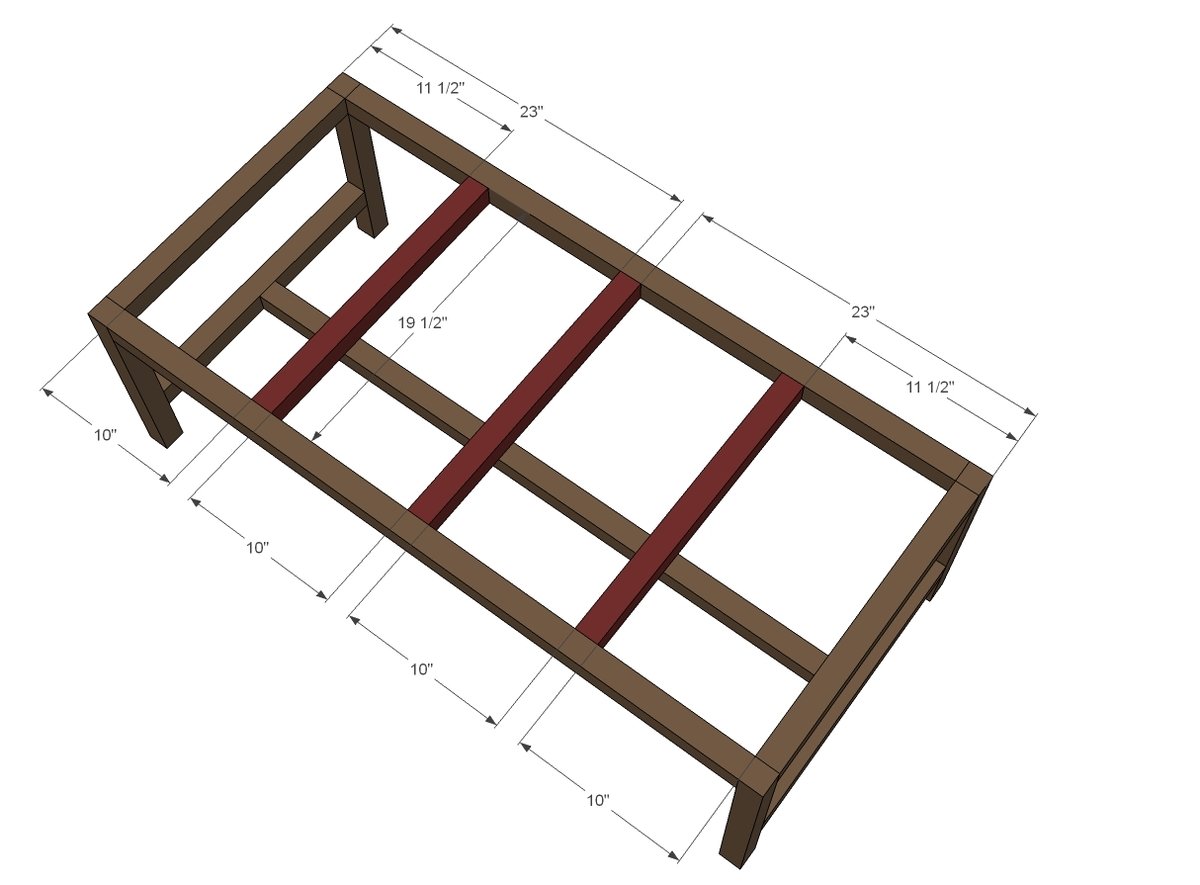
Start by building the two ends leg sets. You can use pocket hole screws or countersunk screws, your choice. Use an exterior appropriate wood glue as well.
Step 2
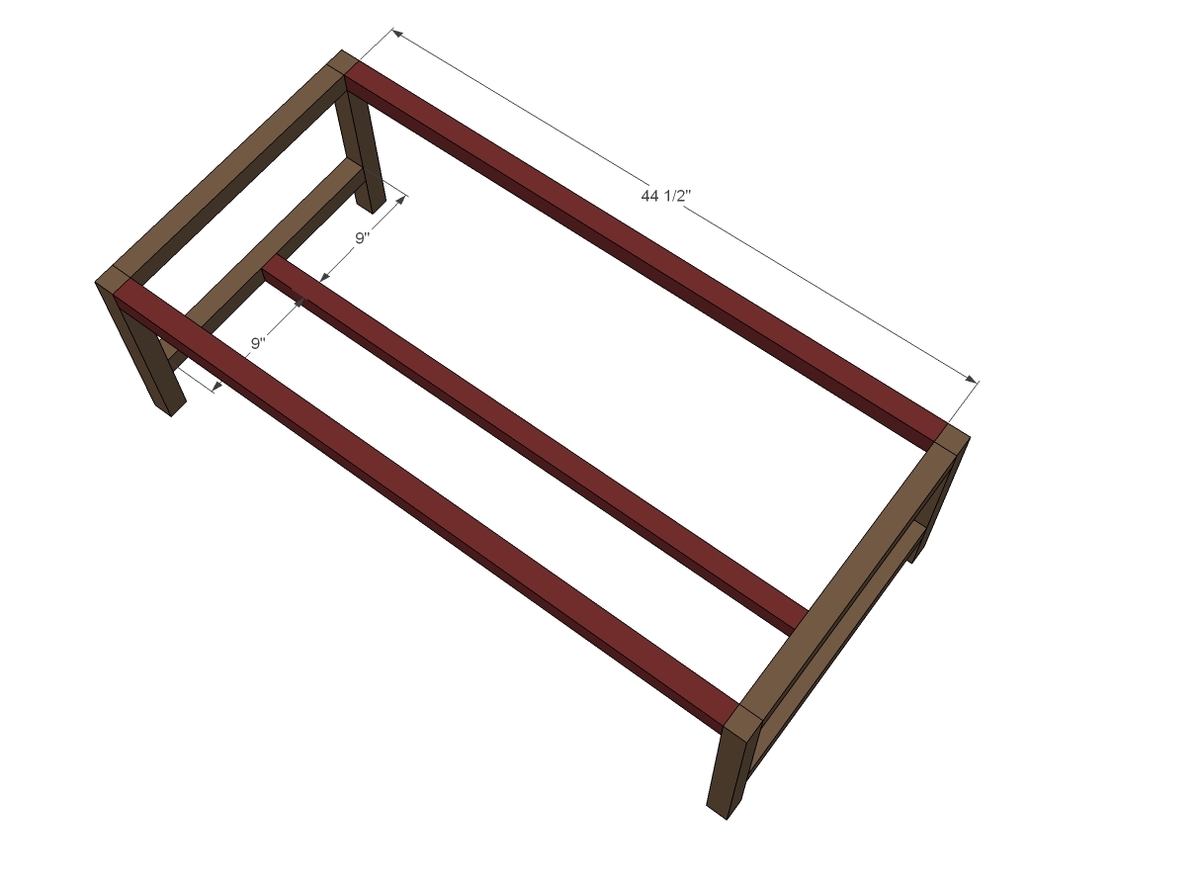
Then add the two side supports and bottom stretcher, same technique as the legs.
Step 3
And then the center supports. With all these supports, this table is rock solid when you are done!
Step 4
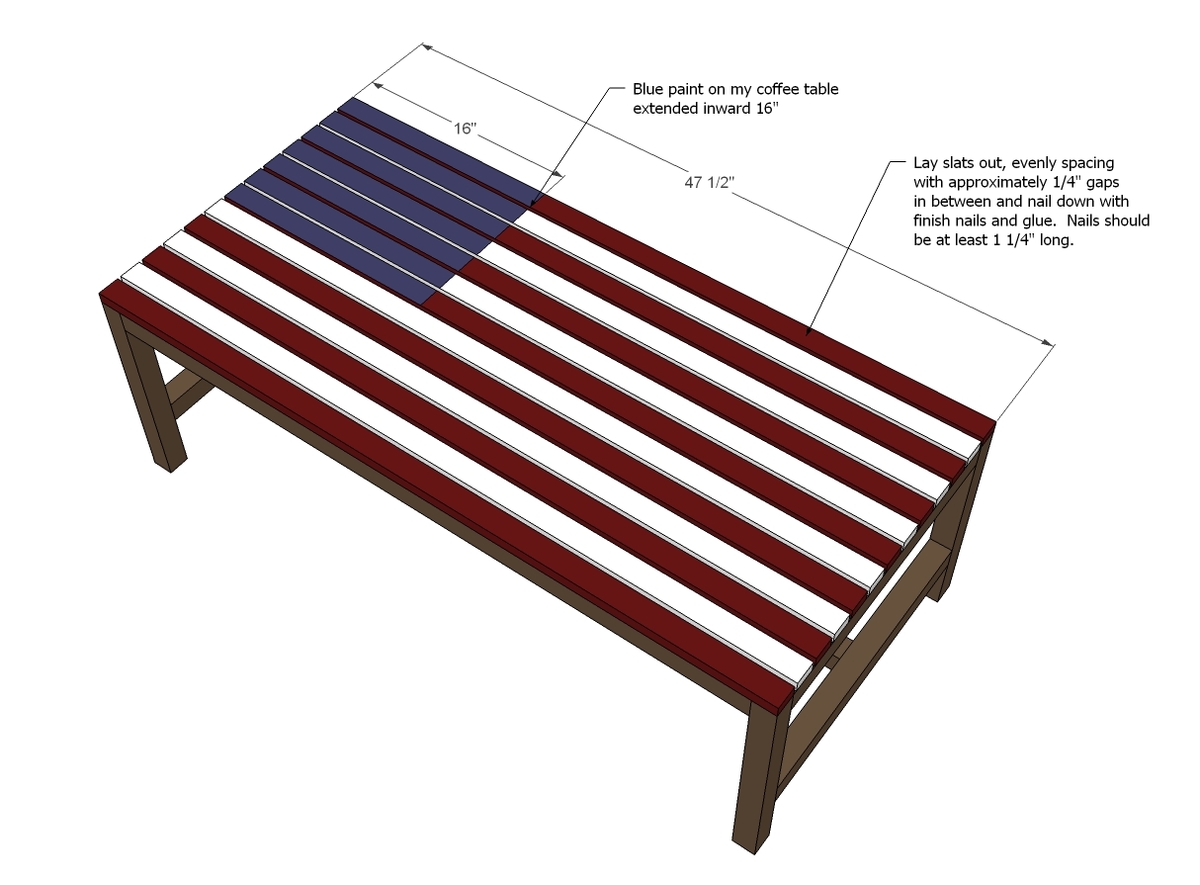
Next, attach the top slats, leaving about 1/4" in between each slat.
Step 5
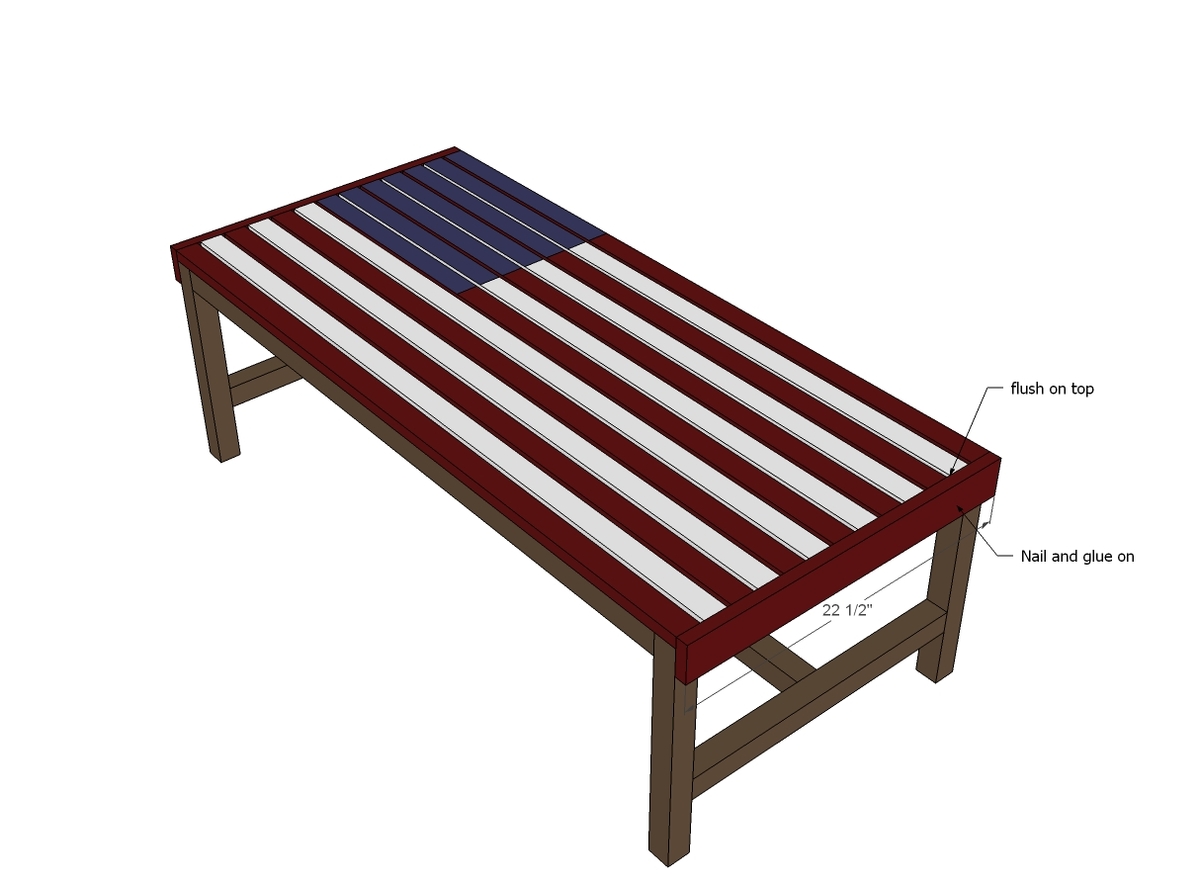
Step 6
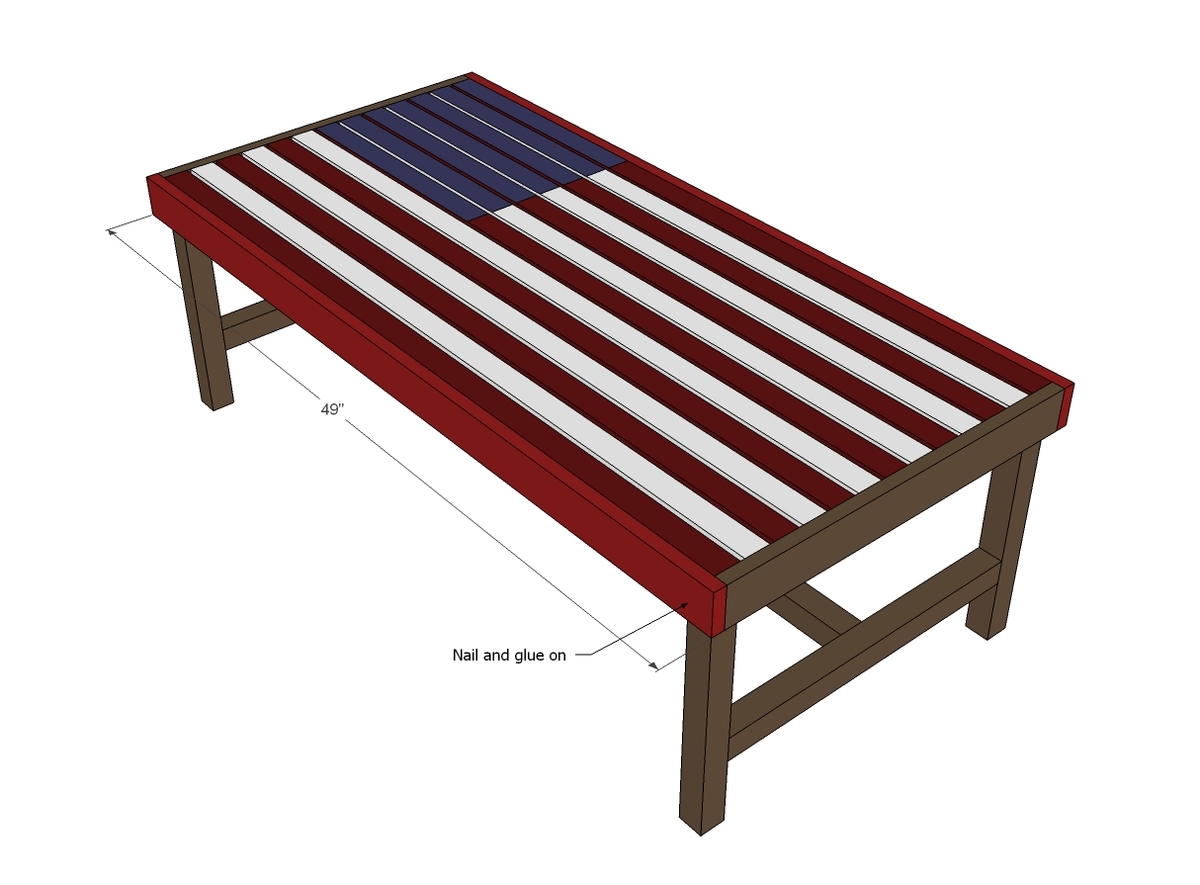
And then finish trimming out the remaining sides.
Finishing tutorial coming soon!
It is always recommended to apply a test coat on a hidden area or scrap piece to ensure color evenness and adhesion. Use primer or wood conditioner as needed.

Comments
birdsandsoap
Fri, 06/14/2013 - 15:41
Cute! I love this. It just
Cute! I love this. It just screams "Summer!"
LisaMarie
Sat, 06/15/2013 - 04:02
Very cool!
This is such a great idea! Can envision a lot of other designs on the top, too. Great idea and inspiration, Ana! Keep up the good work.
bhoppy
Sat, 06/15/2013 - 19:53
Love this!!
I feel a case of the buildies coming on:-)
Two questions.. Did you finish the frame with stain and poly before adding the top slats? And what is considered exterior grade wood glue?
I have made a few outdoor furniture pieces from your plans but I've always painted them with exterior paint... I'd love to try staining something like this gorgeous table but am nervous about the finish withstanding the elements.