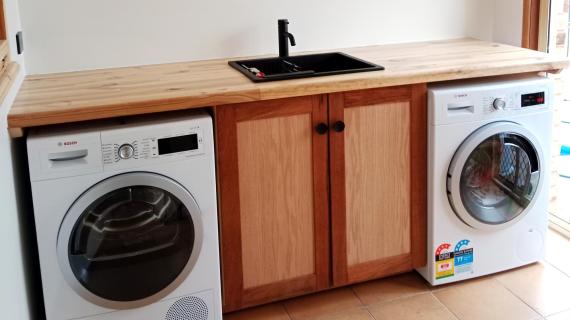

Free kitchen cabinet template that can be customized for different size cabinets. This tutorial is for frameless base kitchen cabinet. You can easily customize this template in width and also by adding shelves, drawers, doors or other modifications.
It's easy to build your own custom sized kitchen cabinets! This template is for a Frameless (sometimes called Euro Style or Full Access) kitchen cabinet with adjustable widths and uses.
MATCHING WALL CABINETS UNIVERSAL TEMPLATE
Also build the matching kitchen wall cabinets with this free template.

DIMENSIONS
This template is for a standard 24" deep cabinet including the full overlay door or drawer faces. You can customize to widths up to 36", and add drawers or leave open.
RECOMMENDED TOOLS AND MATERIALS
- 3/4" plywood for the carcass, cut lists generated in Ana's Design App
- 3/4" edge banding and iron for installing edge banding
- 1x3 or 1x4s for Bay Supports
- 1/4" plywood for the back if using
- For drawer(s): 22" full extension drawer slide, drawer box material, and drawer faces
- For doors: Doors and Full Overlay Frameless Concealed Hinges
- Wood glue
- Drill
- Brad nailer and 1" brad nails
- Pocket hole jig and 1-1/4" pocket hole screws
- Tables or Track Saw
- Circular saw, miters or jigsaw to cut bay supports, toekicks and drawer boxes
WATCH - KITCHEN BASE CABINET VIDEO TUTORIAL
Here's a video tutorial of this cabinet being built -
CONFIGURATION USING ANA'S CUSTOM DESIGN APP
The configuration used for standard base cabinets is as follows:
- Width = Up to 36" (wider width are possible but the countertops and shelves may need additional support to keep from sagging)
- Height = 34.5"
- Bays = 1
- Depth = 23.25"

Click here to use Ana's Free Design App
CUTTING THE PLYWOOD PIECES
After designing your cabinet in Ana's Free Design App, download the plans. There will be a cut list on the second page.
Rip the 3/4" plywood into strips 23-1/4" wide using a table saw or circular saw.
Then crosscut the plywood as directed in the cut list.
ASSEMBLING THE CARCASS
First, cut the toekicks out of the side panels from the finished front edge side. I use a 4" x 4" toekick - but this is variable. You can cut for a deeper toekick or taller.
Apply 3/4" edge banding to all exposed front edges. You do not need to add edge banding to the toe kick portion.
Then drill four 3/4" pocket holes on each end of the bottom shelf. Attach to the side panels flush to the top of the toekick.
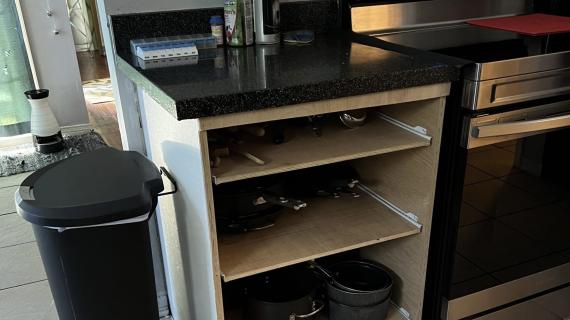
Shelves can also be added fixed with pocket holes, or adjustable with shelf pin holes. Shelf front edges should be edge banded.

BAY SUPPORTS
You'll need a minimum of four bay supports per cabinet, matching the cut length of your shelves. Use pocket holes to attach.
For adding drawers, add additional bay supports in between the drawers as shown in the first two renderings below.

ADDING DRAWERS
For drawers, I recommend a 22" full extension drawer slide like these. For the top drawers, I recommend a 1x4 drawer box. For the bottom, taller drawers, I recommend a 1x8 or 1x10 drawer box. In the video tutorial, I go through the steps to build a drawer to fit in this kitchen cabinet, please watch it.
DRAWER AND DOOR FACES
Measuring for the door and drawer faces is pretty straight forward, but I do recommend taking the extra step and penciling out your drawers on your finished cabinets - just so you can double check before building/ordering doors and drawer faces.
Here is the my standard method for ordering doors. But do double check with your hinges to make sure the overlays work out.

- Widths are the opening + 1"
- Heights are the opening + 1/2"
- For double door widths, use the width of the opening + 1" and then divide by 2
- For drawers, if you placed the drawer divider bay support as recommended in the diagrams, you can use a hardwood 1x6 for the drawer face
- For the doors, the standard bore for the hinges (3mm inset and a 35mm hole) works for most hinges, but do double check your hinge instructions