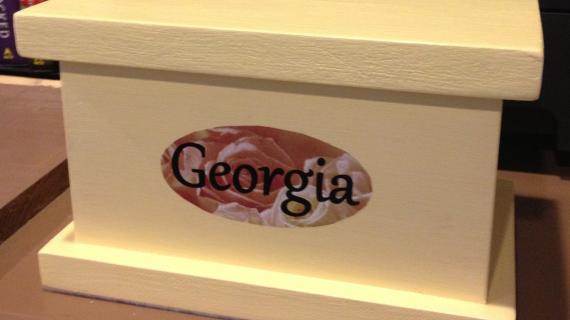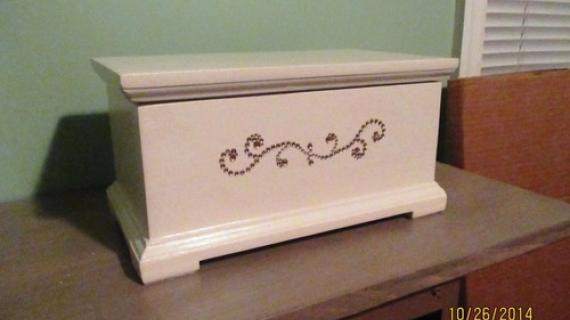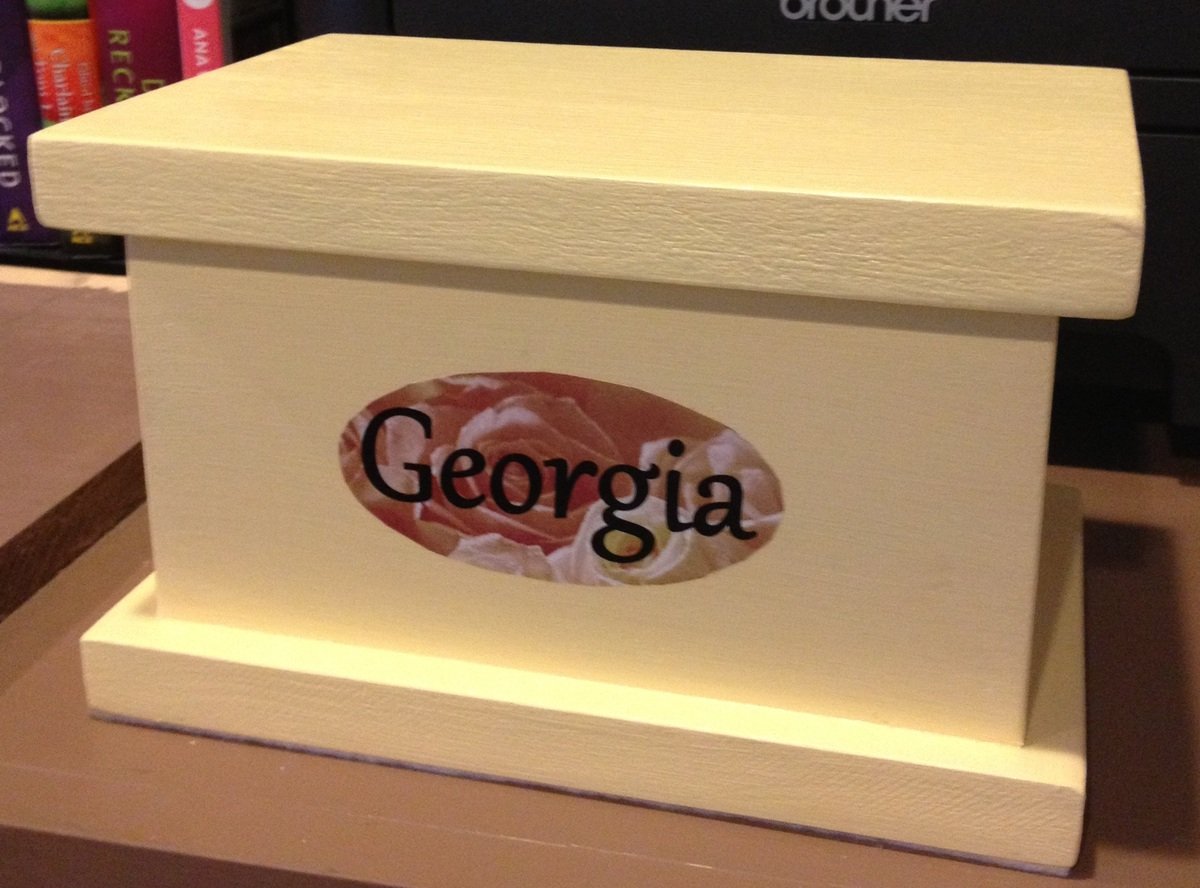

Build Georgia's Jewelry Box from scrap wood and a few decorations!
Preparation
Shopping list: (Check your scrap wood – you’d need 22” of 1x4 and 17” of 1x6, or cut larger pieces of scrap down to the “will be” sizes in the cut list)
1 pc 1x4 at 2 feet long
1 pc 1x6 at 2 feet long
1 ¼” finish nails
Glue
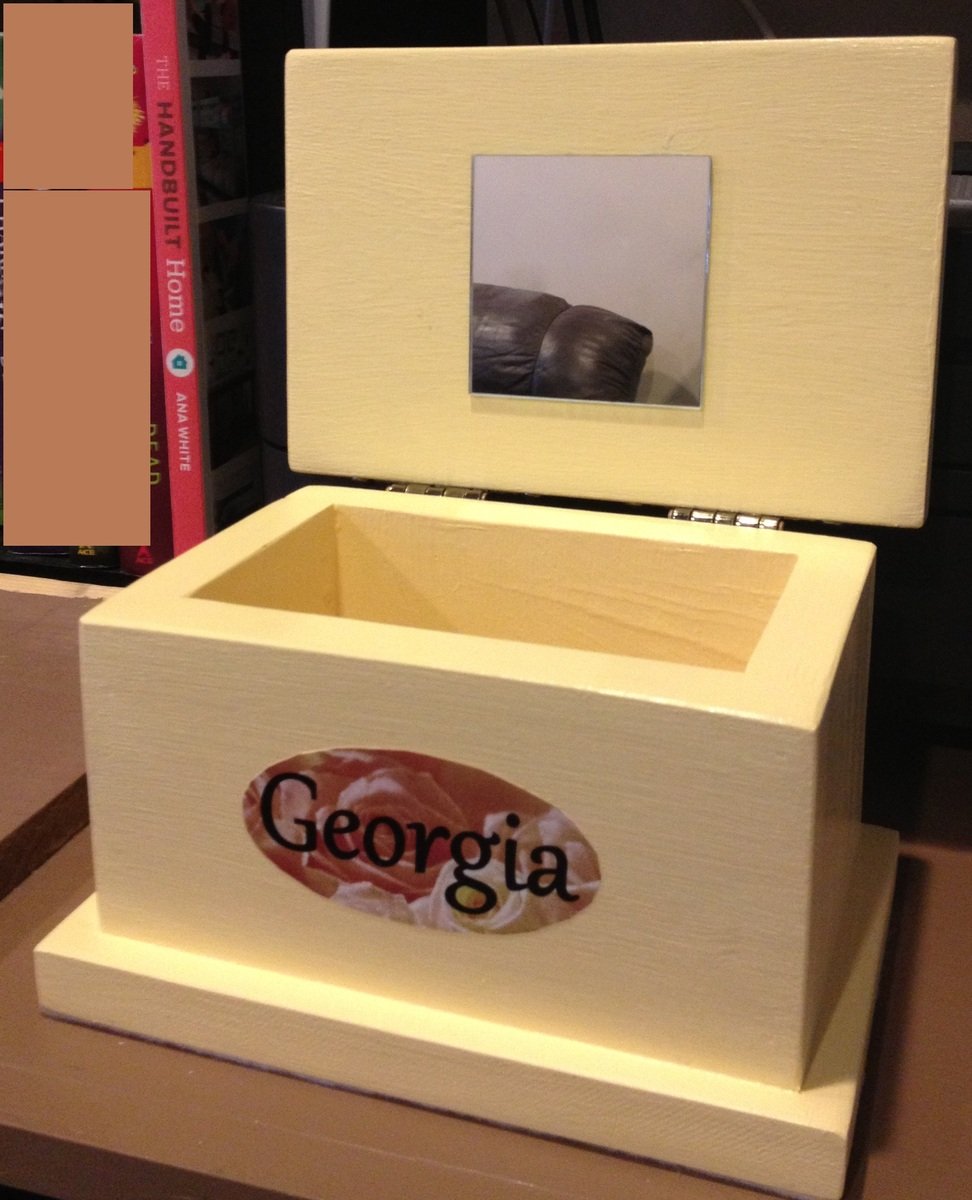
1 pair flat hinges (see picture in .pdf for example)
Finishing supplies for finish of choice
Cut List
(all of these can be cut to size from larger pieces of scrap wood, to the “will be” measurements):
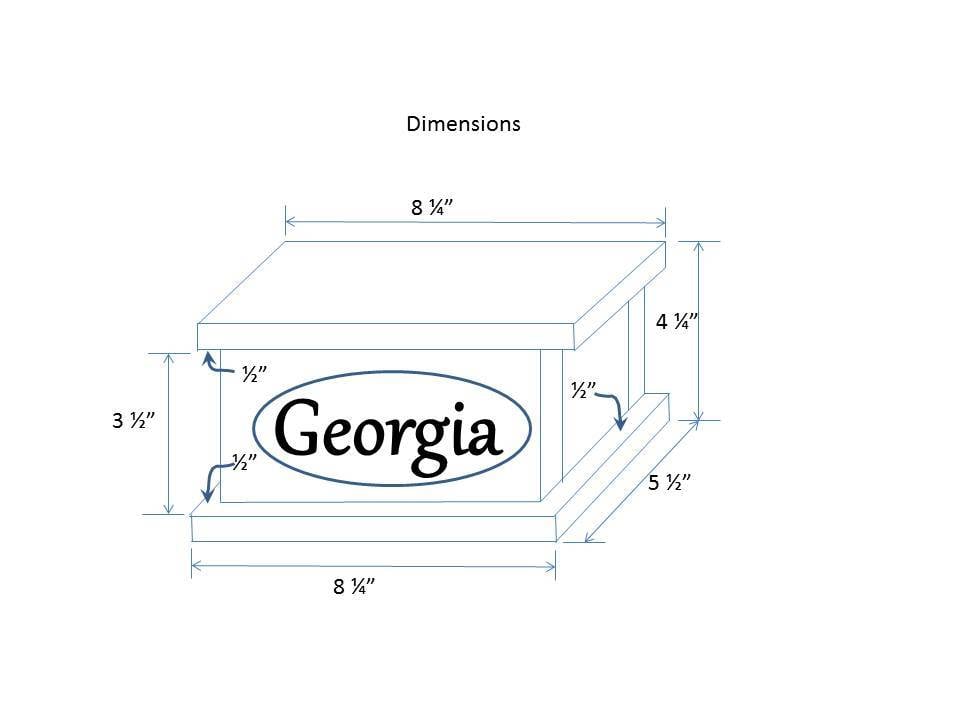
1x4 – 2 pc @ 7 ¼” (front/back – will be 7 ¼” x 3 ½”)
1x4 – 2 pc @ 3 ½” (sides – will be 3 ½” x 3 ½”)
1x6 – 2 pc @ 8 ¼” (top & bottom – will be 5 ½” x 8 ¼”)
You can use 1x4 and 1x6 scraps for this, or cut down to the "will be" sizes from larger scraps.


Please read through the entire plan and all comments before beginning this project. It is also advisable to review the Getting Started Section. Take all necessary precautions to build safely and smartly. Work on a clean level surface, free of imperfections or debris. Always use straight boards. Check for square after each step. Always predrill holes before attaching with screws. Use glue with finish nails for a stronger hold. Wipe excess glue off bare wood for stained projects, as dried glue will not take stain. Be safe, have fun, and ask for help if you need it. Good luck!
Instructions
Step 1
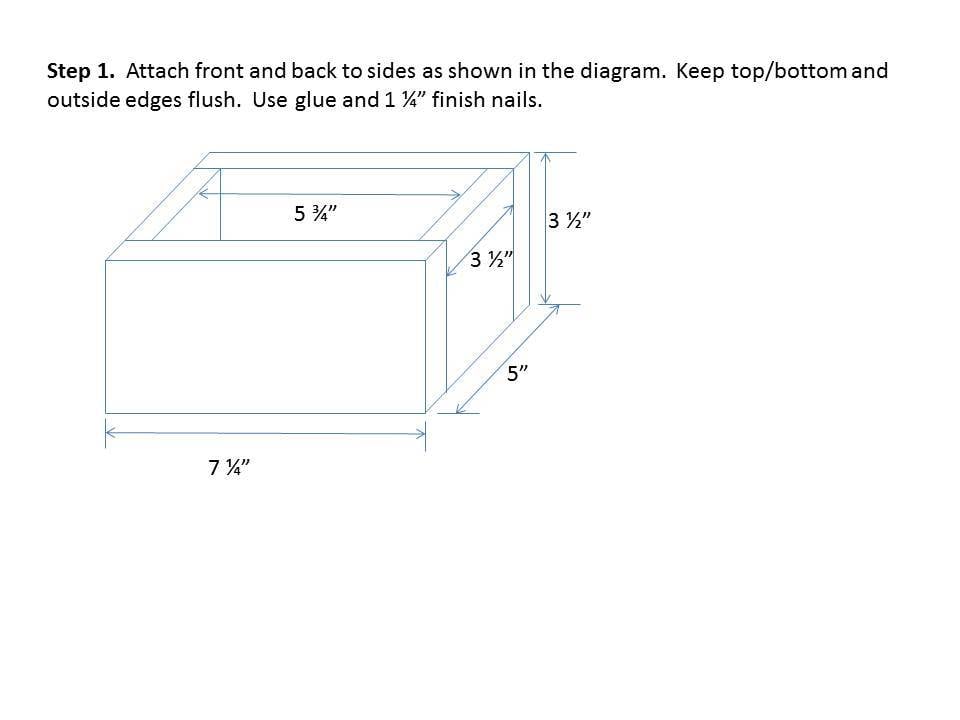
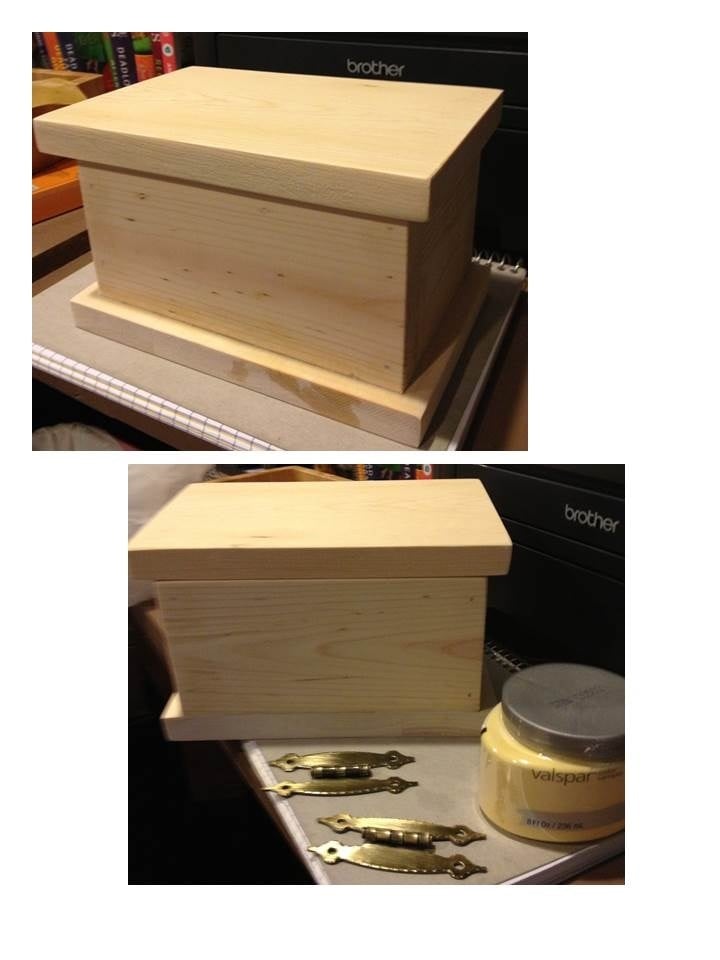
Step 1. Attach front and back to sides as shown in the diagram. Keep top/bottom and outside edges flush. Use glue and 1 ¼” finish nails.
Step 2
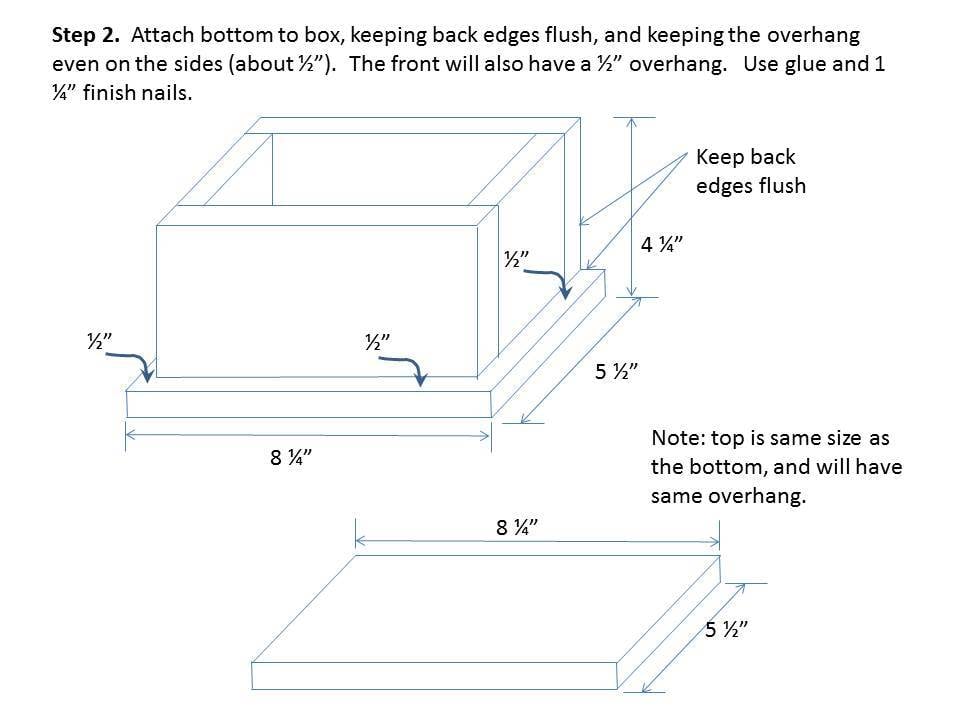
Step 2. Attach bottom to box, keeping back edges flush, and keeping the overhang even on the sides (about ½”). The front will also have a ½” overhang. Use glue and 1 ¼” finish nails.
Note: top is same size as the bottom, and will have same overhang.
Step 3
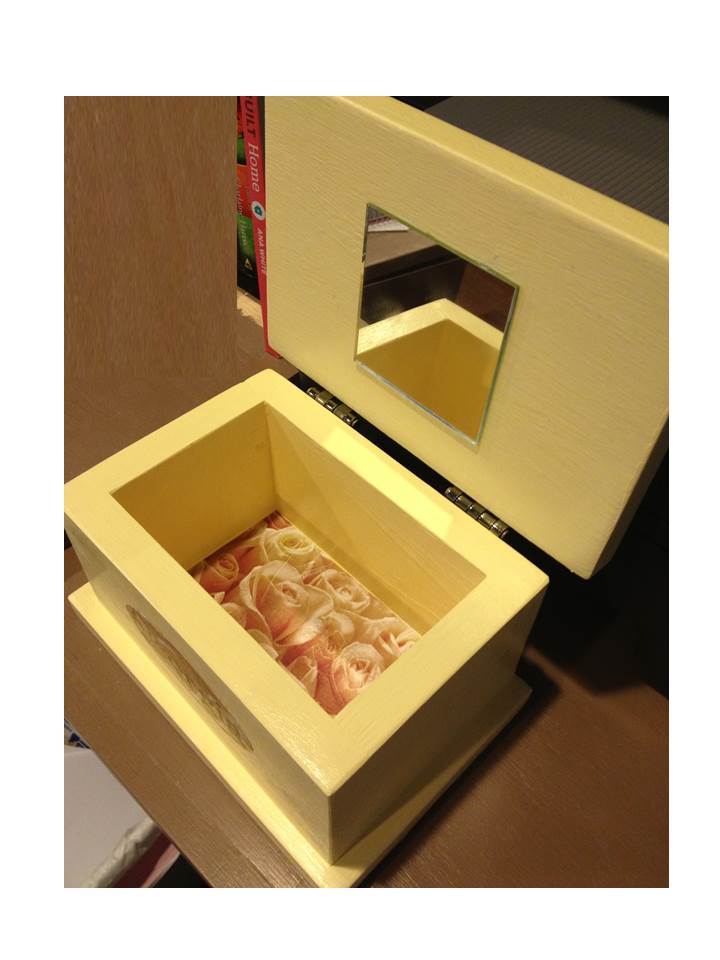
Step 3: Finishing: At this point finish the box and top.
Fill nail holes. Use matching or stainable filler if staining. After filler dries, sand until smooth, remove all sanding residue, and apply desired finish.
Step 4

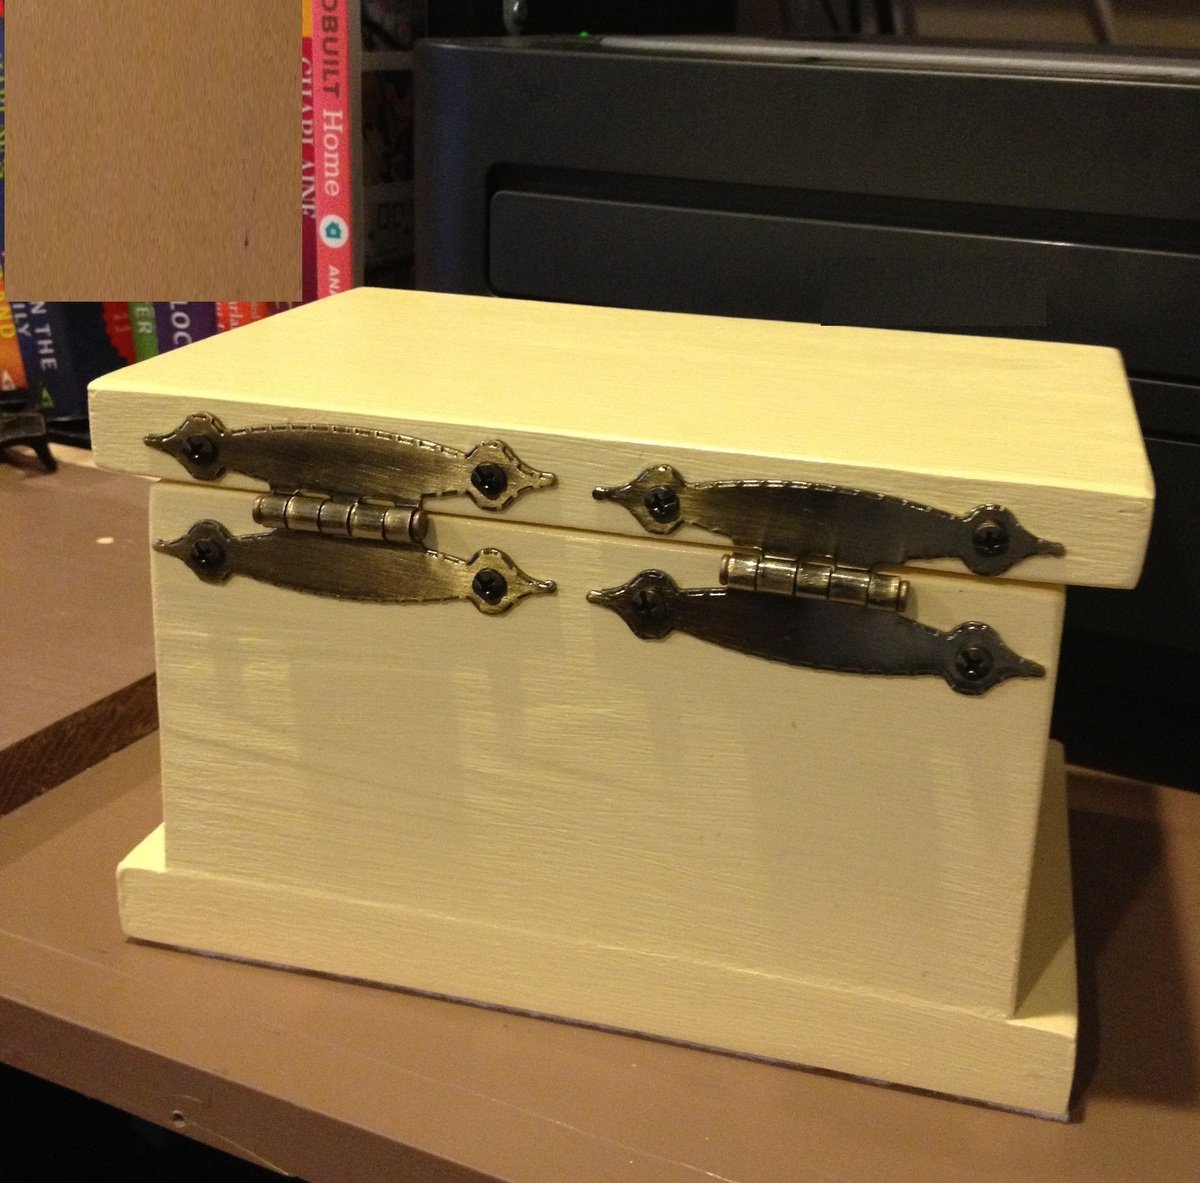
Step 4: Attach flat hinges to back of box and top, as shown in the diagram.
H-style flat hinges are shown, any flat hinge not exceeding 1 ½” wide and 3 ½” long will work.
For ease in attaching, mark where holes should go, and pre-drill to make “starter holes” for the screws – this will make the attaching easier. I usually attach the tops screws first, then align on box, and then attach bottom screws.
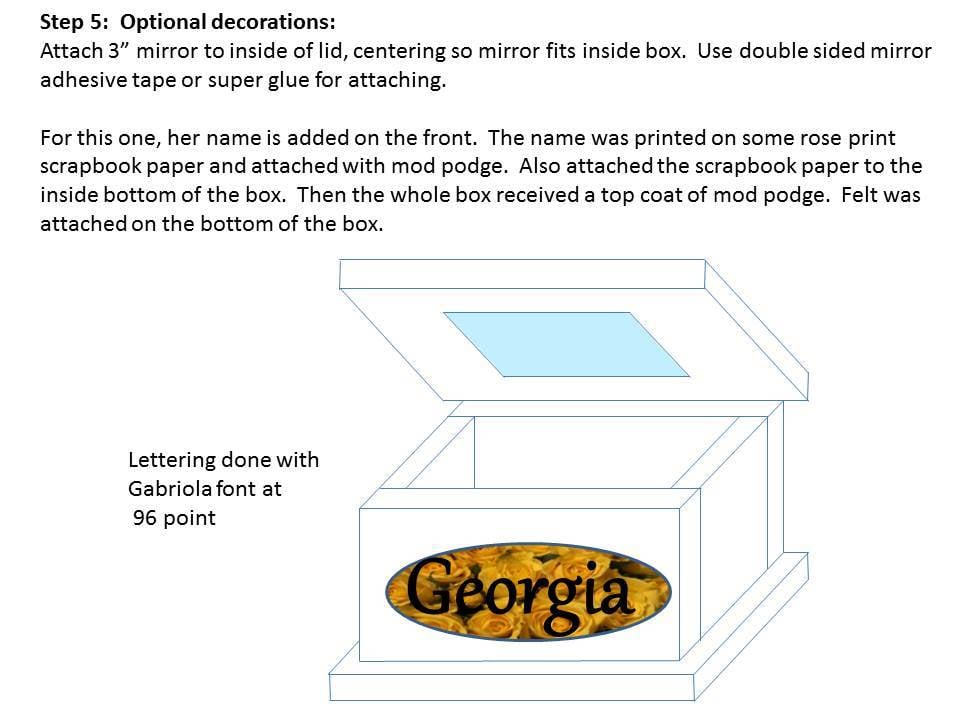
Step 5
It is always recommended to apply a test coat on a hidden area or scrap piece to ensure color evenness and adhesion. Use primer or wood conditioner as needed.