
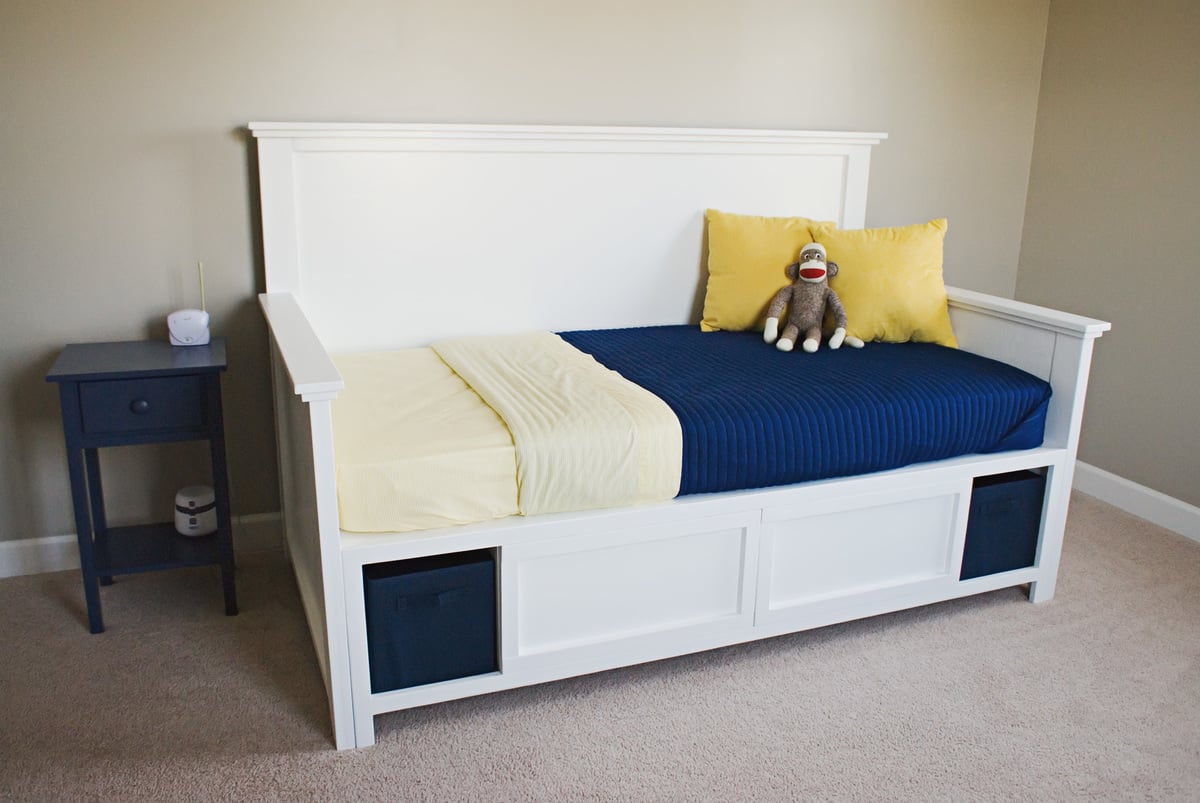

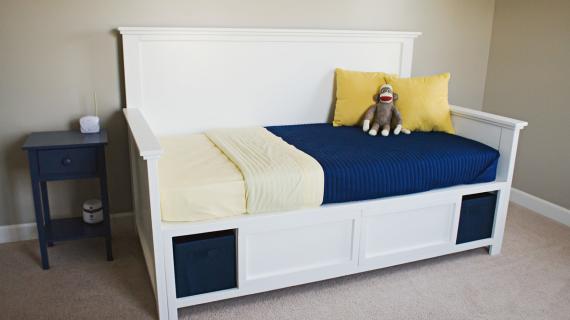
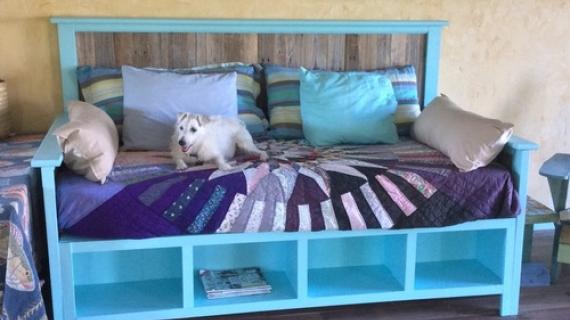
Build your own daybed with storage! You'll love our free step by step plans.
This daybed is a simple modification of the Hailey Twin Storage bed, and features front only storage compartments.
Preparation
Materials to build one bench from the Hailey Storage Bed Plan
1 - 3/4" Particle Board @ 72" x 32 1/2" (Headboard Panel)


Please read through the entire plan and all comments before beginning this project. It is also advisable to review the Getting Started Section. Take all necessary precautions to build safely and smartly. Work on a clean level surface, free of imperfections or debris. Always use straight boards. Check for square after each step. Always predrill holes before attaching with screws. Use glue with finish nails for a stronger hold. Wipe excess glue off bare wood for stained projects, as dried glue will not take stain. Be safe, have fun, and ask for help if you need it. Good luck!
Instructions
Step 1
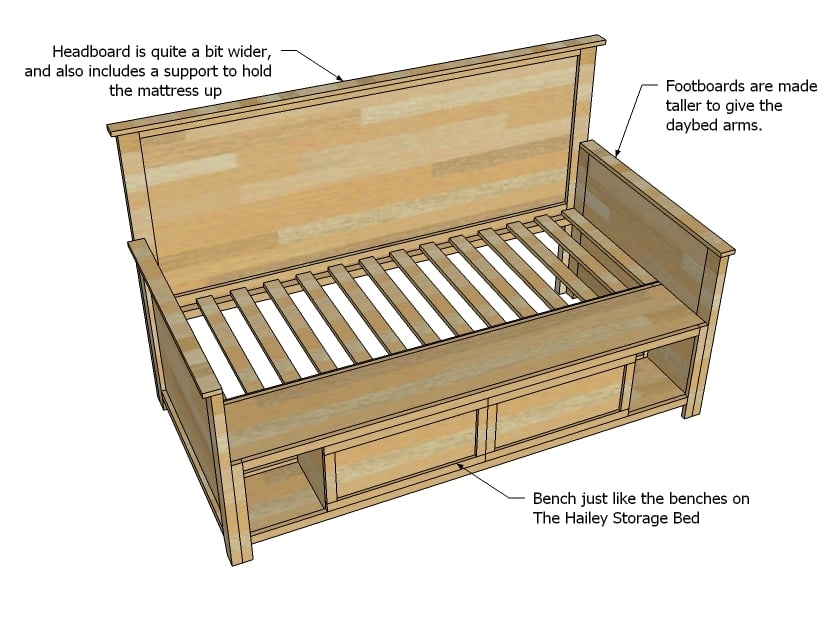
This bed heavily relies on the information provided in the Hailey Storage Bed plans, so please review that plan for detailed instructions and to build the storage bench.
Step 2
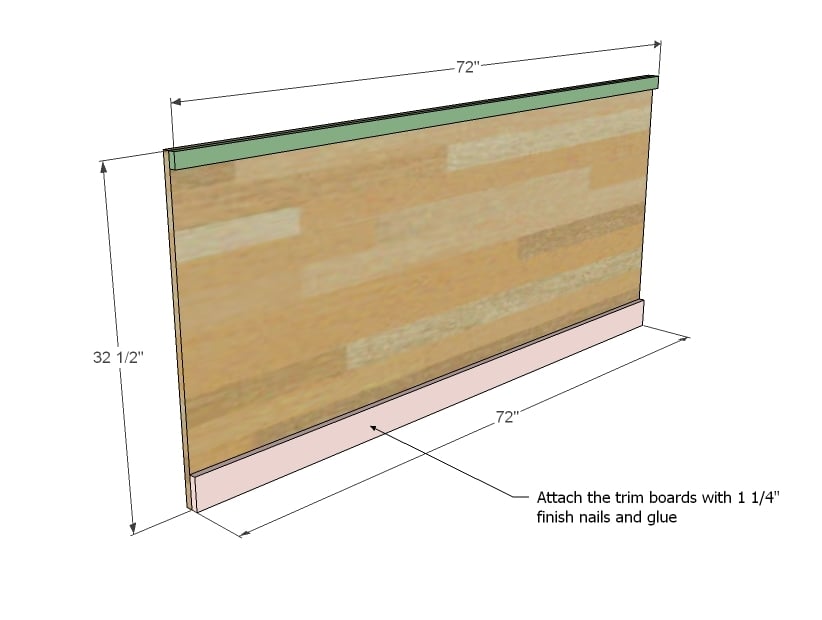
Build the headboard panel as shown above. Please review step 3 because and the Hailey Storage Bed Plan, because this bed assumes that you ripped your 2x4 legs down to 3" wide (take 1/4" off each edge to make the edges nice and square). You will need a table saw to do this right. But you can use standard with 2x4s by simply subtracting an inch to the panel and trim (so you would cut your panel 71" wide and the trim 71" wide too). Attach trim as shown above.
Step 3
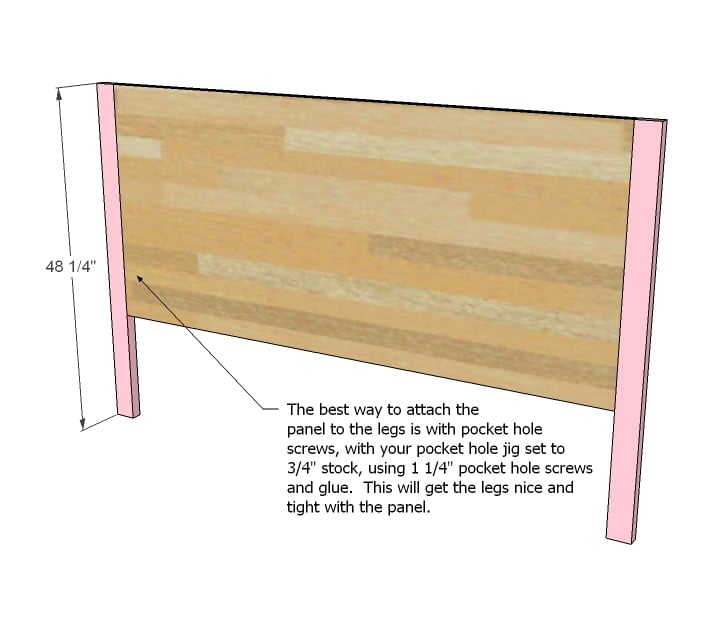
The best way to get a nice tight joint here is to use pocket holes drilled every 8-12" on the back, with the jig set to 3/4" stock. Use glue and attach with 1 1/4" pocket hole screws. It's going to be tricky to drill these pocket holes, so get some help holding that plywood up :)
Step 4
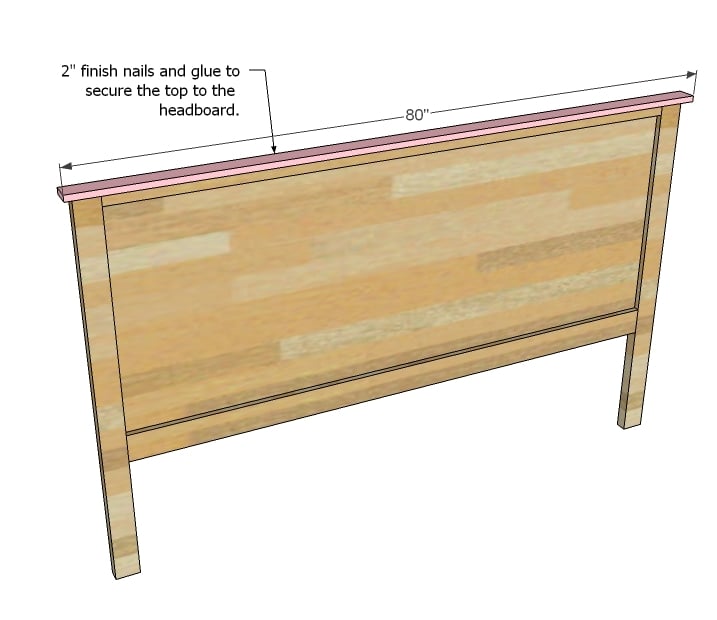
Now we simply add the top trim as shown above.
Step 5
Step 6
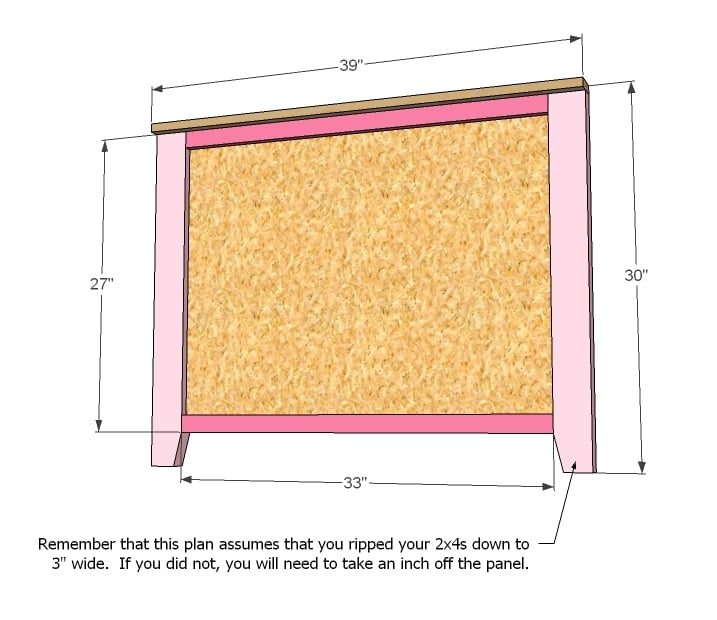
Now it's time to build the arms - which are basically taller footboards from the Hailey Storage Bed plans. Build exactly as the headboard - with the different dimensions. Remember that the dimensions shown above are for legs made from 2x4s that are ripped down to 3" wide. If you use off the shelf 2x4s, you will need to subtract and inch from the panel and panel trim.
Step 7
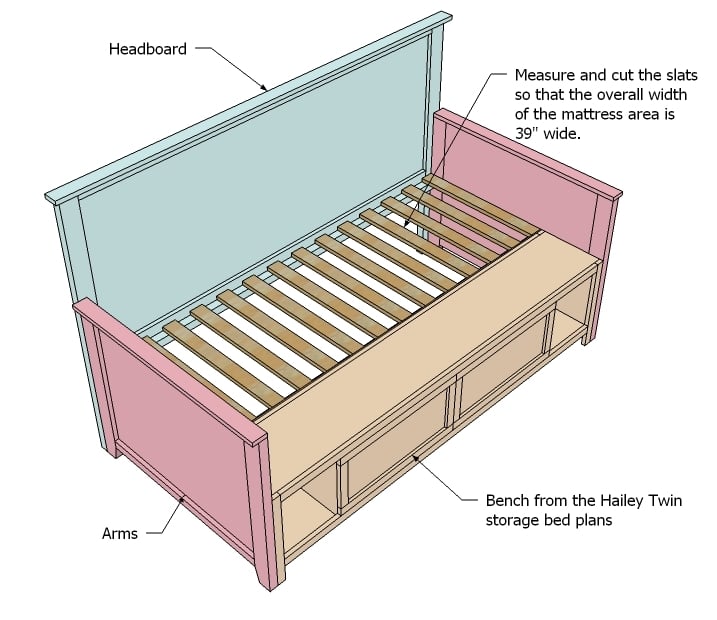
Now the exciting part, the can't wait till the hubs gets home to help me haul it into the house and assemble it! You've made the bench, you made the arms, and the headboard. Now assemble as shown above, without the slats. Start in this order: 1) attach the arms to the front bench with 2" screws from the insides of the cubbies into the legs of the arms 2) attach the headboard to the arms with 2 1/2" screws from the back into the legs of the arms 3) adjust so that the spacing for the mattress is square 4) take a measurement of the slat length and cut your slats to fit 5) screw slats down and put your mattress on top!
It is always recommended to apply a test coat on a hidden area or scrap piece to ensure color evenness and adhesion. Use primer or wood conditioner as needed.


Comments
beccadawn325
Wed, 04/20/2011 - 19:50
similar to Casey Daybed by Coaster that I want to build.
If you check out this link, the bed featured there is exactly what I want for my daughter, only in white. If you added beadboard or used 1x3's instead of plywood, and add a few finials, this bed would almost be exact! Hey Ana, how many inches would I add to the footboards to make this a full size bed?
In reply to similar to Casey Daybed by Coaster that I want to build. by beccadawn325
Ana White
Tue, 08/09/2011 - 19:57
15" I'm so sorry I didn't
15"
I'm so sorry I didn't get to your comment earlier.
beccadawn325
Wed, 04/20/2011 - 19:52
missing link, lol
http://www.daybeds.com/daybeds/full-size-daybeds/caseydaybedblackfull.cfm
Guest (not verified)
Sun, 10/09/2011 - 19:59
Daybed Couch
Daybed Couch
boogey78
Wed, 11/23/2011 - 16:06
trundle bed
is it possible to make this into a trundle day bed? if so do you have any plans for it?
Hannah Stephen… (not verified)
Mon, 03/26/2012 - 15:43
I absolutely LOVE this
I absolutely LOVE this design... glad that it's not too "girly" as i am building for a boy :) i will soon be starting this project and i must admit i am full of excitement! thank you for all you do!
Kathleen (not verified)
Wed, 09/12/2012 - 12:39
OH PLEASE!!
This bed, in a full size, would be AWESOME!! PLEASE OH PLEASE give me the full size instructions. I promise to send a pic when we are done.
Thank you for maintaining this site. It's GOLD!
Kat
cfournier2
Wed, 02/27/2013 - 21:10
Love this, but do not want the arms!
How would I make this daybed with the arms level with the bed frame itself? Meaning, I would not want the arms to be as tall as they are in the plan, but I don't want to disrupt the structural integrity needed to hold a twin mattress and the person sleeping in it!
omanj79
Tue, 09/16/2014 - 13:51
The Hailey Storage Bed
the link on Hailey Storage Daybed With Back And Arms plans for The Hailey Storage Bed isn't working wanted to see if you could help out thanks
twsnowman
Thu, 09/24/2015 - 14:58
link that works:
http://ana-white.com/2011/04/plans/hailey-storage-bed-twin
savannahmelcher
Sat, 02/03/2018 - 18:07
Twin XL
Would you be able to provide dimensions for the wood pieces to adjust the size to fit a Twin XL mattress?
katf
Thu, 05/02/2019 - 15:27
Full Size?
Could this be converted to a full size daybed by making the arms longer?