

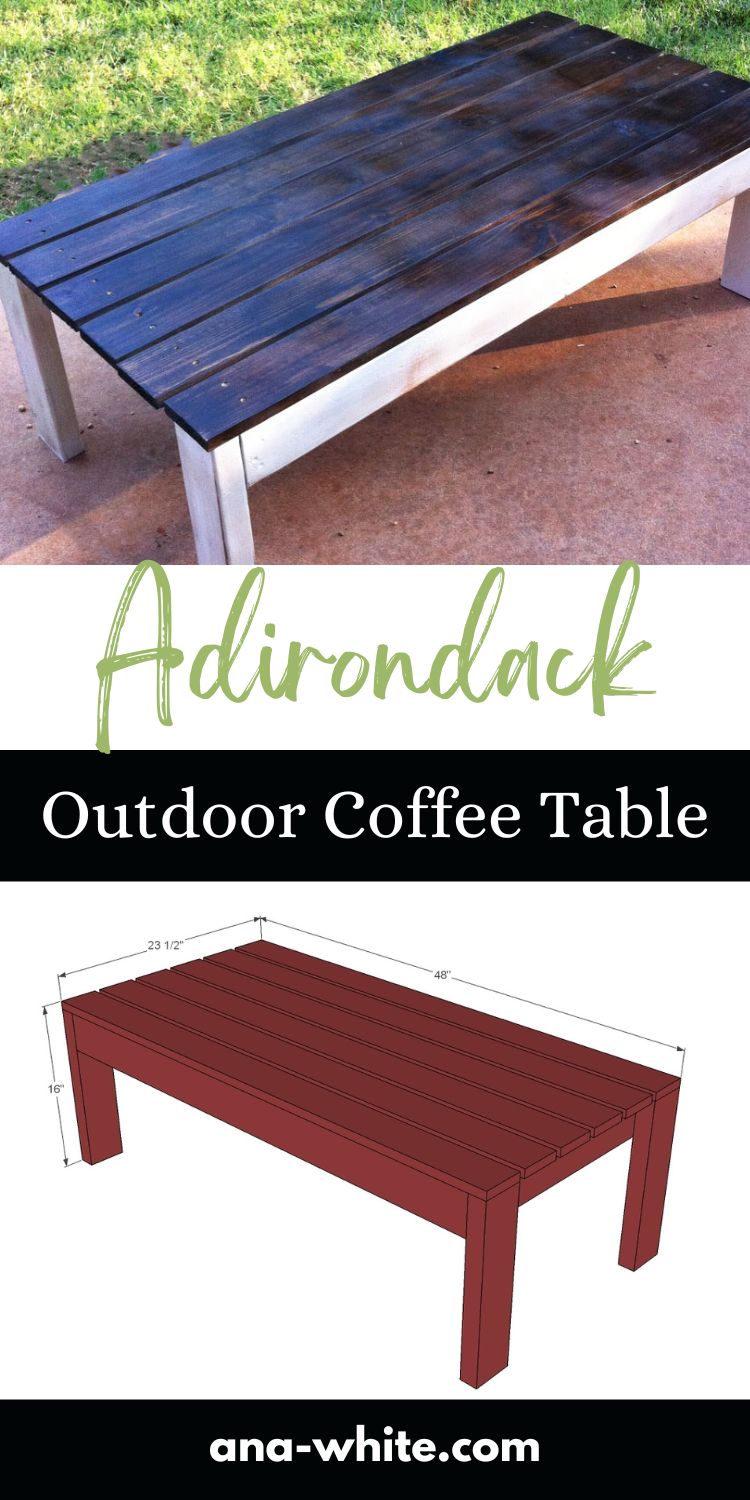
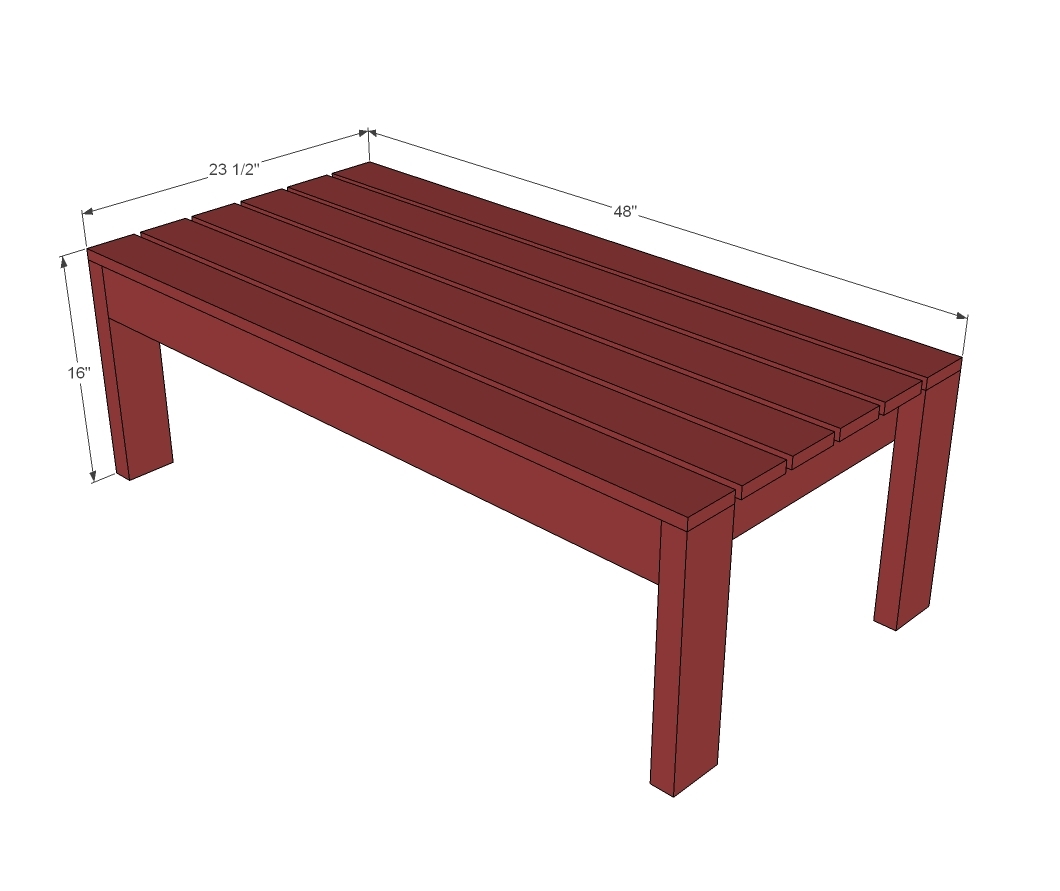
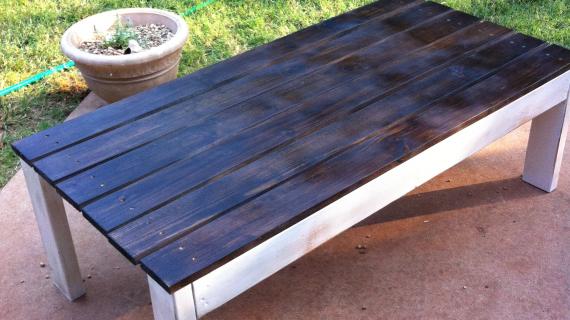
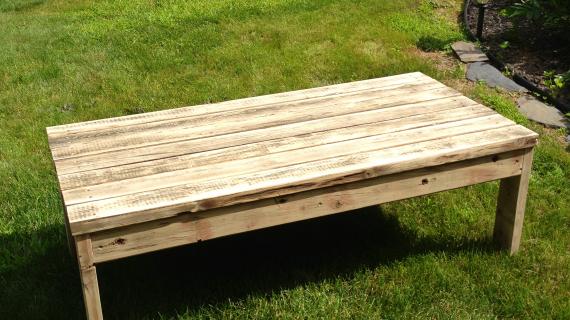
Free plans to build an Adirondack coffee table - this is out simplest plan for an outdoor coffee table! Just cut and screw together - no nails, no pocket holes!
Also check out our Outdoor Finishing Guide and all our Outdoor Furniture Plans.
Want to upgrade your outdoor space? Outdoor furniture can add functionality and beauty to your deck, patio, porch or backyard.
Outdoor Coffee Table Plans
We love this coffee table because it's so simple and easy to build. Since it's made with 2x4s and off the shelf lumber, it's inexpensive and easy to tackle. Check out the free plans below.
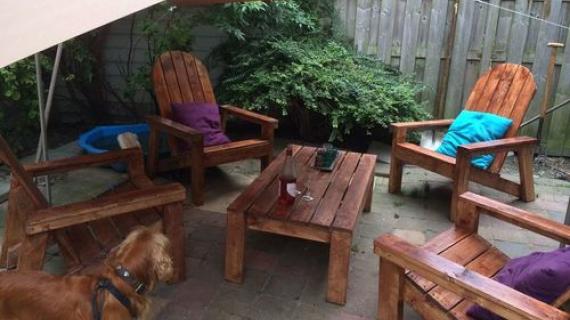
Matching Outdoor Furniture Plans
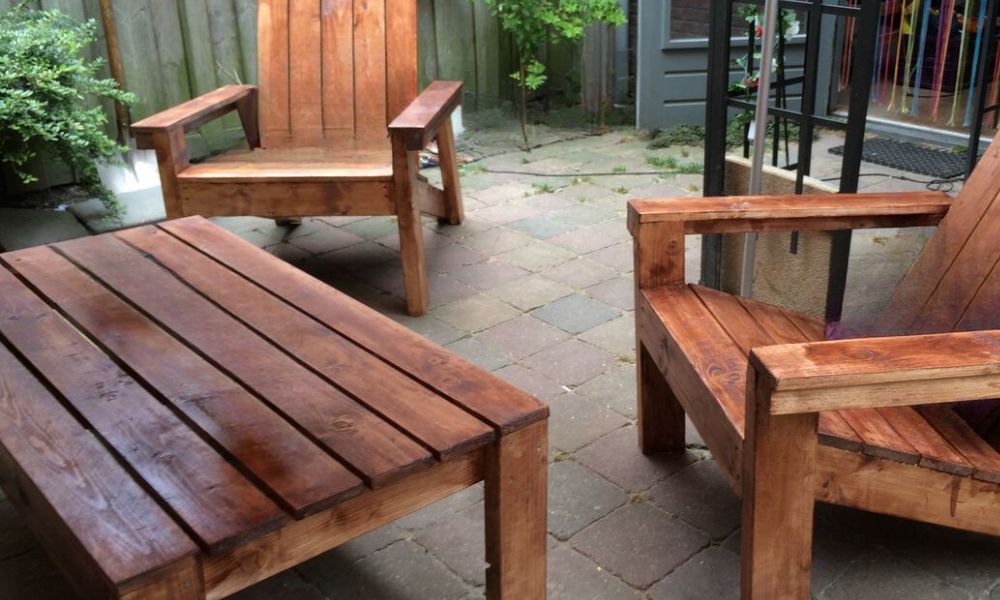
We made an entire collection of simple, easy to build, inexpensive Adirondack furniture for you! Here's some of our favorites - the 2x4 Adirondack Chair Plans
Check out out Adirondack side table plans.
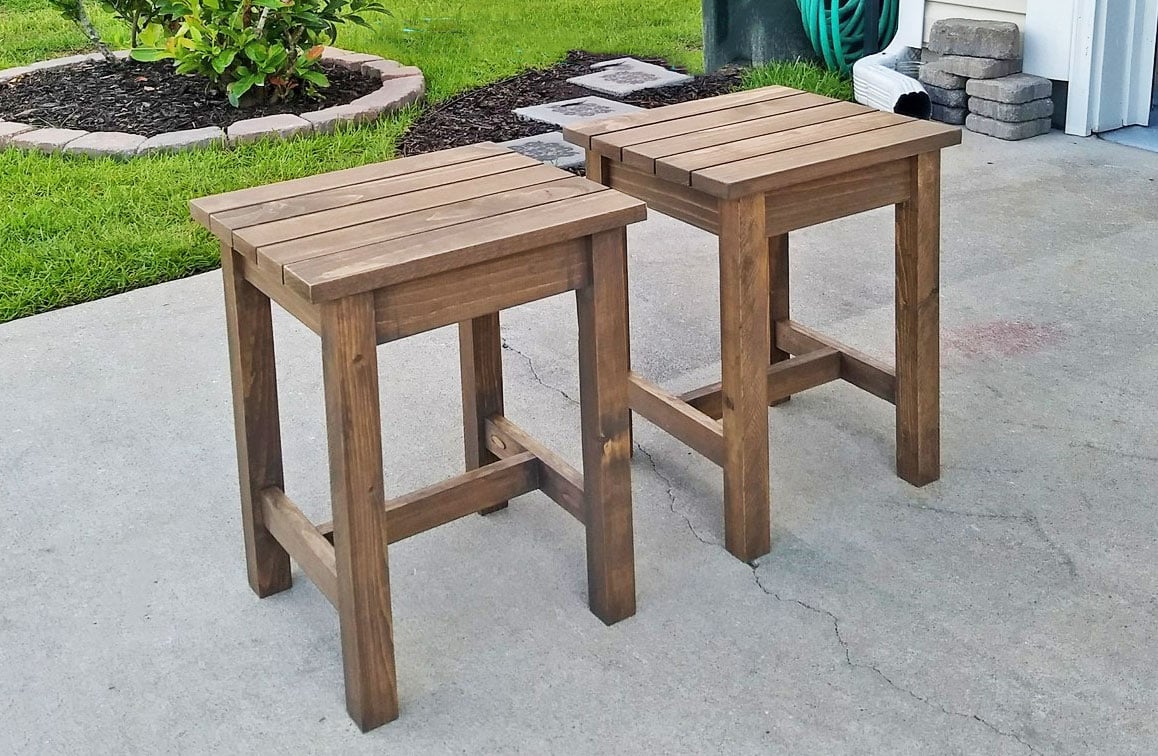
Bonus - the side table is the same height as a stool, so you can use it for seating too.
Pin For Later!
Preparation
• 3 - 1x4 @ 8 feet long
• 3 - 2x4 @ 8 feet long
• 2 1/2” exterior screws
• 2” exterior deck screws or galvanized finish nails (for nailing top down)
• 2 - 2x4 @ 44 1/2” (side aprons)* • 3 - 2x4 @ 20 1/2” (end aprons) • 4 - 2x4 @ 15 1/4” (legs) • 6 - 1x4 @ 47 1/2” (tabletop) * *NOTE: I took 1/2” off these measurements to conserve board use. Cut list is correct.
Cut out all boards from cut list. Cut half of the cut list from each 2x4 to get all cuts to fit on the 2x4s.


Please read through the entire plan and all comments before beginning this project. It is also advisable to review the Getting Started Section. Take all necessary precautions to build safely and smartly. Work on a clean level surface, free of imperfections or debris. Always use straight boards. Check for square after each step. Always predrill holes before attaching with screws. Use glue with finish nails for a stronger hold. Wipe excess glue off bare wood for stained projects, as dried glue will not take stain. Be safe, have fun, and ask for help if you need it. Good luck!
Instructions
Step 1
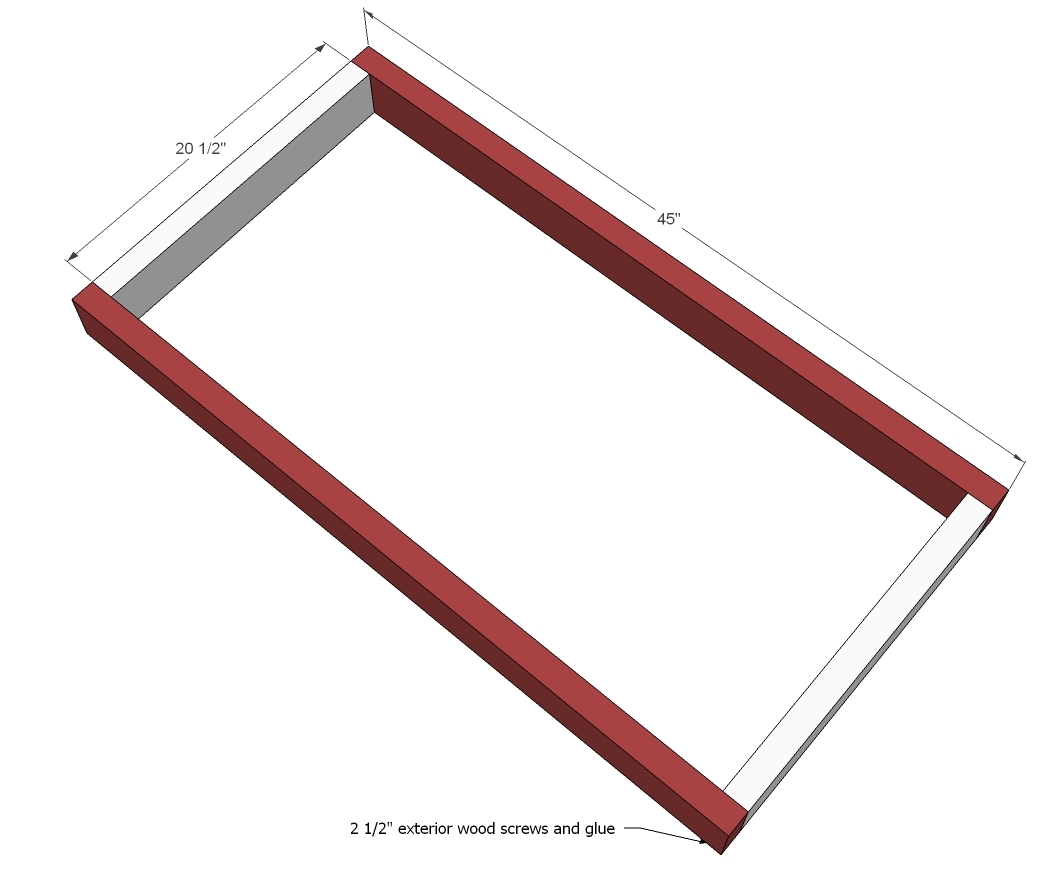
Attach long aprons to shorter aprons by predrilling holes with the countersink bit and screwing 2 1/2” exterior screws into predrilled holes. Take a second to check for square by measuring diagonally from corner to corner and adjusting so diagonal measurements are the same.
I recommend adding an additional 2x4 support (20 1/2" long and in cut list) to the center - attaching exactly as you do the end aprons.
Step 2
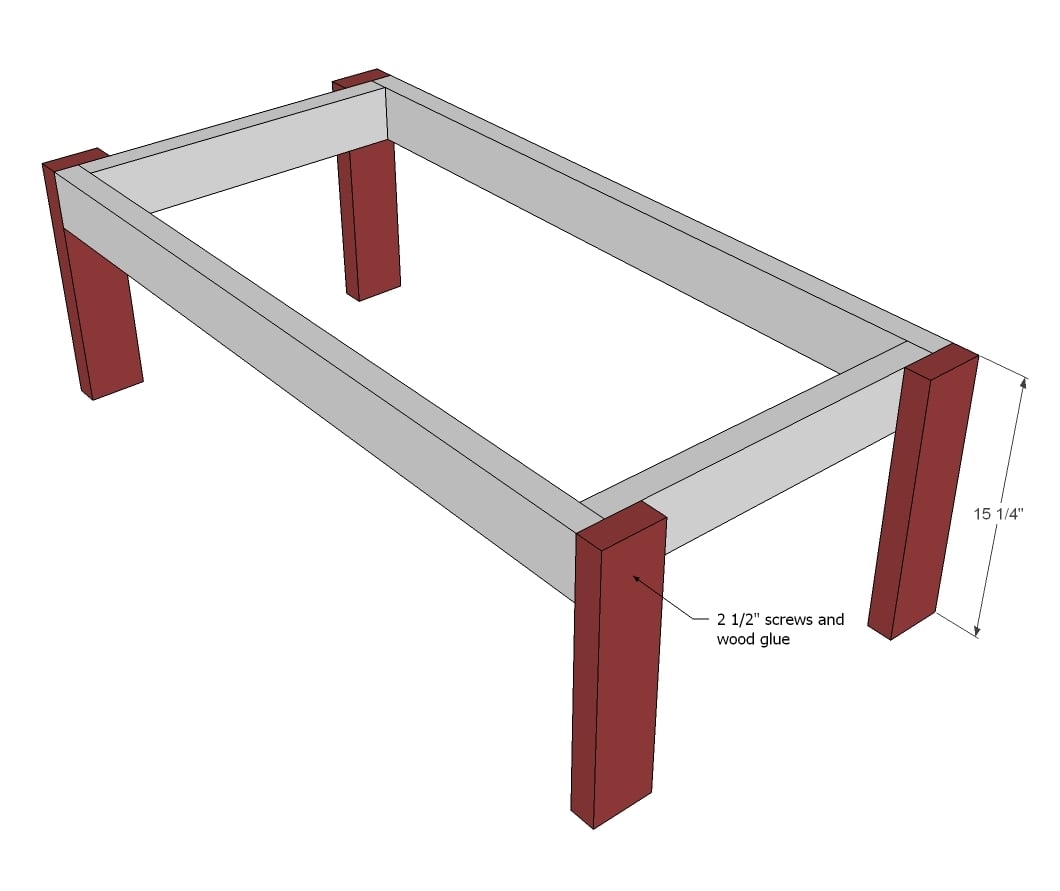
Clamp legs to frame and predrill 4 holes (in pattern for a better looking product) to the apron.
Step 3
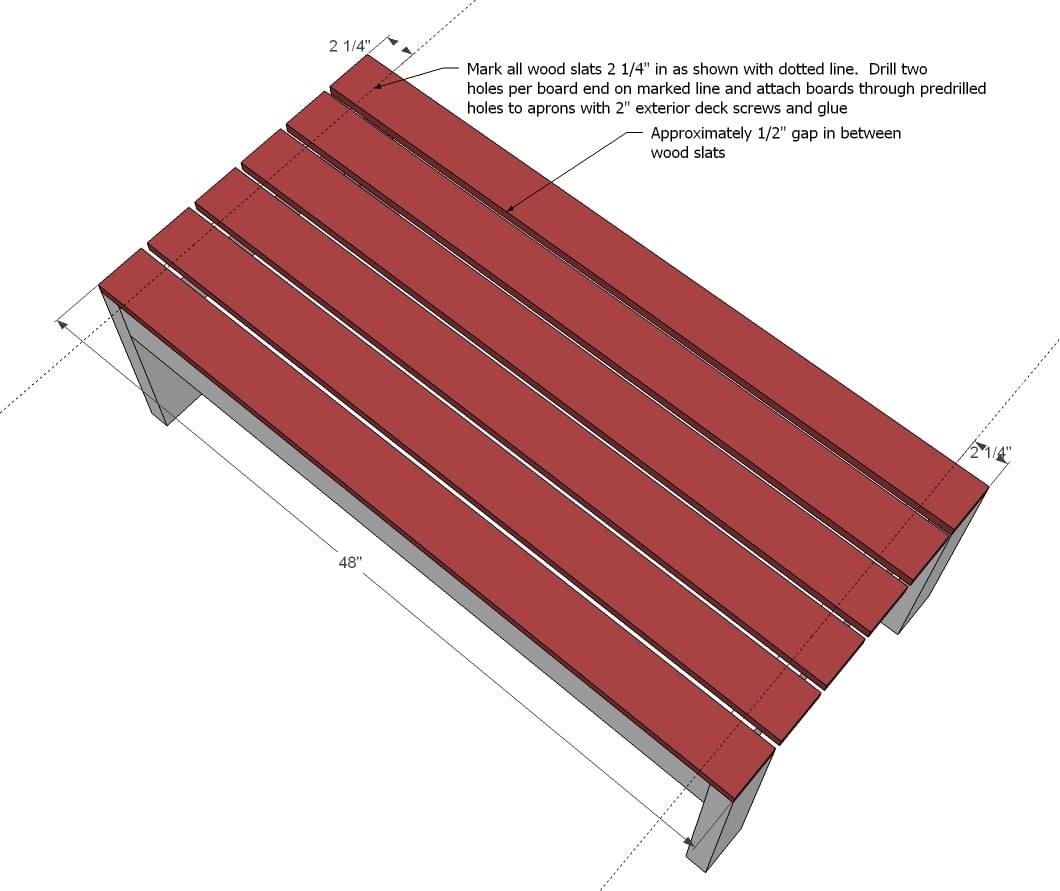
Drill two holes with countersink bit on each end of each board, 2 1/4” in. Attach through predrilled holes with deck screws and exterior wood glue.
Alternatively, you can use glue and galvanized finish nails
It is always recommended to apply a test coat on a hidden area or scrap piece to ensure color evenness and adhesion. Use primer or wood conditioner as needed.

Comments
amf699
Tue, 06/18/2013 - 05:37
The collection looks
The collection looks excellent. I cannot wait to start building it.
One note on the cut list, it looks like you should have 3 end aprons and 2 side aprons, it is listed the other way around.
hawkingbrandy
Thu, 05/23/2019 - 12:13
Perfect.
Perfect.
Ana White
Tue, 06/18/2013 - 09:10
Thanks for the catch and
Thanks for the catch and taking your time to let us know! Ana
Kast
Wed, 10/30/2013 - 09:06
I love the video you posted.
I love the video you posted. I
Kast
Wed, 10/30/2013 - 09:06
I love the video you posted.
I love the video you posted. I
cpoore
Thu, 04/09/2015 - 08:56
Modification
I need a fairly narrow outdoor table to use near the BBQ. If I modified this table to be 8 feet long and about 3 feet high, would I need to add any additional support in the center, or are the legs strong enough as is?
Thanks!
danjohannesen
Tue, 05/19/2015 - 06:35
Dowels
Hi Ana
I wanna try making a table like this, but i wanna do the joints with dowels, cause i got this bag of ½ x 4" dowels will it be strong enough if i use an outdoor glue?
dryphi
Tue, 03/27/2018 - 17:30
Cut list note
Note that you can actually do this with two (2) 2x4s if you fore-go the middle (end) apron. I was confused by the note underneath but the way this would break down is as follows:
1x44.5 + 1x20.5 + 2x15.25 = 95.5". Each 2"x4"x8' board is 96" long so that leave 1/2" excess for the saw blade.
I'm considering making something similar using 2x2s and 1x2s for my living room actually.
dryphi
Tue, 03/27/2018 - 22:00
Cut list note
Note that you can actually do this with two (2) 2x4s if you fore-go the middle (end) apron. I was confused by the note underneath but the way this would break down is as follows:
1x44.5 + 1x20.5 + 2x15.25 = 95.5". Each 2"x4"x8' board is 96" long so that leave 1/2" excess for the saw blade.
That said, if you have the extra 2x4 lying around, go ahead and add it as Ana suggested. You just can't quite "cut half" of three boards as her comment indicates ;)
I'm considering making something similar using 2x2s and 1x2s for my living room.
jas.rohilla
Wed, 04/22/2020 - 18:32
Hi, Can you please mention cut list for 45wide 23"deep and 30" t
Hi,
Can you please mention cut list for 45wide 23"deep and 30" tall? It will look like a desk.