
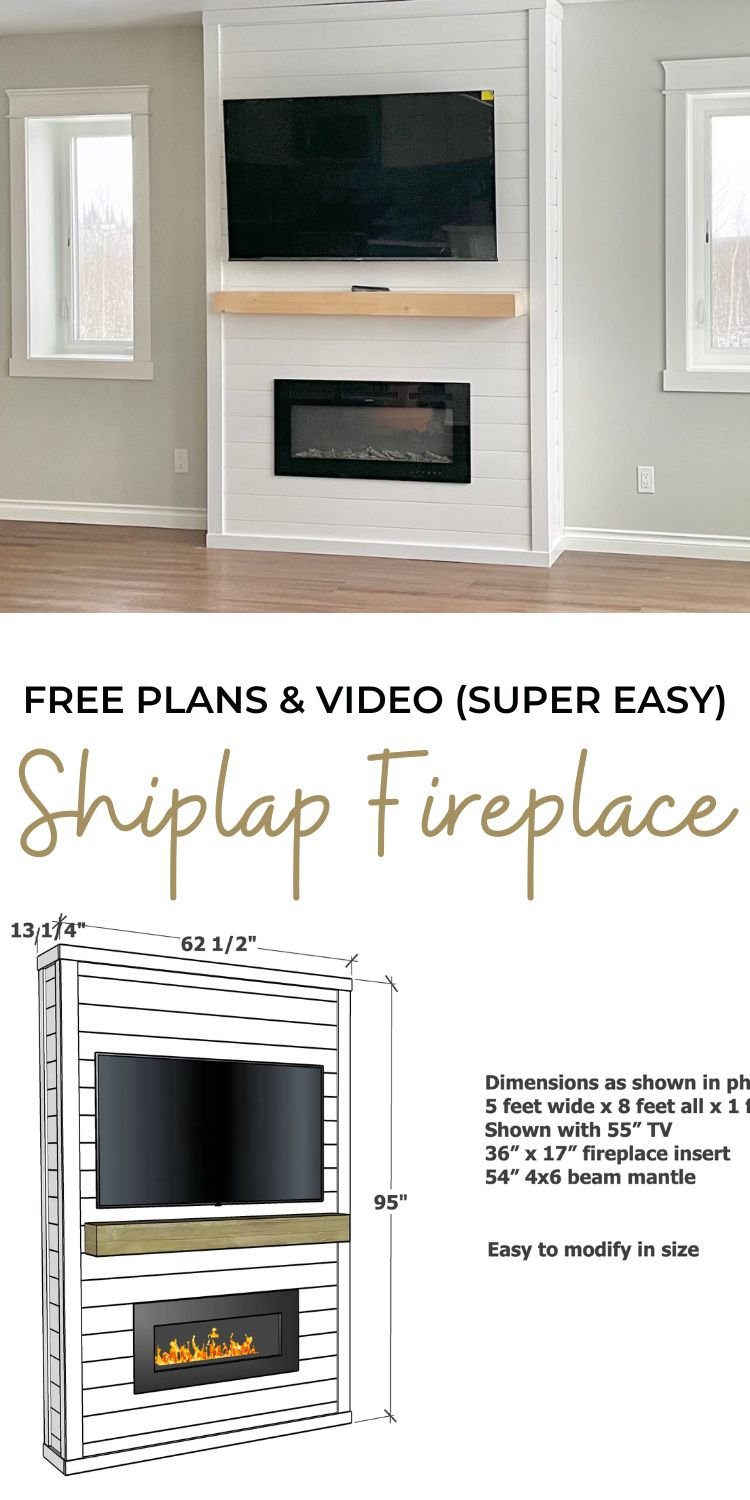
This is the easiest shiplap fireplace tutorial! For about $550 you can build your own shiplap fireplace bump out (tv and insert not included). Step by step instructions with video and shopping and cut lists from Ana-White.com
The Easiest Tutorial to make your own Shiplap Fireplace
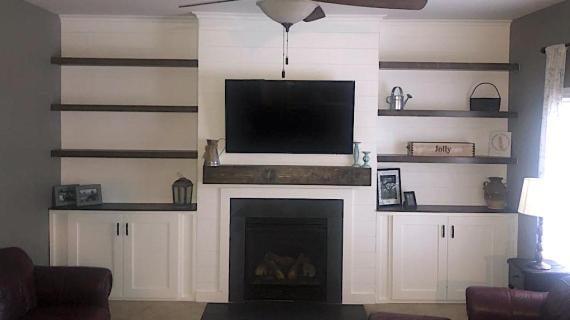
Turn a boring wall into a gorgeous fireplace centerpiece with Ana White's easy shiplap fireplace tutorial using an electric fireplace insert. Get that cozy feeling in your living room, all for about $550! Free step by step plans with video, diagrams, shopping list - everything you need to make it happen.
Why a Fireplace Accent Wall?
We love a fireplace accent wall - it can turn a boring room into a cozy, gorgeous space as the focal point of the room. It is the perfect addition to make your home more valuable and beautiful.
- HIDE TV CORDS: The fireplace wall can integrate a tv, and it can hide ugly cords inside.
- LESS CLEANING: A fireplace wall is contained, so you never have to dust or vacuum behind or under it.
- ARCHITECTURAL ELEMENT: It's also a great way to add an architectural feature to a room that can create interesting spaces and nooks in an otherwise boring room.
- MAKES ROOM LOOK TALLER: The floor to ceiling design adds a vertical strip to a living room, making your space appear taller.
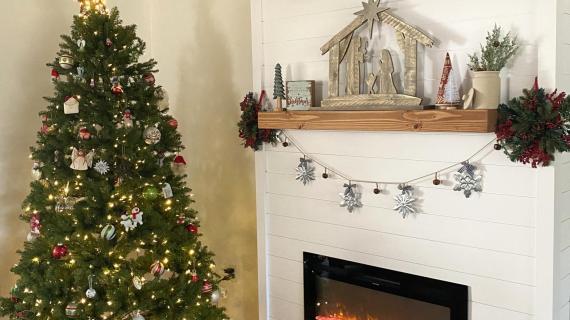
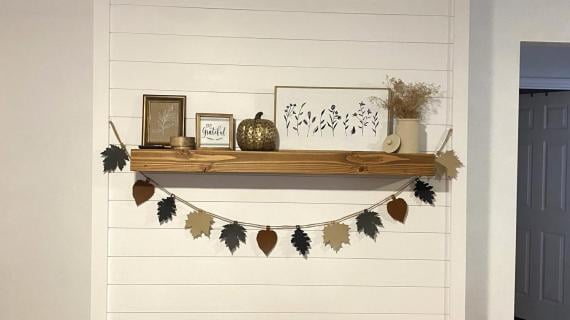
- CHRISTMAS: If for no other reason, build the fireplace accent wall so you have somewhere to hang stockings and a mantle to decorate for Christmas.
- SPACE SAVING DESIGN: Yes, you read that right, because this piece is attached to the wall, it actually takes up less space than a similar sized tv console.
- SHIPLAP WITHOUT A FULL REMODEL: Love shiplap walls but don't want to remodel an entire room? Adding a shiplap fireplace is an easy way to add shiplap to your room.
- ADD VALUE TO YOUR HOME: A stylish fireplace can add between $1000 and $5000 to the value of your home.
But I Need Storage
With today's technology, do you need all that storage? Back in the days of DVDs and big controller boxes, that was a thing. But not anymore! I'd argue that having less storage opportunities is helping keep the clutter down. What would you store in there?
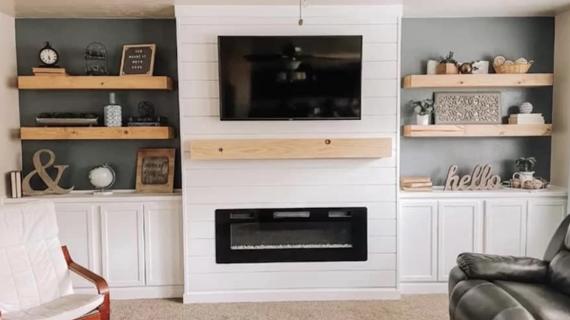
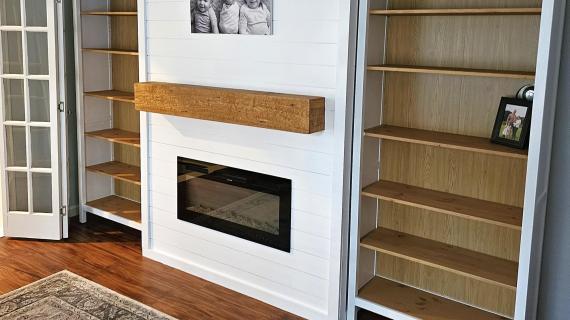
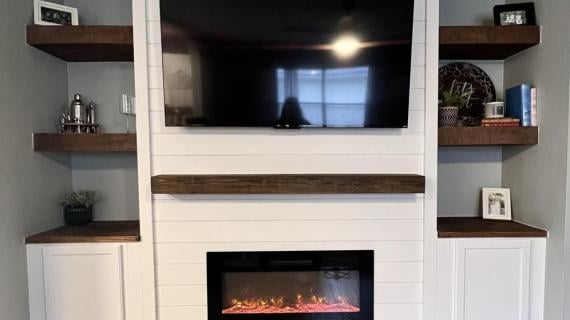
If you really need storage, consider built-ins with shelves on either side of the fireplace. Or a storage coffee table.
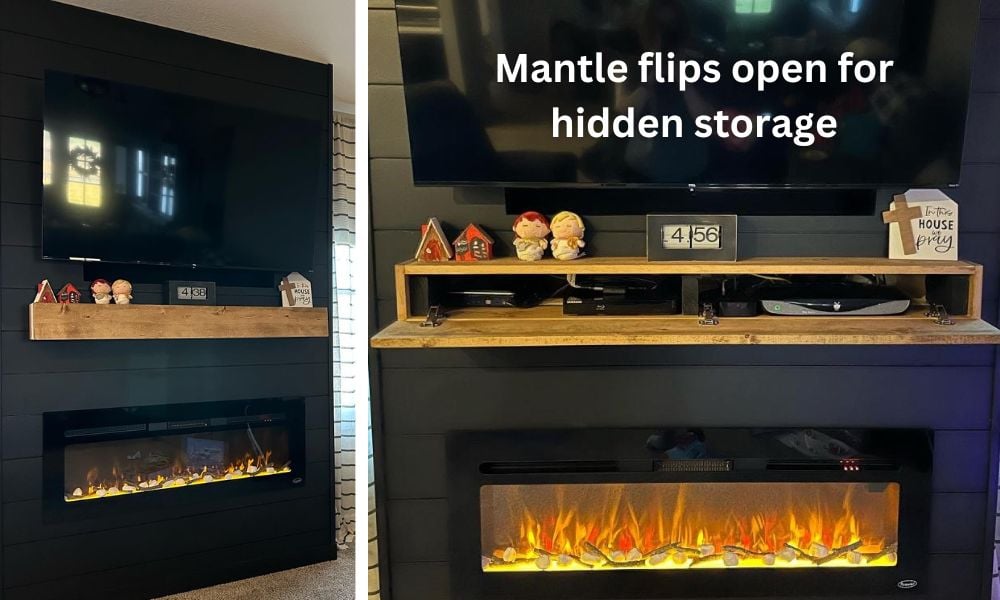
UPDATE: One of our amazing readers built this flip down mantle to add a little storage and we thought it was brilliant! Here's the tutorial on how to do that.
Why an Electric Fireplace Insert?
Just plug and enjoy! Electric fireplace inserts are convenient, inexpensive, easy to install, and super beautiful. Many require no clearances, and only need a simple plugin.
Other options like wood burning or gas fireplaces may need venting, gas lines, clearances to non combustibles, and more. Gas or wood burning insert can also be expensive, heavy and difficult to install.
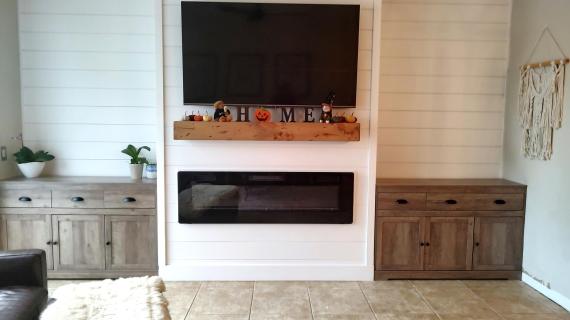
More Shiplap Fireplace Ideas
If you want more than just a white shiplap fireplace, consider these ideas:
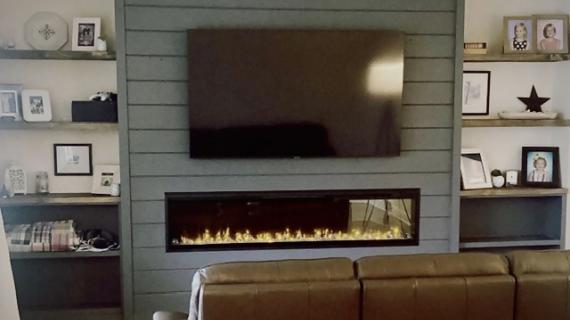
- VERTICAL SHIPLAP: Install the shiplap vertical for an even more exaggerated room height look, and a more modern feel. You may need to add blocking in some places to nail off the shiplap though - this framing is optimized for horizontal run shiplap.
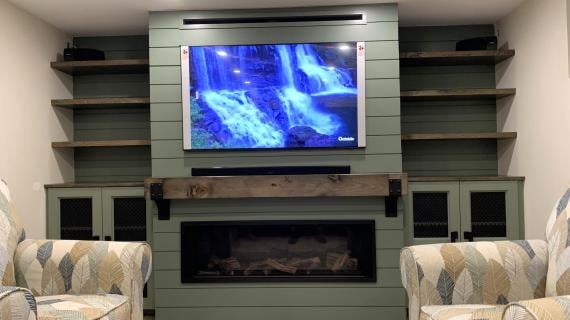
- BLACK SHIPLAP FIREPLACE: We love this painted black because it turns it into a modern shiplap fireplace, all while blending with a black TV and fireplace insert, with no extra work. Want drama? Bring on the moody paint.
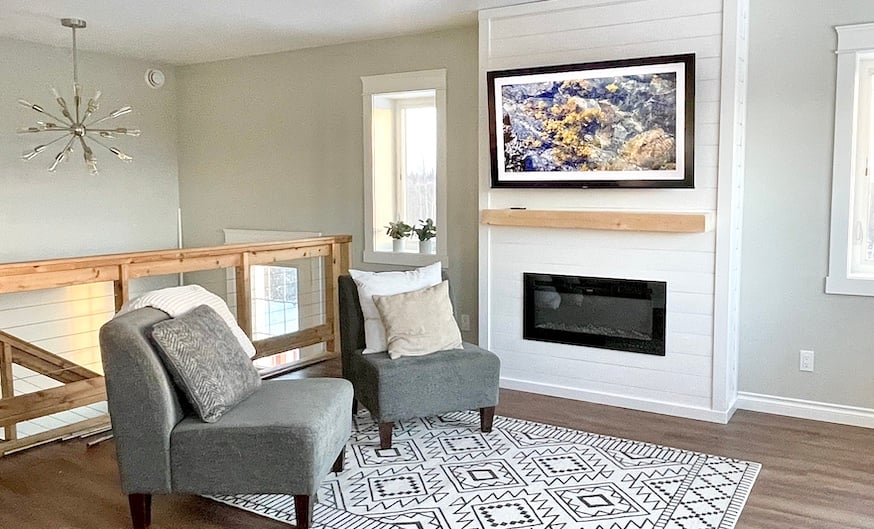
- GRAYS, GREIGES, CREAMS - With a white wall, any of these colors will be beautiful ways to accent your shiplap fireplace.
Can I Use Other Materials Instead of Shiplap?
This tutorial uses shiplap because it's easy to work with, inexpensive, and adds texture to the space, and many people love the country farmhouse vibe. But you can use lots of other materials and methods of installation to achieve just about any look you can envision.
- DRYWALL: This fireplace can be drywalled for the ultimate clean look.
- MODERN PANELING: Try covering the 2x4 framing with smooth panels, then using the trim to create the interesting look.
- BRICK OR STONE: Yes, you can. Instead of shiplap, cover in Durock or similar, and spread the mortar. We especially love a white brick or whitewashed brick, or marble tiles.
- RECLAIMED WOOD, WOOD PLANKS: Yep, all possible. If the planks don't have a tongue and groove, you may want to cover in plywood first, and then nail the planks to the the plywood. It will all depend on the materials you are using.
Cost Breakdown for a my Fireplace Bump Out
This fireplace was very affordable! I was surprised. The total cost was about $550
- Wood framing, shiplap and trim: $300
- Electric fireplace insert: $186
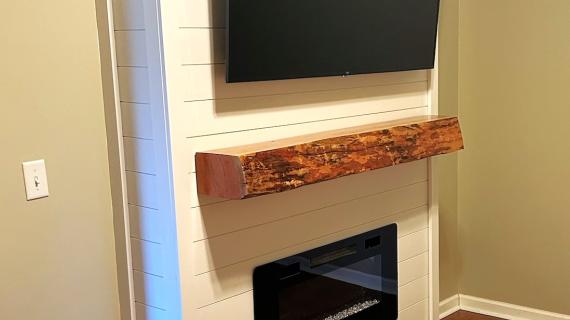
- Mantle: $20
- Paint, fasteners, sandpaper, wood filler etc: $50
Watch! Video Tutorial for Building this Fireplace Bump Out
Before you build, make sure you watch the build video. It shows the entire process, and a few tips and tricks along the way to help out.
Basic Steps to Build a Shiplap Fireplace
Simple 2x4 back frame, attached to studs in the wall

Front 2x4 frame, with fireplace insert framing integrated
Cover 2x4 frames with shiplap
Attach wood beam from inside

Finish the Shiplap and trim top, bottom and corners
Electrical Considerations
Before beginning this project, make sure you have necessary electrical available. Our tv cord barely reached the outlet, and the fireplace insert needs power as well. The fireplace insert may need a dedicated circuit, depending on the model. Consult with an electrician.
Free Plans for Building Your Own Shiplap Fireplace
Here's the free plans that I came up with to build this fireplace. It is easy to modify to fit your needs.
Pin For Later!
Preparation
- 8 - 2x4 @ 8 feet long
- 6 - 2x4 @ 10 feet long (cut 57" boards from these boards)
- shiplap boards total of 56 square feet of coverage, 12 lengths ideal for maximum board use
- 8 - 1x3 trim boards - 8 feet long
- 3/4" cove or shoe moulding if gap at ceiling needs to be covered
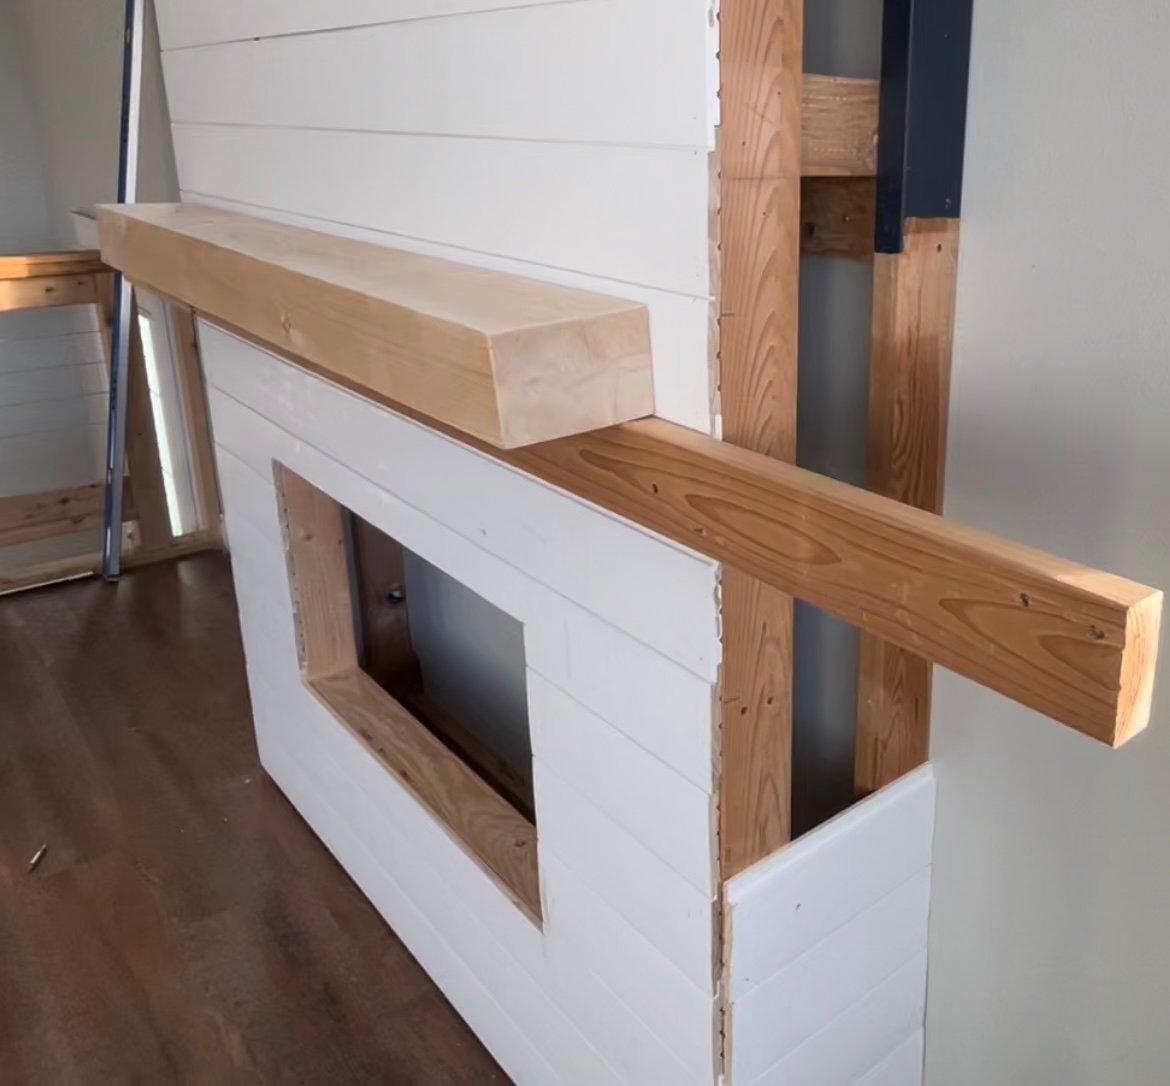
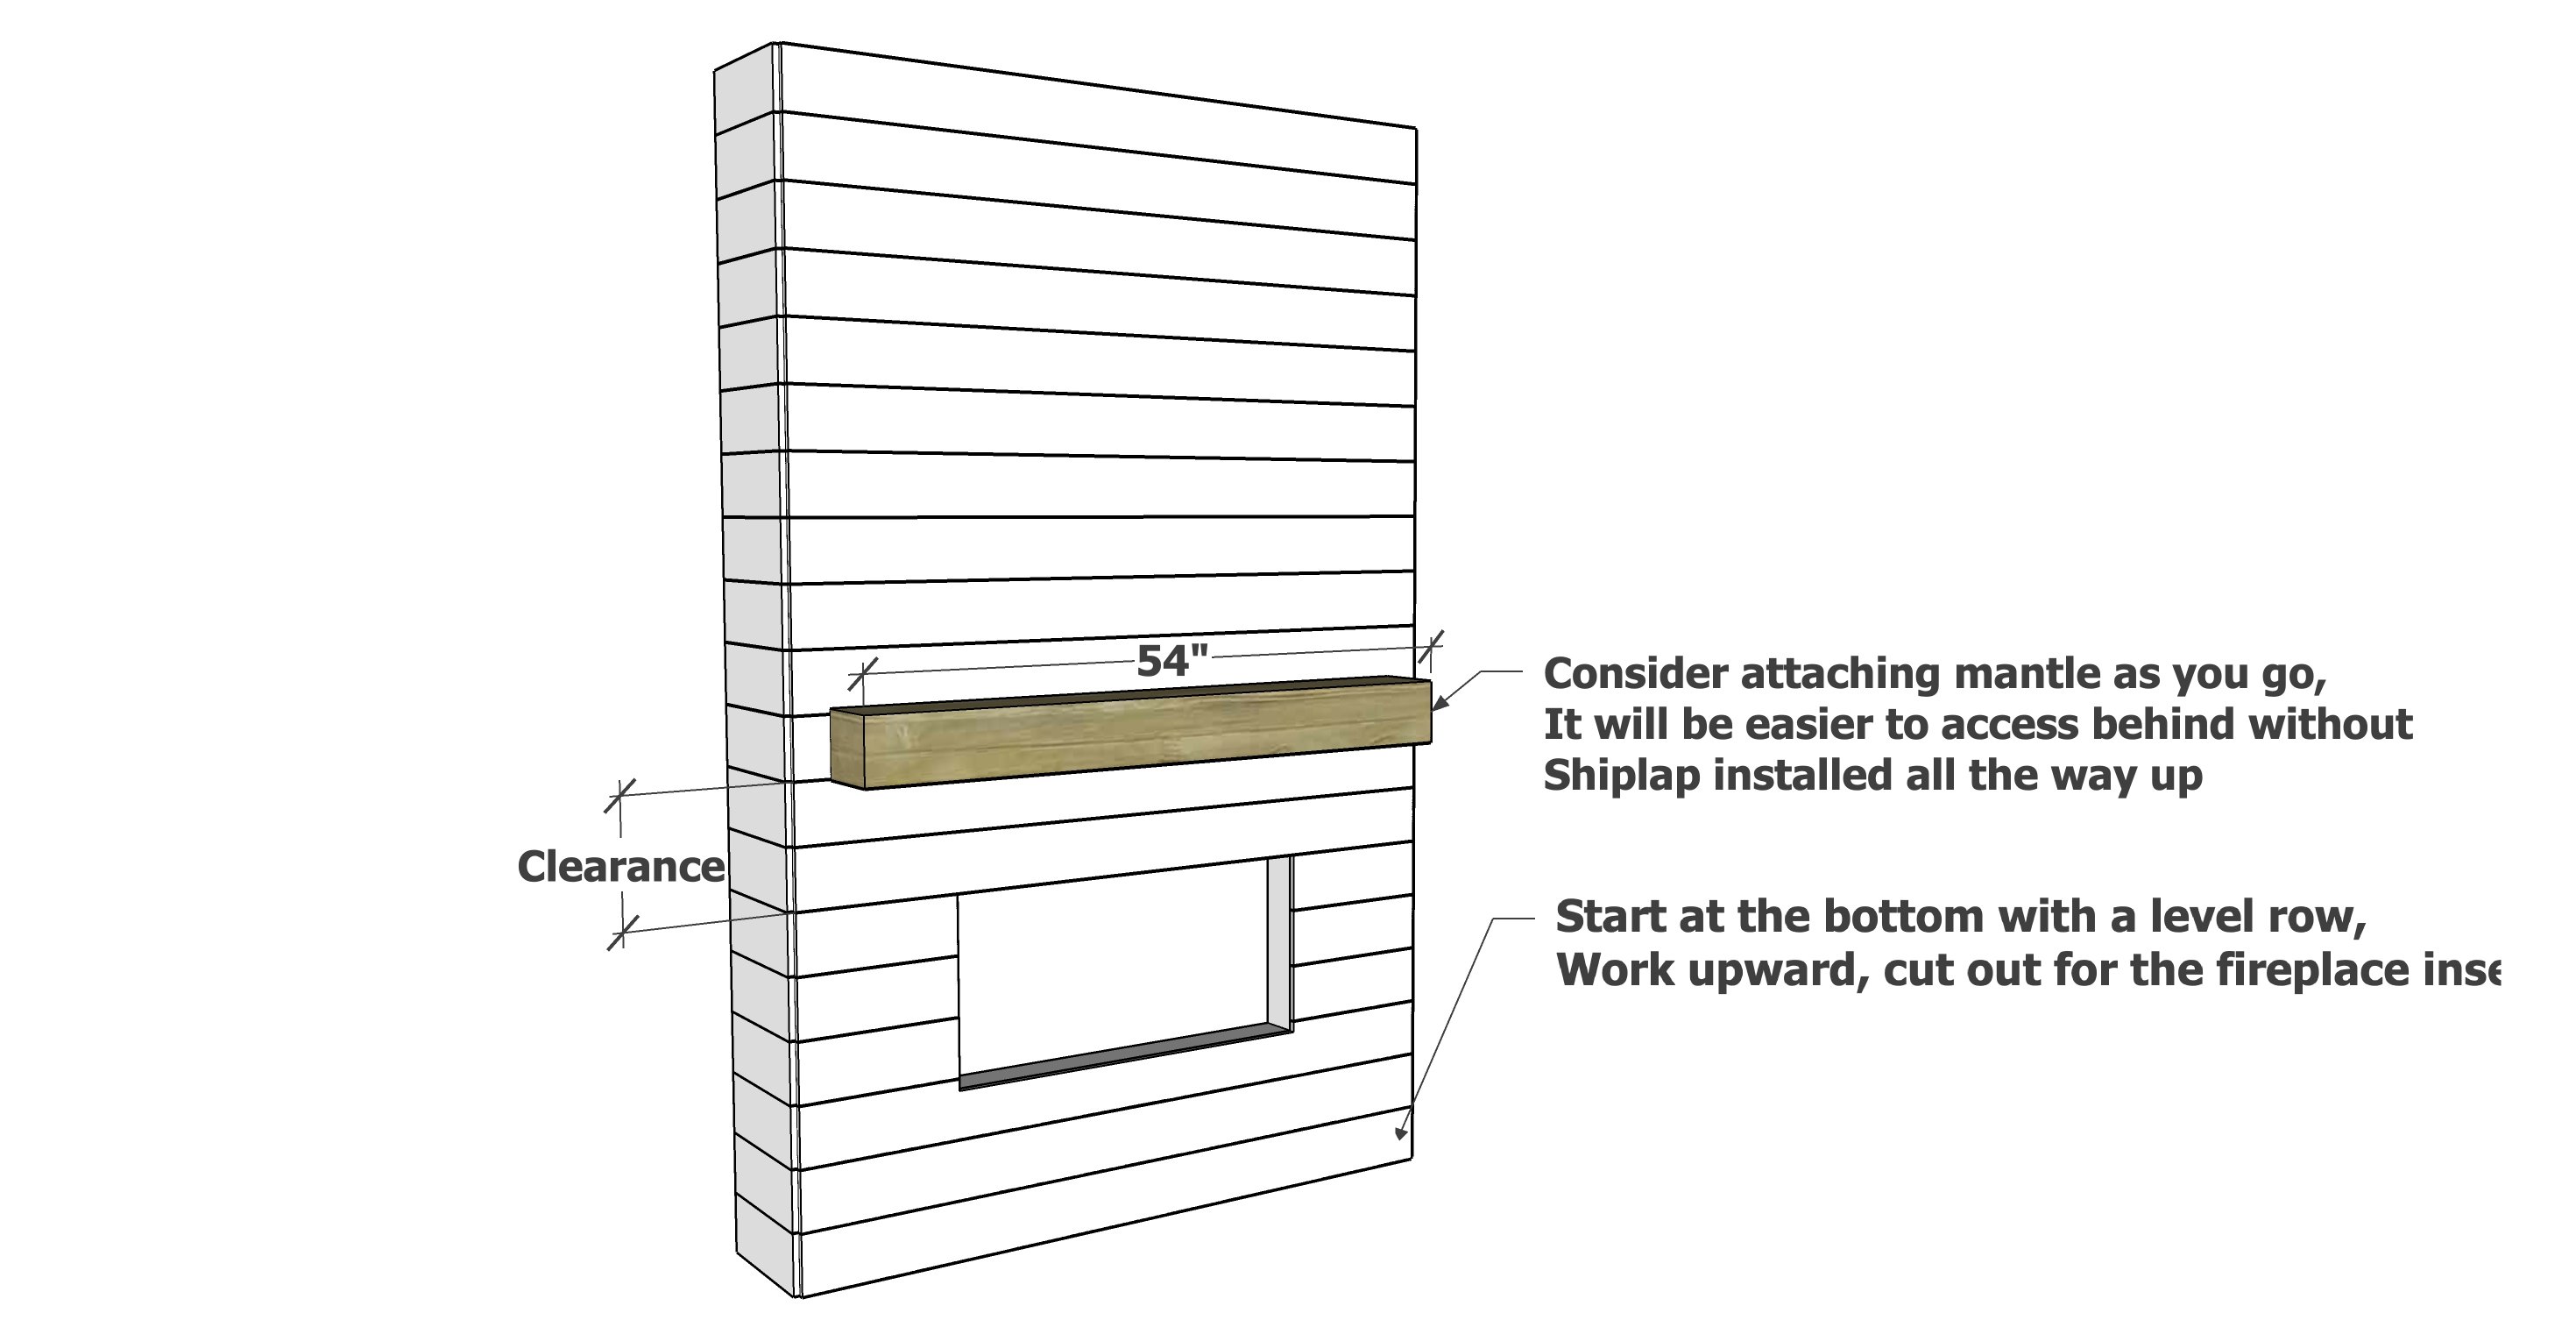
- 54" long 4x6 beam for mantle, also used 4 - 6" long lag screws for attach mantle from back
- 2-1/2" long self tapping star bit screws (pack of 100)
- 1-1/4" brad nails (about 500 total)
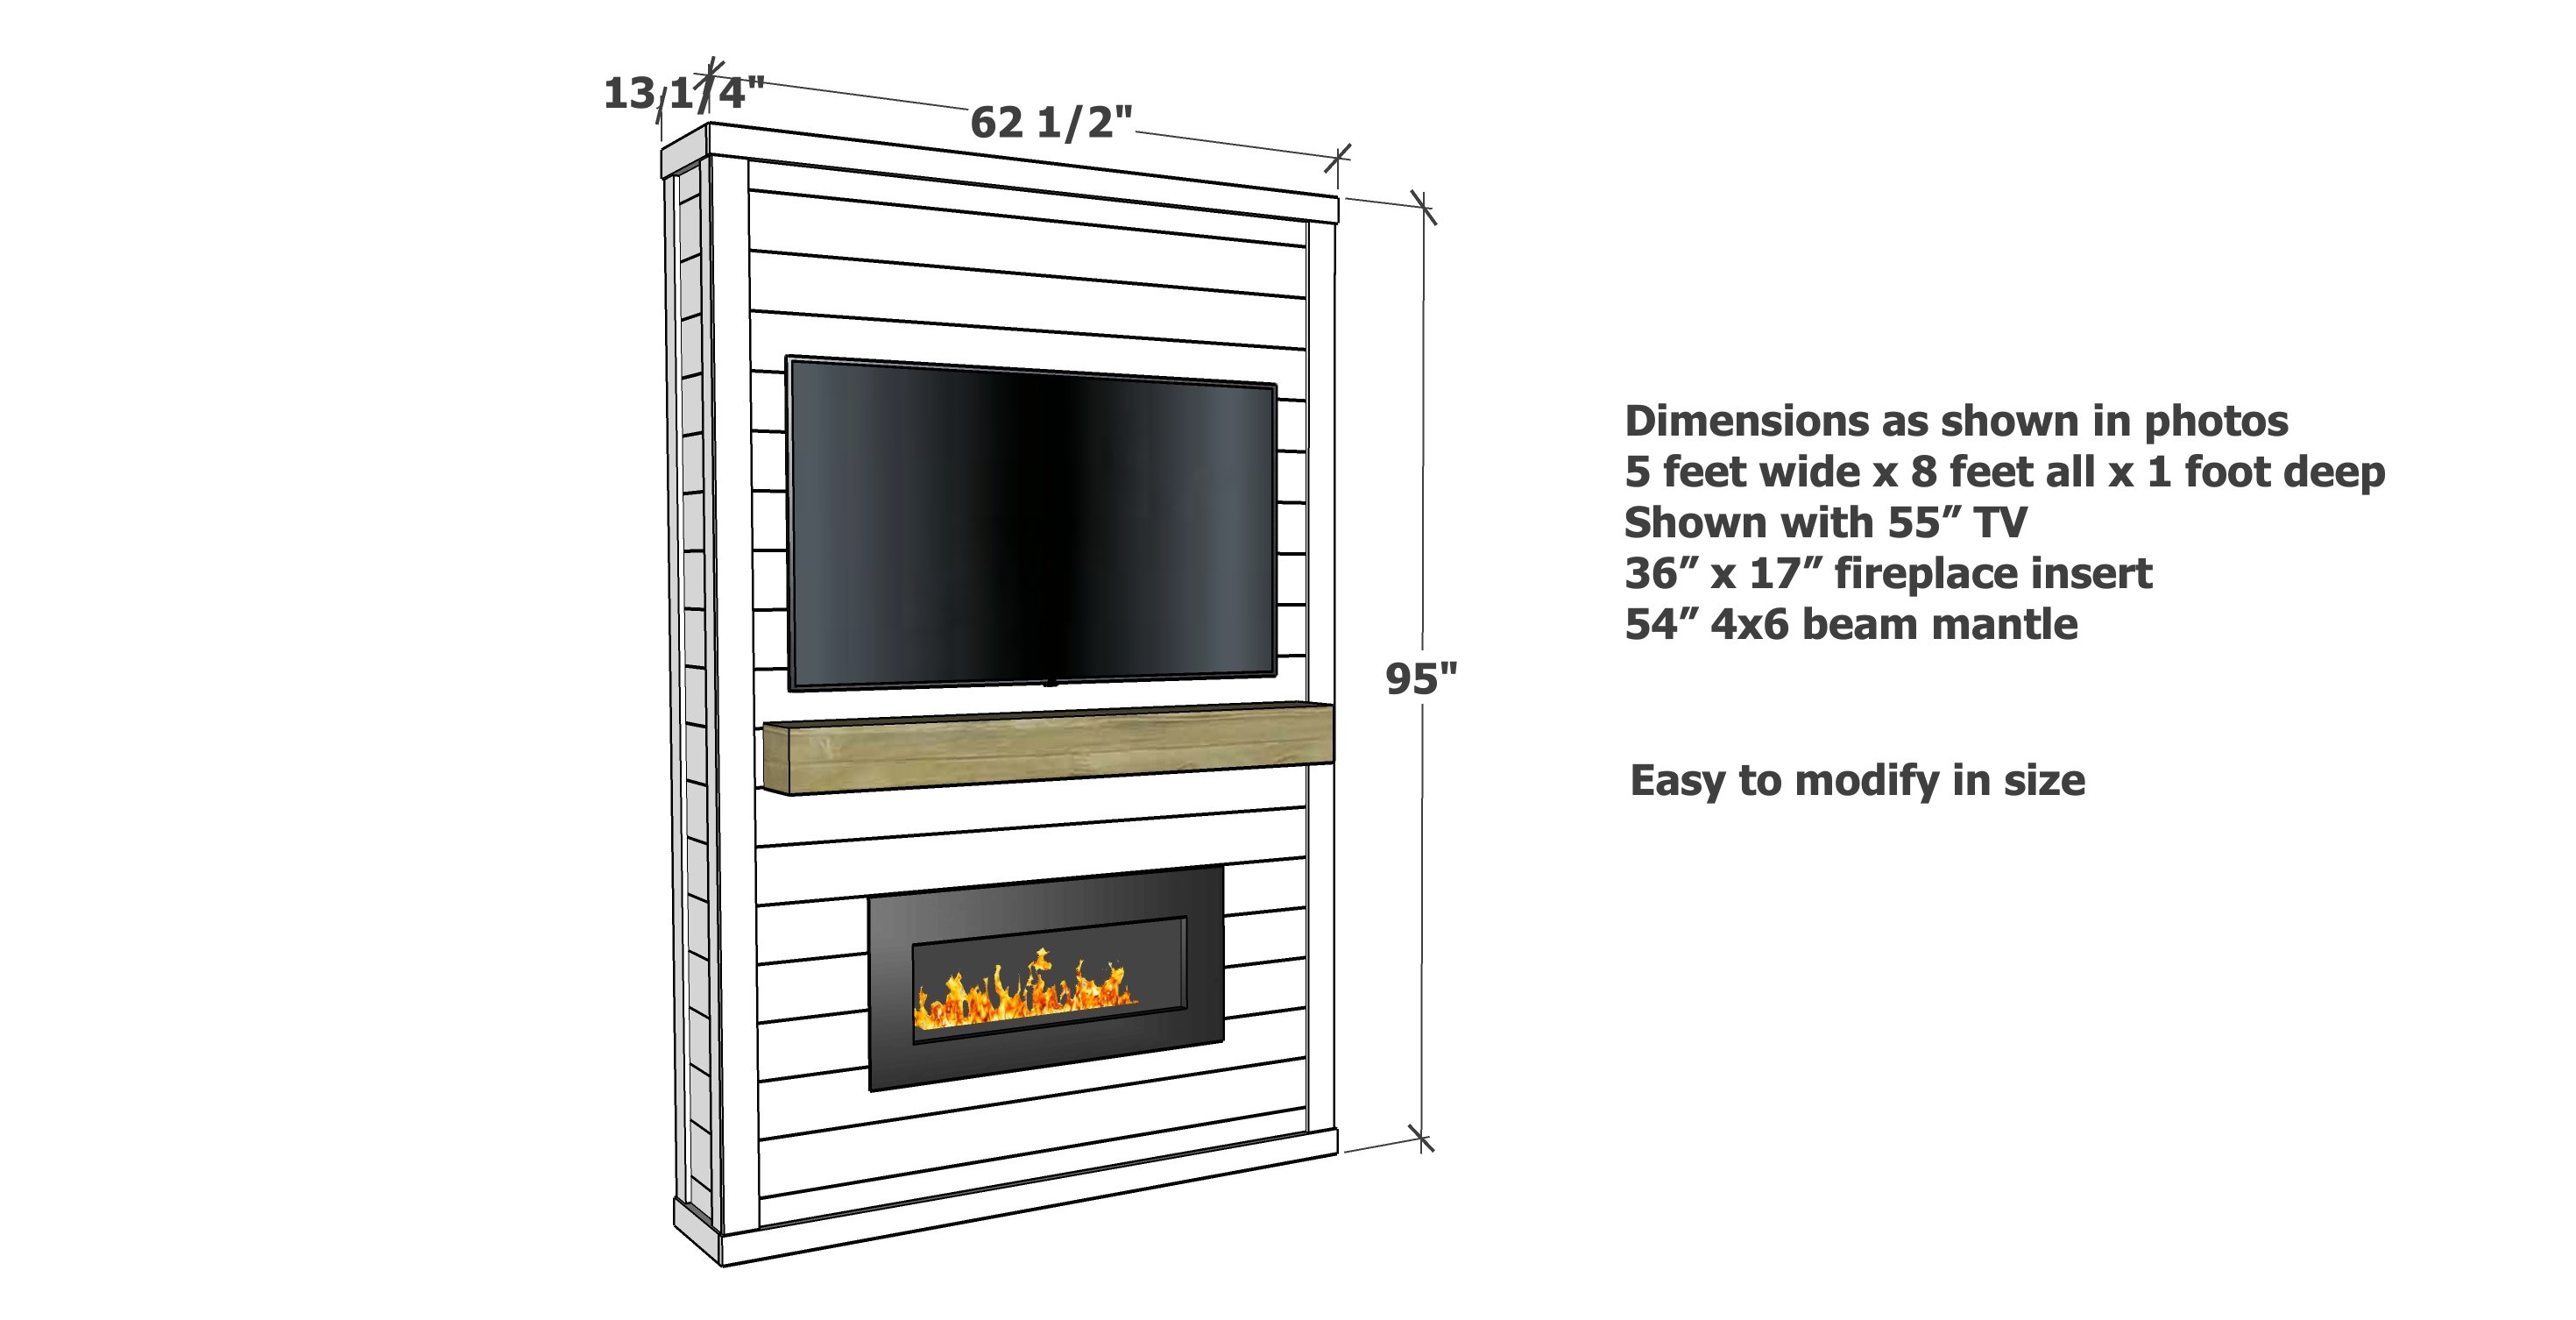
- electric fireplace insert, as shown 36" wide x 17 tall (opening was 33" x 16") - I used this one
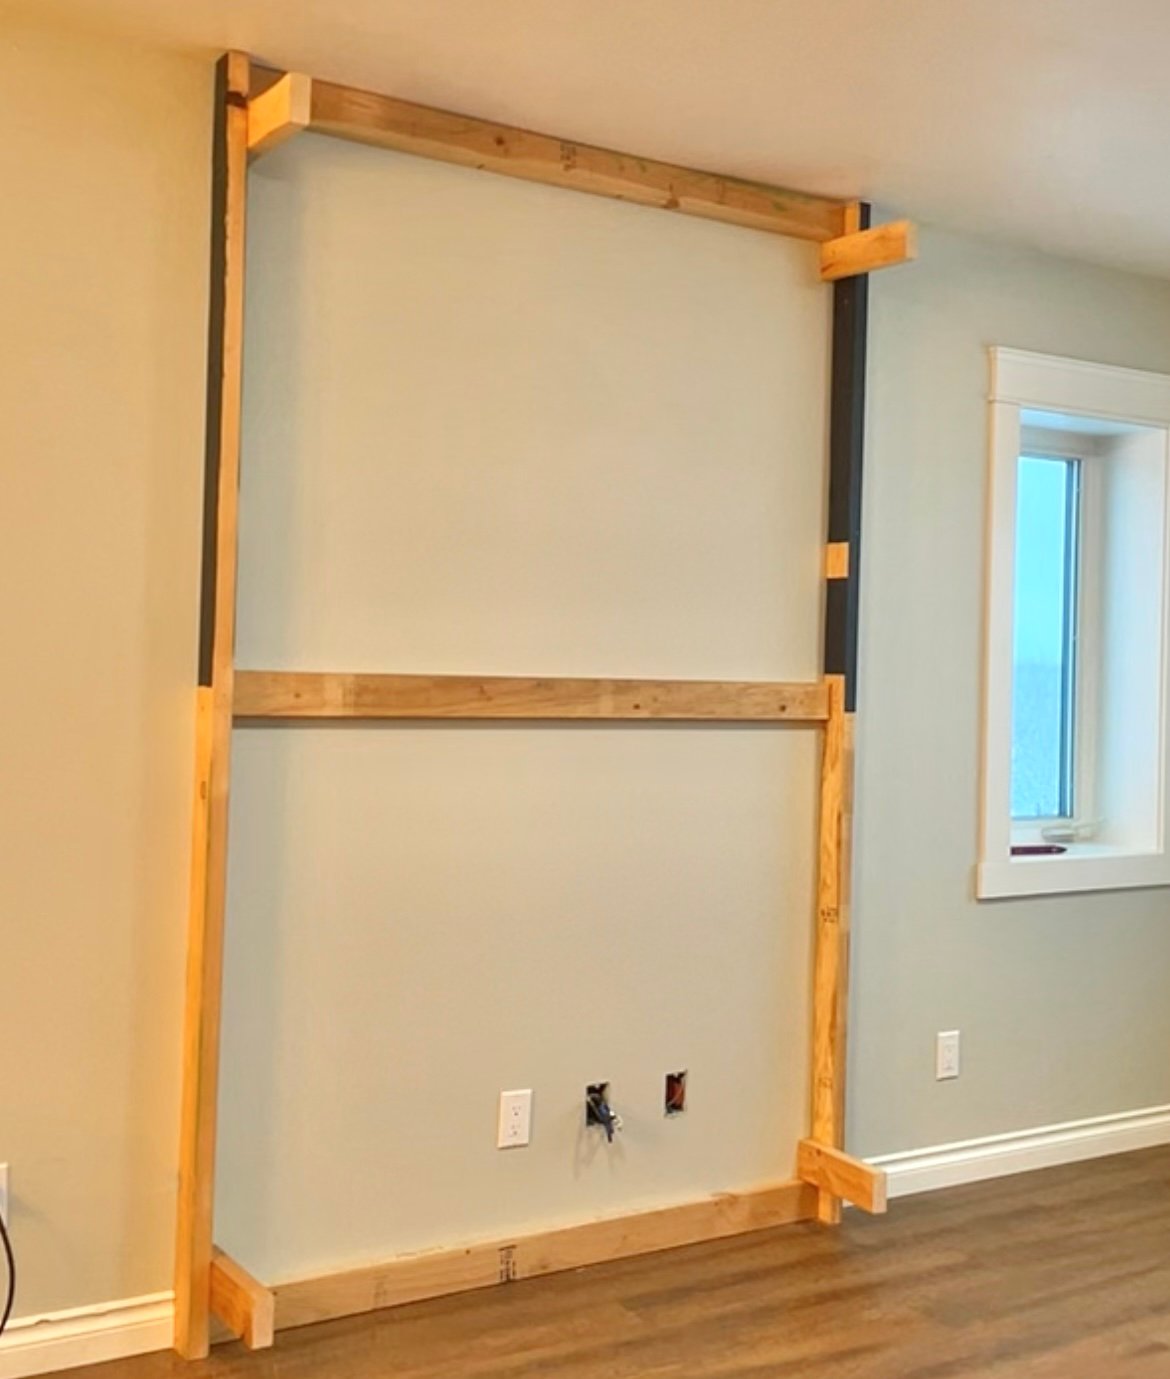
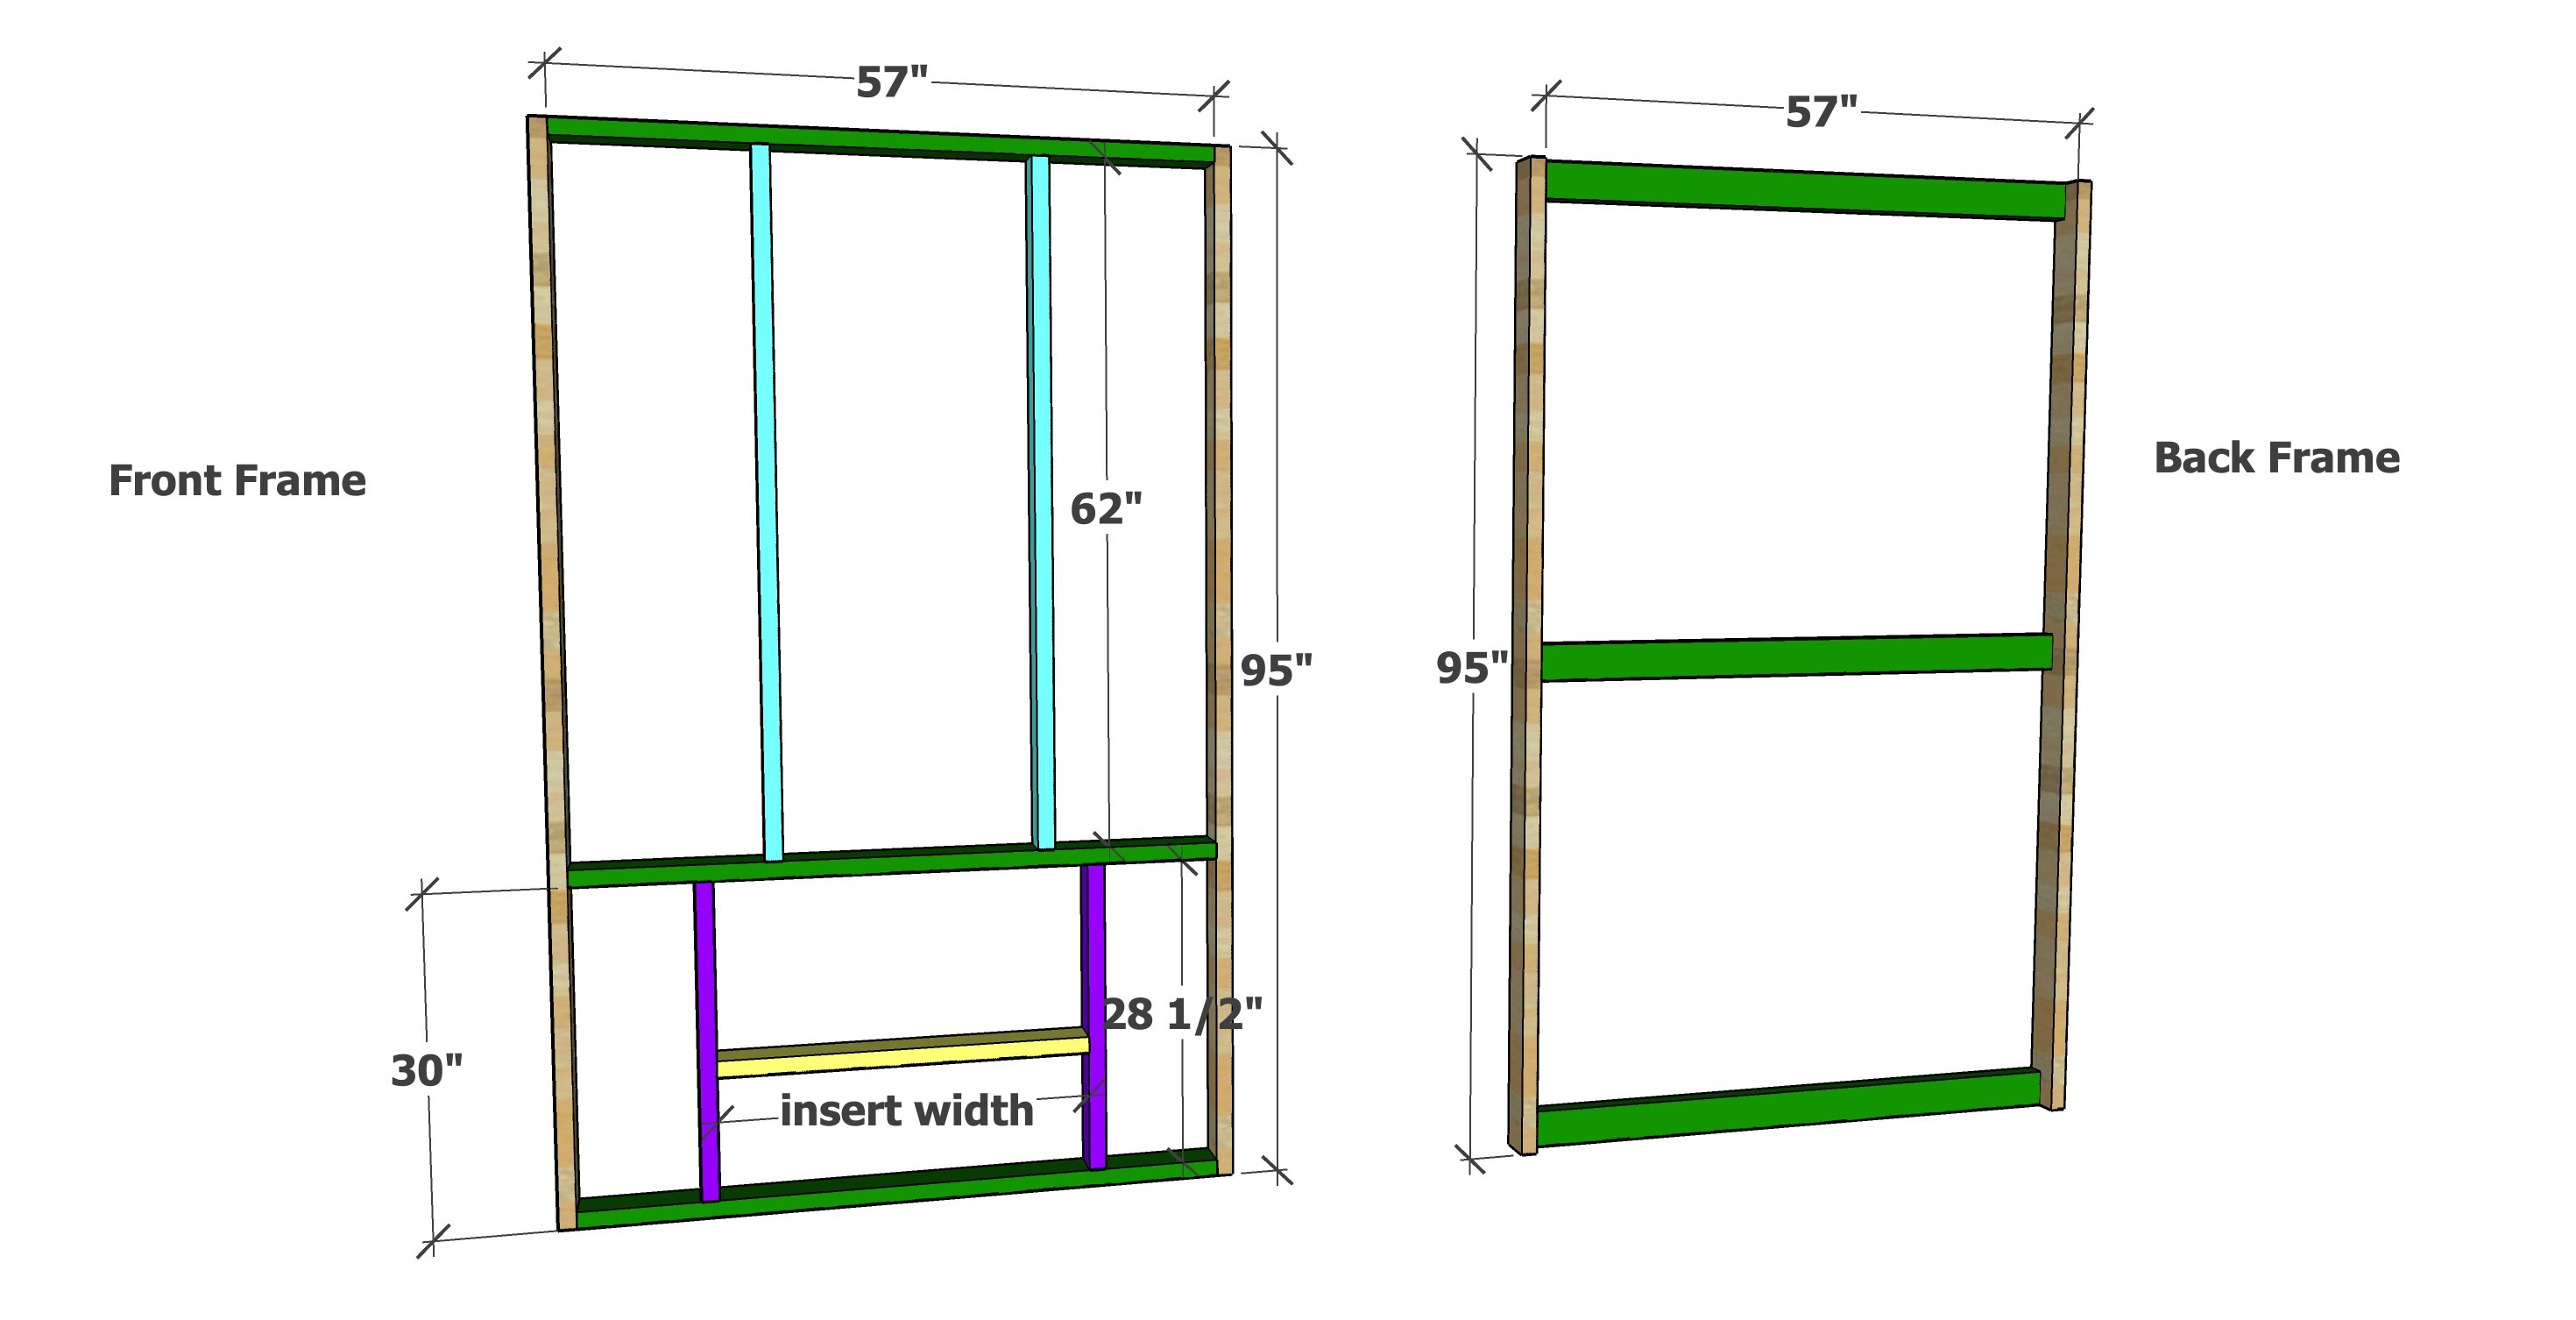
Back Wall Framing
- 2 - 2x4 @ 95" (or 1" less than overall ceiling height)
- 3 - 2x4 @ 57" (or desired width MINUS 3")
Front Wall Framing
- 2 - 2x4 @ 95" (or 1" less than overall ceiling height)
- 3 - 2x4 @ 57" (or desired width MINUS 3")
- 2 - 2x4 @ 28-1/2" (or desired height of fireplace top of opening MINUS 1-1/2")
- 1 - 2x4 @ 33" (or fireplace insert opening width)
- 2 - 2x4 @ 62" (measure and cut to fit if other modifications are made)
- 2 - 2x4 @ 24" - blocking for supporting a heavy mantle is using
Sides
- 6 - 2x4 @ 12" - or desired depth of the fireplace bumpout
Shiplap cut to fit
Beam as shown is 54" long, 4x6 beam
Trim cut to fit


Instructions
Step 1
Measure overall ceiling height. The framing should be 1" less in overall height to allow for installation.
Cut the sides to match the overall desired height.
BACK WALL FRAMING
Build the back framing wall with 2-1/2" screws.
FRONT WALL FRAMING
Build the front wall framing. The center green 2x4 board is placed at the desired top height of the fireplace insert. From there, fill in remaining boards to create the fireplace insert opening framing, following fireplace insert's recommendations.
For the upper portion, place the 2x4s (light blue in diagram) so they match your TV mounting bracket.
Step 2
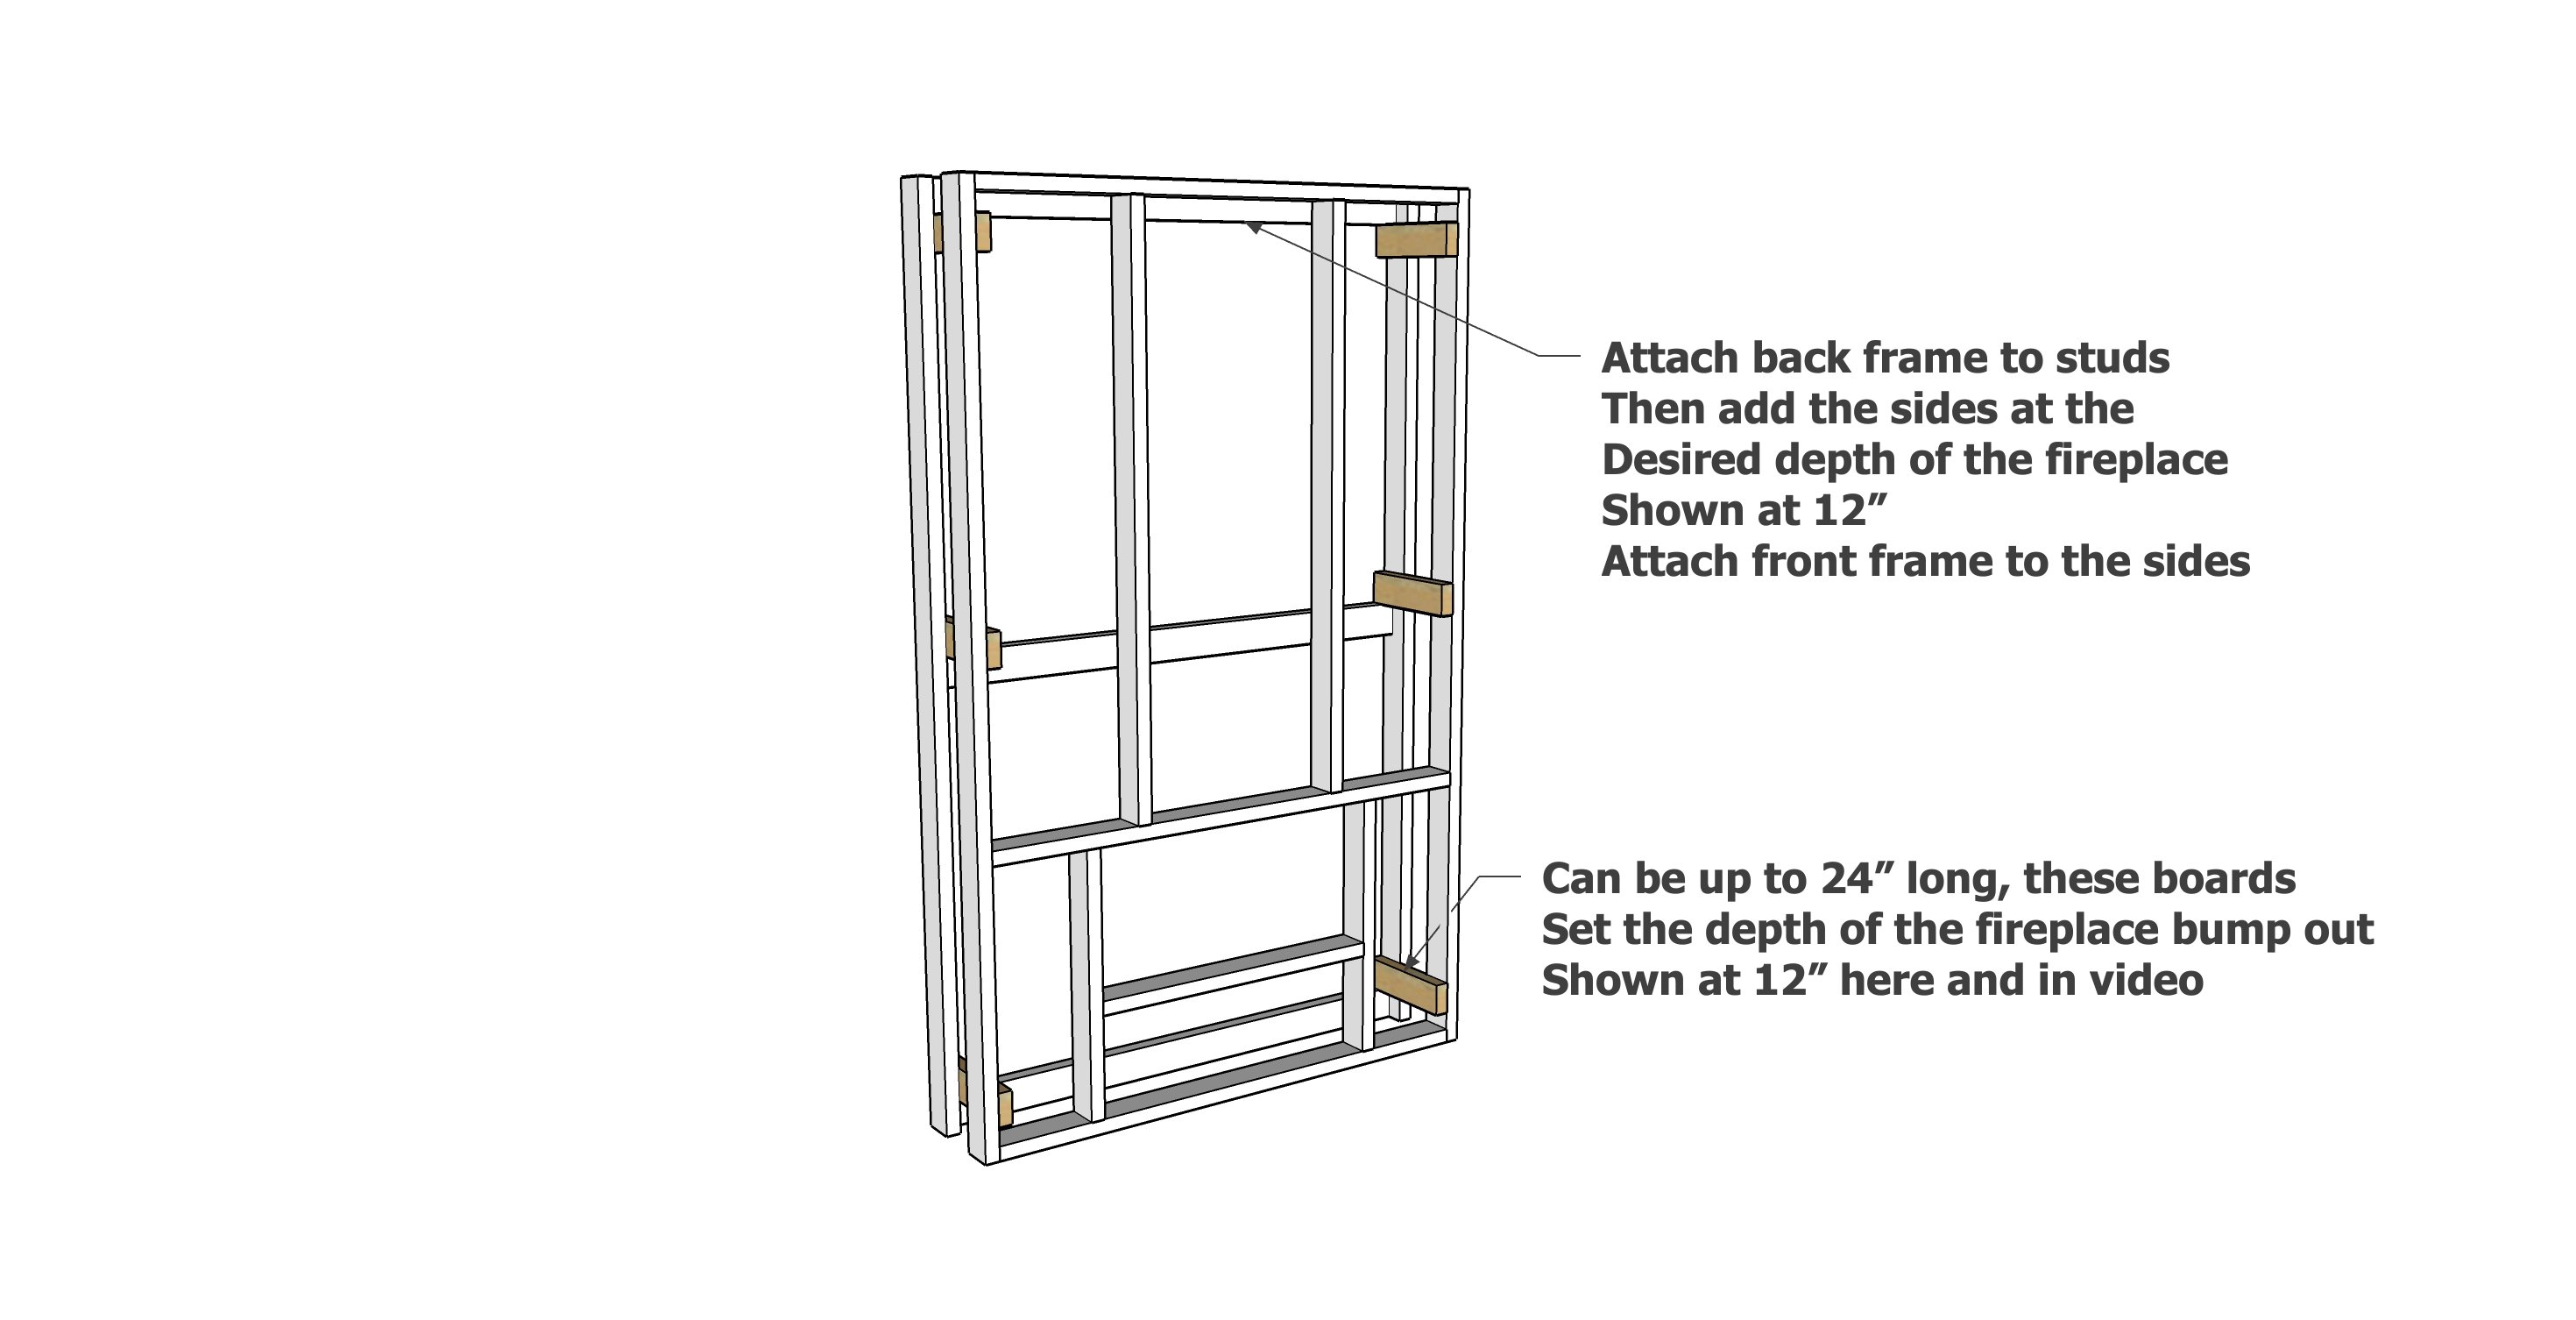
Attach the back wall framing to studs in the wall with 2-1/2" screws through the horizontal 2x4s on the back.
Use a level to make sure the back wall framing is attached level to the wall.
Then add the side 2x4s as shown. These 2x4s set the desired depth of the fireplace bump out.
Then attach the front wall framing to the side 2x4s.
Use the 2-1/2" screws.
Step 3
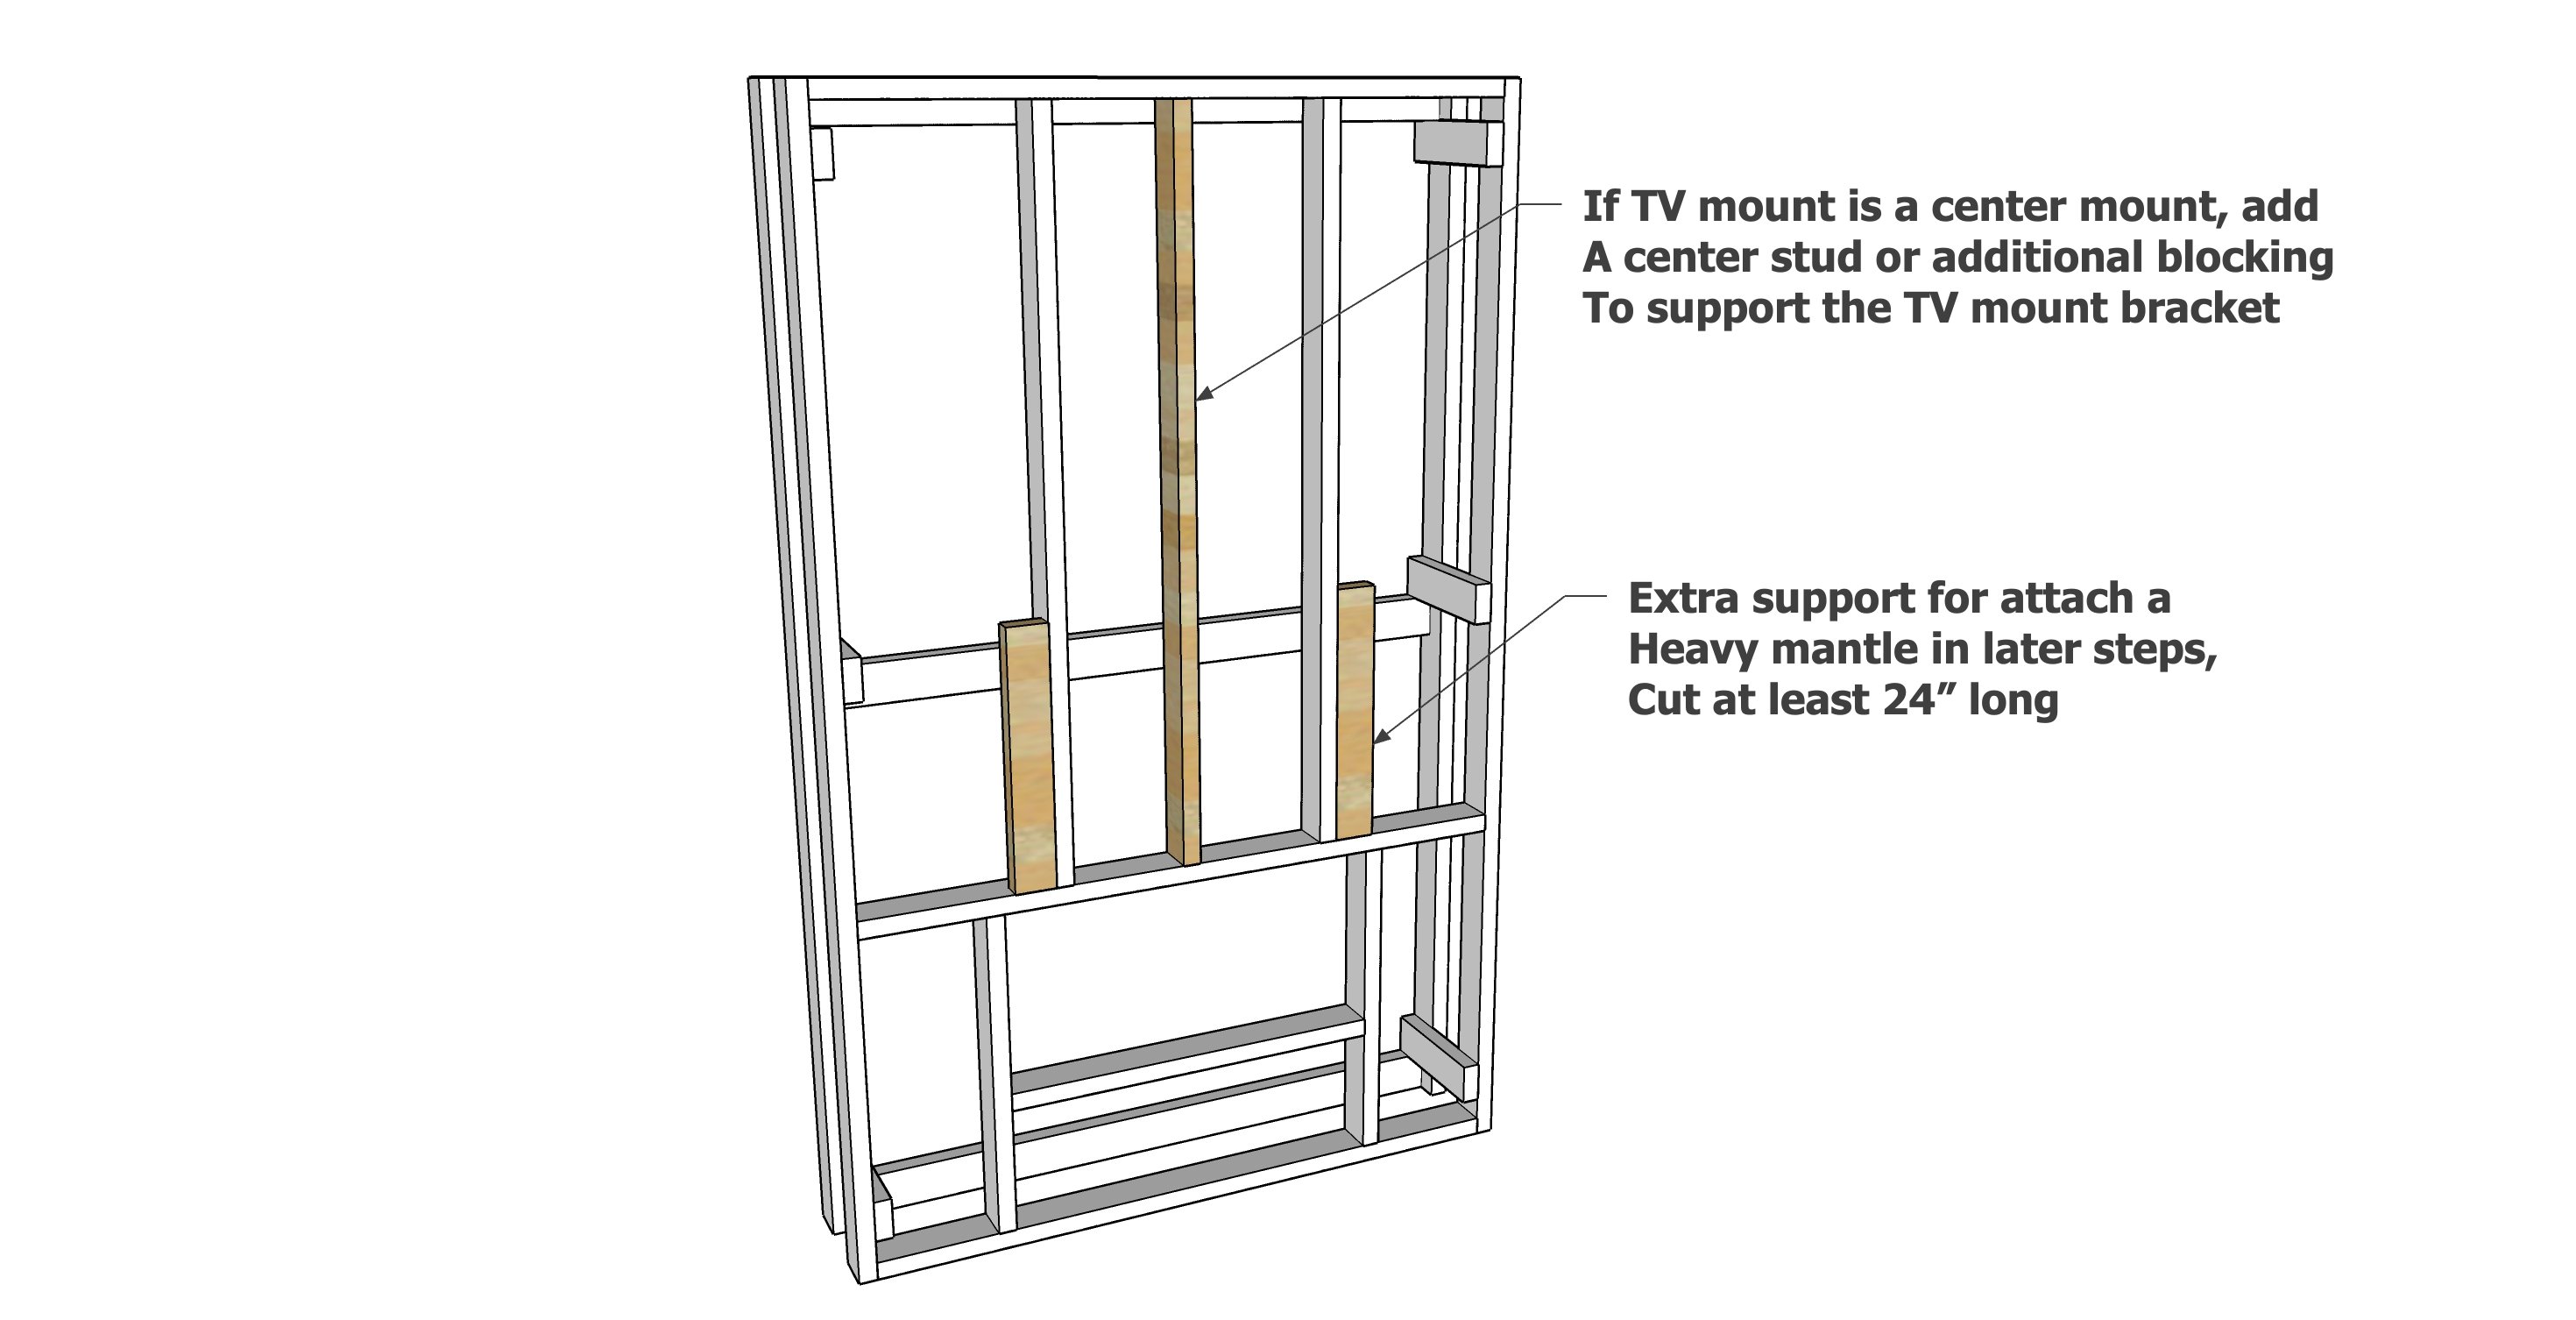
If additional blocking to support a heavy mantle or a center supported TV bracket, add those pieces in now.
The support blocking bottom should rest on the horizontal 2x4, to bring the weight load down to the floor.
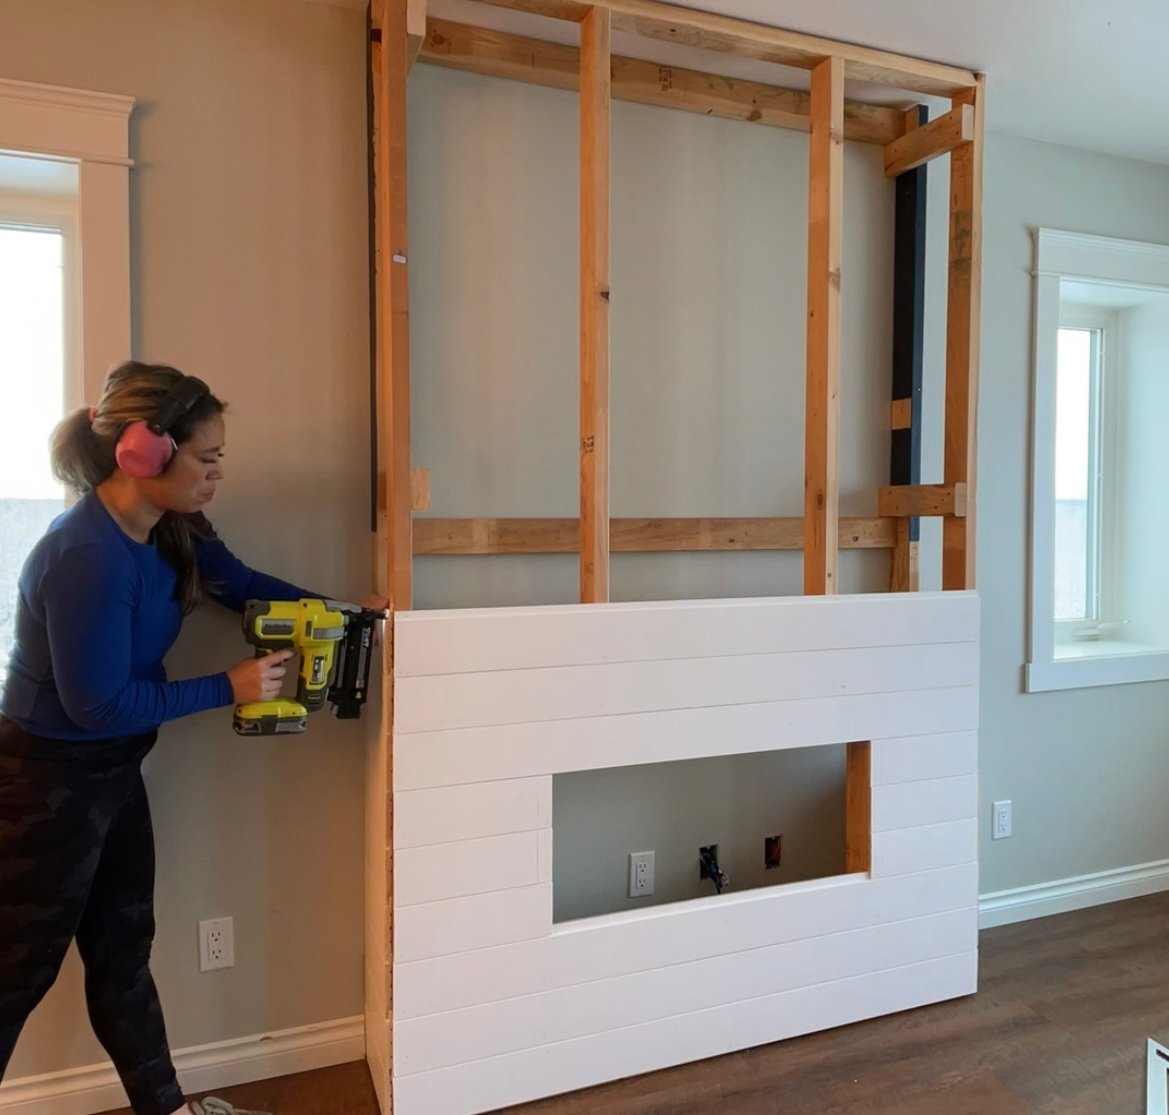
Step 4
Shiplap Installation
Start at the bottom and set the first row using a level.
Attach with 1-1/4" brad nails, two nails per stud.
Work upwards, cutting around the fireplace opening.
TIP: You can trace the fireplace opening on the inside, with the board held in place, then remove the board and cut out with a jigsaw.
Install the mantle as you work upwards while you still have access to the back of the project. There are methods to install mantles from the front but this is easiest way.
Step 5
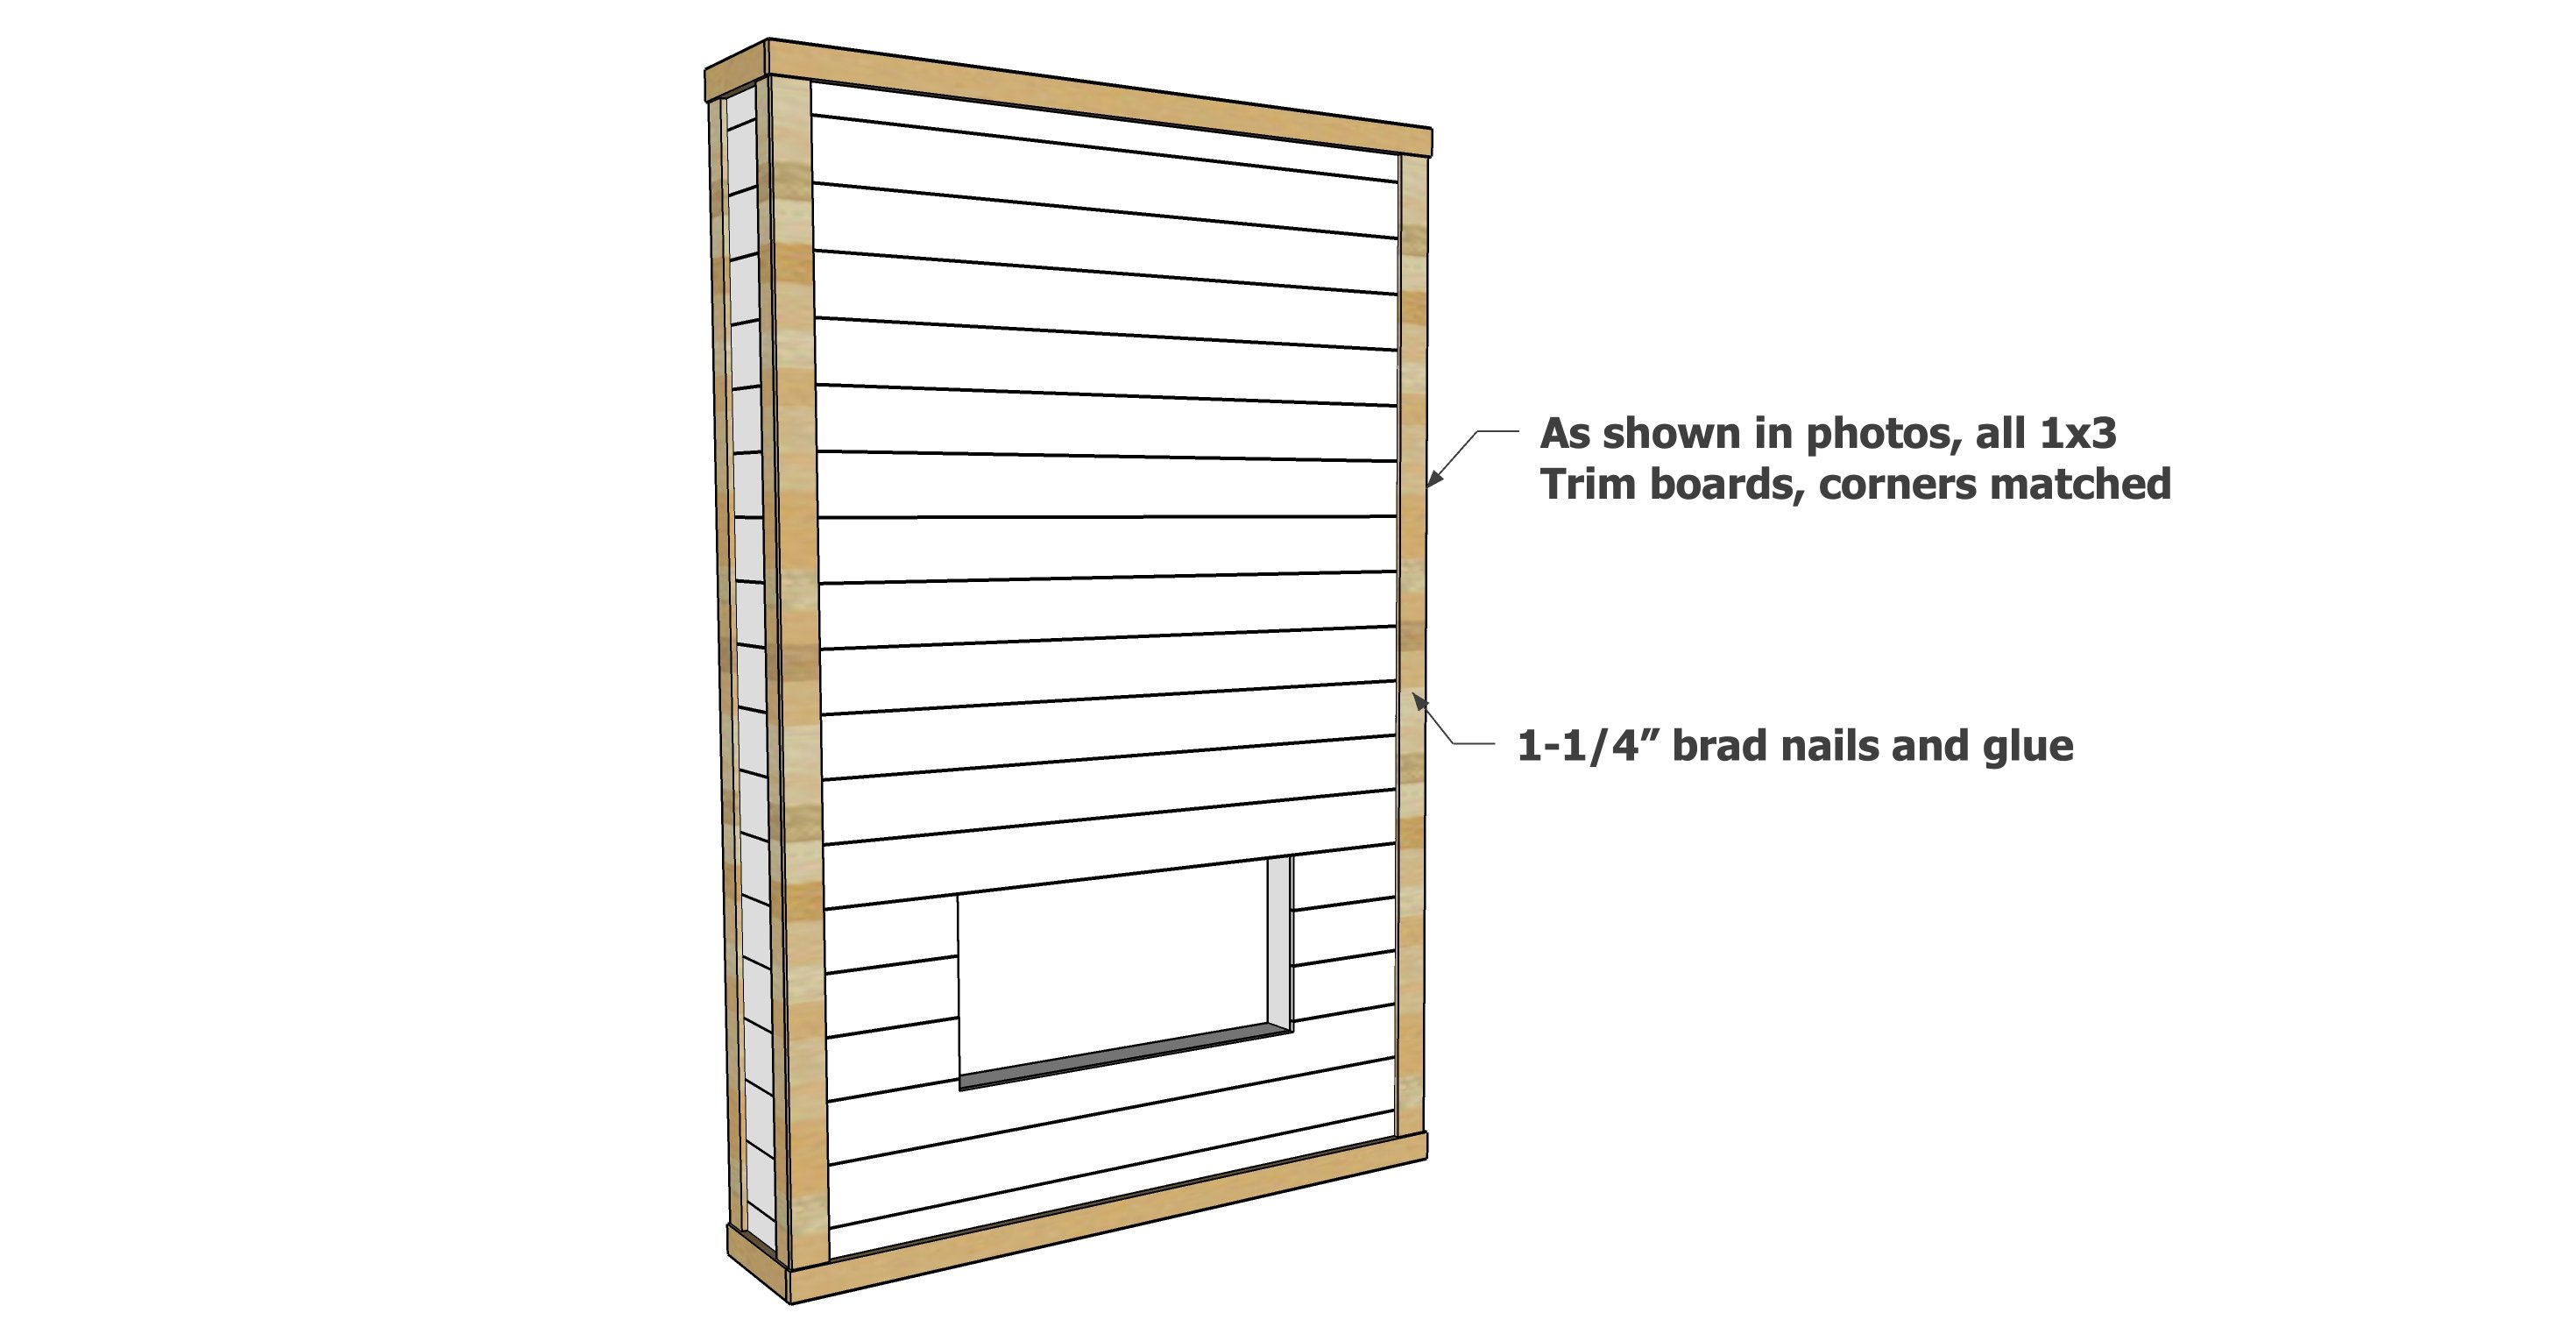
Trim installation:
First, install the top and bottom side trim pieces, cut to fit.
Then install the top and bottom front trim pieces, cut to fit.
Then install the vertical side trim pieces. The front side pieces need to match the plane of the front of the shiplap so a corner works out perfectly when the front trim is added.
Finally, install the front vertical trim pieces, with the corner perfectly matched.
Use 1-1/4" brad nails.
Fill all holes with wood filler and let dry.
Sand lightly with 120 grit sandpaper.
Remove all sanding residue.
Paint or finish as desired.
Step 6
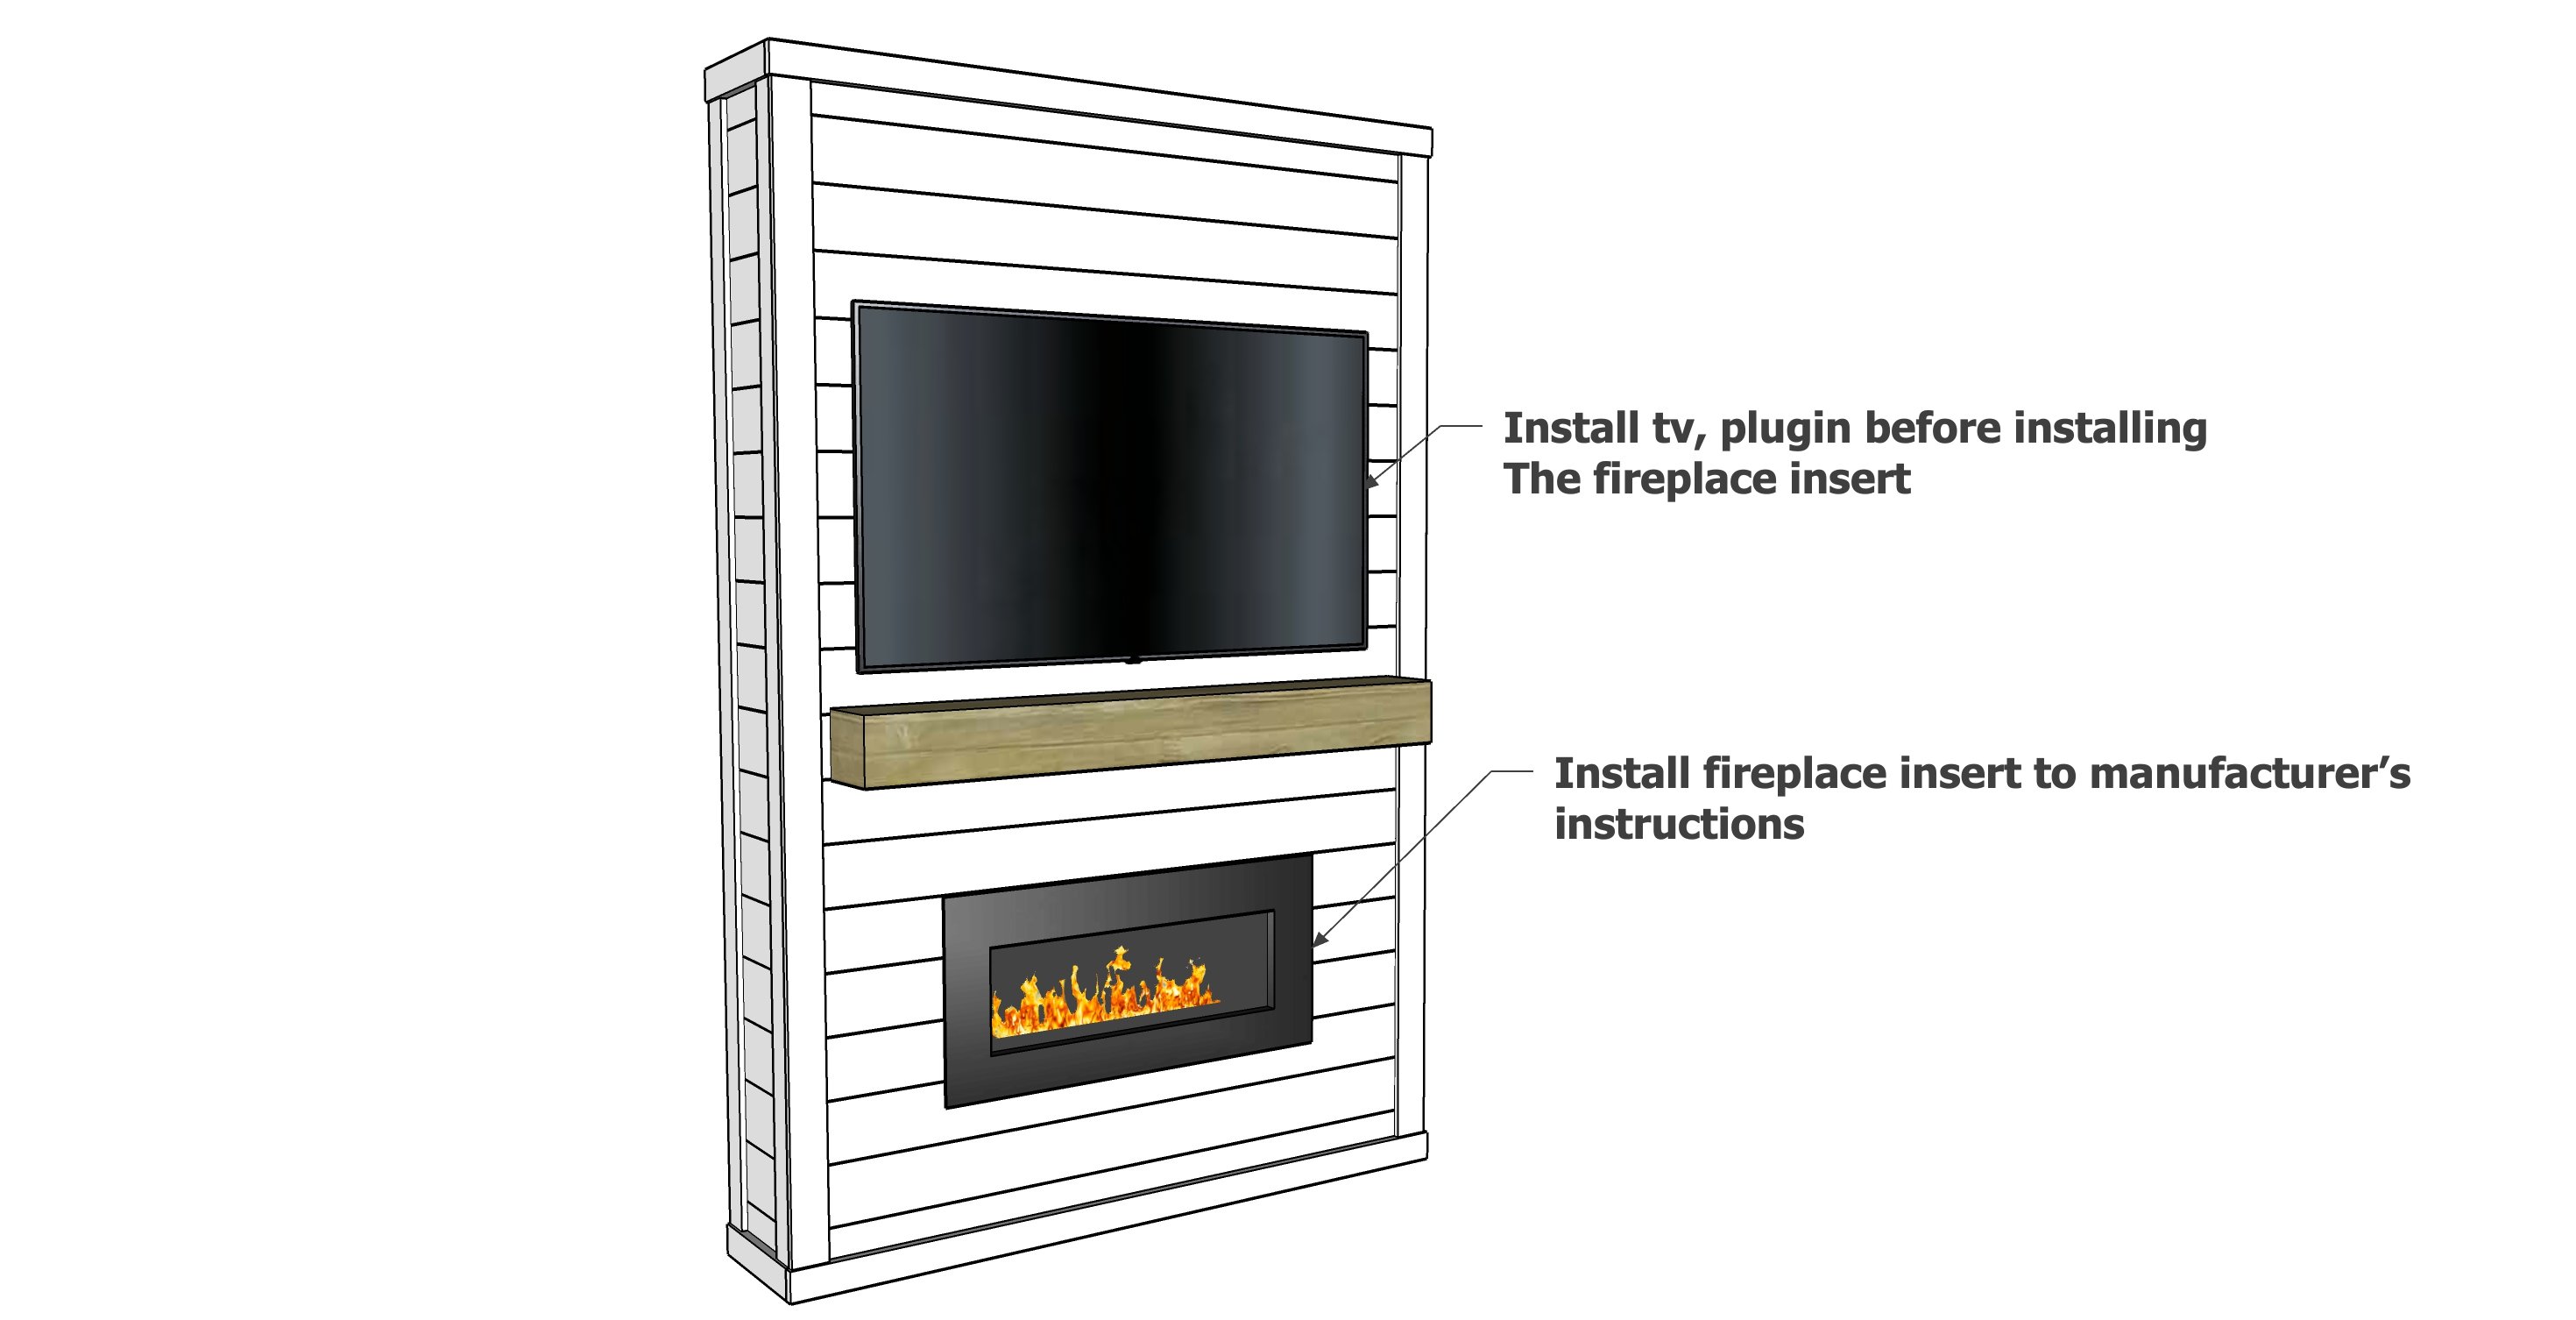
Install the tv and make sure that it is functioning. Once the fireplace insert is installed, the access is gone.
Then install the fireplace insert.
The fireplace insert is easy to remove if you need to get back inside the framing.
Step 7
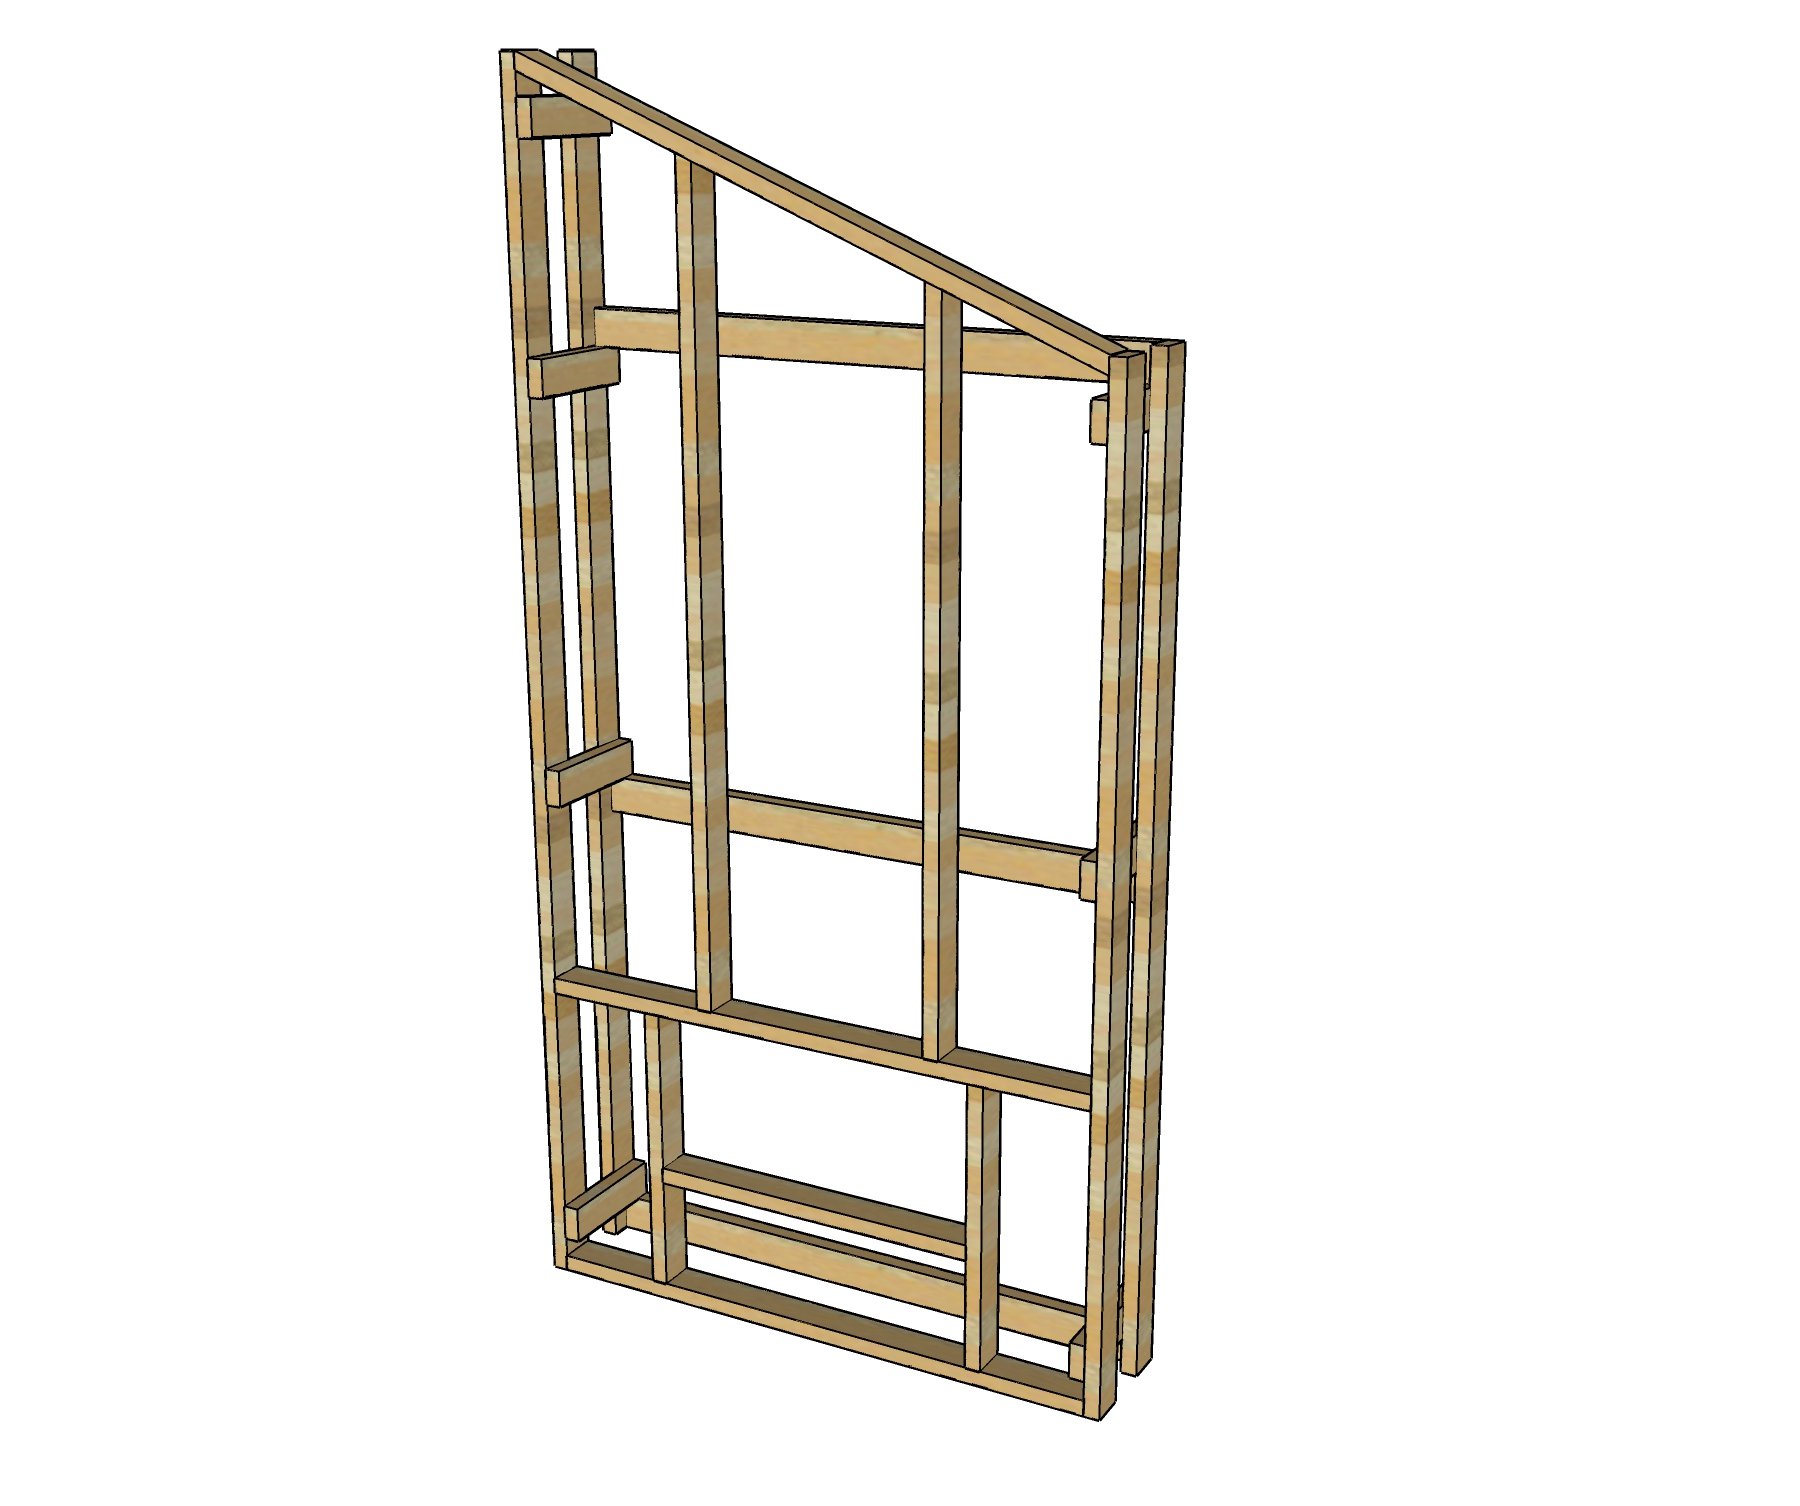
Modification Recommendations for Angled Ceiling
An angled ceiling will definitely produce a few more challenges, but it is still achievable.
The main hurdle will be the front wall framing.
Once you get the framing done, everything else is just cut to fit over the frame.