HOW TO: Wood Pretend Play Lemonade Cart for Preschoolers!

Difficulty
Intermediate
| Print this plan

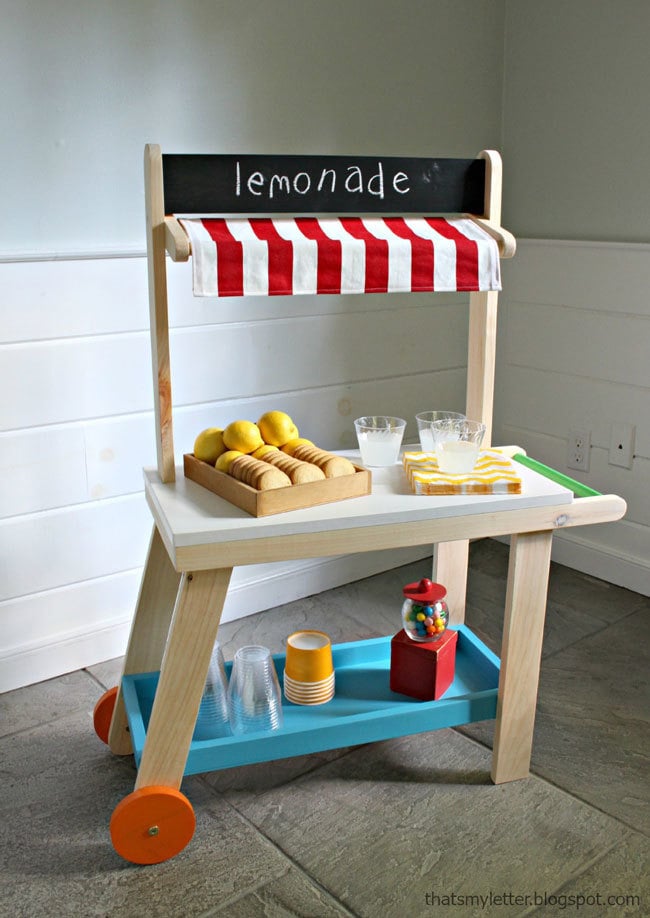
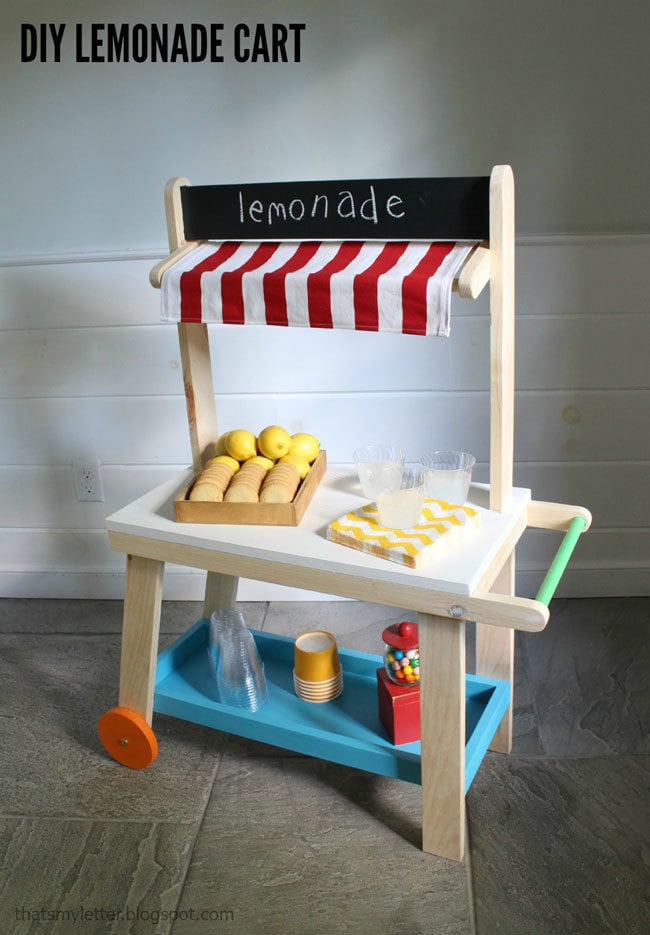
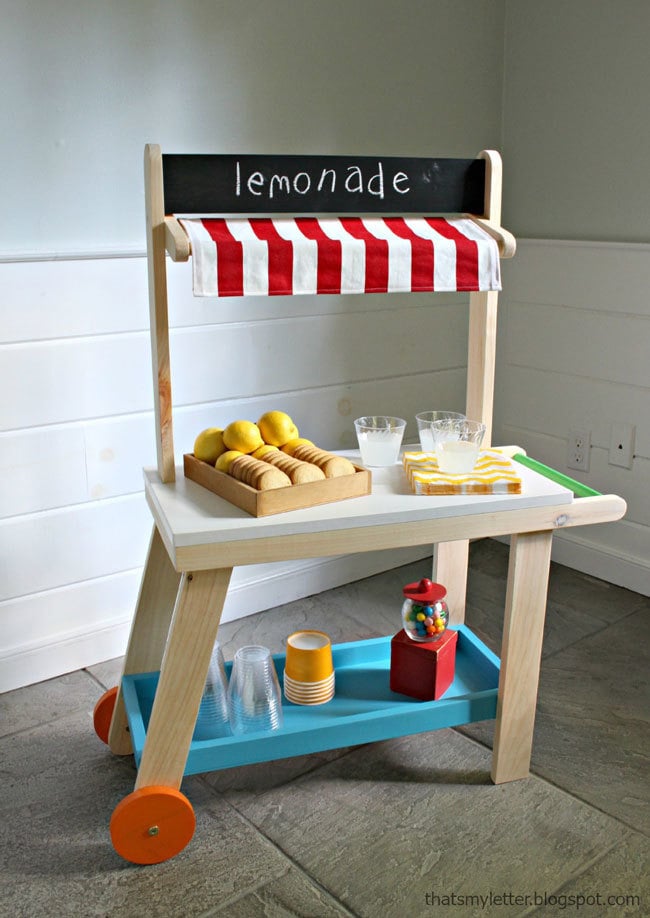
Make this adorable diy lemonade cart!  Can also be used as a play cart bakery or popcorn stand! Free plans by ANA-WHITE.com

We've got just ten weeks left until Christmas!  Are you already busy building gifts?

Every year Jaime from That's My Letter and I put on a series we called the Handbuilt Holiday -

It's pretty simple - we get you a new gift plan for free every Friday in the weeks leading up to Christmas!  You can check out all of the previous project plans we've collaborated on over the years (and this year too) right here.

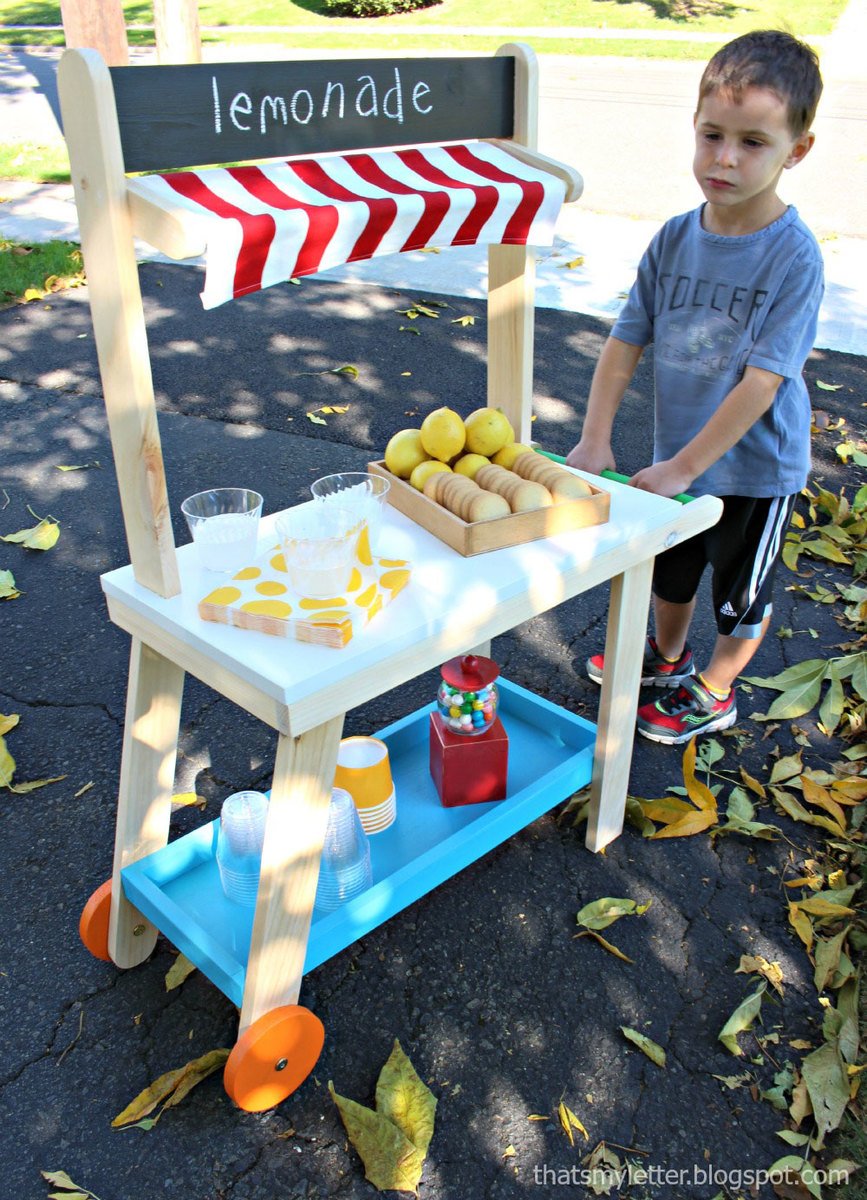
My daughter got a sneak peek of this week's Handbuilt Holdiday plan and she said, Did you make that Mom?  Where is it at?  Let's just say this one is kid approved!

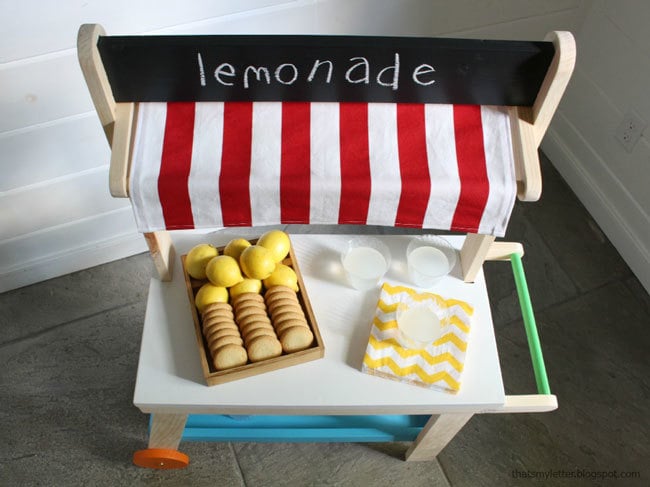
It is suitable for preschoolers (although I could see my eight year old loving it too).  Use the sign at top to change the use of the cart - from a lemonade stand to a bakery cart or even a popcorn cart on movie night.  I love that your child can customize this project!  And you can also customize it to match your home or your child's favorite colors!

Jaime used up scrap wood when she could, so this entire project only cost her $24 to make!!!  

It's your turn!  Here's what to do -

Head on over to check out Jaime's building post right now with lots more photos and build details.  And when you are ready to build, the free plans follow (if this is the homepage you'll need to click READ MORE below to get the plans).  

Have an awesome weekend!

XO Ana + Friends

Preparation

Shopping List

2 – 1x2 @ 8 feet long

5 feet of 3/4" wood dowel

1 – 1x12 @ 2 feet long

1 – 1x3 @ 12 feet long

1 – 1/4" plywood @ 25-3/4” x 8-1/4”

1 – 1x4 @ 21”

2 – 2” bolts with washers and nuts for attaching the wheels

Common Materials
1 1/4 inch finish nails
120 grit sandpaper
Cut List

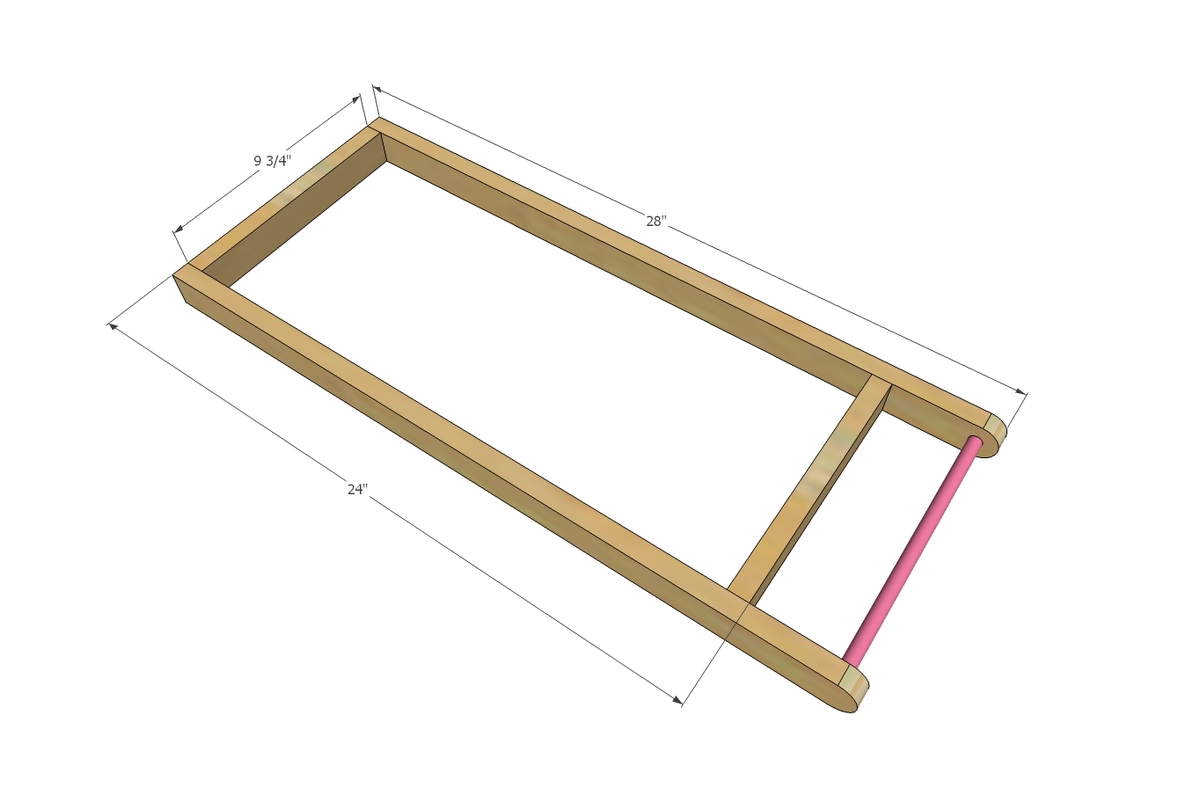
2 – 1x2 @ 28” - countertop front and back support

2 – 1x2 @ 9-3/4” - countertop side support

1 – 3/4” dowel @ 9-3/4” - handle

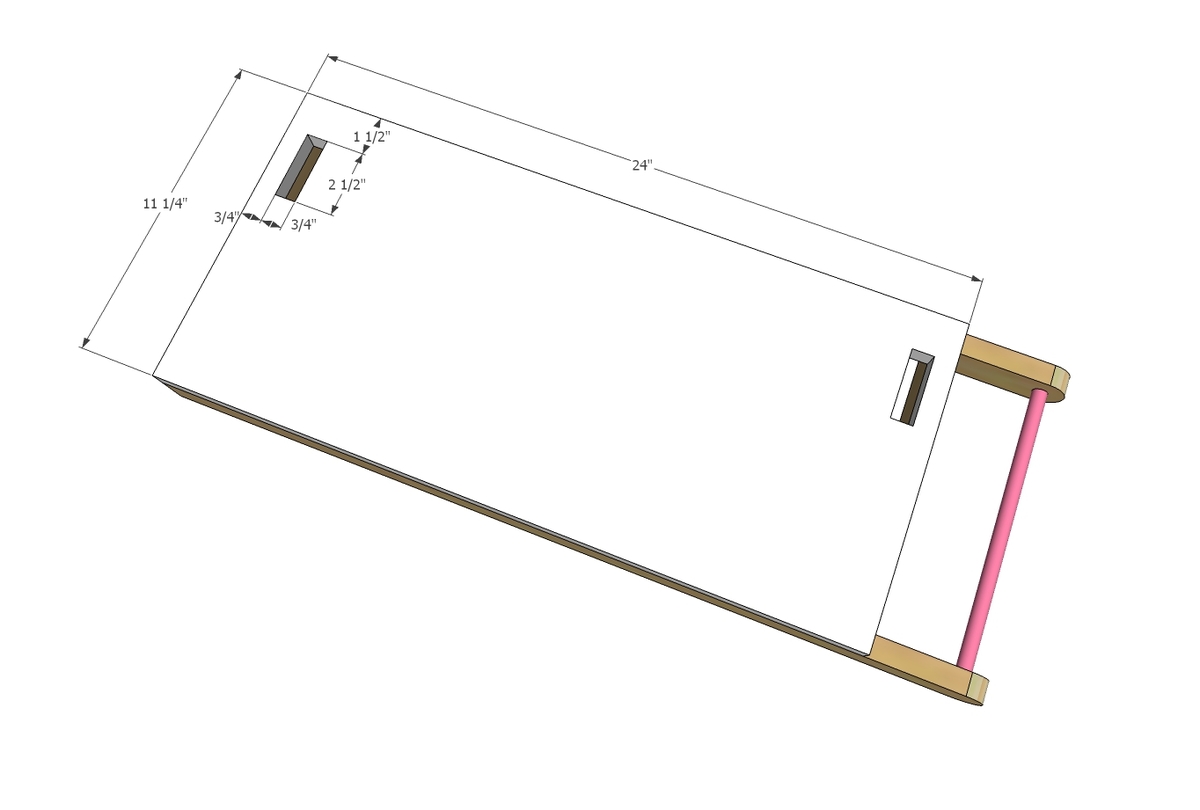
1 – 1x12 or 3/4” plywood @ 11-1/4” x 24” - Countertop

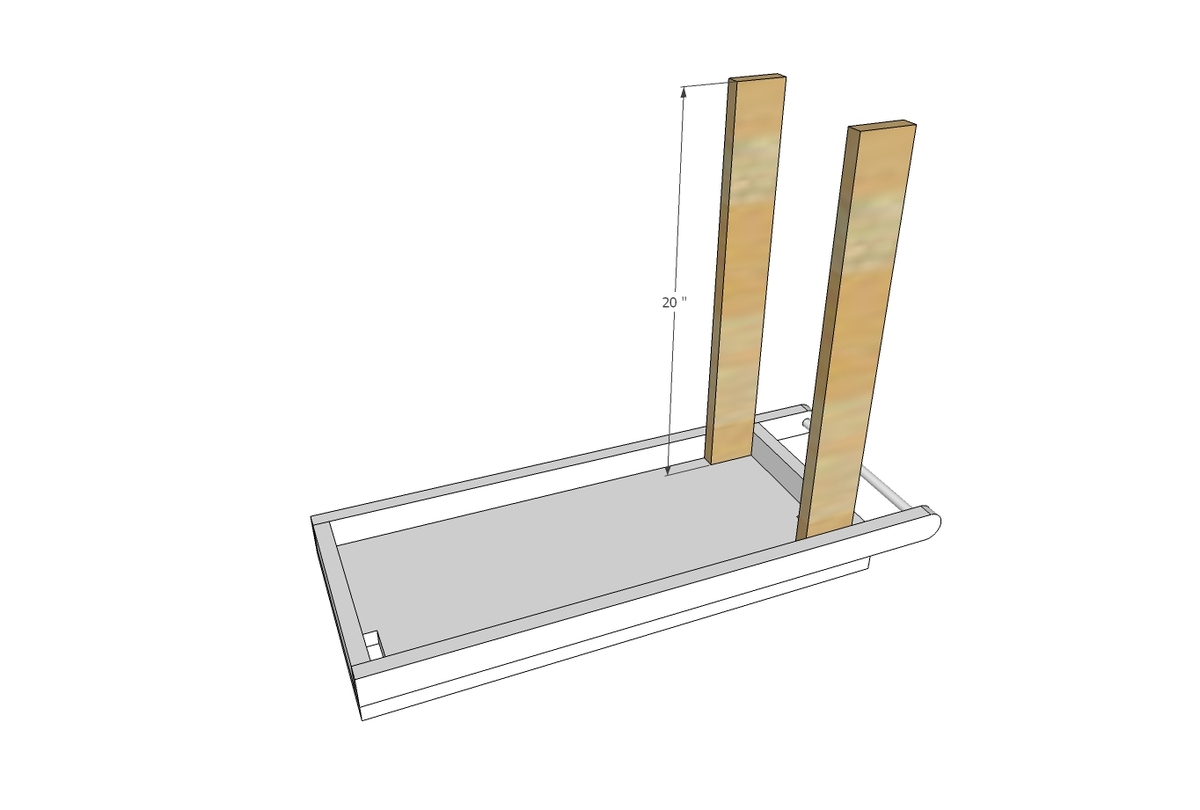
2 – 1x3 @ 20” - front legs

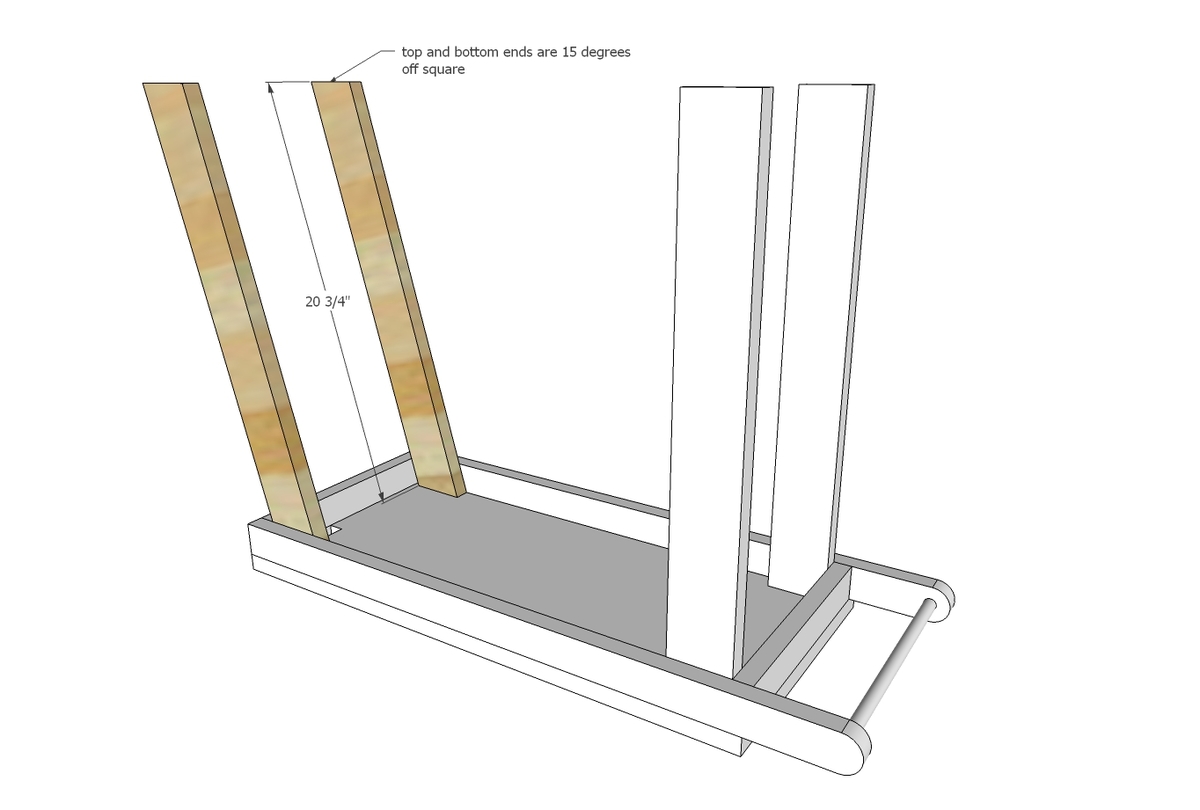
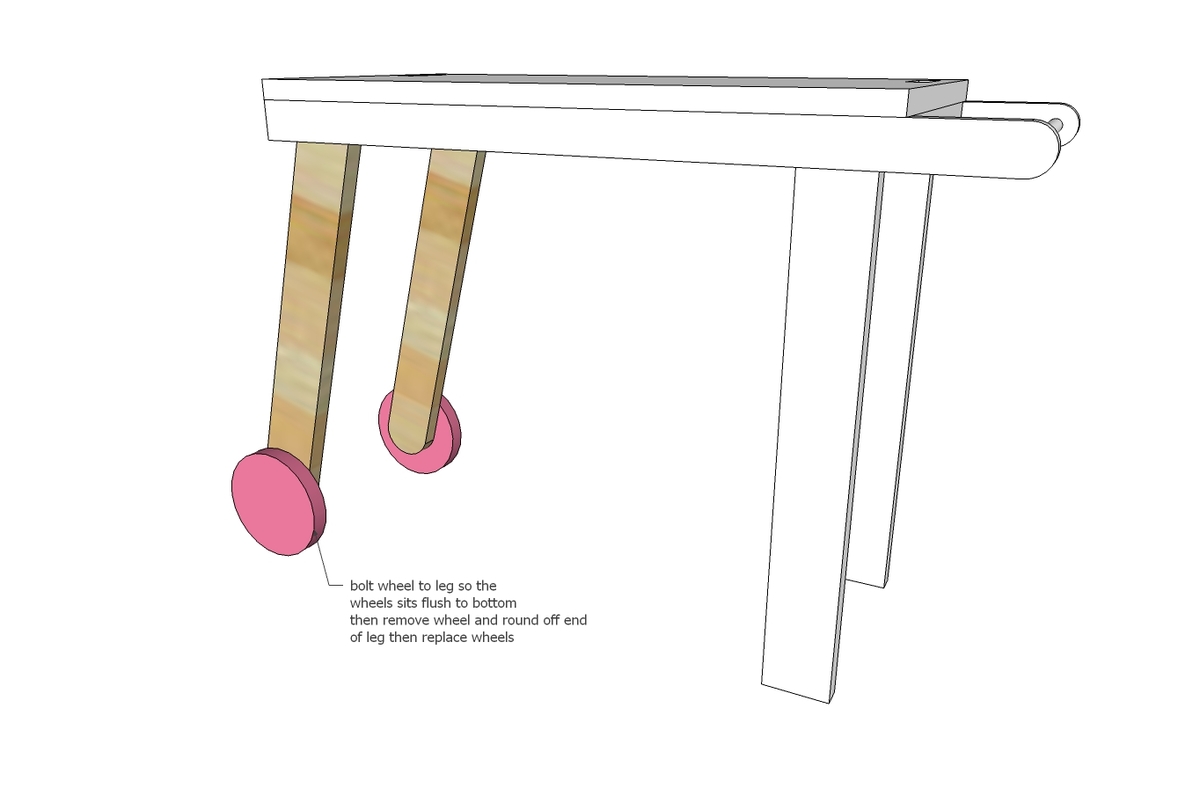
2 – 1x3 @ 20-3/4” long point to short point measurement, both ends cut at 15 degrees parallel – back legs 2 – 5” wheels (can be cut from wood or store bought 5” rounds)

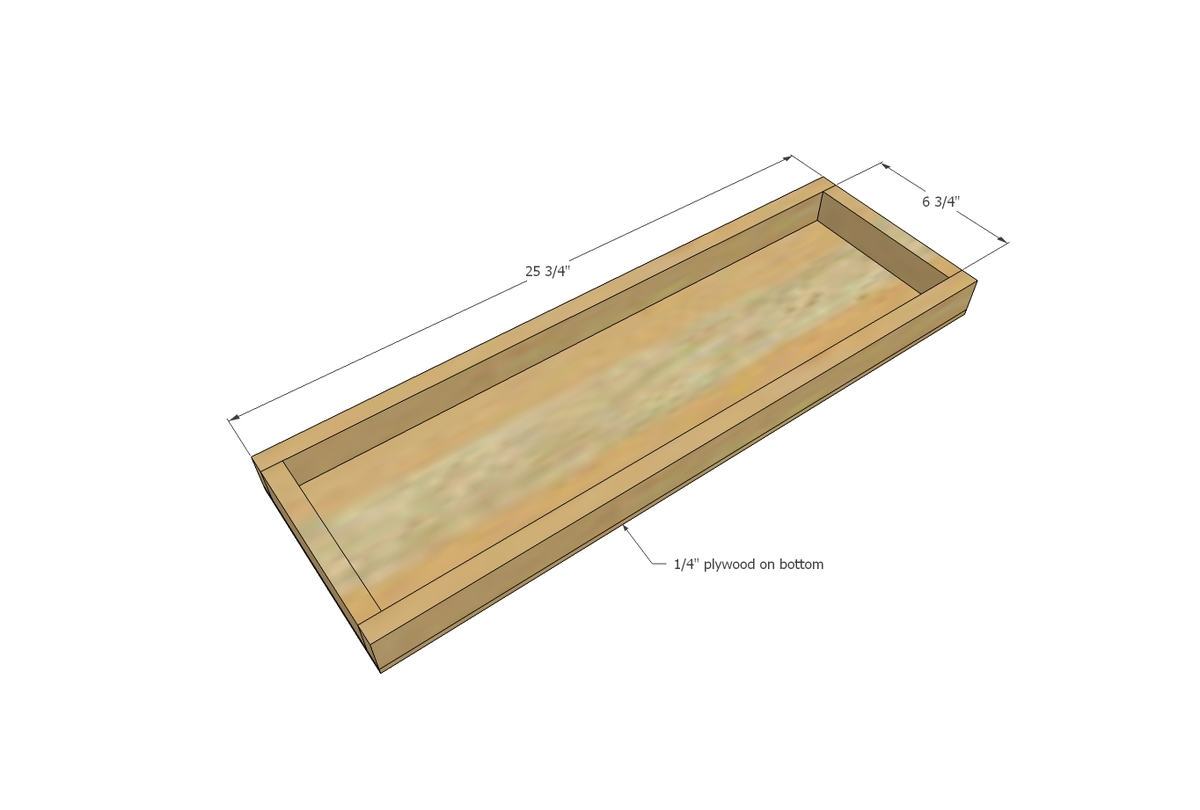
2 – 1x2 @ 25-3/4” - tray sides

2 – 1x2 @ 6-3/4” – tray ends

1 – 1/4” plywood 25-3/4” x 8-1/4” – tray bottom

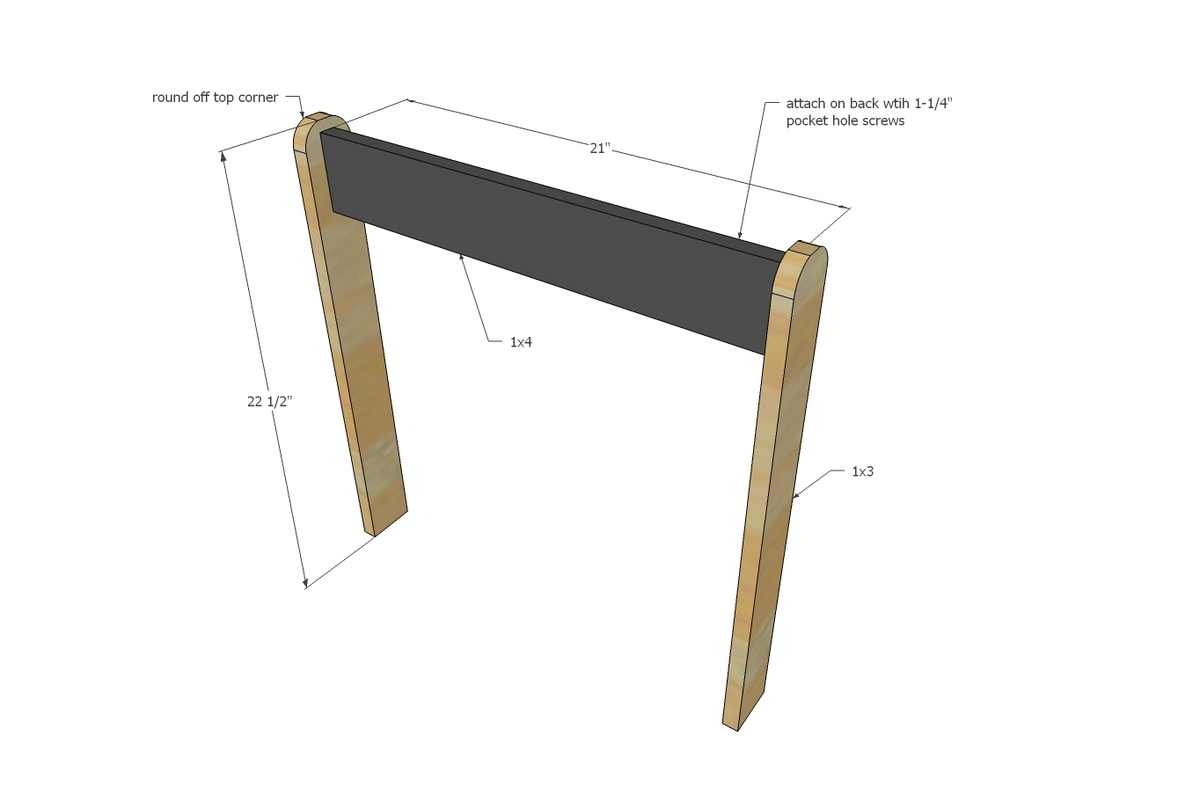
2 – 1x3 @ 22-1/2” – awning legs

1 – 1x4 @ 21” – awning sign

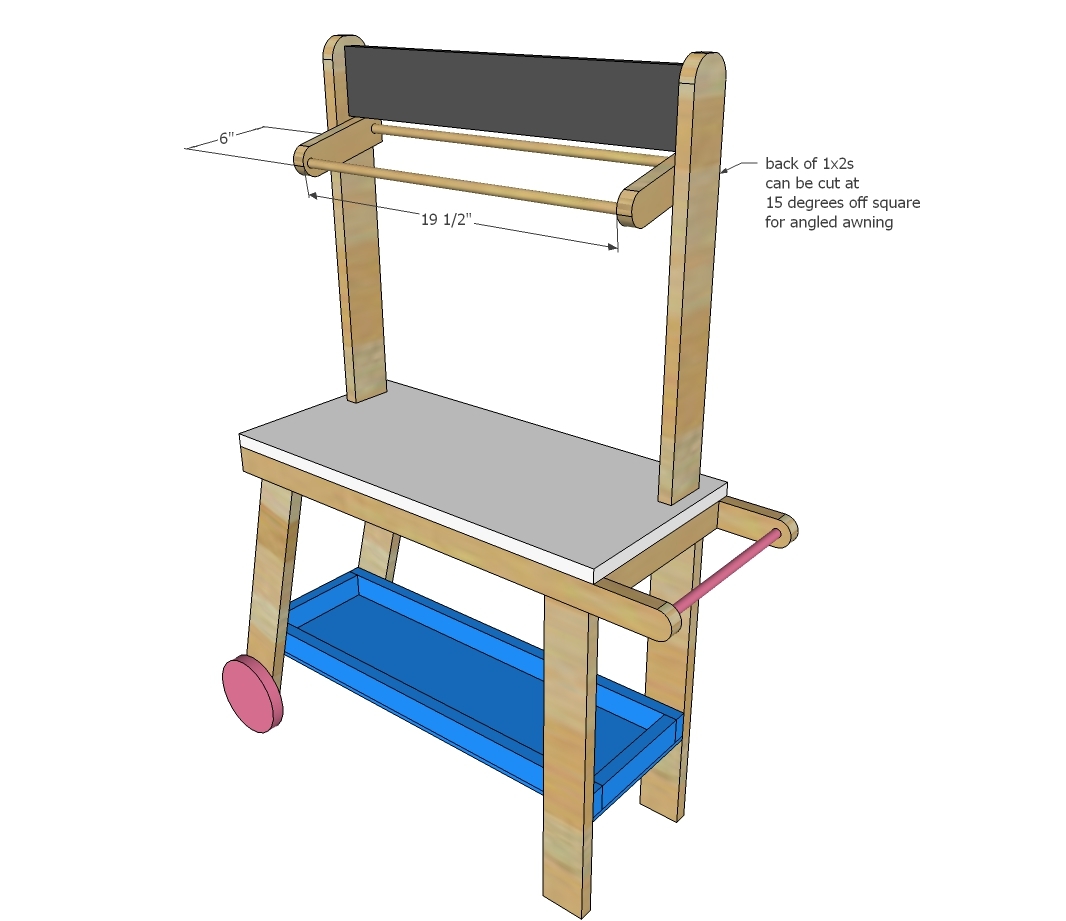
2 – 1x2 @ 6” – awning sides – back end can be cut at 15 degrees off square for an angled awning

2 – 3/4” dowels @ 19-1/2”

Tools
Tape Measure
Speed Square
Pencil
Safety Glasses
Hearing Protection
Kreg Jig
Drill
Jigsaw
Miter Saw
Table Saw
Brad Nailer
Power Sander
General Instructions

Please read through the entire plan and all comments before beginning this project. It is also advisable to review the Getting Started Section. Take all necessary precautions to build safely and smartly. Work on a clean level surface, free of imperfections or debris. Always use straight boards. Check for square after each step. Always predrill holes before attaching with screws. Use glue with finish nails for a stronger hold. Wipe excess glue off bare wood for stained projects, as dried glue will not take stain. Be safe, have fun, and ask for help if you need it. Good luck!

Instructions

Step 1

Build the frame for the top tray.  I recommend using 3/4" pocket holes and 1-1/4" pocket hole screws here, but since the top will reinforce joints, you can also glue and nail.  Use at least 1-1/4" length nails that fit your nailer (18 gauge brad nailer is recommended).

Step 2

Mark out notch outs in 1x12.  Drill holes bigger than your jigsaw blade to start the holes.  Then carefully cut out with a jigsaw.  I know this is extra work to embed the awning in the tabletop, but with little kids, I wanted ot make sure the awning is secure and won't topple over in time.


Make sure the cutouts will fit a 1x3 board through, but snug.  Then attach the 1x12 to the top of the 1x2 frame with glue and nails at least 1-1/4" long.

Step 3

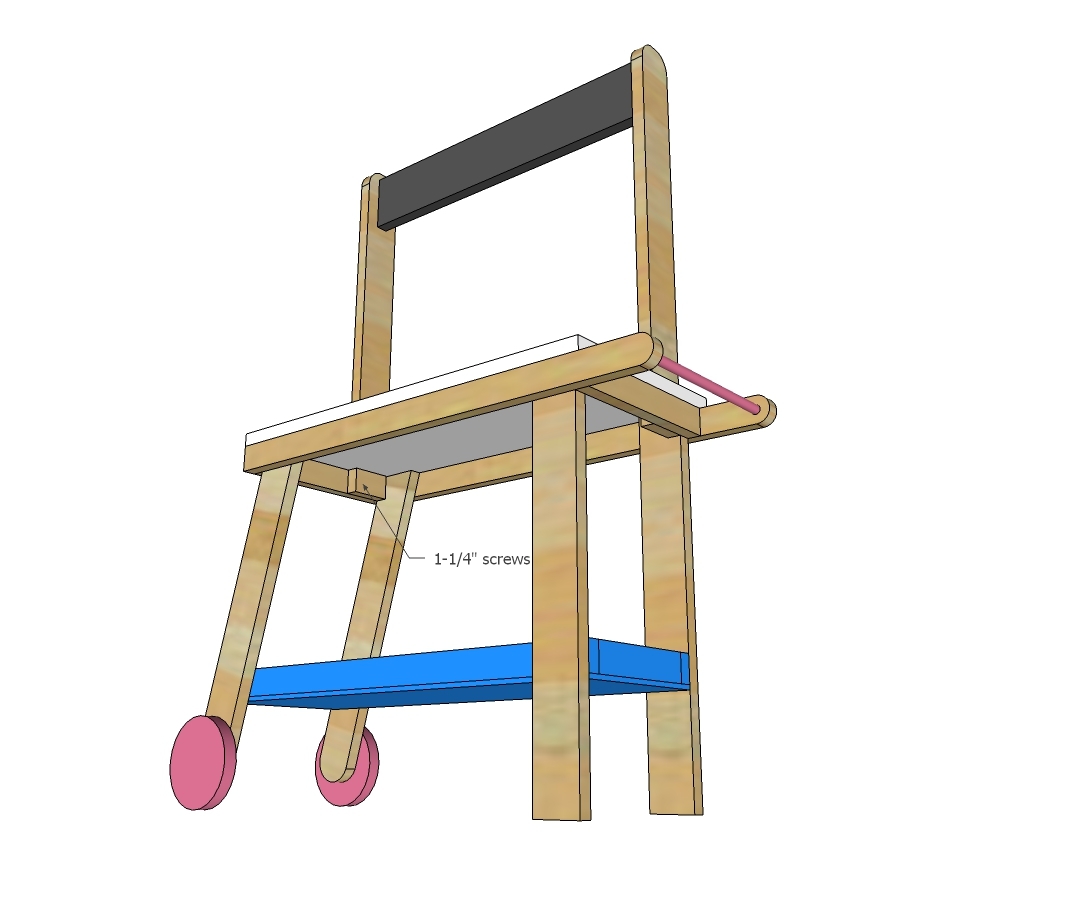
Attach the straight legs on the handle side with 1-1/4" screws and glue.  You can use pocket hole screws so you don't need to go out and buy new screws.

Step 4

Add the angled legs on the opposite side, in the same manner as you did the straight legs.

Step 5

Step 6

Build the bottom tray - can be nailed and glued together. If you want to use a contrasting color on the tray, I recommend painting it now.

Step 7

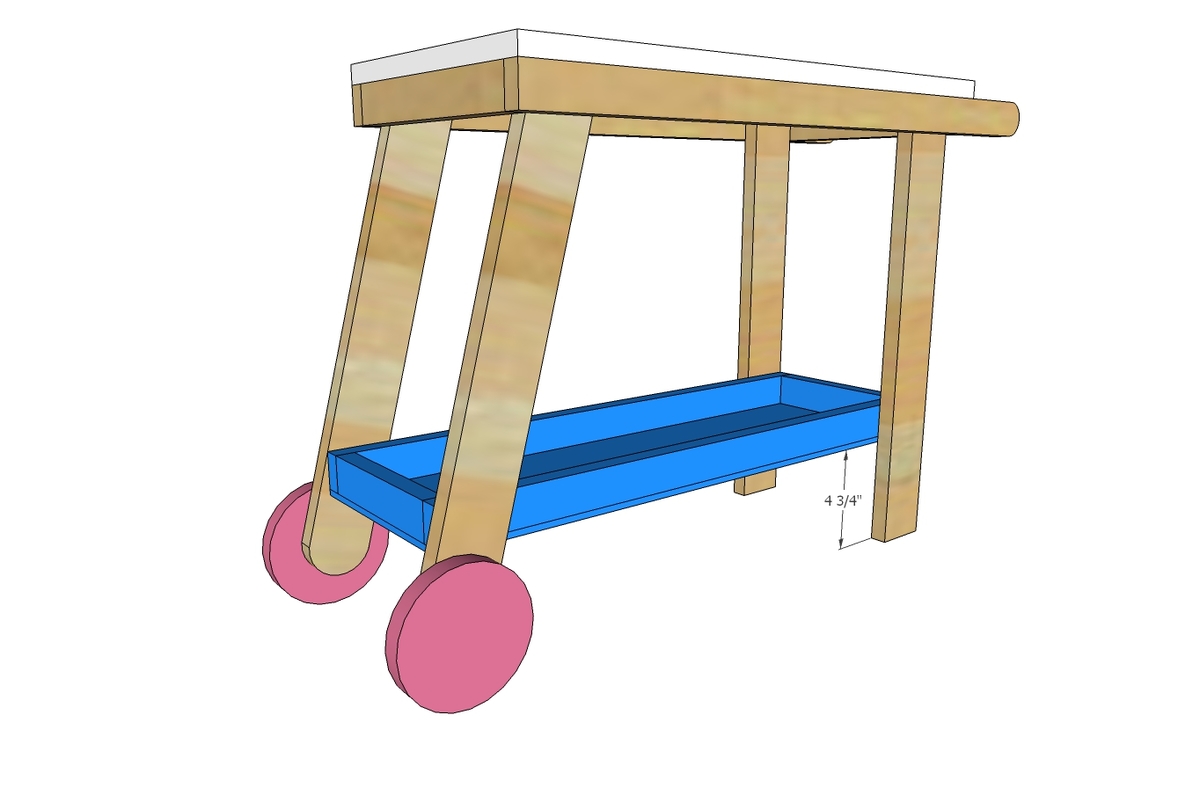
Screw the tray to the bottom of the cart. Use 1-1/4" screws to attach. You can cut a scrap wood block to 4-3/4" long and place under tray as a spacer to help guide you when installing the tray.

Step 8

Build the sign by attaching the 1x4 to the two sides. I recommend pocket holes here because this joint will not be reinforced.

Step 9

Insert the sign into the tabletop and screw down on underside with 1-1/4" screws.

Step 10

If you'd like to add the awning, I recommend building it separately and then attaching. Jaime provides a tutorial for sewing the awning here.

Finishing Instructions
Preparation Instructions
Fill all holes with wood filler and let dry. Apply additional coats of wood filler as needed. When wood filler is completely dry, sand the project in the direction of the wood grain with 120 grit sandpaper. Vacuum sanded project to remove sanding residue. Remove all sanding residue on work surfaces as well. Wipe project clean with damp cloth.

It is always recommended to apply a test coat on a hidden area or scrap piece to ensure color evenness and adhesion. Use primer or wood conditioner as needed.
Project Type