


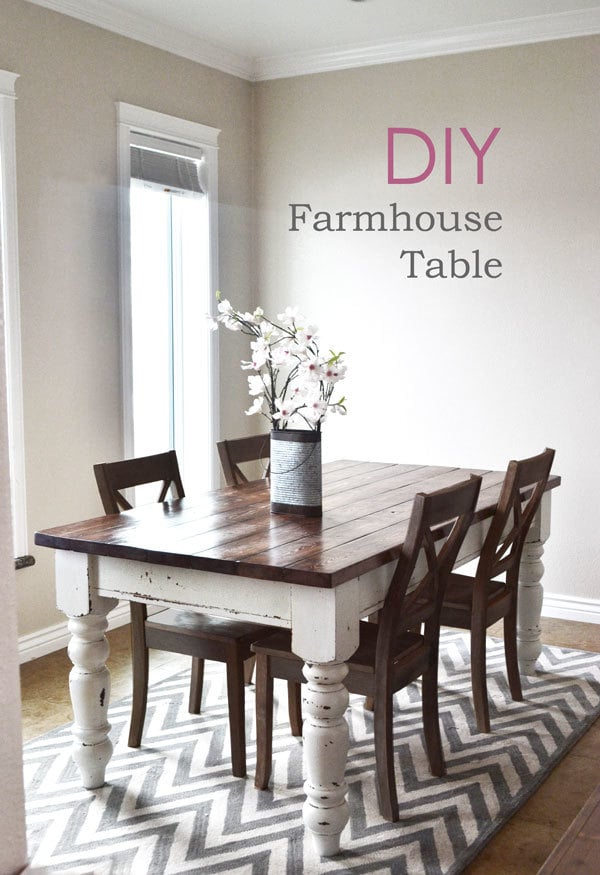
Free plans to DIY a farmhouse table with store bought table legs. Plans from Ana-White.com

Hello DIY Friends!
I hope you had a wonderful weekend! Can you believe it is still snowing up here in Alaska? I can't either, and I tell you what, I am ready to be working outdoors on projects. If you get a second, point your fans north and blow some of your hot weather toward us, will you?
We have been busy getting the odds and ends complete on the downstairs of the Momplex (I'll be posting an update for you later this week) and then finishing up the drywall downstairs. I've been told to order flooring, doors and moulding - how crazy is that? I know we aren't getting Mom moved in by this weekend (sorry Mom!), but we are feeling so great about how things are moving along (haha I'm not trying to be punny!).
You know we've been working double time now, right? That's right, we took on another job. Darn little nieces are just too cute!
Well, of course, I'm going to be building (or helping build - my sister wants to build her own furniture too!) furniture for my nieces as well. And I've already been working on projects in my spare time.
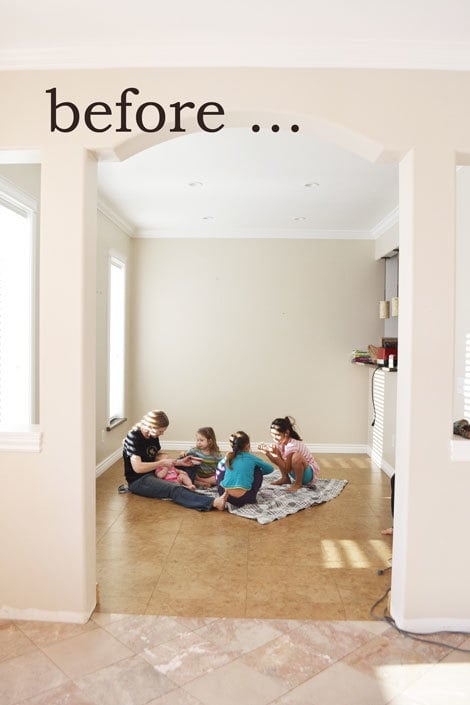
I was just thinking about something as I was putting together these photos. I often get magazines asking for "amazing before and after photos" to showcase my work, and I kinda give them a funny look and say, "but my before photos are a pile of 2x4s."
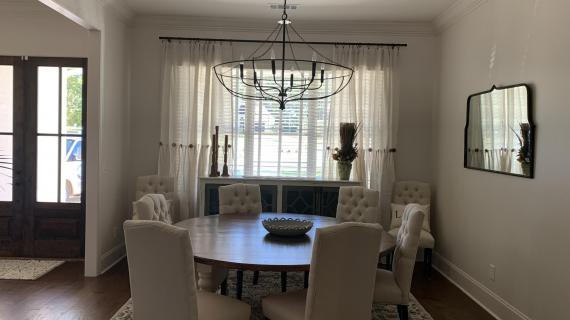
When we build furniture, it's not always about dramatic room transformations. It's not always about magazine-worthy after photos.
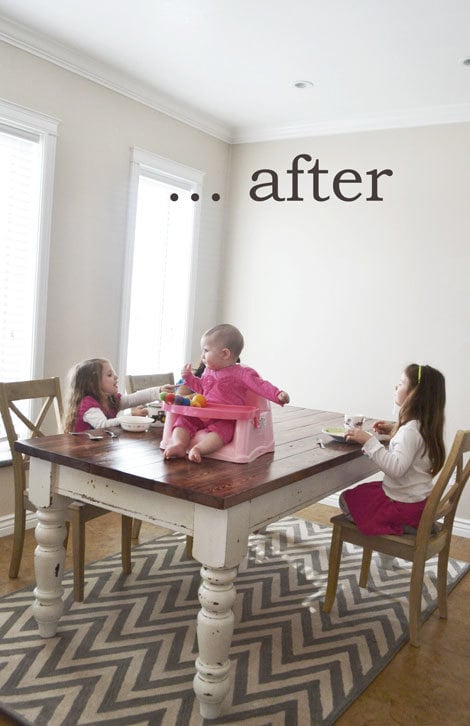
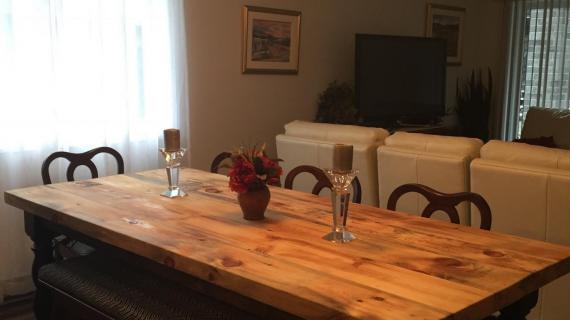
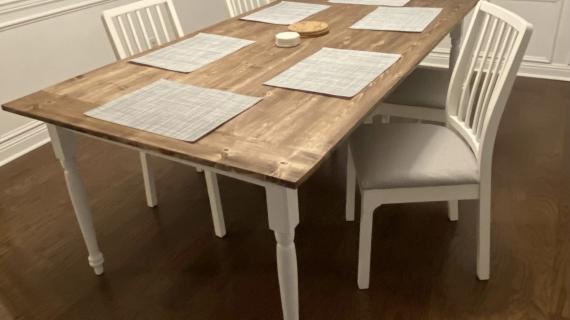
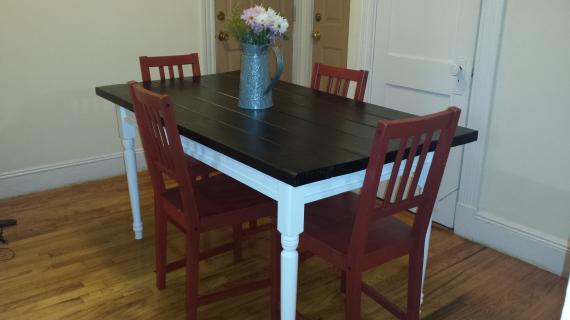
It's about this:


Our befores-and-afters are about making our lives better. Having a place to eat dinner. Getting mattresses off floors, corralling toys into toyboxes, books into shelves ....

But I won't tell you a lie ... making something pretty doesn't hurt either :)
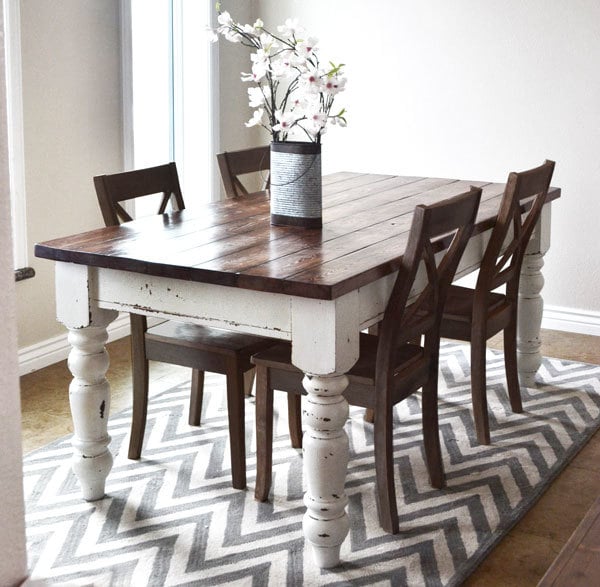
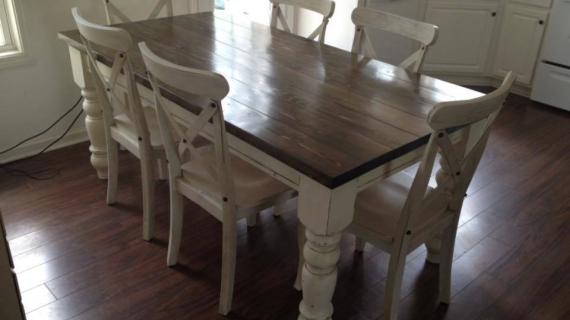
My sister and I put this table together surprisingly quick - in just a few hours. She wanted a "planked top" look made of 2x6s, so that took a little longer to get the top really flat and level (no rocking plates on this tabletop!). We love you belt sander. You could be smarter than us and use tongue and groove for the top. But I promise you, you won't get an arm workout like we did.
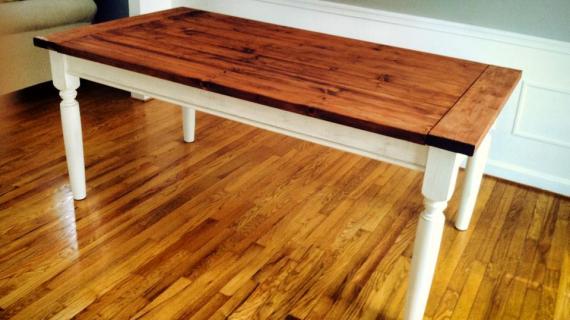
I gave the legs an authentic old world finish and will be sharing that tutorial with you next week - it's actually a pretty easy finish to achieve!
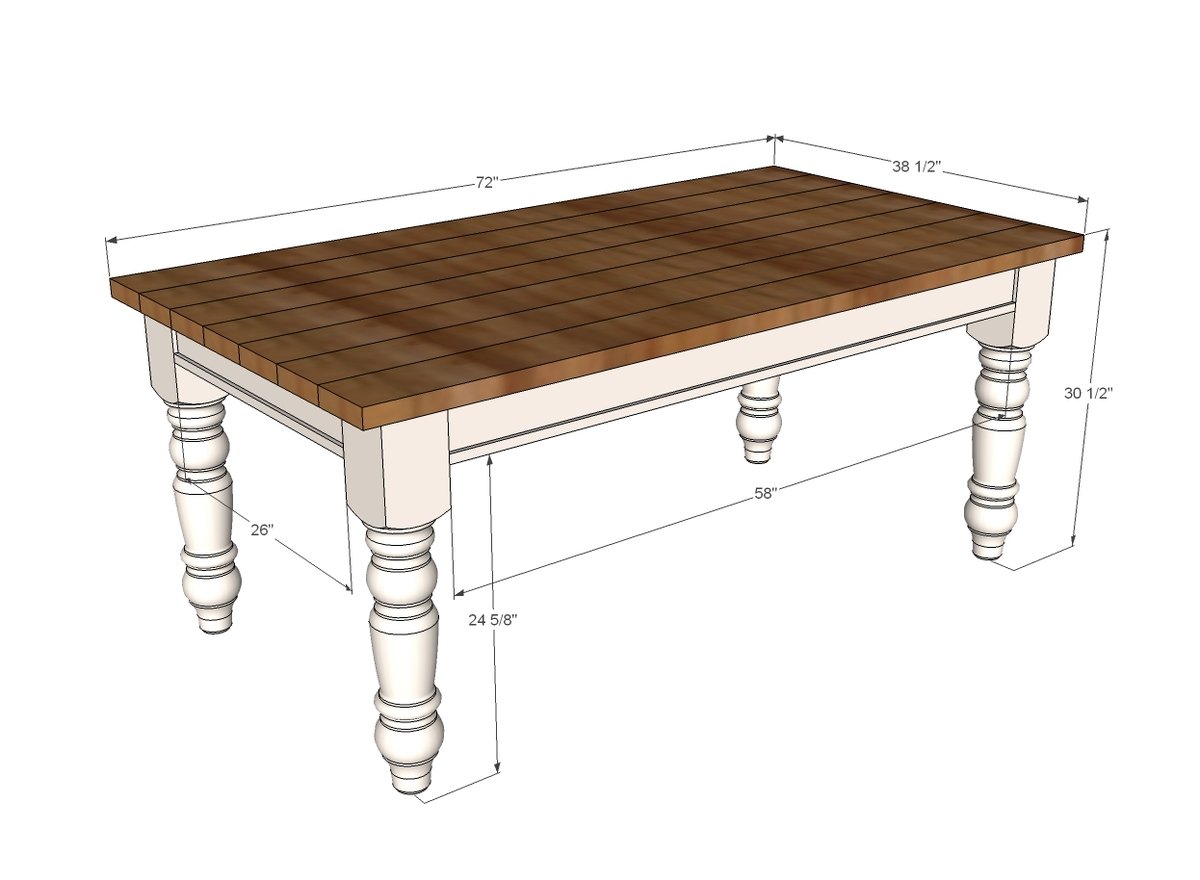
And of course, we got you covered with the free Farmhouse Table plans following!
Also giving a shout-out to the folks at Osborne Wood for providing the legs for this table. The legs are just massive, and retail for about $50 a leg for the legs shown. You will be shocked at how giant these legs are! Thank you Osborne Wood!
Preparation
4 - Osborne Wood Husky Dining Table Legs
2 - 2x4 @ 8 feet long
2 - 1x2 @ 8 feet long
7 - 2x6 @ 72" long (you may consider using 2x6 tongue and groove for a easier finishing option but as shown in photos, I used 2x6s kreg jigged together and then sanded flat on top with a belt sander)
2 1/2" pocket hole screws
2" finish nails
wood glue
2 - 2x4 @ 58" (side aprons)
2 - 2x4 @ 26" (end aprons)
2 - 1x2 @ 26" (end apron trim)
2 - 1x2 @ 58" (side apron trim)
7 - 2x6 @ 72" (tabletop boards)


Please read through the entire plan and all comments before beginning this project. It is also advisable to review the Getting Started Section. Take all necessary precautions to build safely and smartly. Work on a clean level surface, free of imperfections or debris. Always use straight boards. Check for square after each step. Always predrill holes before attaching with screws. Use glue with finish nails for a stronger hold. Wipe excess glue off bare wood for stained projects, as dried glue will not take stain. Be safe, have fun, and ask for help if you need it. Good luck!
Instructions
Step 1
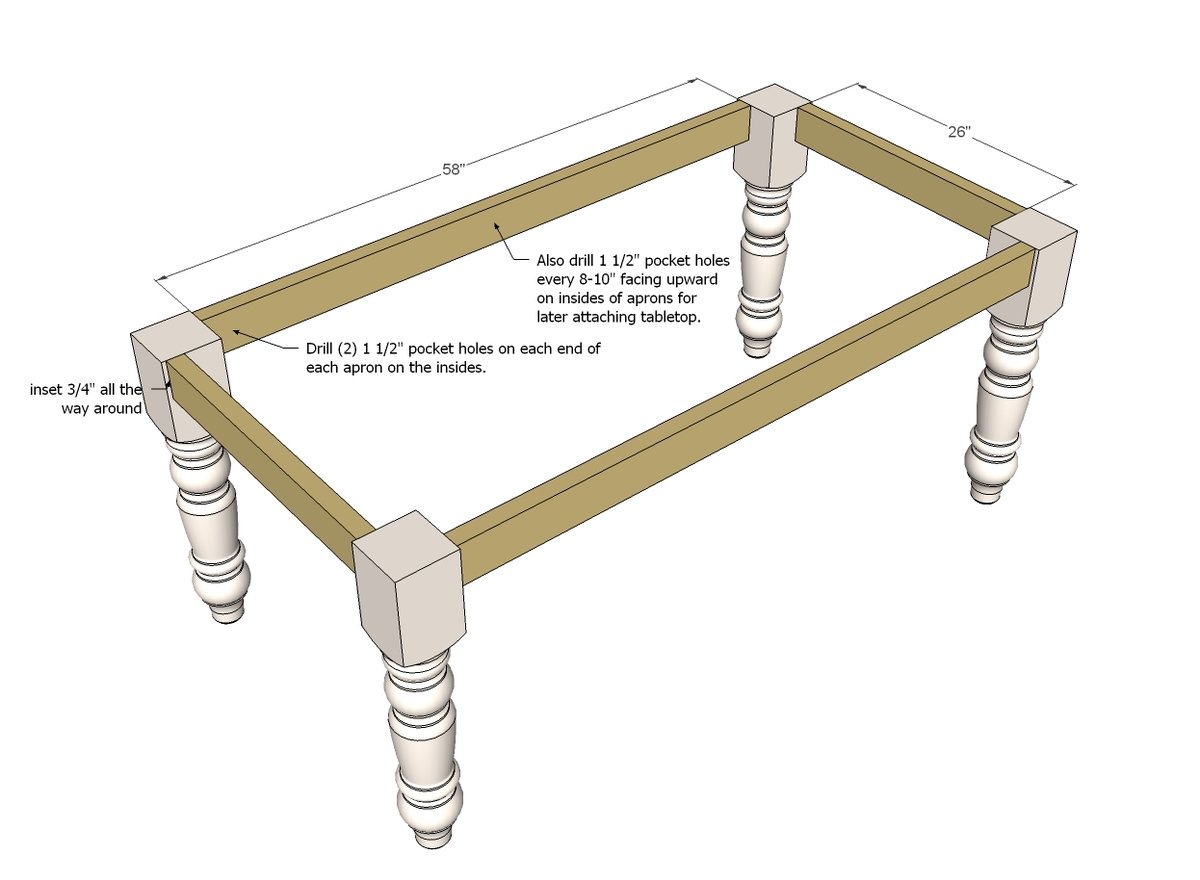
First things first, drill all the pocket holes in the aprons. You'll need two per apron end, and then ever 8" or so, a 1 1/2" pocket hole facing upward for attaching the tabletop later on.
When you go to attach the legs to the aprons, make sure you have the pocket holes pointing upward - I make this mistake all the time - doh! - but you are probably way smarter than me!
Step 2
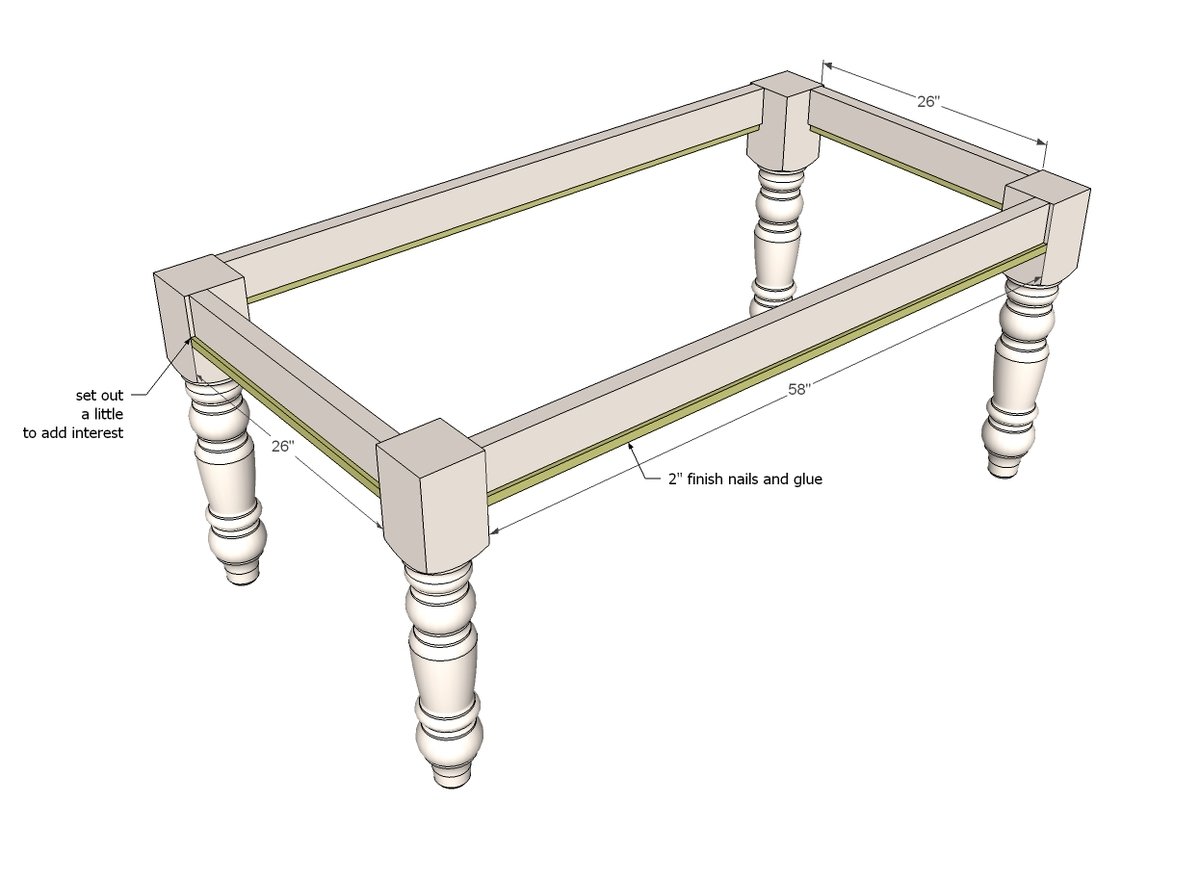
This is really just to add that decorative touch to the underside.
Another option for those of you with a table saw is to use 2x6s for the aprons and then cut a small groove with the tablesaw at the base of the aprons to give the look of multiple boards.
NOTE: You can also add corner cross supports, but we found the table really didn't need it. It's up to you!
Step 3

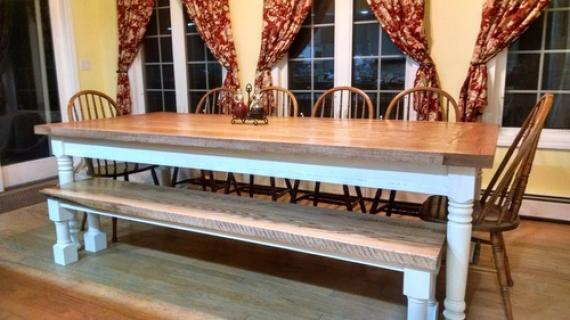
Now build the top. If I can say anything about this top it's this: GET STRAIGHT BOARDS. Mine were a little crooked and so I ended up having to use long bar clamps to pull everything together tight as I attached pocket holes.
Clamp, clamp and clamp!
If your ends end up a little off, no bigge there, just run a circular saw down the ends to clean them up.
I think part of this table's charm is the planked top, but to make it more functional, we belt sanded the top flat, and then silicone any gaps to prevent food from sticking in cracks.
Not trying to scare you - this wasn't hard - it's just my sister's got kids between 6 months and 9, and we are preparing this table for real life use and abuse.
Step 4

Now flip the tabletop over so all the pocket holes are facing up and place the base on it. Then just start attaching through those predrilled pocket holes into the tabletop.
Flip it over (it's gonna be heavy!) and the building part is done!
It is always recommended to apply a test coat on a hidden area or scrap piece to ensure color evenness and adhesion. Use primer or wood conditioner as needed.


Comments
Ana White Admin
Wed, 01/27/2016 - 14:06
Top
http://www.ana-white.com/2013/05/staining-and-finishing-tabletops
daneleven
Sat, 03/05/2016 - 14:57
Drawers
Has anyone tried this plan with drawers in the table ?
rutledgeac
Mon, 07/18/2016 - 11:27
Silicone cracks in table top
Ive searched all over and cant find any info on the silicone trick for the table top. I have a 3 year old and 8 year old and it would be greatto not have to worry about stuff in the cracks. What type os silicone did you use and did you apply before or after the stain and polyurethane? Thanks!
Shoshana Turin
Mon, 08/01/2016 - 17:50
Expanding
I cannot wait to try this out. It's so beautiful and exactly what I am looking for! If I wanted to make it longer, say 96 inches instead of 72, can I follow the same plan or would I need to make adjustments?
Thank you!
cjcameron
Sun, 12/04/2016 - 06:22
Is there a farmhouse table
Is there a farmhouse table plan with drawers available?
In reply to Is there a farmhouse table by cjcameron
Ana White
Mon, 12/05/2016 - 15:00
http://www.ana-white.com/2016
http://www.ana-white.com/2016/06/free_plans/small-old-english-style-far…
https://www.youtube.com/watch?v=FeTGItL24lE&t=46s
JMN17
Fri, 12/09/2016 - 18:41
Chair/rug
May I ask what's where you purchased the chairs and the rug?
Ezmerelda1969
Tue, 12/19/2017 - 07:22
Husky farm house table
Can you please tell me the colors you used on this table?
Abrangham15
Tue, 01/23/2018 - 17:45
Table top wood
What kind of wood did you use for this table?
Slehrke
Sat, 02/24/2018 - 10:49
Length of table
Can the length of this table be extended and still have the same strength? I need a 10 to 12 foot dining table.
garyc
Mon, 09/03/2018 - 12:37
Joining boards for a table top
Does anyone do any preparation to the boards before joining?
Thanks in advance.
In reply to Joining boards for a table top by garyc
Brian Famous
Tue, 09/04/2018 - 07:13
Joining depends on your boards, and tools.
If your boards are perfectly straight, you don't really NEED to do anything to them for these small pieces. But boards are rarely straight, so if you have either a table saw or a jointer you would want to straighten them first.
Personally, at a minimum I like to glue the boards together using parallel clamps and biscuits or floating tenons to help ensure the top edges are aligned and flat.
You could also use pocket screws to help hold the boards together, but these are only a substitute for the biscuits or tenons.
garyc
Sun, 09/09/2018 - 08:54
Thank you for resonding.
Thank you for resonding.
Ryan57ford
Sun, 09/09/2018 - 08:00
Make sure the edges are square too
like the last poster said, make sure the boards are straight, but I would also make sure the boards are square too. too many times when I go to put it all together you realize the boards have a bit of a in and out down the length, so I usually will use my table saw and just take a a tiny bit off the sides so all the boards lay flush with one another.
garyc
Sun, 09/09/2018 - 08:57
Thanks for responding. I don
Thanks for responding. I don't have a table saw but, I'm thinking of using a router with a straight bit, on a router table, and shaving a little off that way.
firejake1033
Sun, 03/03/2019 - 15:04
A shorter table
I love the look of this table, but want to make it 40" x 40". My question is do I use 4x4 legs or build a pedistal for it? Would the 4x4's be too bulky and not leave enough space for legs of the people sitting at the table?
tablemakeover
Thu, 10/31/2019 - 19:41
Old world table legs
Hello,
Love the table but where do I find the directions on how to do the finishing of the legs?
Thanks, Pam
tmwhite13
Tue, 06/16/2020 - 12:40
table plan
dinning room table idea
colinusher
Fri, 08/21/2020 - 02:07
Larger version strength issue
Hi from France, hoping you can help... we love this table design. We are looking at building one 126 x 60 inch.
Do you think we will need extra support/strengthening for this size?
'hope you're well
Kindest
Colin
sherrik
Sun, 09/13/2020 - 09:27
Husky farmhouse table to wedding cake table
I had seen this and contemplated making it several times. When my daughter got engaged and we planned an on farm wedding, I knew this would be the perfect cake table. My niece helped me with the build. The stain and milk paint finish on the legs worked perfectly and crackled and chipped as desired. Only thing I didn’t like was the the silicone to fill the cracks didn’t last well. Boards were picked out of the pile at Menards. It still looks great two years later and my daughter bought a bigger house so she now has room for it in her dining area. Couldn’t get picture to post here but if go to community brags it is there.
WinginSue
Fri, 09/17/2021 - 10:58
Kreg Jig
Hi Ana,
I hope you are still monitoring this. What is the Kreg jig you are using? The link is no longer valid. Oh and those table legs for $50 are now $260! LOL
Thanks