
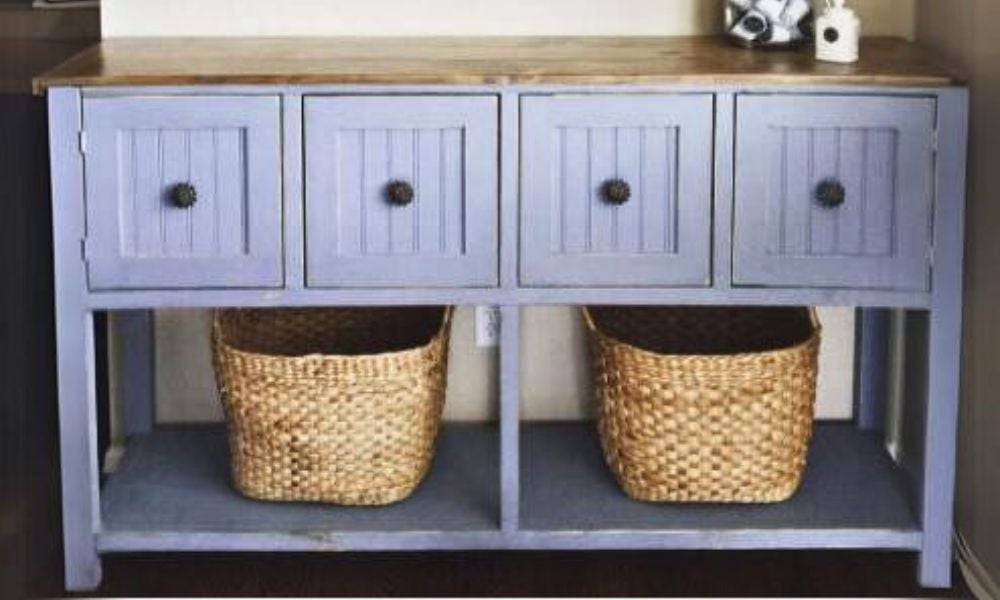

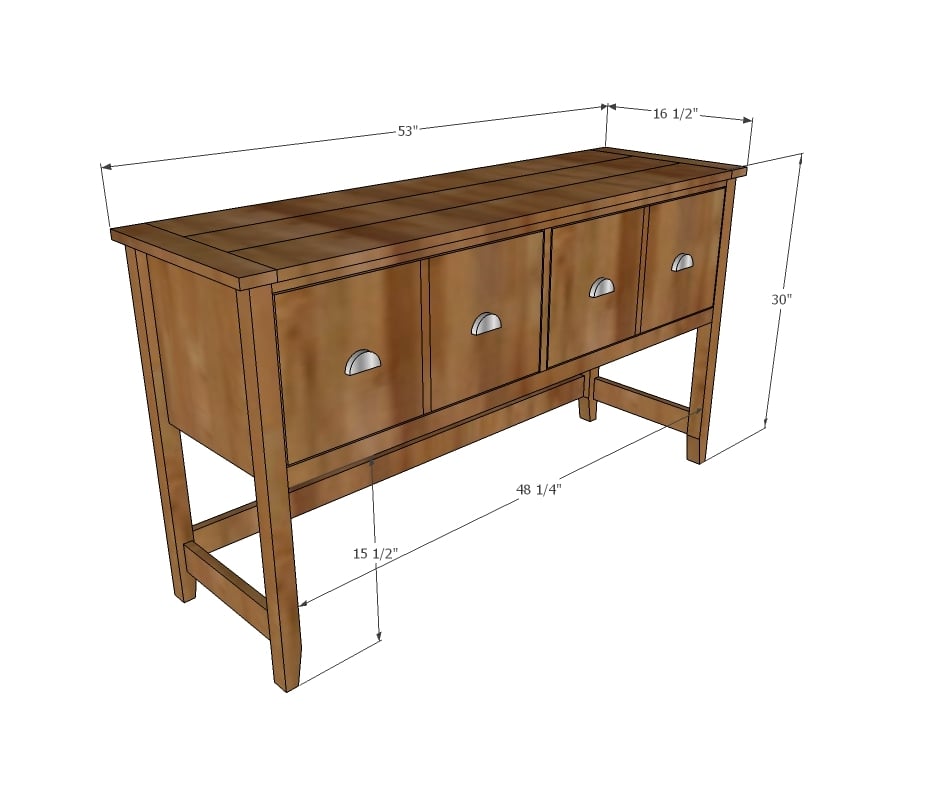
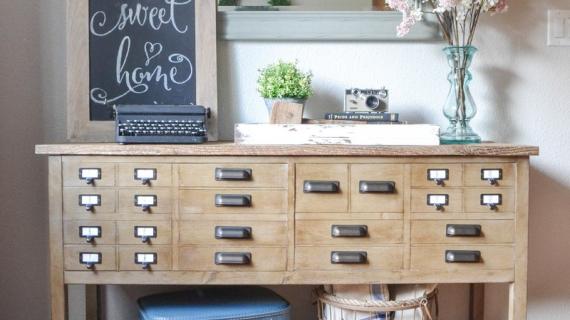
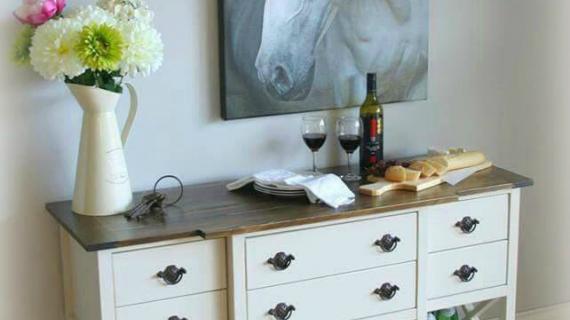
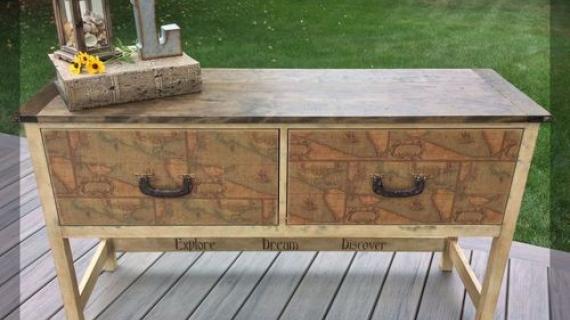
Free console table plans featuring large cubbies with doors and a large bottom shelf. The free plans include step by step instructions, diagrams, shopping and cut list and lots of reader submitted photos.
See also: Bailey Console Table with Drawers
Preparation
- 3 – 2x2 @ 8 feet long
- 2 – 1x2 @ 8 feet long
- 2 – 1x2 @ 8 feet long
- 1 – 1x6 @ 12 feet long
- 1 – 1x12 @ 4 feet long
- 24” x 48” 3/4” plywood panel (can also use planked 1x pieces for sides)
- 1 – full sheet of 1/4" thick plywood
- 1 – 1x8 @ 12 feet long
- 4 knobs
- 2 sets of euro style (white bottom corner mount style) drawer slides, 14” length
- 1-1/4” and 3/4” brad nails
- 1-1/4” and 2-1/2” pocket hole screws
- Wood glue
- 4 – 2x2 @ 29-1/4” (legs)
- 2 – 2x2 @ 48-1/4” (below drawer support)
- 2 – 1x2 @ 48-1/4” (above drawer support)
- 2 – 1x2 @ 11-1/2” (in between drawer support)
- 2 – 3/4” plywood @ 13” x 13-3/4” (sides) – can also use planked wood pieces
- 1 – 1x3 @ 48-1/4” (stretcher, back)
- 2 – 1x3 @ 13” (stretcher, sides)
- 1 – 1/4” plywood @ 13-3/4” x 50-1/4”
- 4 – 1x8 @21-1/4” (drawer front and backs)
- 4 – 1x8 @ 14-1/2” (drawer sides)
- 2 – 1/4” plywood @ 22-3/4” x 14-1/2” (drawer bottom)
- 2 – 1x12 @ 23-1/2” long (drawer faces)
- 3 – 1x6 @ 47-7/8” (tabletop boards)
- 2 – 1x3 @ 16-1/2” (breadboard ends)


Instructions
Step 1
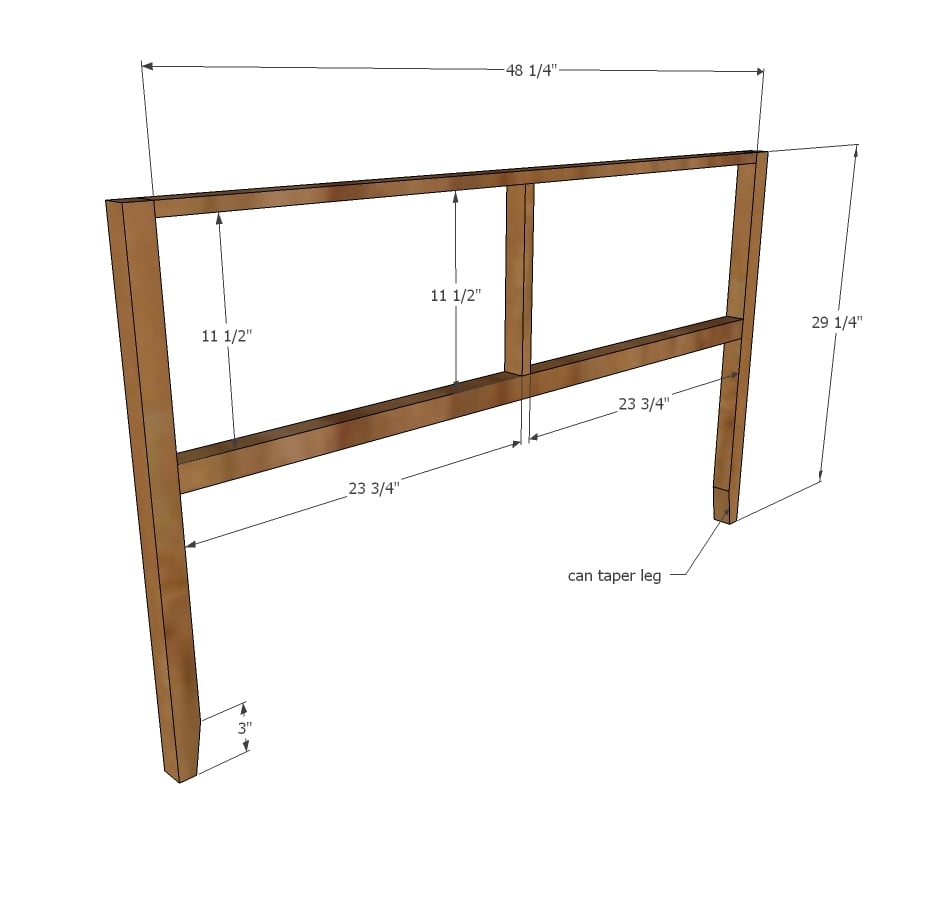
Build the frame for the console, using pocket holes. Use 3/4” pocket holes when ANY 1x material is being joined, and 1-1/2” pocket holes when ONLY 2x material is being joined. Hide pocket holes on undersides and top sides, where will be hidden from sight. Build two identical frames – this is important for drawer slides to work correctly.
Step 2
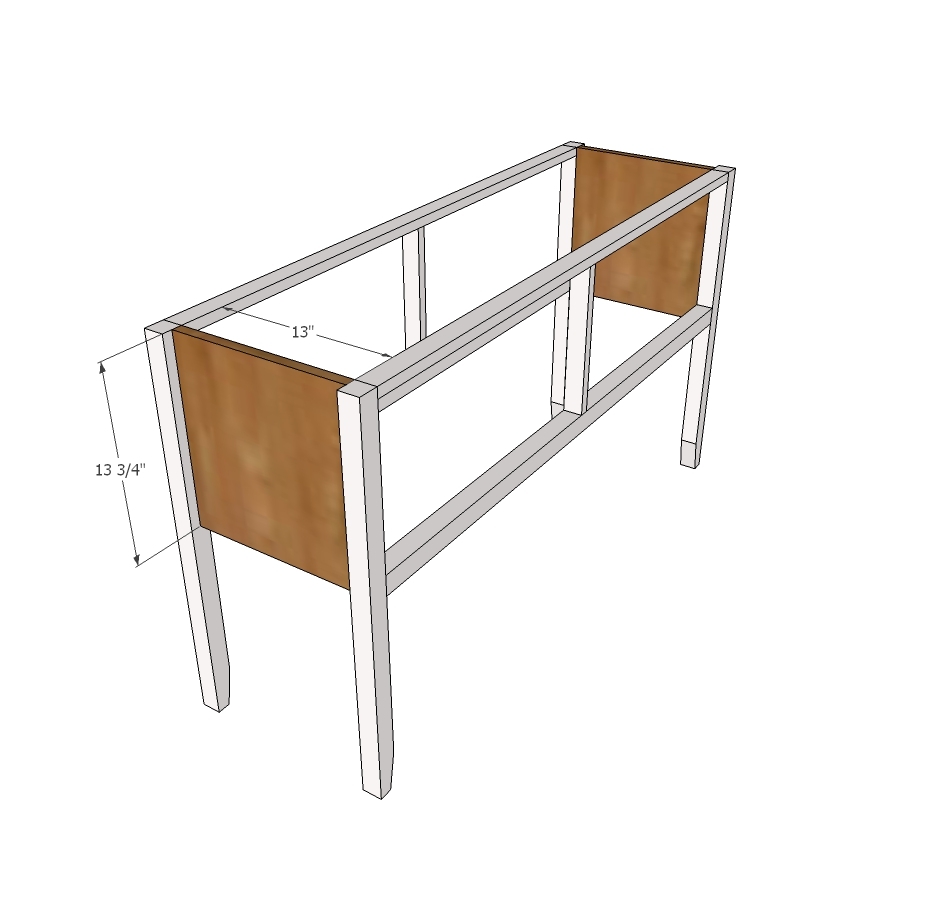
Drill ¾” pocket holes along side and top edges of ¾” plywood panels and attach to legs, pocket holes on inside, flush to inside of project.
Make sure project is square – cross bracing at corners can be added to further increase strength and stability.
Step 3
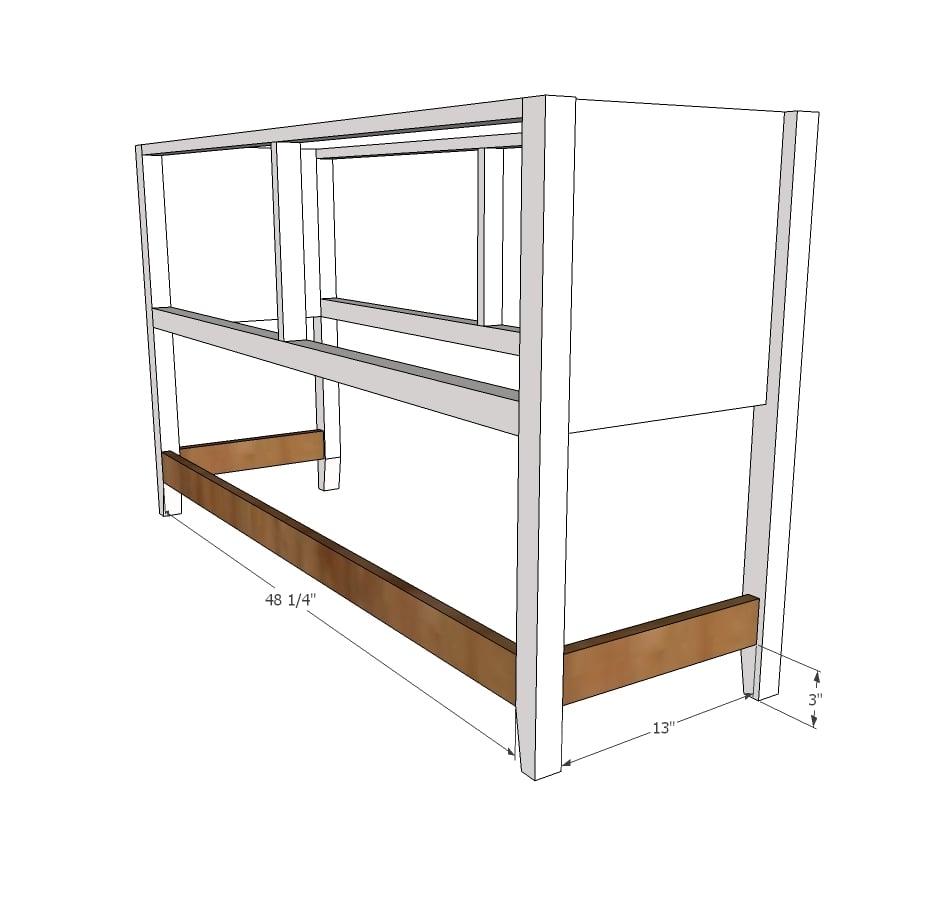
Attach bottom aprons with ¾” pocket holes, hiding on back sides and insides.
Step 4

Attach back with nails and wood glue.
Step 5

Step 6
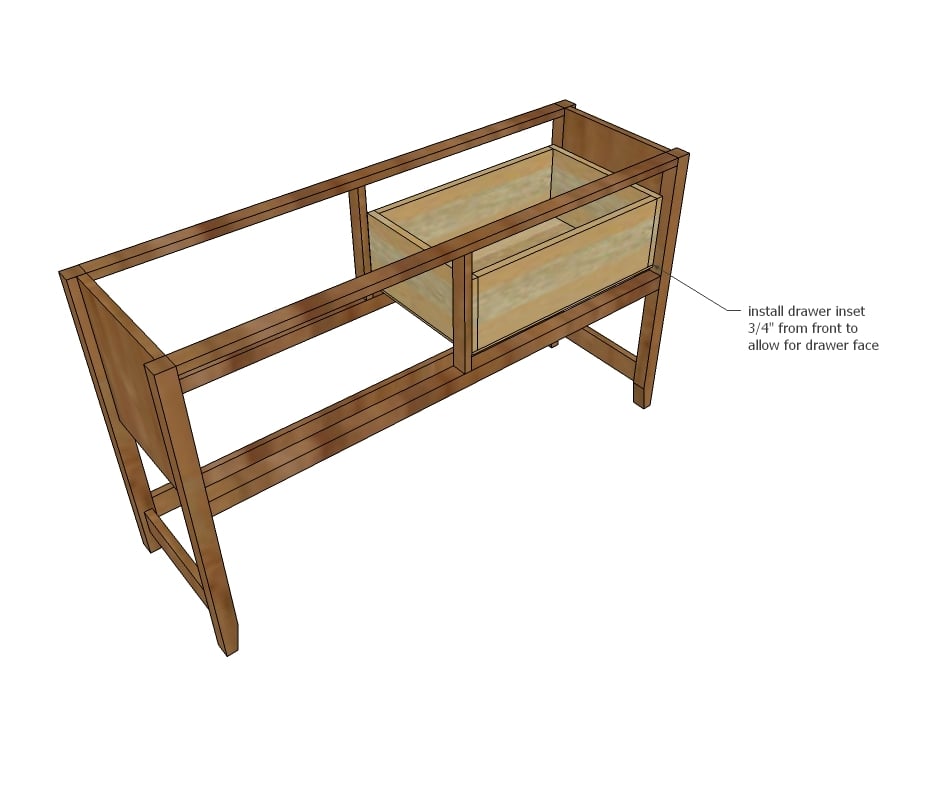
Install drawers with drawer slides, inset ¾” from front of cabinet. Adjust until drawers slide easily.
Step 7
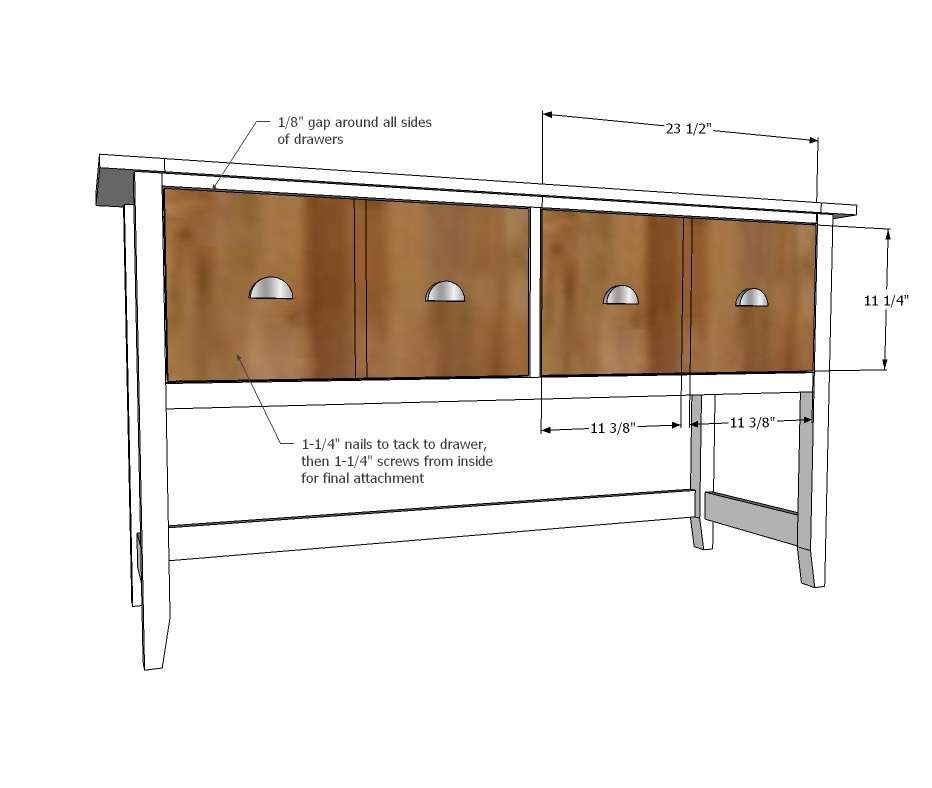
Attach drawer faces to drawer boxes, leaving 1/8” gap around all sides of drawer faces. Secure from inside with 1-1/4” screws.
Step 8
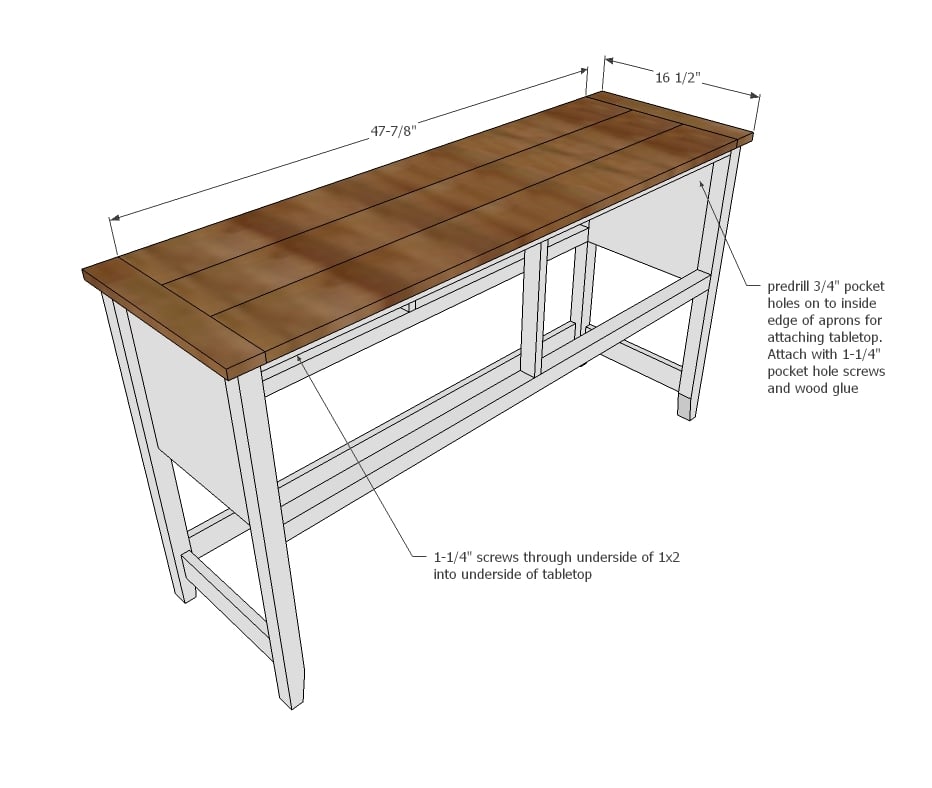
Build top with ¾” pocket holes. Remove drawers and attach tabletop to frame with 1-1/4” screws and wood glue.


Comments
handmadewithash
Fri, 07/22/2016 - 21:22
I loved participating in the
I loved participating in the challenge! I had so much fun following along with everyone's progress via the #igbuilderschallenge hashtag. Thank you Ana for creating the plans. :)