

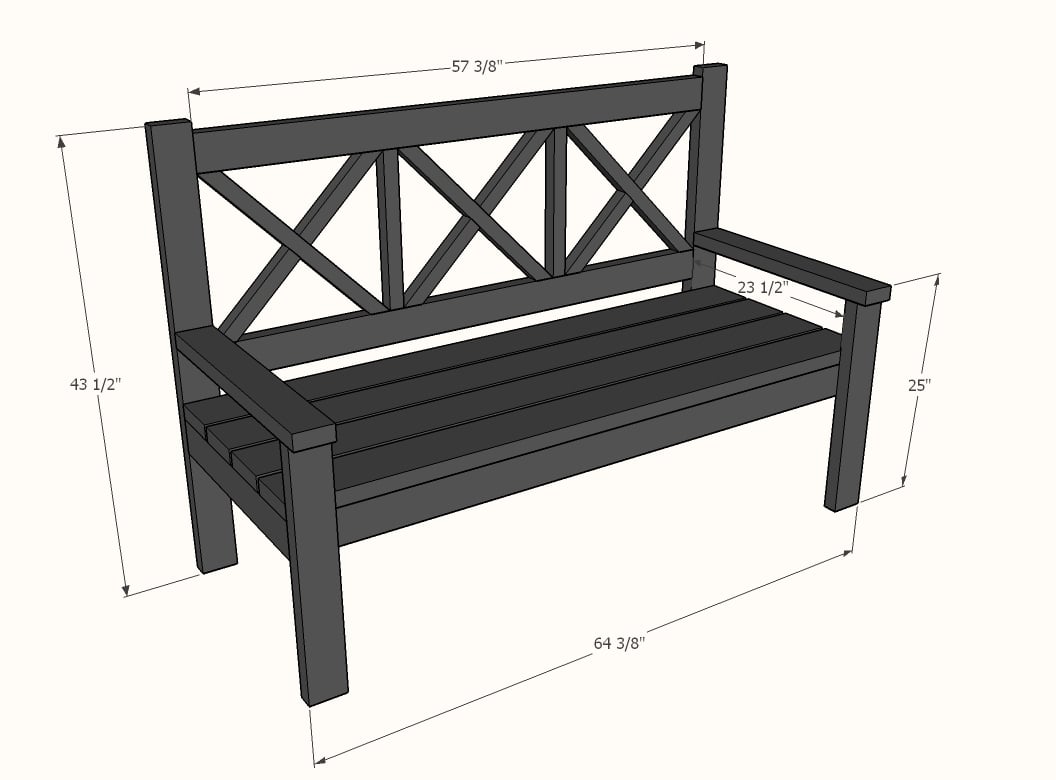
How to build a large outdoor bench with 2x4s and 2x6s with X back with free step by step plans from Ana-White.com
Why I Built this Outdoor Bench
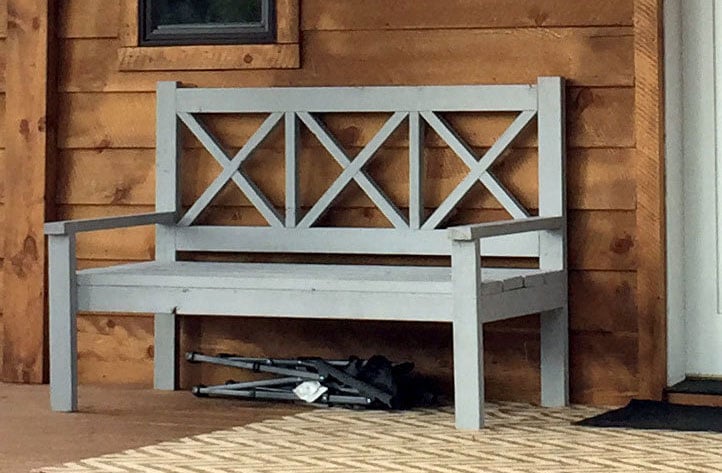
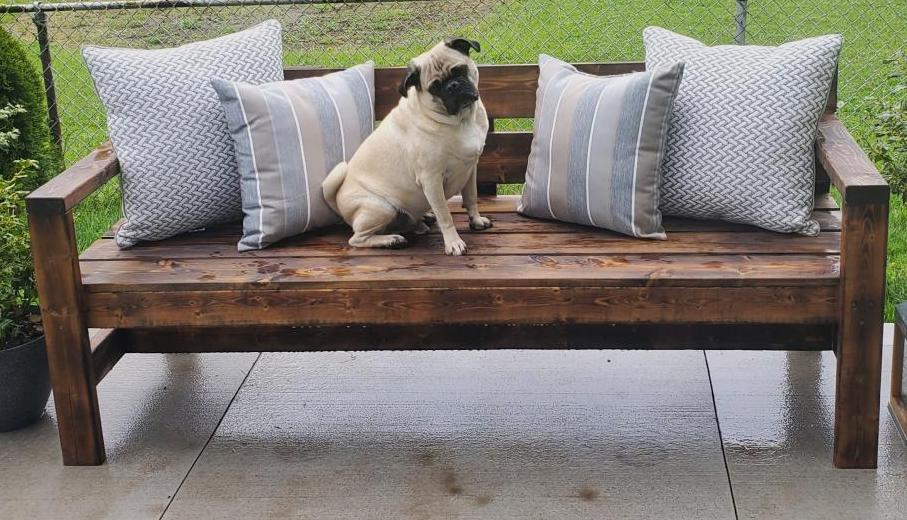
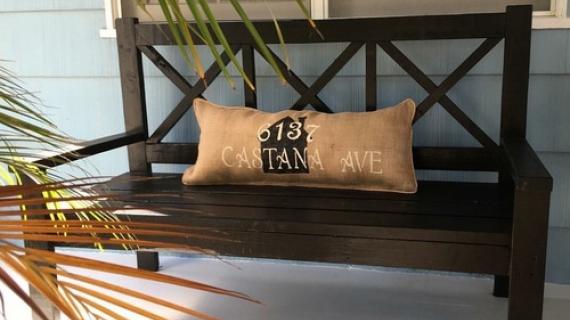
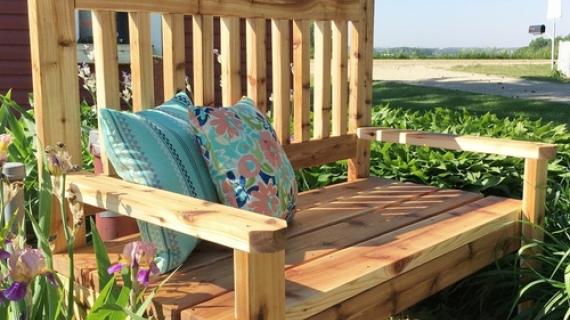
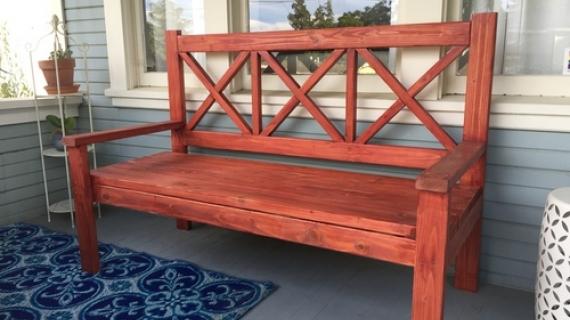
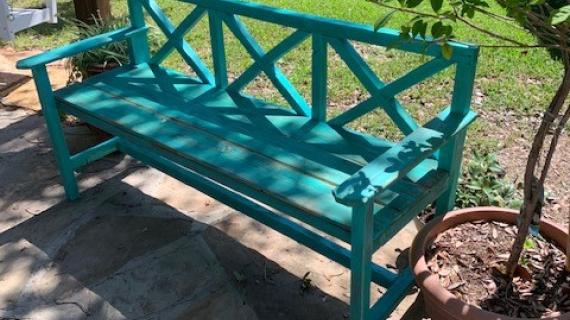
We love this beautiful, oversized porch bench with X detailing. It accents our front porch at our cabin, and adds a comfortable and sturdy seating space. You can add cushions - but none are required!
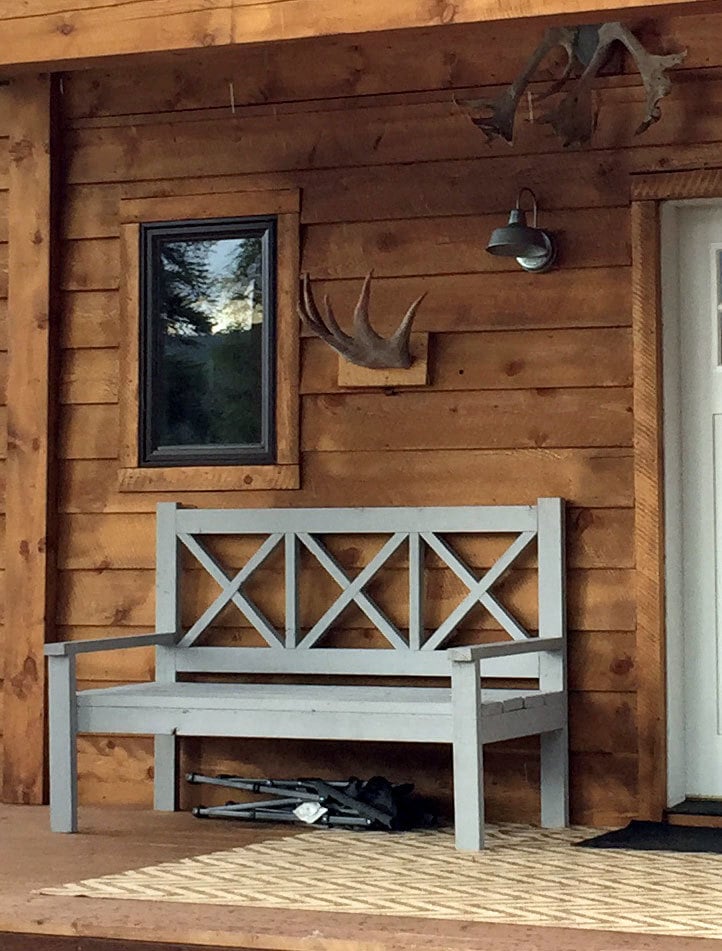
This bench is very large in size with a deep seat.
How this Bench has Held Up, Seven Years Later!
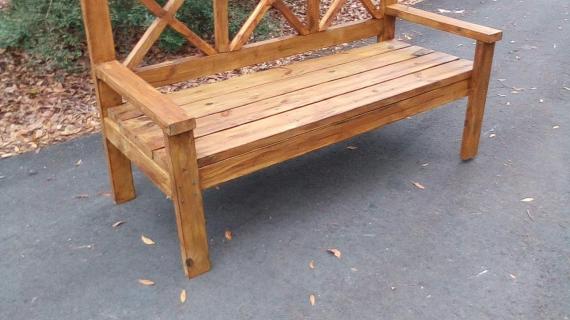
We have been using this bench for over seven years and it is still as strong and sturdy as ever. Ours is under a covered porch, so we just used framing lumber to build. But if your bench is exposed to the elements, consider exterior appropriate wood.
Video of Outdoor Bench with X Backs
Tips for Building this Outdoor Bench
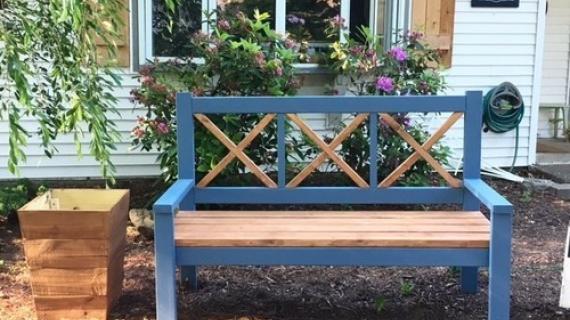
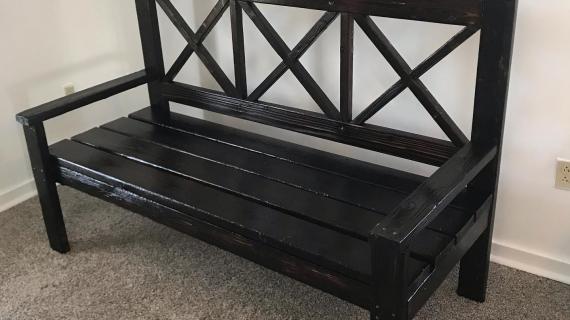
The hardest part of building this bench is the X detailing in the back - it was a little tedious and did take some time. I think the X detailing was totally worth it! Alternatively, you could use vertical slats.
Other Bench Plans that You Might Like
If the X detailing is more than you want to take on right now, consider these options:
1. Modern Park Bench with 1x6 tops - this one is super quick and easy to build! Free plans here.
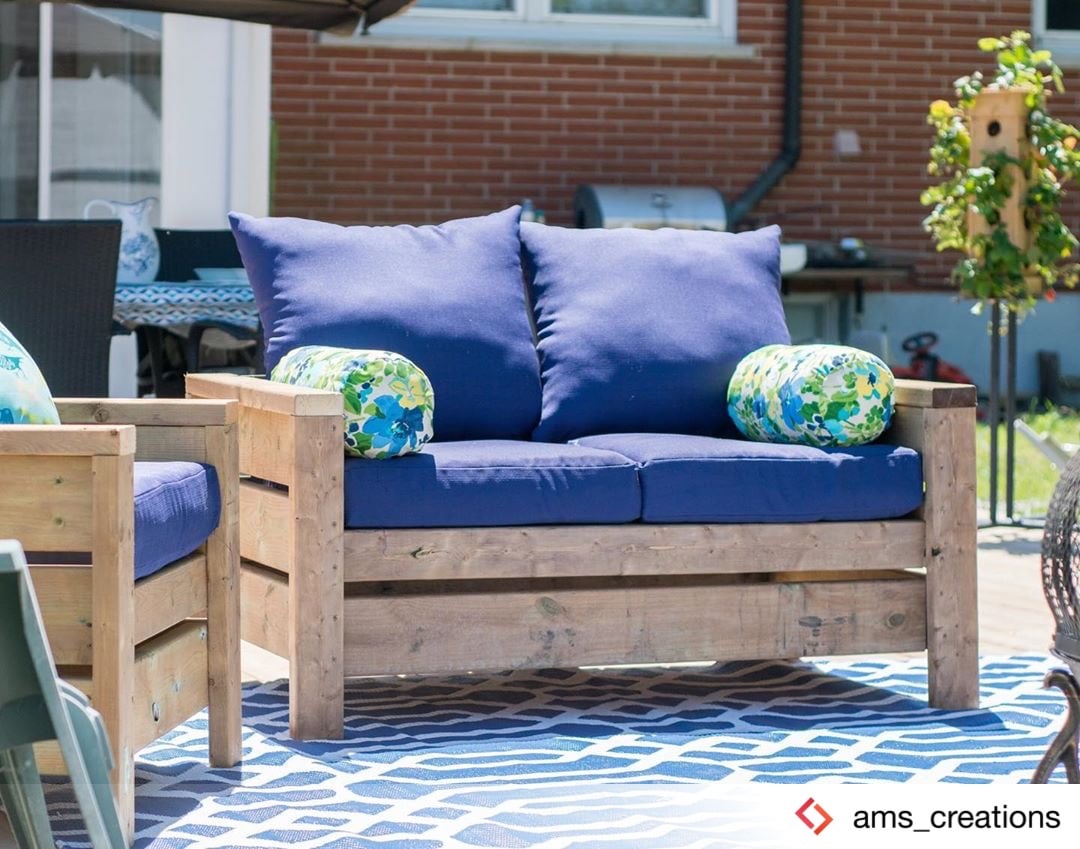
2. 2x6 Loveseat with Cushions - this one is heavy and stylish! It's also a pretty easy build. Free plans here.
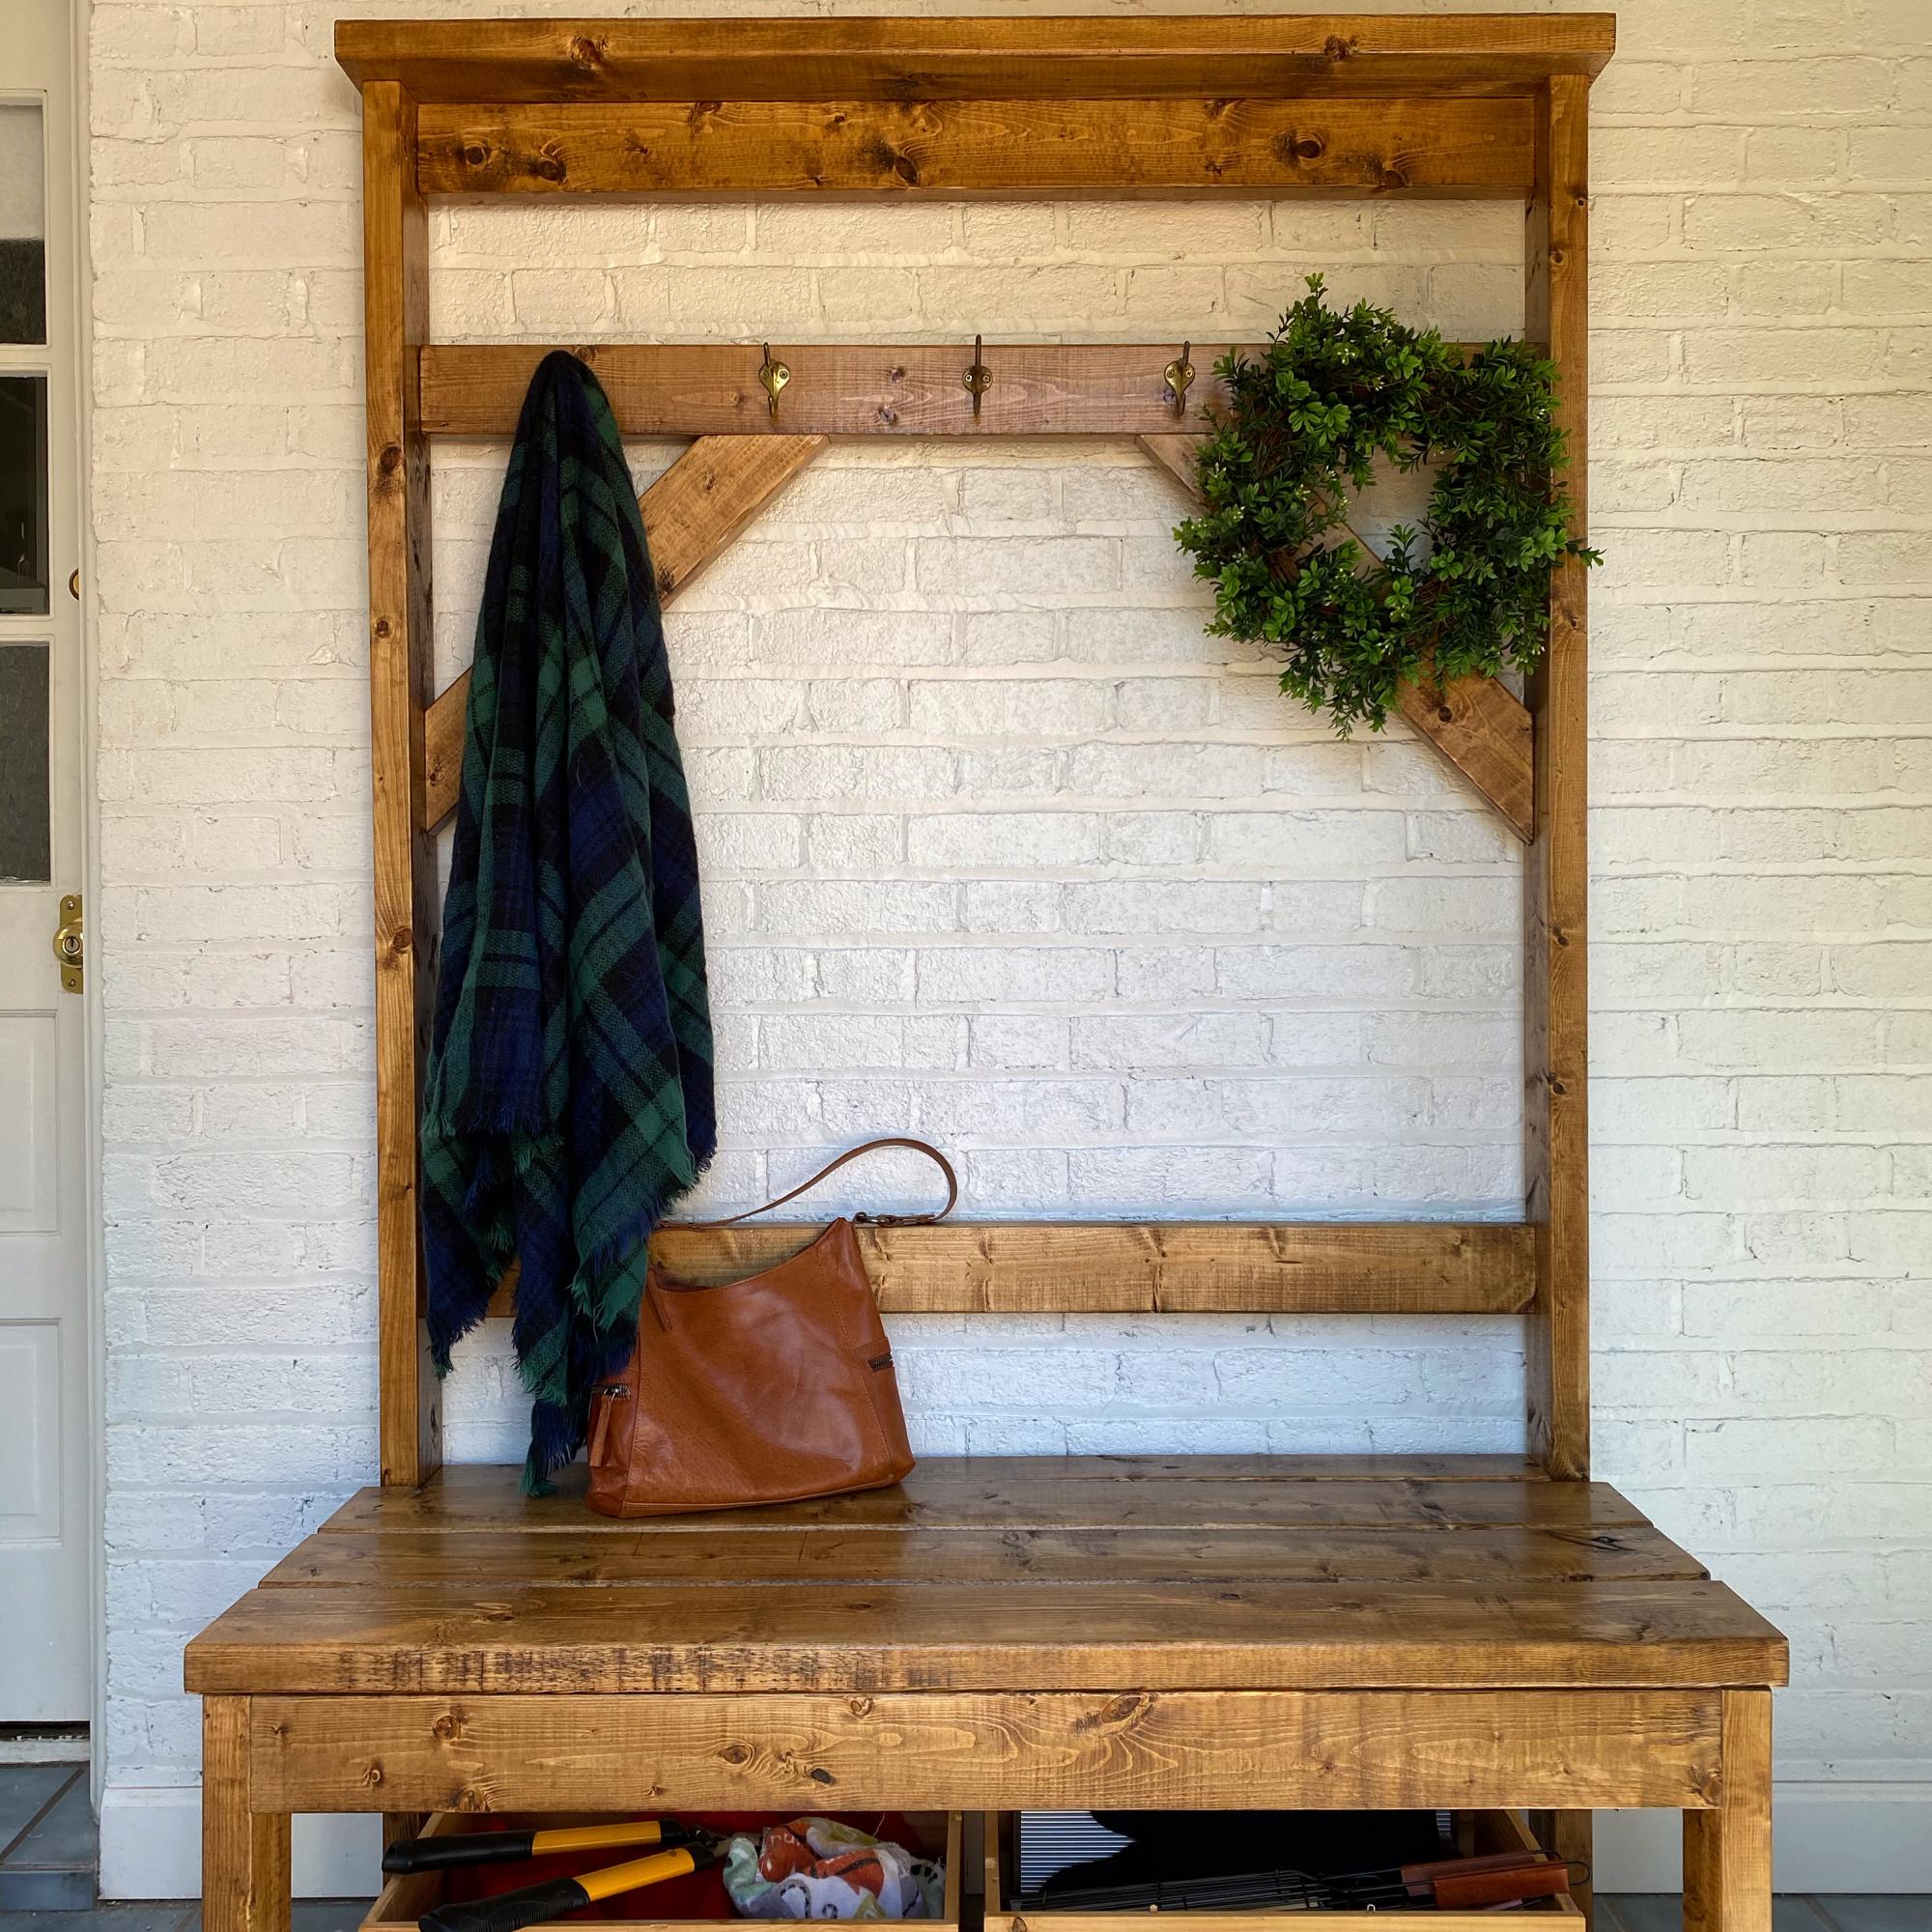
3. Outdoor Hall Tree Bench - great for storage and suitable for outdoor use! Free plans here.
Free Plans to Build Your Own Outdoor X Back Bench
Preparation
- 7 - 2x4 @ 8 feet long
- 2 - 2x6 @ 12 feet long
- 2 - 2x2 @ 8 feet long
- About 50 - 2-1/2" self tapping star bit outdoor wood screws (deck screws or Spax or similar)
- About 30 - 2-1/2" pocket hole screws (outdoor)
- 2 - 2x4 @ 43-1/2" (back legs)
- 2 - 2x4 @ 57-3/8" (back horizontal boards)
- 2 - 2x4 @ 61-3/8" (seat framing front and back)
- 2 - 2x4 @ 23-1/2" (seat framing ends)
- 2 - 2x4 @ 20-1/2" (seat framing under supports)
- 2 - 2x4 @ 23-1/2" (front legs)
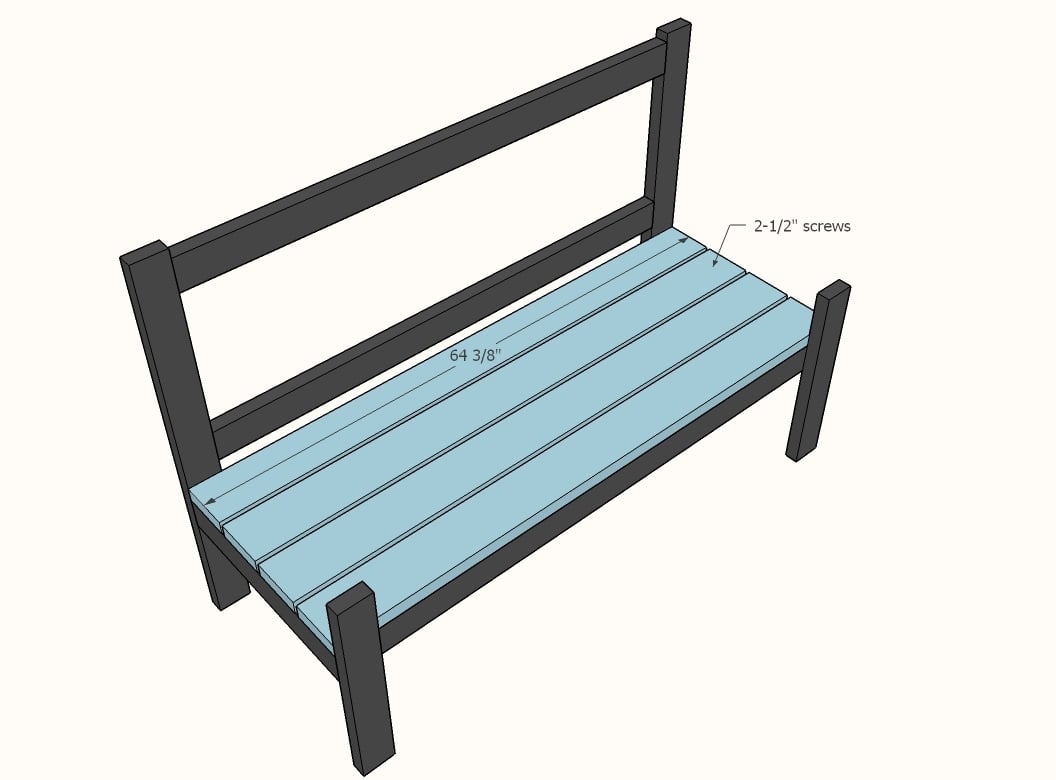
- 4 - 2x6 @ 64-3/8" (seat slats)
- 2 - 2x4 26" (arms)
We recommend cutting the back pieces to fit. You can "scribe" them by simply placing a long piece of wood in place and tracing the cuts with a pencil, then cutting the wood on the pencil lines.
- 2 - 2x2 @ 16" (decorative back vertical pieces)
- 3 - 2x2 @ 22-5/8" - both ends cut at 45 degrees, ends are parallel, long point to long point measurement (long X pieces)
- 6 - 2x2 @ 11-3/8" - one end cut at 45 degrees, longest point measurement (short X pieces)


Please read through the entire plan and all comments before beginning this project. It is also advisable to review the Getting Started Section. Take all necessary precautions to build safely and smartly. Work on a clean level surface, free of imperfections or debris. Always use straight boards. Check for square after each step. Always predrill holes before attaching with screws. Use glue with finish nails for a stronger hold. Wipe excess glue off bare wood for stained projects, as dried glue will not take stain. Be safe, have fun, and ask for help if you need it. Good luck!
Instructions
Step 1
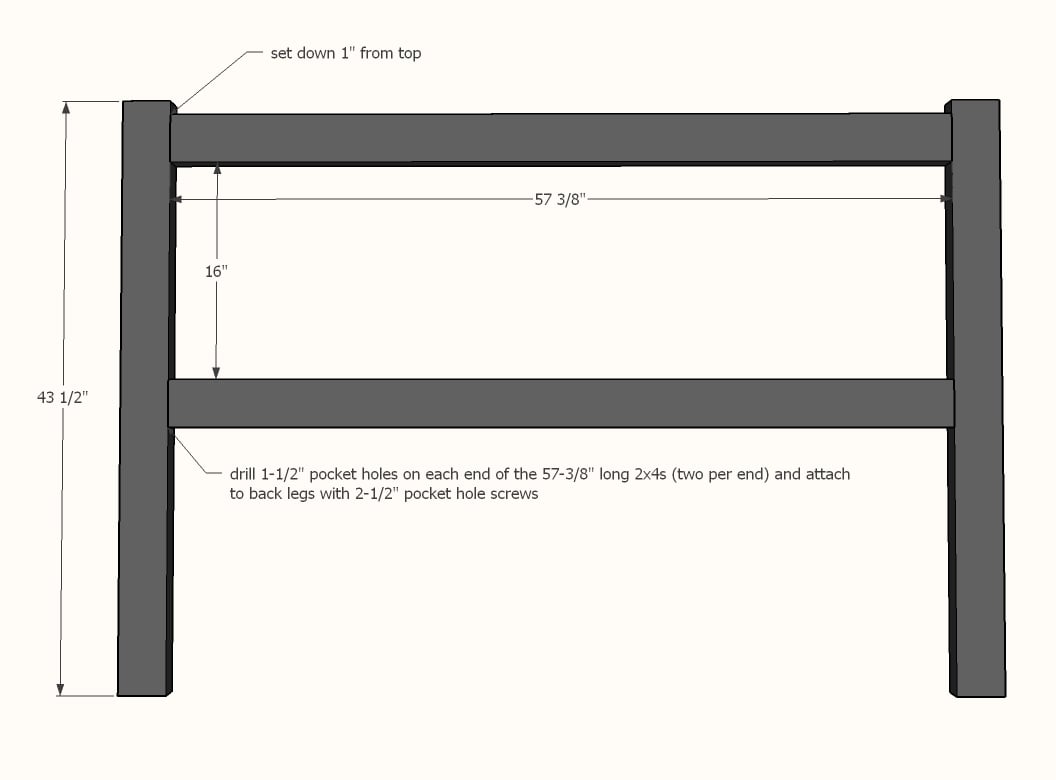
Build the back with 1-1/2" pocket holes and 2-1/2" pocket hole screws. If you prefer you can also add the decorative pieces now (may be easier to work on a bench top instead of at the back of the bench later on).
Step 2
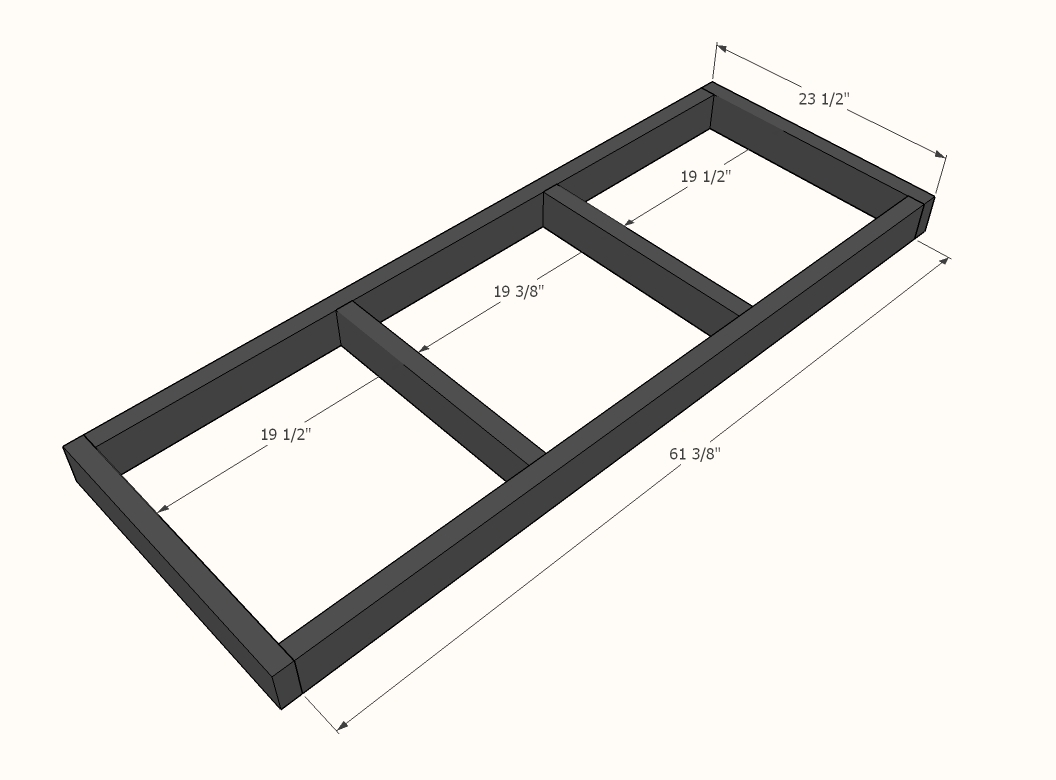
Build the seat framing either with pocket holes or 2-1/2" self tapping exterior screws.
Step 3
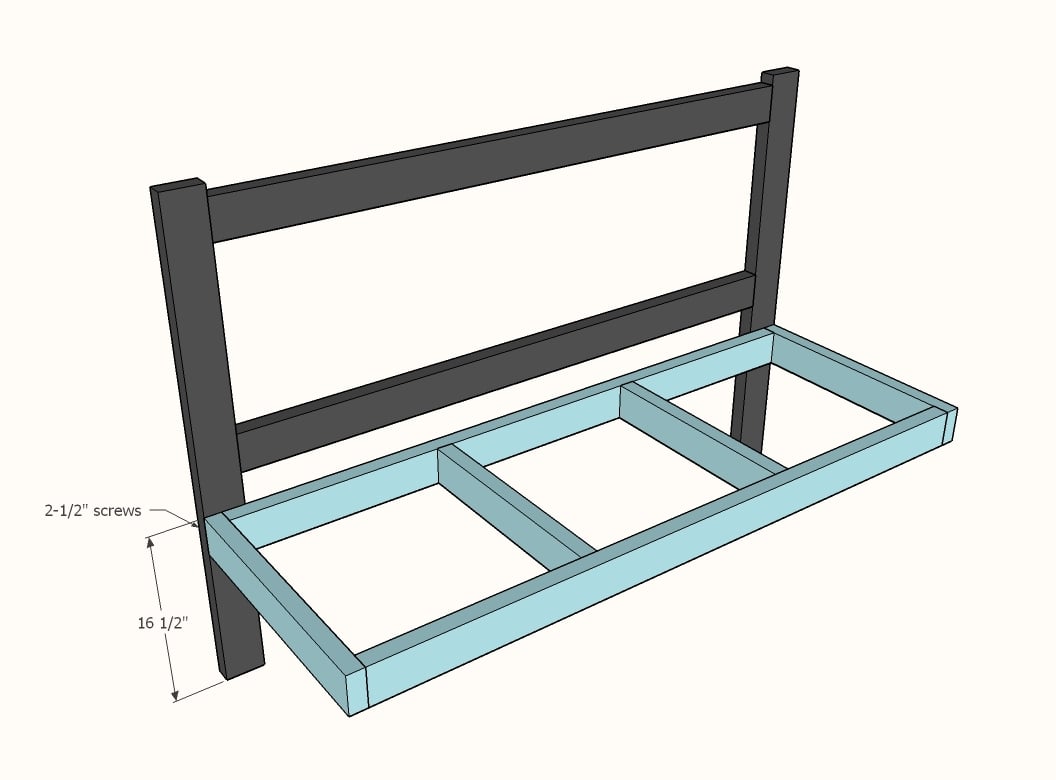
Attach seat framing to back with 2-1/2" exterior screws.
Step 4
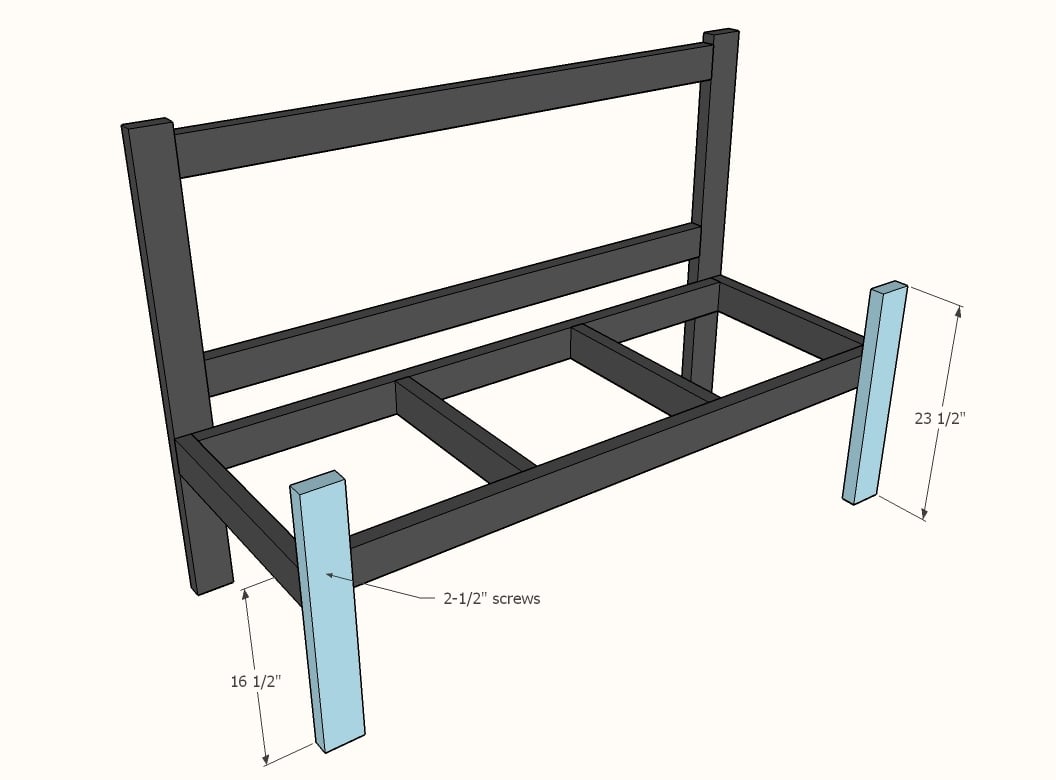
Attach front legs to front of seat framing with 2-1/2" screws.
Step 5
Step 6
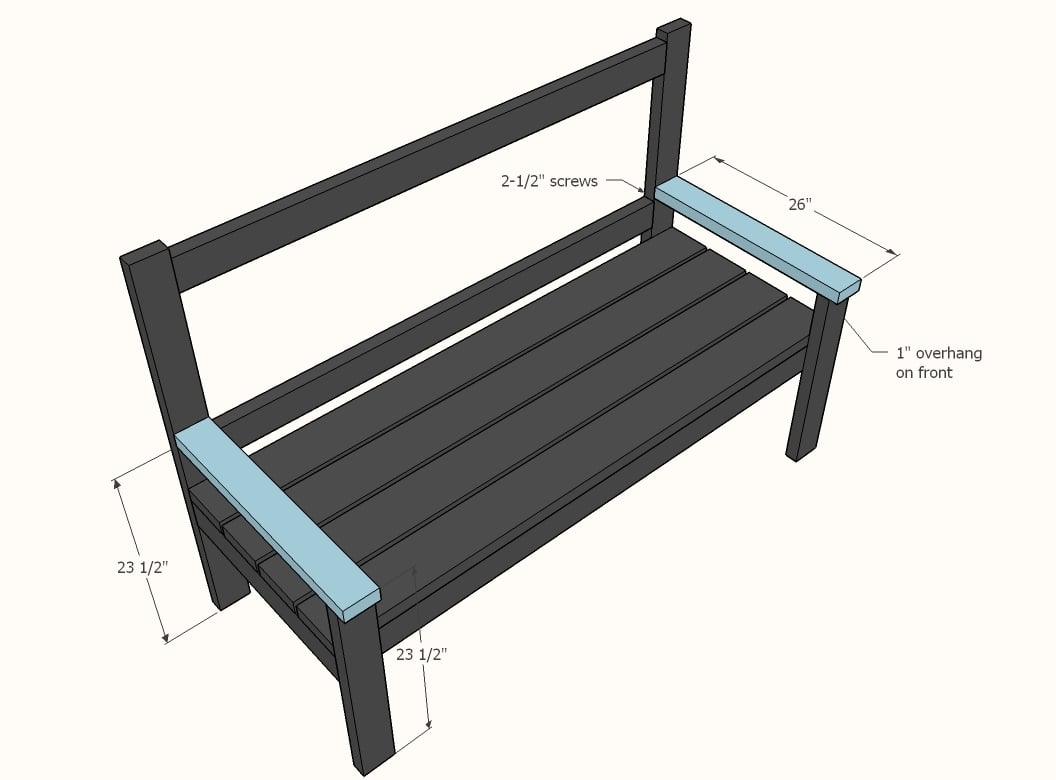
Add the arms. I used 2-1/2" screws from top and back to attach.
Step 7
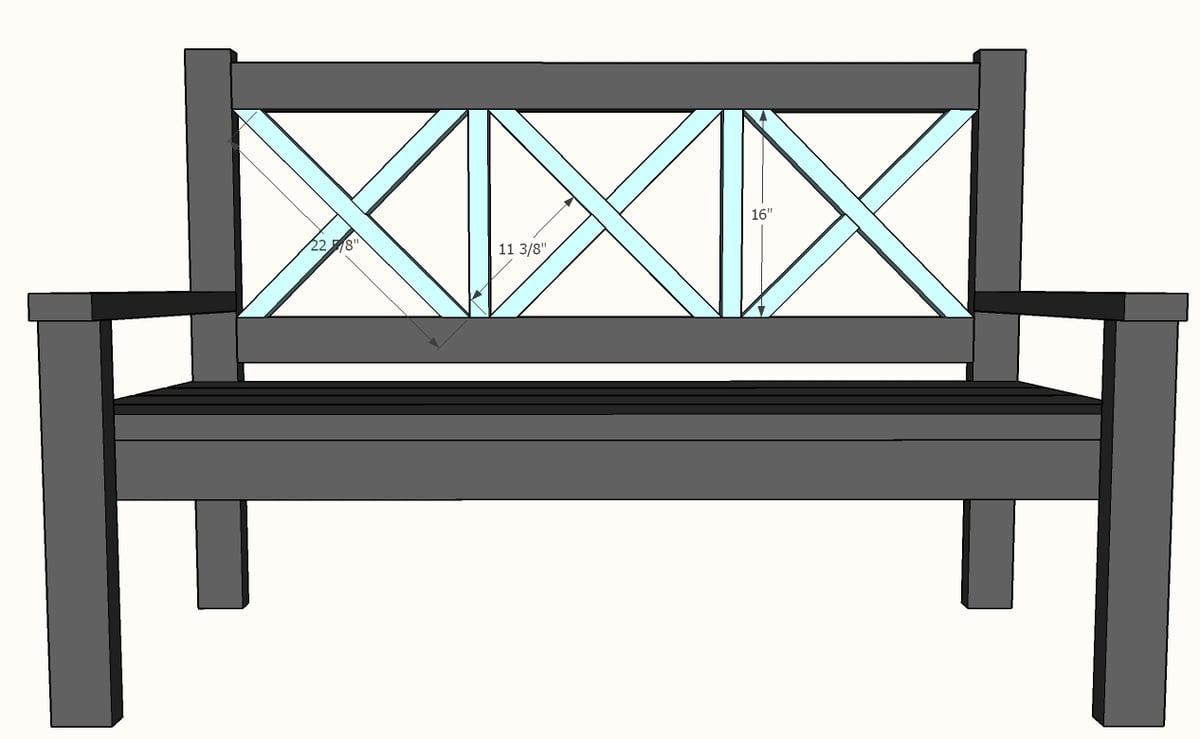
First, add the 2x2s that are 16" long, centering so there is 18-1/8" spaces between the 2x2s and 2x4 back legs.
Then cut out all the pieces for the Xs on the back and fit in the openings. Once they are all fit, mark the pocket holes that need to be drilled on the back side and also the joint (What I do is put an A and A on the two pieces at the joint, then a B and B on the next two pieces at next joint and so on). The reason for this is you want to avoid a situation where your pocket holes are on the front of the bench.
On the 45 degree sides, you can drill a pocket hole, there won't be much material removed, but it will work just fine. Trust me on this one.
Then attach with 2-1/2" pocket hole screws and glue from back side.
It is always recommended to apply a test coat on a hidden area or scrap piece to ensure color evenness and adhesion. Use primer or wood conditioner as needed.


Comments
MduHas
Wed, 07/22/2015 - 22:36
Yes!
I am so excited to build this bench! Thank you so much for posting :)
In reply to Yes! by MduHas
Ana White
Fri, 07/24/2015 - 11:24
You are welcome! Can't wait
You are welcome! Can't wait to see how yours turns out!
In reply to You are welcome! Can't wait by Ana White
MduHas
Thu, 08/20/2015 - 11:33
A few weeks later!
Finally finished my two benches for our front porch! Thanks so much for the plans, Ana!
http://i.imgur.com/RZ3jrZW.jpg
Wendy M
Sat, 11/21/2015 - 15:34
They look awesome!
They look awesome!
In reply to A few weeks later! by MduHas
Anat Zach
Mon, 01/09/2017 - 07:37
It looks great!!
Well done!
dcbones
Sat, 10/30/2021 - 11:01
Needing a bench for my…
Needing a bench for my daughter. What modifications if any did you make to the little bench? How long is it? Looks really good!
handmadewithash
Wed, 07/22/2015 - 22:54
I love the color of this
I love the color of this bench!
Lady Goats
Thu, 07/23/2015 - 12:37
Ohhh, this is so great!
It's PERFECT! I love this bench. I also love the new rustoleum chalked paints. That Raspberry is killin' me, here!
Misslizzy
Fri, 07/24/2015 - 05:50
Is there a reason you used
Is there a reason you used the chalk paint over another paint?
In reply to Is there a reason you used by Misslizzy
Ana White
Fri, 07/24/2015 - 10:54
Chalk Paint
Hi Misslizzy, chalk paint is designed for use on furniture. It doesn't need a primer and is easy to distress. It's also a very matte finish so you can sand for either distressing or creating an ultra smooth and even coat. Then add a clear coat on top. I feel like there's just more control when you use a chalk paint over a wall paint. Hope this helps! Ana
Misslizzy
Mon, 07/27/2015 - 06:09
Thanks!
Thanks!
abbymarie1226
Sat, 08/06/2016 - 11:39
outdoor use?
Have you ever used this paint for outdoor furniture? I saw that it's labeled for indoor use. I have a porch that is covered but wind does blow rain onto it at times. Think it will be a problem? Thanks!
Mrs_Sib
Sun, 08/09/2015 - 19:04
Yay!!
I love this and I am starting it tomorrow!!! My first build!!! I knew I had to build it as soon as I saw it! ❤️ Thanks for posting the plan!!!
Ana White Admin
Mon, 08/10/2015 - 07:56
Super!
We can't wait to see your first project!
Emilynhok
Thu, 10/01/2015 - 14:36
Xs
Are there any good tutorials on getting the x's in? I'm stumped! Mine have gaps and are not lining up just right.
Tsu Dho Nimh
Sat, 10/03/2015 - 09:28
Do NOT cut the diagonals
Do NOT cut the diagonals according to any tape measure. Use the finished back to measure the diagonals.
Make the back with the uprights, checking for square and clamping to keep things square.
Then lay the back over the lumber for the diagonal, lining up the first diagonal. Mark it and cut it just outside the lines (you have to allow for the saw "kerf" - the amount the blade removes) so it will barely slide in. You might have to slice off a teensy bit.
Do the longer duiagonals, then repeat for the short ones.
Emilynhok
Fri, 10/09/2015 - 09:01
Thank you!
thanks so much! It turned out perfect! Loving this bench! Love the size and everything about it!
Emilynhok
Fri, 10/09/2015 - 09:01
Thank you!
thanks so much! It turned out perfect! Loving this bench! Love the size and everything about it!
Anat Zach
Mon, 01/09/2017 - 07:39
It looks great!!
Well done!
RJ92179
Sun, 05/31/2020 - 21:21
Hello!
I’m starting to build this bench. I’ve already built a few of the Farm house tables. I will post pictures when I’m done. 😊
haleyymarks
Mon, 08/31/2020 - 10:00
Is there an alternative diy…
Is there an alternative diy guide for a smaller bench?
rebecca.c.haddox
Sun, 07/11/2021 - 10:23
what was the approximate…
what was the approximate cost of materials on this bench?
zericon
Sat, 07/02/2022 - 15:20
Great bench
Just built one. Thank you for the plan. I now have 3 of my neighbours asking me to make them one.