


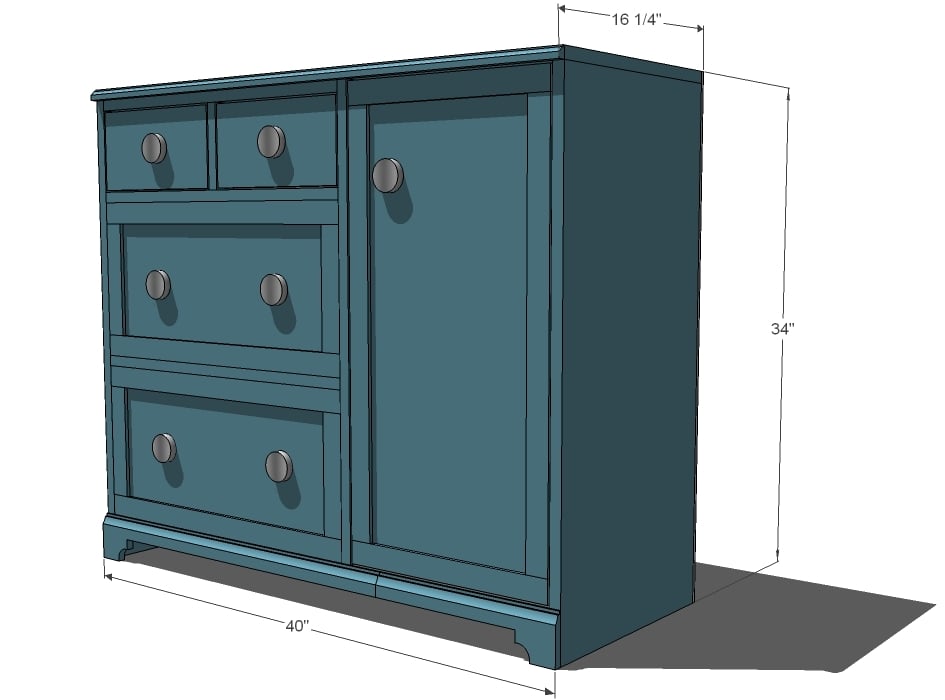
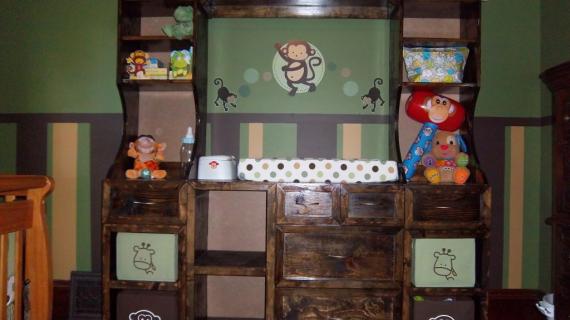
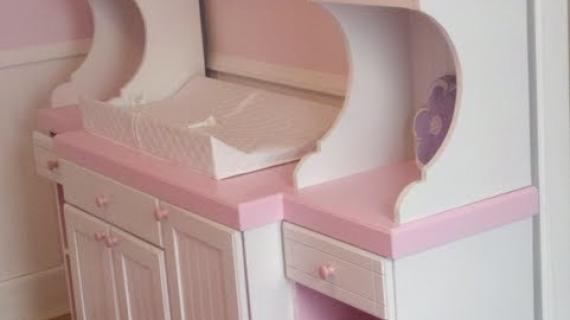
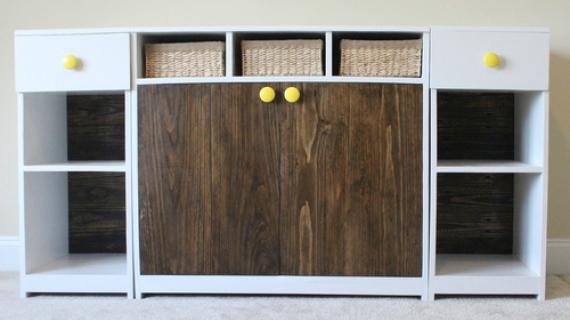
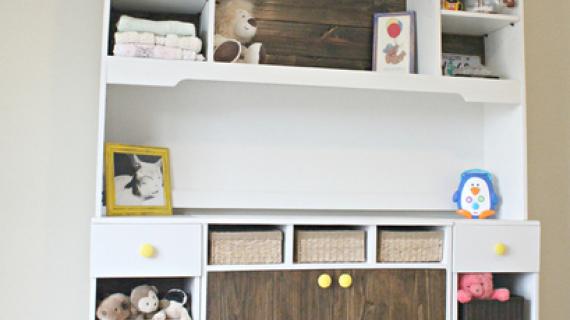
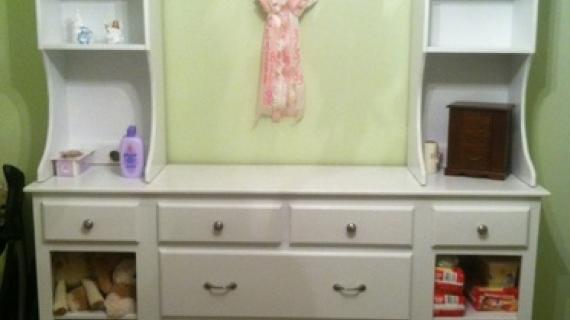
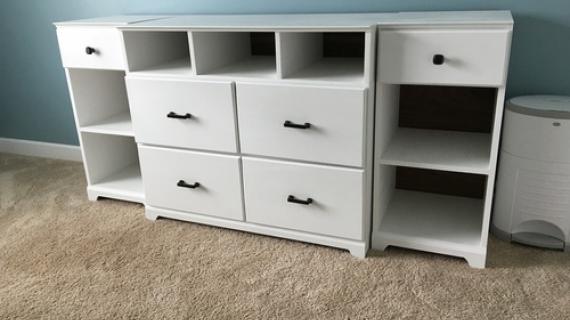
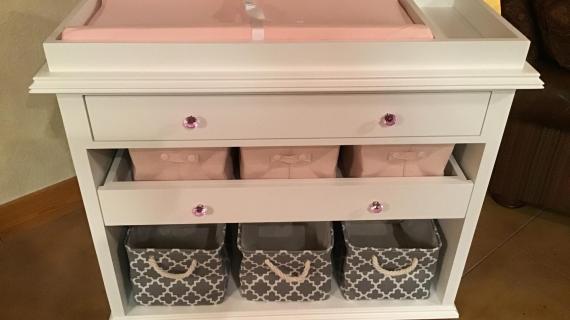
Featuring three drawers, one cupboard and a large changing area, this changing table will meet the needs of your new baby, while still looking beautiful. Works with the rest of the Madeline Changing Wall. Special thanks to our readers for sharing their photos.
Preparation
2 Sheet of 3/4″ MDF or 3/4″ A1 Plywood, cut into 1×16 boards
3 1/4″ Floor trim or base moulding
Knobs
Shelf Pins (for adjustable shelves)
Cutting List for Box


Work on a clean level surface. Use necessary safety equipment and precautions. Always check for square after each step. If you are working with MDF, use drywall screws and predrill the entire distance of you screw shaft to avoid splitting the MDF. Always predrill and countersink your screws. Mark joints on both sides of the joint so you know where the joint is and where to fasten the joint. Keep outside edges flush. Do not forget the glue
THIS IS AN ADVANCED PLAN and will be easy to make a mistake. Please do not attempt as a first project.
Instructions
Step 1

Build the Box. Begin by attaching the inner dividers together, as shown above. Start on the inside and work outward. It always is a good idea to mark out your joints on both the inside and the outside of your boards so you know where to line up your boards, and where to fasten. Also in this step, if you would like to add a shelf to the right compartment, cut the shelf (or shelves) at 15″ from 1×16 scraps. You can also attach later using shelf pins to create adjustable shelves. Remember that your boards are 3/4″ thick. Use 2″ screws and glue.
Step 2

Back. Square up your project and add the back. The easiest way is to use lots of glue and 1 1/4″ brad nails (either with your pneumatic nailer set on a lower pressure setting to keep the nails from shooting through) or with a good ole hammer. You can use the scraps from the back as your door and drawer face rails and stiles.
Step 3
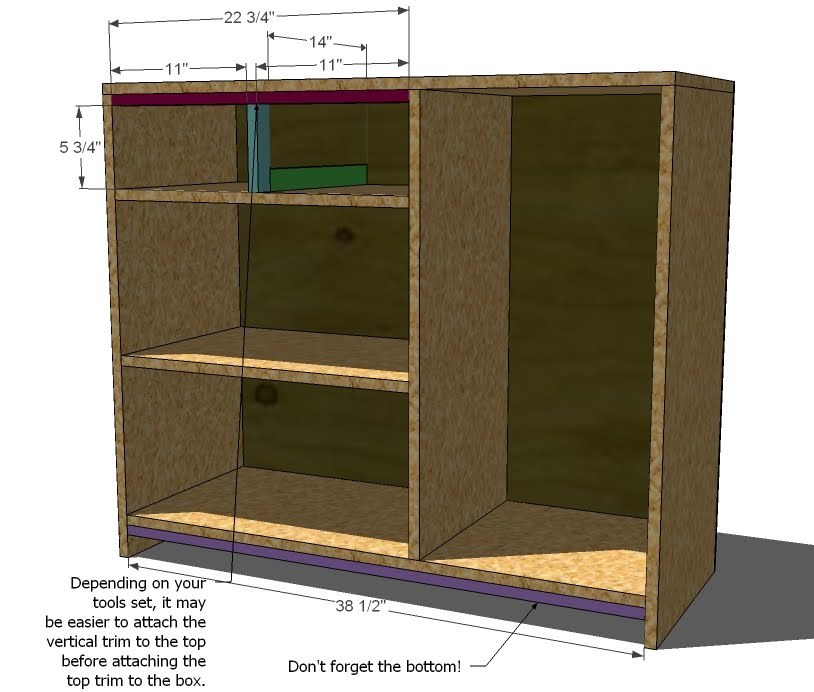
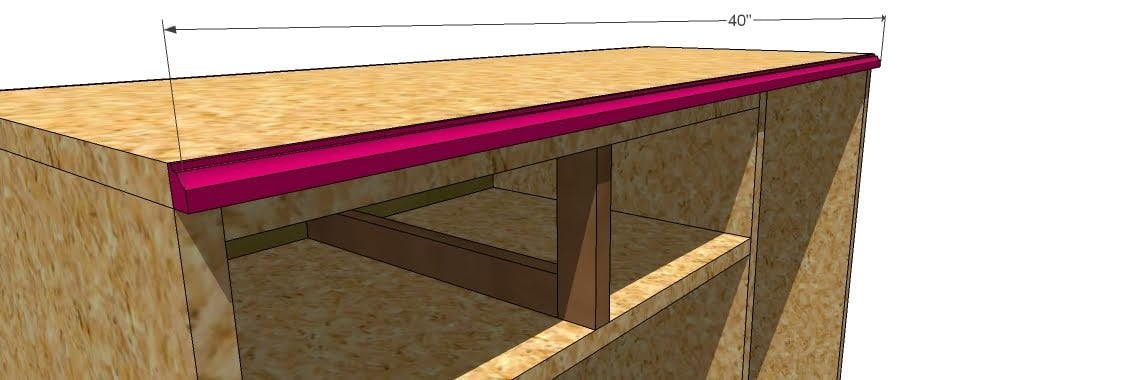
1×2 Inner Boards. Begin by building the top drawer divider system by fastening the blue, green and pink boards together. Use 2″ screws (you won’t need many). Then fasten the Green and Pink boards to the box, usine 1 1/4″ screws and glue. Fasten the boards from underneath to hide your screws. Don’t forget the bottom board!
Step 4
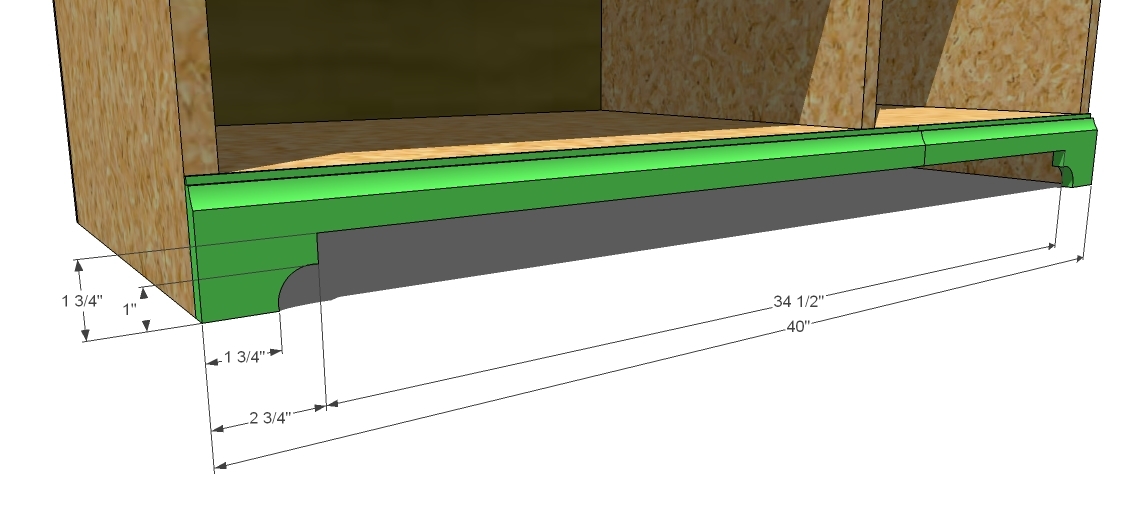
Base Moulding. Cut your bottom moulding and attach, using 1 1/4″ nails and glue. Then cut out the moulding as shown above using a jigsaw.
Step 5
Step 6
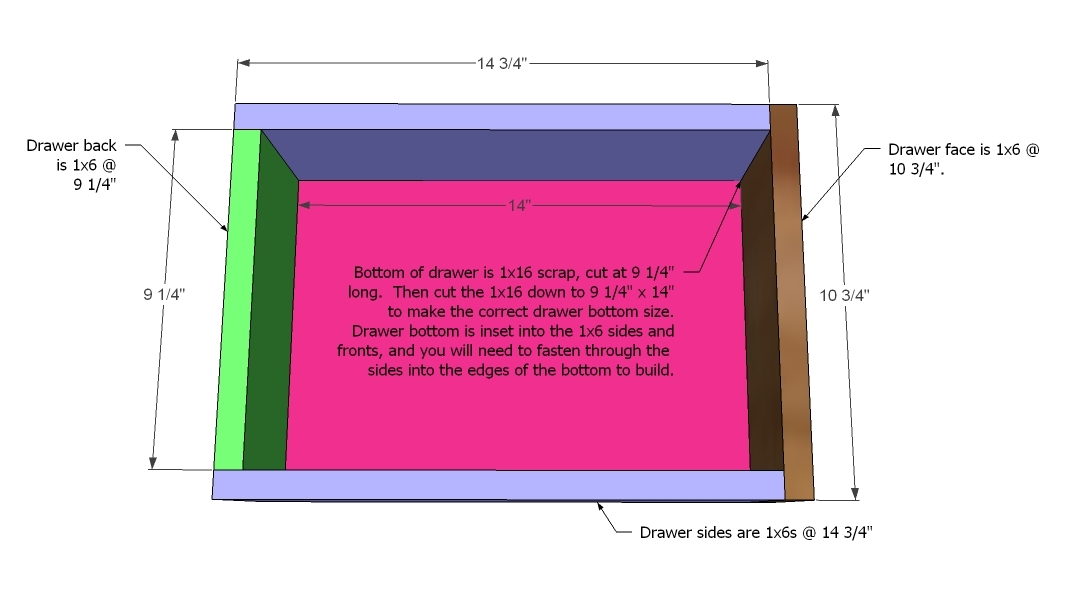
Small Top Drawers
Because these drawers are so small, I have decided to not add drawer slides to the drawers. If you would like to add drawer slides, you would need to build the drawer 1″ less on the sides to account for a 1/2″ side mount drawer slide. Build 2 Drawers.
Construct your drawer by first fastening the back to the bottom using 2″ screws. Then fasten the sides to the bottom and the back using 2″ screws and glue. Then attach the face. I like to fit the drawer into the drawer housing without the face attached, then line the face up with the drawer and fasten in place centering the face on the opening.
Step 7
Large Bottom Drawers
These drawers are quite a bit larger, and you will need to use drawer slides. I have designed these drawers with undermount slides to make them easier to install, but you could also use side mount slides. You would then need to make your drawer 1″ less wide to accommodate 1/2 clearance side mount slides.
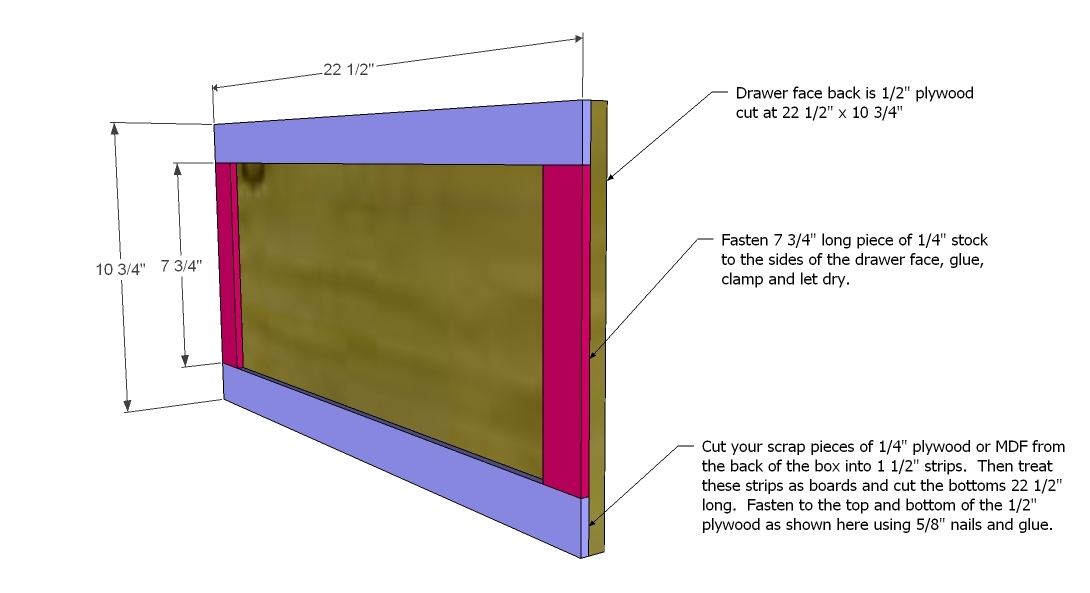
1. Drawer Face. Build your drawer face as shown above. Use glue. Clamp and let dry flat, stacked on top of each other, on a level surface, with a heavy object on top.
Step 8
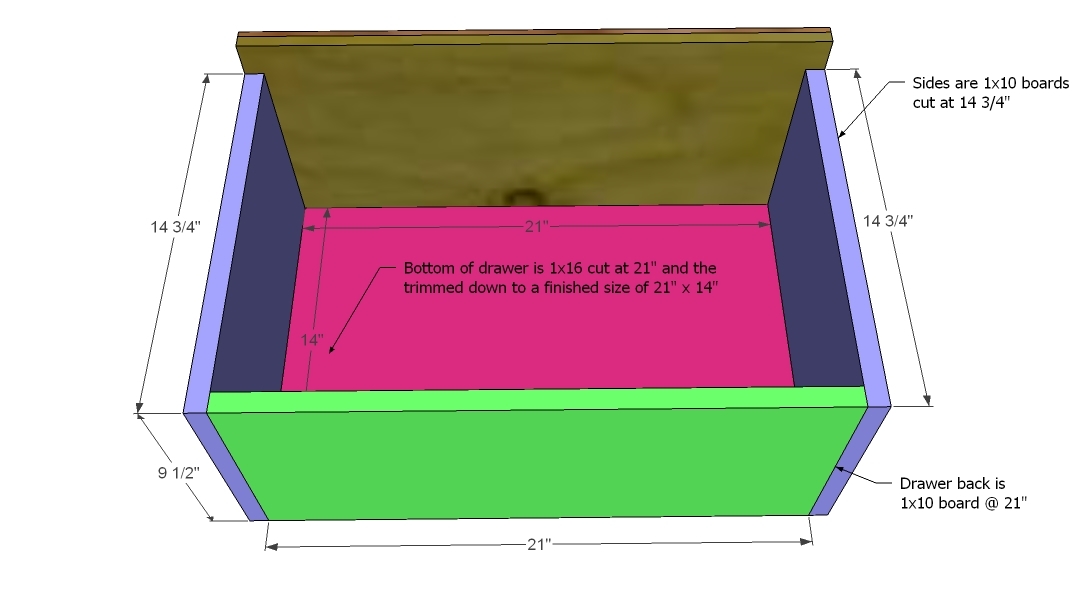
Drawer Box. First cut your drawer bottom using a 1×16 @ 21″, and then trim the 1×16 down to a finished size of 21″ x 14″. By doing this, you will get a more square drawer bottom. Then fasten the back to the bottom using 2″ screws, then the sides. Use glue. Mount the faceless drawer onto the undermount drawer slides. Push the drawer all the way into the drawer housing, adjust so that the faceless drawer is inset 3/4″. Set the face on the drawer box and screw in place, centering on the opening.
Step 9
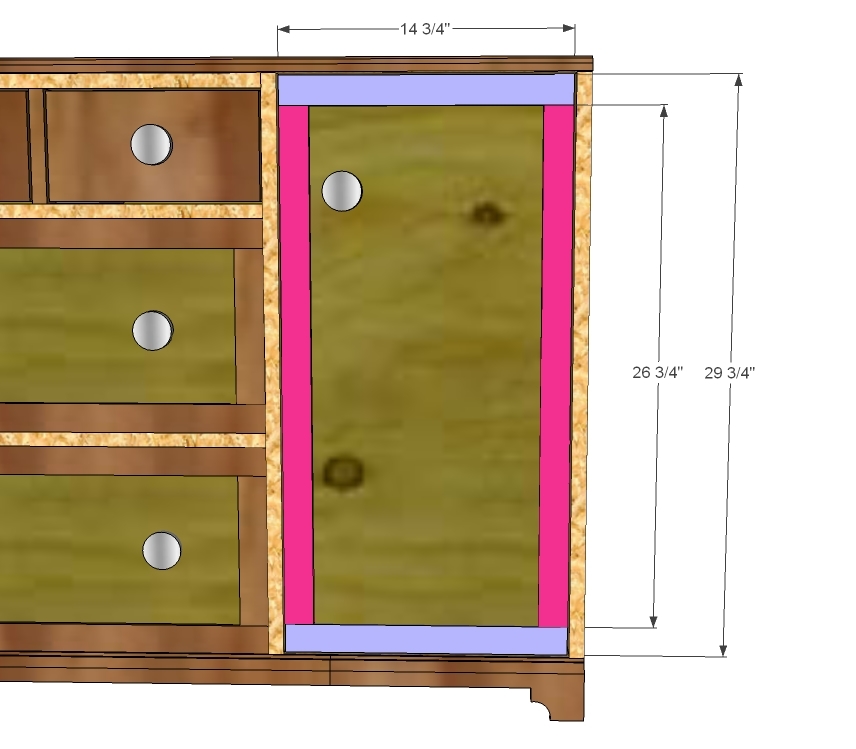
Large Door
Build the Large Door Face as you did the large drawer faces.

Comments
Emily (not verified)
Sat, 04/17/2010 - 00:49
YES! Thank you, thank you,
YES! Thank you, thank you, thank you!
I think you'll be get a lot of Bragging Board pictures from readers (including me!) very soon :)
Dana Enzor (not verified)
Mon, 04/19/2010 - 03:30
Yay!! Thanks so much! I can
Yay!! Thanks so much! I can now get started on this system for a friend that I have been eyeing for her for months!!
Amy Carter (not verified)
Mon, 04/19/2010 - 06:20
Can I just tell you how
Can I just tell you how freaking happy I am that I found your blog??? My husband is a wanna-be handyman and I like to help (sometimes). I really really really want that pottery barn changing system for when we have our first baby (sometime next year, hopefully), but we would never be able to afford it. THANK YOU for taking the time to make all these detailed plans and giving them to us for free!!! Now our nursery will be inexpensive, beautiful, and functional.
geoff simpson (not verified)
Mon, 08/09/2010 - 16:19
Ana...you complete me!I just
Ana...you complete me!
I just completed the dresser/change-table portion of this build with very few changes. If it wasn't for your cutlist and instruction, i couldn't possibly have completed it.
Kelsey (not verified)
Sat, 01/22/2011 - 12:23
Ana, i was looking at this
Ana,
i was looking at this and wanting to maybe make it a little different and add another set of the drawers to one side and make it a dresser (so it had 4 small drawers, 4 large drawers, and the cabinent), and my husband and i were wondering if you left room on the drawers for drawer glides to be used?
Guest (not verified)
Mon, 01/16/2012 - 05:48
Tutorial Missing Links
Hi Ana - I tried to follow along to where the rest of the change table was for the tutorial but couldn't find a link - any chance you could direct me to the right place?
thanks a bunch!
Steph
Guest1 (not verified)
Sun, 07/15/2012 - 07:41
Drawers
I am currently building this changing table and realized the drawers in your plans do not match what you have done in your pictures. Do you have any size revisions that I can reference to be sure I am building correctly? I want to match the way it was done in your pictures. Thanks!
ASmith317 (not verified)
Tue, 08/14/2012 - 10:07
side hutchs for changing table
Ana can u please send me the plans for the side hutchs for some reason they are not pulling up through the link. i would be sooo greatful!!!
thanks
Rachel Mills (not verified)
Thu, 09/20/2012 - 11:41
Madeline Side Hutches for Changing Table
I am very anxious to start this project for my baby girls room! I cannot get the link for the side hutches to pull up it says that the link is unavailable. :( Is there any way you could direct me to the right place or send them to me? Thanks so much! I love your site!
Sasha Brynn (not verified)
Mon, 10/01/2012 - 16:25
Madeline Changing System
HELP!!! I have all the plans except the SIDE HUTCHES!! I am finally building this project, but I need the rest of the plans!!! Everytime I try to get to the side hutch plans, it tells me 'File Not Found' or 'Webpage Cannot be Found'... It doesn't seem to matter what web browser I use! Can anyone send it or fix the problem!! PLEASE!!!
Jen G. (not verified)
Thu, 12/27/2012 - 14:07
I was having problems finding
I was having problems finding the side hutches as well but a quick Google search led to me a link that works:
http://theme.ana-white.com/2010/03/plans-scalloped-edge-changing-wall-t…
Calmari
Thu, 03/07/2013 - 10:15
Side hutch plans
I am interested in the plans for the side hutches, but following the link gives a 'file not found' error. I tried using the link that Jen G. posted above but got an error with that as well. Any help would be appreciated!