
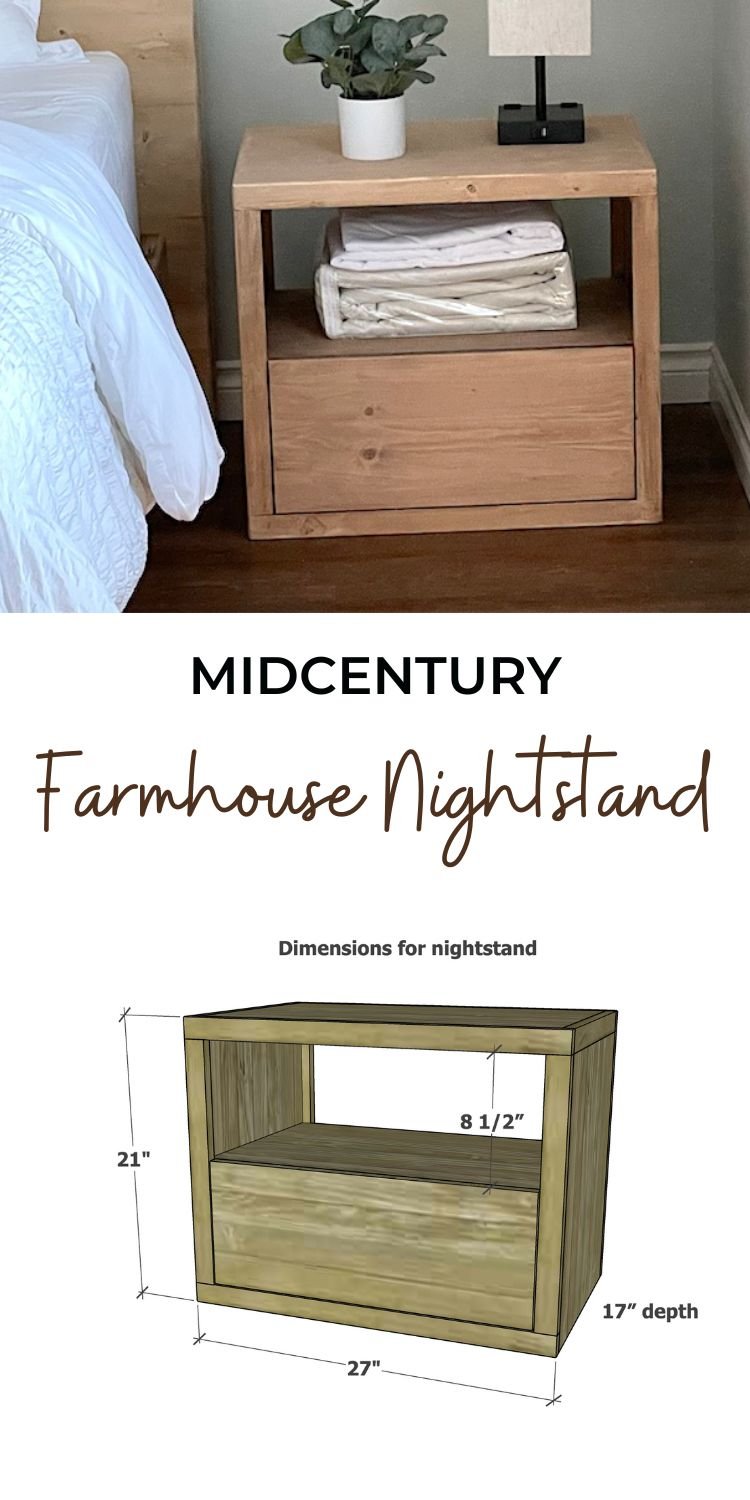
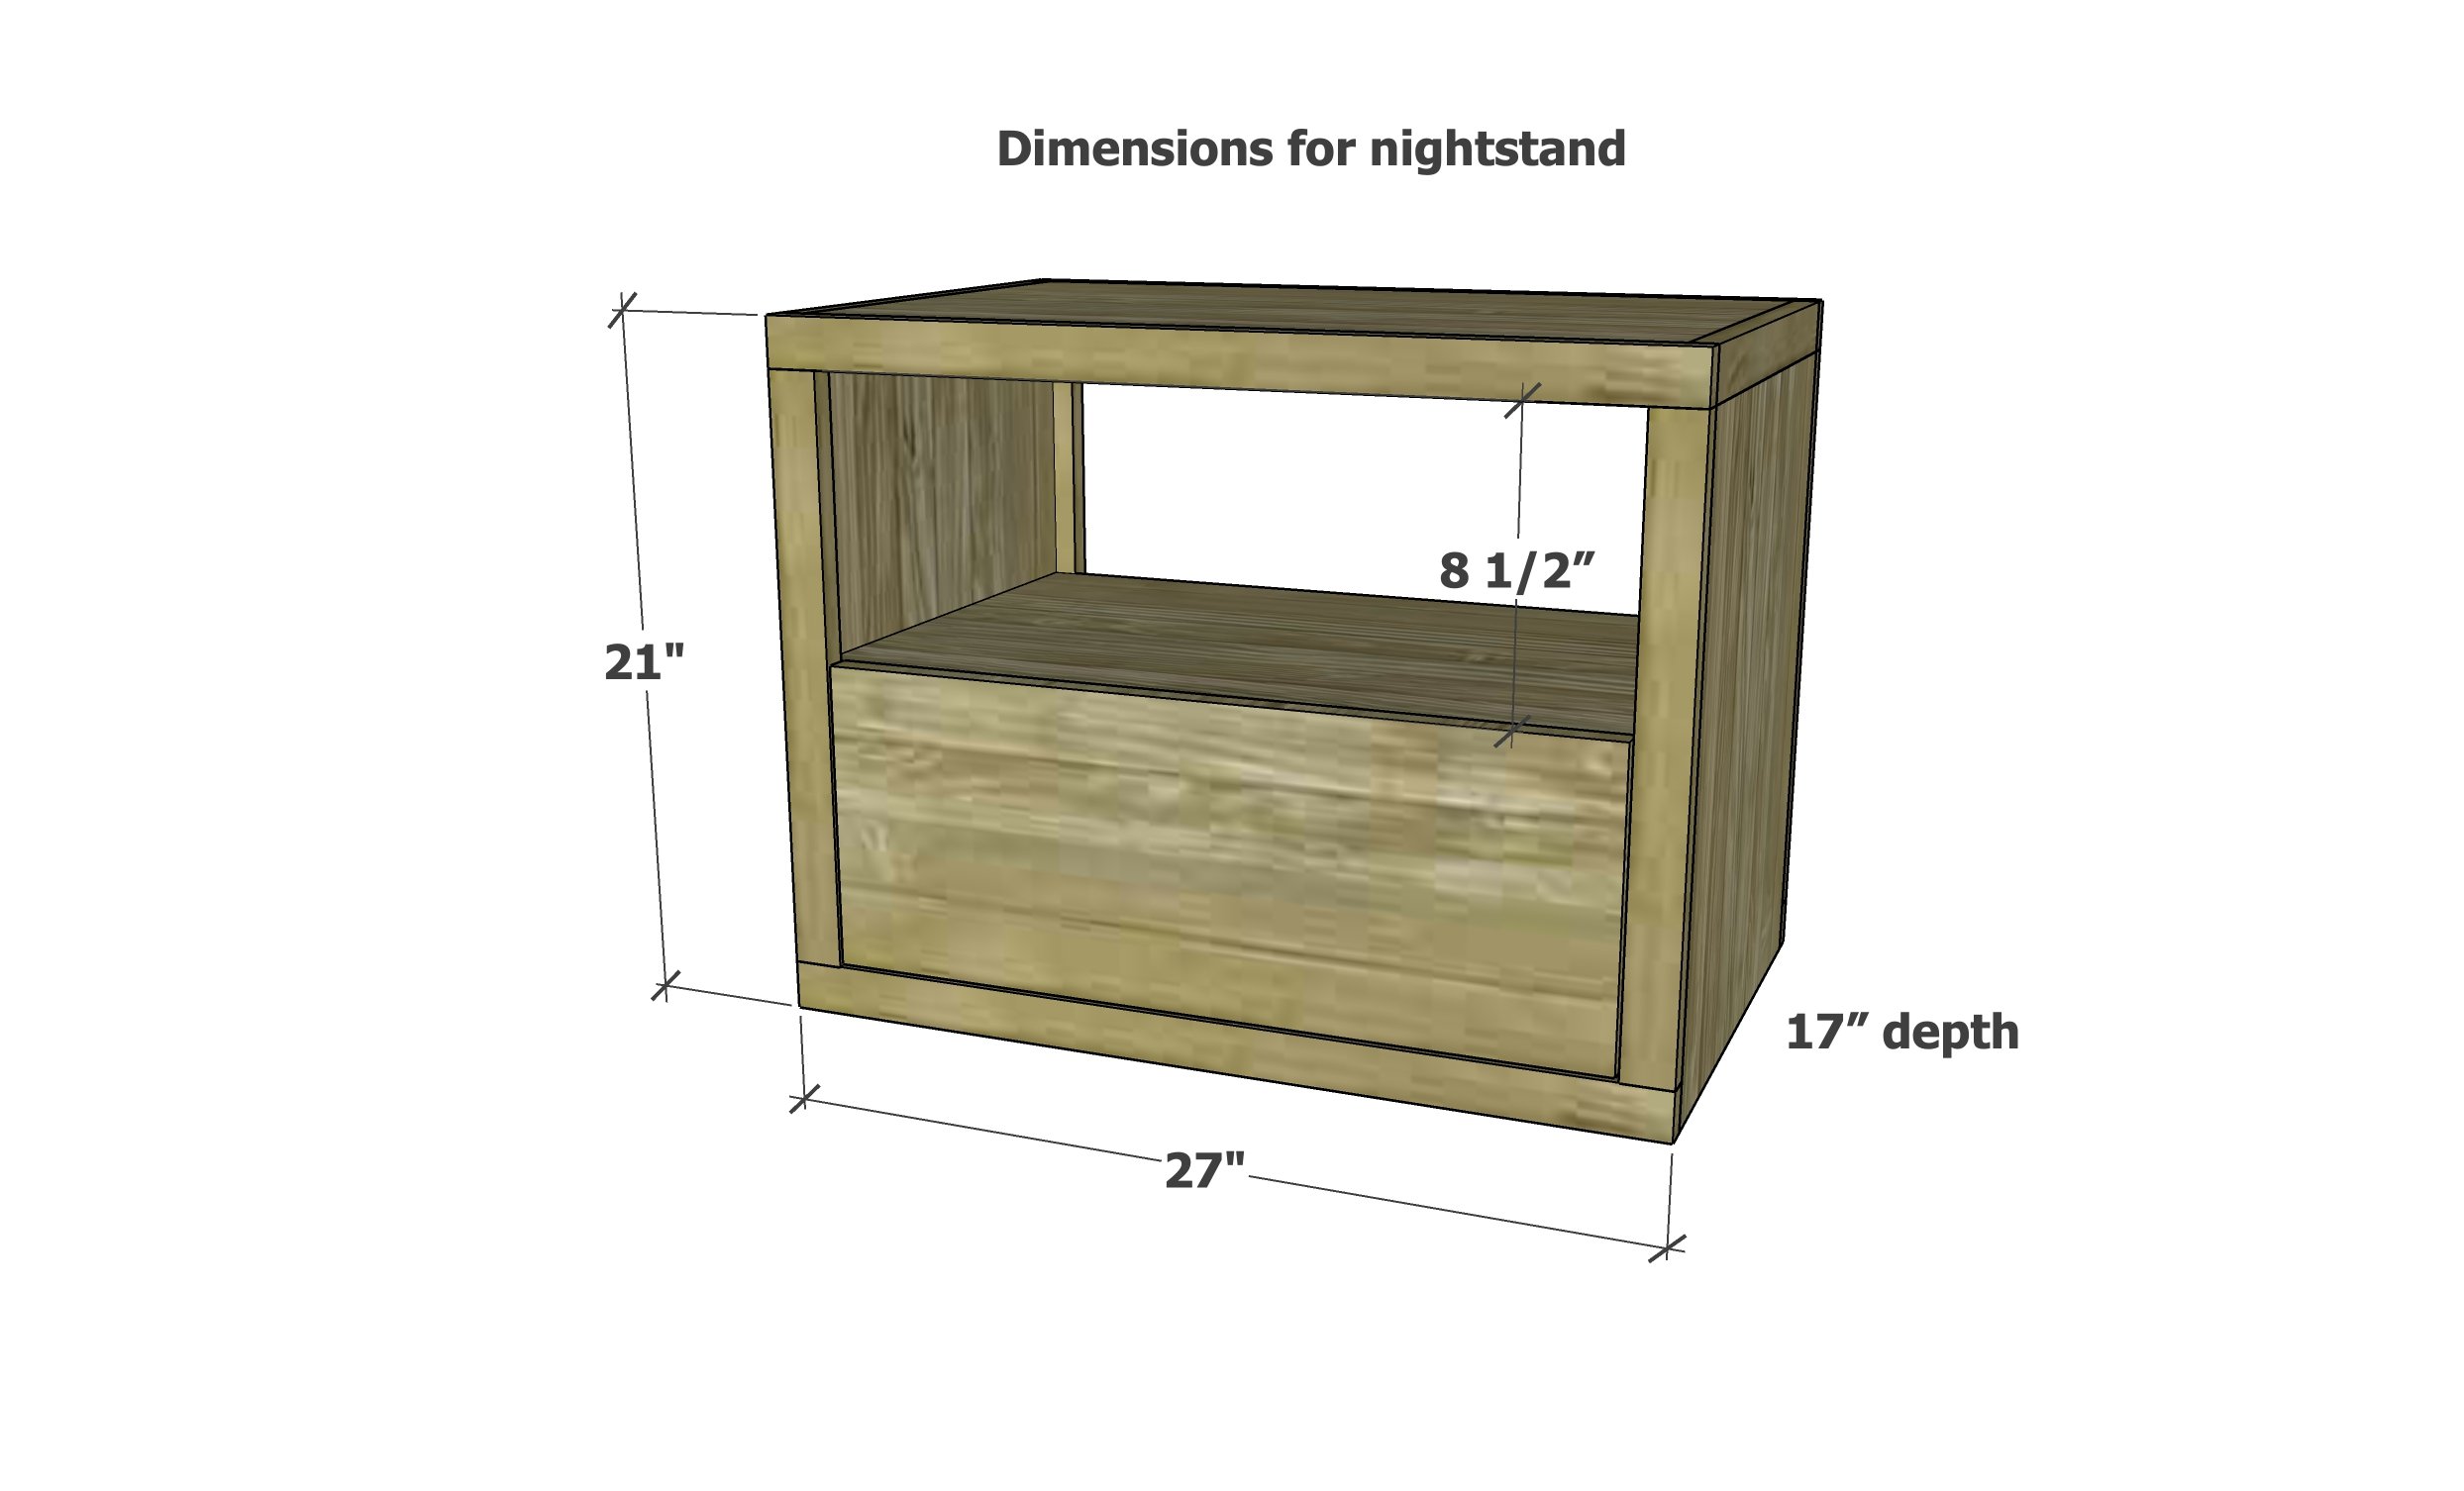
Free plans to build a minimalist modern style nightstand featuring one large drawer and shelf. This is a gorgeous piece, that is easy to build with a miter saw and brad nailer (no pocket holes required). The open back makes it easy to plug in cords, the drawer adds some storage. The case is plywood based but you can also use a pine project panel. Step by step plans include diagrams, shopping list and build video from Ana White.
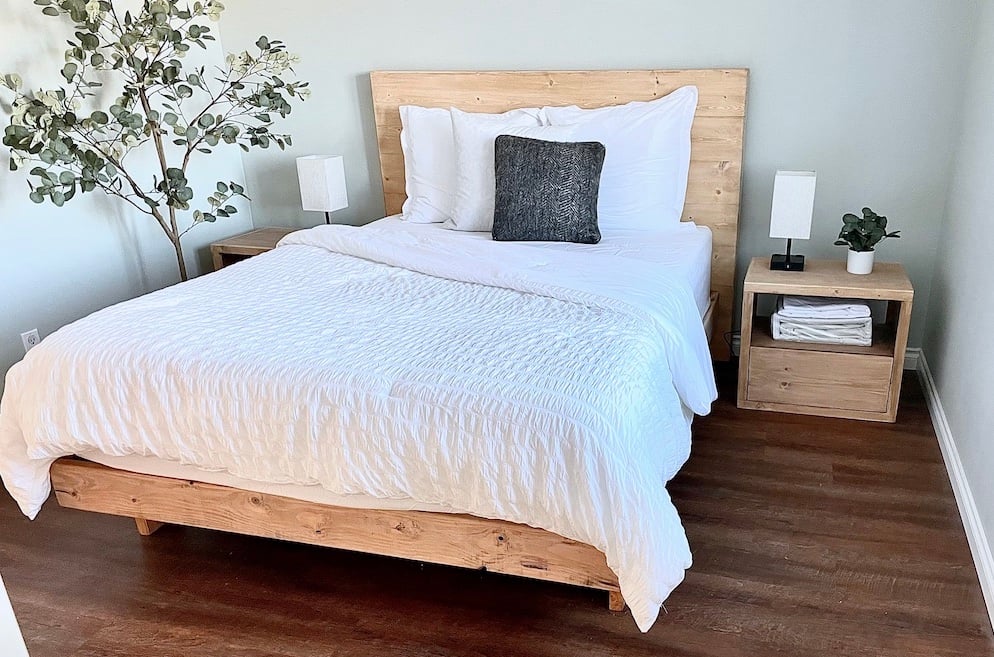
RELATED: Minimalist Modern Bed Plans
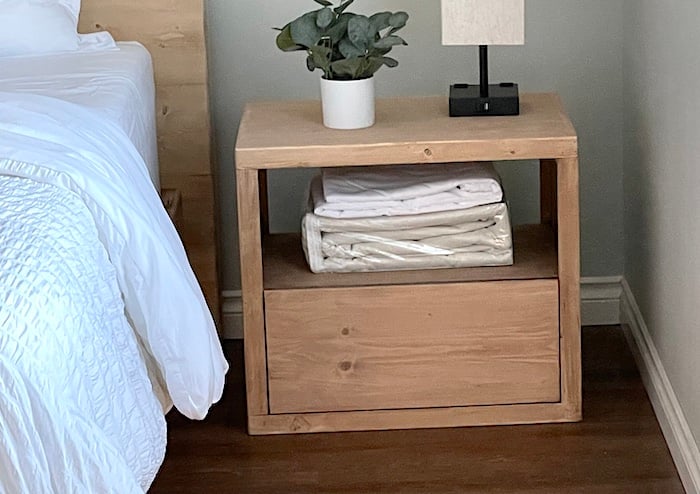
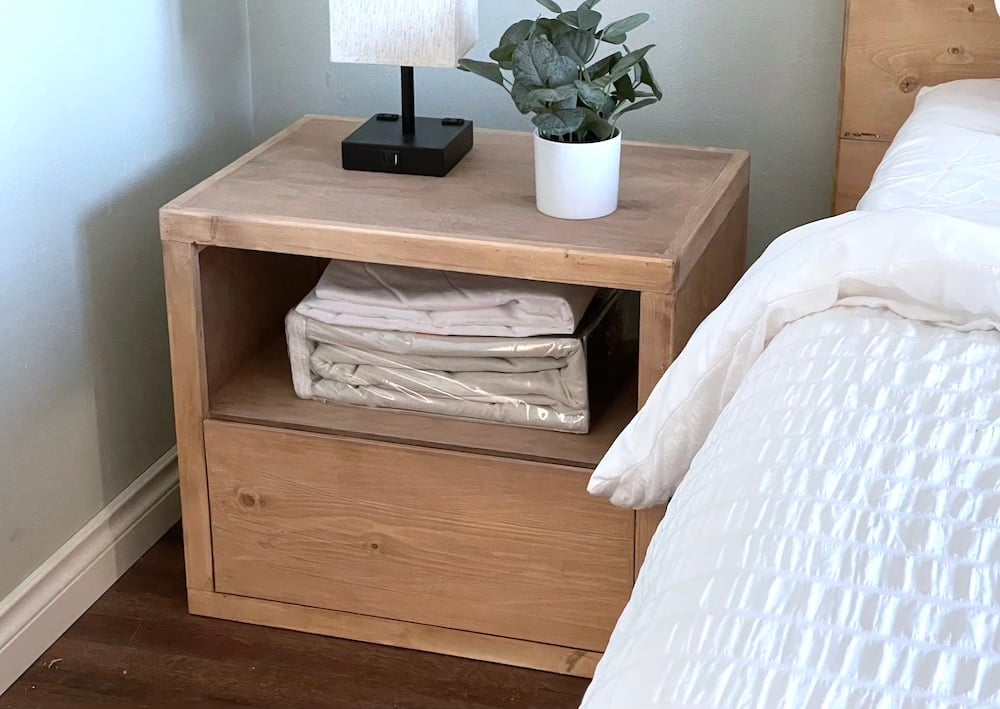
I built these nightstands to match the Minimalist Modern Bed plans! They were super easy to whip out, and turned out beautiful! I love the roomy drawer, the open shelf, and the wide top. If you are looking for inexpensive but nice nightstands with a modern feel, these are the ones!
Watch the Build Video to See How It's Made
The best way to understand how this is made is to watch the quick build video:
Pin For Later!
Preparation
Shopping list is for ONE nightstand
- 1 - 3/4" plywood strip, 15-1/2" wide x 8 feet long
- 3 - 1x2 @ 8 feet long
- 1 - 1x6 @ 8 feet long
- 1 - 1x10 @ 24" long
- 1/4" plywood for bottom is 16" x 23"
- 1-1/4" and 5/8" brad nails
- 1 set of 16" white euro drawer slides (bottom corner mount)
Cut List is for ONE nightstand
- 2 - 3/4" plywood @ 15-1/2" x 19-1/2" - side panels
- 2 - 3/4" plywood @ 15-1/2" x 25-1/2" - top and shelf
- 4 - 1x2 @ 10" - spacers for the drawer slides
- 4 - 1x2 @ 27" - top and bottom trim (rails)
- 4 - 1x2 @ 18" - vertical trim (stiles)
- 2 - 1x2 @ 15-1/2" - side trim on (side rails)
- 4 - 1x2 @ 4" - inside cleats
- 2 - 1x6 @ 16" - drawer sides
- 2 - 1x6 @ 21-1/2" - drawer front and back, should be measured and cut to fit, 2-1/2" less than opening
- 1 - 1/4" plywood @ 16" x 23" - bottom of drawer
- 1 - 1x10 @ 22-3/4" - drawer face


Instructions
Step 1
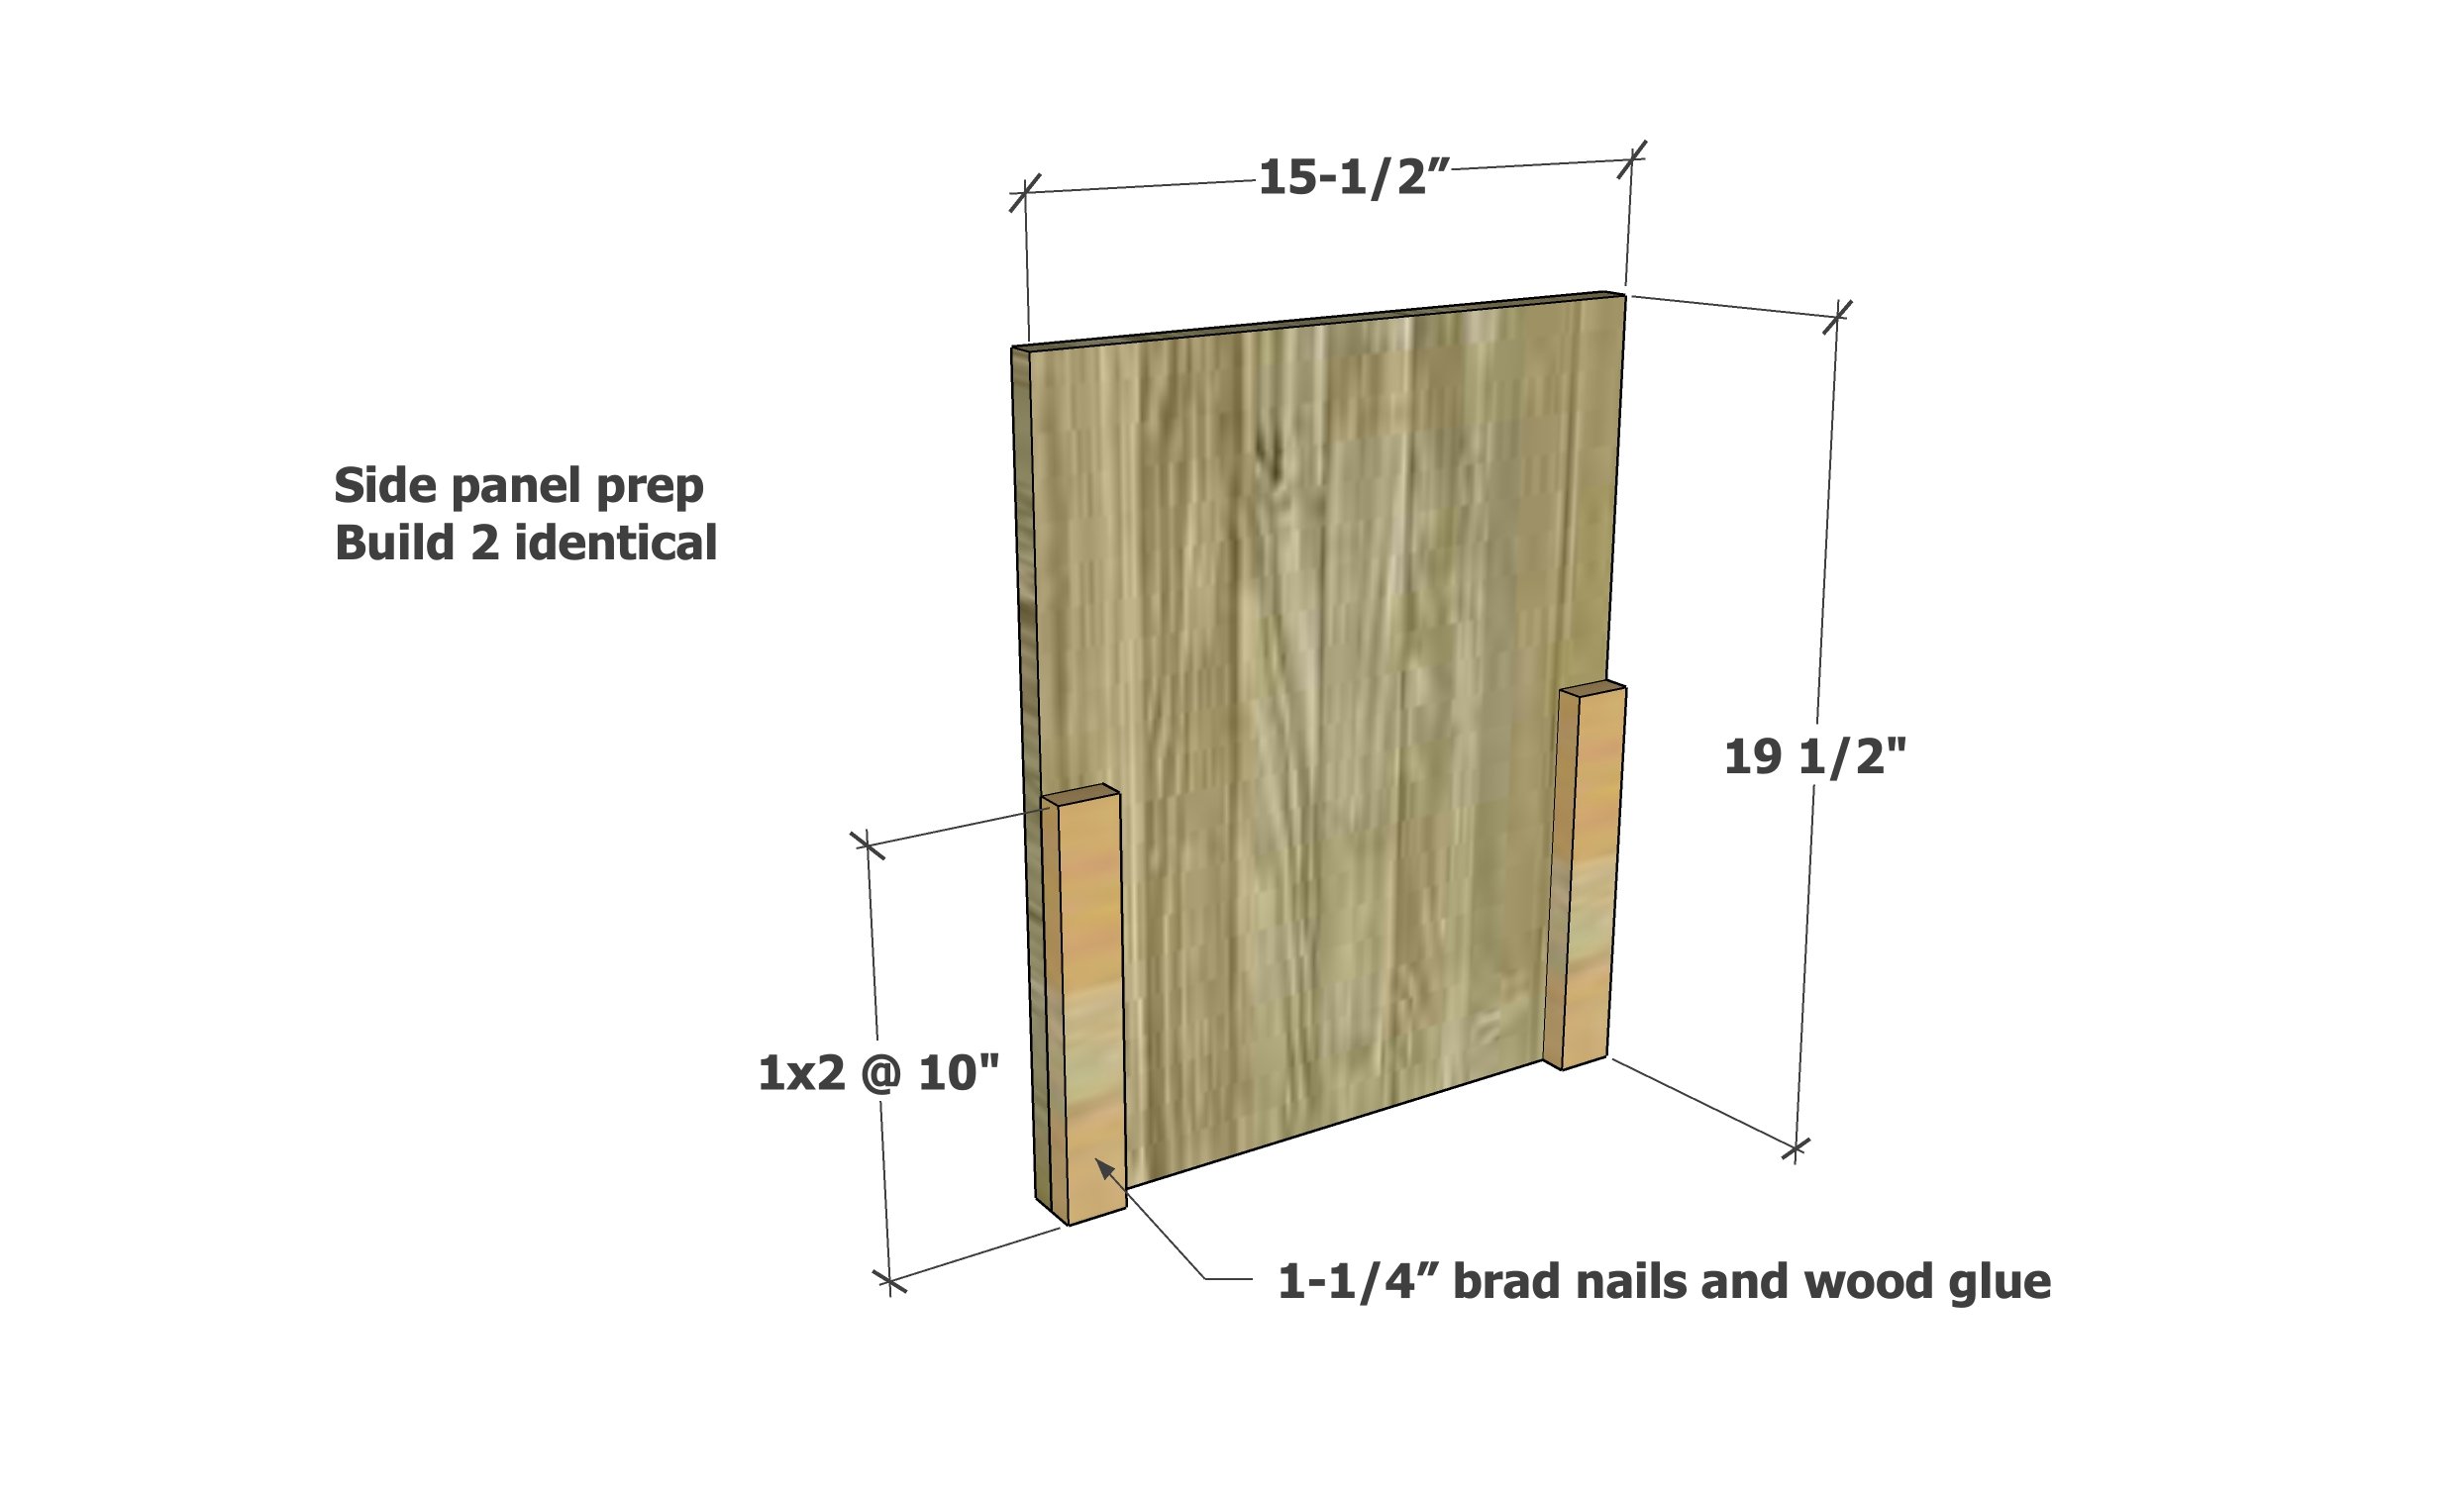
On each of the two side panels, attach with 1x2s with 1-1/4" brad nails and glue. Make sure the outside edges are perfectly flush to the outside edges of the panel.
Do this on both side panels.
Step 2

Attach at the bottom of both side panels the 1x2@ 27" with 1-1/4" brad nails and glue.
Step 3
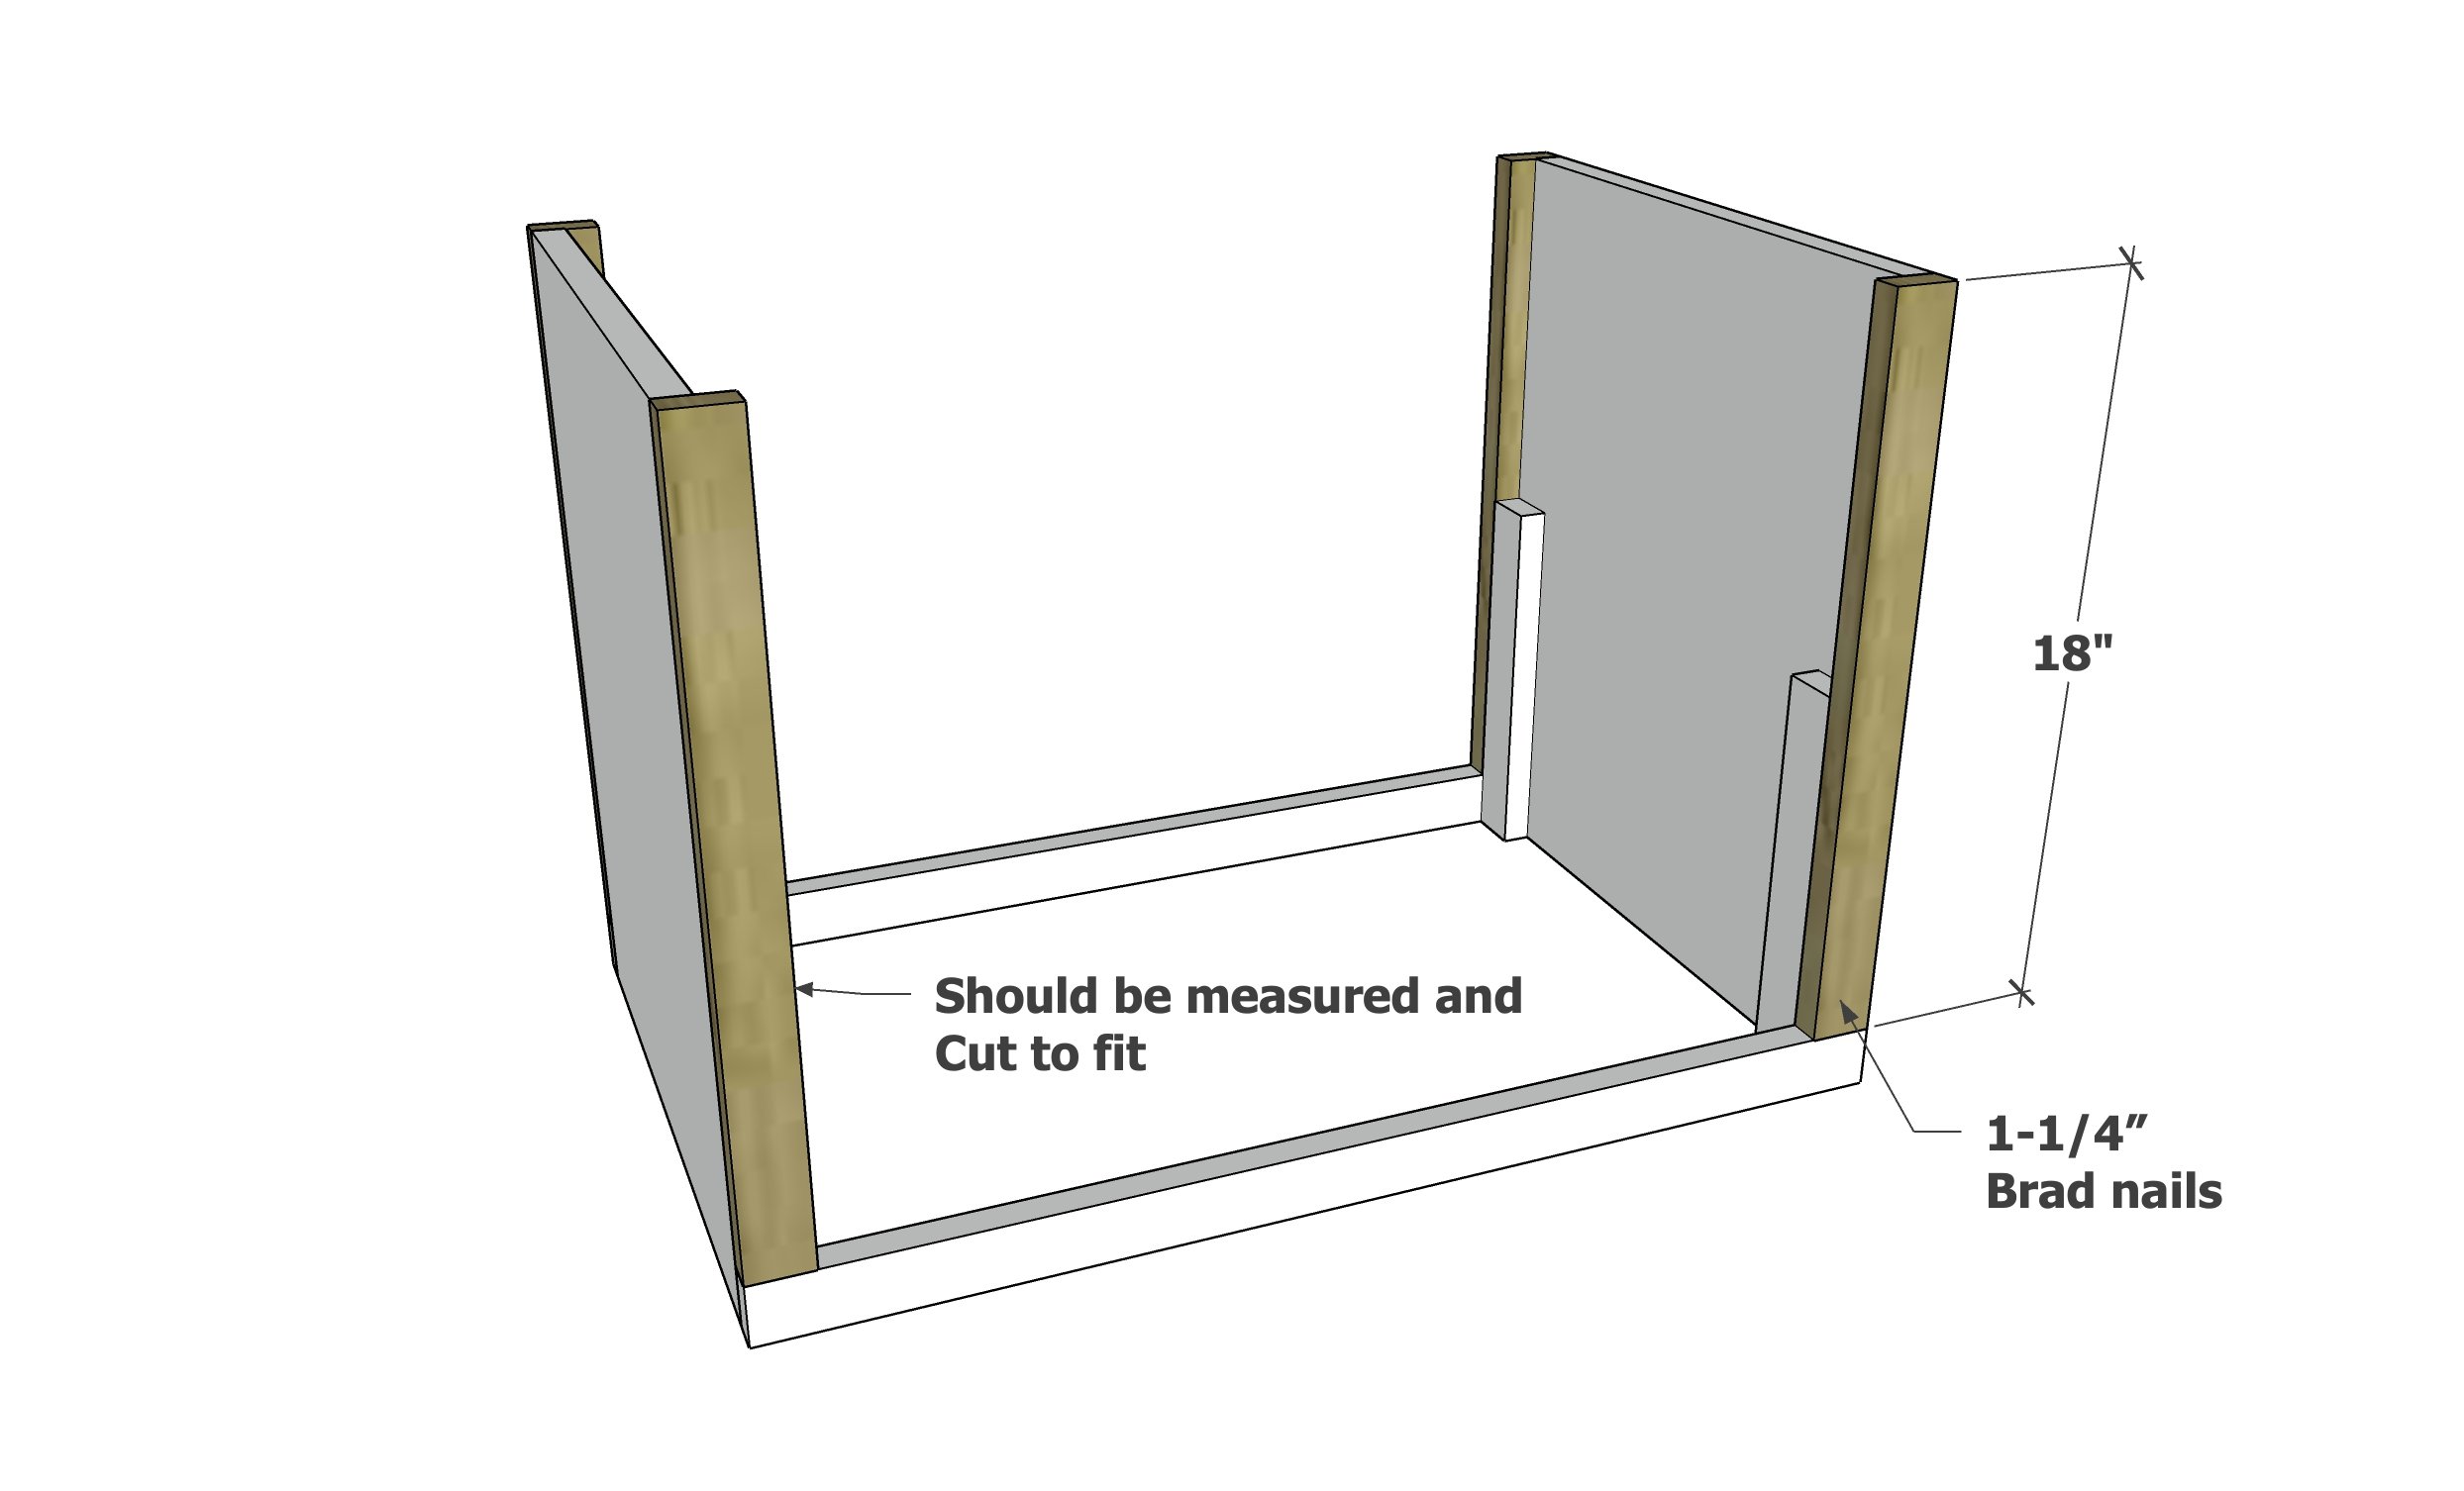
Measure and cut the vertical trim. Attach with 1-1/4" brad nails and glue.
Step 4
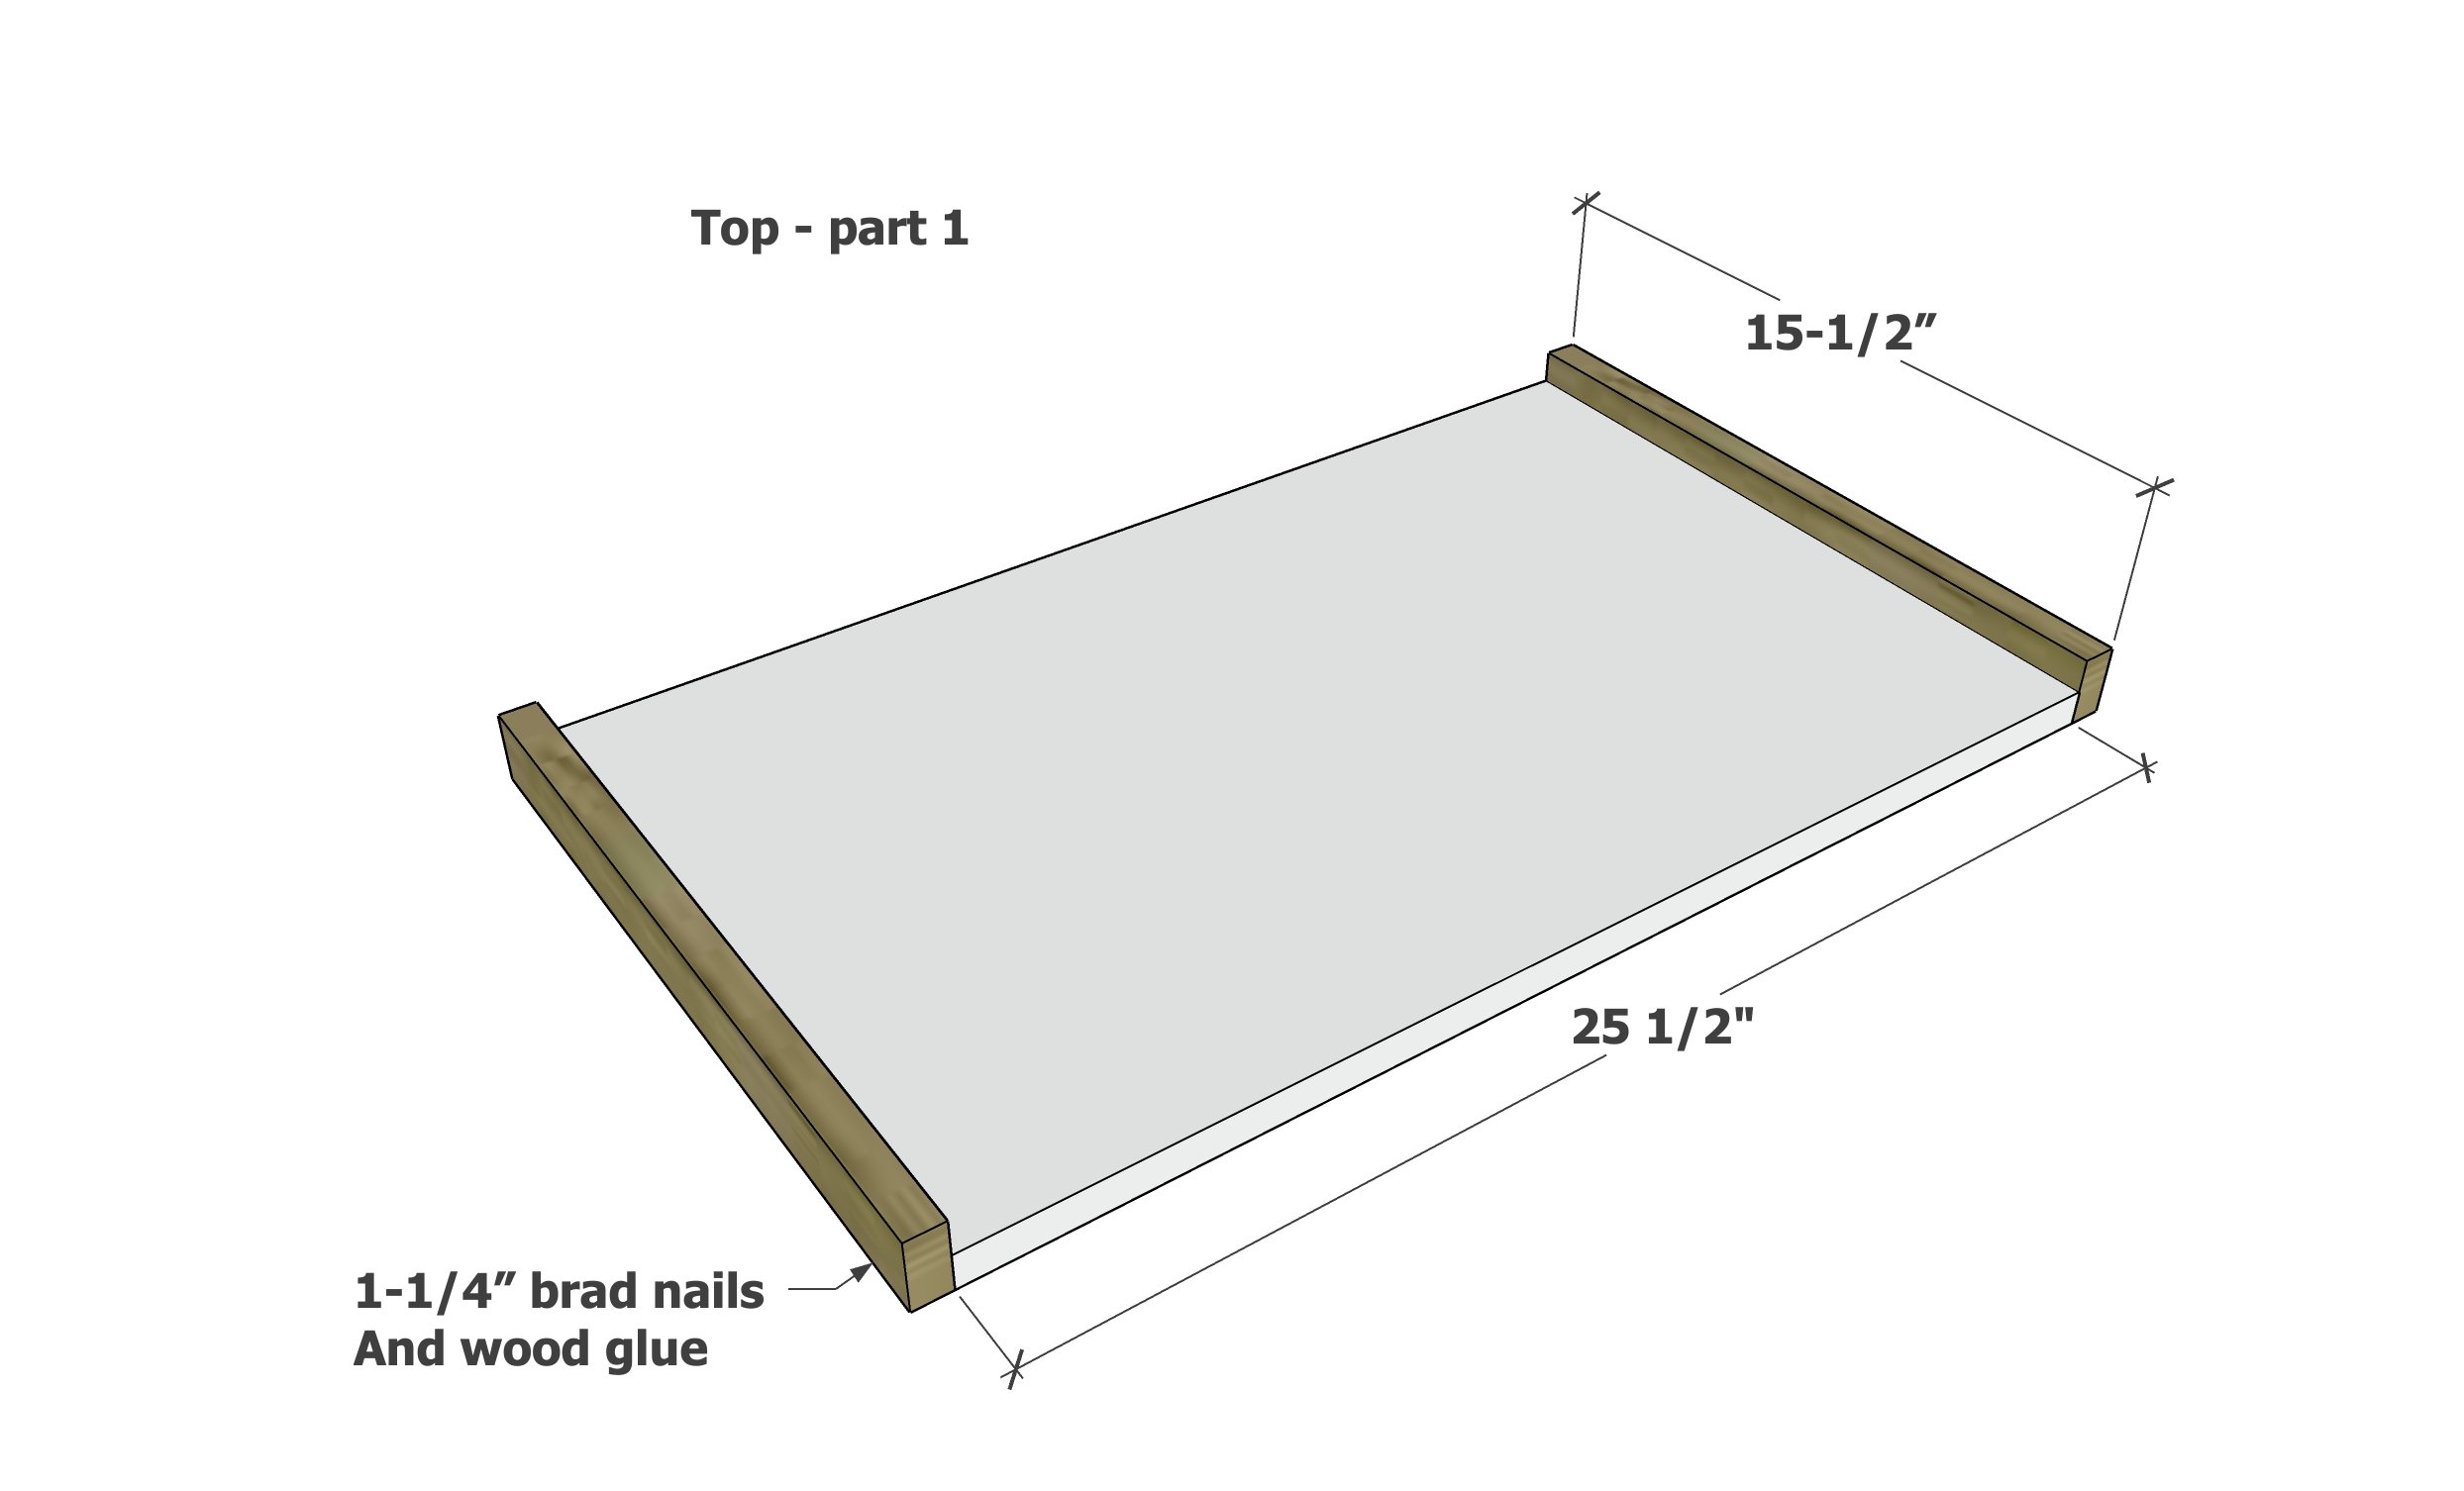
Trim the sides of the top panel with 1x2s @ 15-1/2".
Step 5
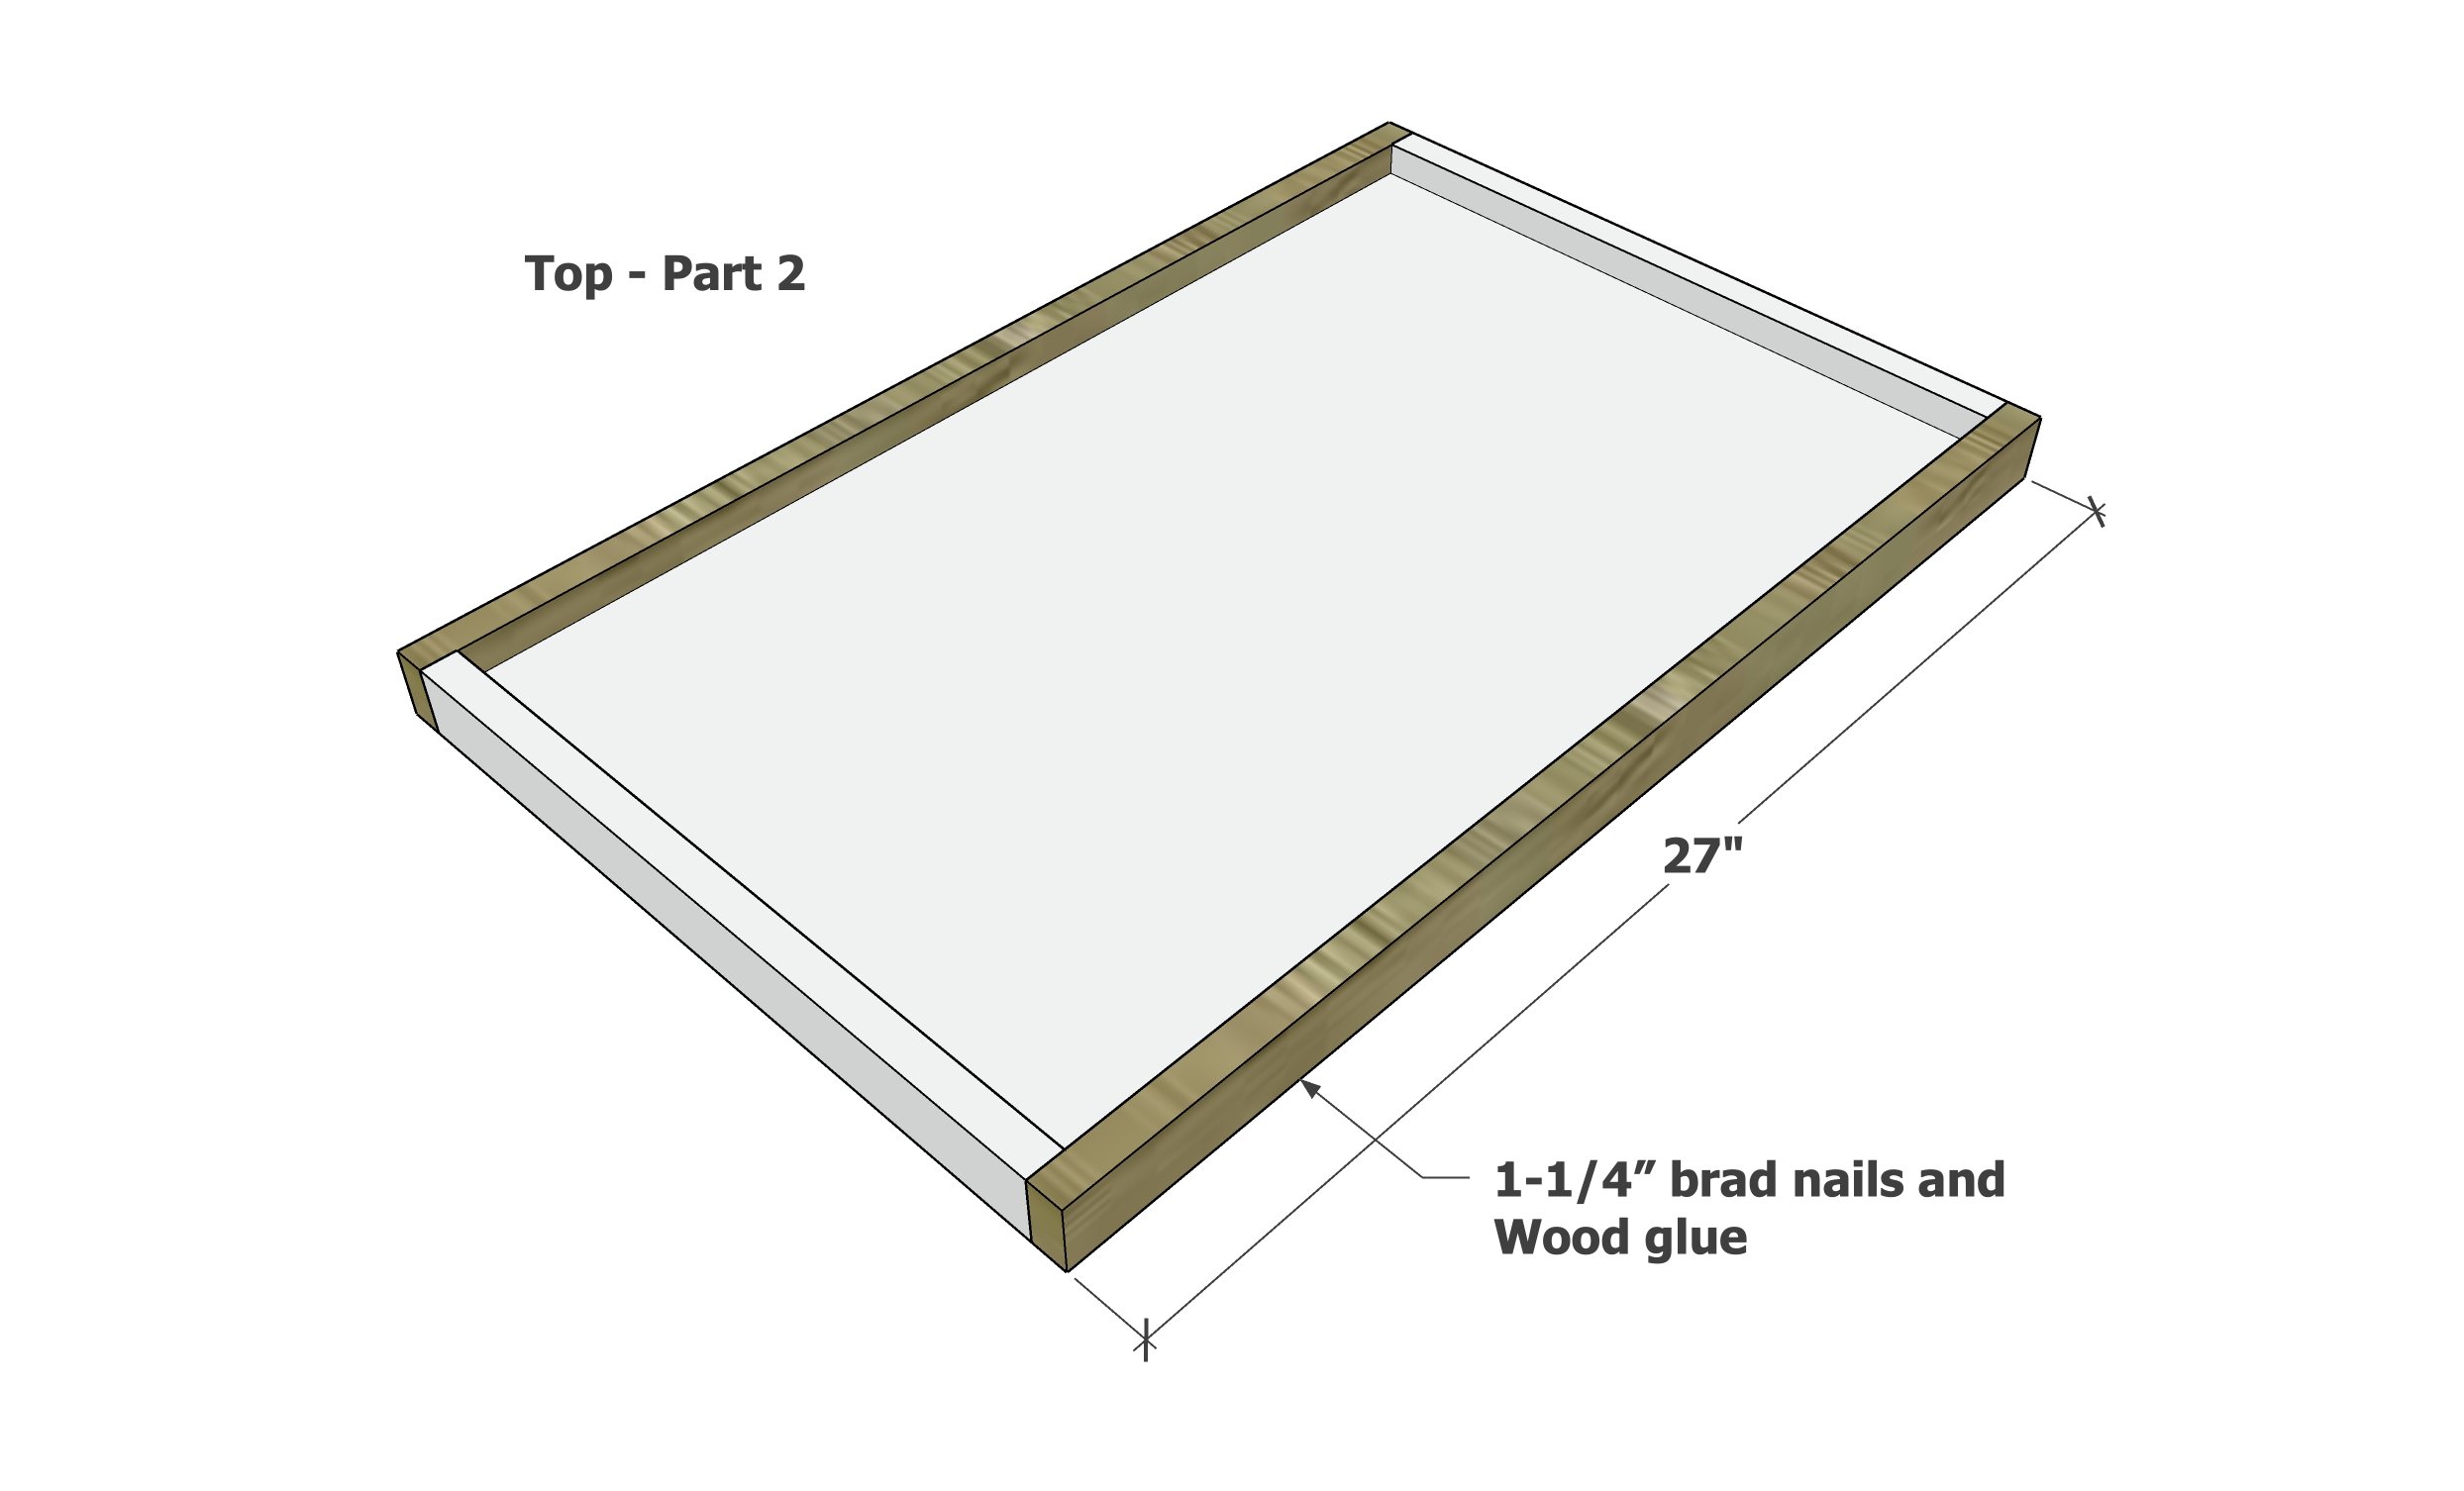
Trim the front and back with 1x2s, use 1-1/4" brad nails to attach.
Step 6

Attach cleats to inside with 1-1/4" brad nails and glue.
Step 7
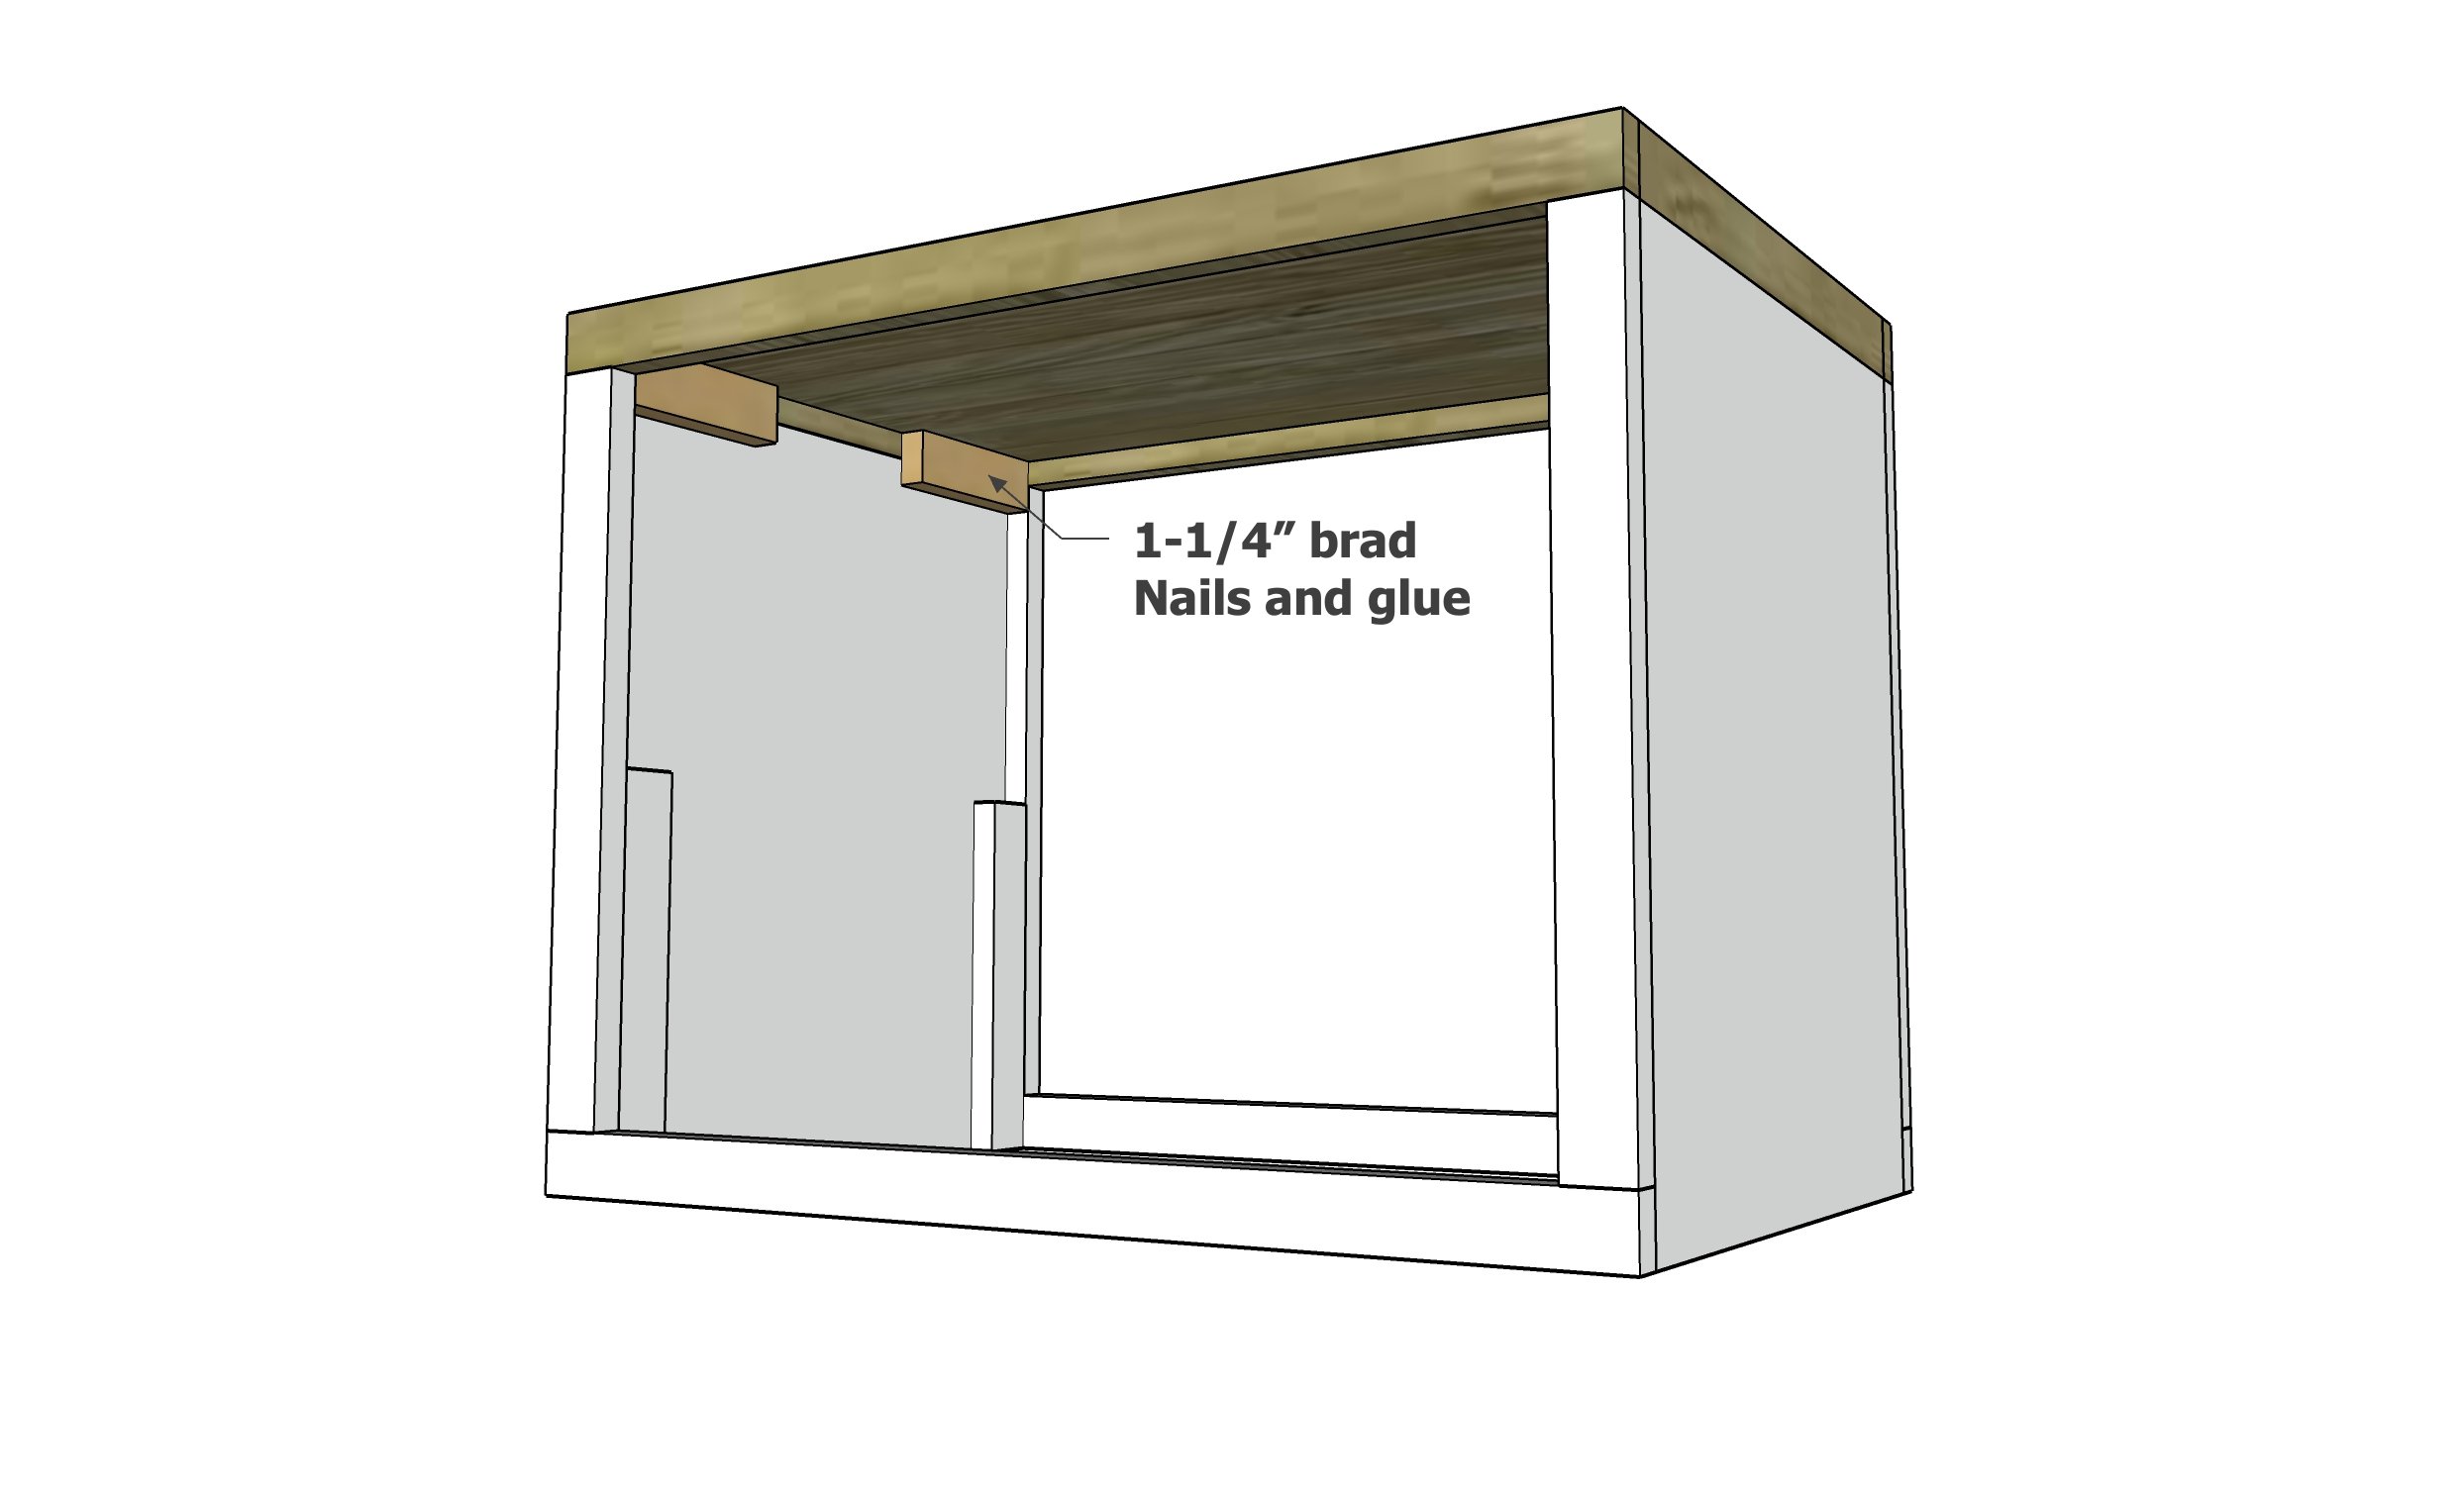
Set the top on the base.
You can secure later - it is easier to finish with the top removeable.
Step 8
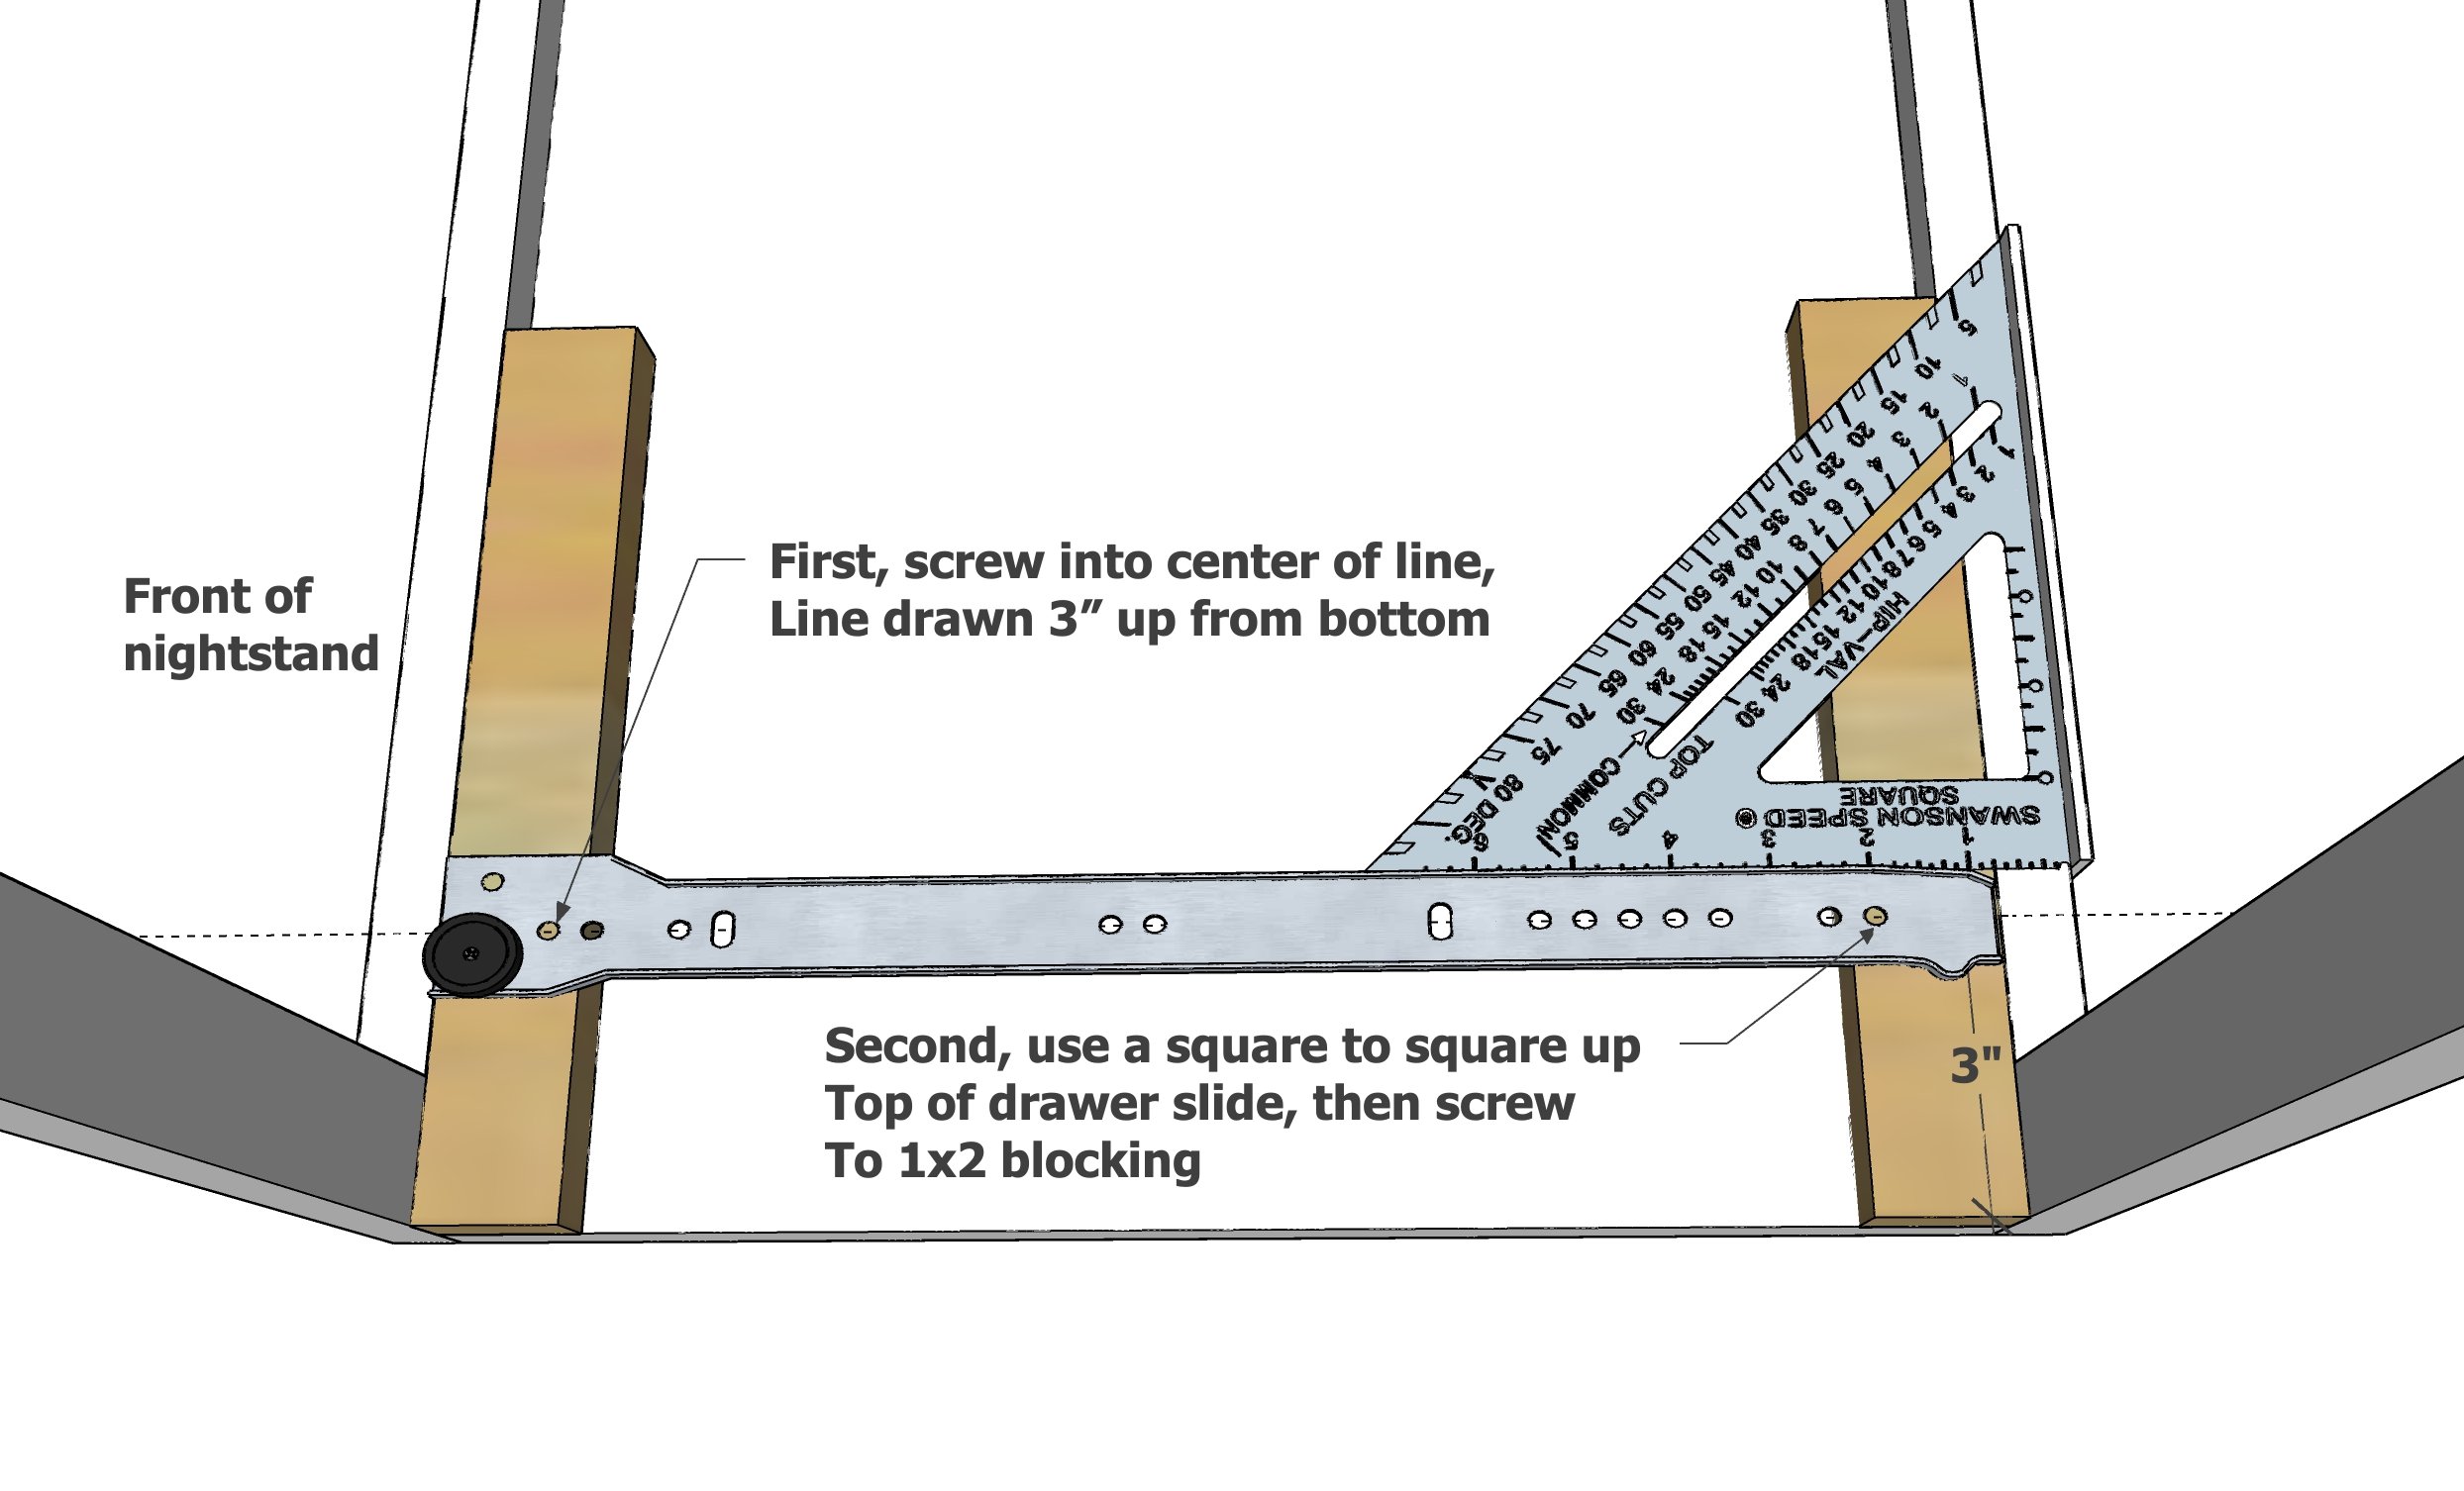
Attach the drawer slides as shown, to the 1x2 @ 10" long.
Step 9
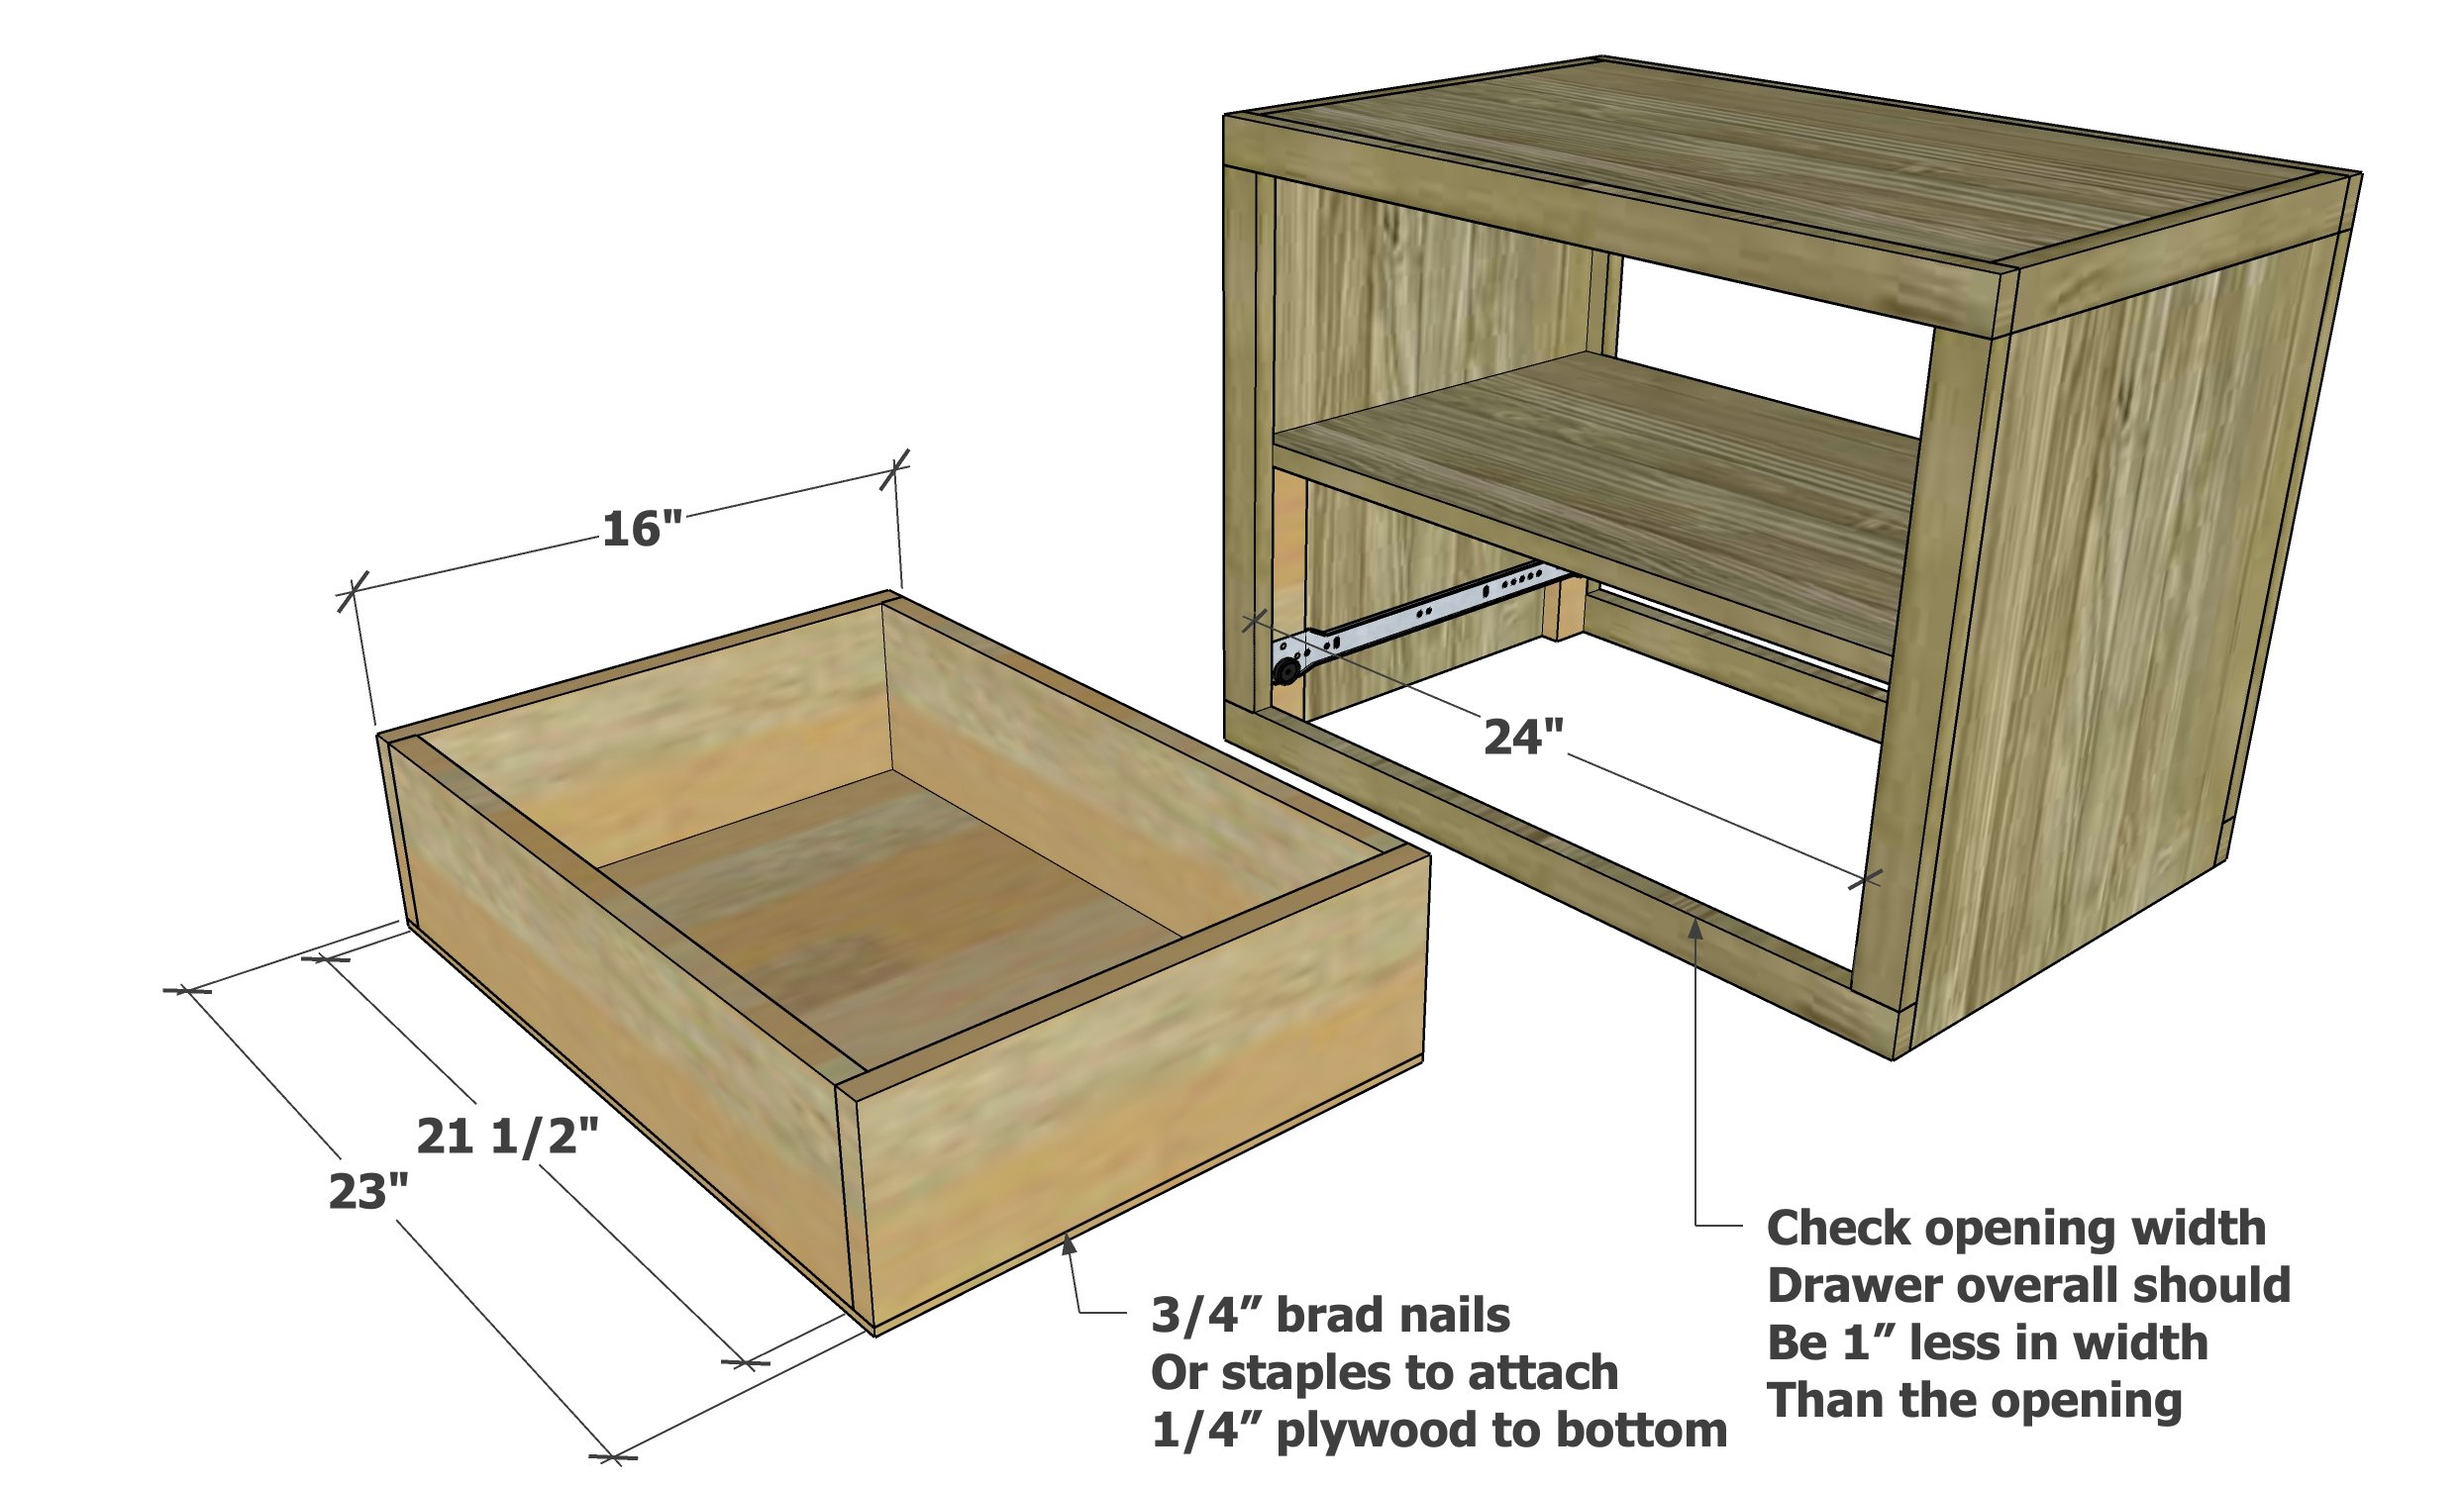
Build the drawer box to fit.
The sides are the same length as the drawer slides (16").
The front and back of the drawer slides should be 2-1/2" less than the opening (assuming drawer slides require 1/2" clearance each.
I attached the drawer box together with 1-1/4" brad nails and the bottom with 5/8" brad nails.
Make sure the drawer slides nicely. Adjust slides if necessary.
Set the middle shelf on top of the 1x2s and attach with 1-1/4" brad nails.
Step 10
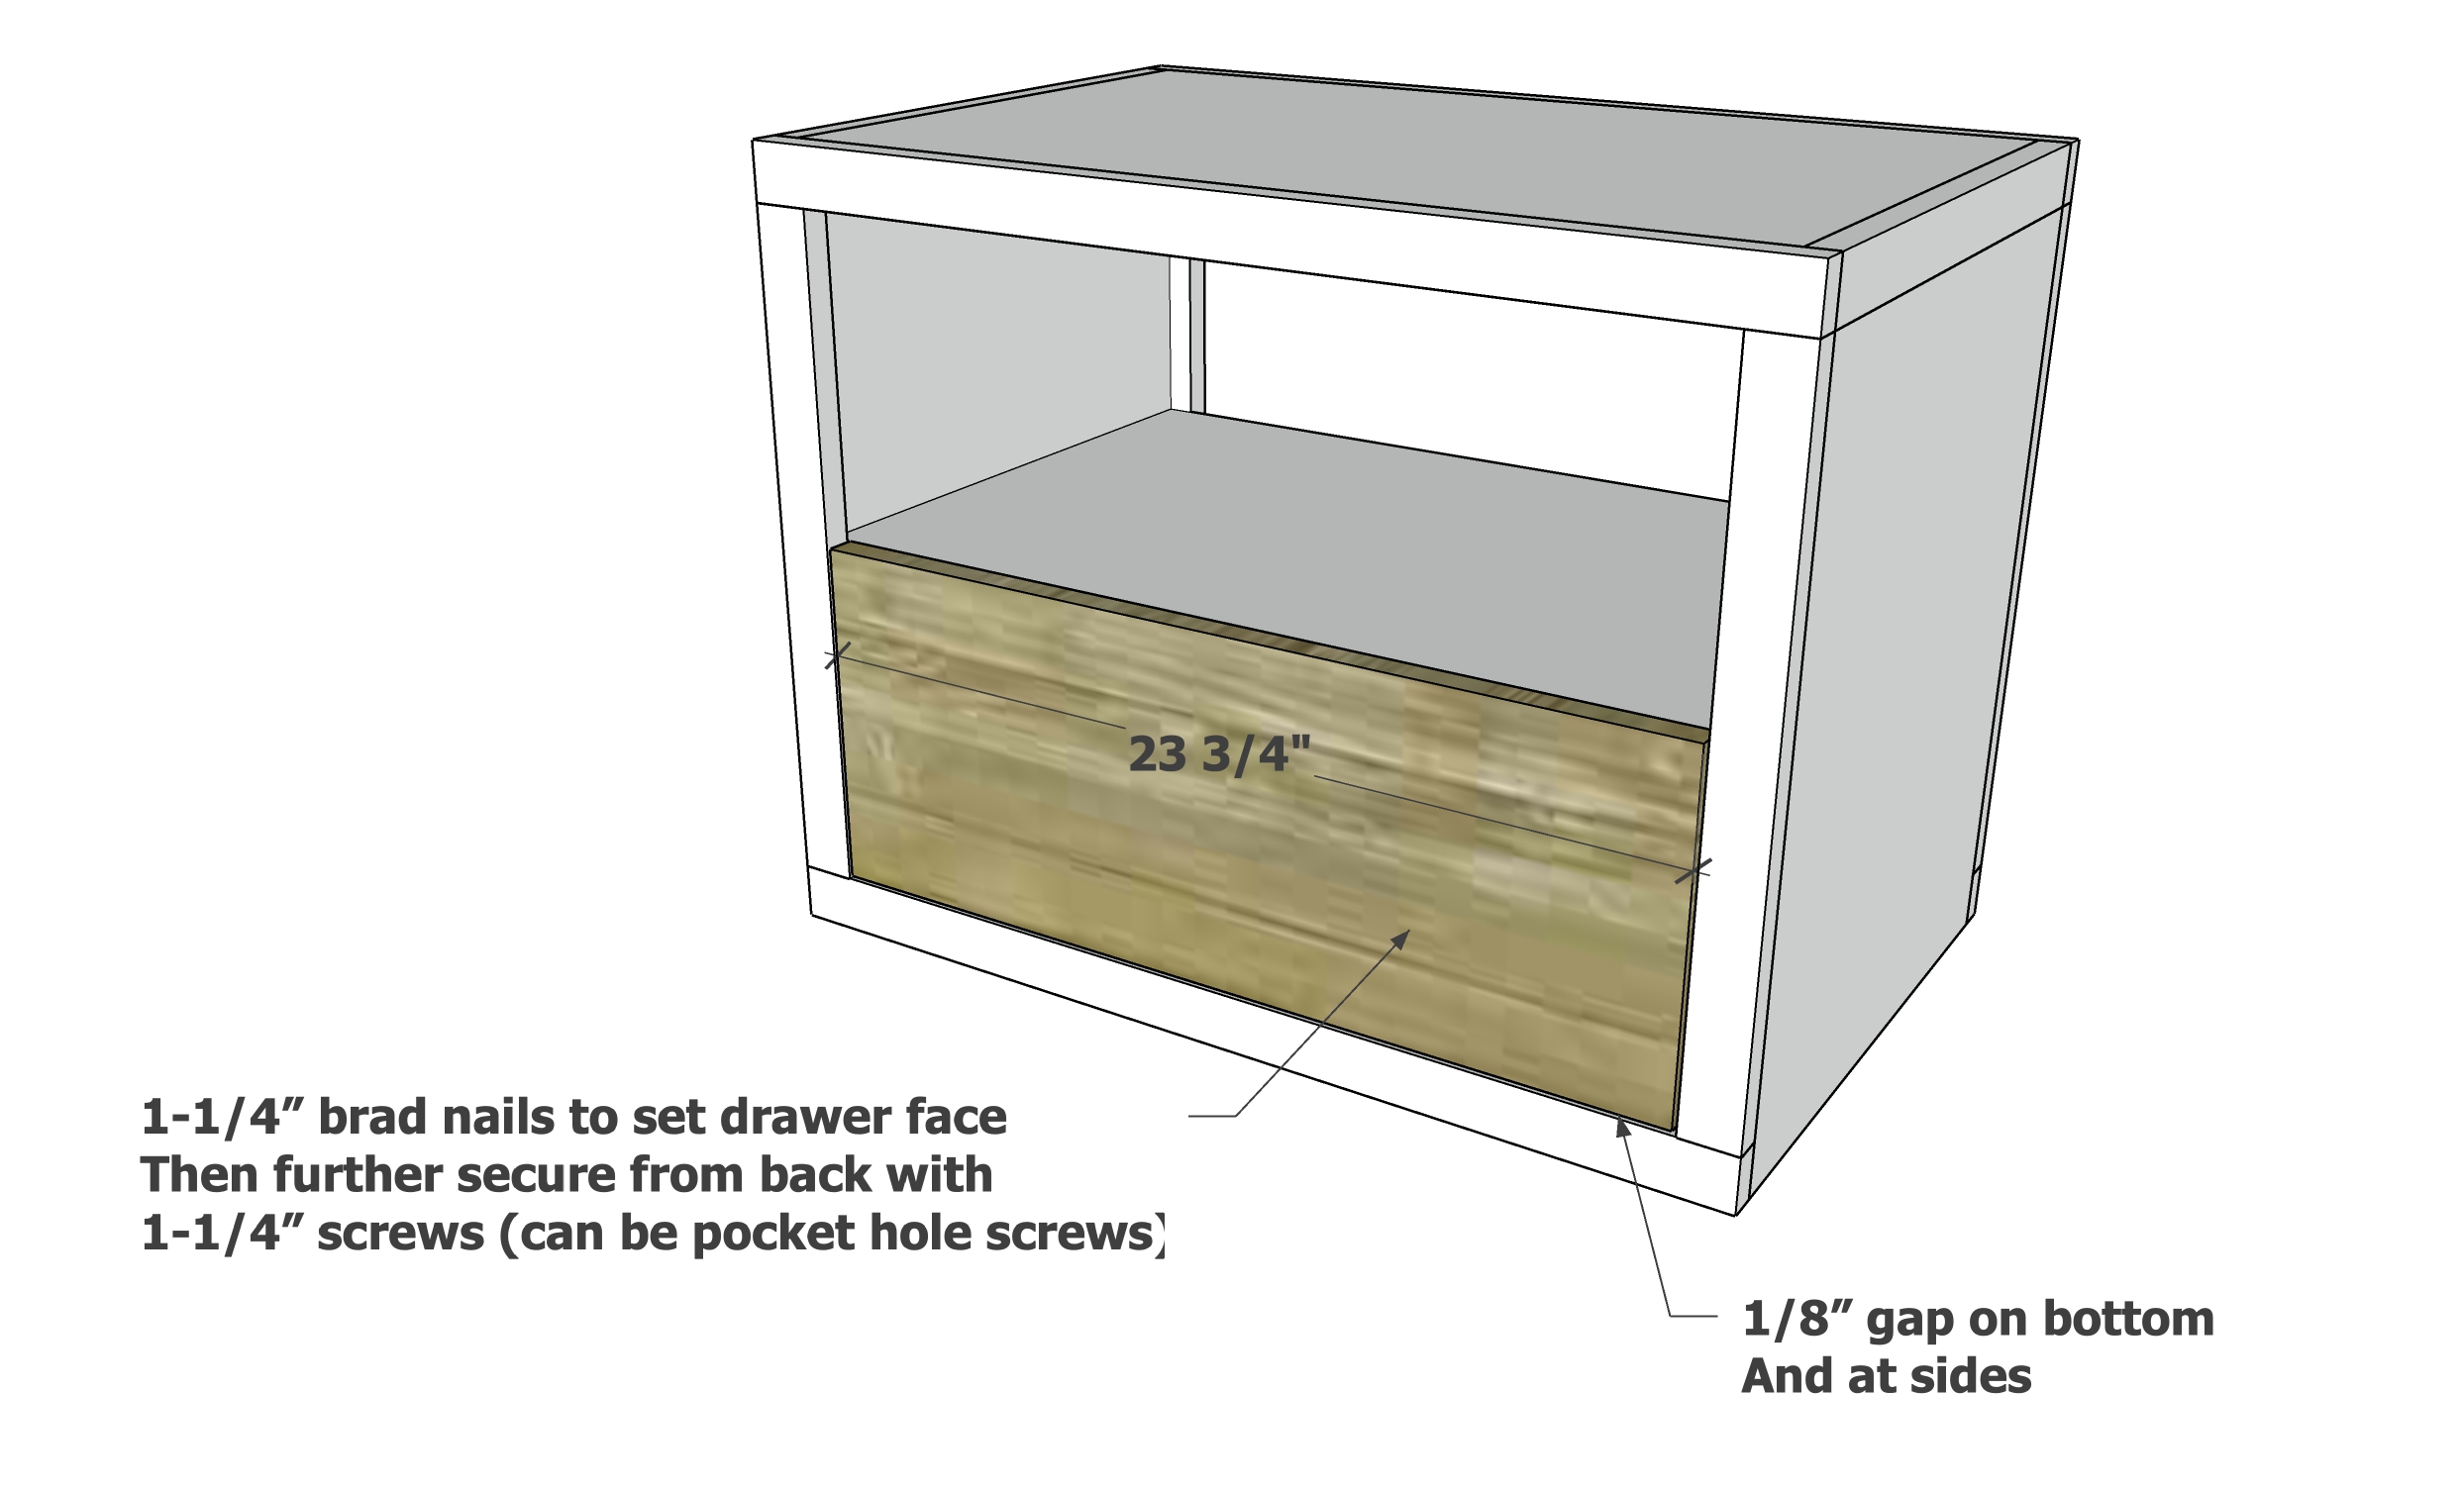
Set the 1x10 drawer face on the drawer box. Attach with 1/8" gap on sides and bottom with 1-1/4" brad nails.
Further secure from inside with 1-1/4" screws (I used Kreg Jig screws).
I also ripped the top edge of the drawer face so it is at an angle, so it serves as a finger pull.
Follow up with a fine grit sandpaper.
Remove all sanding residue.
After this dried, I lightly sanded with fine sandpaper. Then clear poly on outside edges.