


DIY play vanity from Ana-White.com

Hi everyone!
Hope you and yours had the Merriest of Christmases!
Thank you so much for sharing all your projects - I feel like it's Christmas all over again every time I see a handmade gift! It is very inspiring and appreciated!
I am so sorry I didn't get this play vanity plan (see below) to you before Christmas - it went to a very special little girl that loves princesses and dress up, and I was honored to get to help her Mom (my friend Jen who painted the step stool) work on it.

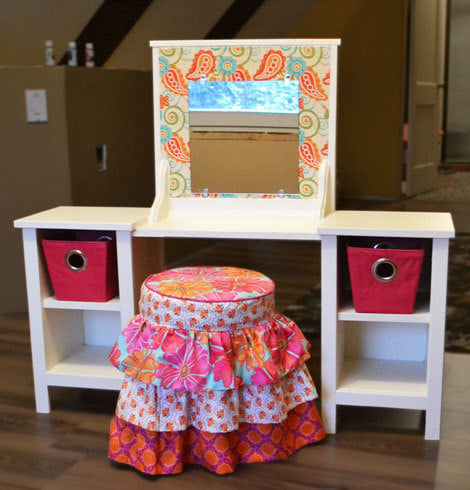
Of course, building this little play vanity was the easy part.
I will take no credit for that vanity stool. That was all Grandma, Aunt Rosie and Aunt Pam.
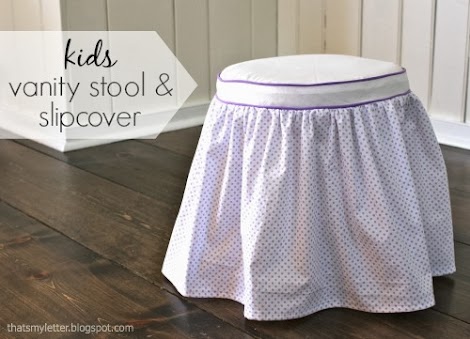
NOTE: Jaime from That's My Letter also shared a vanity stool tutorial here.
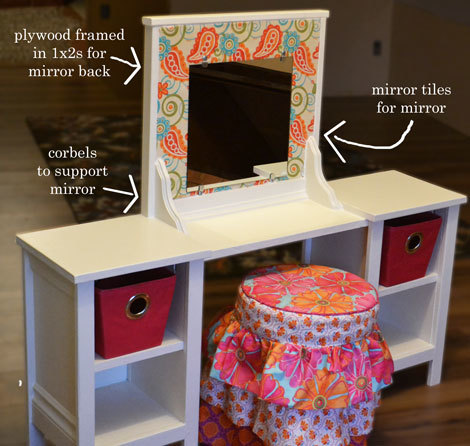
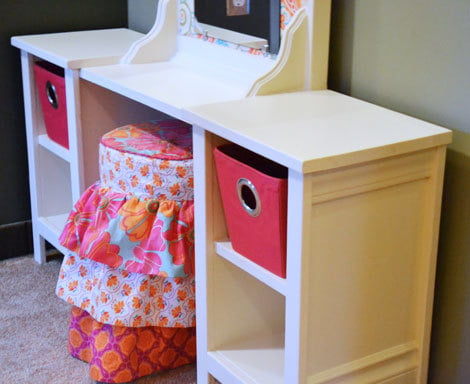
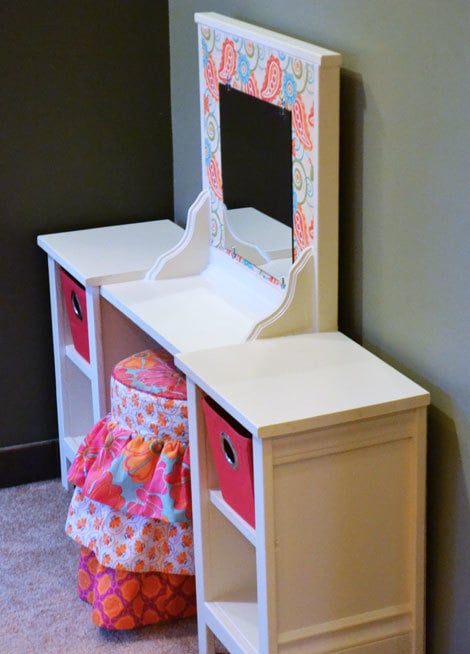
I just helped my friend Jen with building the two towers (the easy part). She created the mirror and attached it with corbels to the center - isn't it lovely how she used coordinating fabric around the mirror? I love it!

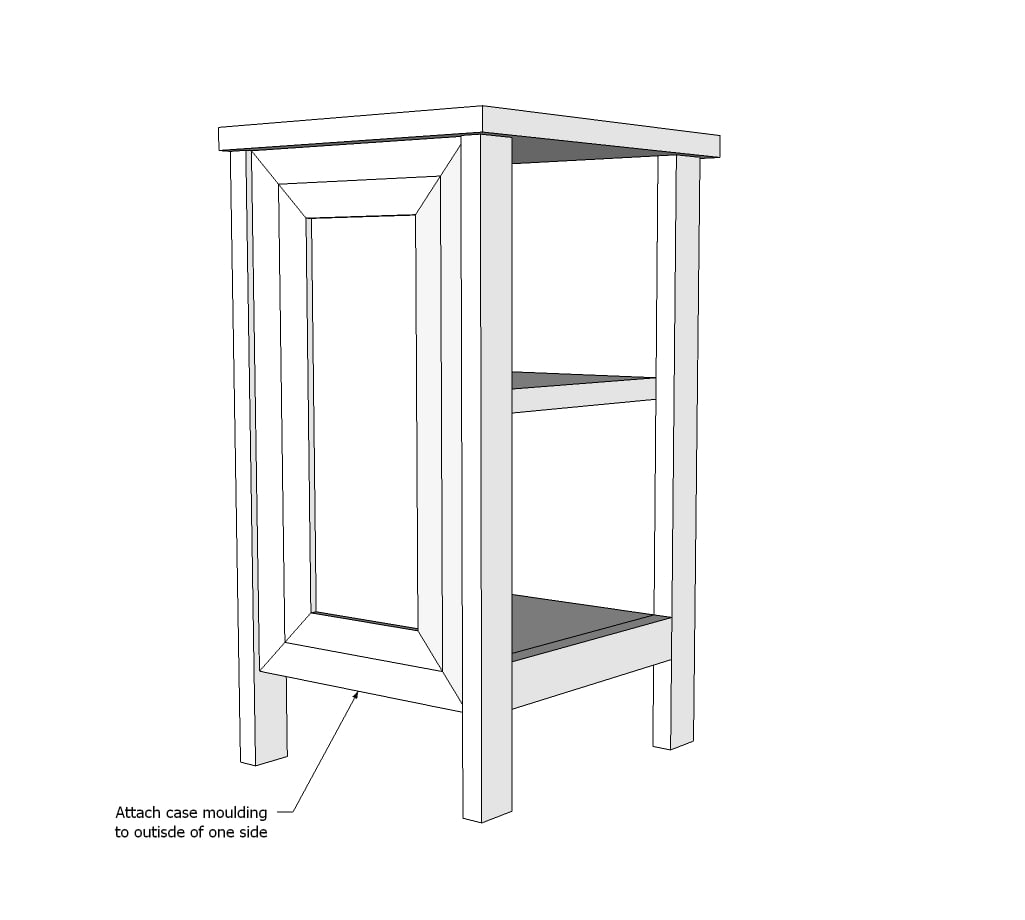
We had some leftover base moudling and casing from the Momplex, so we added that to the outsides of the tower to dress up the ends.

What little lady wouldn't want?
Thank you so much Jen for letting us share this beautiful DIY play vanity project!
Of course, plans follow!
XO Ana
Preparation
9+ feet of 1x10s (add more for center tabletop)
2 - 1x2s @ 8 feet long
1 - 1x12 - 27" long
Base moulding and casing for trim on sides
1/4" plywood for backs (optional)
4 - 1x10 @ 17 1/2”
4 - 1x10 @ 9”
8 - 1x2 @ 20 3/4”
4 - 1x2 @ 9”
2 - 1x12 @ 13”
Mitered casing to decorate ends
1x10 for center tabletop (cut to fit)
1x3 or 1x4 for back center tabletop (cut to fit)


Please read through the entire plan and all comments before beginning this project. It is also advisable to review the Getting Started Section. Take all necessary precautions to build safely and smartly. Work on a clean level surface, free of imperfections or debris. Always use straight boards. Check for square after each step. Always predrill holes before attaching with screws. Use glue with finish nails for a stronger hold. Wipe excess glue off bare wood for stained projects, as dried glue will not take stain. Be safe, have fun, and ask for help if you need it. Good luck!
Instructions
Step 1
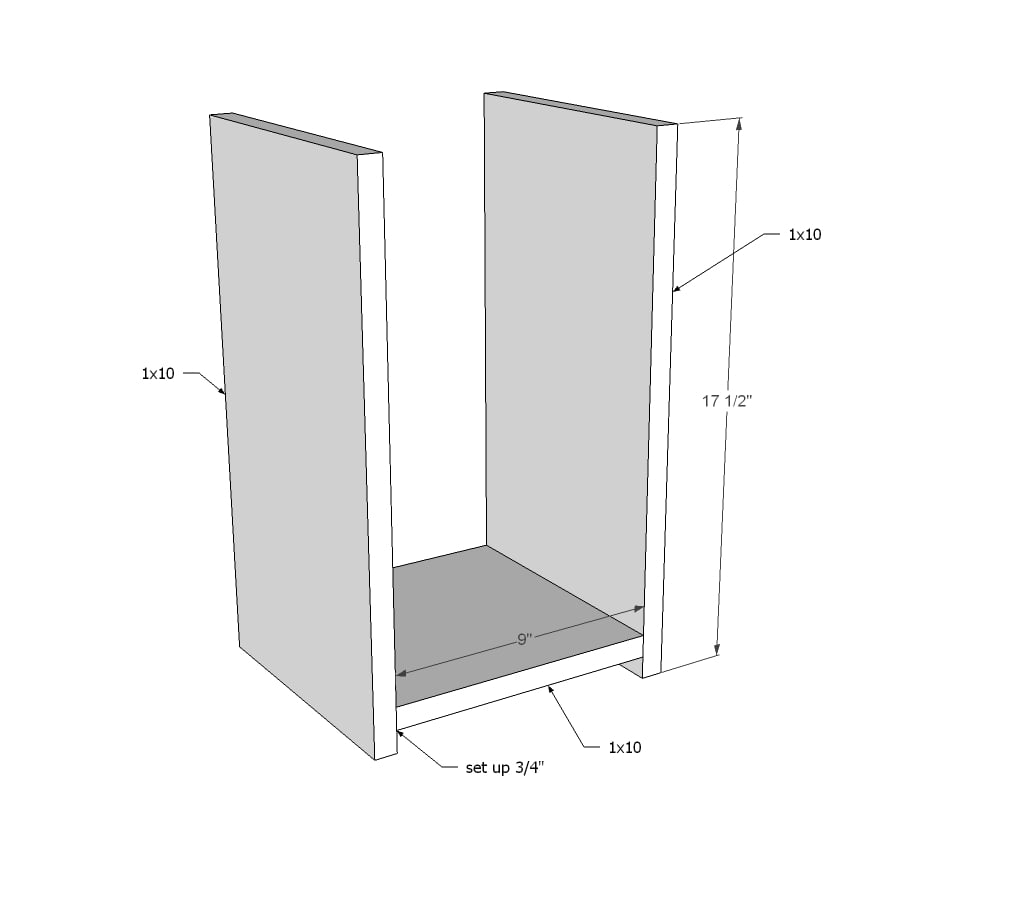
First, attach the two bottom shelves to the sides. You can also attach the middle shelf at this step too (see diagram 4 for placement).
Step 2
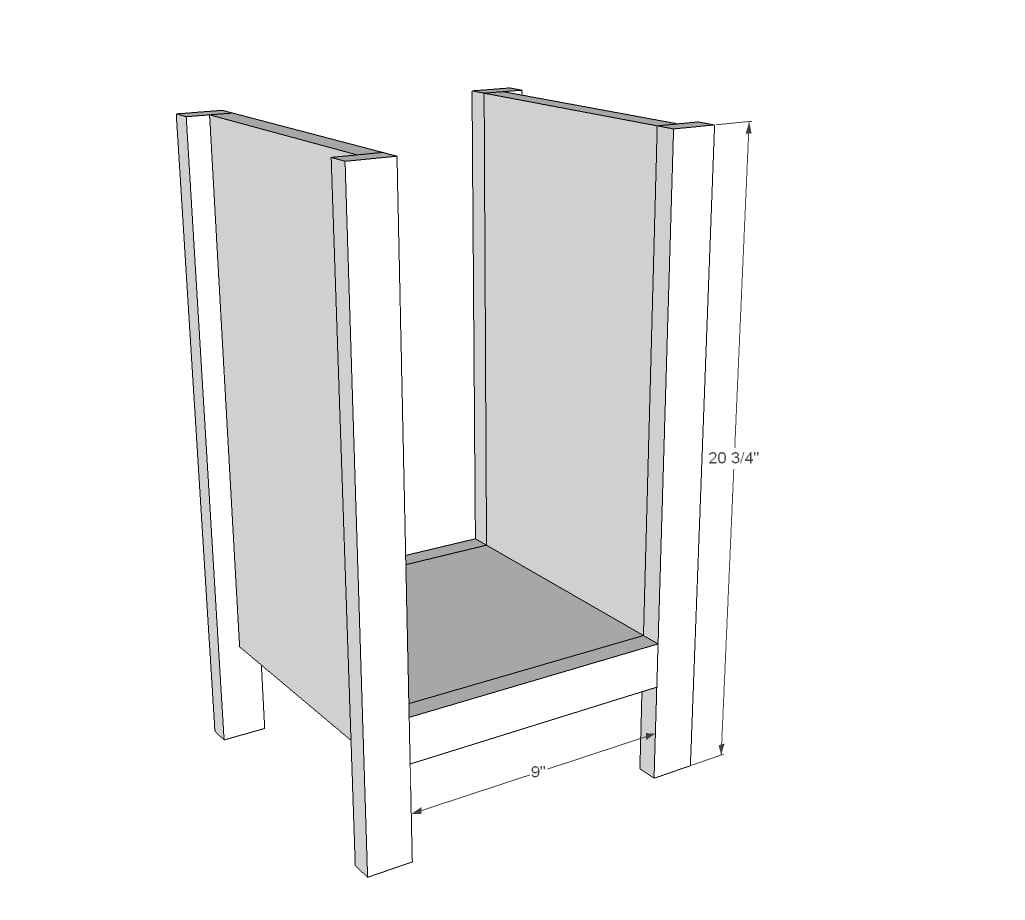
We attached the legs to the bottom trim first with 3/4" pocket holes and 1-1/4" pocket hole screws first (basically building mini face frames) and then attached the whole thing to the front of the 1x10 shelving and sides. Note that the face frame is flush to inside.
Step 3
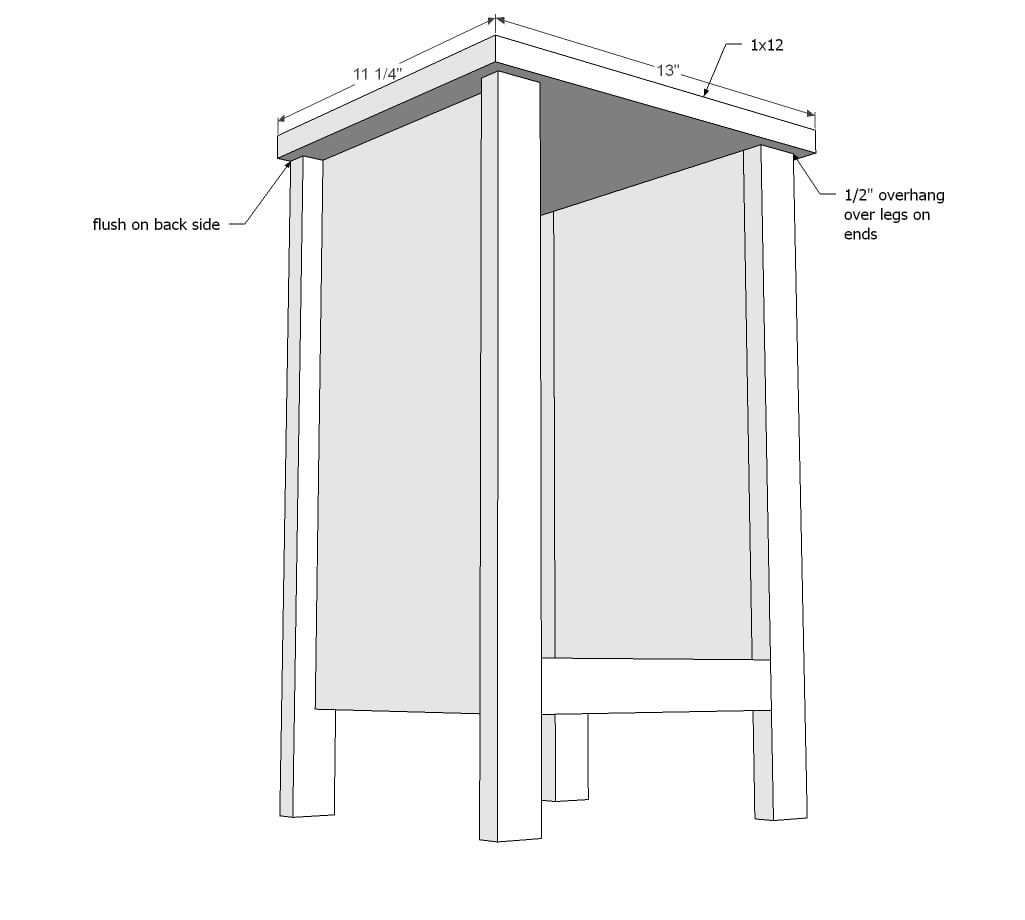
Then we added the top - flush to back.
Step 4
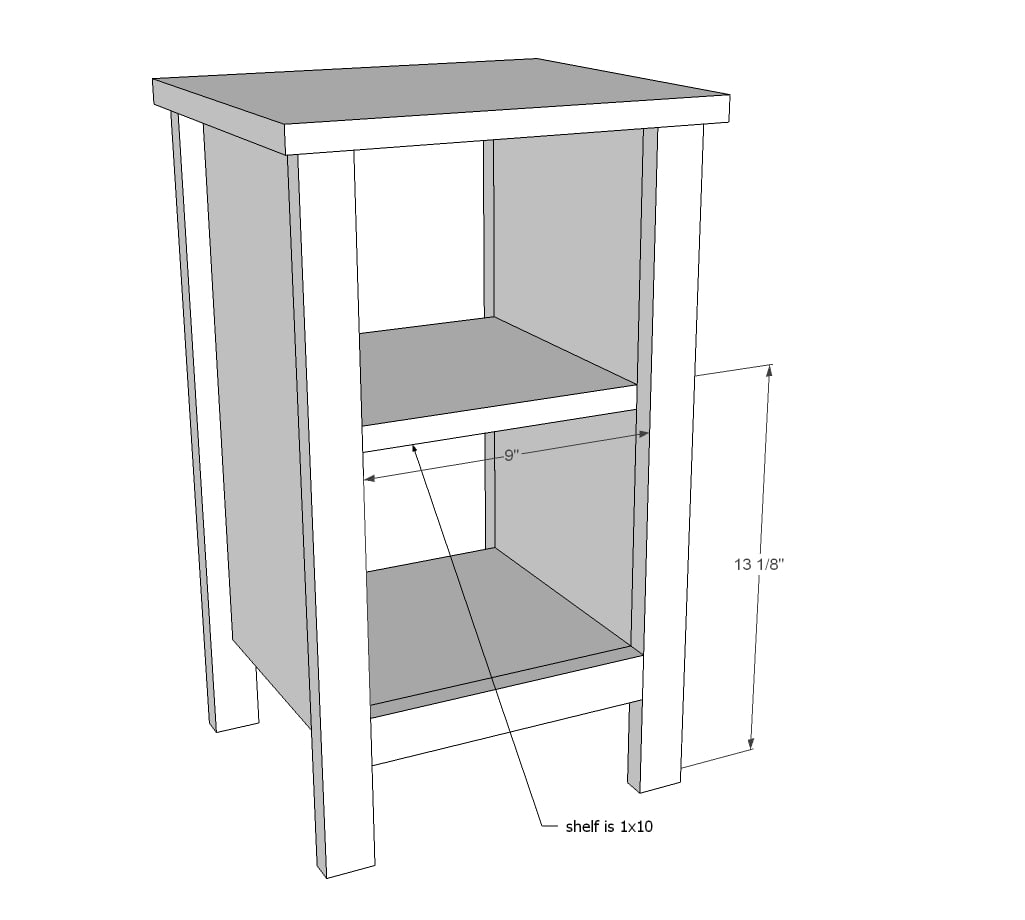
And then the shelf - just nailed in place.
Step 5
Step 6

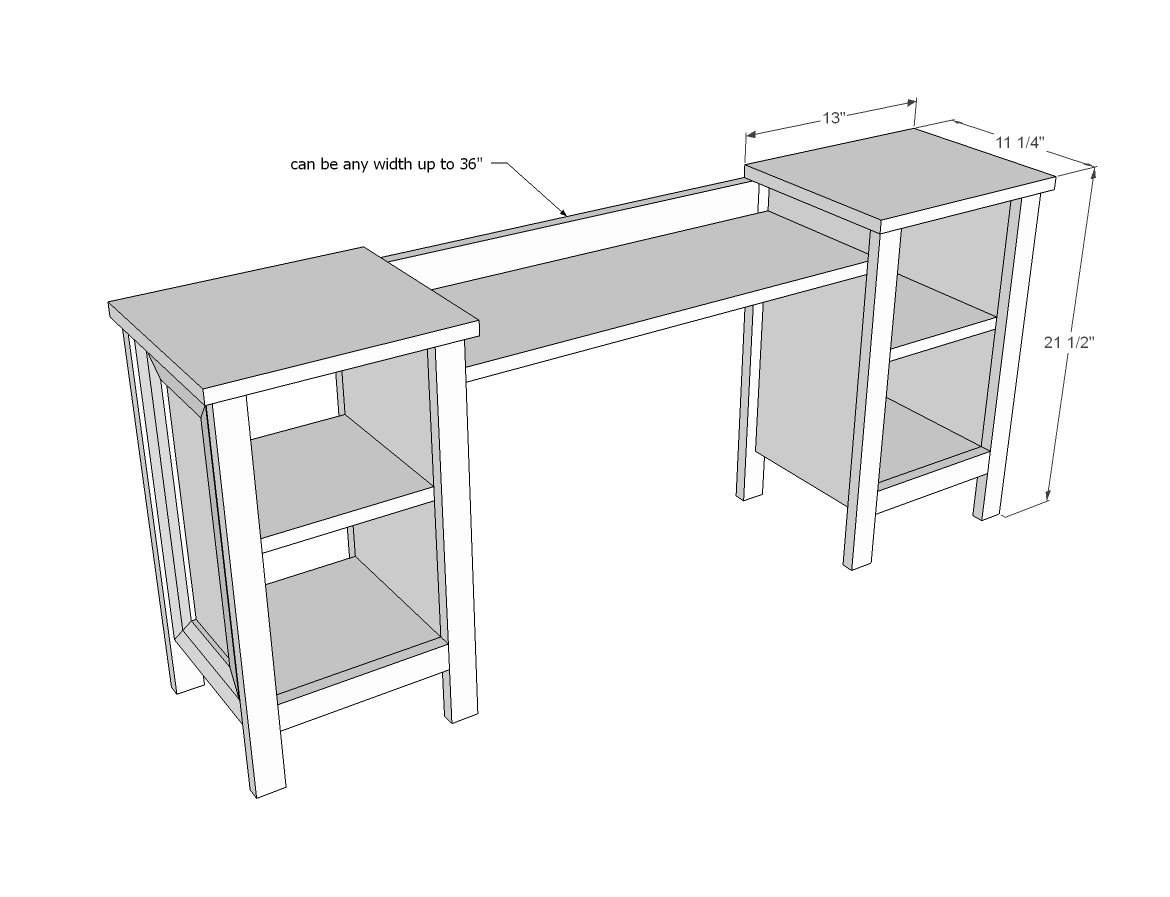
The vanity top can be made to any size, although any longer than 36" and you may have sagging issues. We attached with pocket holes, first attaching the 1x10 between the two towers, and then adding the back trim (cut to fit).
NOTE: Jen choose to build her vanity top differently to accommodate her mirror - see below.
Step 7

Jen created the mirror with 3/4" plywood trimmed on sides and top with 1x2s and casing along bottom. She supported it with store bought corbels (adds cuteness too!).
It is always recommended to apply a test coat on a hidden area or scrap piece to ensure color evenness and adhesion. Use primer or wood conditioner as needed.
