
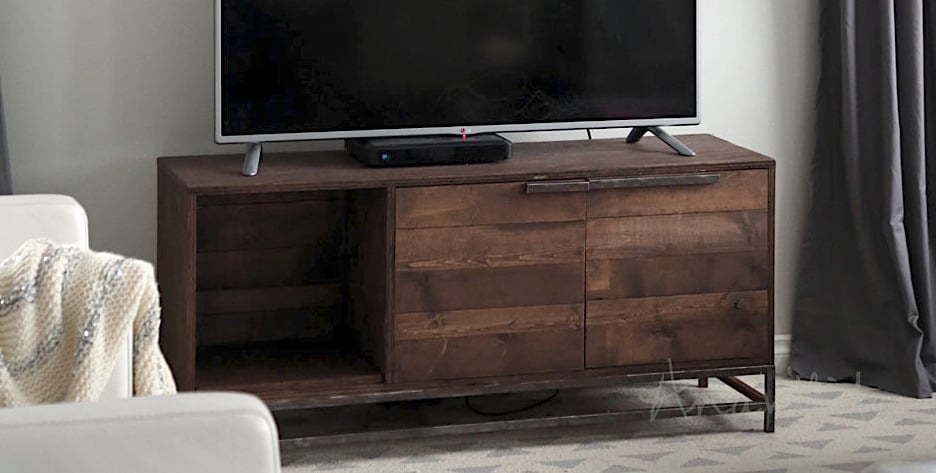

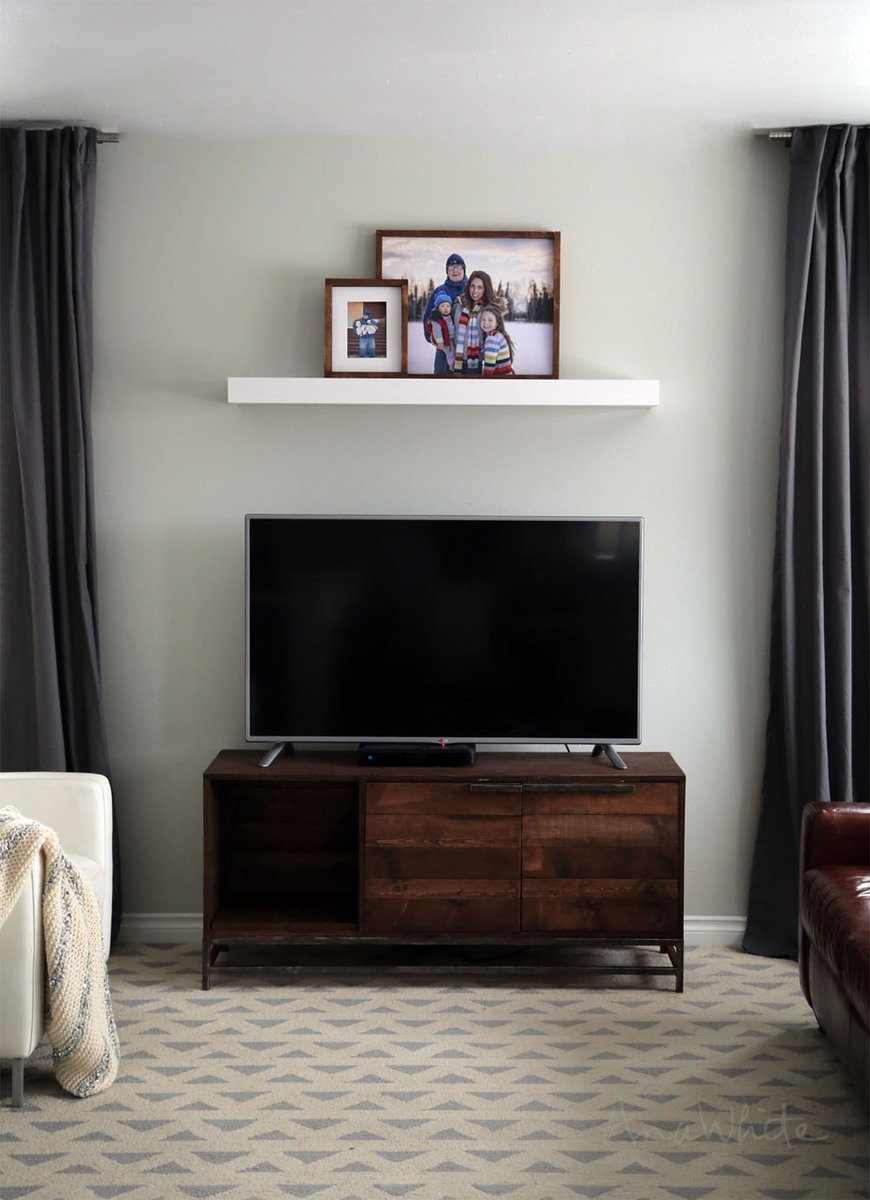
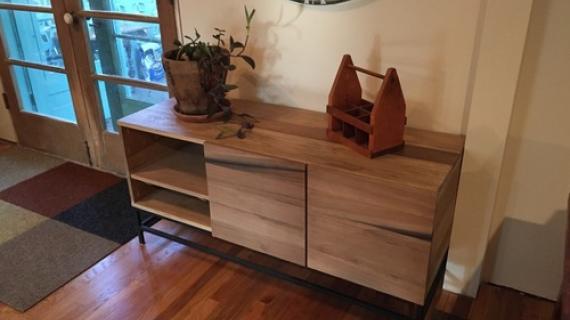
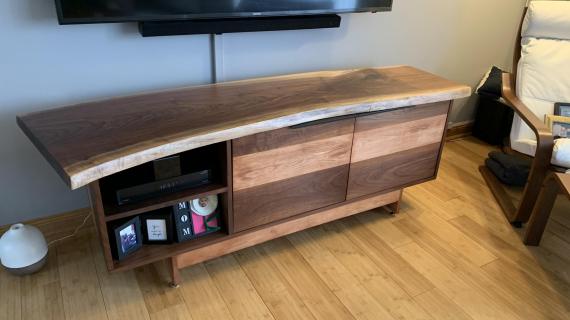
Free plans to build your own rustic modern media console.

Preparation
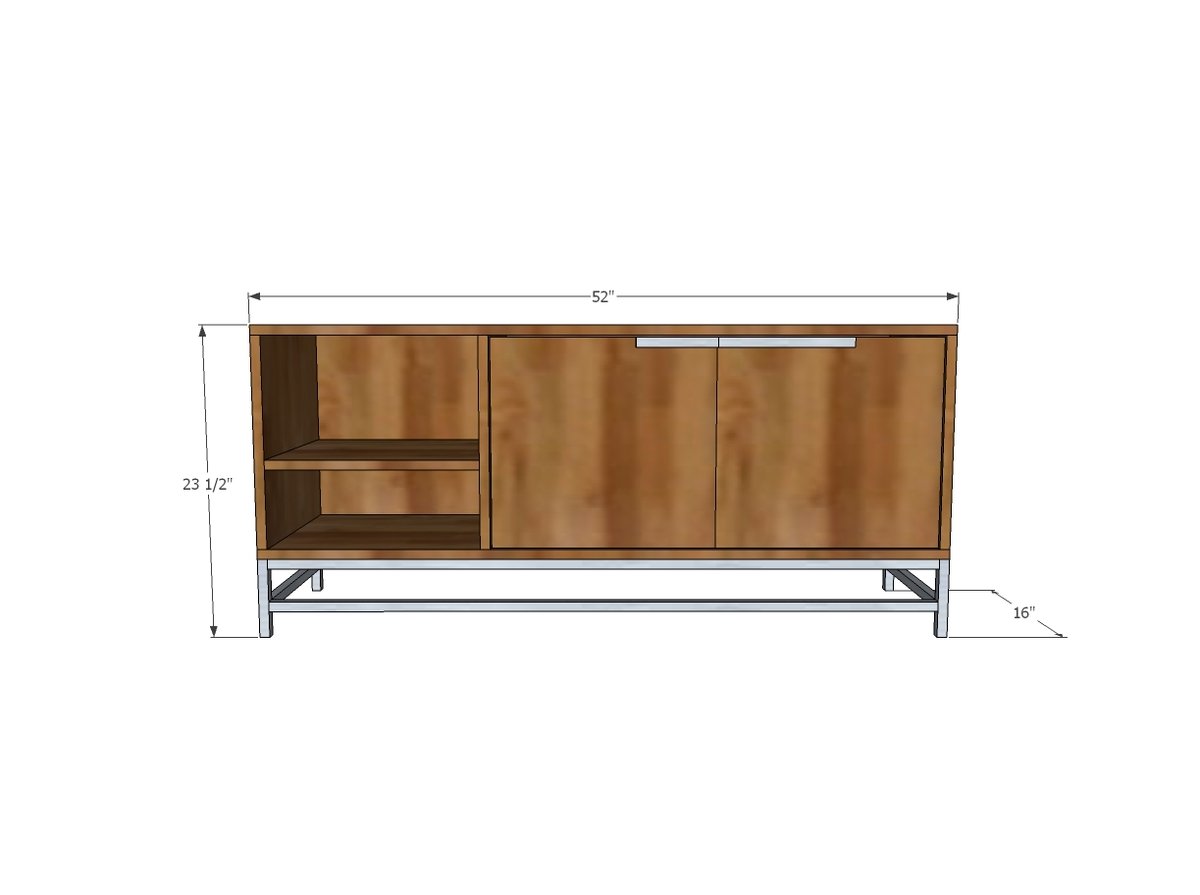
1 sheet of 3/4" plywood (I just used AC plywood) ripped into three strips 15-3/4" wide x 8 feet long
1 - 1/4" plywood @ 52" 17-1/2"
24 feet of 3/4" x 3/4" square tubing
I set of hinges (I used this type)
- 2 - 3/4" plywood @ 15-3/4" x 52"
- 4 - 3/4" plywood @ 15-3/4" x 16"
- 1 - 3/4" plywood @ 15-3/4" x 33-3/4"
- 1 - 1/4" plywood @ 52" 17-1/2"
- 2 - 3/4" plywood @ 15-3/4" x 16-3/4"
SQUARE METAL TUBING BASE (can also build base using 2x2s or hardwood 1x1 pieces)
- 4 - 3/4" square tubing @ 6" long
- 4 - 3/4" square tubing @ 14-1/4" long
- 4 - 3/4" square tubing @ 50-1/2" long
SCRAP TUBING FOR HANDLES are 6" and 10" long


Please read through the entire plan and all comments before beginning this project. It is also advisable to review the Getting Started Section. Take all necessary precautions to build safely and smartly. Work on a clean level surface, free of imperfections or debris. Always use straight boards. Check for square after each step. Always predrill holes before attaching with screws. Use glue with finish nails for a stronger hold. Wipe excess glue off bare wood for stained projects, as dried glue will not take stain. Be safe, have fun, and ask for help if you need it. Good luck!
Instructions
Step 1
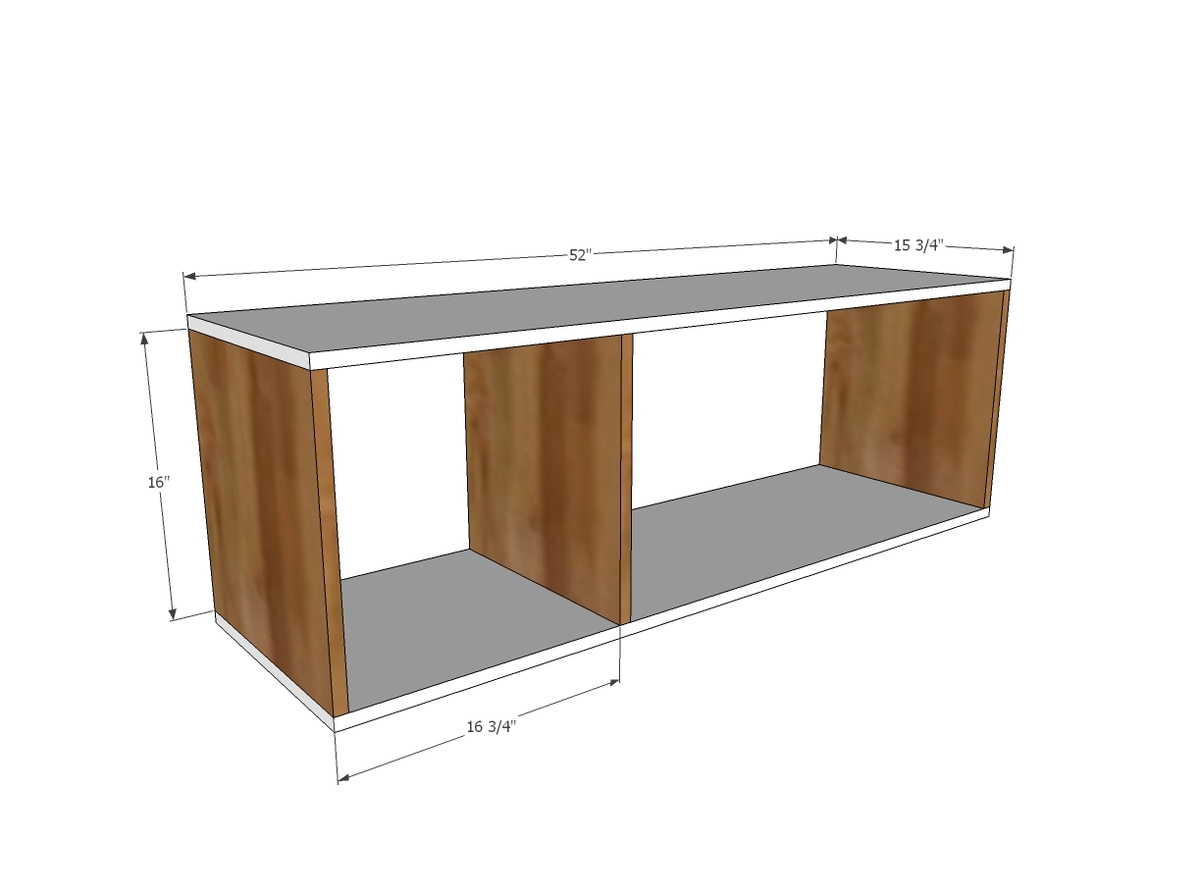
Build the basic box frame for the project. I recommend using a Kreg Jig on this project because there is no face frame to reinforce these joints. Use 3/4" setting to drill pocket holes and attach with 1-1/4" pocket hole screws. Three pocket holes per joint are recommended for this width of board.
Step 2
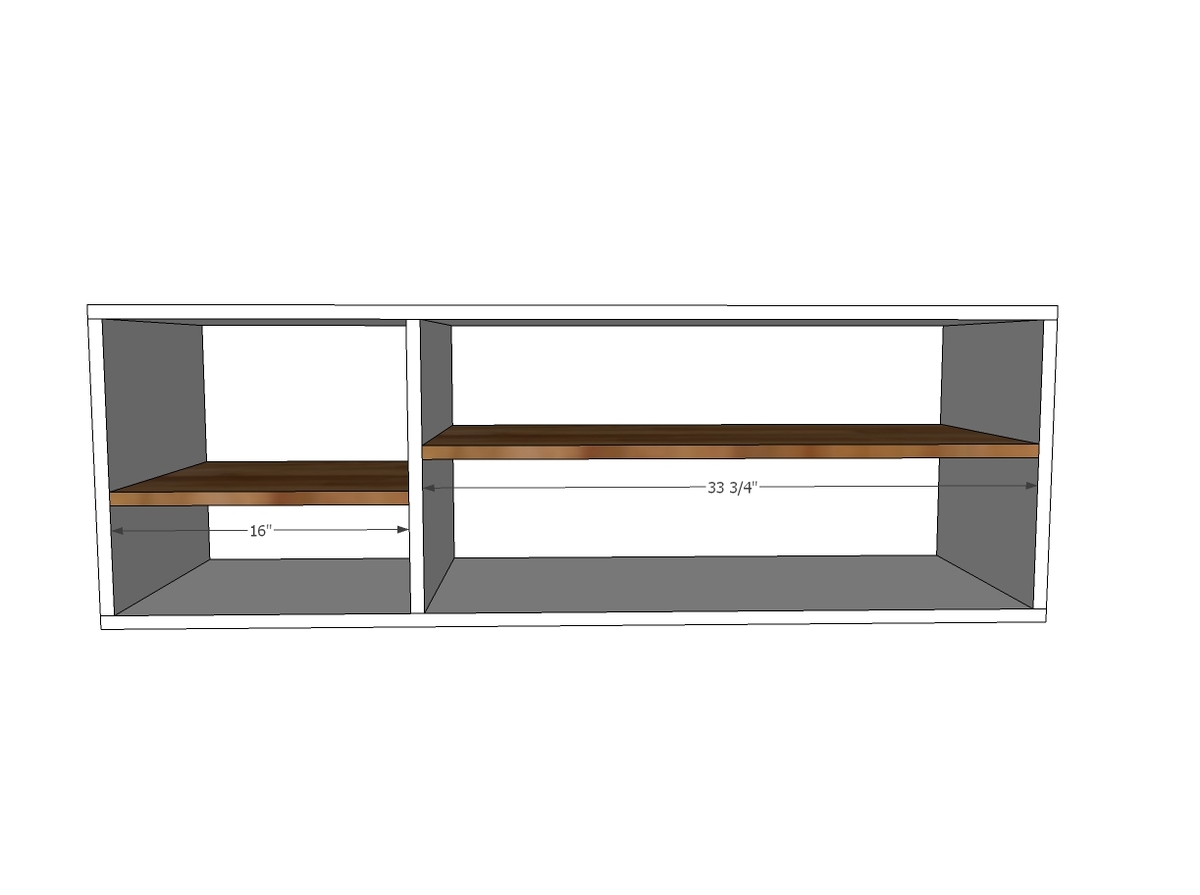
Add shelves as desired, using pocket holes again. Alternatively, you could use a shelf pin jig to create adjustable shelves (I did).
Step 3
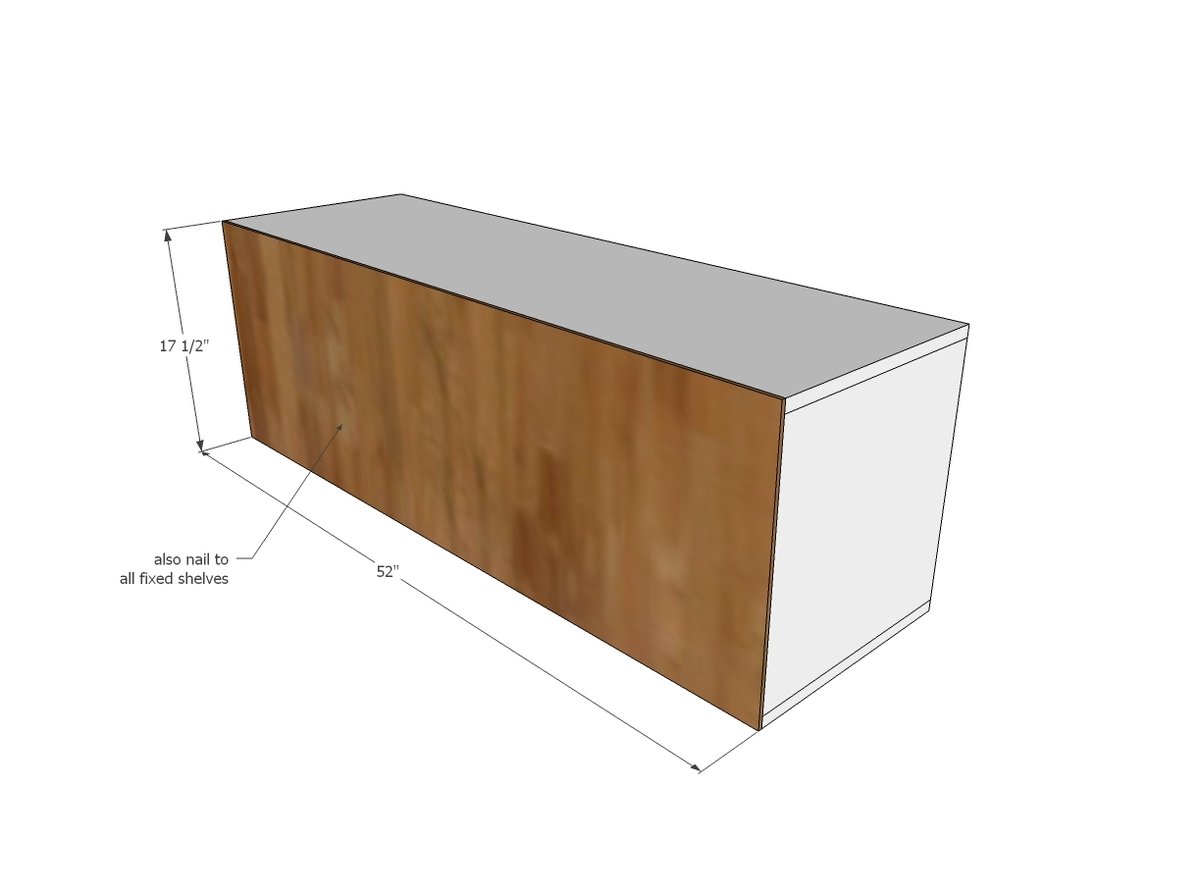
Add the back. Use glue and 3/4" brad nails or staples, secure to all fixed shelves too.
Step 4

Hinge doors on. I used this type of hinge. I ended up Kreg Jigging some 1x boards together to make my doors.
Step 5

Step 6
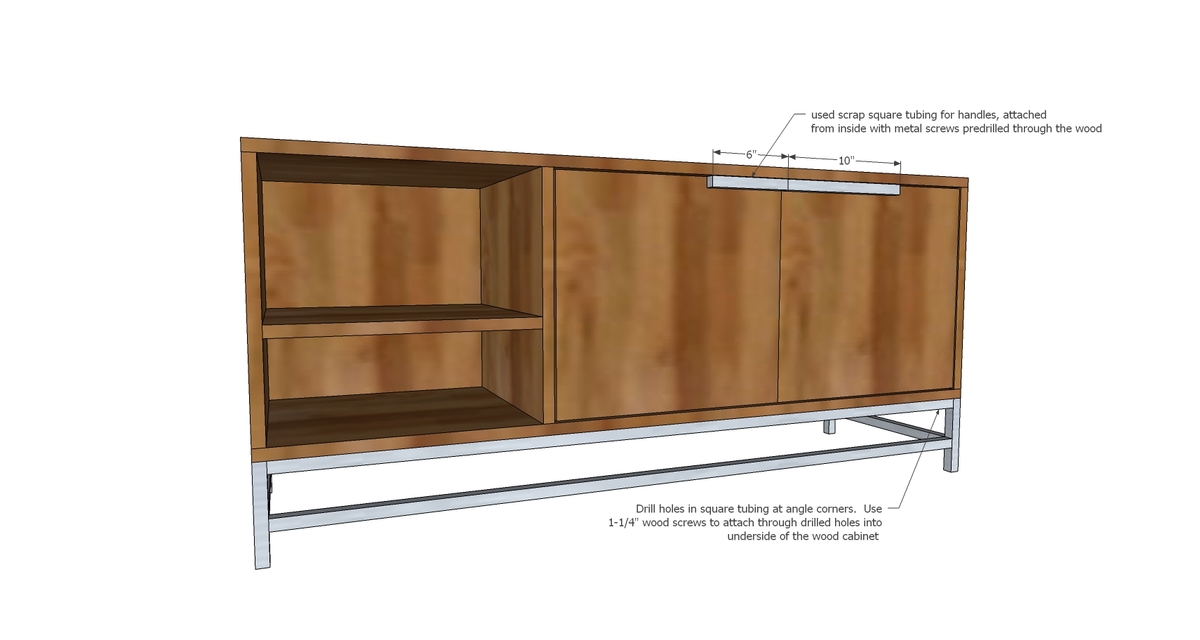
Attach to the underside of the cabinet with 1-1/4" screws (I just used a few of my pocket hole screws).
It is always recommended to apply a test coat on a hidden area or scrap piece to ensure color evenness and adhesion. Use primer or wood conditioner as needed.

Comments
milleall
Mon, 10/19/2015 - 11:58
Thanks!
I am so happy to see these plans! It looks great in all finishes, but I think I like the dark stain the best. It will sure be difficult to figure out what finish to put on mine.
Pam the Goatherd
Mon, 10/19/2015 - 21:22
I've been planning to make
I've been planning to make this. I don't have a welder but I figured I'd just make the bottom frame out of 1"x2"s and paint it with some of the metallic Rustoleum spray paint. I built a pair of hutches for my kitchen a few years ago and used the hammered metal spray paint on the countertop part. It turned out really well, so I think using the metallic paint on the wood frame would work equally well.
In reply to I've been planning to make by Pam the Goatherd
Ana White
Tue, 10/20/2015 - 12:00
That sounds like a great idea
That sounds like a great idea, hope you have the chance to share when it's
done!