

The easiest way to build a drawer bench. Free step by step plans by ANA-WHITE.com
UPDATE: The project turned out so well, that I used the same method to build a daybed with drawers:
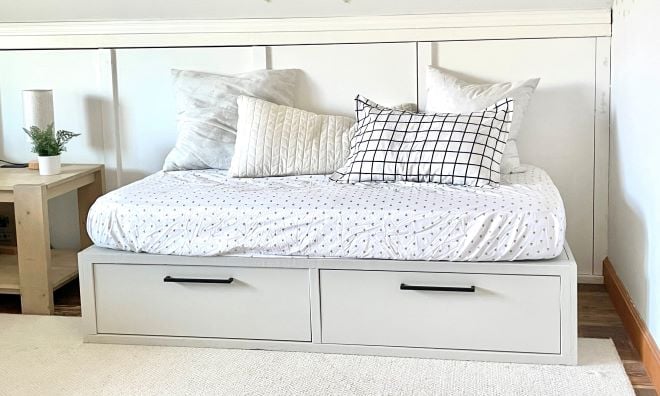
You can find the drawer bed plans here.
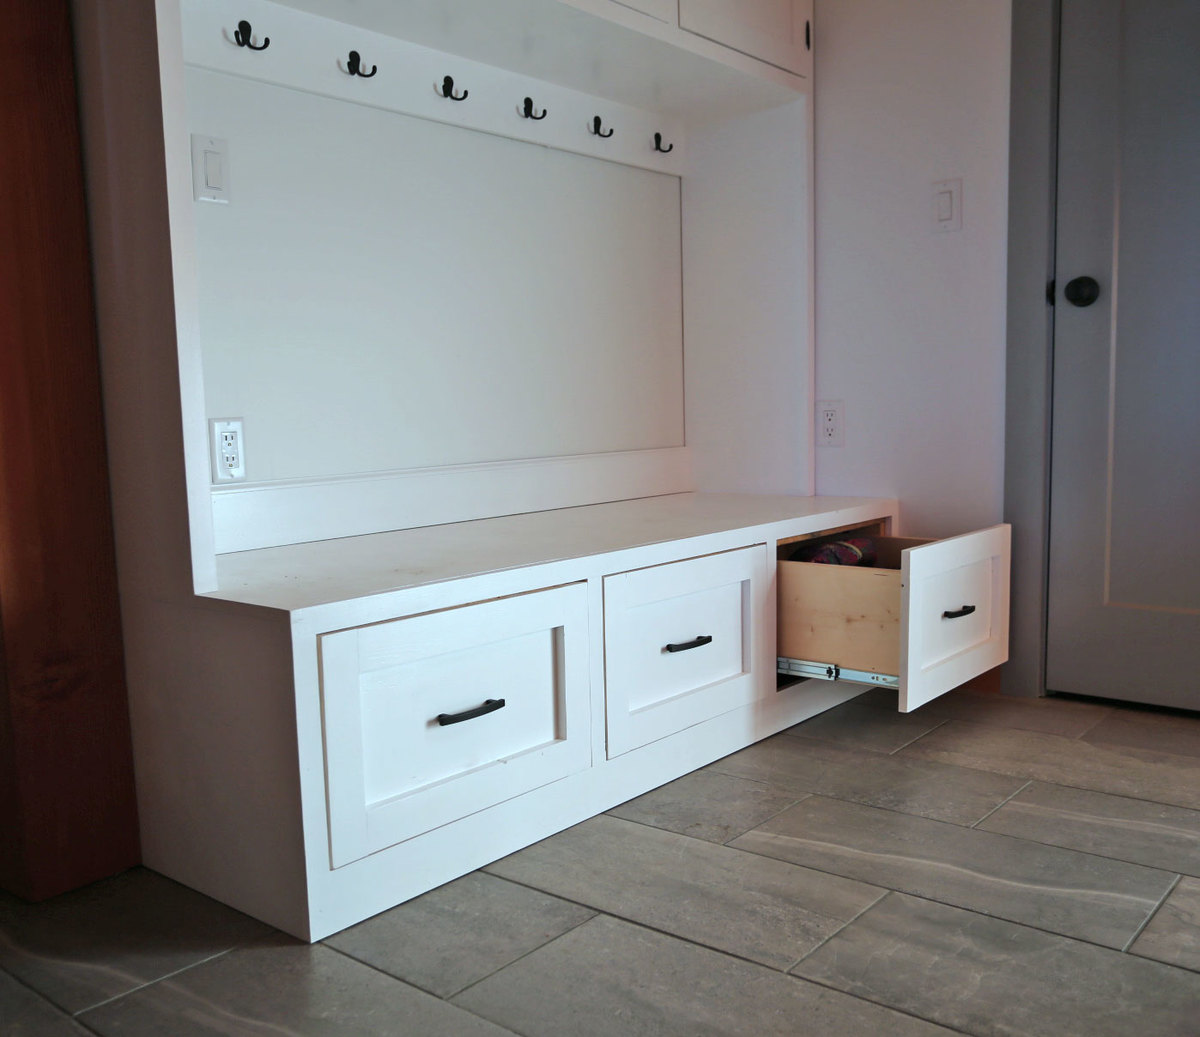
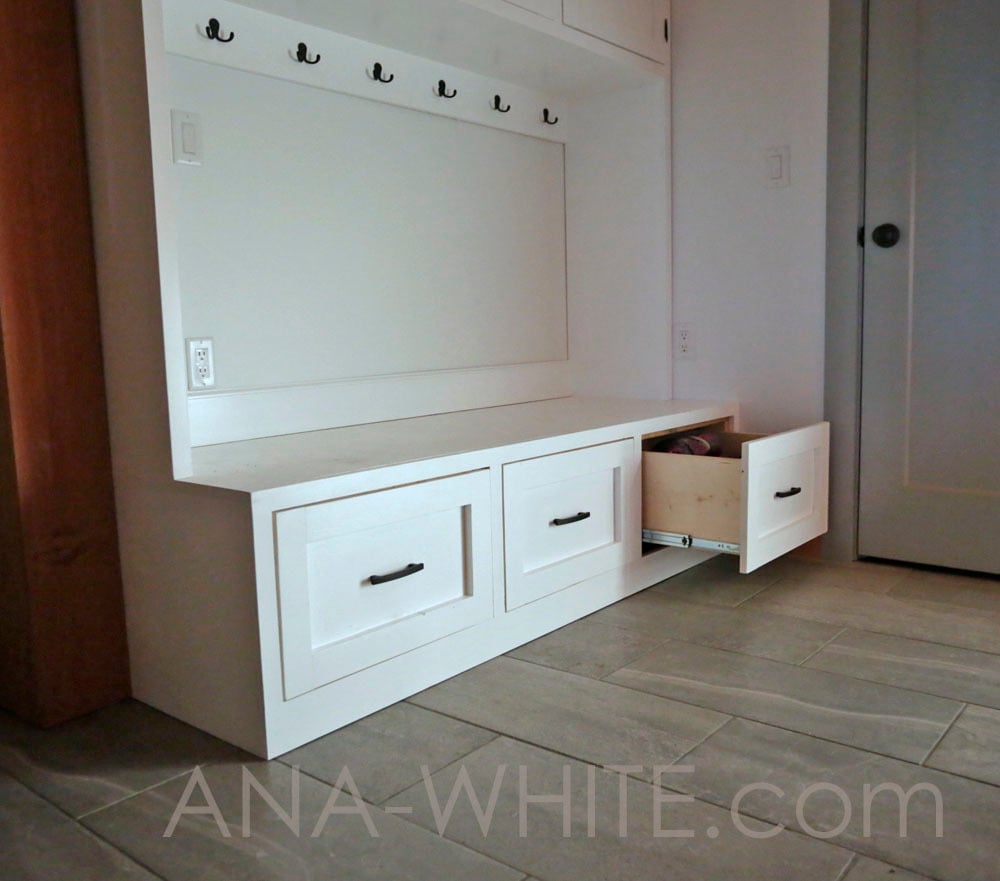
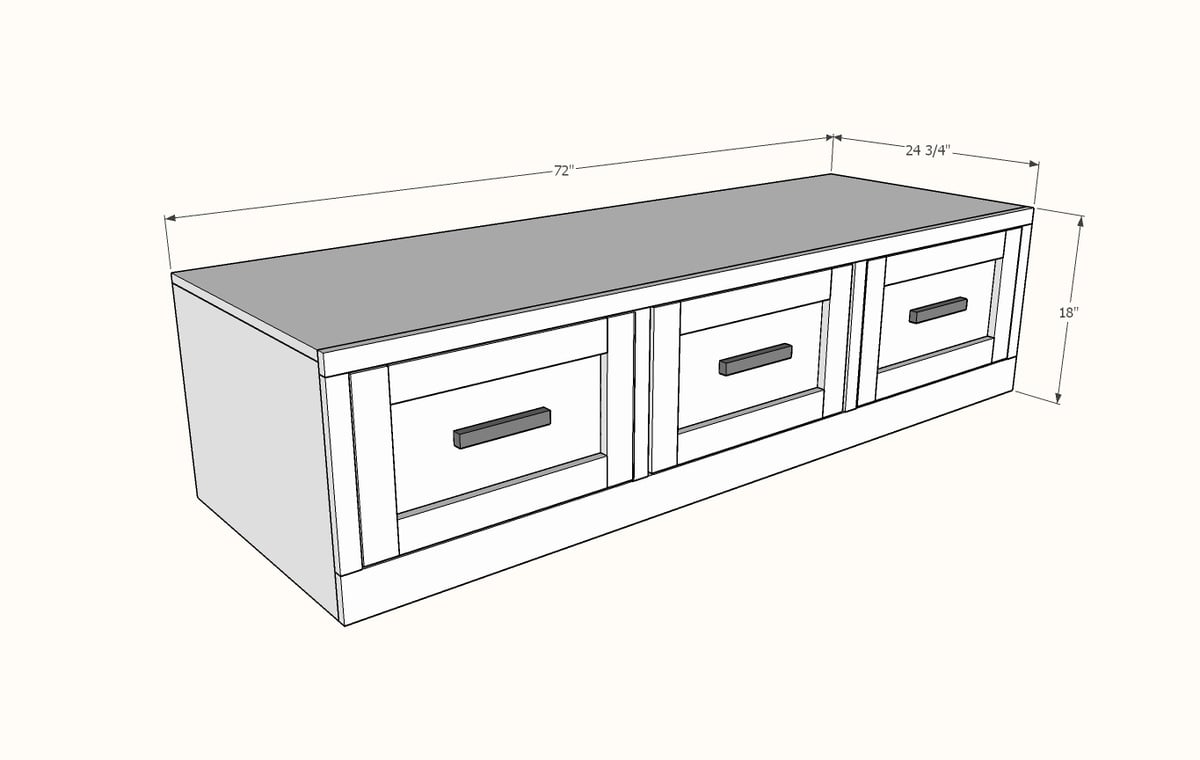
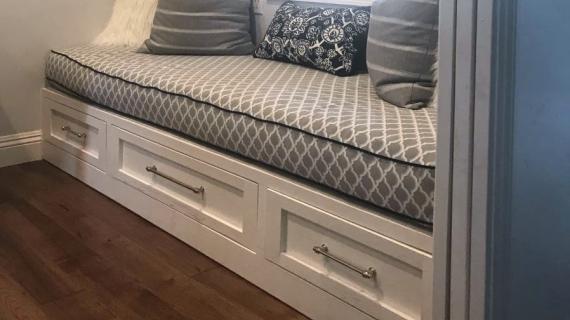
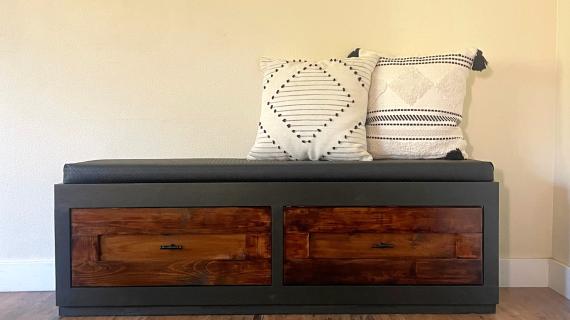
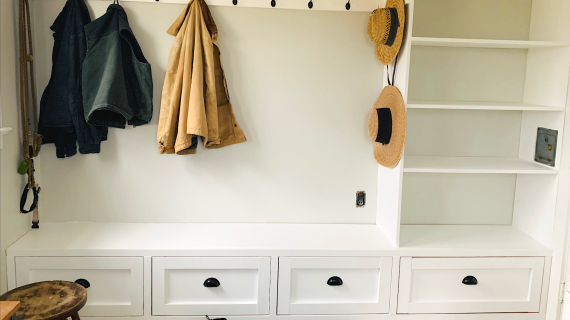
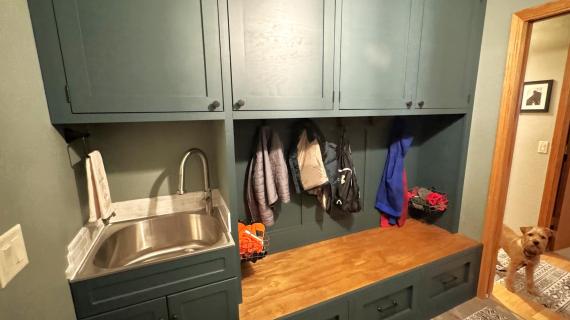
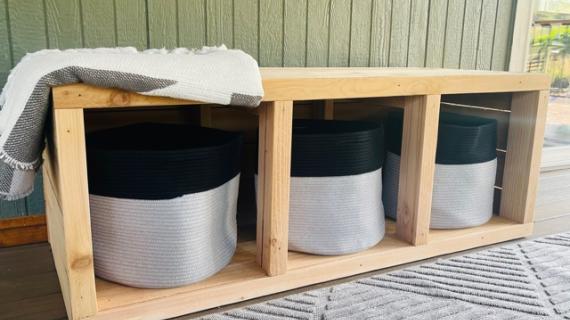
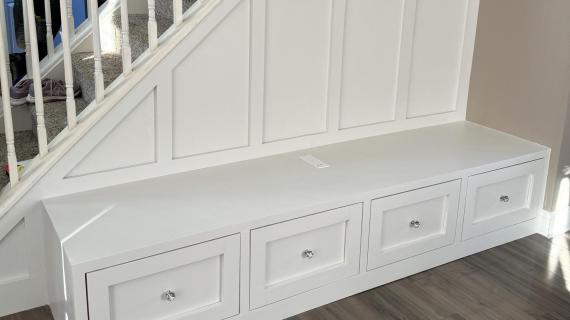
Maximize the functionality and storage in your mudroom with a new mudroom bench with drawers. This easy to build drawer bench will add a ton of very accessible storage and provide a comfortable bench in your mudroom. The free plans are below.
Nothing like falling snow to motivate you to tackle your mudroom organization system.
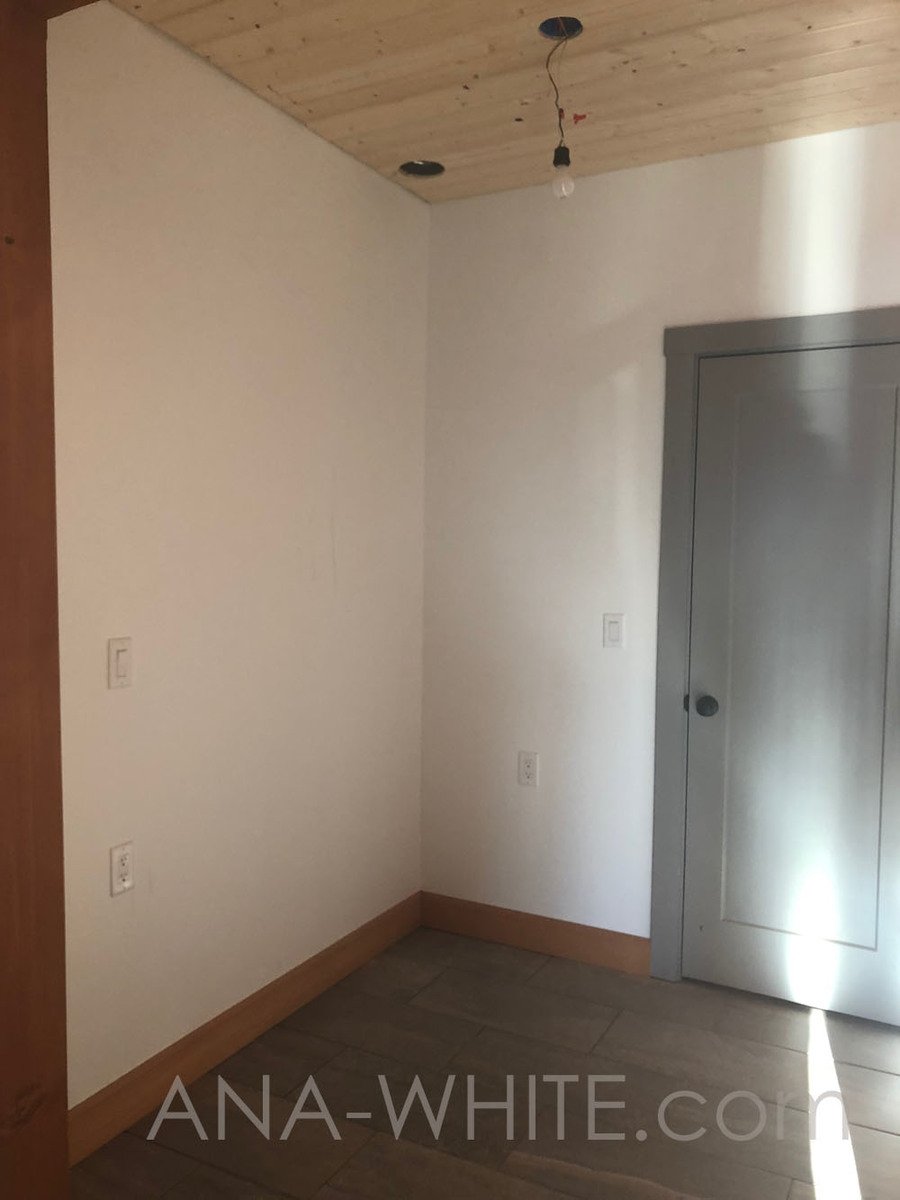
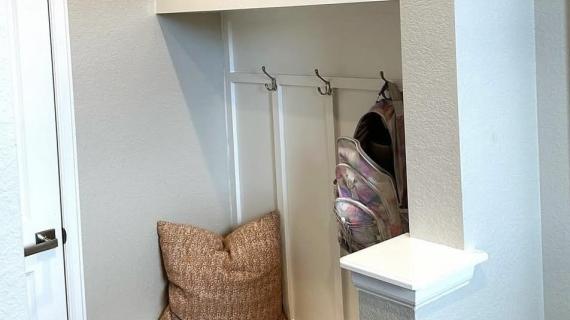
Especially when it looks like this.
Especially when it's below zero and there's a few inches of snow on the ground.
Especially if you've got a down coat problem. And two kids in ice hockey. And you live in Alaska.
I love drawers for any storage below the knee - otherwise, I end up on my hands and knees digging stuff out. And since the space allows for a deep bench and I especially don't want to be on my hands and knees digging something out two feet back, drawers are a must build for our space.
But drawers can be a little bit of a pain - and alot of wasted material. So we did something a little different this time.
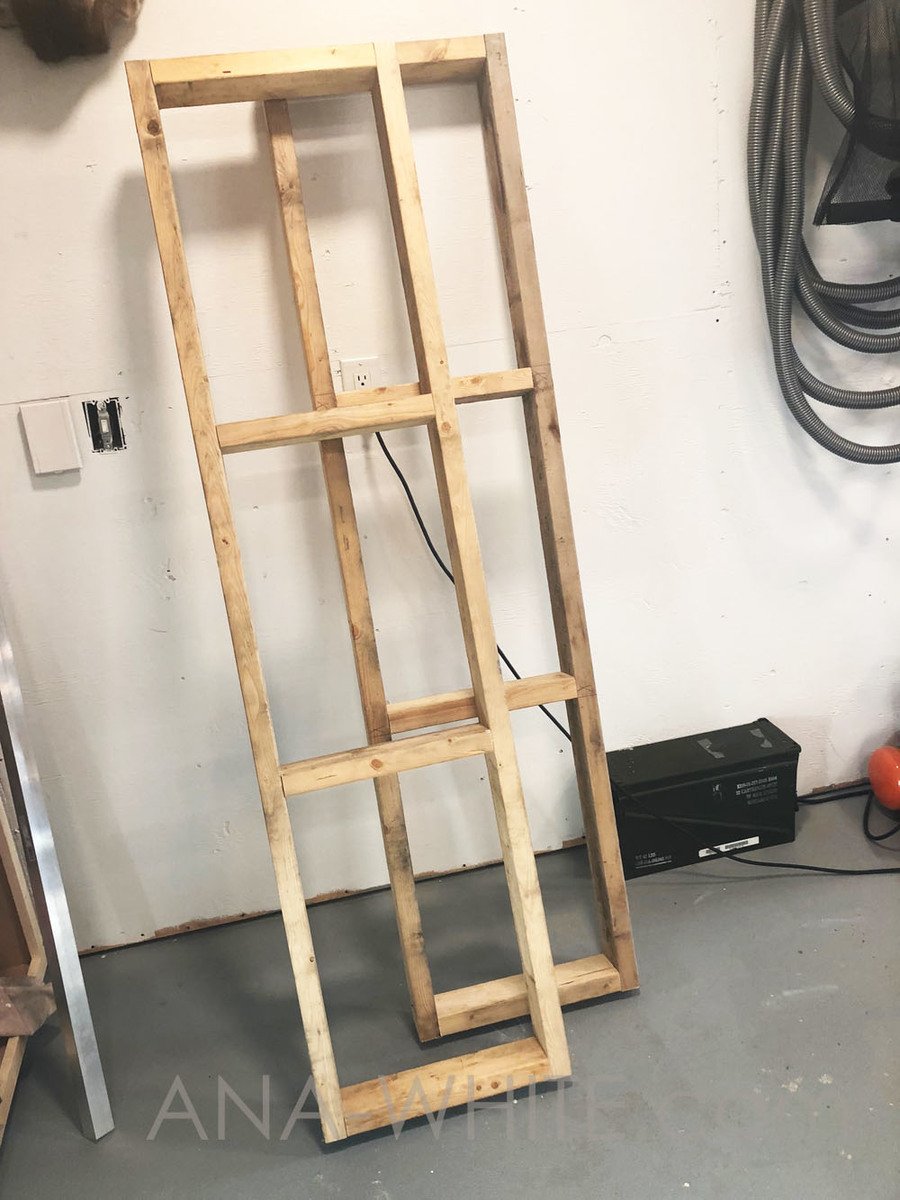
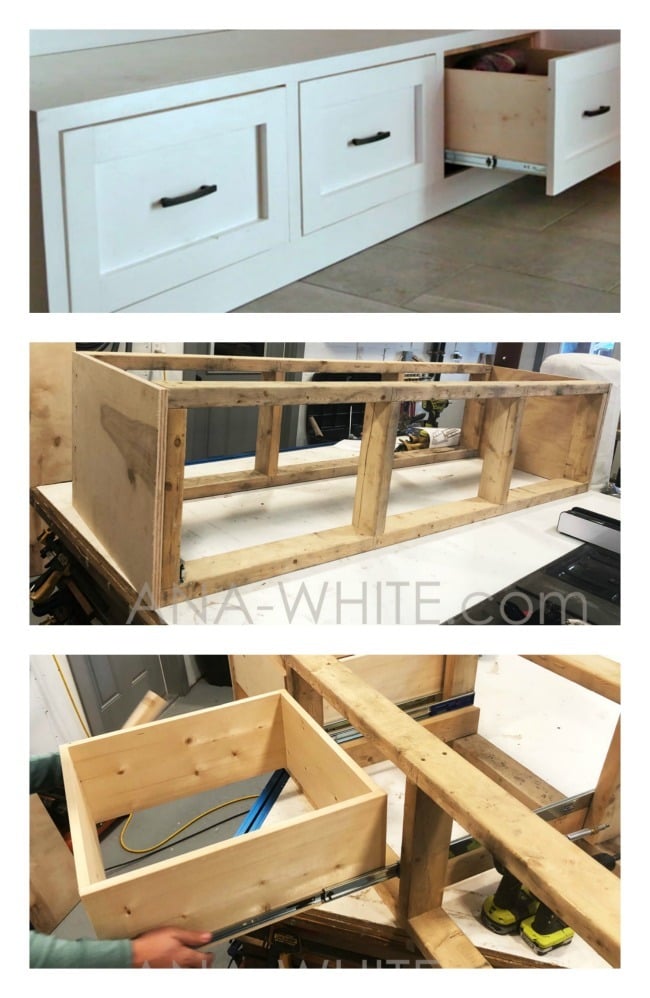
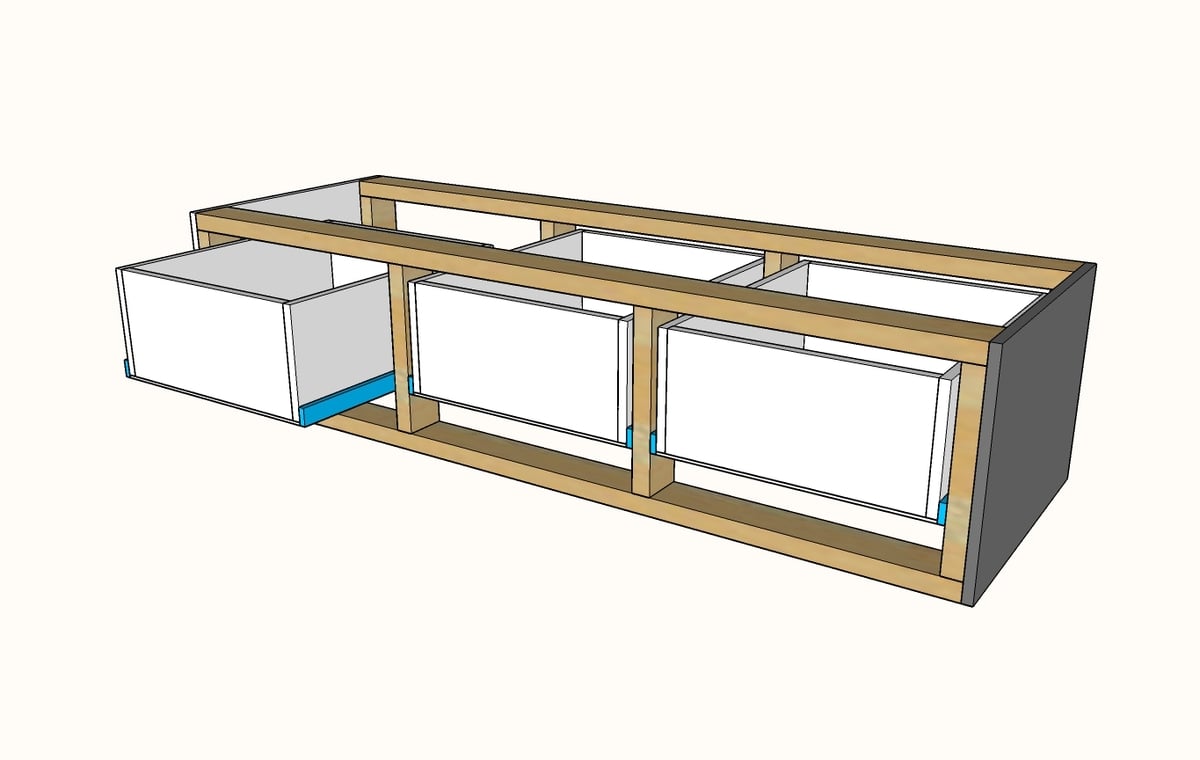
We built these two frames out of 2x4s. Just chop up 2x4s with a chop saw and screw them together.
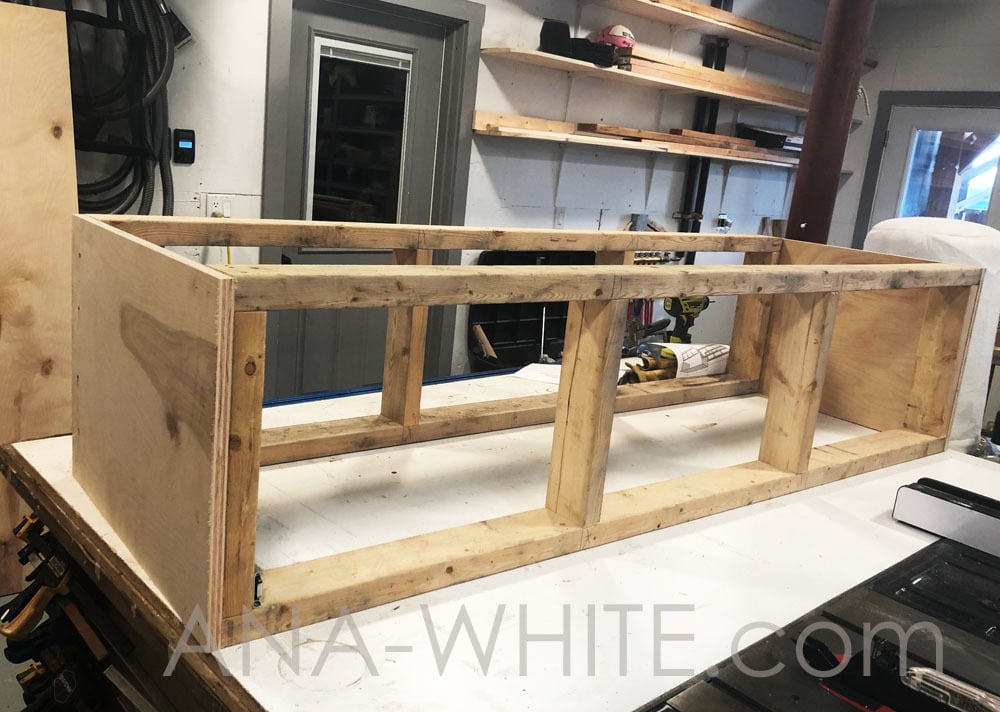
Then we screwed/nailed plywood to the sides.
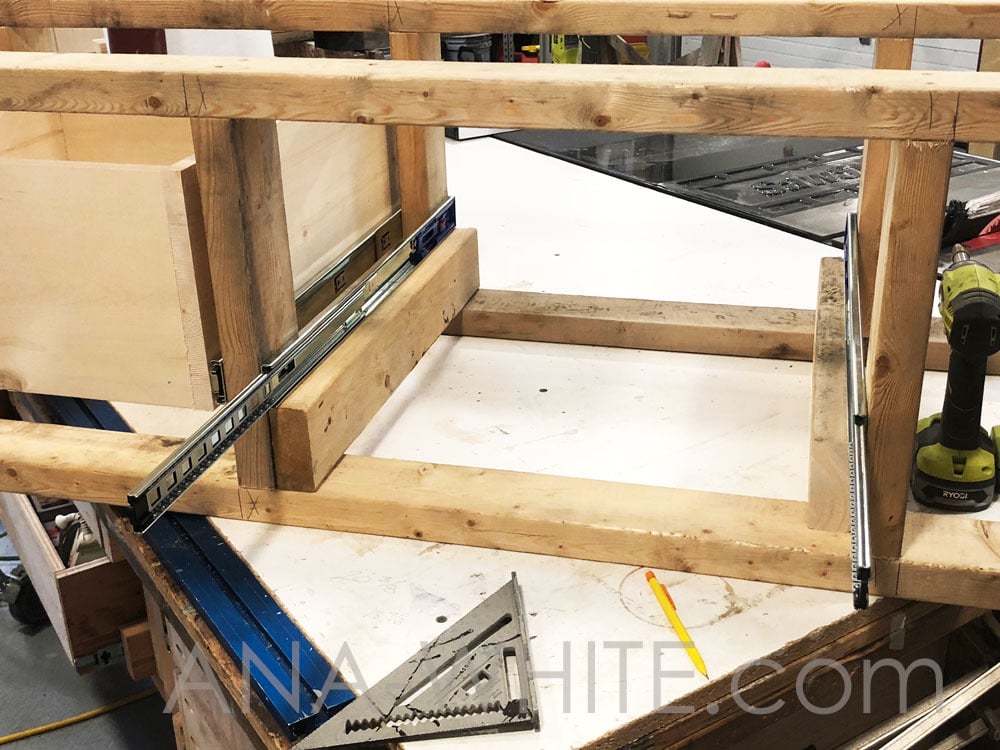
Then we installed some drawer slides inside the 2x4 frames.

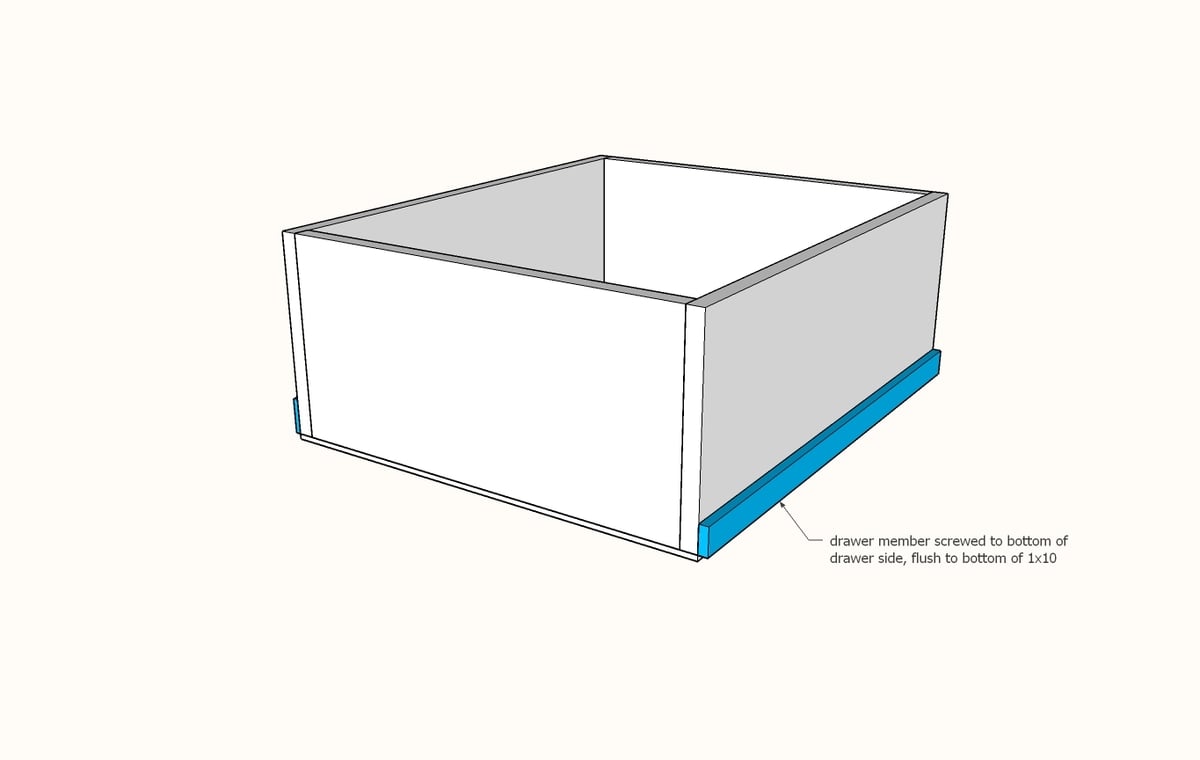
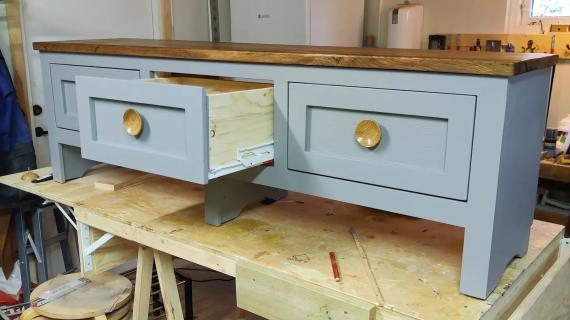
Then we built drawer boxes out of 1x10s and added the other part (drawer member) of the slide to the drawer.

Drawer goes in the slide ... Top goes on the top ...
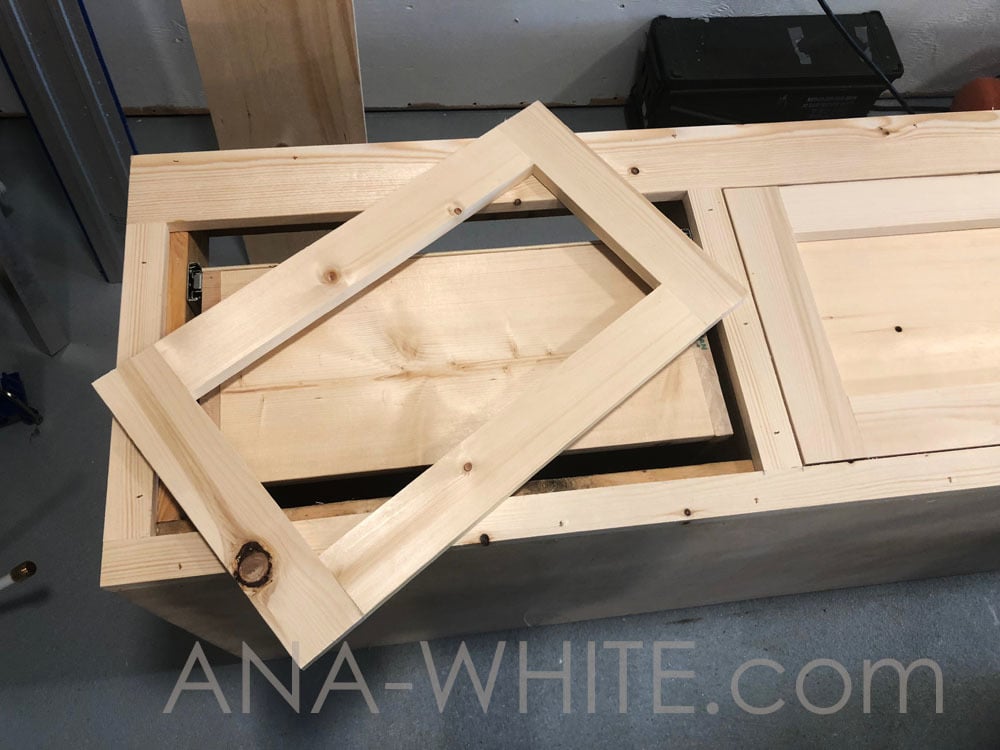
Instead of building a drawer face, we just built these frames ...
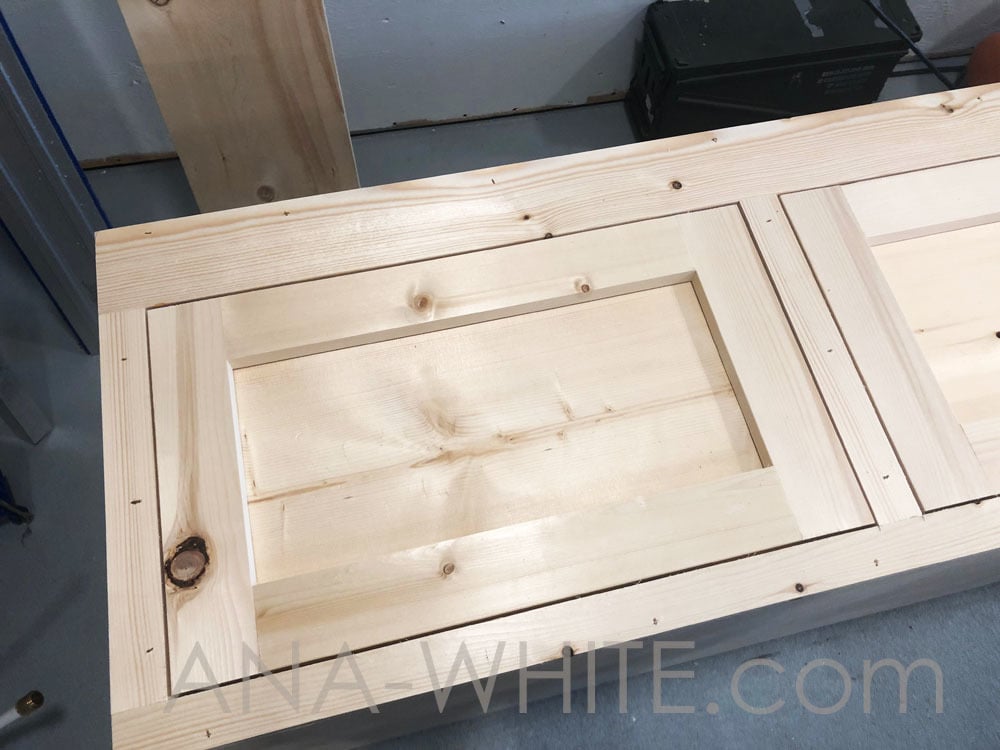
And nailed them to the front of the drawer box.
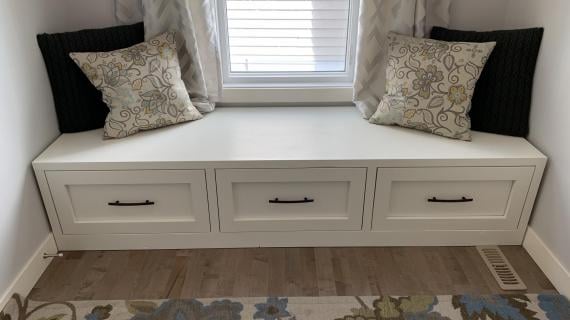
Two coats of paint (with a fine sanding in between) and we built this!
There's lots of ways to build a bench with drawers, but this is how I'm doing it for now on. This was the fastest easiest method I've ever done.
If you want to see us build this bench, we did a video on it as well -
And if you are ready to build, the free plans are below.
Please share if you build, it makes our day (and helps other diyers out too) when you share your projects!
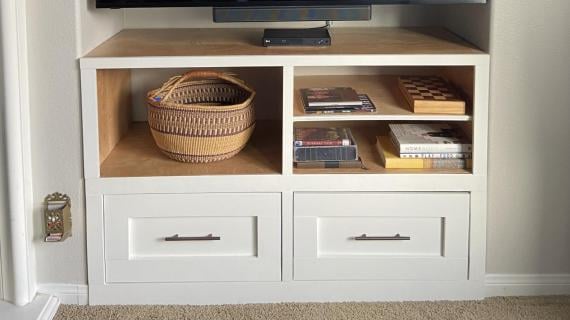
UPDATE: We built a hutch for over the drawer bench.
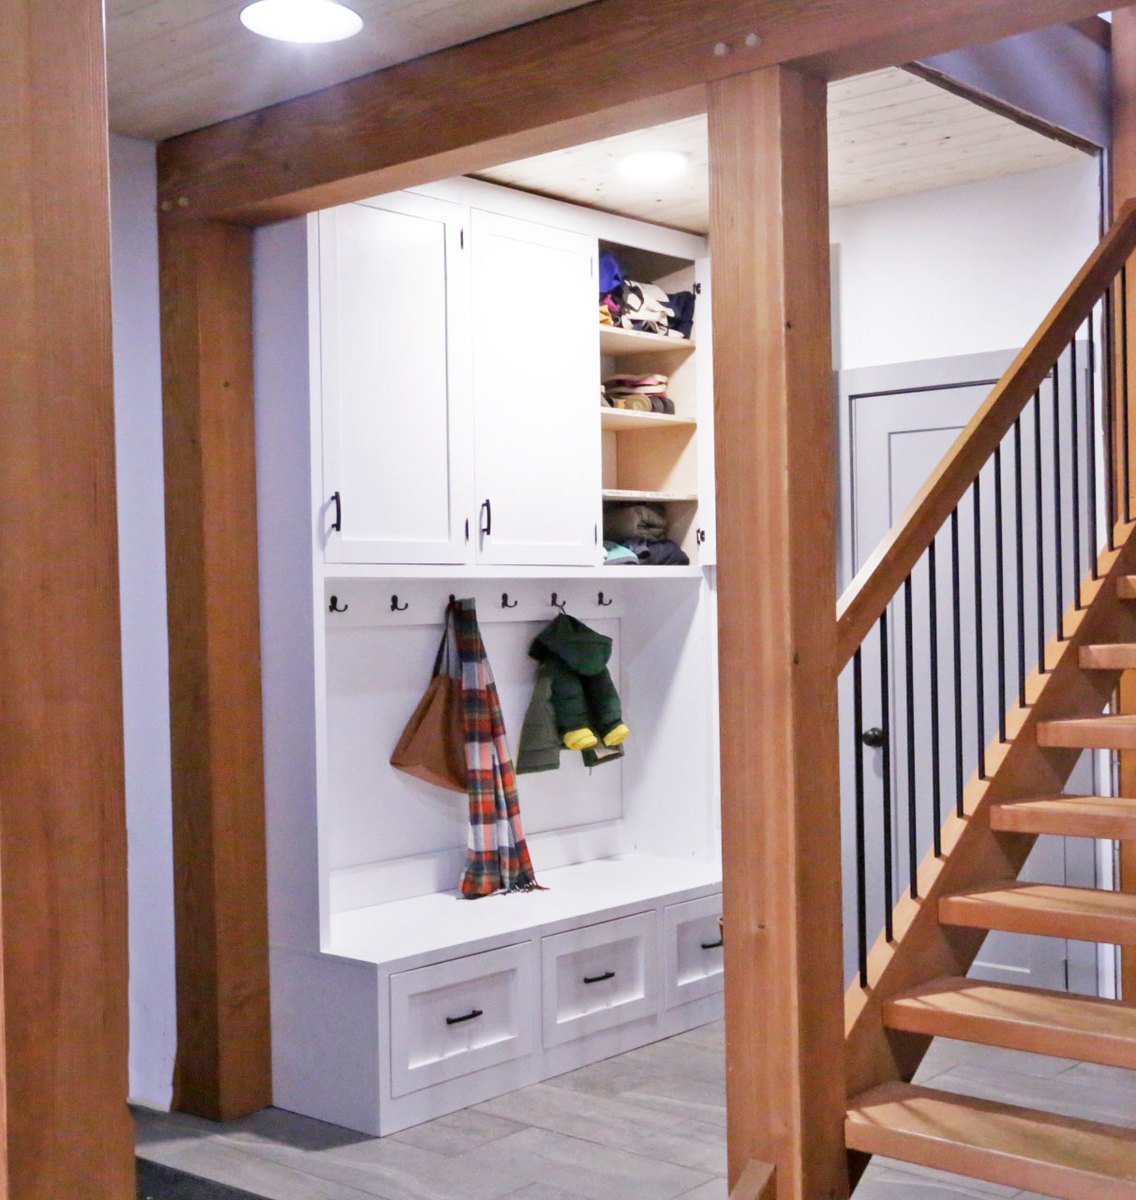
The plans for the mudroom hutch cabinet are here.
Preparation
1 -sheet of 3/4" plywood cabinet grade, 48" x 96" - ripped into two strips, 96" x 23-7/8"
5 - 2x4 @ 8 feet long
3 - 1x10 @ 8 feet long
48" x 48" sheet of 1/4" plywood (for drawer bottoms)
12 feet of 1x2 boards
6 feet of 1x4 board
2 - 1x3 @ 8 feet long
3 - full extension side mount drawer slides
3 knobs or handles
3" screws (about 40)
FRAMES
4 - 2x4 @ 70-1/2"
8 - 2x4 @ 14-1/4"
SIDES/TOP
2 - 3/4" plywood @ 23-7/8" x 17-1/4"
1 - 3/4" plywood @ 23-7/8" x 72"
DRAWERS - CUT TO FIT!!!
6 - 1x10 @ 23-7/8"
6 - 1x10 @ 19"
3 - 1/4" plywood @ 23-7/8" x 20-1/2"
FACE FRAME
1 - 1x2 @ 72"
1 - 1x4 @ 72"
4 - 1x2 @ 13"
DOOR FACE FRAMES
6 - 1x3 @ approx 12-3/4"
4 - 1x3 @ approx 17" - end drawers
2 - 1x3 @ approx 16-1/4" - middle drawer
For the 3/4" plywood - first rip the plywood into two pieces, 96" long x 23-7/8" wide. Then cross cut to get the pieces in the cut list.


Instructions
Step 1
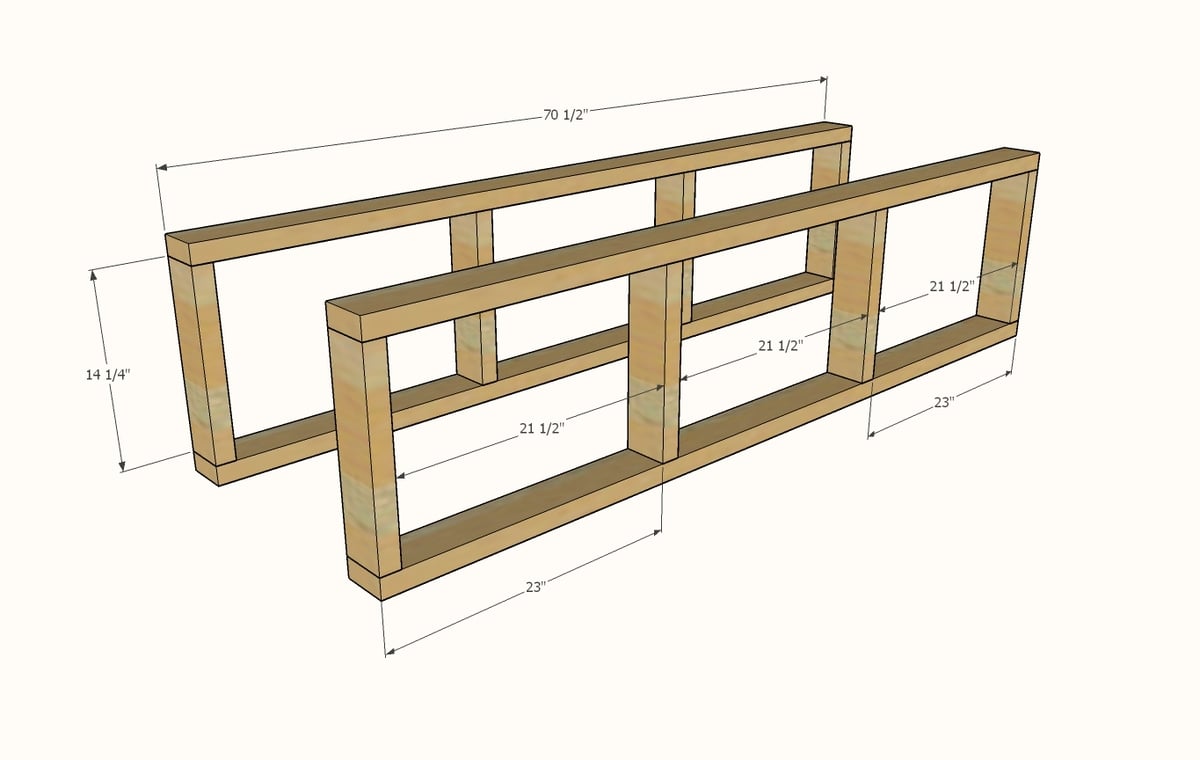
Cut the 2x4 pieces with a compound miter saw. Build the two frames so they match exactly - this is important for the drawers to slide straight. I used 3" self tapping screws. You can also use a Kreg Jig with the 1-1/2" material setting and 2-1/2" pocket hole screws.
Step 2
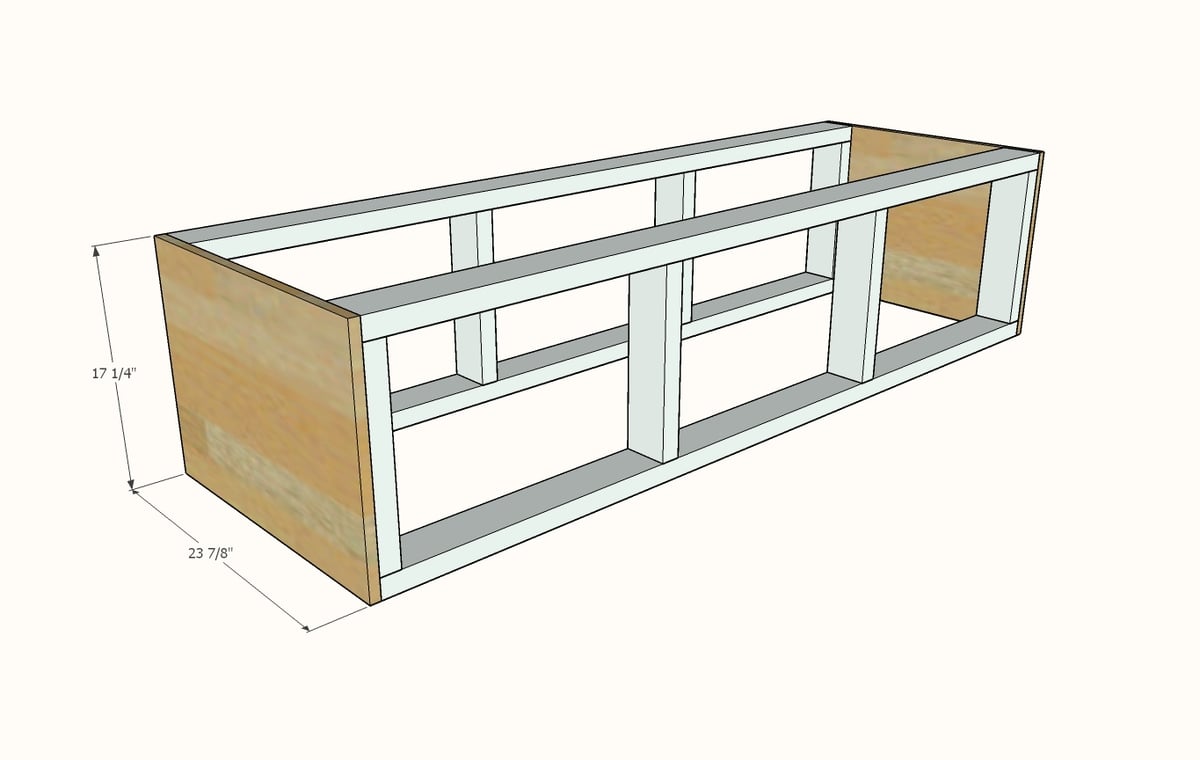
Attach the plywood to the ends. I used screws (2" length) but you can also use nails and glue.
Step 3
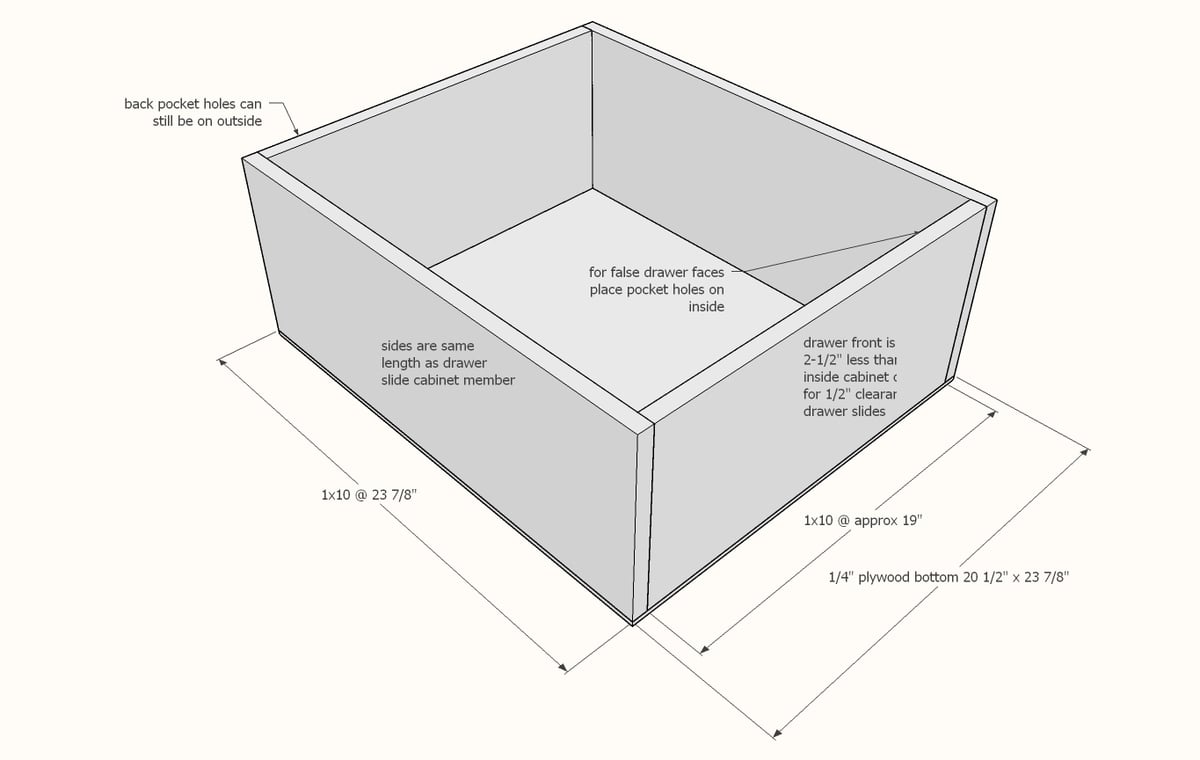
Read the instructions with your drawer slides and build drawers to fit your slides and opening. The measurements show are for standard 1/2" clearance drawer slides with 3/4" thick 1x10s.
If using a Kreg Jig to build the drawer box, place pocket holes on the inside of the front of the drawer. You can still place on the outside on the back. I used a Kreg Jig set for 3/4" thick material and 1-1/4" pocket hole screws.
I used a stapler with 3/4" narrow crown staples to attach the bottom with glue. You can also use a brad nailer with 3/4" brad nails and glue.
Step 4
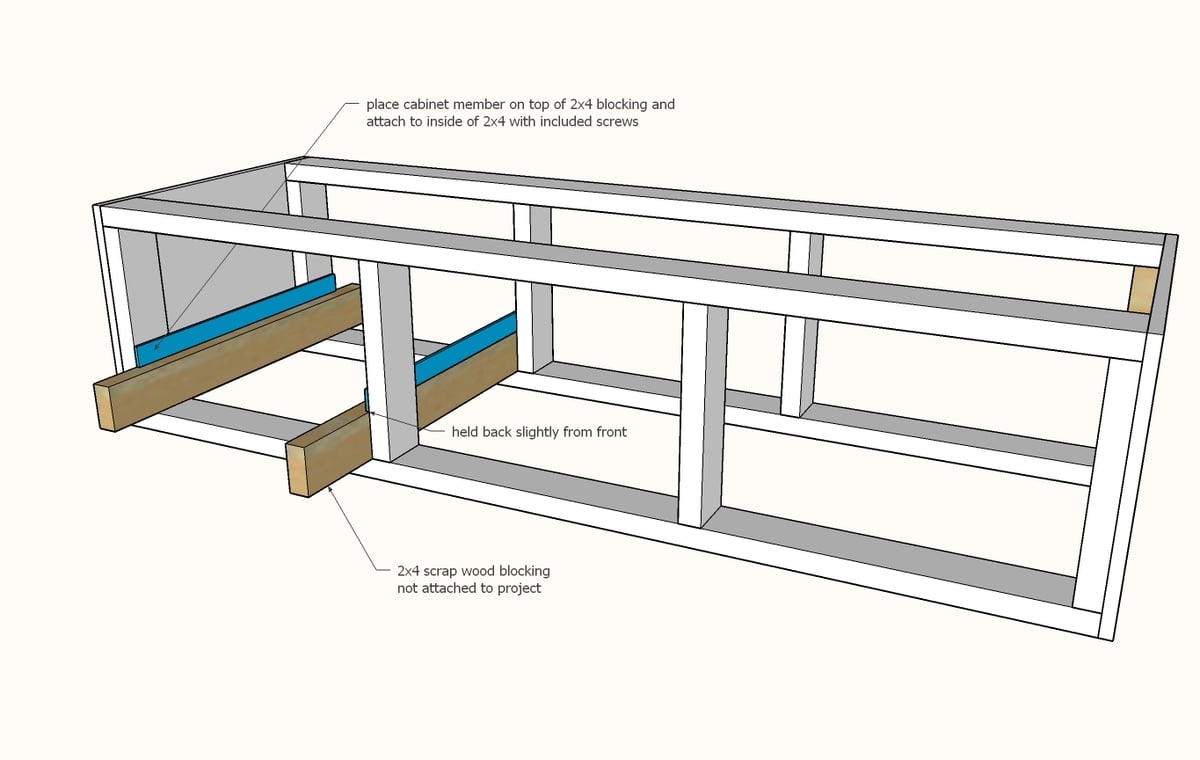
Place 2x4 scraps inside the bench as shown. Place the cabinet member of the drawer slide on top of the 2x4 and attach to the inside of the cabinet.
Step 5
Step 6
Test the fit of the drawer in the bench. Adjust if necessary until drawer slides smoothly.
Step 7
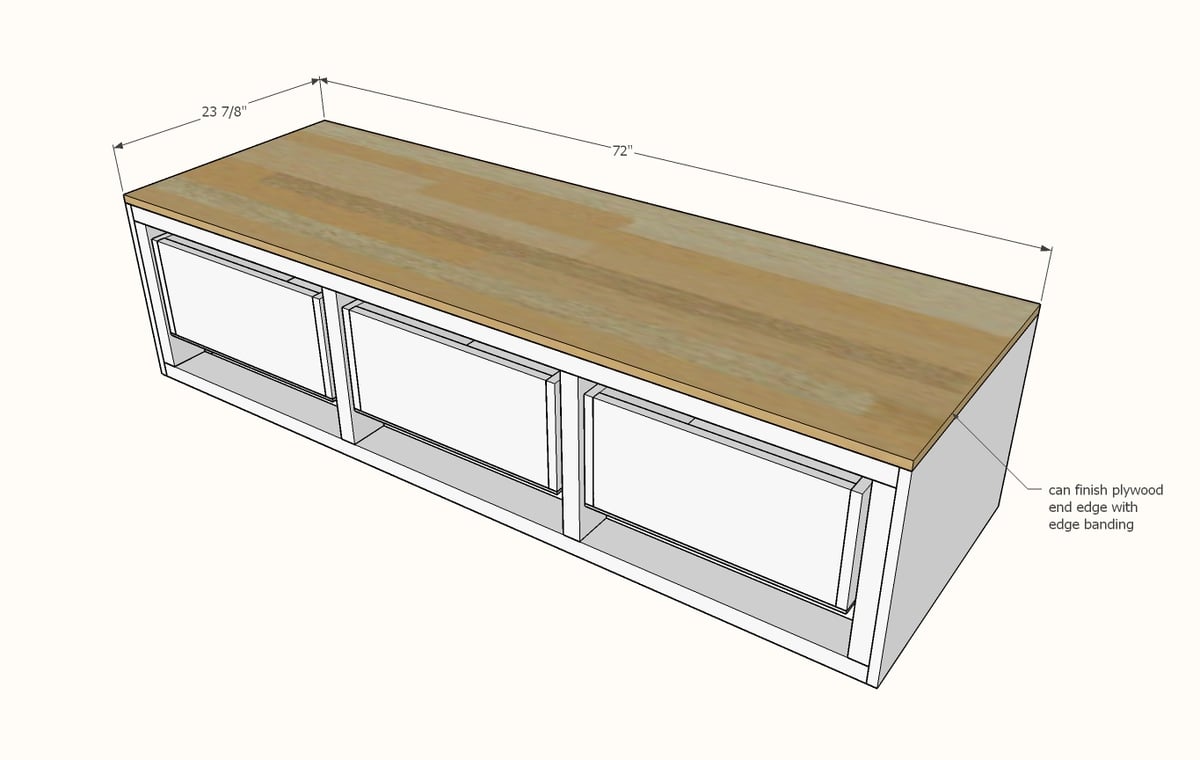
Attach top to the bench with 1-1/4" brad nails and glue. You can also use screws or staples - they will just be harder to hide.
Step 8
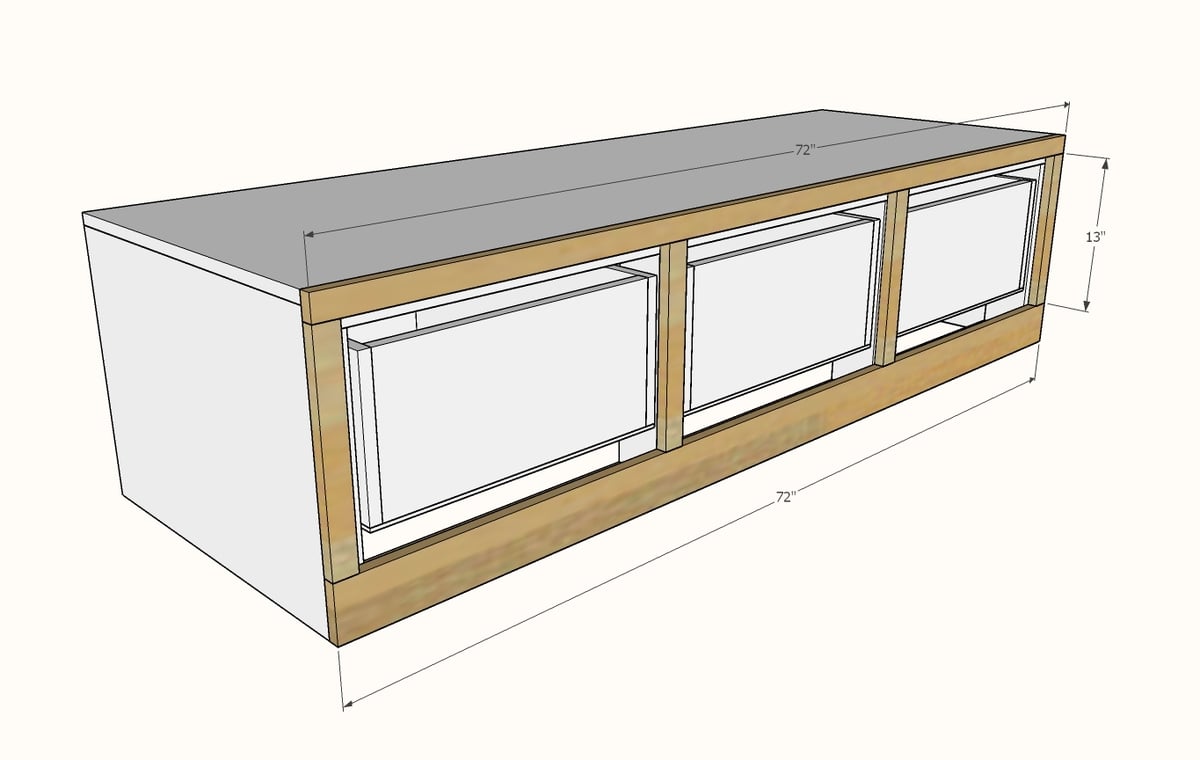
Build the face frame first using a Kreg Jig set on the 3/4" setting with 1-1/4" pocket hole screws. Attach the completed face frame to the front of the project with 1-1/4" brad nails and glue.
Step 9
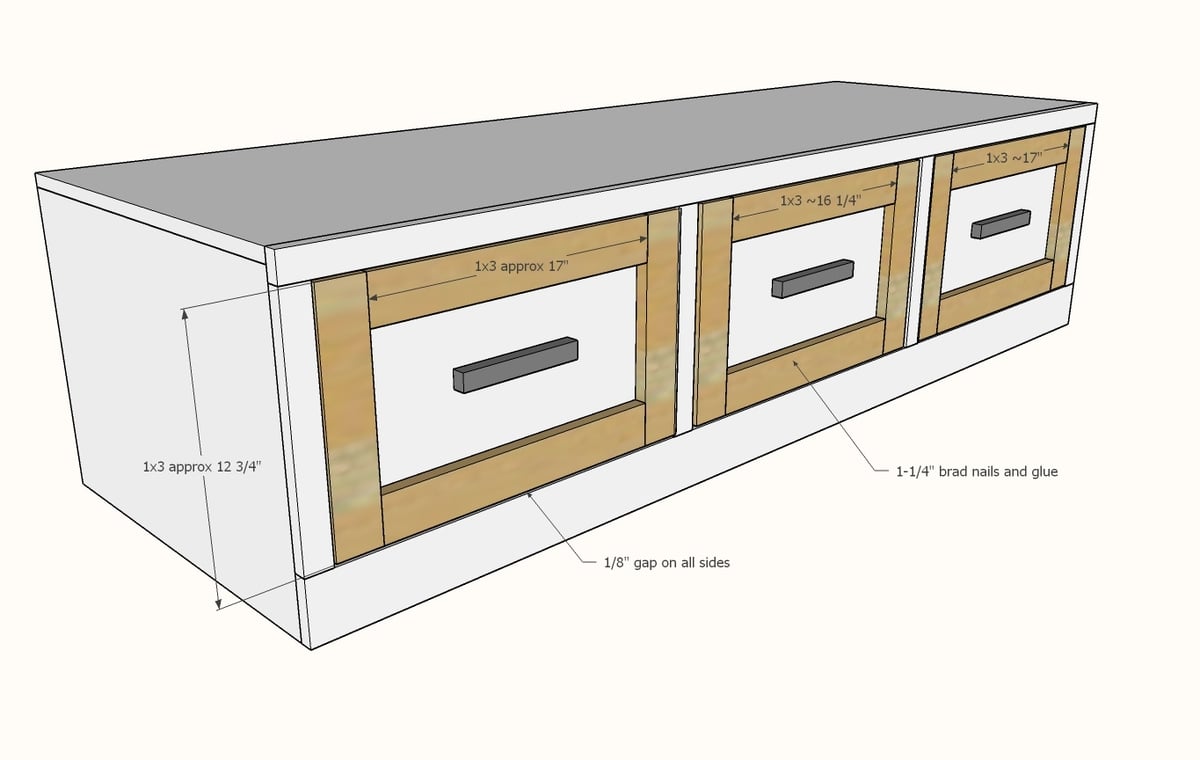
Build the drawer face frames and attach to the drawer boxes with an even 1/8" gap on all sides with 1-1/4" brad nails and glue.

Comments
Pjrichar
Mon, 11/26/2018 - 05:20
Size of drawer slides?
Would you be able to share what size drawer slides you used?
In reply to Size of drawer slides? by Pjrichar
Ana White
Wed, 11/28/2018 - 18:25
Yes of course, 24"
Yes of course, 24"
jenbunn
Mon, 03/22/2021 - 09:38
If the drawers are only 23 7…
If the drawers are only 23 7/8” in deep, the slides are still 24”not 22”?
rachelowe
Fri, 06/28/2019 - 10:03
Adjusting Dimensions
I LOVE this plan! And I'm really hoping to accomplish this look in my mud room. My only problem is, I don't have as much room lengthwise as you do and I'm having trouble adjusting some of the dimensions. Any way you can help me out with this? I'm REALLY good at following directions and and DIY projects but math is not my strong suit haha
Chrismmalone405
Sun, 12/01/2019 - 17:49
Me too. I am looking to make…
Me too. I am looking to make this 2 feet smaller and am gonna have to figure out the dimensions. Would love support!
LandOfOzArts
Sat, 11/02/2019 - 17:17
Can this bench be used under a mattress?
Could this bench be used to make a storage bed? I like the queen & king storage bed plans, but want 3 drawers on the side benches. Would this design style (the 2x4 frame) be sturdy enough to use for a bed frame? Thanks.
Sananasir1
Mon, 11/18/2019 - 12:47
Hi Ana, Love your simple…
Hi Ana,
Love your simple designs and videos....you and your family are an inspiration for us!!
We bought all the basic tools...now unsure about the kind of wood to buy (in terms of 2x4's and the plywood). We went to Home Depot (I'm in Canada) and got confused with the curved woods! Can you please give us some pointers dear.
Thanks a million
miked1108
Fri, 01/24/2020 - 16:29
Mudroom bench with easy drawers question
Hello. Just curious what grade of plywood do you recommend for this project?
EliG
Tue, 05/19/2020 - 15:40
Two Drawer Size
Great bench the wife will love it. I'm a novice at building things and since we have time on our hands I figured I try something new. I am trying to figure out how to duplicate this, but for 2 drawers instead of 3 drawers. The length of the bench would be 46" 3/16, the height is 18" and the depth 15" 3/4. I was looking for any assistance as to what the sizes of the drawers should be, and what size the drawer slides I should use? Any help will be greatly appreciated.
Momof7Dragons
Wed, 02/09/2022 - 12:08
Help with cut list and measurements
I have a bar-height table that I want to build built-in seating for. What dimensions or cut list would I need to use to make 2ft tall by 4 ft wide with approx 18 inch seat width? How big would the drawers be then?
Lcoccetti
Fri, 01/06/2023 - 09:49
Maximum drawer width?
Hi Ana, my son and I are planning to build this for his new apartment. The space between walls under the three windows is very wide (10' 10"). What is the widest size drawer you recommend?