


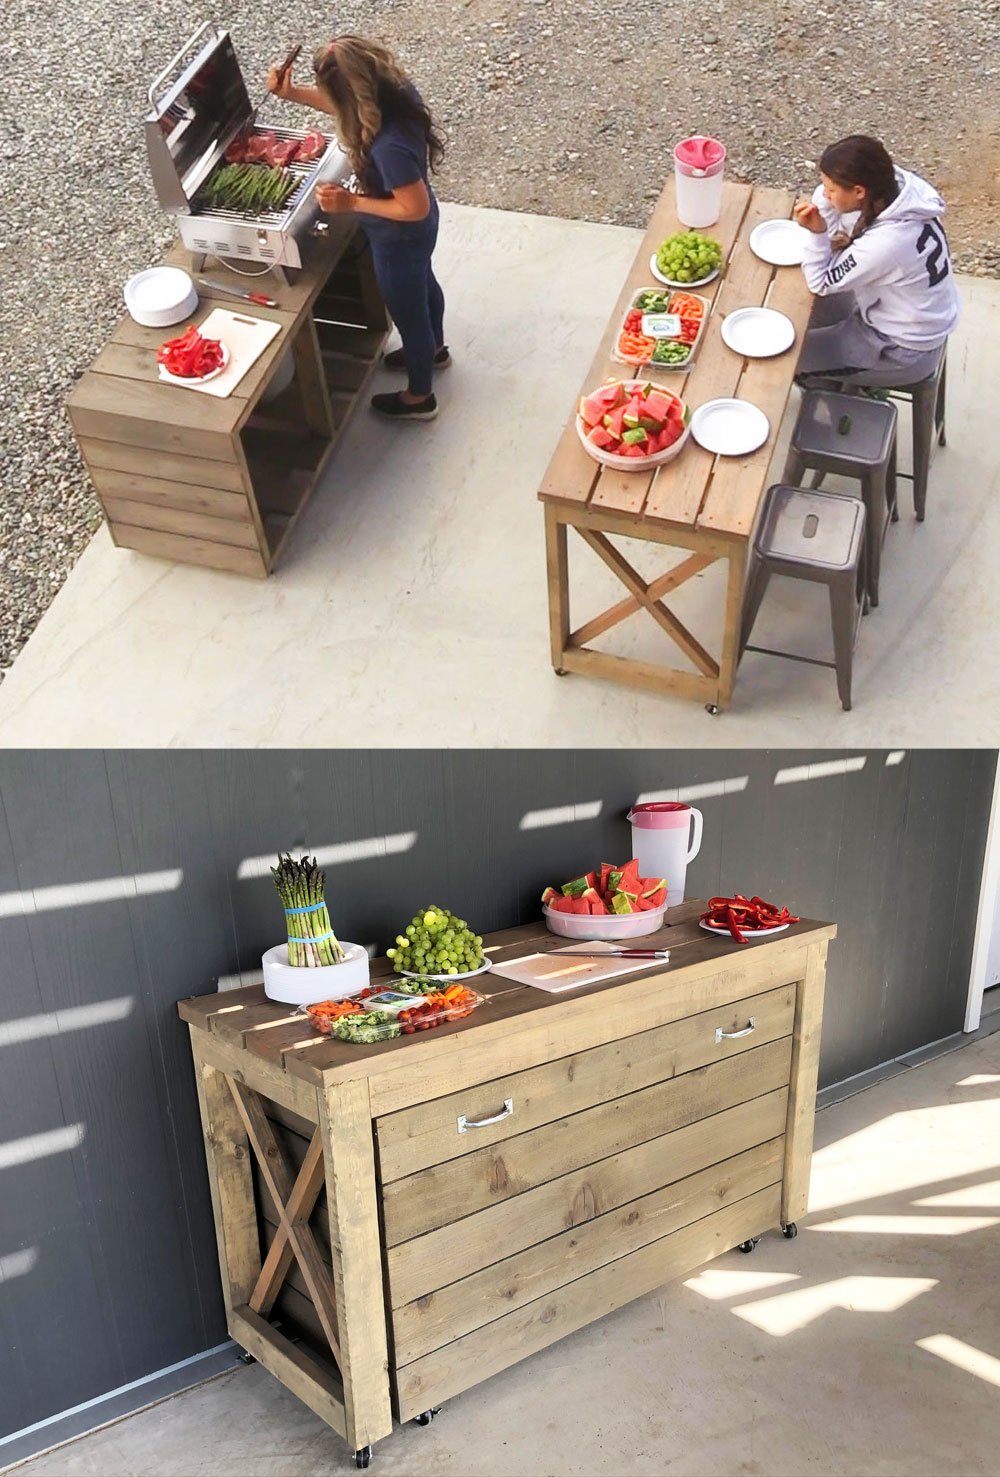
Build your own nesting grill station for a portable grill! Features grill table with storage for gas and grill, and a counter height dining/serving table, so you can pop out an entire outdoor kitchen set up in seconds!
Free step by step plans with detailed diagrams and shopping and cut list from Ana-White.com
How amazing are portable gas grills? They take up so little space, you can bring them anywhere - so no need to have multiple grills, and they do a great job for an economical price!
I love portable gas grills so much, I had to make an entire grilling station based around one!
Here's how it works -
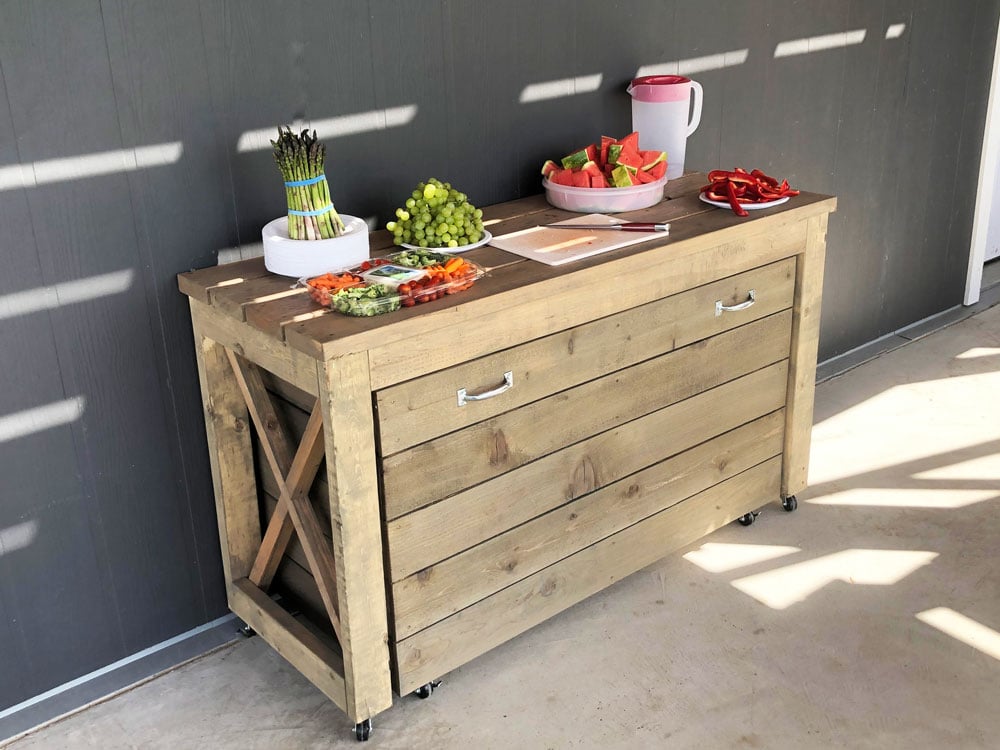
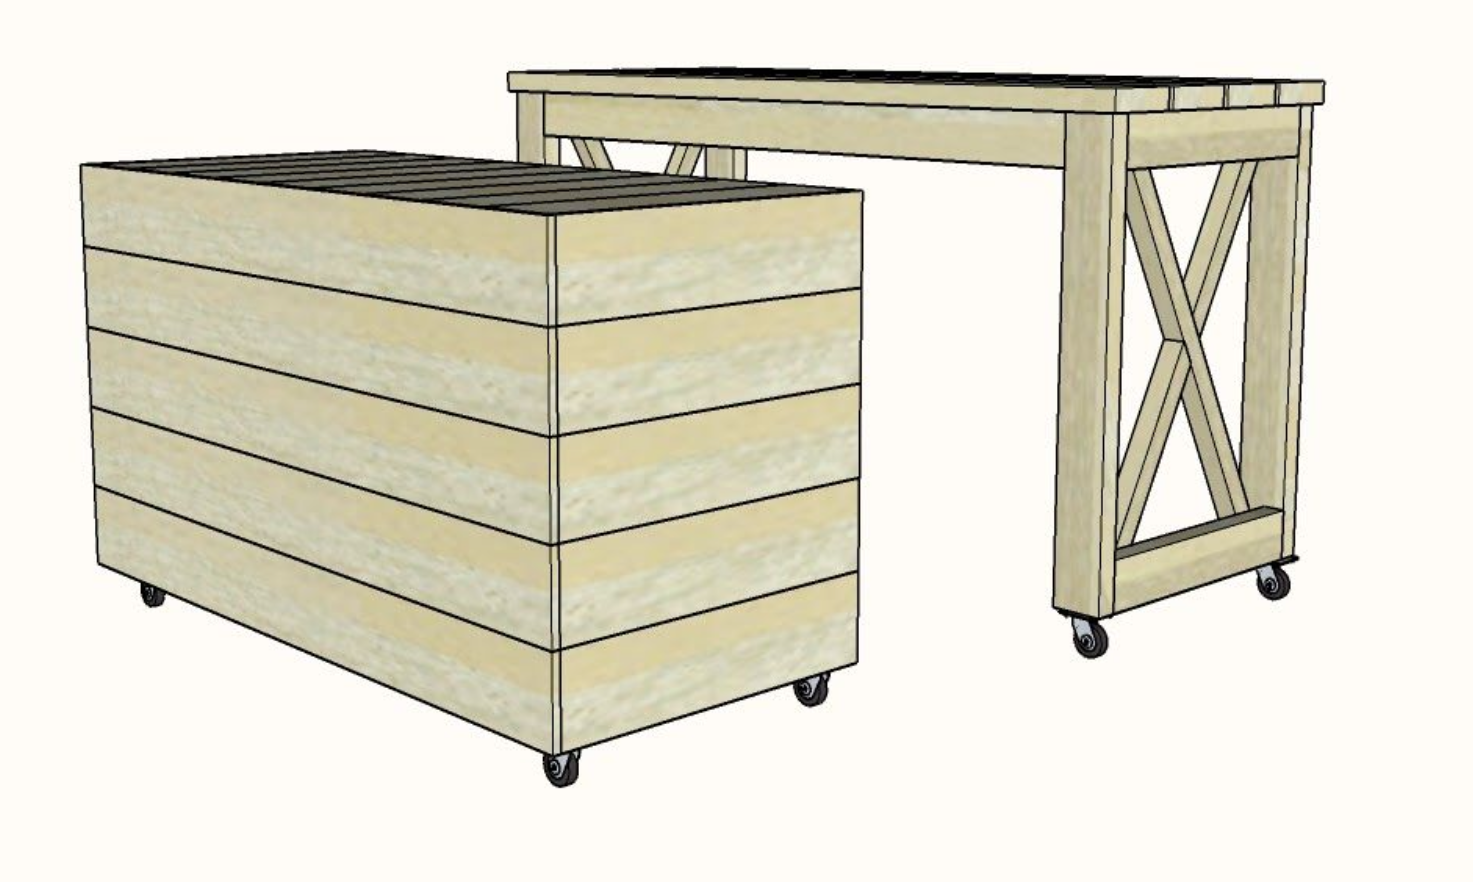
An enclosed console outside, that you can use for a variety of uses - as a bar, put an outdoor TV over it, or as a serving console -
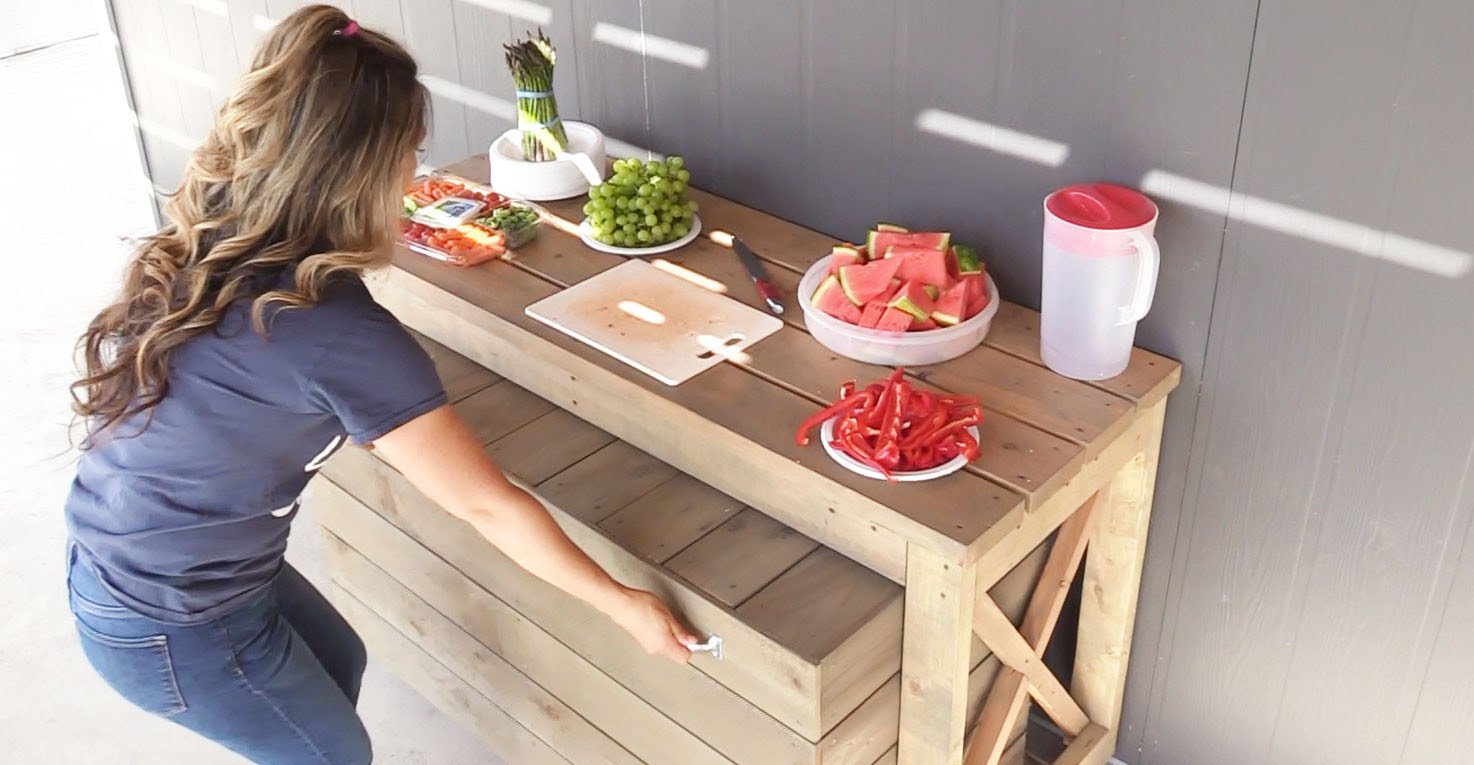
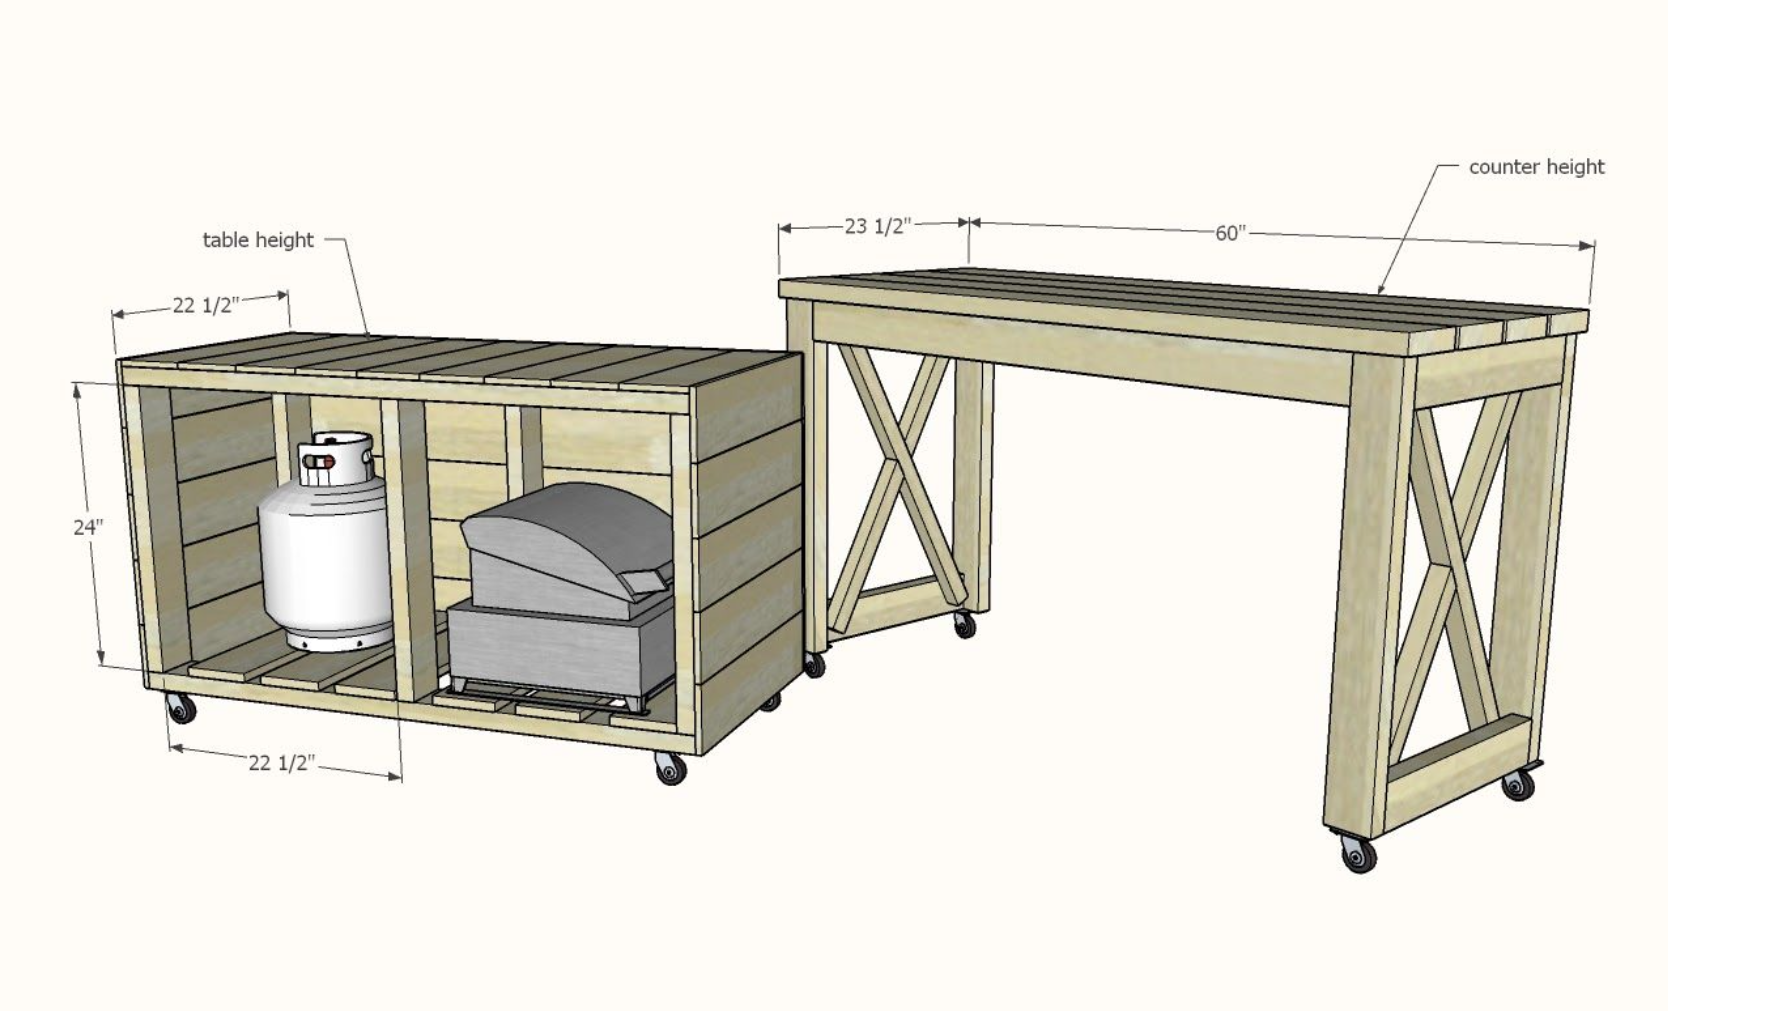
If you want to grill, just pull out the lower table, move it away from a structure (so it's fire safe), and set your grill up. I made the lower table table height, so it's perfect for a portable gas grill that adds about 6" in height.
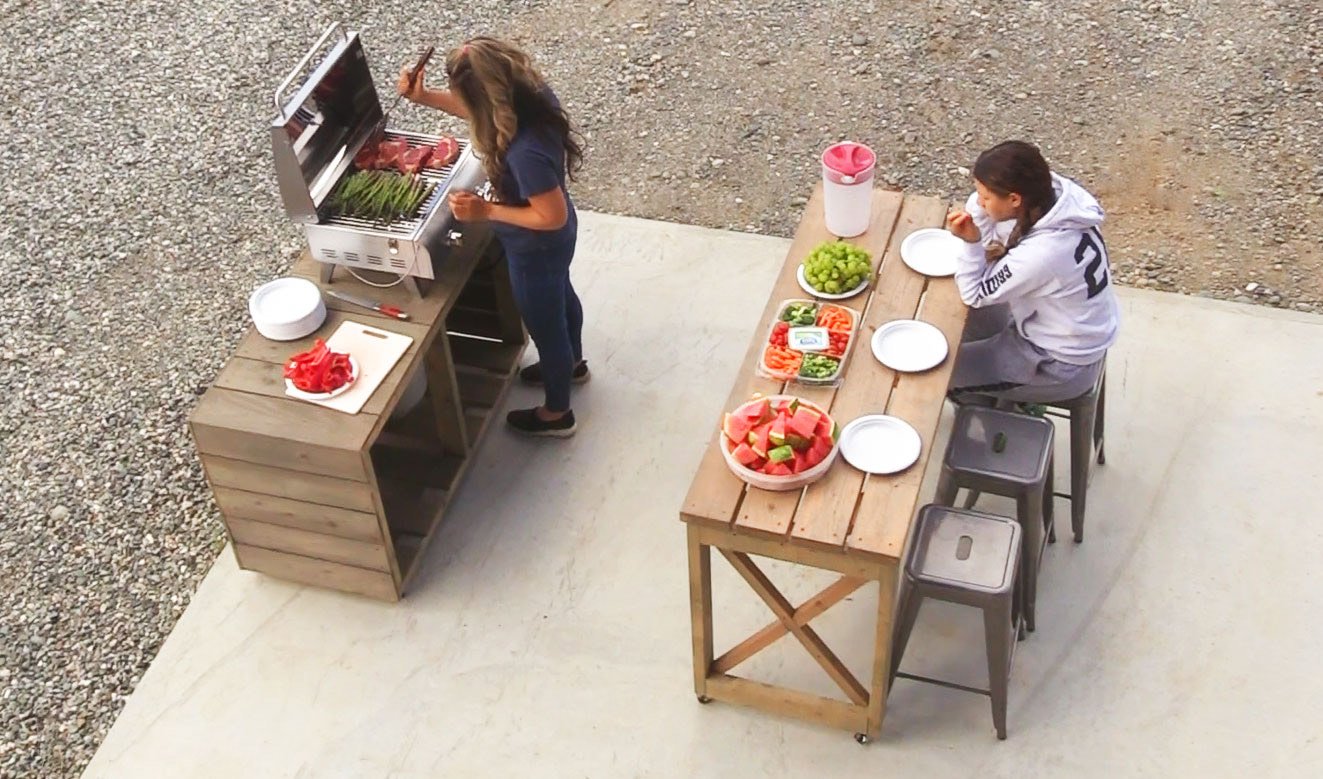
You can also move the "over" table out, and use it for dining. It fits about six stools (max) - but four would be more comfortable.
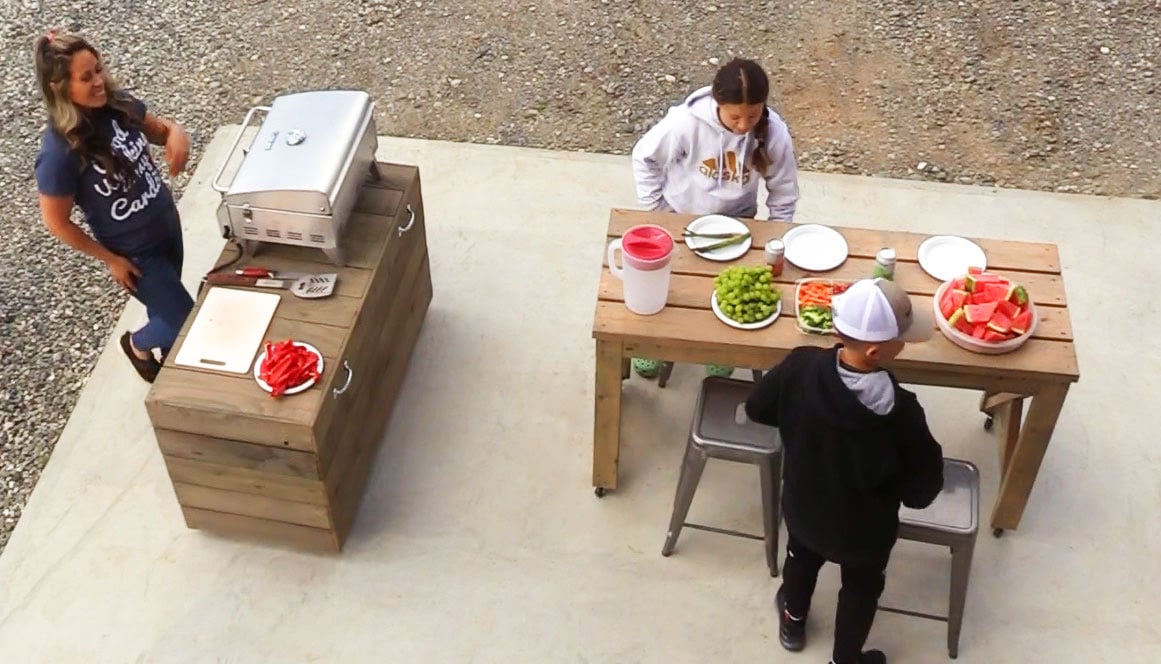
We LOVE that you can use this system in unlimited configurations. You can set it up as an island, as an L shape, with the grill out, with the grill facing in ... whatever your occasion and your space requires, this grill system is up for the challenge!
Watch the Video - Building the Grill Station
This was actually a pretty easy build! The hardest part was the X detailing (which you can omit or customize to make easier). We created a video of the build process for your convenience -
Free Nesting Grill Station Plans
Love this grill station? You can't buy it - you have to build it!
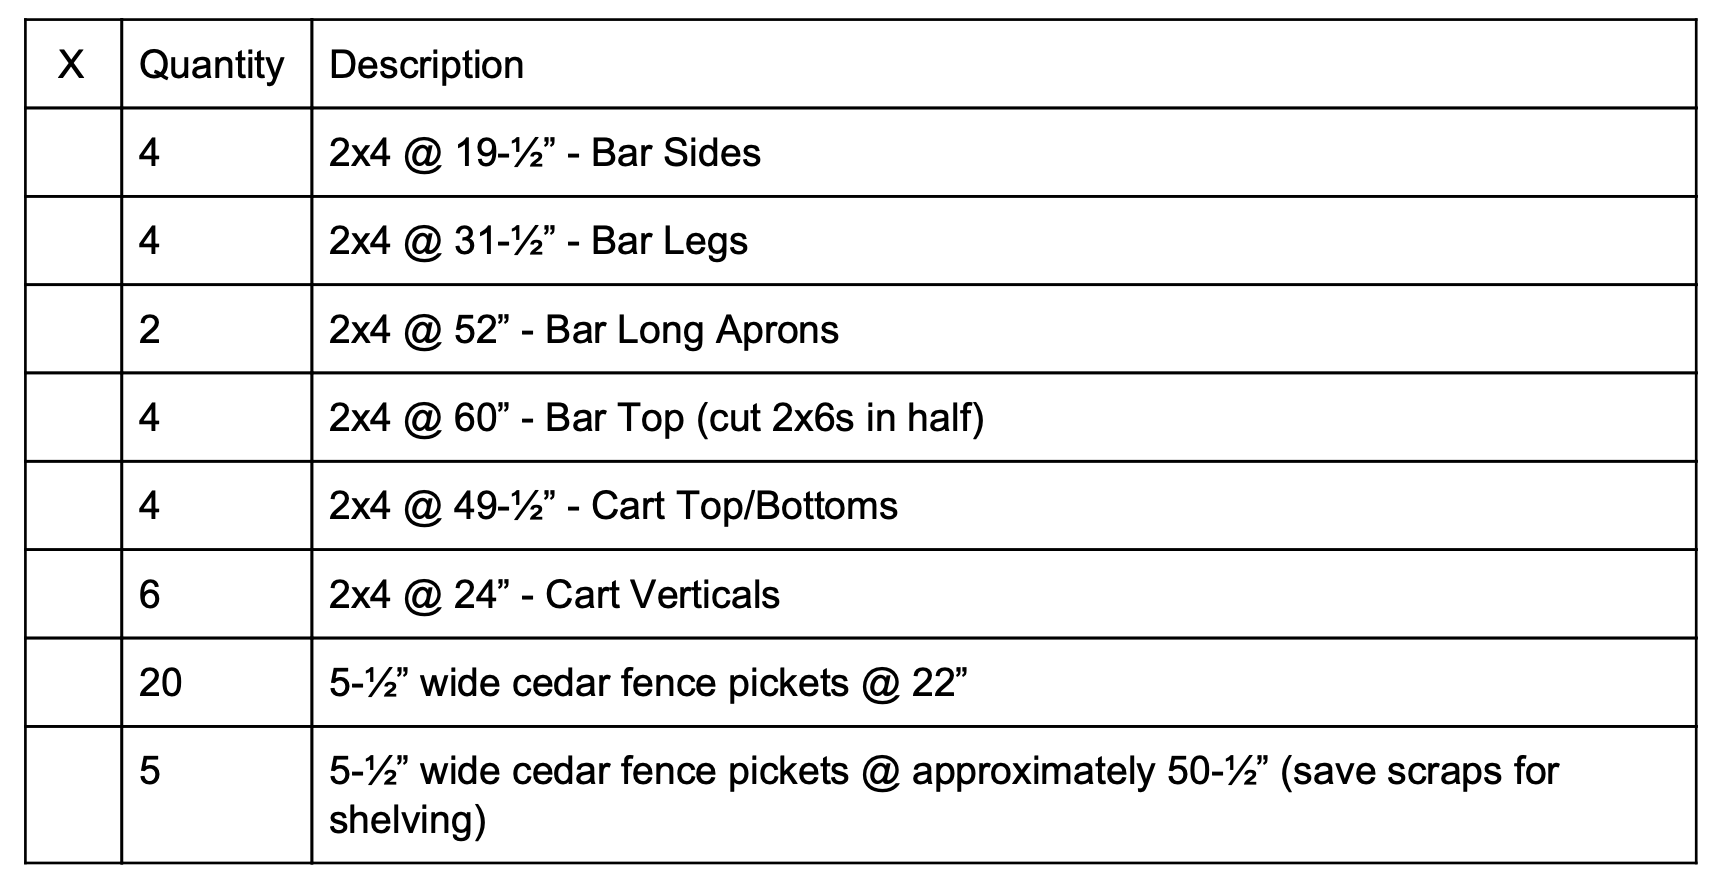
Preparation
- 2 - 2x6 @ 10 feet long
- 8 - 2x4 @ 8 feet or 92-5⁄8” stud length
- 2 - 2x2 @ 8 feet long
- 12 - 5-1⁄2” wide Cedar Fence Pickets (can be dogeared, but better to use straight cut fence pickets)
- 8 - 2-1⁄2” diameter caster wheels for exterior use
- 100 - 2-1⁄2” to 3” long self tapping exterior screws (recommend star bit wood construction screws)
- 150 - 1-1⁄4” to 1-1⁄2” long self tapping exterior screws (recommend star bit wood construction screws)
- Exterior wood stain or paint (about a quart)
- 8 Caster Wheels, 2-1⁄2” diameter (4 braking recommended)


Instructions
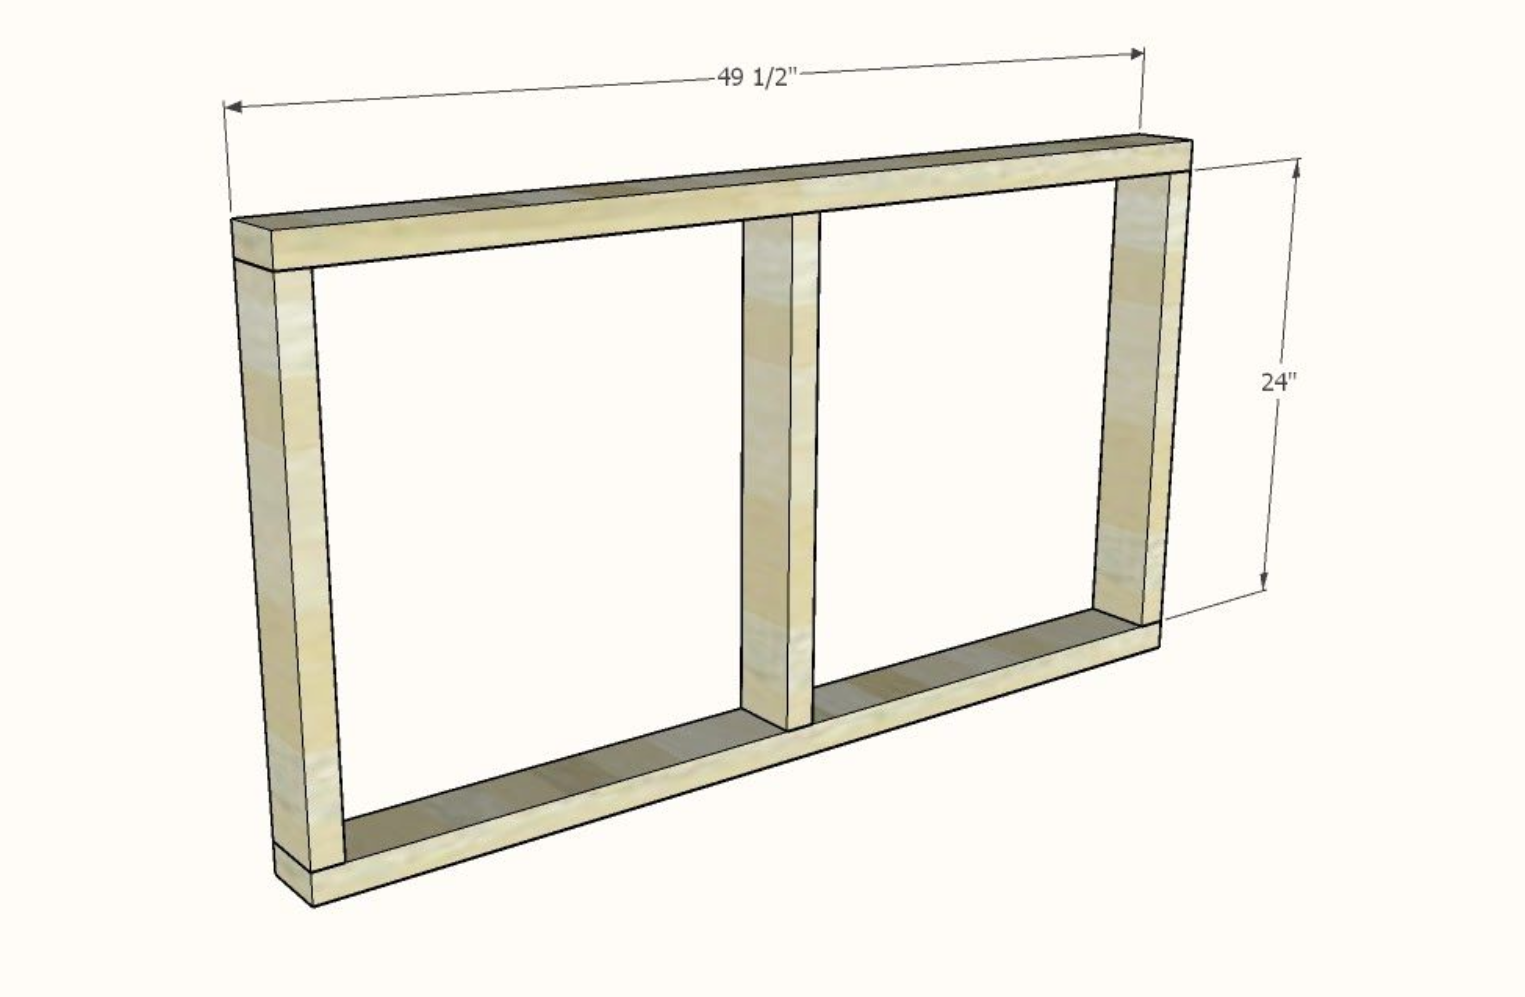
Step 1

Build two bar sides identical by attaching the legs to the 19-1⁄2” side pieces. Use the longer screws, two per joint. All outside edges are flush, everything is flush to the back.
Step 2
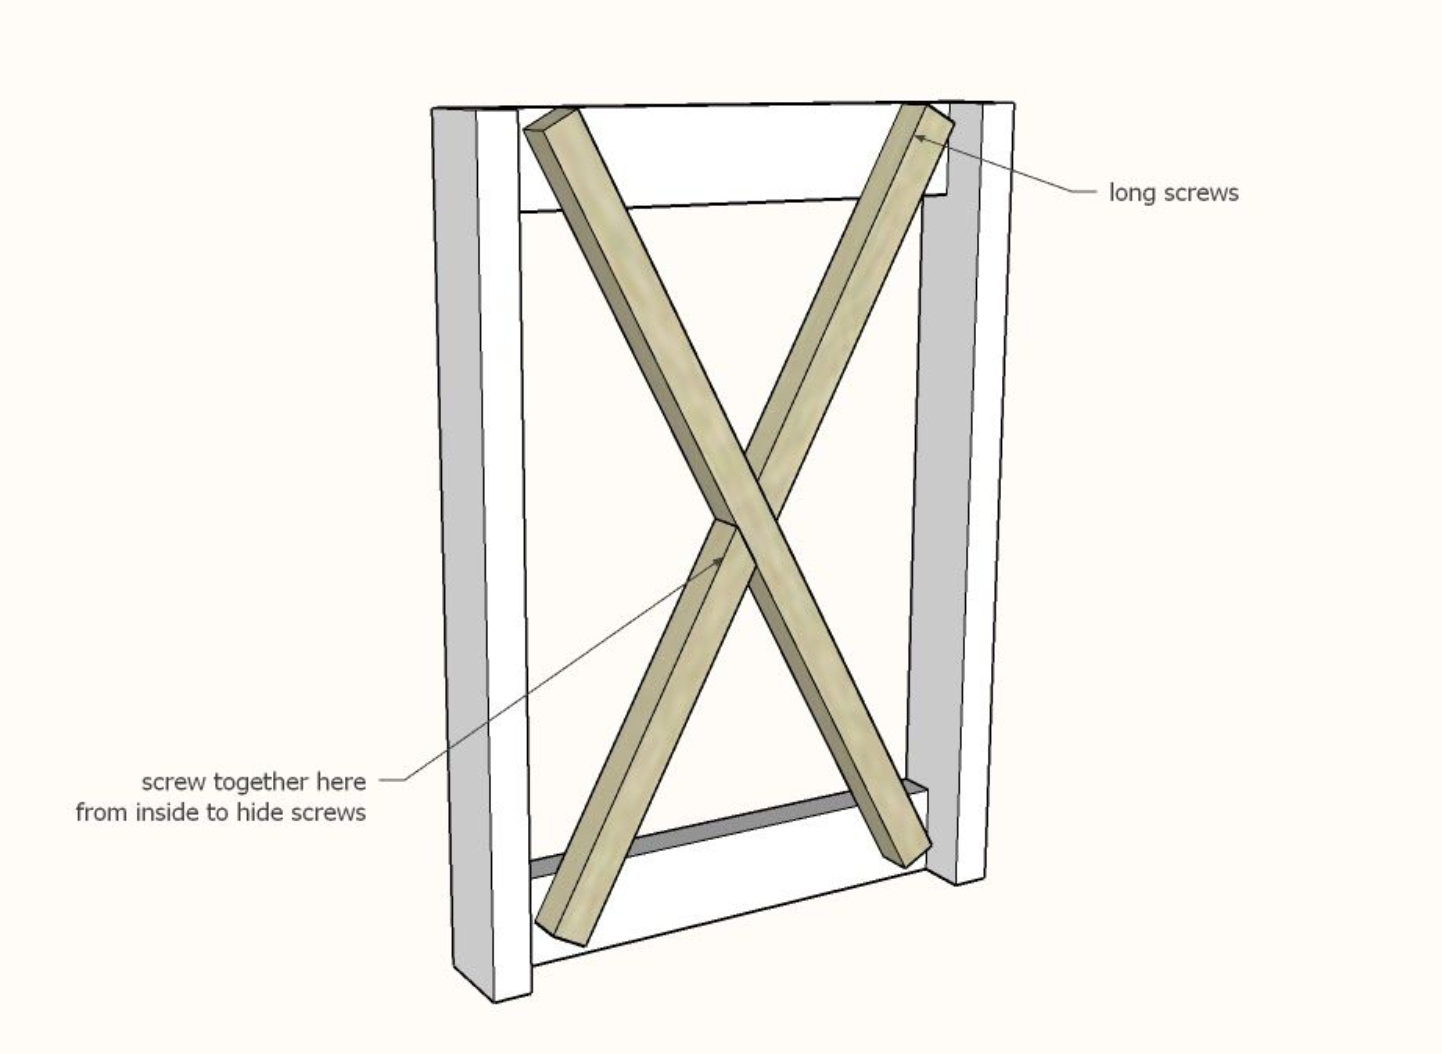
Lay the 2x2s out over the side openings and trace with a pencil. Cut off ends (can be cut at an angle to match or simply cut square as shown.
Overlap and trace the overlap in the middle. Cut one of the 2x2s on the overlap lines.
Attach to the sides with a single longer screw, and longer screws at the intersection of the 2x2s. Repeat for both sides.
Step 3
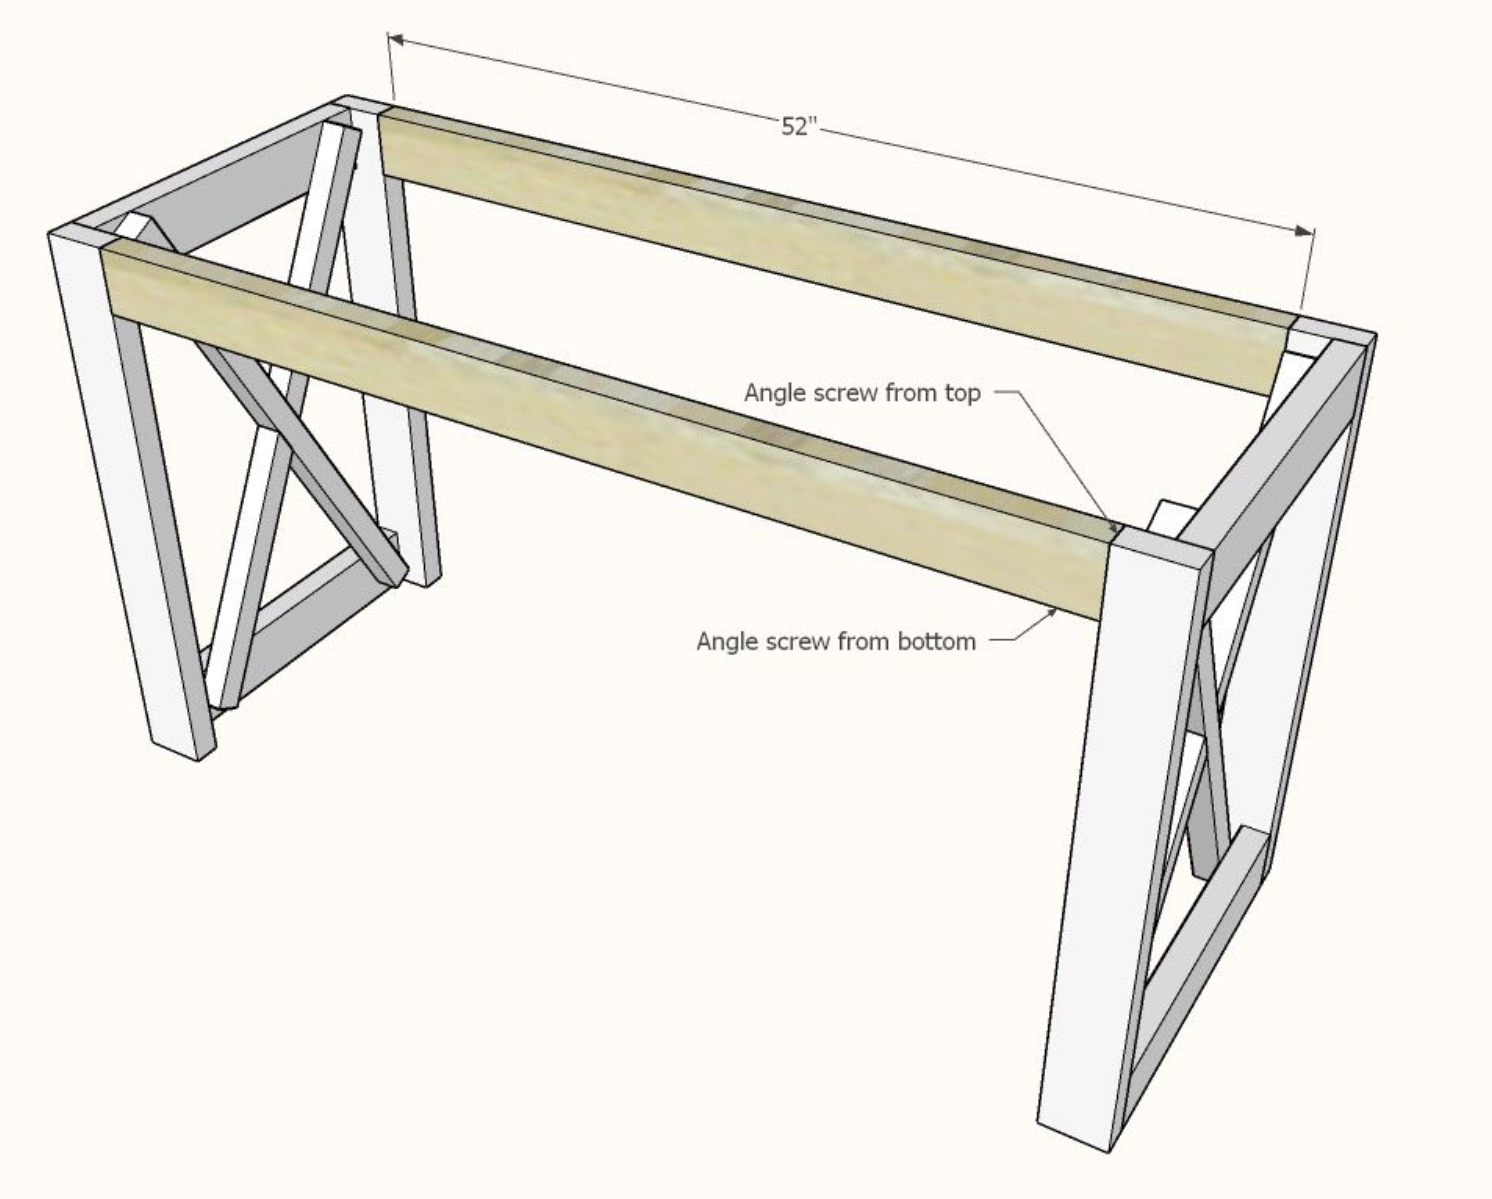
Attach bar aprons to the legs with the longer screws at an angle or use a Kreg Jig on the 1-1⁄2” setting with 2-1⁄2” screws.
Step 4
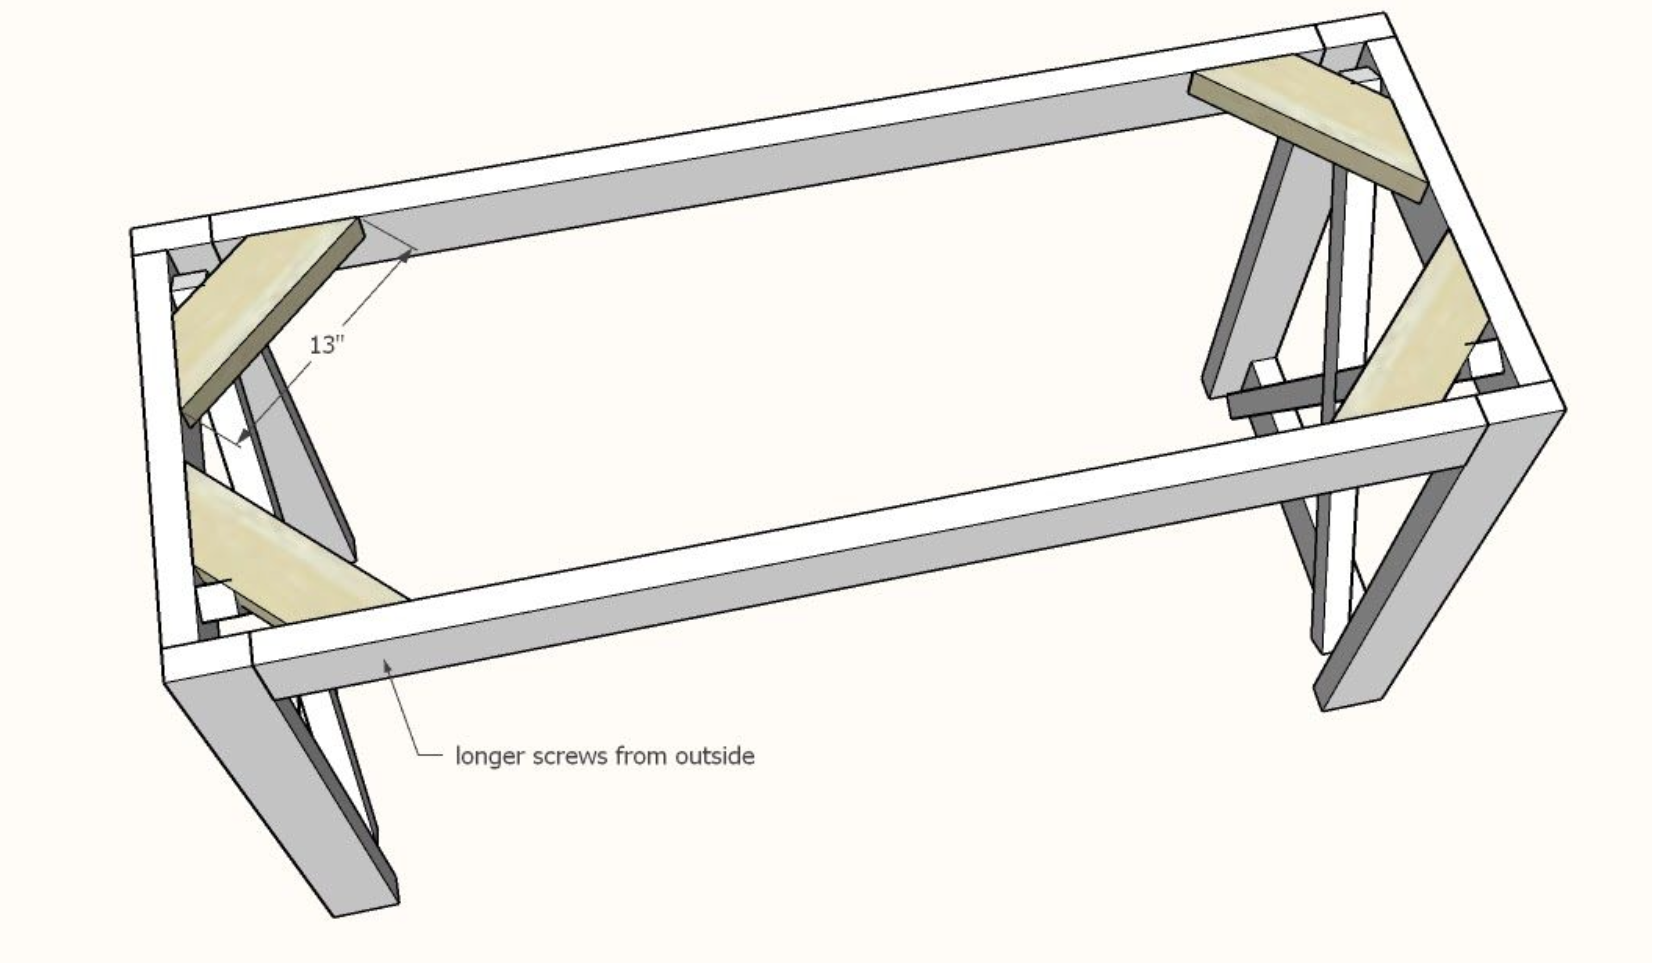
If you did not use pocket hole screws and want to add additional bracing, you can use either 2x4 or 2x2 scraps with ends cut at 45 degrees, about 12-13” long, as shown in the diagram.
Avoid cutting angles from 2x4s from small pieces of wood - always secure with clamps before cutting.
Step 5
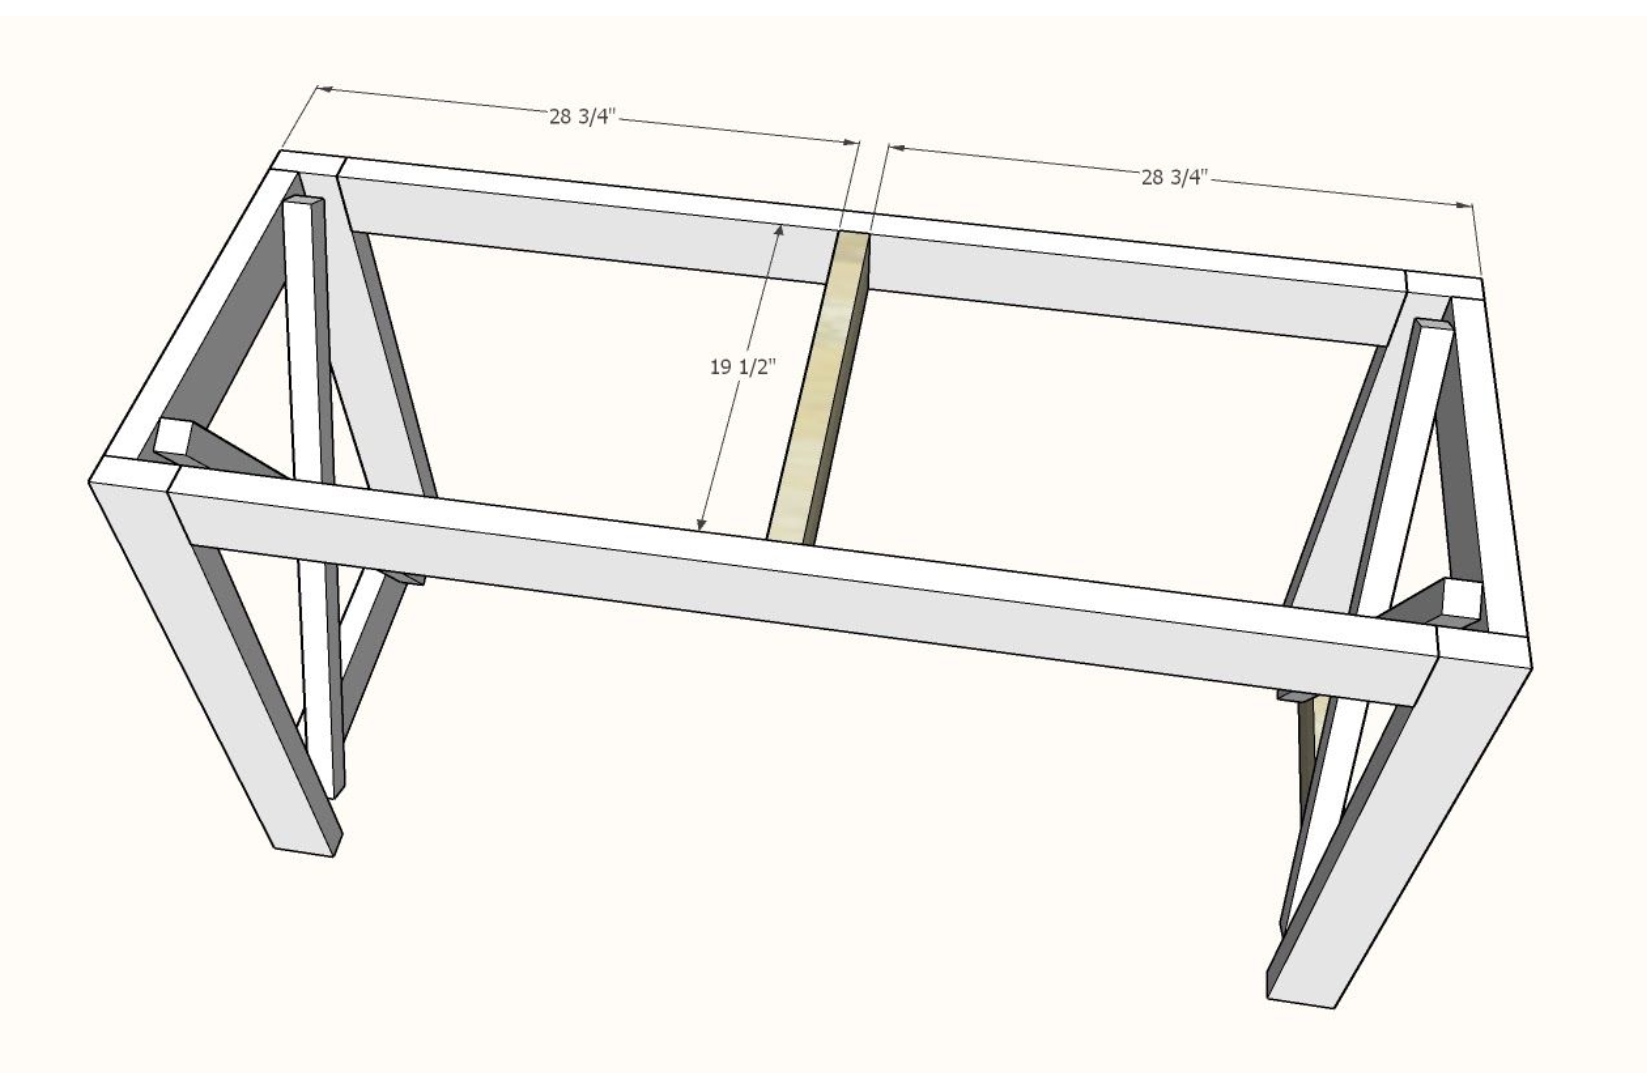
Attach with longer screws the remaining 2x4 @ 19-1⁄2” long in the center - you need this board to help support the 2x6 top.
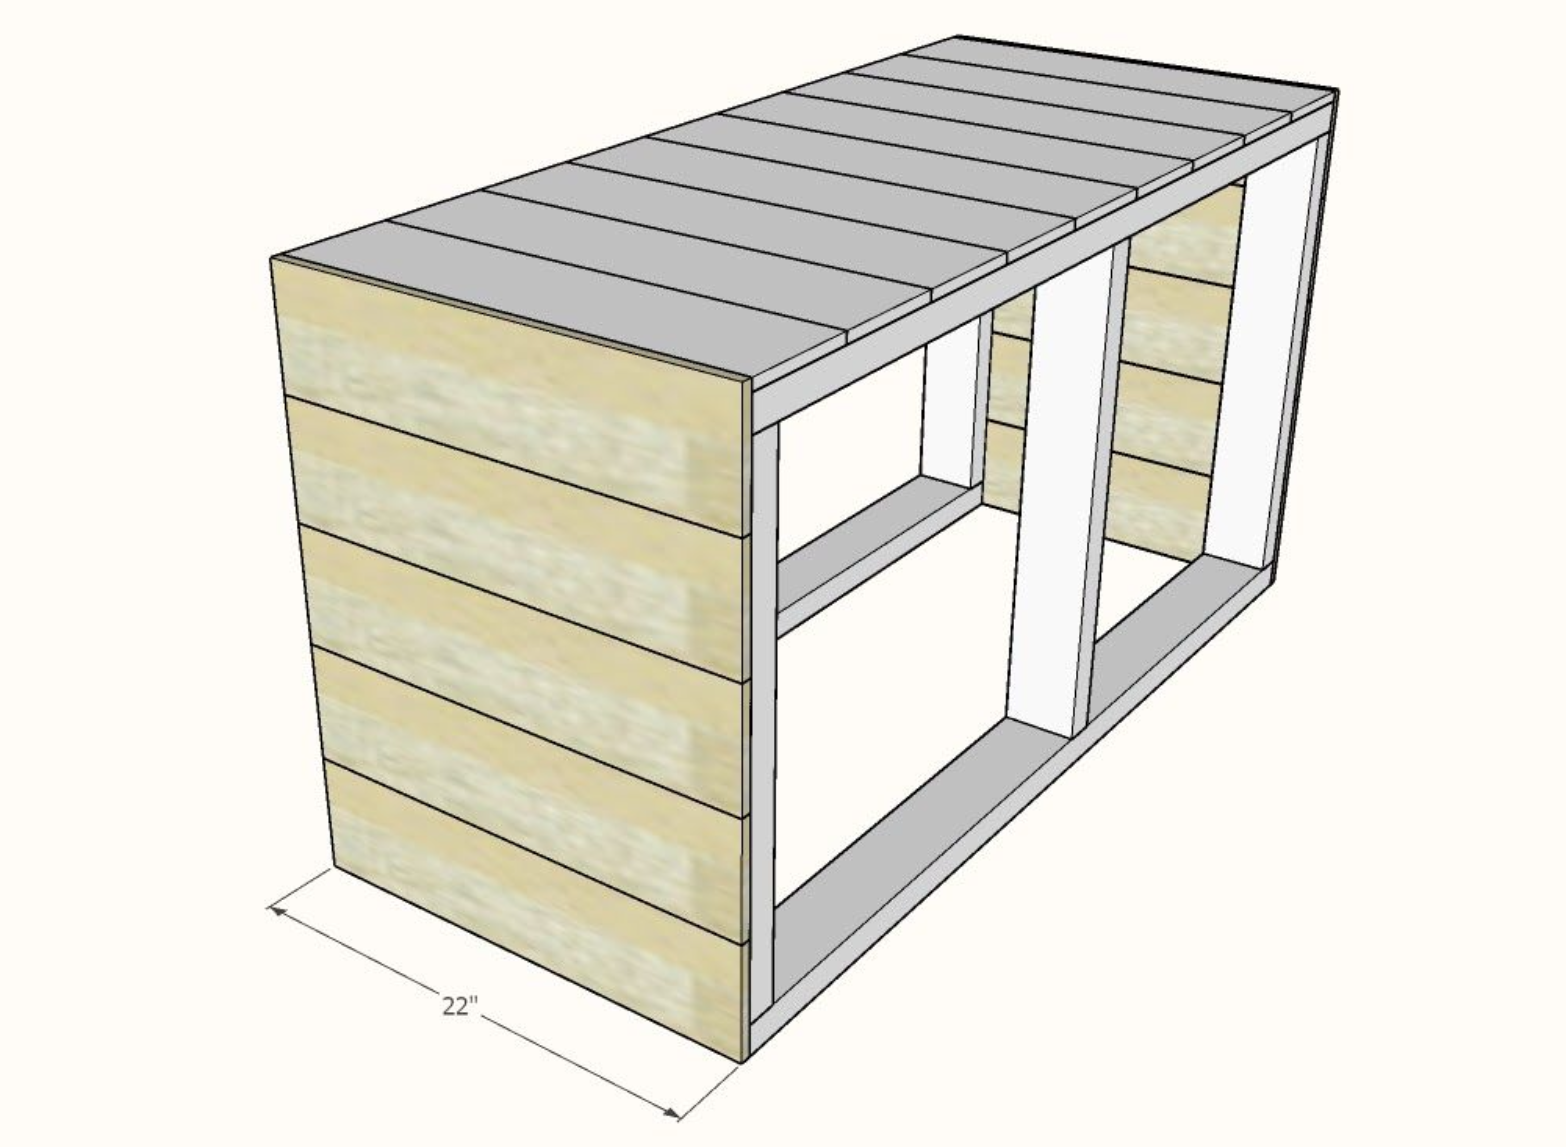
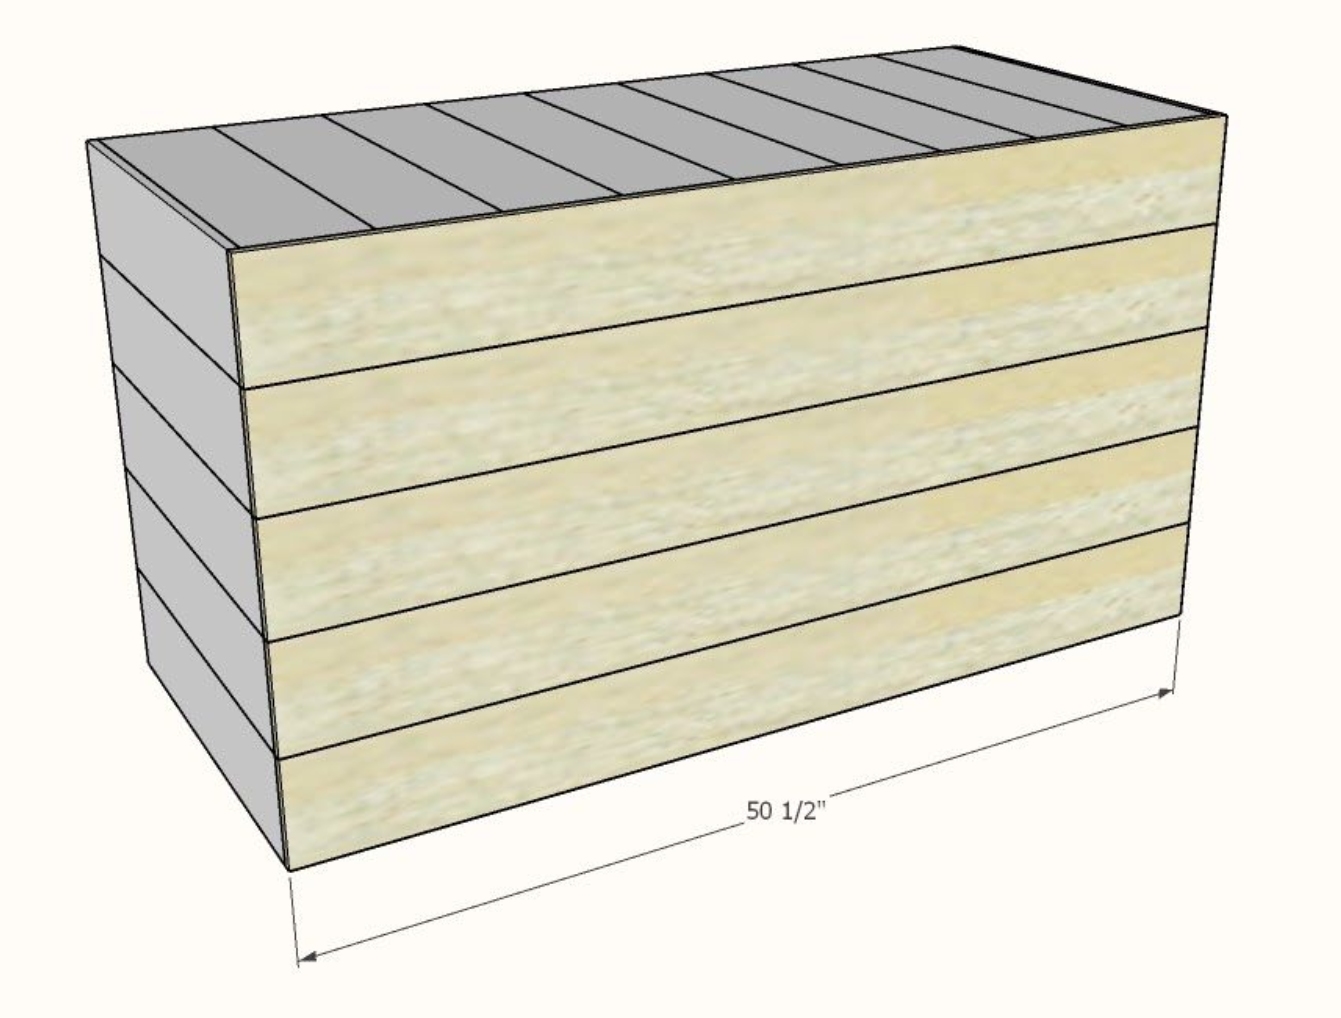
Step 6
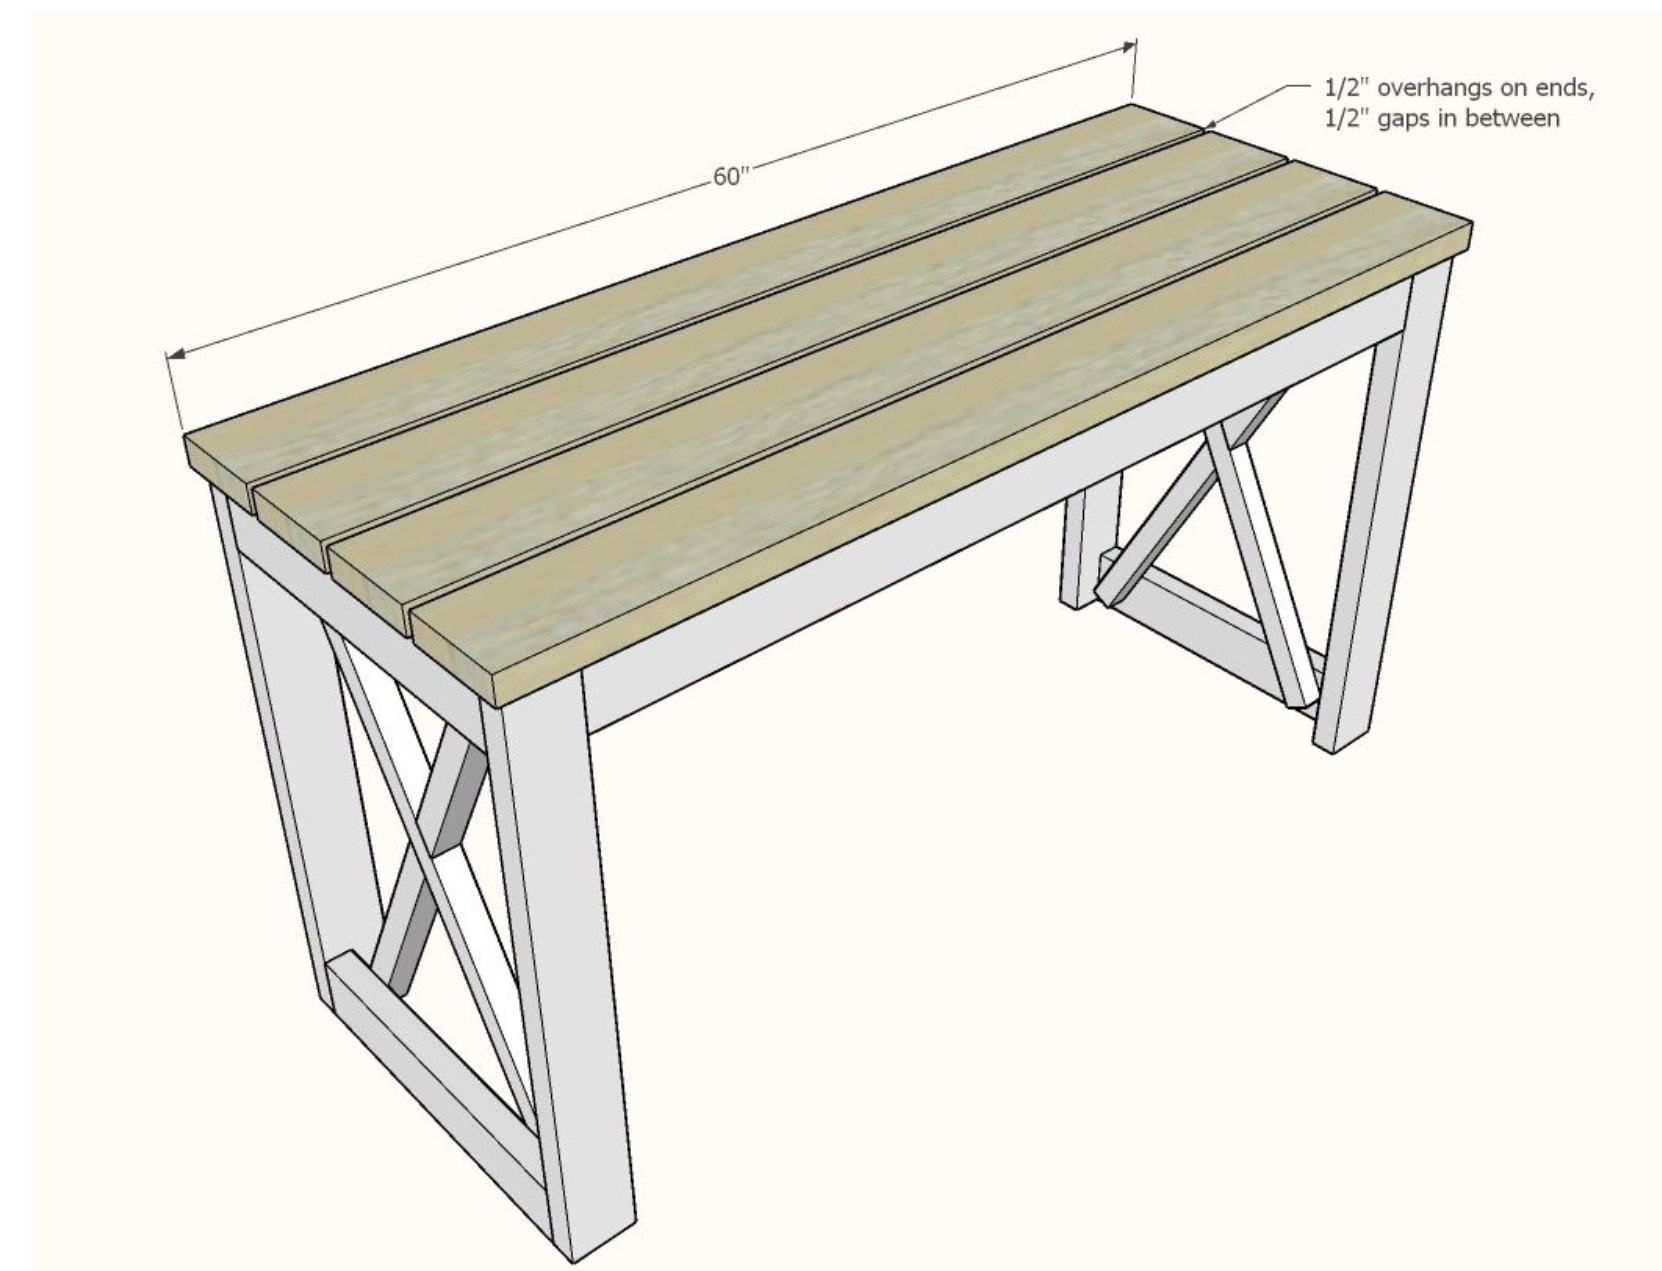
Layout the 2x6 bar top boards on top of the bar, with even overhangs (about 1⁄2”) on the ends and sides, and about 1⁄2” gap in between. Secure with longer screws into the legs, and the center support.
Step 7
Inner Cart Construction
Use the longer screws to build two identical frames for the grill cart, two screws per joint.
Step 8

Layout the grill cart top boards, evenly spacing with small gaps in between. Secure with the shorter screws, two screws per end of each cedar fence picket.
Step 9
Repeat steps for the two sides of the grill cart.
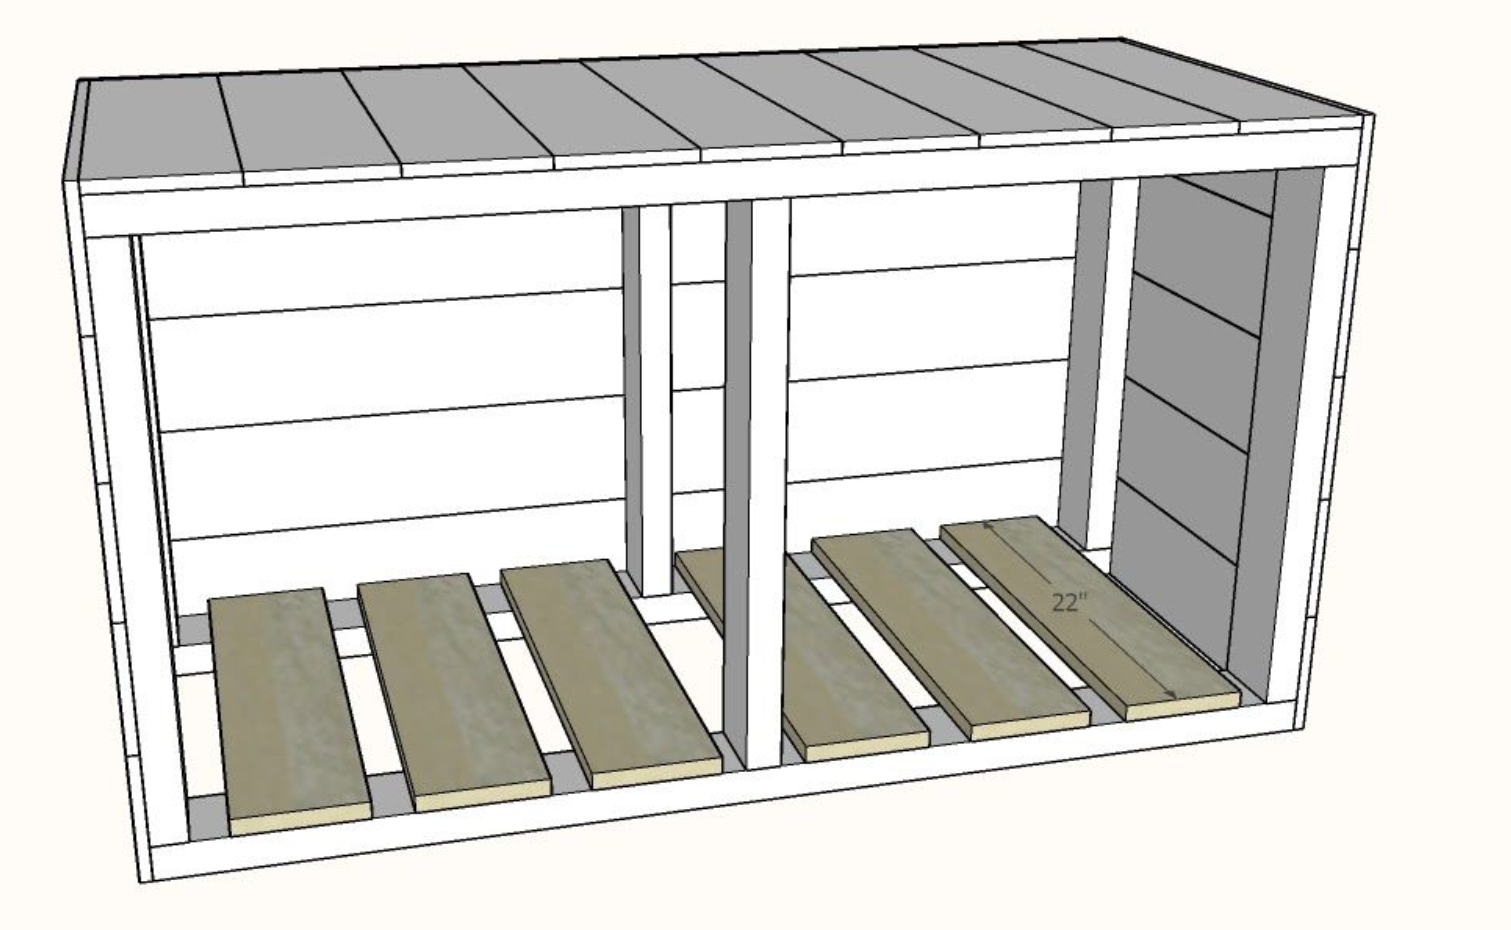
Step 10
Measure the width of the front of the grill cart and cut the front pieces from remaining cedar fence pickets. Save the scraps.
Attach to the front with shorter screws, also attaching in the middle to the middle 2x4 support.
Step 11
Place remaining scraps inside the cart and secure with screws.
Step 12
Attach caster wheels to the base with the shorter screws. We recommend braking casters for two wheels on each of the pieces.

Comments
jvizuete
Tue, 07/07/2020 - 18:41
Love this! Printed out the…
Love this! Printed out the plans and we’ll be starting soon! Quick question: can you please link the grill pictured? Thank you!
michael_b101
Thu, 07/09/2020 - 05:27
Plans are no longer…
Plans are no longer available?. Saddened, as this likely will retire our kitchen table and put in its place this as a breakfast station for the waffle/pancake griddles.
michael_b101
Thu, 07/09/2020 - 05:35
clicked on the wrong link…
clicked on the wrong link. thx
Sb1212
Tue, 07/14/2020 - 18:09
Brag post help
I want to add brag post for the nesting grill station but it is not allowing me to add pictures.
Sb1212
Tue, 07/14/2020 - 21:16
I was able to post. I don't…
I was able to post. I don't know how to delete the anonymous one though.
MamaMaria
Thu, 07/16/2020 - 10:56
Hi, New to all this. How do…
Hi,
New to all this. How do we get the same natural finished look on any project. Is this wood douglas fir or pine or some other? And what finished coat would be used to achieve this look and color?
Thanks!