

Build your own desk with free plans by Ana-White.com
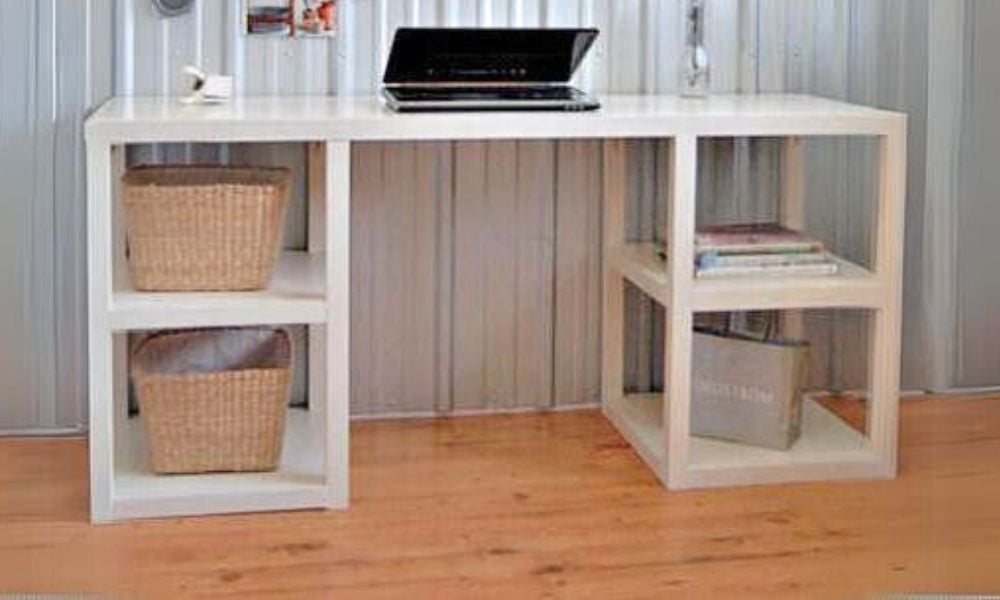
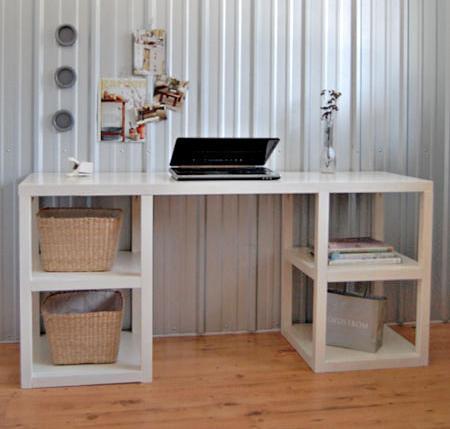
This desk features a modern, parsons style design, with large roomy shelves. Step by step plans include detailed diagrams, shopping and cut list, and lots of reader submitted photos.
Preparation
- 1 - 4x8 Sheet of 3/4″ thick MDF or Plywood, ripped into three 15 1/2″ widths x 8 feet long
- 7 - 2×2 boards, 8′ long
- 1-1/4″ and 2-1/2" pocket hole screws
- paint and finishing supplies
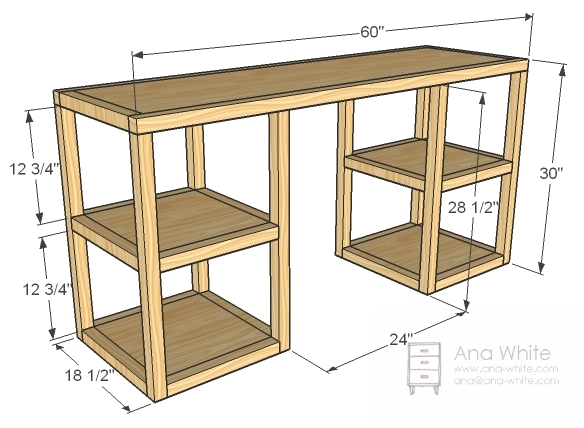
- 1 – 1×16 @ 57″ (desk top)
- 4 – 1×16 @ 15″ (Shelves)
- 10 – 2×2 @ 15 1/2″ (Trim perpendicular to desktop)
- 8 – 2×2 @ 15″ (Trim parallel to desktop)
- 8 – 2×2 @ 28 1/2″ (Legs)
- 2 – 2×2 @ 60″ (Desktop Side Trim)


Pocket Holes - Go through the entire set of instructions and drill all pocket holes first. Basically, you need pocket holes on both ends of all the 15″ and 15 1/2″ 2x2s, one pocket hole on the tops of each leg, and then pocket holes on all sides of the shelves and desktop. Remember to set your jig for 1-1/2″ thickness for 2x2s and 3/4″ thickness for the MDF or plywood panels.
Instructions
Step 1
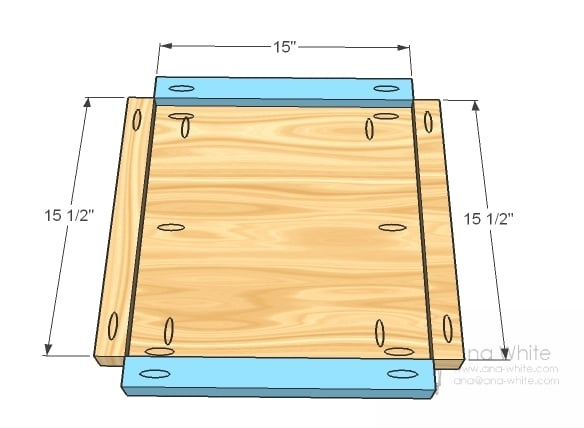
Shelf Trim
With the tops flush, glue and screw the shelves to the trim as shown above. Use 1 1/4″ pocket hole screws. Drill pocket holes set for 3/4″ stock. Make sure you have already drilled one pocket hole in each end of all of the 2×2 trim pieces. The pocket holes in the 2x2s need to be for 1 1/2″ thick stock. Build four of these.
Step 2
Legs
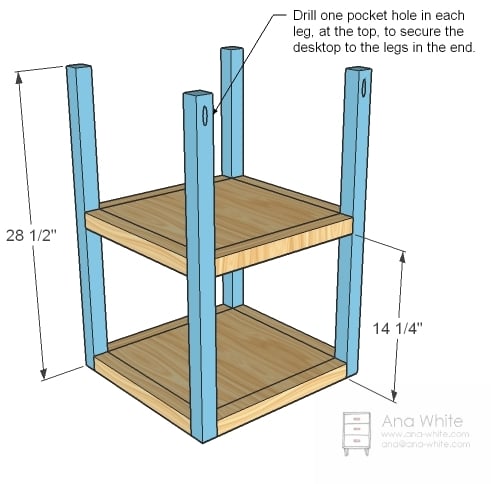
Mark legs for the center shelf. Then glue and screw through the pocket holes into the legs. Remember – the tops of the legs should each have a single pocket hole to attach the top. If you don’t have a right angle drill, resist the urge to place the pocket hole on the inside where it won’t be seen – you also won’t be able to get your drill in there. Build two of these.
Step 3
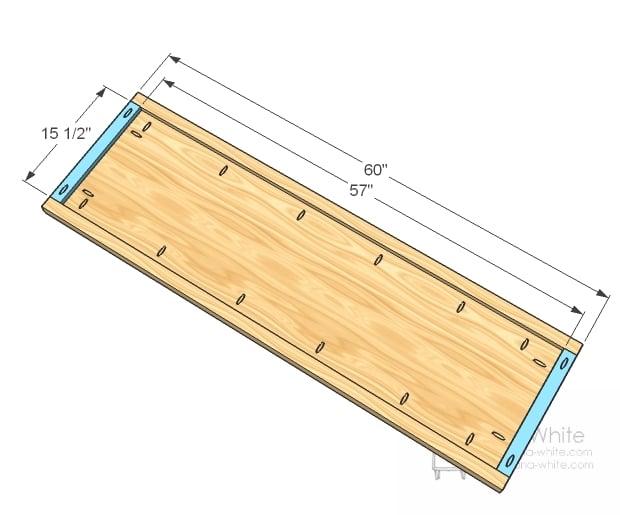
Tabletop
The tabletop is super simple. Begin by attaching the end trim to the top. Then attach the front and back trim (the long ones) to the top and the side trim. Done. Keep the bottom edges flush.
Step 4
Assembly
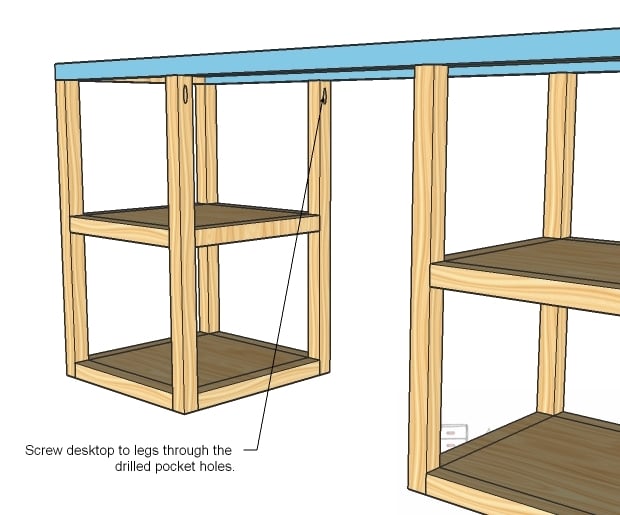
I choose to leave the glue off to make for moving the desk easy. Simply lay the desktop on top of the tower and screw through the pocket holes into the underside of the desktop. Remember, the towers are not perfect squares, so you may need to rotate the towers to get the perfect fit.
After dry, sand well with 120 grit sandpaper.
Remove any sanding residue with a vacuum followed by wiping down with a damp, lint free cloth.

Comments
russkilpatrick
Thu, 09/10/2020 - 08:03
Downloading plans
Hi this is perfect for our new home schooling room we’re scrambling to build. I can’t seem to download the pdf. Is there another way to get these plans? Thx!