
How to build a console with tiered hutch - with the extra deep bottom that serves both as a bench and tabletop, and the hutch for storage on top, this unique piece may be perfect for your space. Free step by step plans with diagrams, shopping and cut list from Ana-White.com
Why We Built this Deep Console Table with Hutch
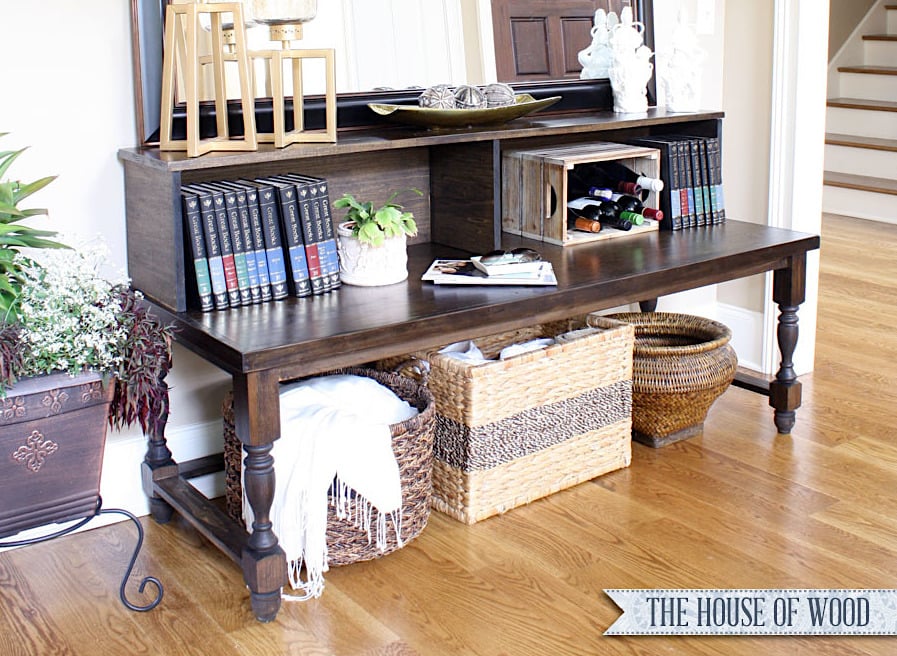
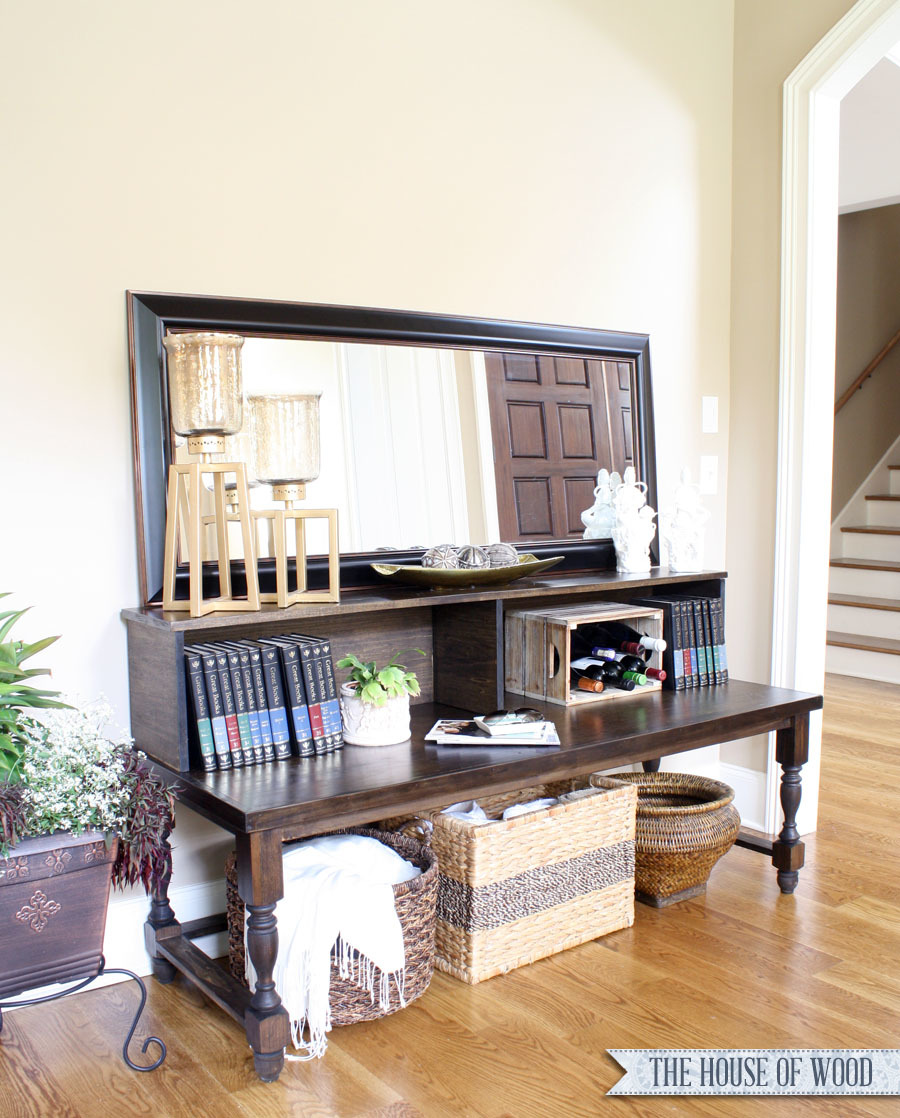
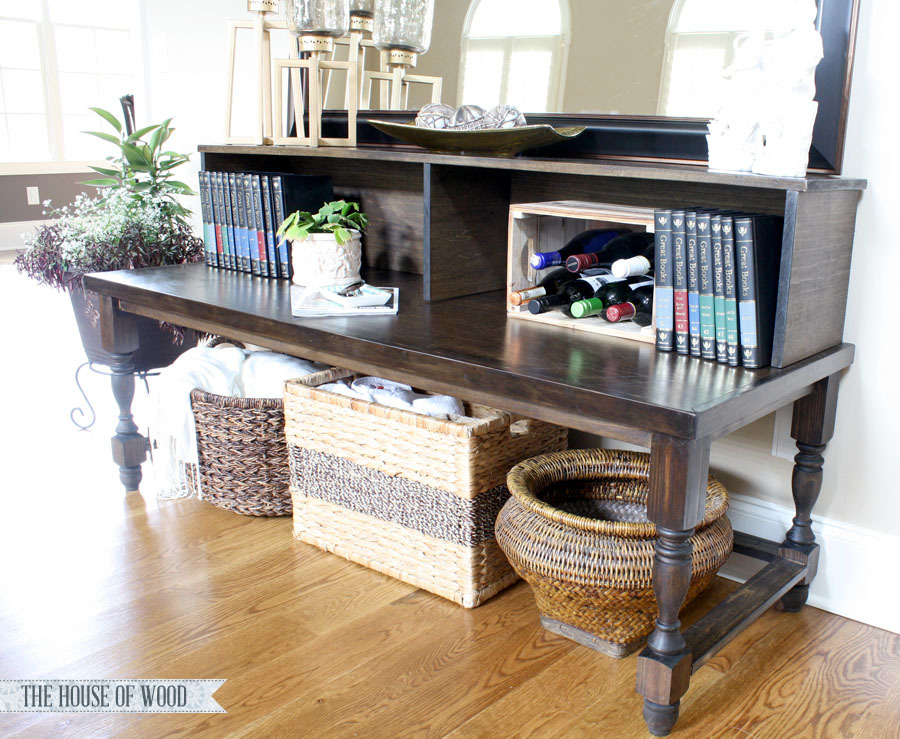
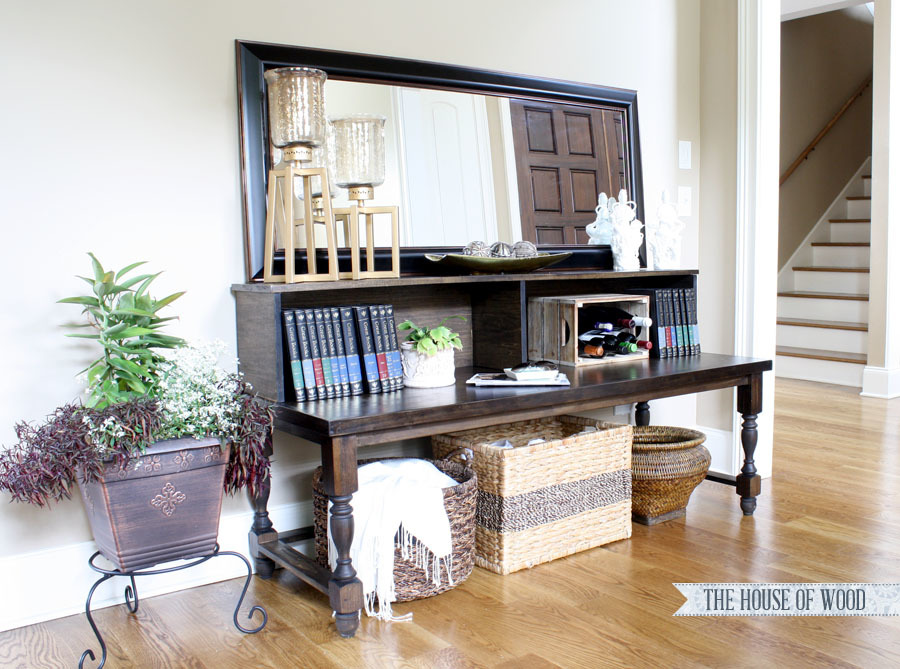
My dear friend Jen Woodhouse from House of Wood loved this discontinued foyer console table from Pottery Barn ....  Jen wanted something a tiny bit fancier, by adding turned legs to the base ...
 Oh. My.
Goodness. How beautiful is this!!! If you are going to make something, you might as well make something awesome, right?
More Photos and Build Post
Jen shares lots more photos and details on her blog - go check it out.
Free Step by Step Plans to Build it Yourself

Height depends on length of legs
Preparation
- 2 - 1x3x8
- 1 - 1x3x6
- 1 - 1x12x8
- 1 - 1x12x6
- 1 - 3/4” plywood sheet
- 4 - turned legs
TABLE
- 3 - 1x3 @ 59"
- 4 - 1x3 @ 18"
- 1 - 3/4" plywood @ 23-1/2" x 64" (could also use pine project panel for top)
- 1 - 1x2 @ 65"
- 2 - 1x2 @ 23-1/2" for the trim
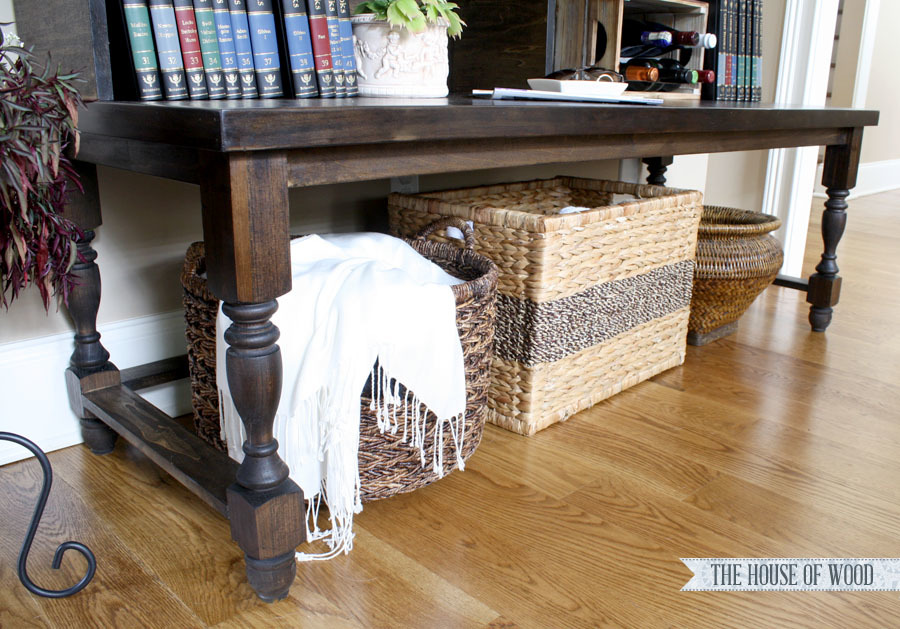
- Jen also added additional 1x3s underneath table for additional support
HUTCH
- 3 - 1x12 @ 11-1/4"
- 2 - 1x12 @ 30-7/8"
- 1- 1x12 @ 65"


Please read through the entire plan and all comments before beginning this project. It is also advisable to review the Getting Started Section. Take all necessary precautions to build safely and smartly. Work on a clean level surface, free of imperfections or debris. Always use straight boards. Check for square after each step. Always predrill holes before attaching with screws. Use glue with finish nails for a stronger hold. Wipe excess glue off bare wood for stained projects, as dried glue will not take stain. Be safe, have fun, and ask for help if you need it. Good luck!
Instructions
Step 1
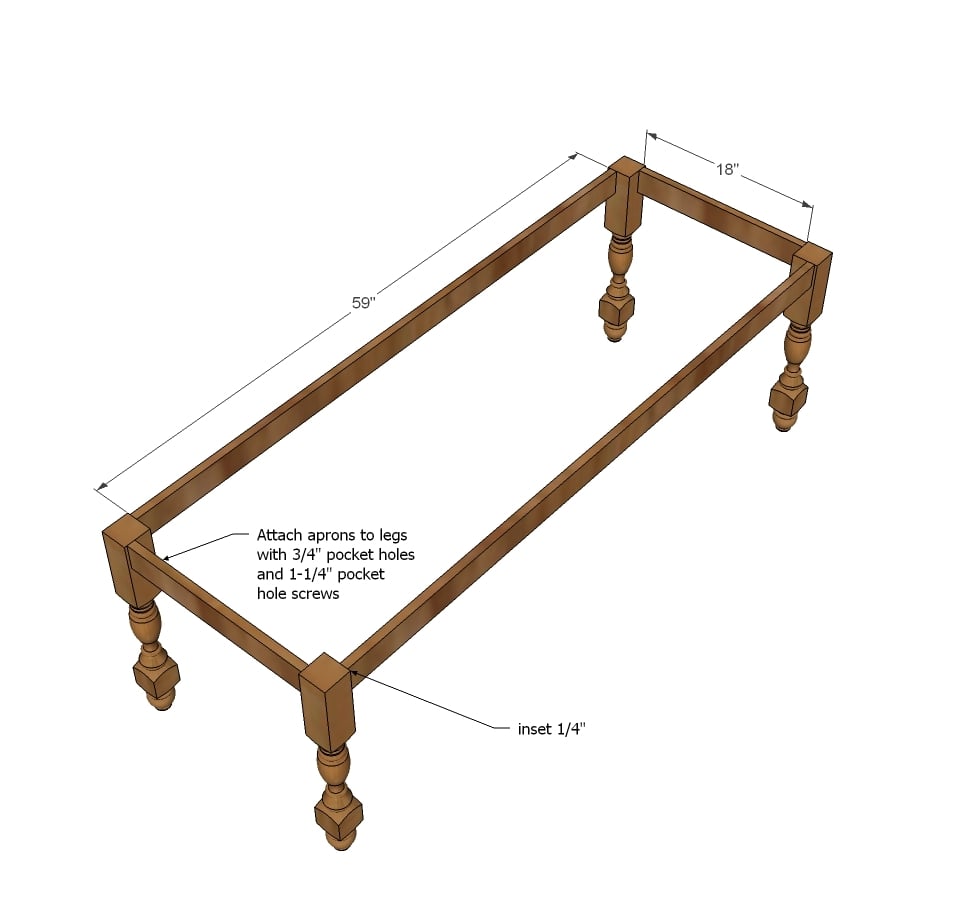
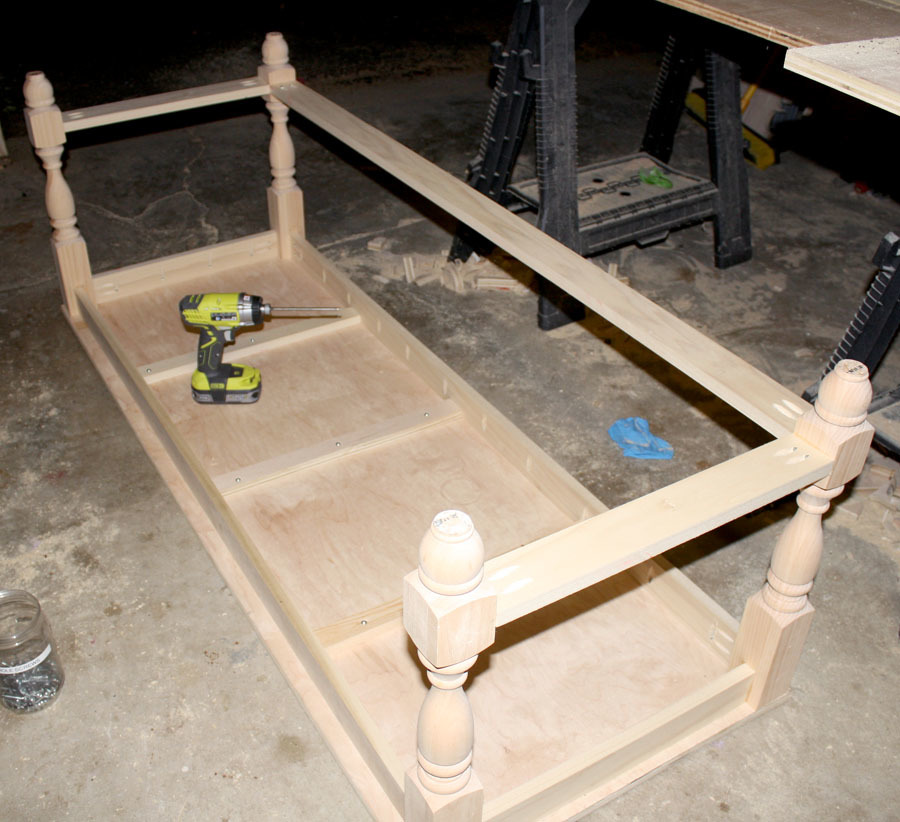
Build the basic table shape by attaching aprons to the turned legs.
TIP: Drill 3/4" pocket holes facing upward for attaching tabletop in next step prior to attaching aprons to legs.
Step 2
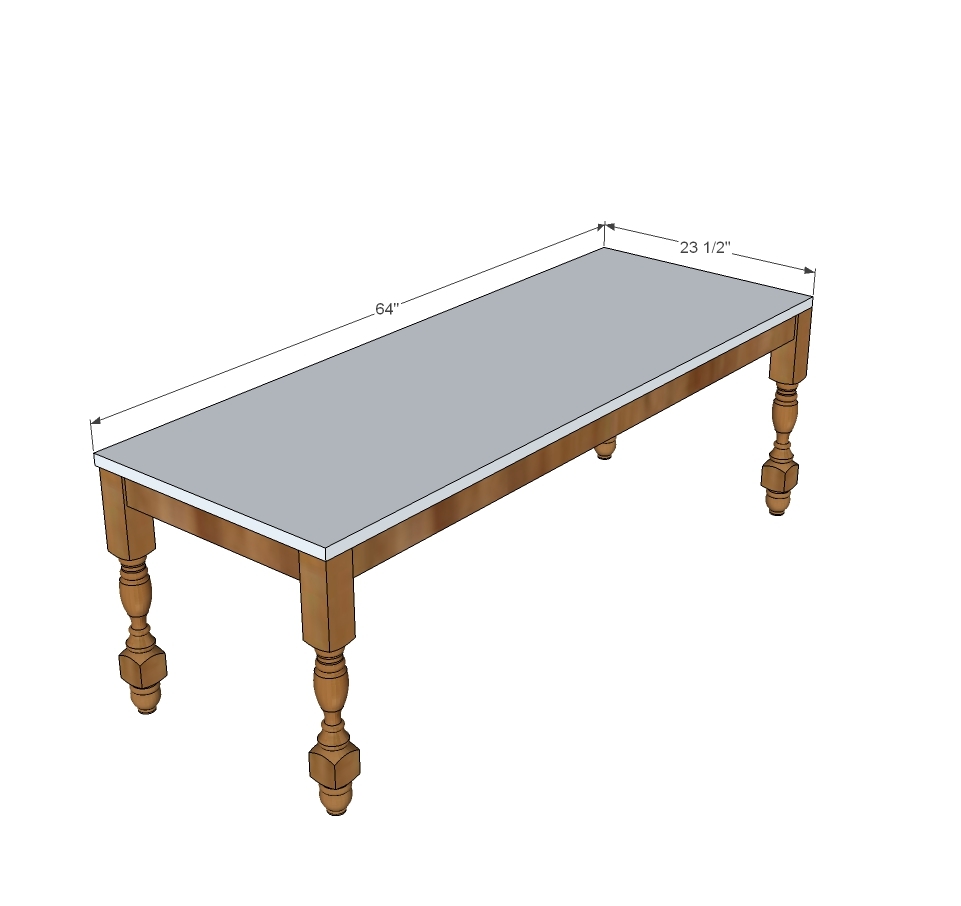
Attach tabletop to the aprons. Use 3/4" pocket holes in aprons and 1-1/4" pocket hole screws.
Step 3
Jen added extra support underneath the tabletop by adding additional boards.
Step 4
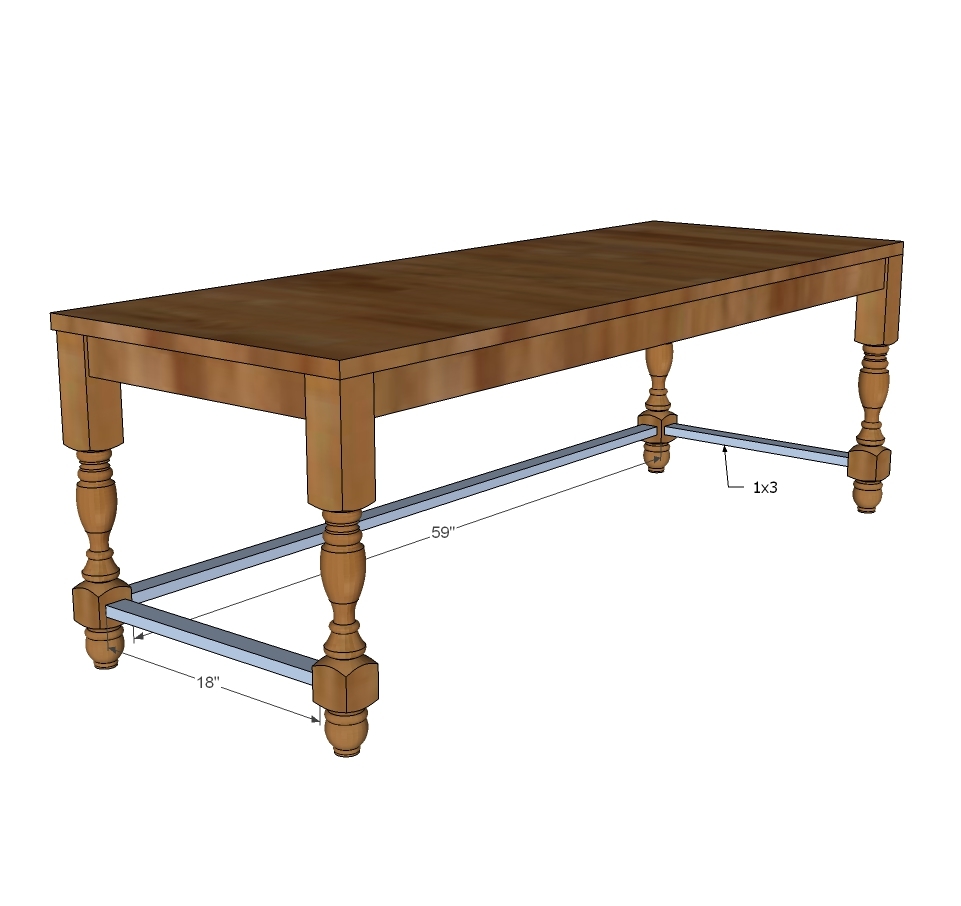
Attach stretchers to legs at stretcher blocks. Hide 3/4" pocket holes on underside.
Step 5

Step 6
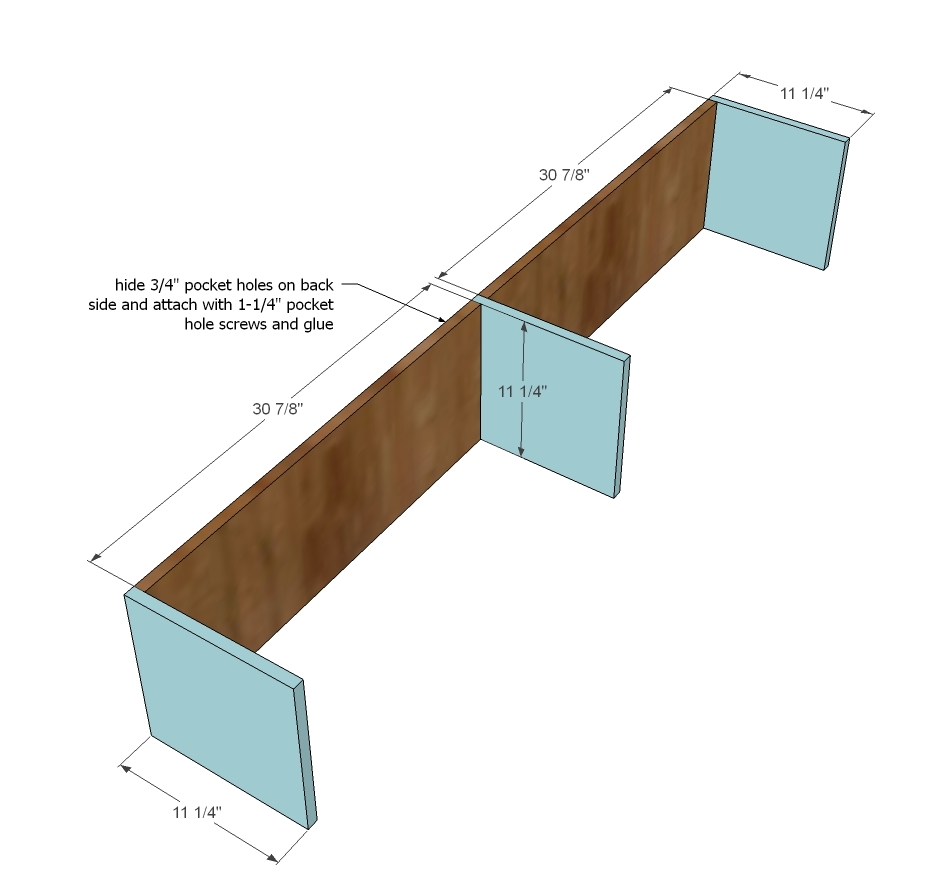
Attach the back 1x12 boards to the dividers with 3/4" pocket holes and 1-1/4" pocket hole screws.
Step 7
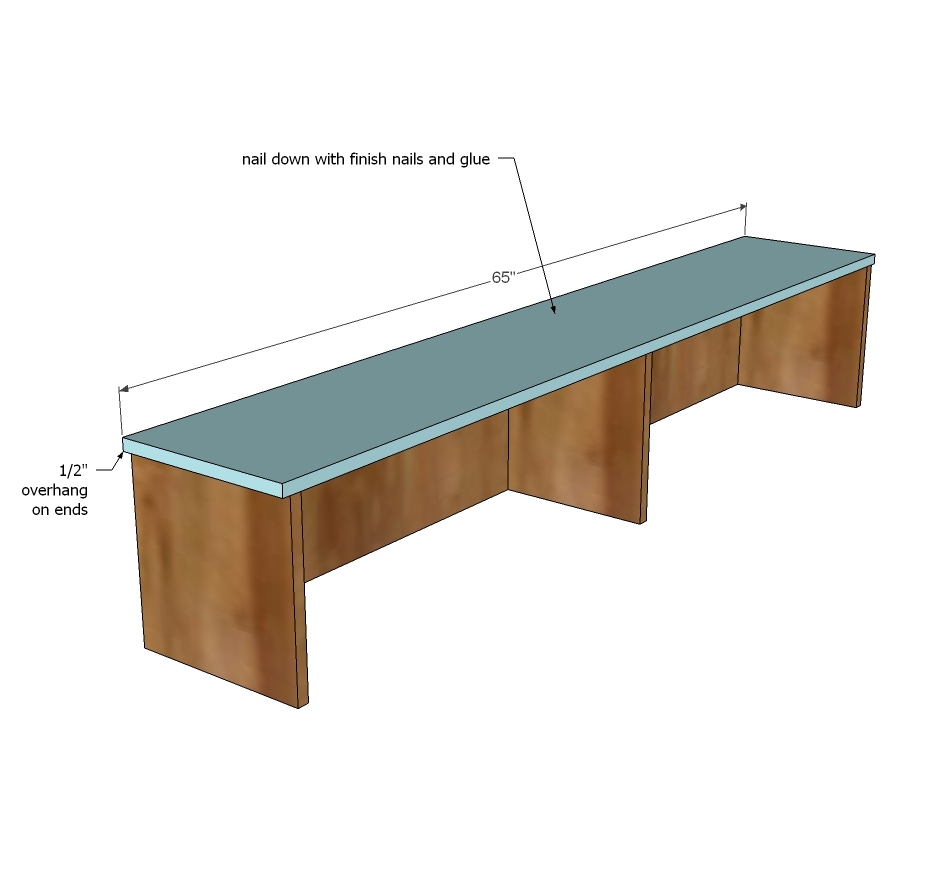
Attach top to hutch framing - can be attached with nails and glue.
Step 8

Attach hutch from underside with screws.
Step 9
Make sure you check out Jen's post on how she finished hers here.
It is always recommended to apply a test coat on a hidden area or scrap piece to ensure color evenness and adhesion. Use primer or wood conditioner as needed.