

Turn an inexpensive mirror tile into a beautiful framed mirror. Free tutorial from Ana-White.com
Why I Built These Mirrors
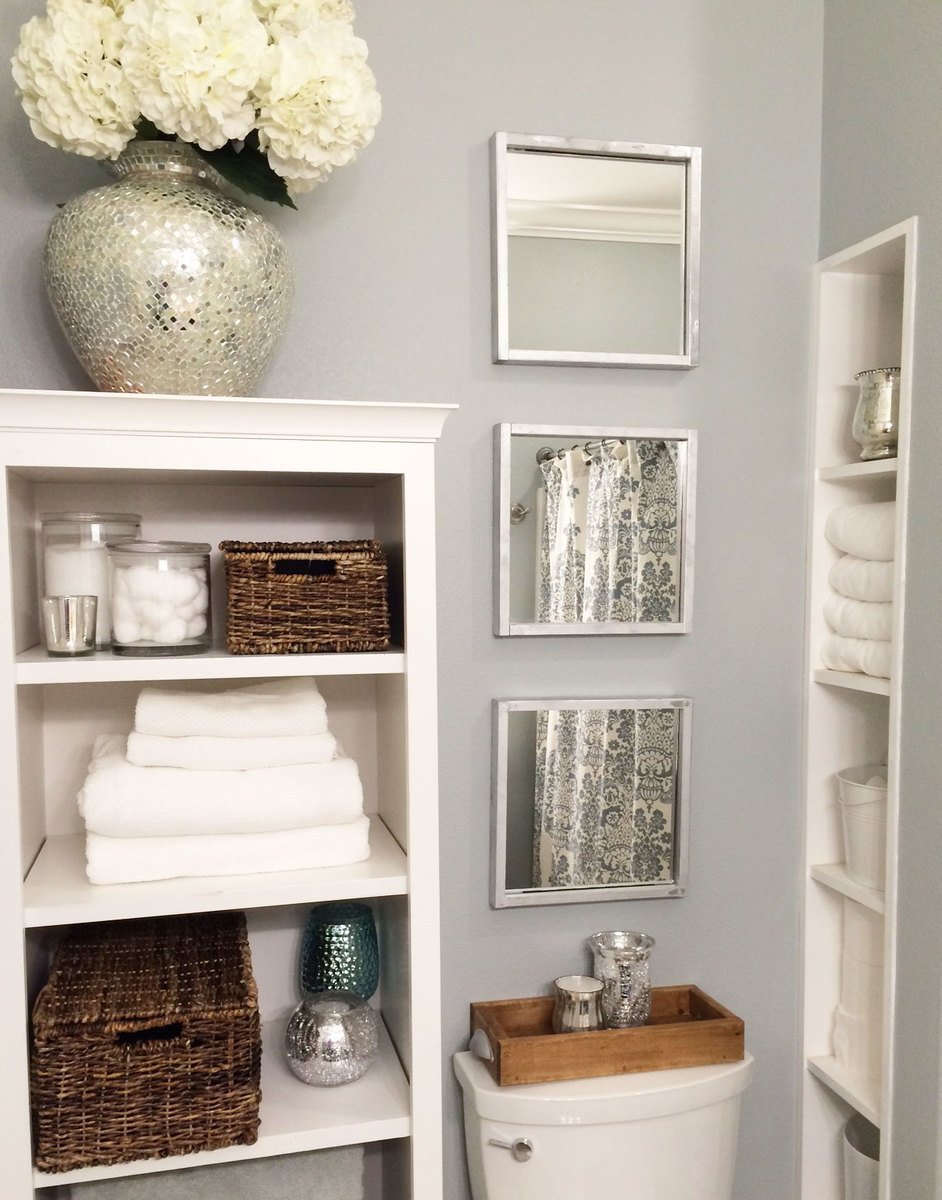
I've been helping my sister out with her family/guest bathroom and she had this giant open space above her toilet that needed some decor. There's plenty of storage in this bathroom, but what the bathroom did lack is windows.
Artwork this size would have costed a fortune. And because this bathroom has no windows, I felt like a mirror would be the best bet. Not a big mirror that's actually useful - just one for reflecting light and making the bathroom feel larger.
So I made these little wood framed mirrors out of a 1x2 and a mirror tile.

Maybe the biggest bang for twenty bucks ever.
Build Video for Mirror Tile Mirrors
And here's a quick video tutorial too!
Thanks for watching!
More on this bath makeover coming soon! Stay tuned!
XO Ana + Family
Preparation
For ONE Mirror -
- 1 - 12" x 12" mirror tile
- 1 - 1x2 @ 8 feet long
- mirror adhesive
- wood glue and nails or screws or pocket hole screws
- picture hanging kit and hanging hardware
- 4 - 1x2 @ 12-1/8" (for 12" mirror tiles)
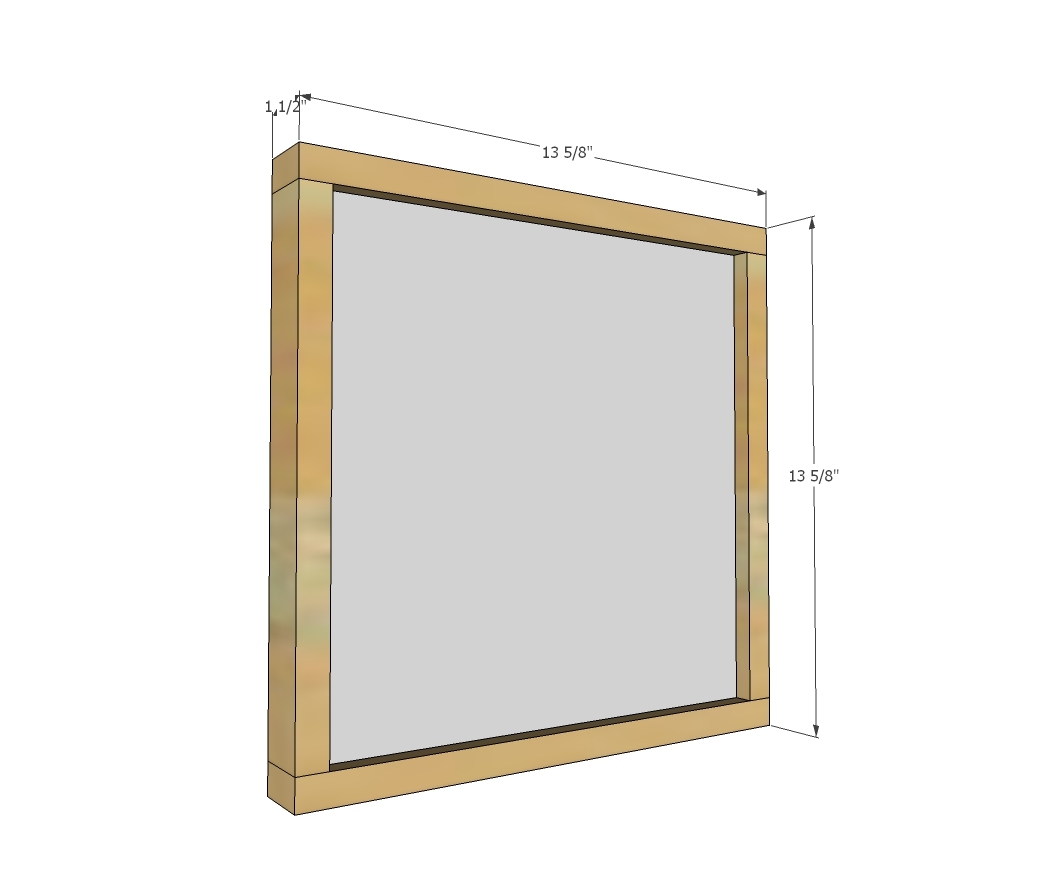
- 2 - 1x2 @ 13-5/8" (cut to fit)


Instructions
Step 1
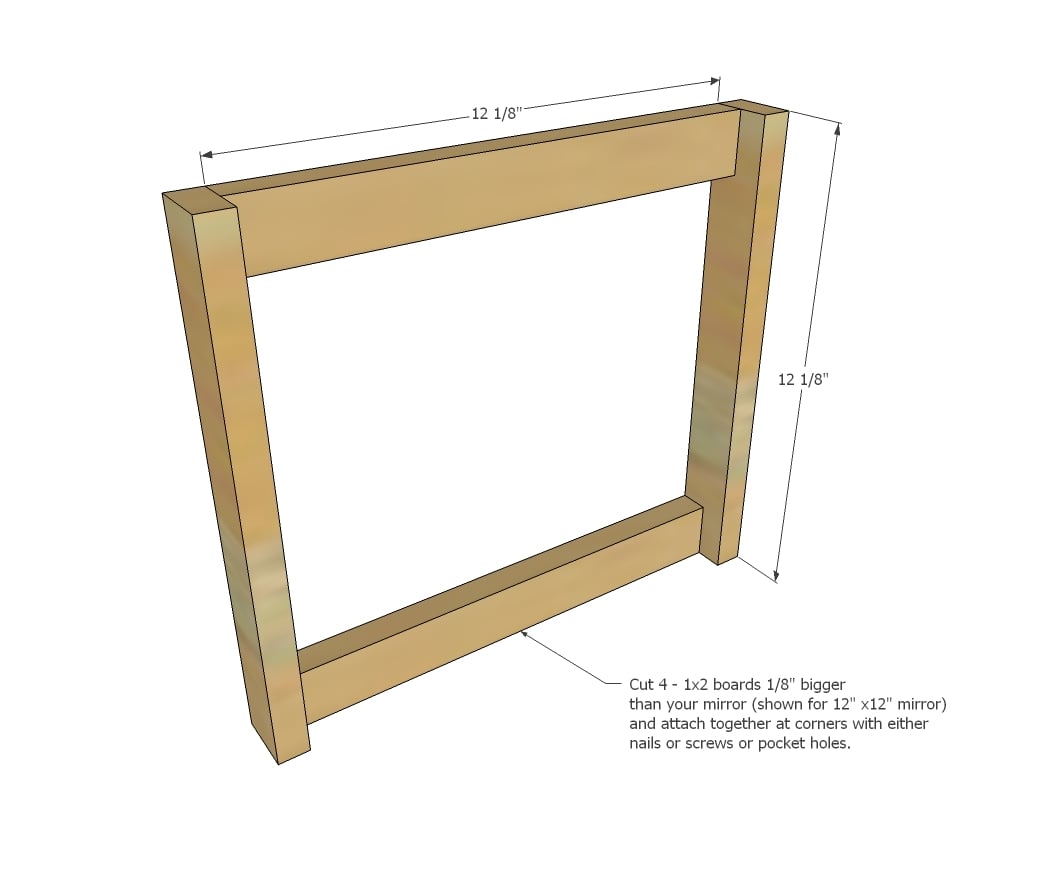
Cut 4 - 1x2s 1/8" bigger than your mirror (you don't want too tight or it could crack your mirror. Also if you live in moist environments where wood can expand, consider using MDF). Attach together as shown.
Step 2
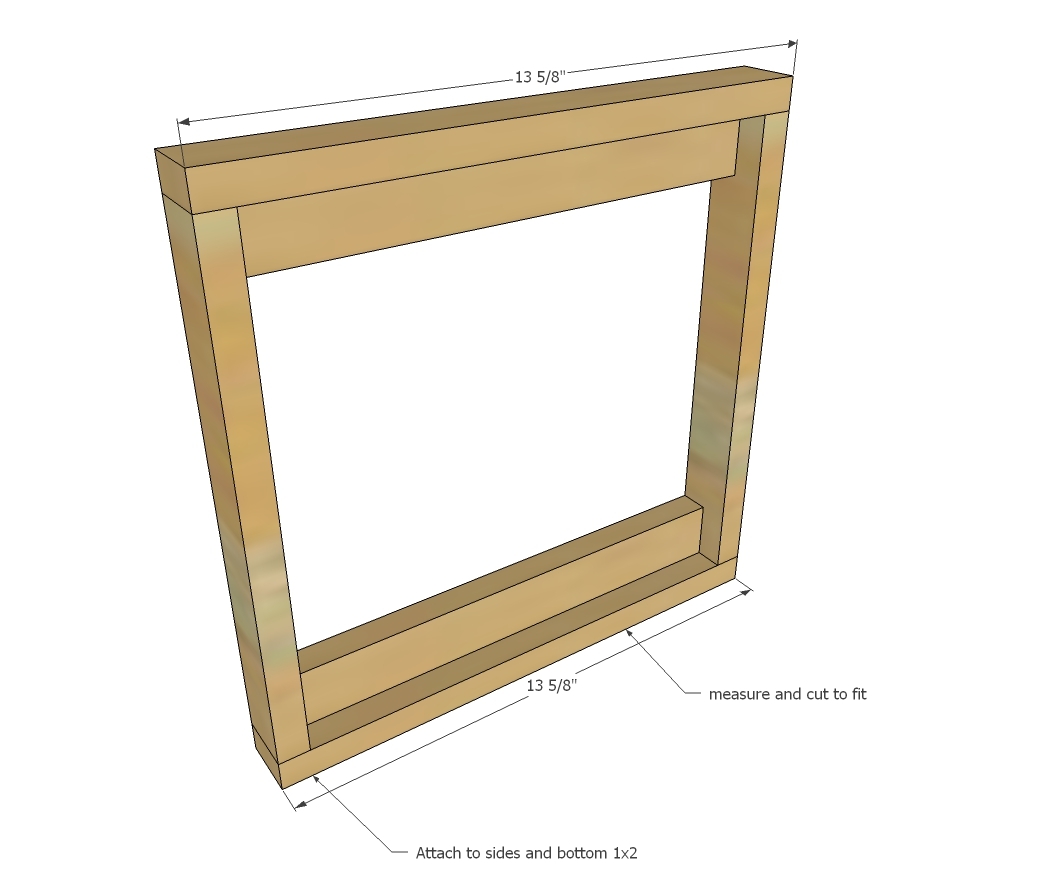
Then cut two more 1x2s and attach on outsides with glue and nails or screws or pocket holes to all of the exisiting 1x2 boards.
Step 3
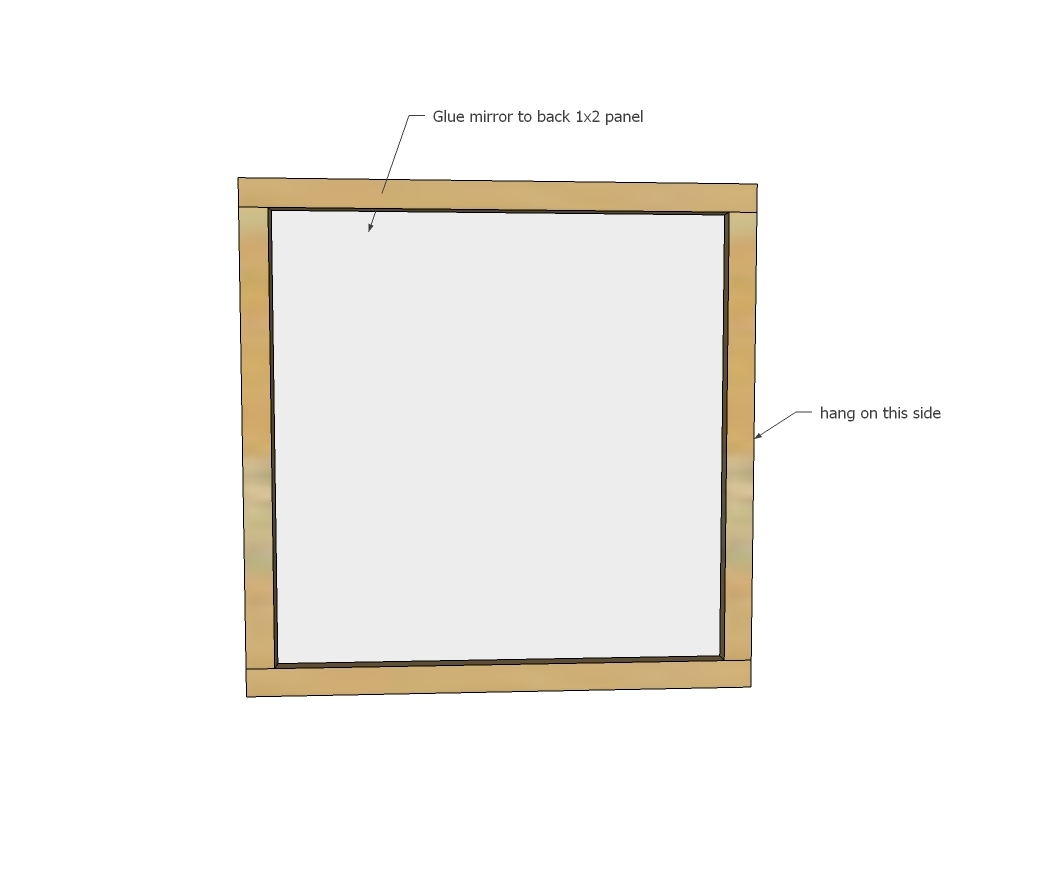
NOTE: Add picture hanging kit hardware before installing mirror.
Glue the mirror to the frame according to the directions with the mirror. For added security, you may wish to also apply a small bead of clear silicone around the front of the mirror, further preventing mirror from popping outward.
Hang using a picture hanging kit.
It is always recommended to apply a test coat on a hidden area or scrap piece to ensure color evenness and adhesion. Use primer or wood conditioner as needed.

Comments
dmcarwin
Mon, 10/20/2014 - 13:58
So cute!
I love these simple and easy!