
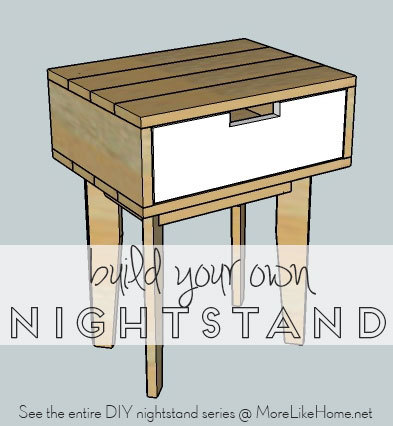

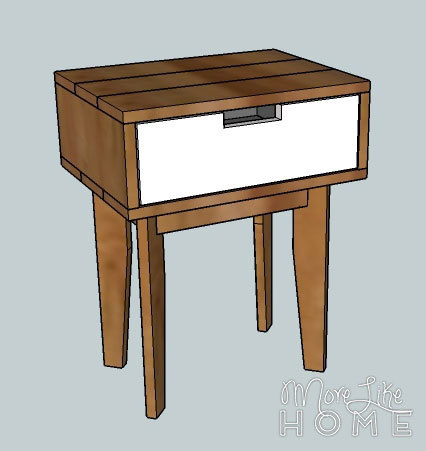
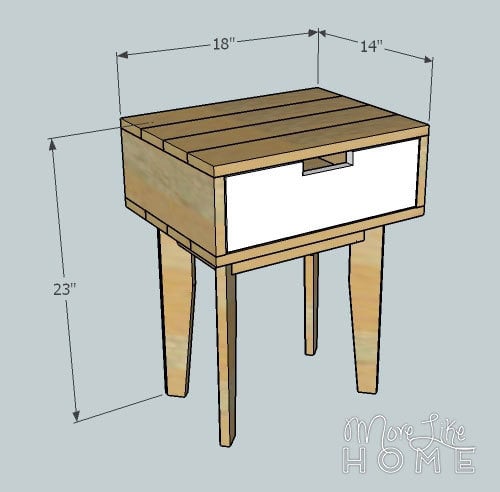
This nightstand has a modern style with tapered legs and features a drawer to keep your bedside looking neat and tidy! Full plans at More Like Home: http://www.morelikehome.net/2015/03/nightstands-day-2-tapered-legs-and…
Preparation
1 - 1x3 @ 12'
2 - 1x4 @ 8'
1 - 1x6 @ 6'
1 - 1x12 @ 2' (4' is probably the shortest you can buy, if you have a scrap 2' is plenty)
10 or 11" drawer slides
wood filler
wood glue
1 1/4" screws
2" screws
Kreg Jig with 1 1/4" and 2 1/2" pocket screws (optional)
finishing nails
(A) 4 - 1x4 @ 18" (bottom)
(B) 2 - 1x6 @ 14" (sides)
(C) 1 - 1x6 @ 16.5" (back)
(D) 4 - 1x3 @ 16" (legs)
(E) 2 - 1x3 @ 12" (front/back trim)
(F) 2 - 1x3 @ 6 5/8" (side trim)
(G) 1 - 1x12 @ 15 1/2" (drawer bottom)
(H) 2 - 1x4 @ 11 1/4" (drawer sides)
(I) 1 - 1x4 @ 14" (drawer back)
(J) 4 - 1x4 @ 18" (top)
(K) 1 - 1x6 @ 16 1/4" (drawer front)
Please read through the entire plan and all comments before beginning this project. It is also advisable to review the Getting Started Section. Take all necessary precautions to build safely and smartly. Work on a clean level surface, free of imperfections or debris. Always use straight boards. Check for square after each step. Always predrill holes before attaching with screws. Use glue with finish nails for a stronger hold. Wipe excess glue off bare wood for stained projects, as dried glue will not take stain. Be safe, have fun, and ask for help if you need it. Good luck!
Instructions
Step 1
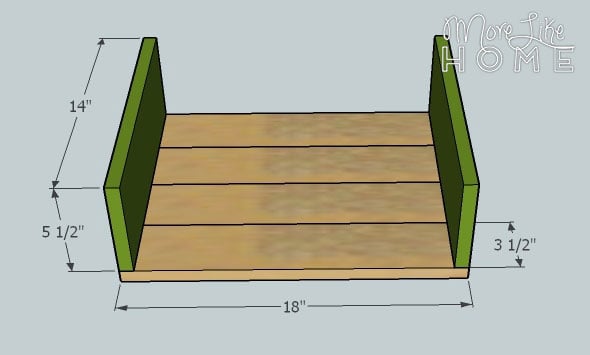
Start by lining up the four bottom boards (A) side by side, keeping everything flush (if you have a Kreg Jig go ahead and attach the four pieces together). Attach a side board across each side of the bottom section you just made (see pic below) using a Kreg Jig (or you could drill through each bottom board into the side boards). The front, back, and sides should be flush.
Step 2
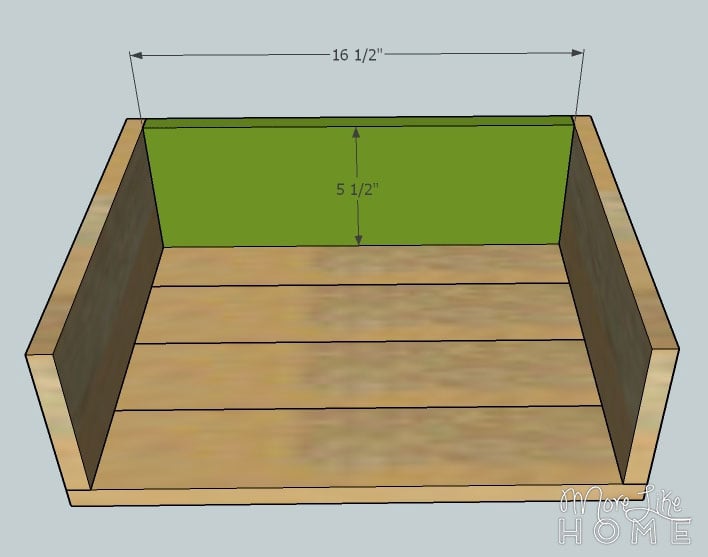
Slip the back board (C) between the side boards, keeping it flush with the back edge. Attach it using a Kreg Jig or by drilling through each side board into the ends of the back board.
Step 3

Now you can taper each of the legs (D). Make a mark 6" down one side of the leg. Along the bottom edge measure in 1.5" from the opposite side. Draw a line connecting the two marks. Cut along the line.
Step 4
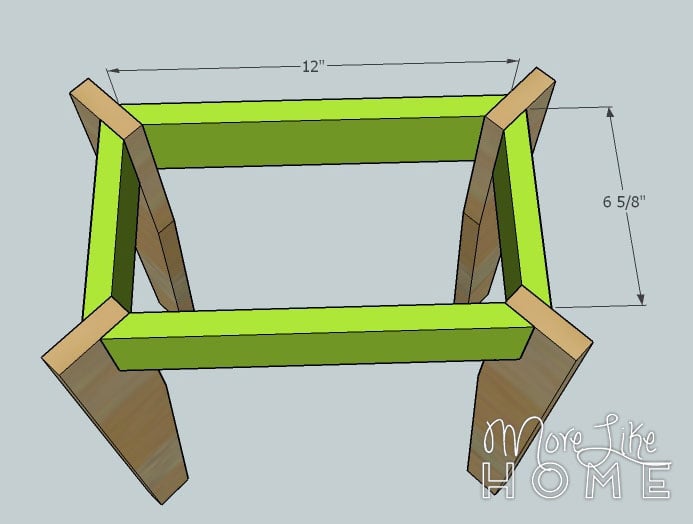
Next prepare each of the front/back trim boards (E) and side trim boards (F) by cutting each end at a 45 degree angle (see pic below). Make sure the cuts are perpendicular (like this /=\, not this /=/). Use the trim pieces to connect the four legs like in the picture below. Keep the top and inside edges flush, and make sure all the tapers point in toward the middle. Don't forget to use glue. Assemble the pieces using finishing nails or screws (screws will be harder to hide and could look messy, but would be stronger). Check for square before attaching this to the nightstand body (measure corner-to-corner each direction. if it is square the measurements will match.).
Step 5
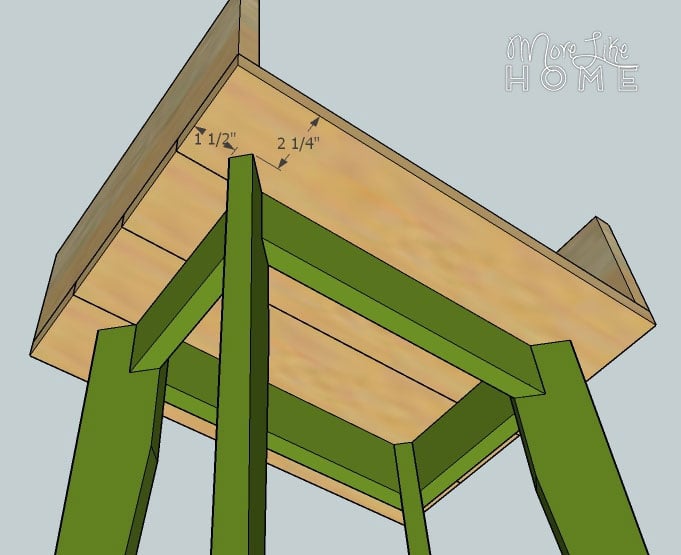
Attach the leg assembly to the bottom of the nightstand using a Kreg Jig, or by drilling down through the bottom into the legs and trim boards. It should be set back 2 1/4" from the front and 1 1/2" from each side. Try to get at least one screw in each board.
Step 6
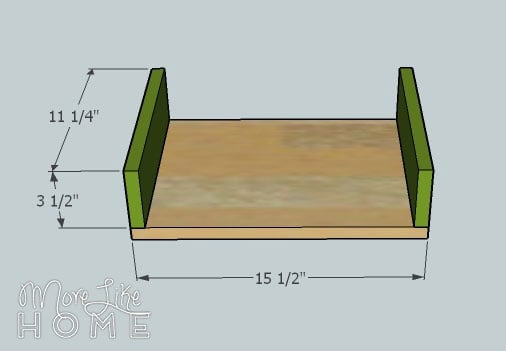
Next build the drawer box. Start by attaching a drawer side (H) on each end of the drawer bottom (G). Use a Kreg Jig or drill through the drawer bottom into the sides.
Step 7
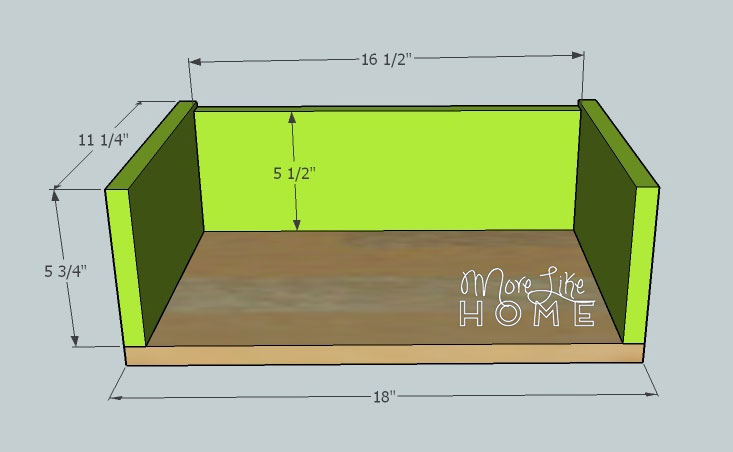
Attach the drawer back (I) between the drawer sides using a Kreg Jig or by drilling through the sides and bottom into the back.
Step 8
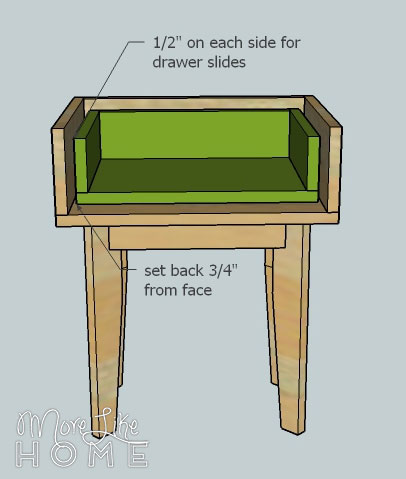
Follow the instructions on your drawer slides to install the drawer box. This is much easier to do before the top is attached! These plans are based on a 1/2" slide allowance so you will need to adjust the size of the drawer if your slides are different. Make sure your drawer box is recessed 3/4" from the face of the nightstand so your drawer front will end up flush later.
Step 9
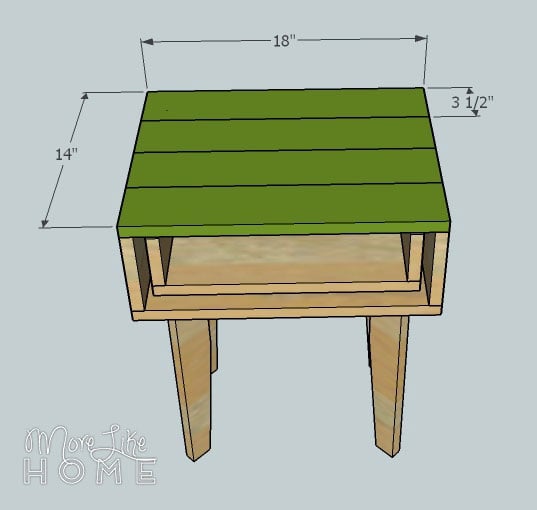
Once the drawer box is in place you can attach the top (J). You can use a Kreg Jig to assemble the four top boards side-by-side first, or just attach each board individually. Use finishing nails and glue.
Step 10

Now you just need to make the drawer front (K). First you need to trim 1/4" off the board so it is only 5 1/4" tall. A table saw would work best for this, but we've done it with a regular circular saw as well. If you want to attach a regular drawer pull, you can leave the drawer front like this and skip to the next step (if you're doing this you may want to just set the top in place without attaching it in the previous step, then nail it down after the drawer front is in place and the pull is on. One the top is on, it will be very difficult to open the drawer without a drawer pull!) Your other option is to do a notched drawer pull like in my drawings. Use a reciprocating saw to cut a notch in the top edge of the drawer front - I measured in 6" from each side and notched 1" down.
Step 11
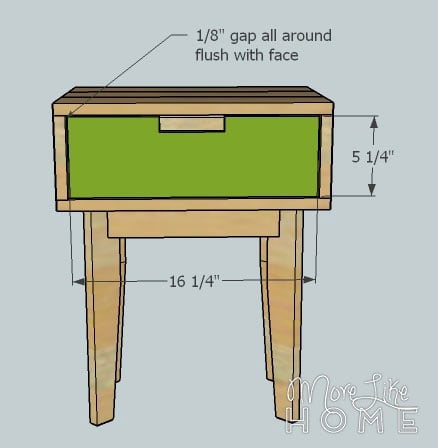
Set the drawer front on the drawer box and center it in the opening with 1/8" gap all around (it's important to have the top in place to get this gap right). It should be flush with the face of the nightstand. Use finishing nails and glue to attach the drawer front to the drawer box. I find it helps to trace the drawer box on the front of the drawer front first so I know where to nail.
It is always recommended to apply a test coat on a hidden area or scrap piece to ensure color evenness and adhesion. Use primer or wood conditioner as needed.
