

Adorable pretend play bunny hutch build plans by ANA-WHITE.com
Are you looking for an affordable and unique, but sure to be treasured gift for a child this Holiday season? For the fifth year in a row, Jaime Costiglio and I have teamed up for Handbuilt Holidays - to create and share new gift plans, free every Friday in the weeks leading up to Christmas.

This year in particular, we've strived to create unique gift plans that you simply can't find anywhere else.


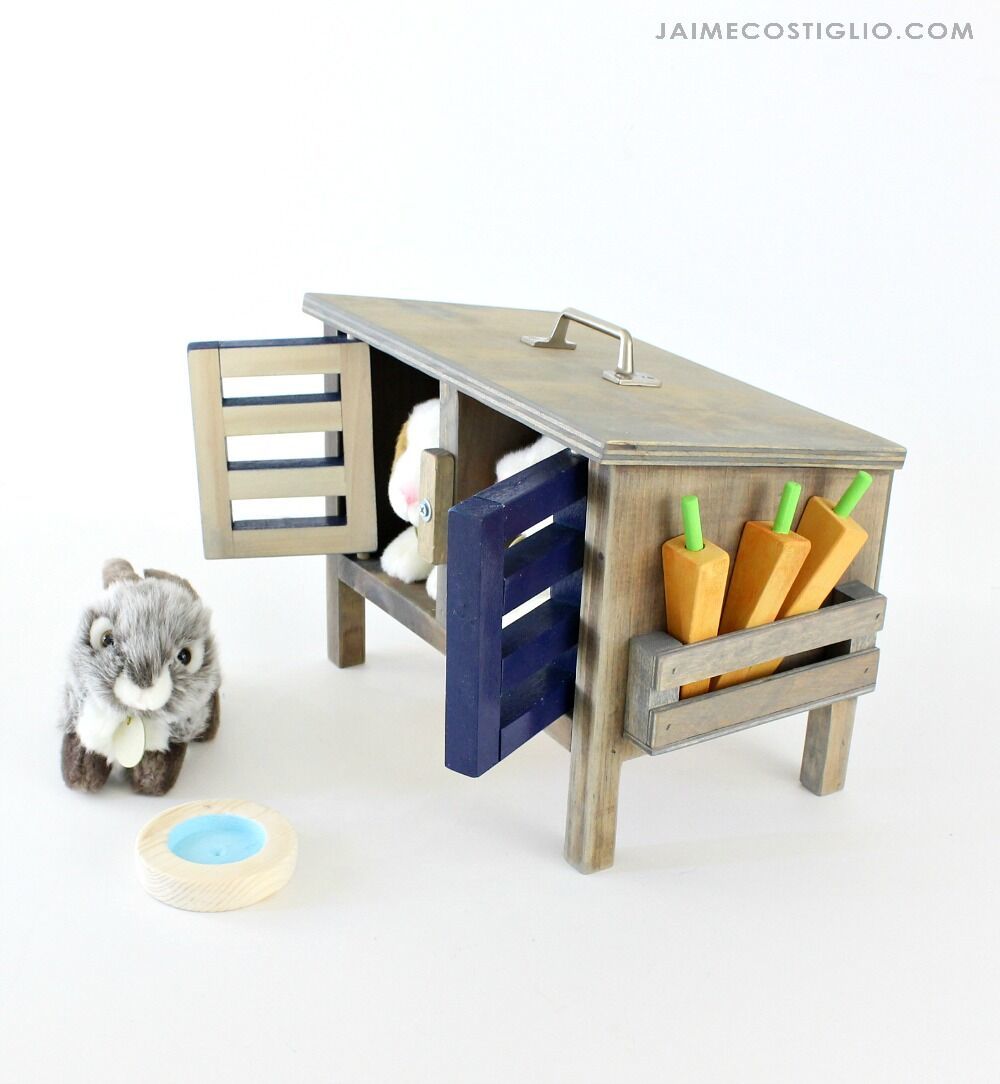
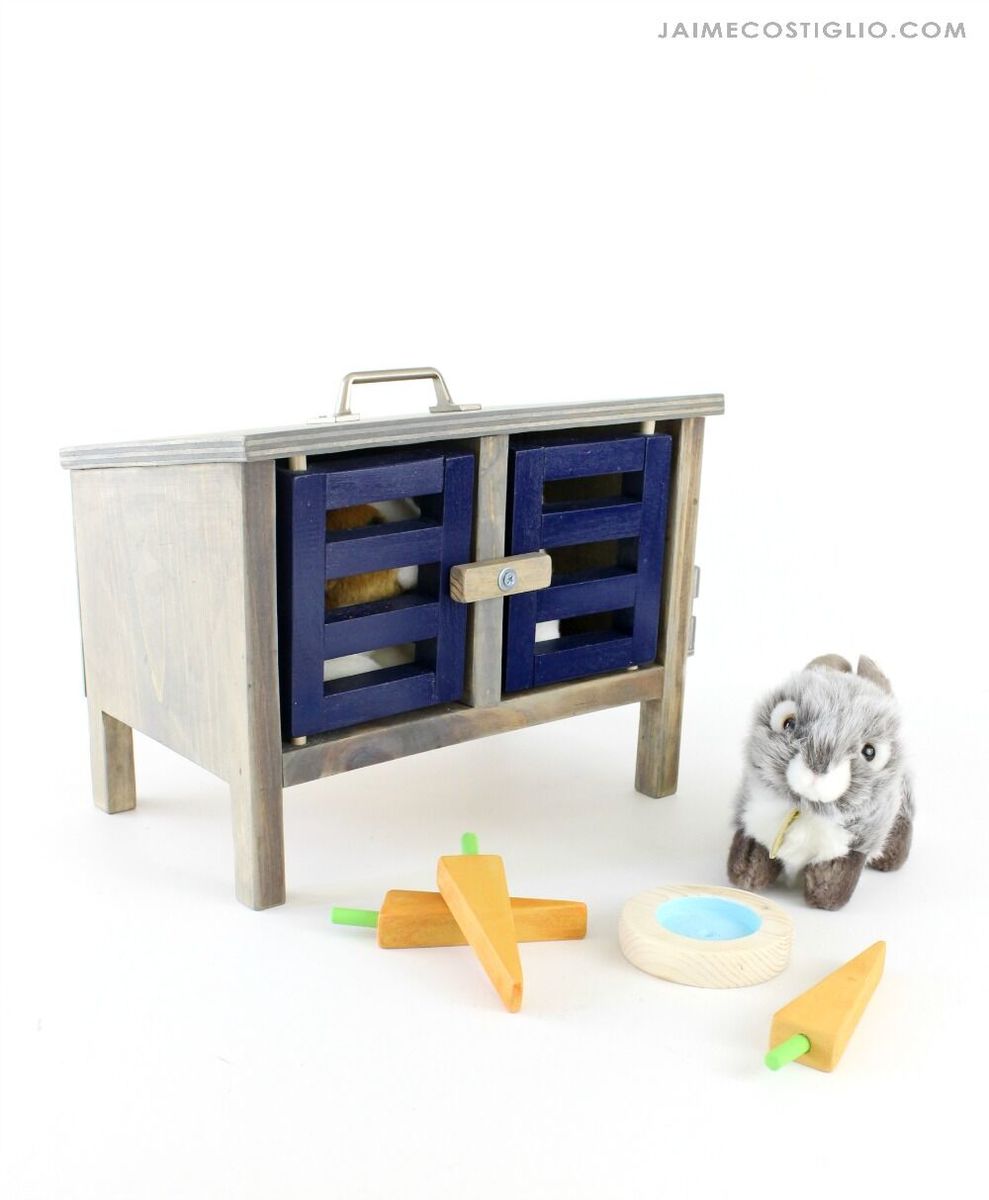
My guess is not too many kids already have a toy bunny hutch. But what child wouldn't love to play with this set? We've sized it to be compatible with 18" or American Girl Dolls, but this little set can be played with all by itself too.
I'm sharing the free plans with you below. But before we get to the plans, do hop over and for Jaime Costiglio's build post -with LOTS more photos, build details, links to purchase the bunnies, and those carrots .....
XO Ana
CLICK HERE FOR MORE DETAILS AT JAIMECOSTIGLIO.COM
Preparation
1 - 1x8 @ 3 feet long
1 - 1x1 @ 4 feet long
1 - 1/2" plywood @ 8" x 12-1/4"
1 - 1/4" plywood @ 5-1/4" x 11-3/4"
Small wood dowels (1/4" diameter)
See steps for fastener recommendations
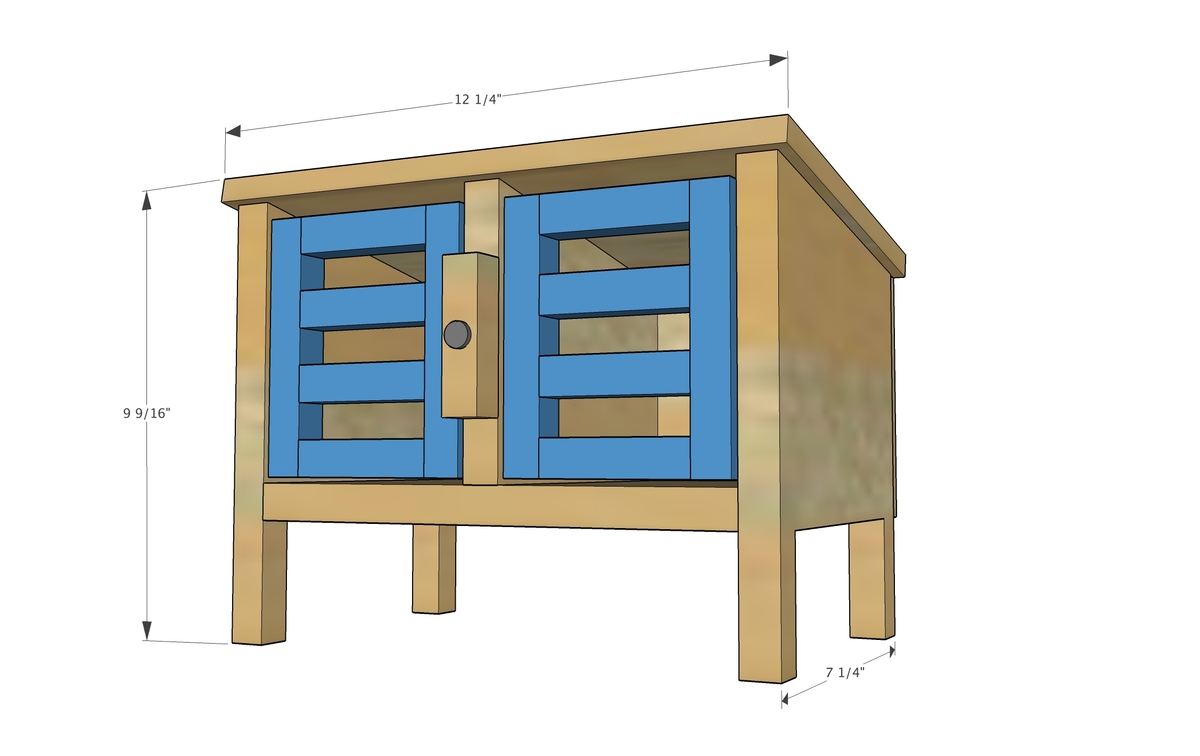
2 - 1x8 @ 9" - longest point measurement, one end cut at 10 degrees off square
1 - 1x8 @ 10-1/4"
1 - 1x8 @ 5-3/4" - longest point measurement, one end cut at 10 degrees off square
4 - 1x1 @ 5- 1/4"
8 - 1x1 @ 3"
1 - 1/2" plywood @ 8" x 12-1/4"
1 - 1/4" plywood @ 5-1/4" x 11-3/4"


Instructions
Step 1
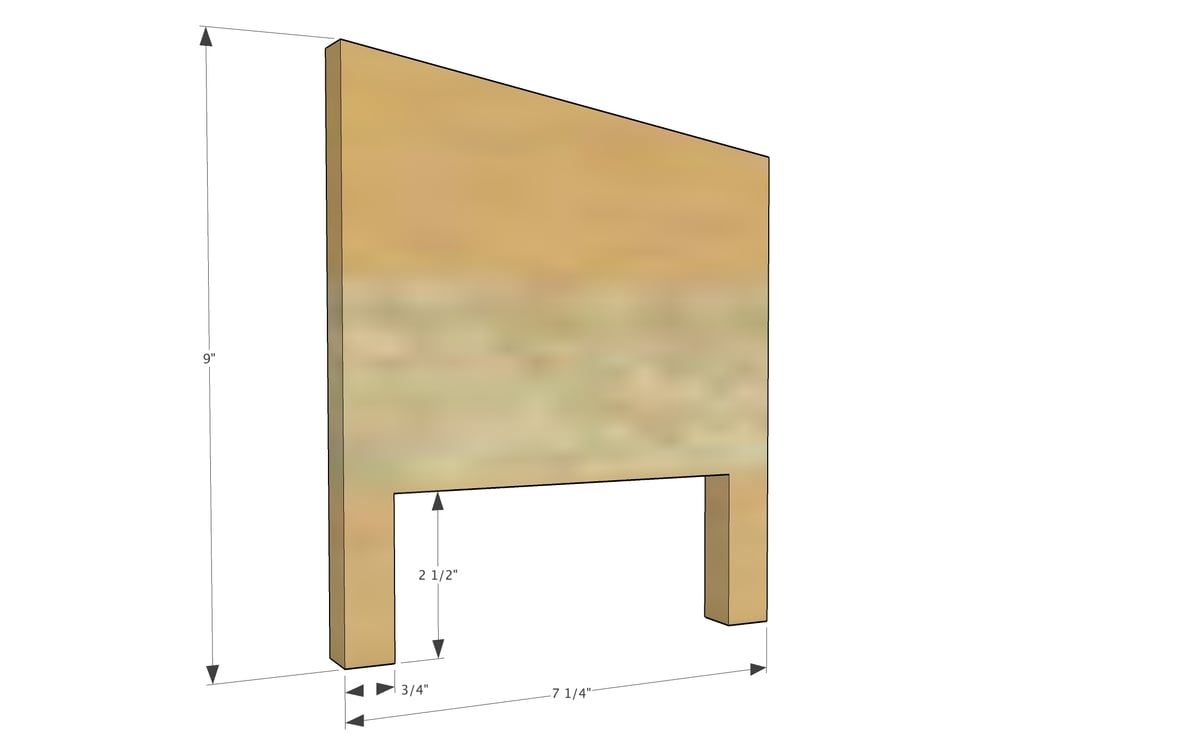
From side pieces, cut out bottom with jigsaw.
Step 2
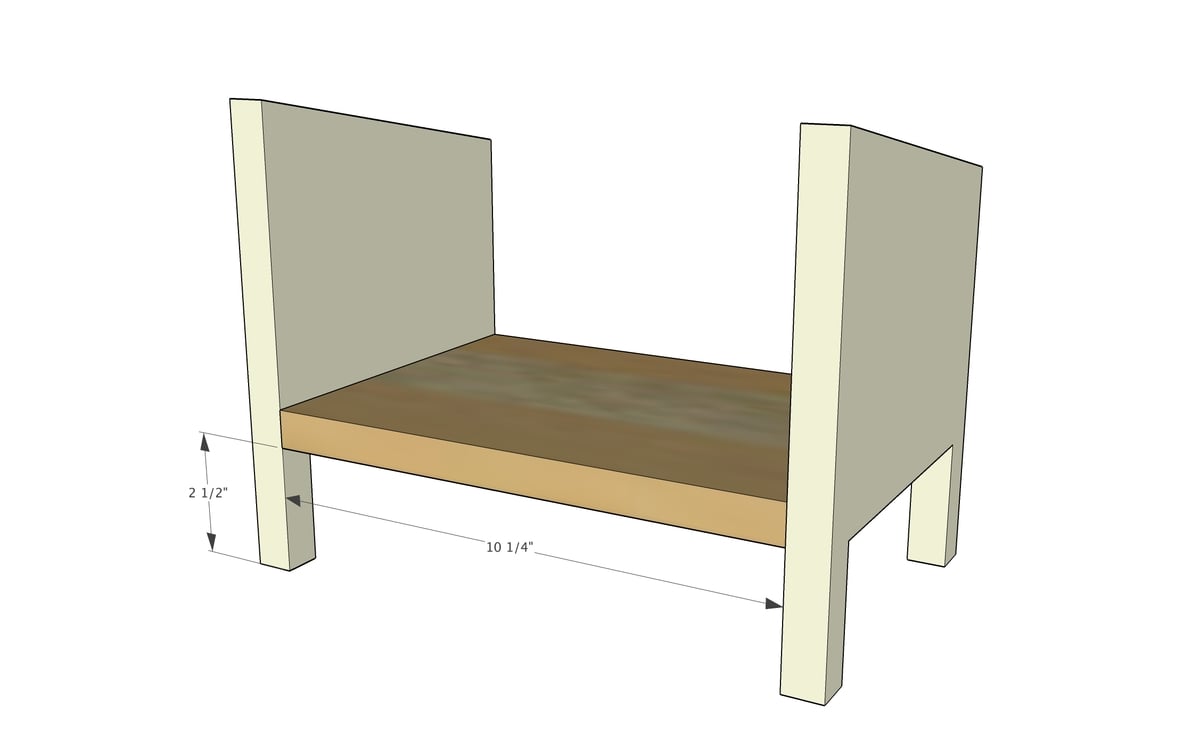
Attach bottom to sides. You can use brad nails (at least 1-1/4" long) wood screws or pocket hole screws.
Step 3
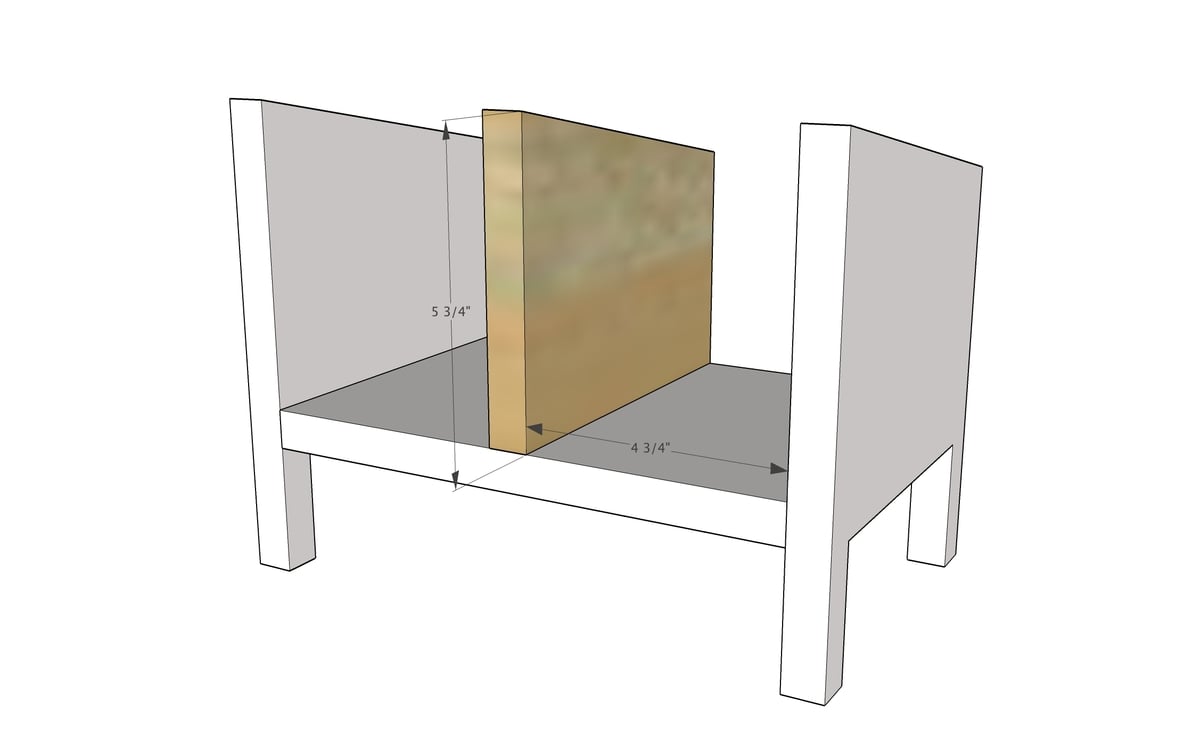
Step 4

Build doors (I'd use glue and brad nails 1-1/4" length).
Drill dowels hole on top and bottom and fit inside bunny hutch.
Step 5
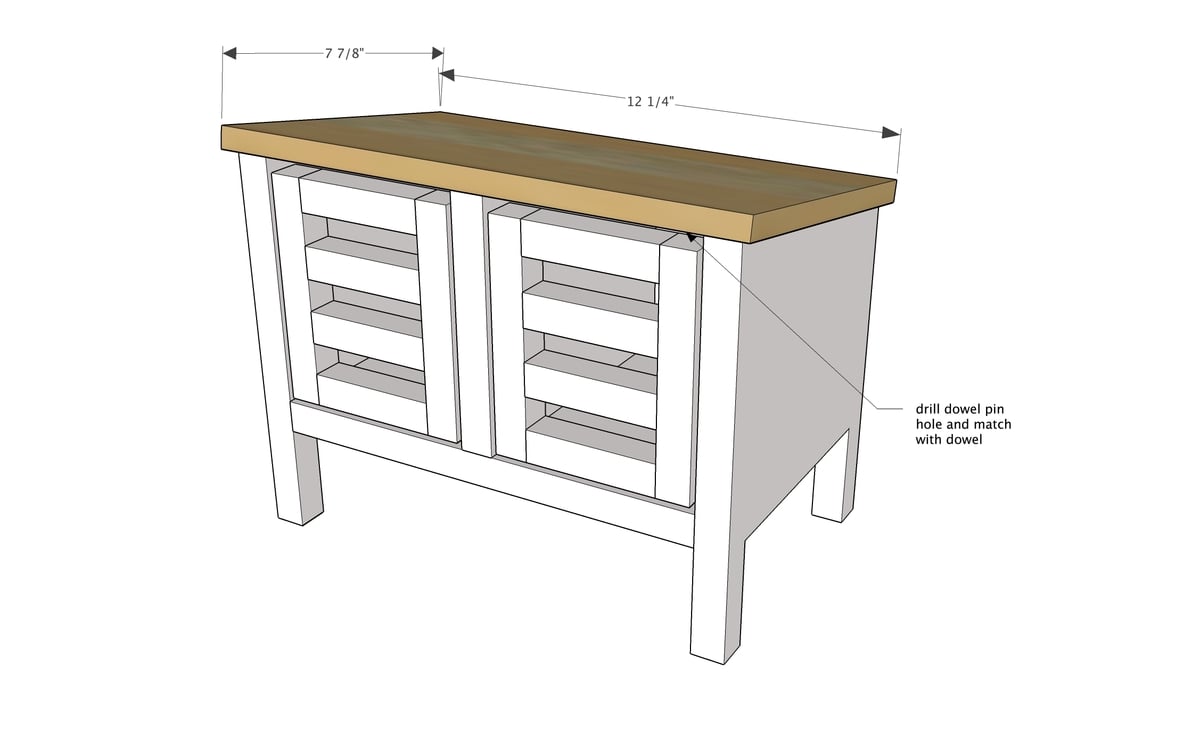
Step 6

Attach back with glue and brad nails (3/4" length).
