
Difficulty
Beginner Projects
| 
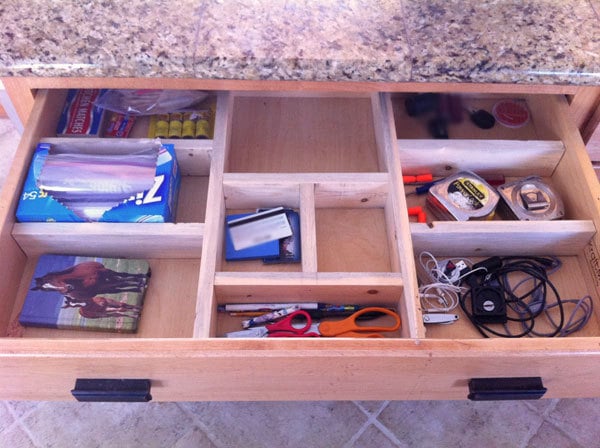
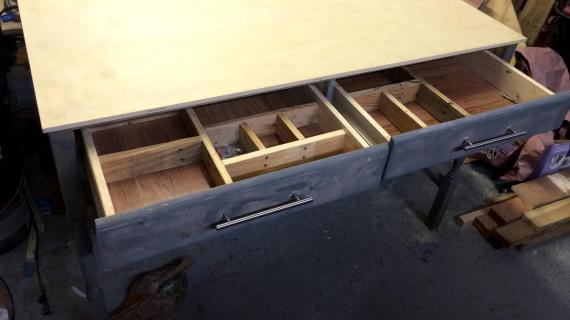
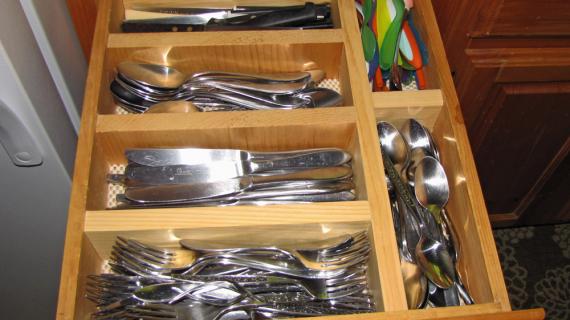
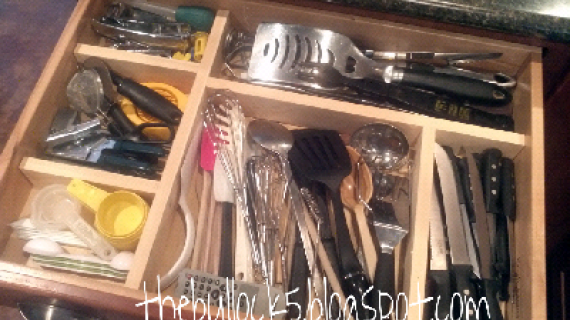
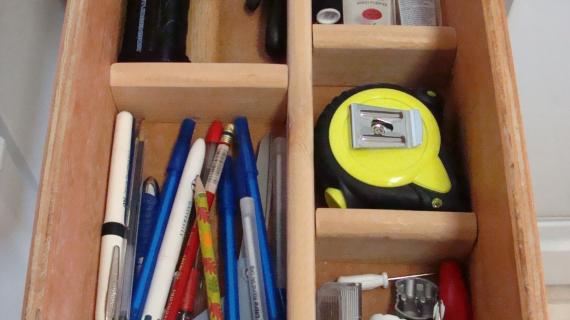
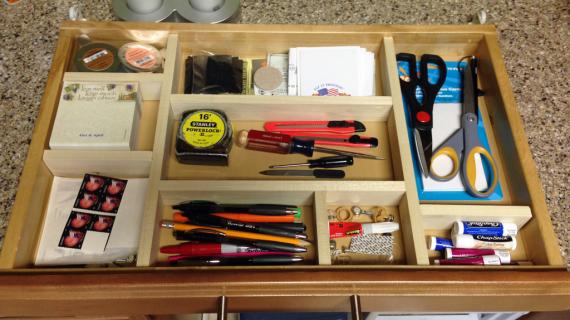
If you have a large drawer that needs organizing, this is a great way to do it. This works best in a larger drawer, as multiple compartments custom fit will all work together to hold up over time.
Dimensions
Custom to fit your Drawers
Preparation
Shopping List
1 - 1x3 pine or whitewood boards
1-5/8" self tapping trim screws (can also use 1-1/4" brad nails)
Cut List
Cut to fit your drawers
Tools


Instructions
Step 1
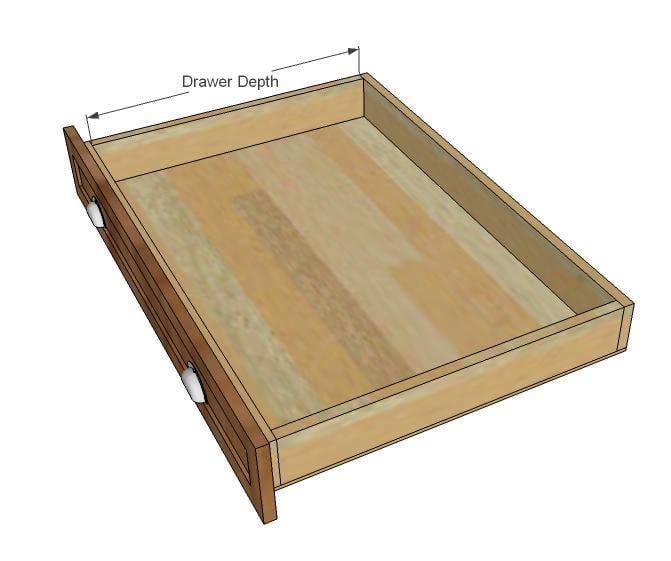
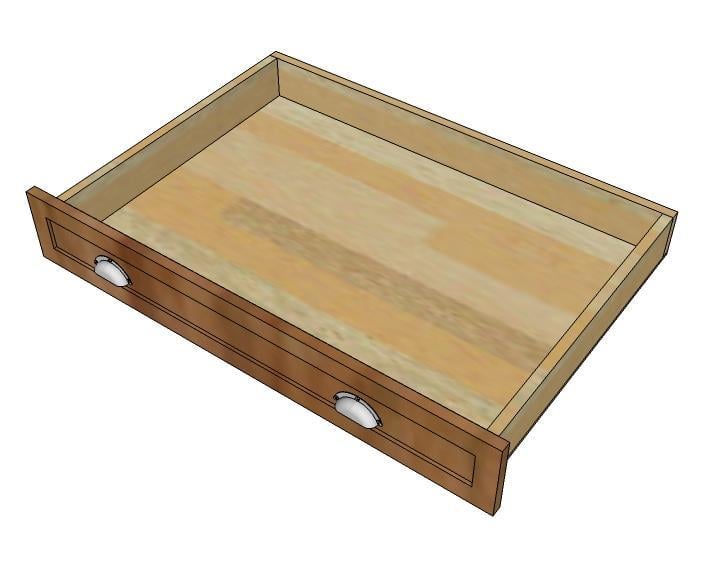
Measure your drawer first and do some planning.
Step 2
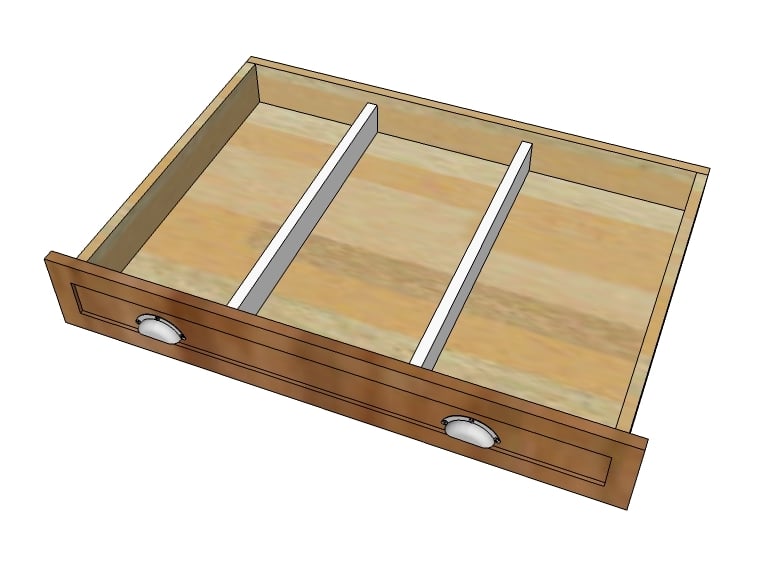
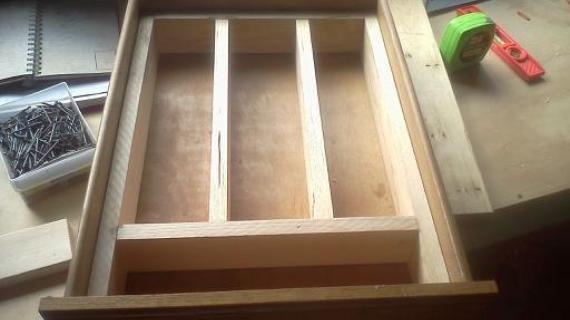
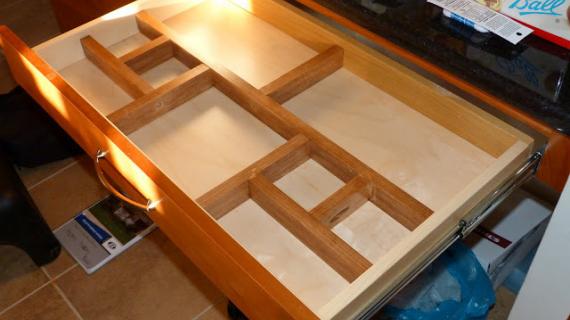
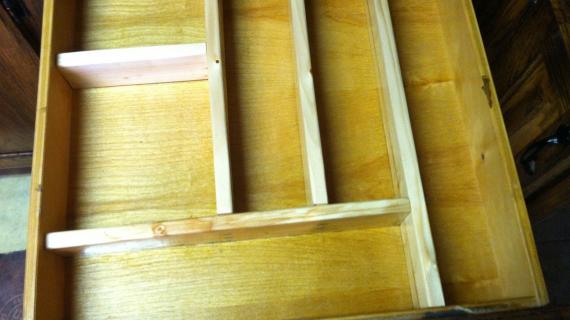
Cut first the long dividers and place in the drawer where you'd like to divide out.
Step 3
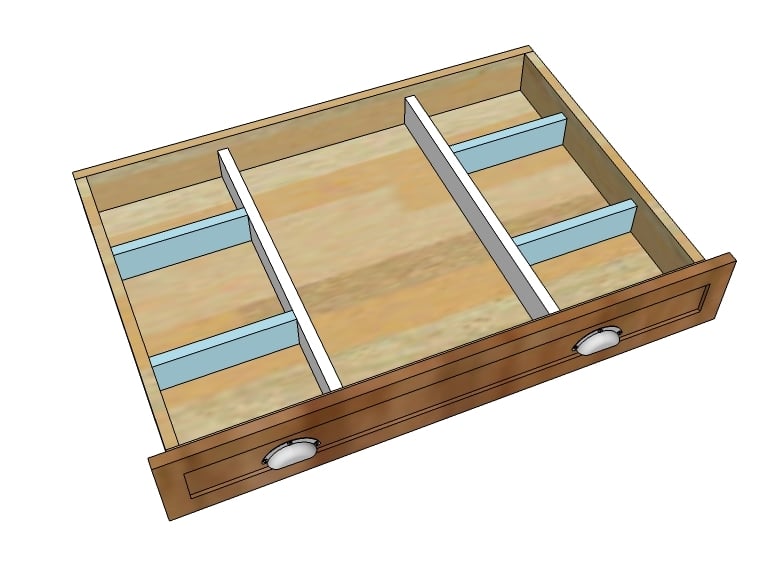
Measure and cut smaller dividers as shown. Mark the placement and screw to the longer dividers with 2 screws per joint.
Step 4

Measure and cut center dividers. Mark placement.
Remove from drawer and nail or screw to side dividers.
Step 5
Finishing Instructions
Finish Used
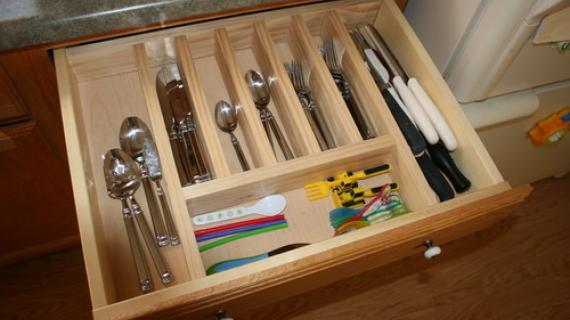
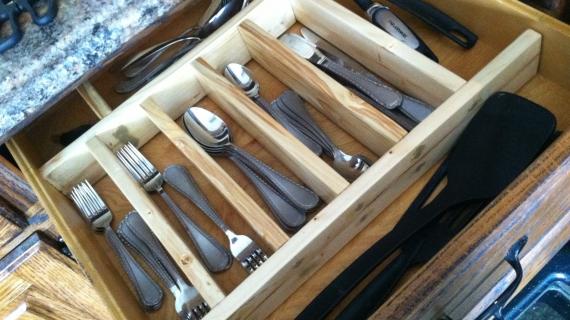
Because this drawer is going to hold eating utensils, I simple gave the wood a good sanding a a coat of mineral oil to seal it.
Project Type
Room

Comments
cathrynj
Mon, 03/21/2011 - 00:42
perfect!
This is just in time for spring cleaning here at my house. I need to do this for my knife drawer this week!
QueenMahin
Mon, 03/21/2011 - 06:59
Love it!
Yes, love it! Only problem is, my kitchen doesn't have any drawers yet. :) Have to decide if I can make drawers or if I need to buy them. Either way, once I have drawers, I'm making your drawer dividers!
Guest (not verified)
Mon, 03/21/2011 - 07:18
"Use 2” screws” Where? I
"Use 2” screws” Where?
Kate (not verified)
Mon, 03/21/2011 - 11:39
I did a similar drawer
I did a similar drawer divider in my desk back in high school using balsa wood and some wood glue. I'm not sure it would stand up to the abuse a kitchen drawer gets, but it works very well for my (much less often used and not food safe) desk drawer.
Guest (not verified)
Mon, 03/21/2011 - 07:43
I used the same wood for
I used the same wood for drawer dividers as easy art clip rails......
Lang (not verified)
Mon, 03/21/2011 - 08:19
Re: "USE 2" SCREWS" WHERE?
If you use wood that is smaller then you won't be able to fasten it with screws. 1" wood is likely to split if you don't pre-drill your holes anyway, so something with less thickness would surely split. I'm not saying you couldn't use something of less thickness, but you might would have to place some wax paper down in the bottom of your drawer, be sure to dry fit all of your pieces to make sure they are tight first, and then re-install your pieces with glue. As long as there is nothing to hinder you from sliding the whole unit out once it is dry then you can remove the wax paper after it is dry. This will prevent any glue runs from gluing the entire piece into your drawer permanently.
Ana, I love this idea! I may actually have some scrap 1x3s out in the garage too!
Guest (not verified)
Mon, 03/21/2011 - 11:00
Love it, but...
Ive been looking for dividers for my large utensil drawer (spatulas, whisks, measuring cups) But, my drawer is super deep. would love plans that let me add another level, some kind of insert maybe?
In reply to Love it, but... by Guest (not verified)
annalea
Mon, 03/21/2011 - 15:10
Lauan might be good . . .
Try some 1/4" Lauan hardwood plywood for a second-level floor. You can get side-mount drawer glides if you wanted to make it only half as long, and slide it out of the way . . .
John Gray (not verified)
Mon, 03/21/2011 - 12:05
I've been trying to get the
I've been trying to get the time to do the same thing for years, but like you looking after a family and working 12 hour days just doesn't give you a chance. You are doing a great job with your website dear. Please keep doing it your way.
Thanks, John.
Guest (not verified)
Wed, 03/23/2011 - 20:25
Additional Idea
My only problem is my kids...they don't always put things back where they should. Stickers or an outline of the item can be drawn on the bottom of the drawer space to show little ones where to put things away. This has alleviated some of the stress of making sure the drawer organizers are used to their fullest potential.
Kate (not verified)
Wed, 04/20/2011 - 09:34
drawer organizer
Last summer I built the drawer dividers similar to what you have but I used 1 5/8" x 3/8" slat wood that I bought in the molding aisle at the lumber store. I couldn't use screws or nails on wood so thin so I just wood glued them all together. First I laid out everything in the drawer and then cut the wood to divide everything, I have a picture, not sure how to upload it. It has held together really well! I agree that my $2 lumber investment has taken me much further towards an organized drawer then the expensive organizing bins that never quite fit the way you want. So, in less than an hour you to can have an organized drawer!
Deborah (not verified)
Thu, 05/26/2011 - 17:04
shortening depth of drawers
I would like to shorten the depth of some drawers I have in my sewing desk. Any suggestions?
Tsu Dho Nimh
Thu, 05/26/2011 - 17:28
Shorten existing drawers?
You want to shorten existing drawers?
If all you want is to prevent things from getting lost at the back of the drawer, fill the back of it with a cardboard box.
If you want to shorten the whole drawer, it's a bit trickier.
Drawers aren't all built the same, so this is general advice: Take the drawer apart, cut the bottom and sides shorter and re-assemble it. You might need to replace the drawer sliders with shorter ones.
In reply to shortening depth of drawers by Deborah (not verified)
claydowling
Thu, 05/26/2011 - 19:07
Build new
Drawers don't shorten that well. The joinery at the corner tends not to like being messed with, and you'll probably weaken the drawer. Still, if you're determined to try, and willing to risk building a new drawer, you might as well give it a shot.
If you want to get hard-core about building your own, grab this video: http://www.amazon.com/Dovetail-Drawer-Frank-Klausz/dp/1561587044
Tsu Dho Nimh
Fri, 05/27/2011 - 08:54
I've had luck doing it, but
I've had luck doing it, but only because of the way the drawers were built.
If I ran into a tricky drawer, I would remove the front and put it onto a new box.
CraftyMama47 (not verified)
Thu, 12/27/2012 - 14:20
shortening deep drawers
Since drawers don't shorten well, make an insert to raise the bottom. First decide how much you want the bottom of the drawer to come up i.e. 3 inches. Remove the drawer from its slide and measure the interior. Then build a platform to fit. Place it in the drawer. Once the platform is in the drawer, you can either leave it as it is or cover it. If you later decide that you want the drawer at its original size, just take out the platform :)
Guest (not verified)
Sat, 11/19/2011 - 09:05
Pine lattice seems to work
Glad to have the encouragement to use wood instead of cardboard like most seem to recommend. I had a strip of pine lattice on hand, so I cut to width - tiny bit extra for safety, thinking I could file or sand down as needed - and friction seems to want to hold it just right. I only need horizontal separation in this drawer. Going to try for a few days before deciding whether I need anything else to hold it in place. I wanted a thin divider, which seems likely to split if I try to screw into the end, so if something more is needed, I think I'll either use a couple of interlocking dividers or double sided foam tape. Not as pretty as yours, but thin makes me happy.
tannisg
Mon, 04/30/2012 - 17:56
food safe?
I want to make some dividers for our kitchen silverware drawer. Its a mess and I want the kids to be able to just throw forks in one slot, spoons in another, etc. Larger than the plastic ones where they have to stack just so and still overflow (we have 5 kids, so with 7 of us we regularly use/wash/put away more than a standart 8 piece set)
I'm wondering what I can do to make sure its all foodsafe? If I use the staandard white pine boards from Lowes (have some in the garage) those are untreated (they told me) and then if I just use screws it should be good, right? is wood glue food safe?
Any finishing that would be foodsafe, or just sand well and vacuum/wipe well to remove sawdust?
Thanks!
claydowling
Mon, 04/30/2012 - 18:53
Food Safety
Any finish that dries will be food safe. I've been warned though that the smell of any finish gets concentrated in closed drawers, and that you won't appreciate it. Most professional cabinet makers I've heard on the subject don't recommend any kind of finish in a drawer. That would presumably apply to the dividers as well.
Glue should be sufficient, possibly with finish nails to hold them in place if that makes you feel better. There's always the option of cutting dados to hold the dividers as well, but that might be overkill for what you're trying to achieve.
tannisg
Tue, 05/01/2012 - 07:19
thanks!
thanks Clay - I'm always up for an answer that allows me to skip the finishing step :)
I think finish nails would be easy enough...
Tina Bucci (not verified)
Tue, 09/11/2012 - 10:06
Simple Alternative
I went through the same struggle recently - trying to find drawer dividers, only to be disappointed with the outrageous cost. I was using them in my bedroom to keep my husbands drawers from becoming utter chaos lol. I settled on cardboard. I cut cardboard pieces from old boxes and covered them in dollar store decorative laminate paper. I have to say I am pretty pleased with the results. They certainly aren't as sturdy as wood would have been, but they do the job I needed (and have a little give to shove one more sweater in!). Just thought I'd share for someone looking for another solution. I'm just getting started with wood myself, so cardboard is less intimidating lol.
Smokeydog
Wed, 08/20/2014 - 10:59
Utensil Drawer Divider Suggestion
I have made a couple of drawer dividers for utensils (spoons, forks, knives). I found it helpful to cut oval sections out of the tops of the dividers as it results in easier access to items and also prevents scraps on knuckles. I simply measured in 1 1/2 inches in on the ends of the dividers and marked the spots with a pencil. I then placed an upside-down plate on the marks and traced around the plate for an outlined half oval for cutting. I used a jig saw to cut out the sections and sanded as needed. Using this technique resulted in uniform cuts for each section and gives it a professional appearance.