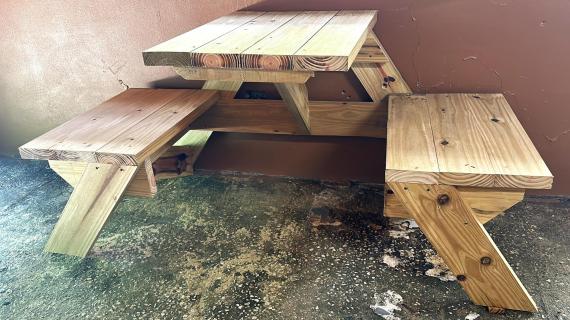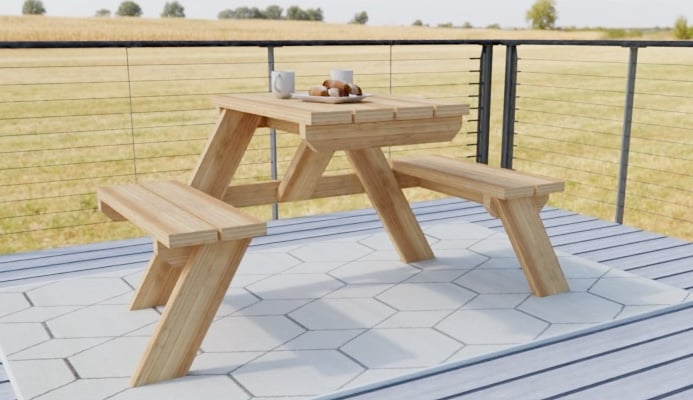

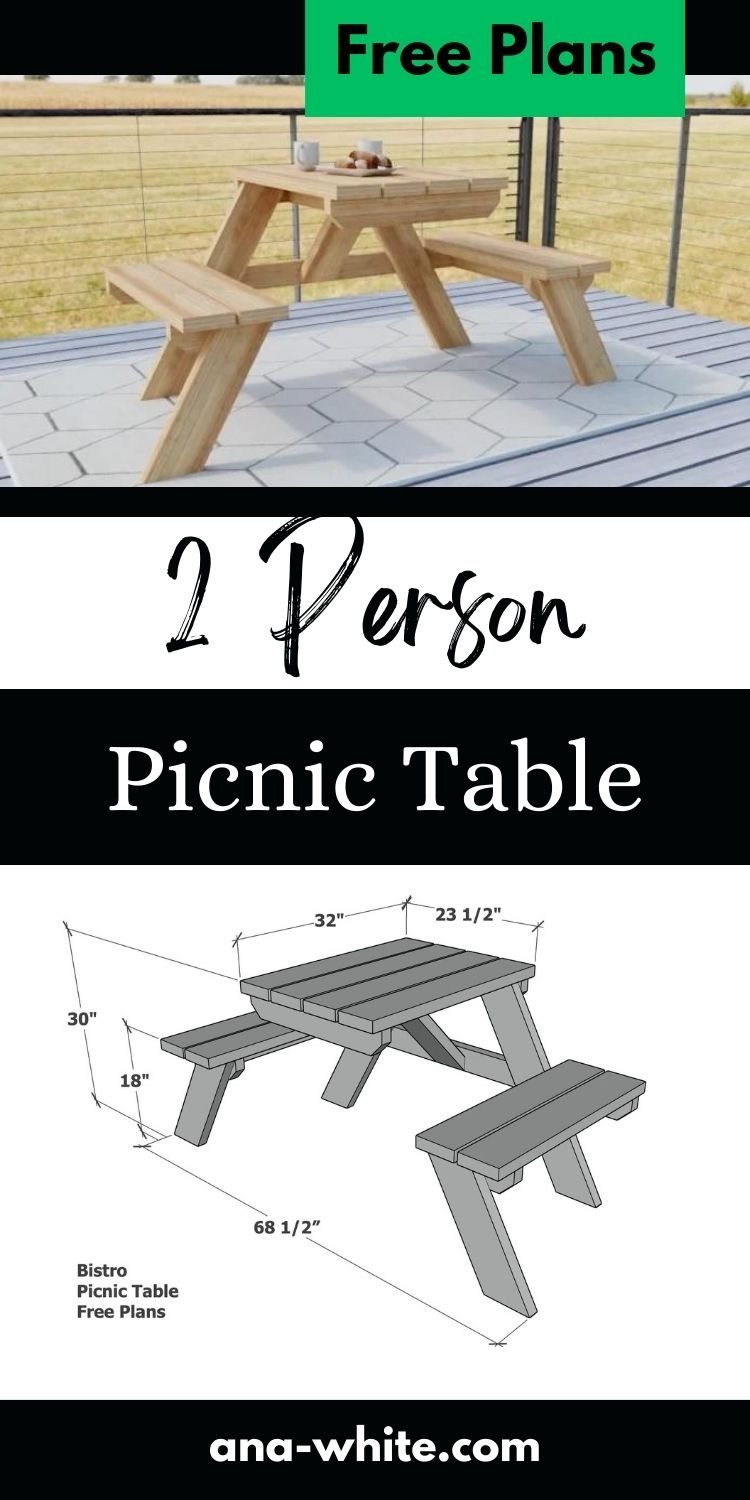
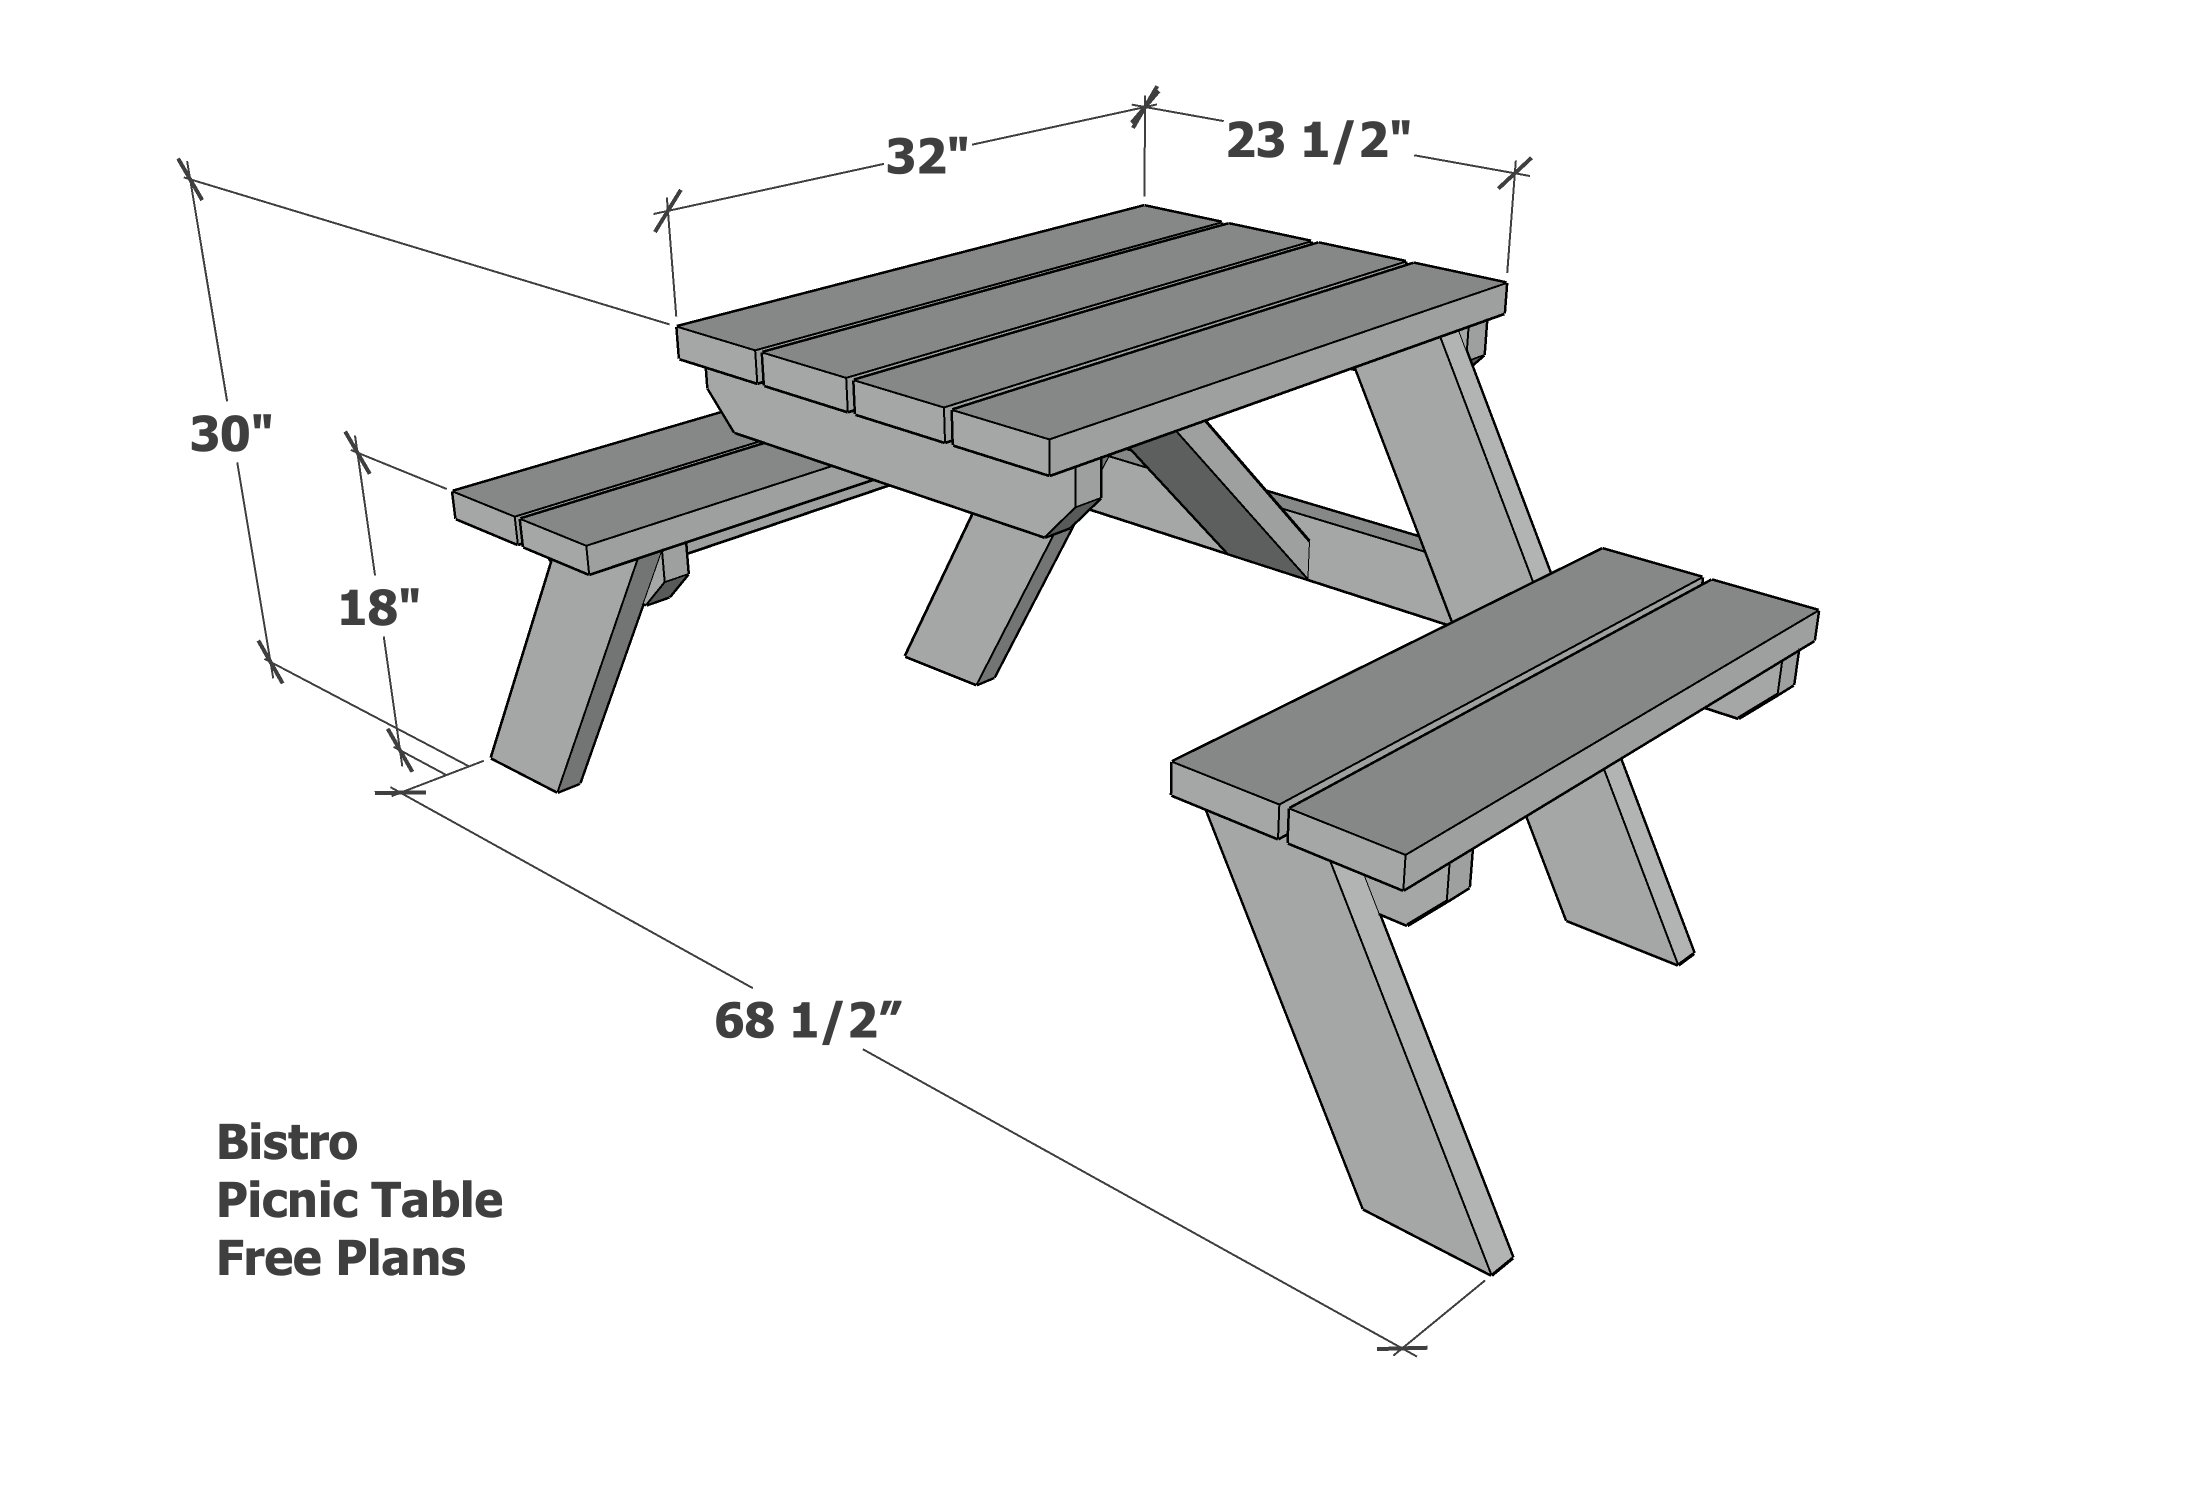
Here's a free plan to build your own two person picnic table!
We love this two person picnic table because it is an open design, so its easy to sit at, can be placed flat against a wall, and is perfect for small outdoor spaces.
Free plans include step by step diagrams, shopping and cut list with reader submitted photos from Ana-White.com
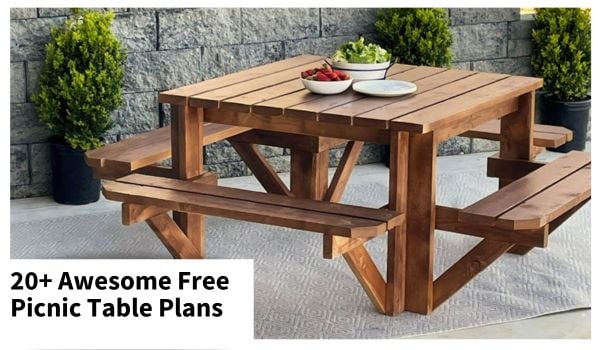
Want more than two seats? Check out our list of 20 awesome picnic table plans in all shapes and sizes!
More Free Picnic Table Plans
Pin For Later!
Preparation
- 2 - 2x4 @ 10 feet long
- 4 - 2x6 @ 10 feet long
- 2-1/2" self tappping star bit screws
- exterior wood stain
Top
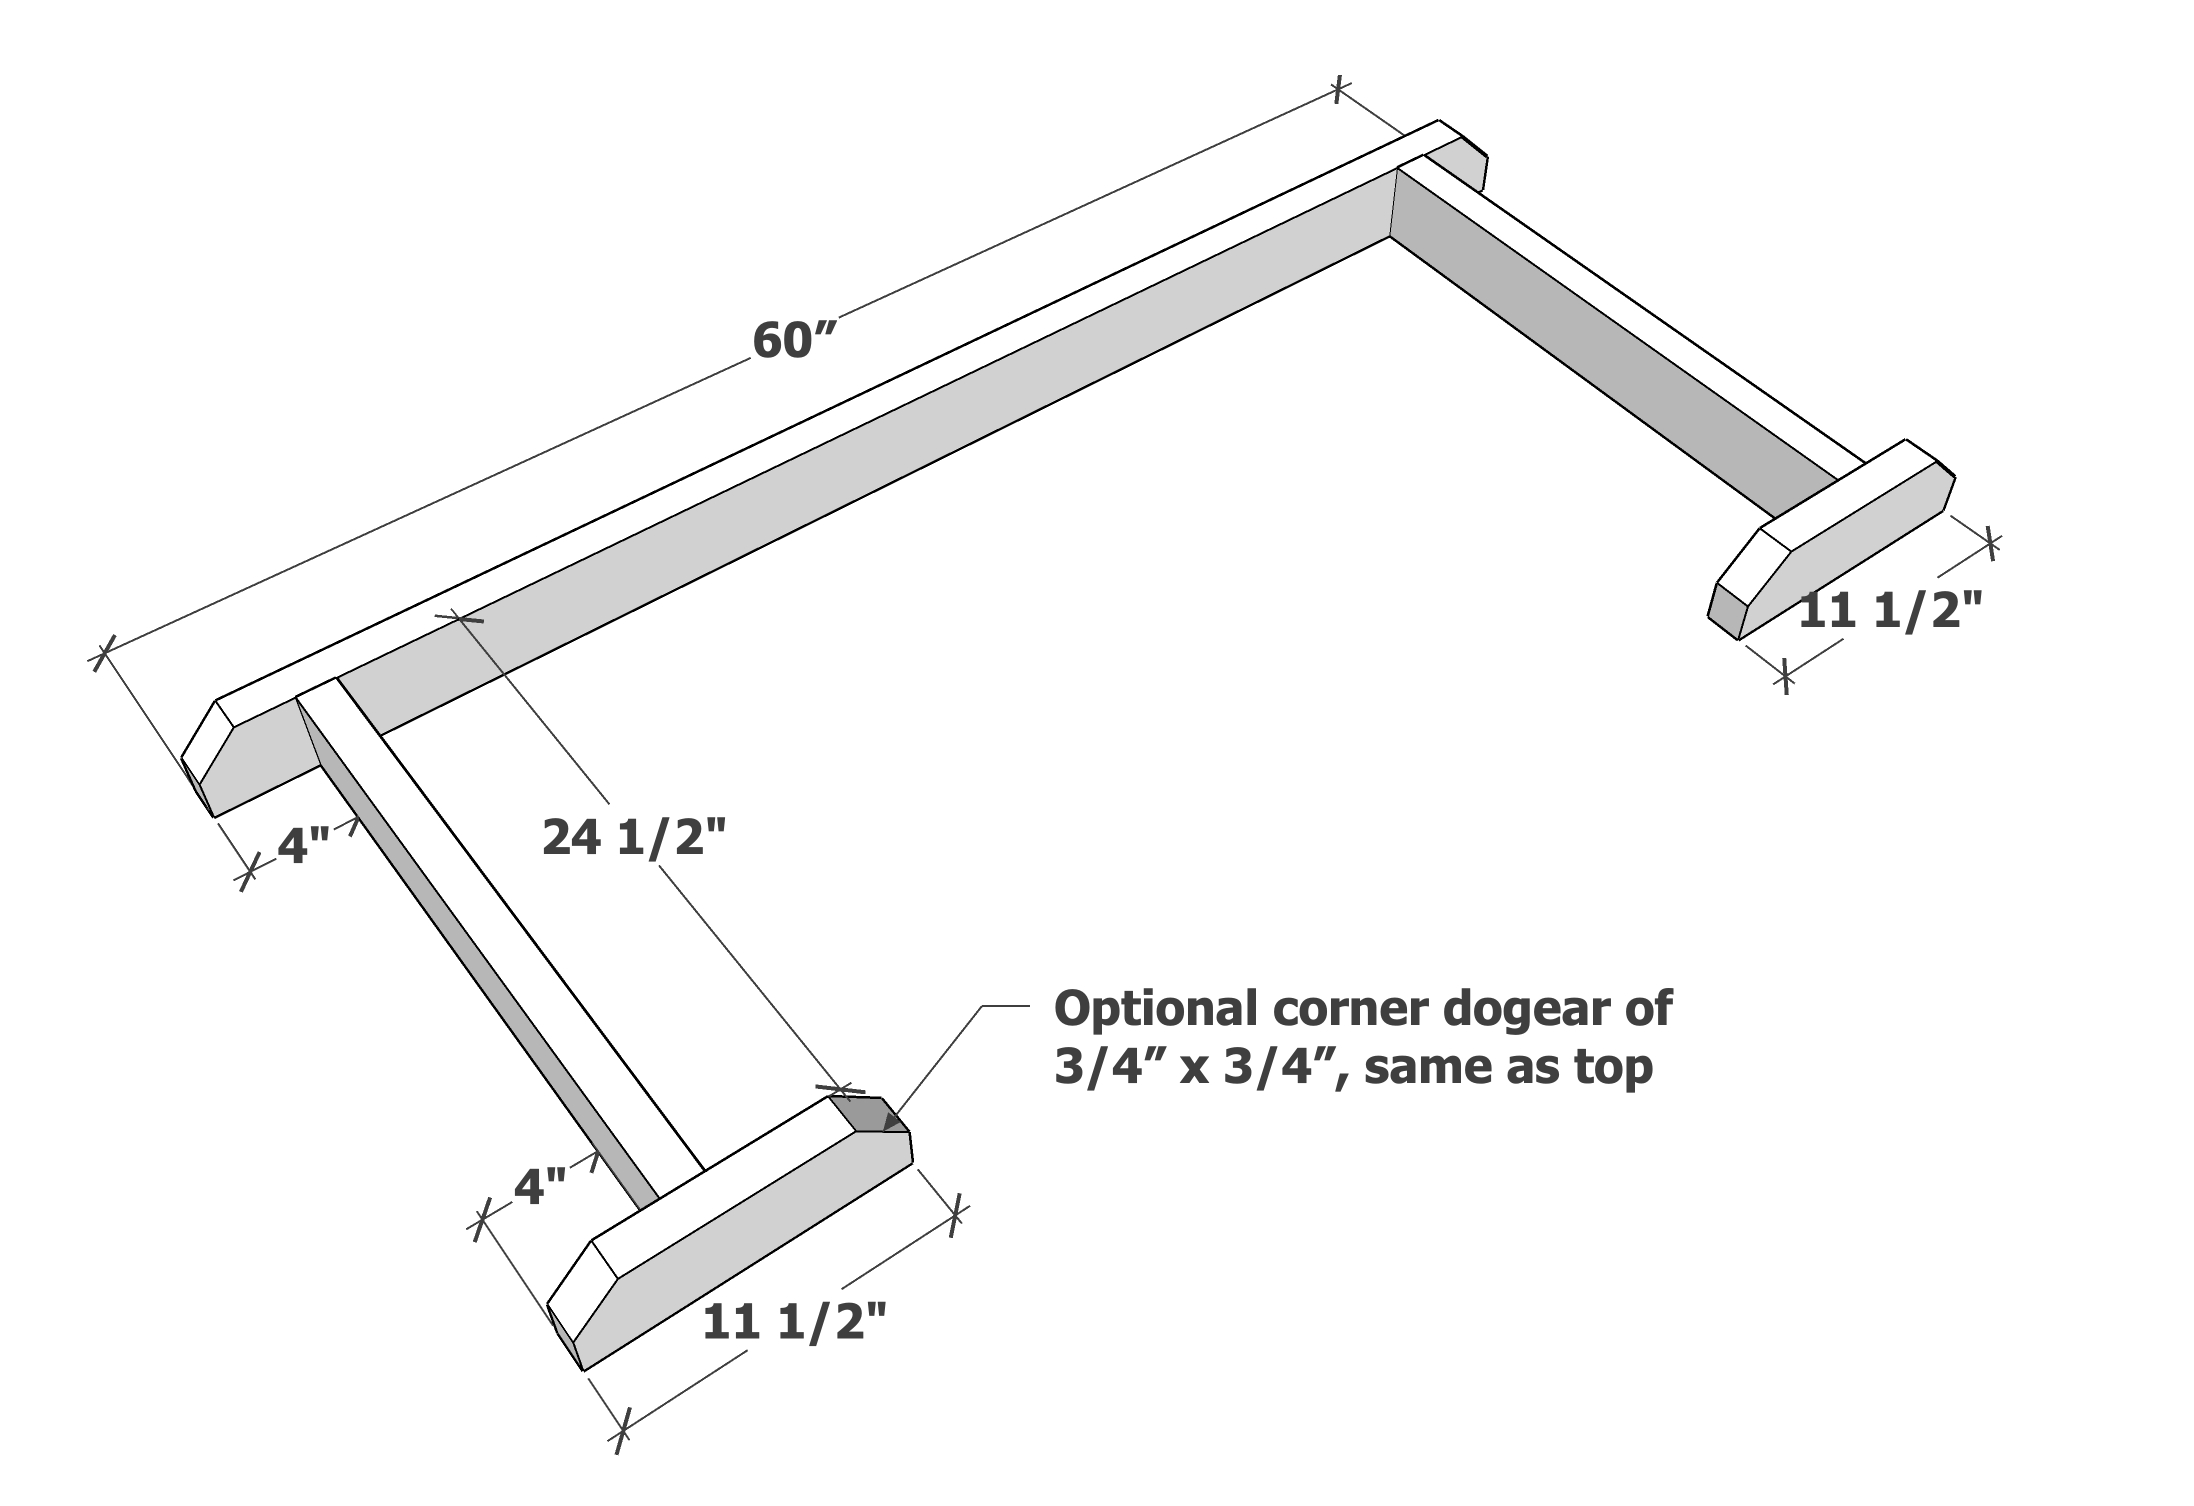
- 2 - 2x4 @ 23-1/2" - outer tabletop supports
- 2 - 2x4 @ 26" - inner tabletop supports
- 4 - 2x6 @ 32" - tabletop
- 2 - 2x6 @ 32-7/8" both ends cut at 30 degrees off square, ends are parallel - back legs
Seats
- 1 - 2x4 @ 60" - seat back stringer
- 2 - 2x4 @ 24-1/2" - seat supports
- 2 - 2x4 @ 11-1/2" - seat front stringers
- 4 - 2x6 @ 32" - seat boards
- 2 - 2x6 @ 19" - both ends cut at 30 degrees off square, ends are parallel - front legs
Support
- 1 - 2x6 @ 21-3/4" - both ends cut at 45 degree bevel, ends not parallel - tabletop support
I recommend prestaining boards before cutting.
Cut boards using a compound miter saw.


Instructions
Step 1
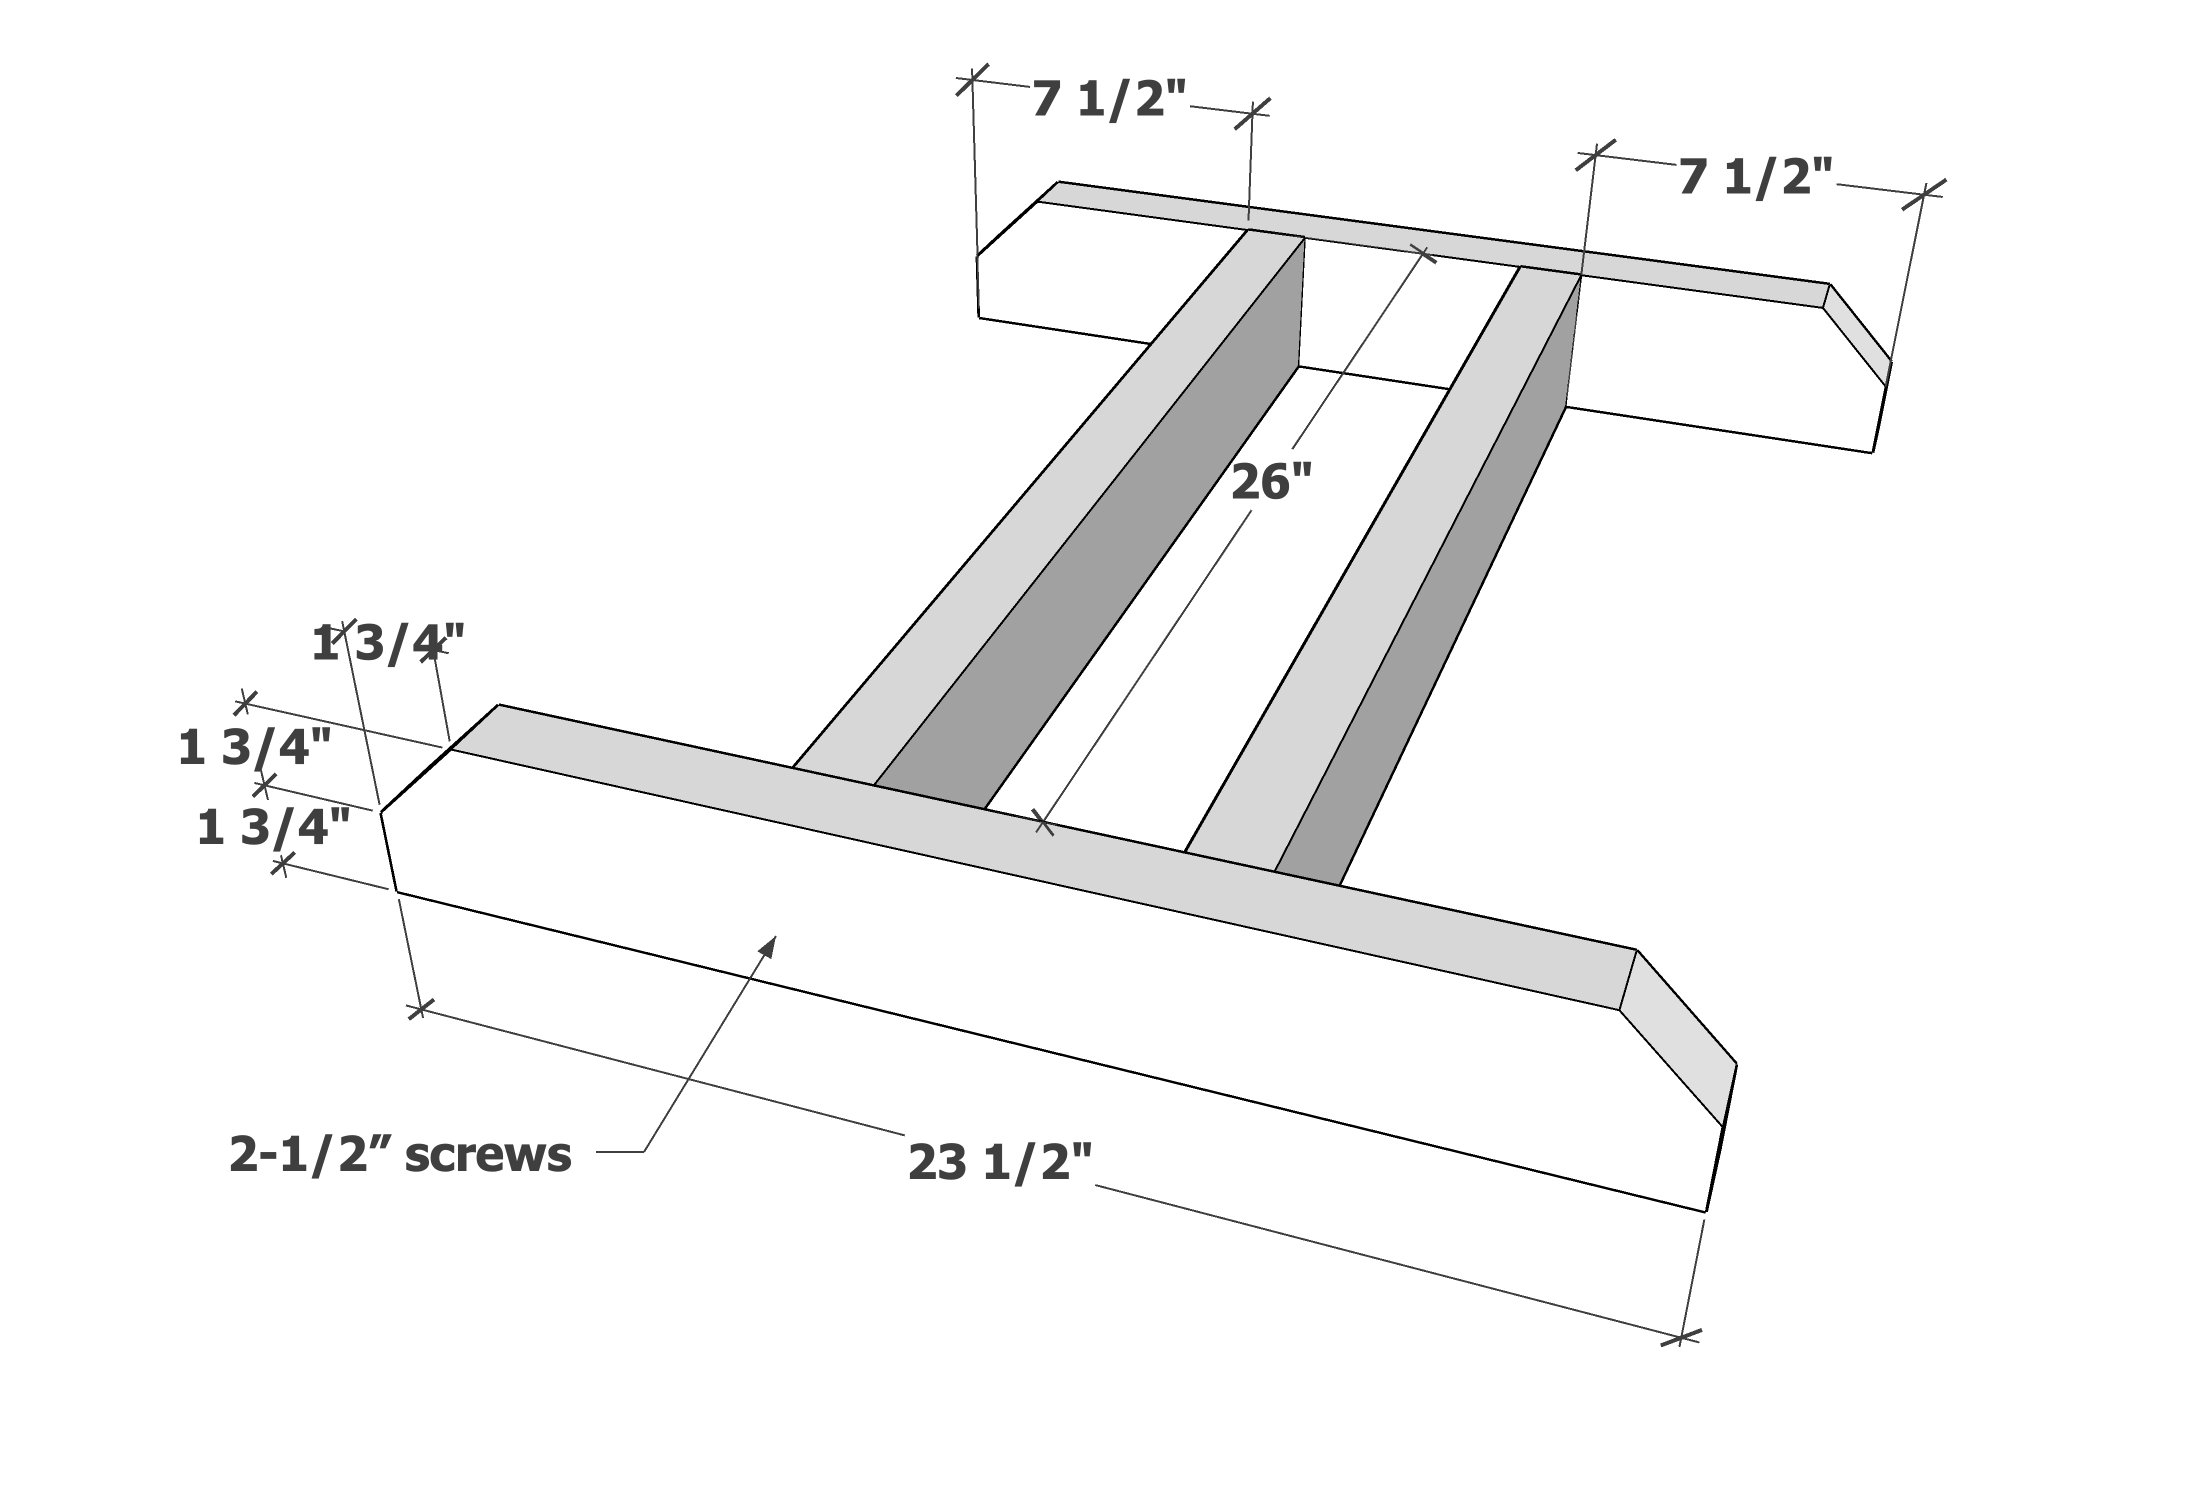
Build the frame for under the tabletop as shown using 2-1/2" self tapping screws, two per joint.
Optional dogear cuts can be made at the ends as shown to soften corners. Mark with a speed square and cut with a circular saw.
Step 2
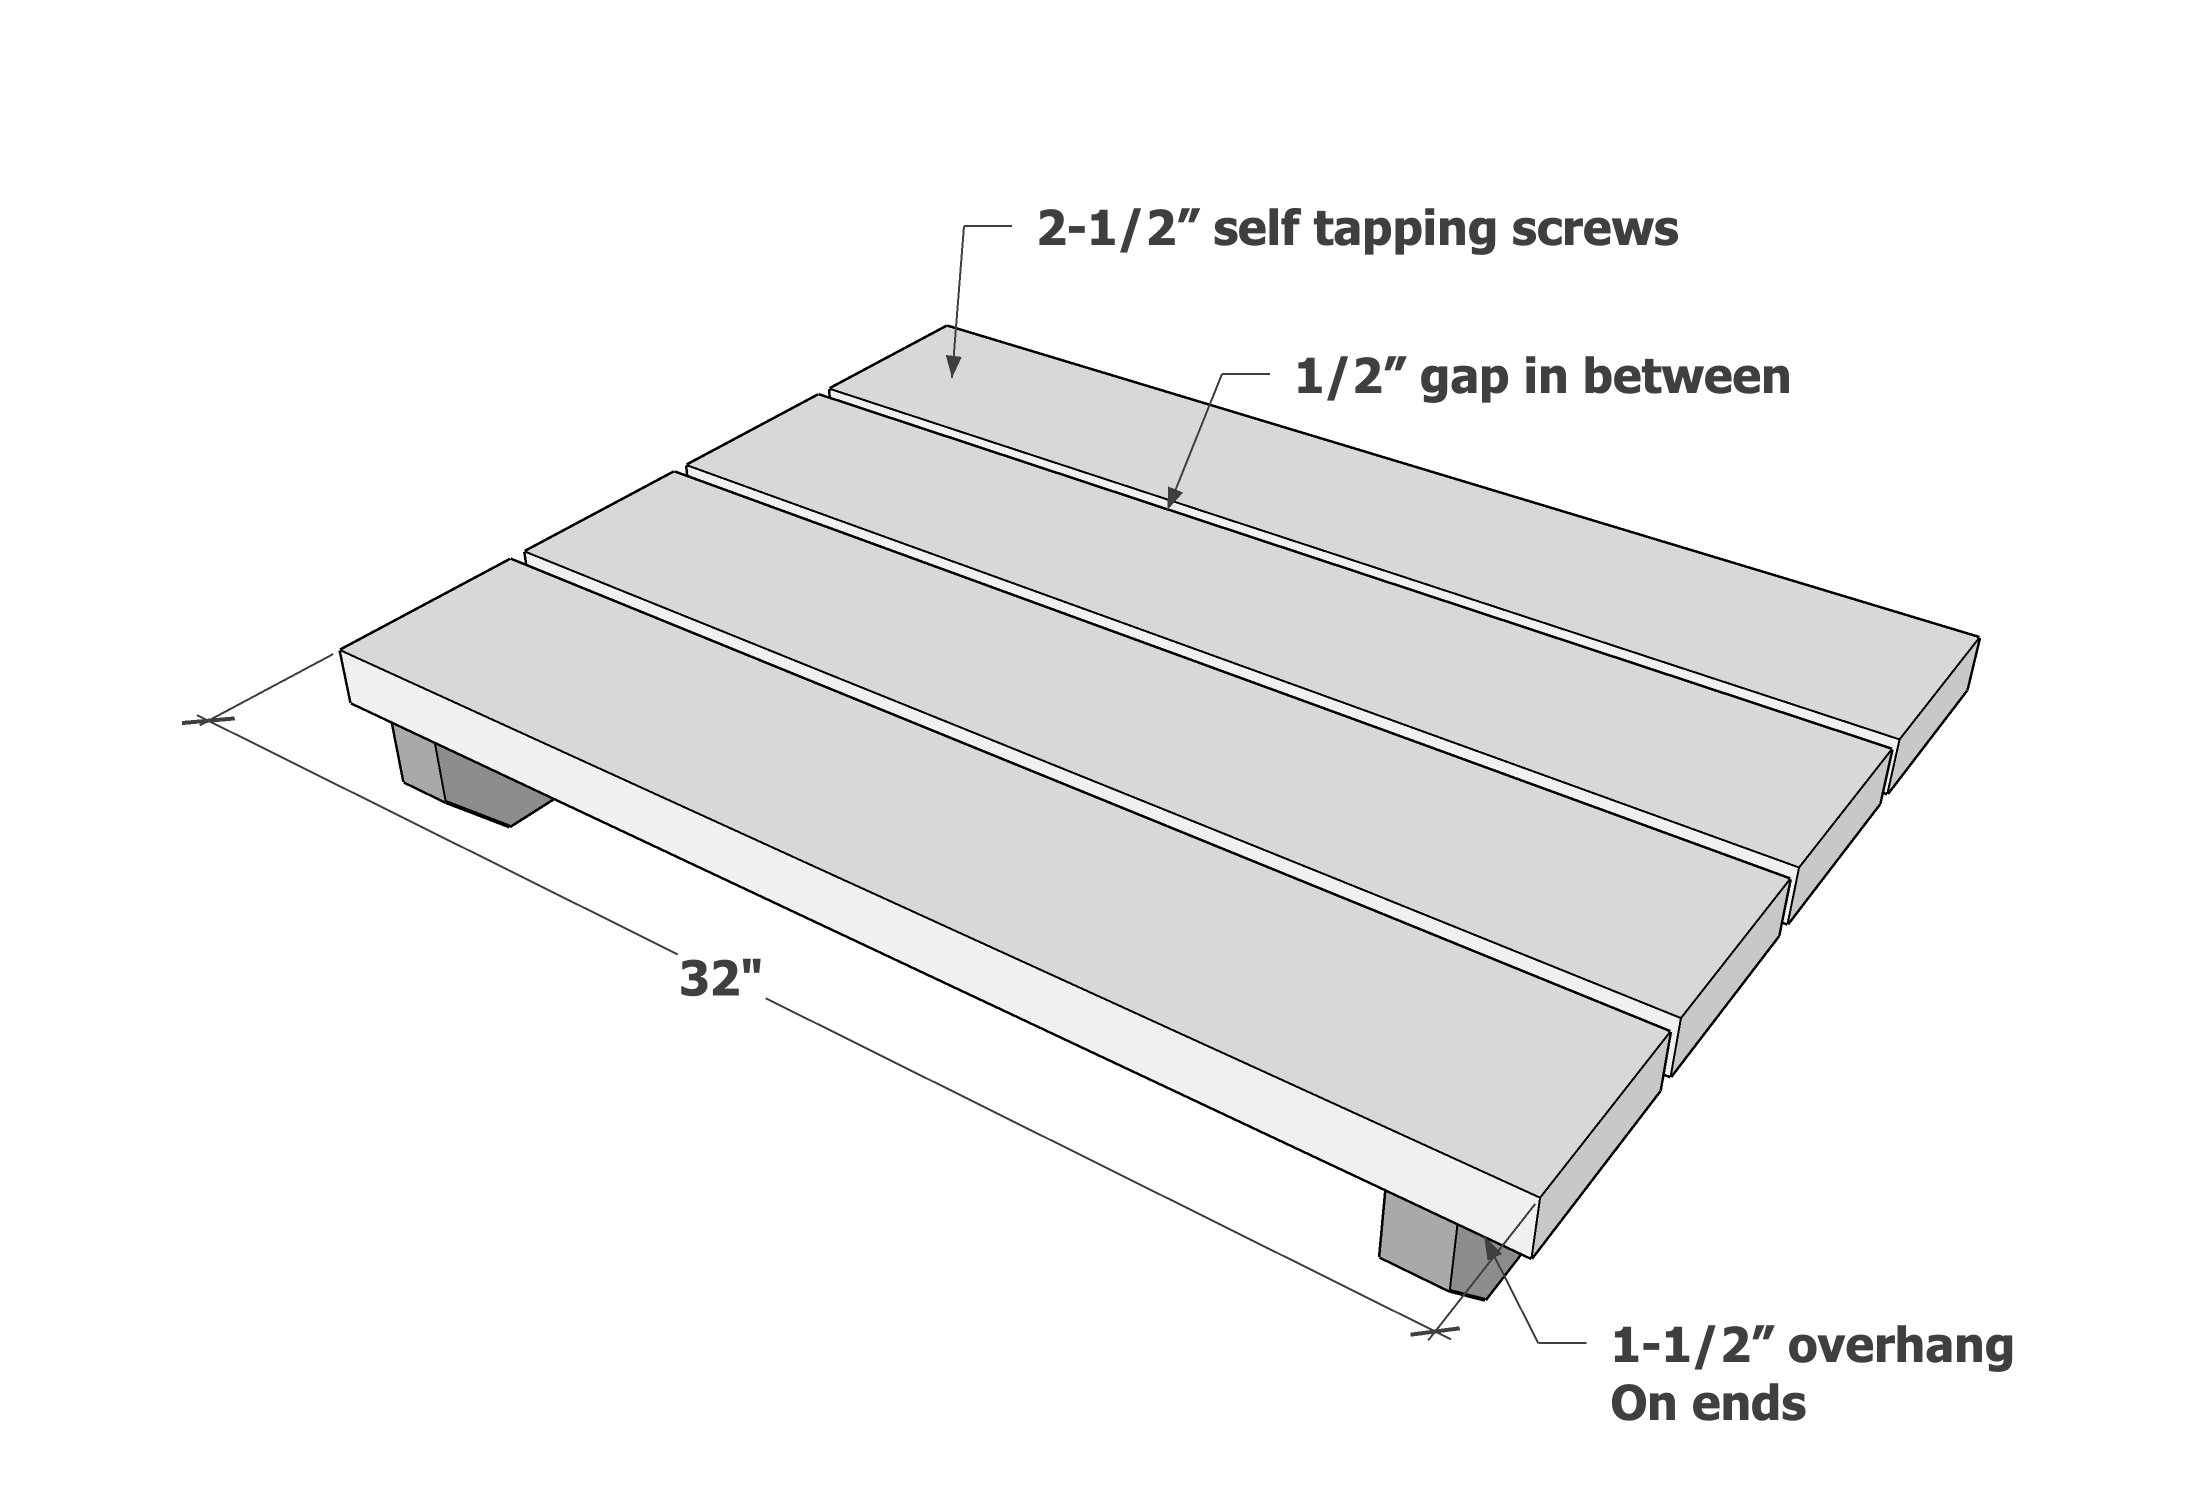
Layout the tabletop boards on top of the frame, so the ends are flush to the ends of the outer supports, with 1-1/2" overhangs on sides. Evenly space the gaps between boards. Attach wtih 2-1/2" self tapping screws.
Step 3
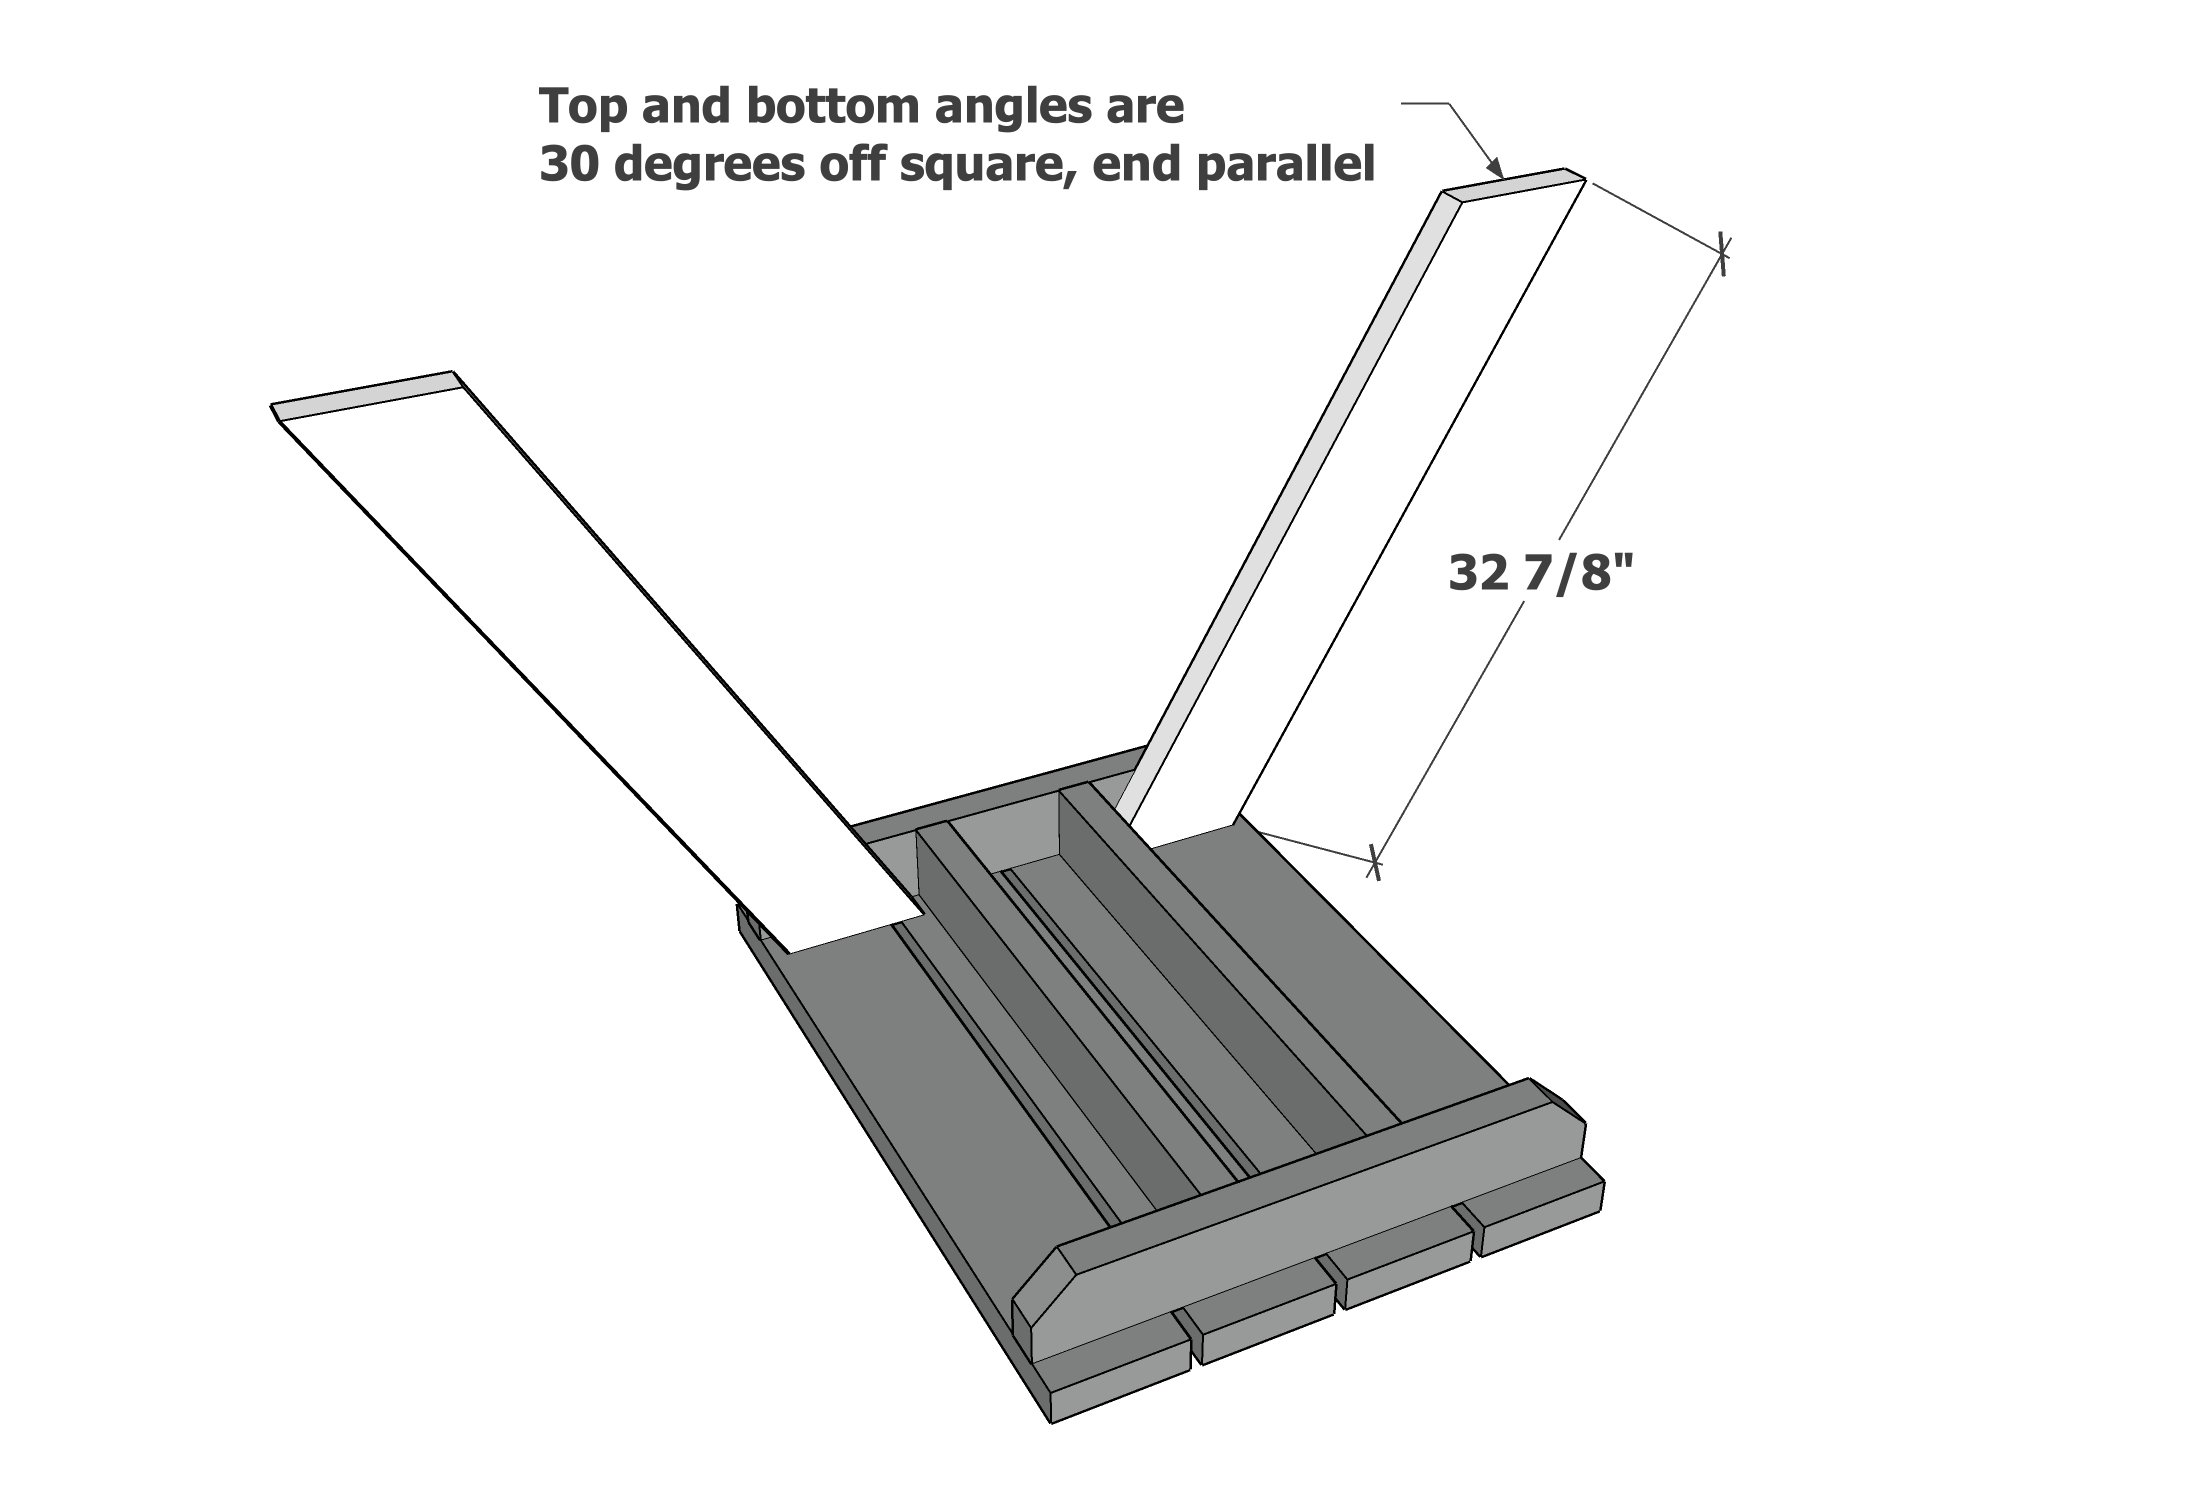
Attach legs to the tablet support with 2-1/2" screws, three per joint.
Step 4
Build the seat frame as shown.
Optional corners can be dogeared, as done with the tabletop supports in step 1.
Step 5
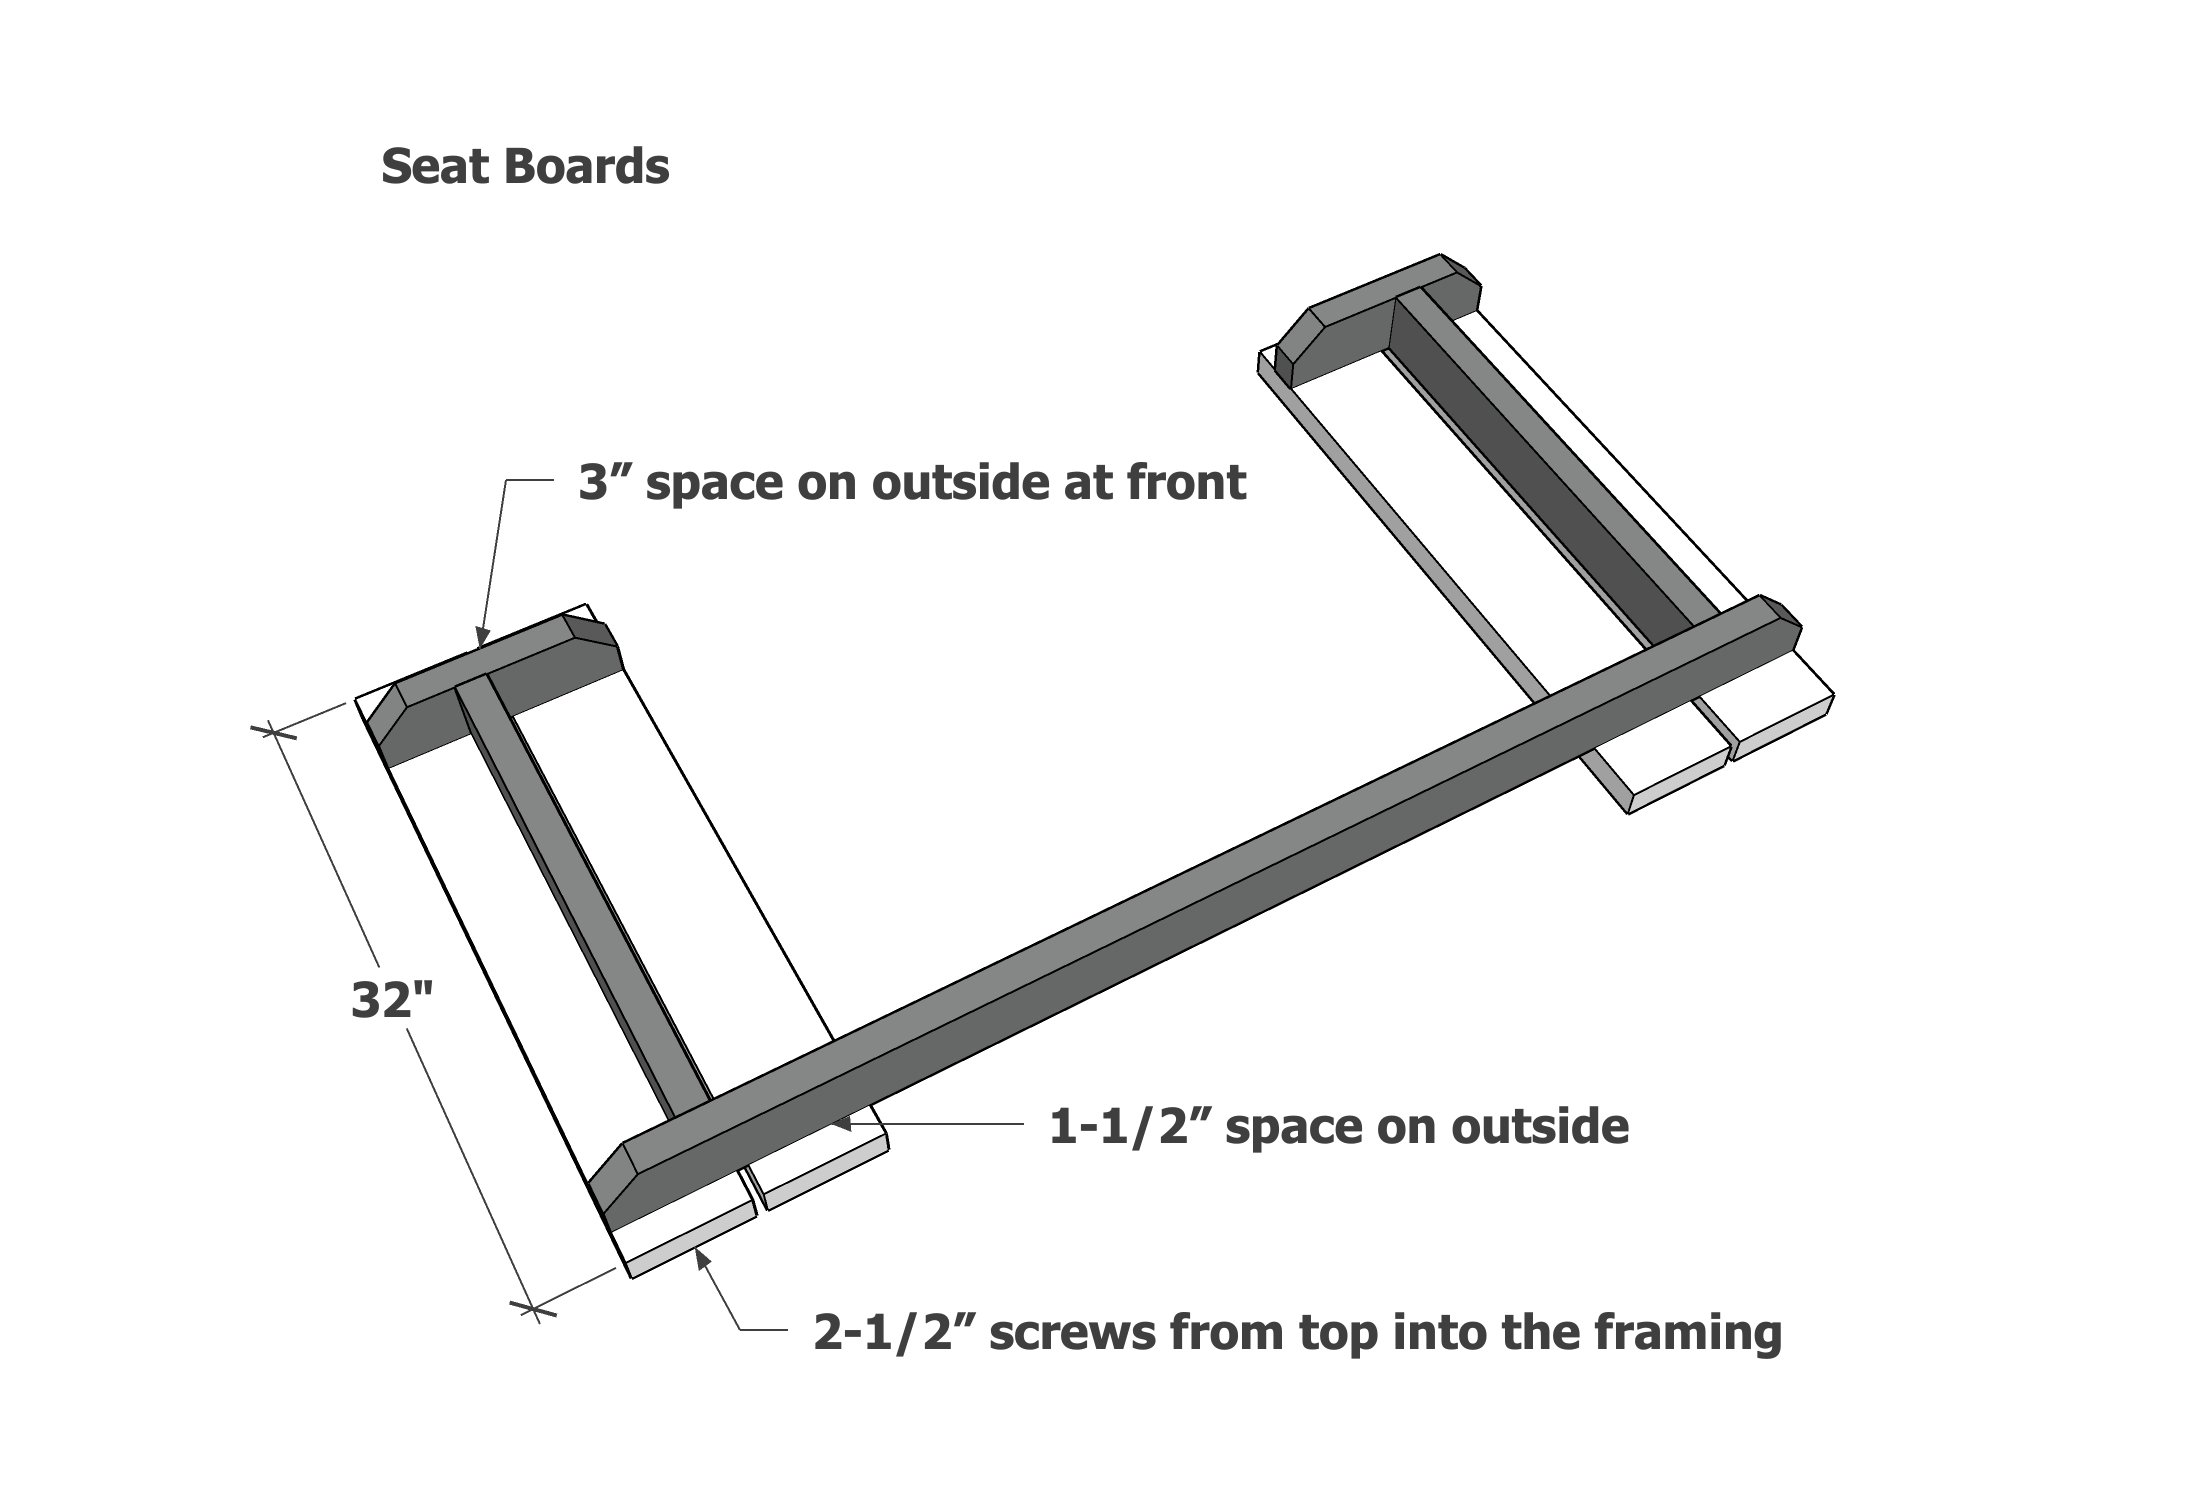
Attach seat boards to the frame, with 2-1/2" self tapping screws.
Step 6
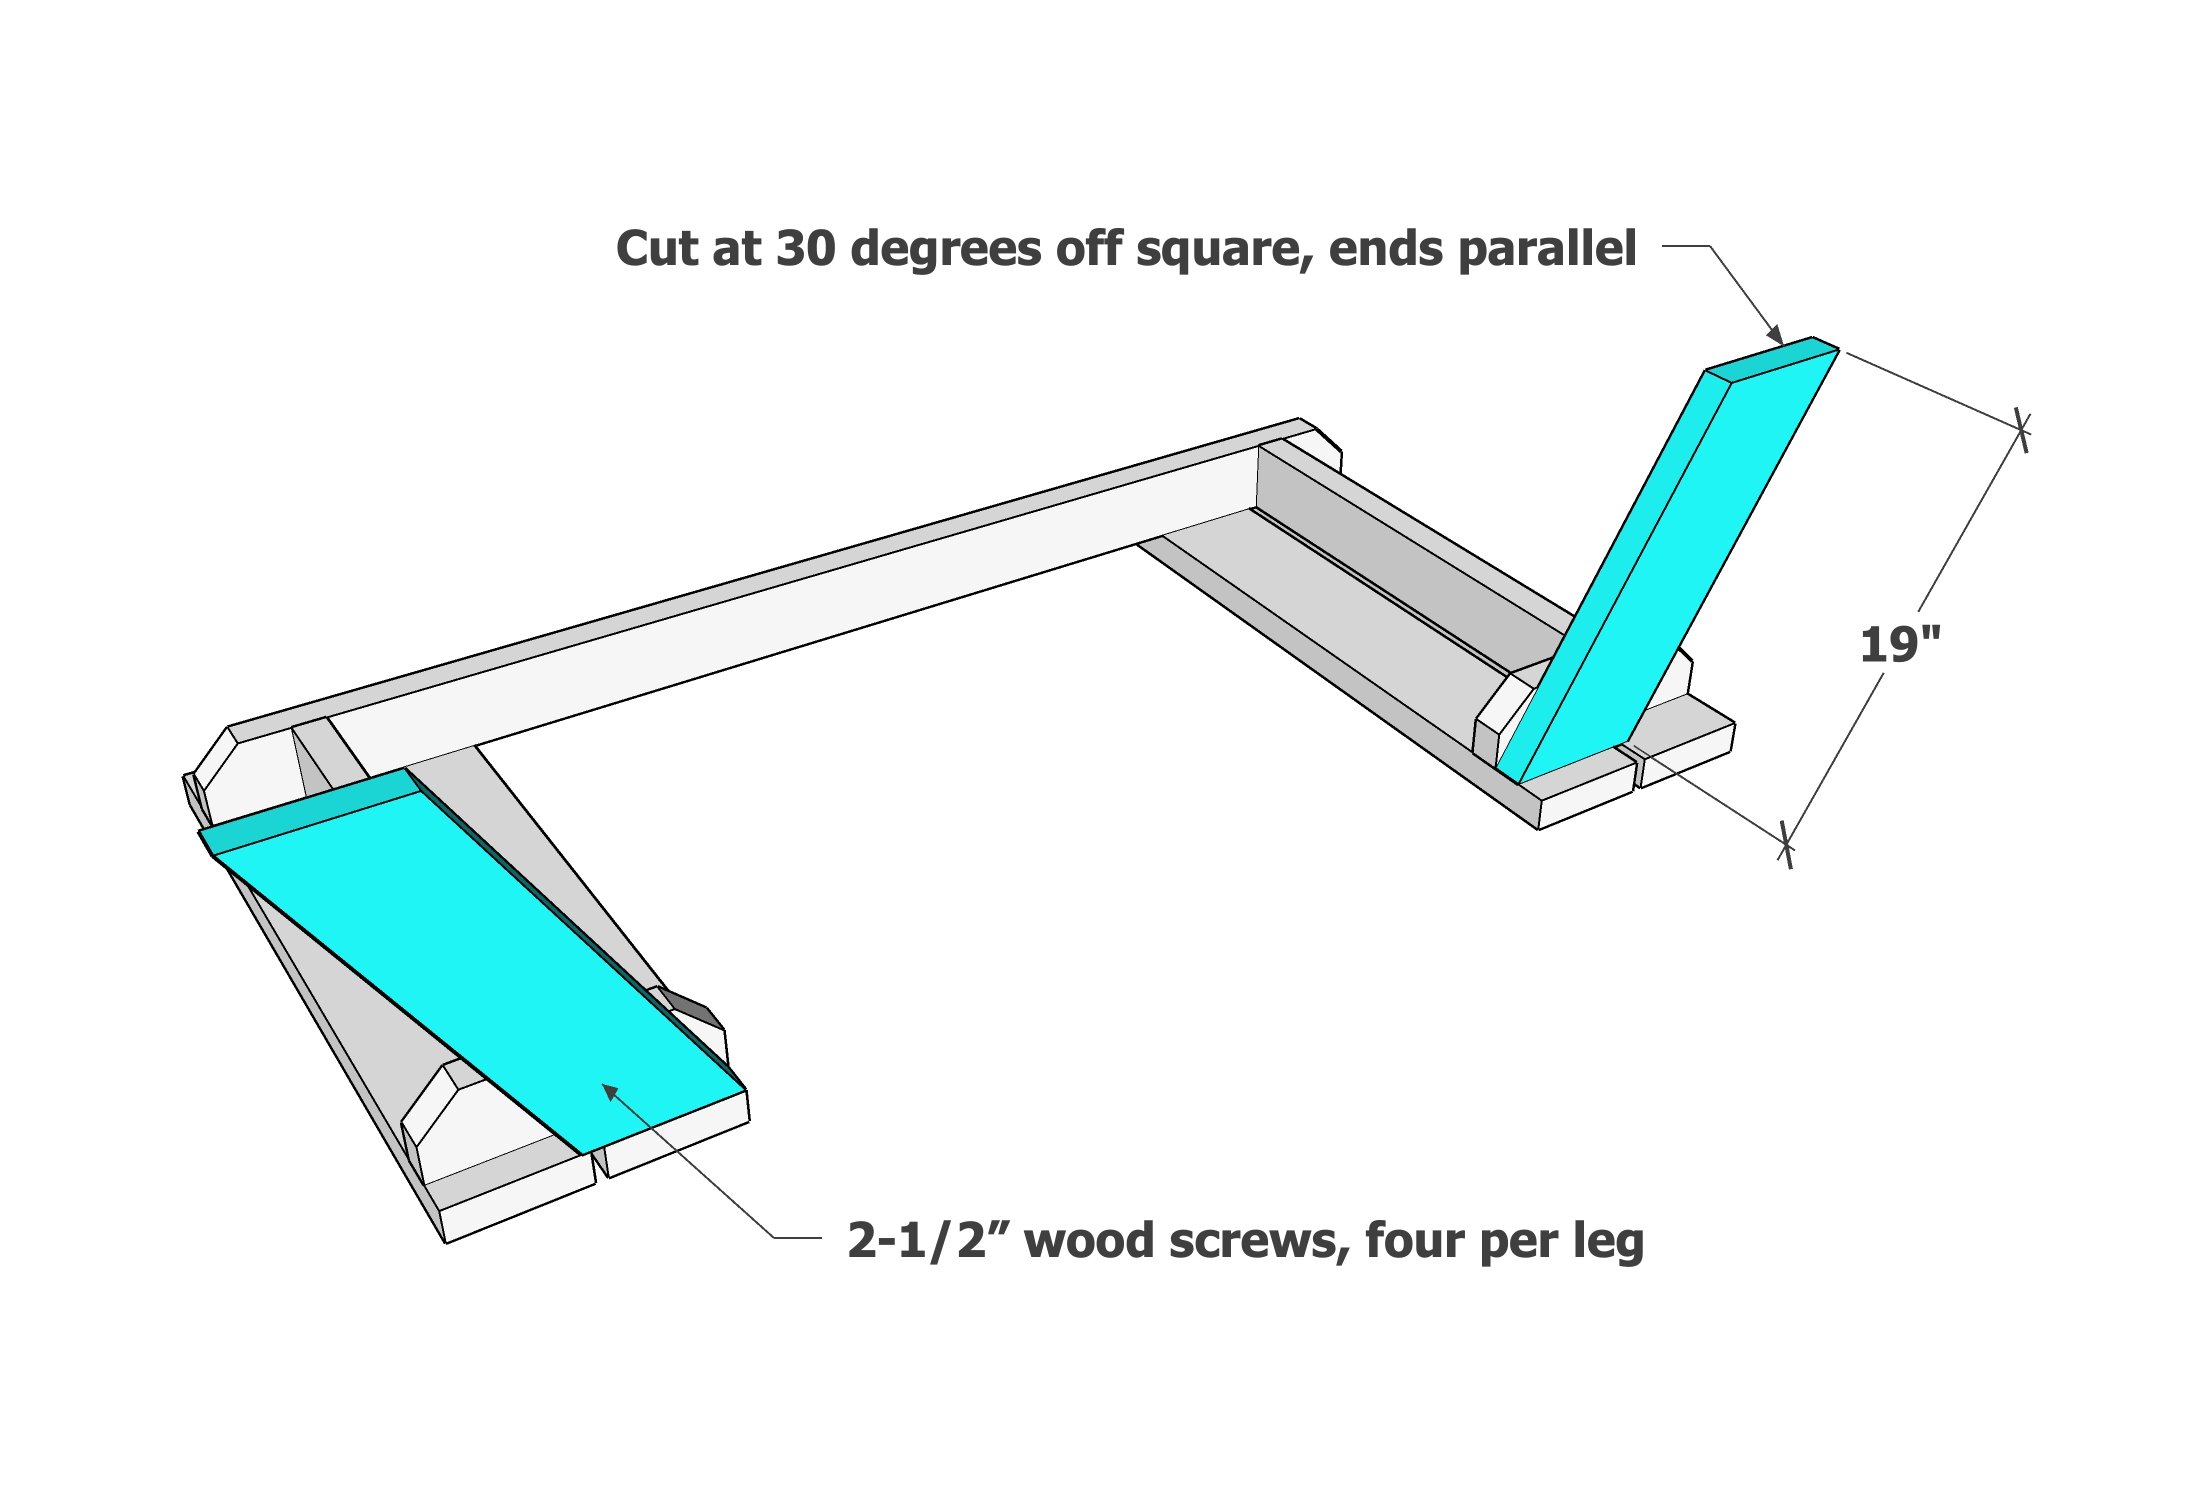
Attach short legs to the seat frame with screws.
Step 7

Position the tabletop and seat frame together (may need a second person or use a supporting wall).
Check the seat and tabletop for level, and long seat stringer.
Adjust if needed.
Attach together with 2-1/2" self tapping screws, four per joint.
Step 8
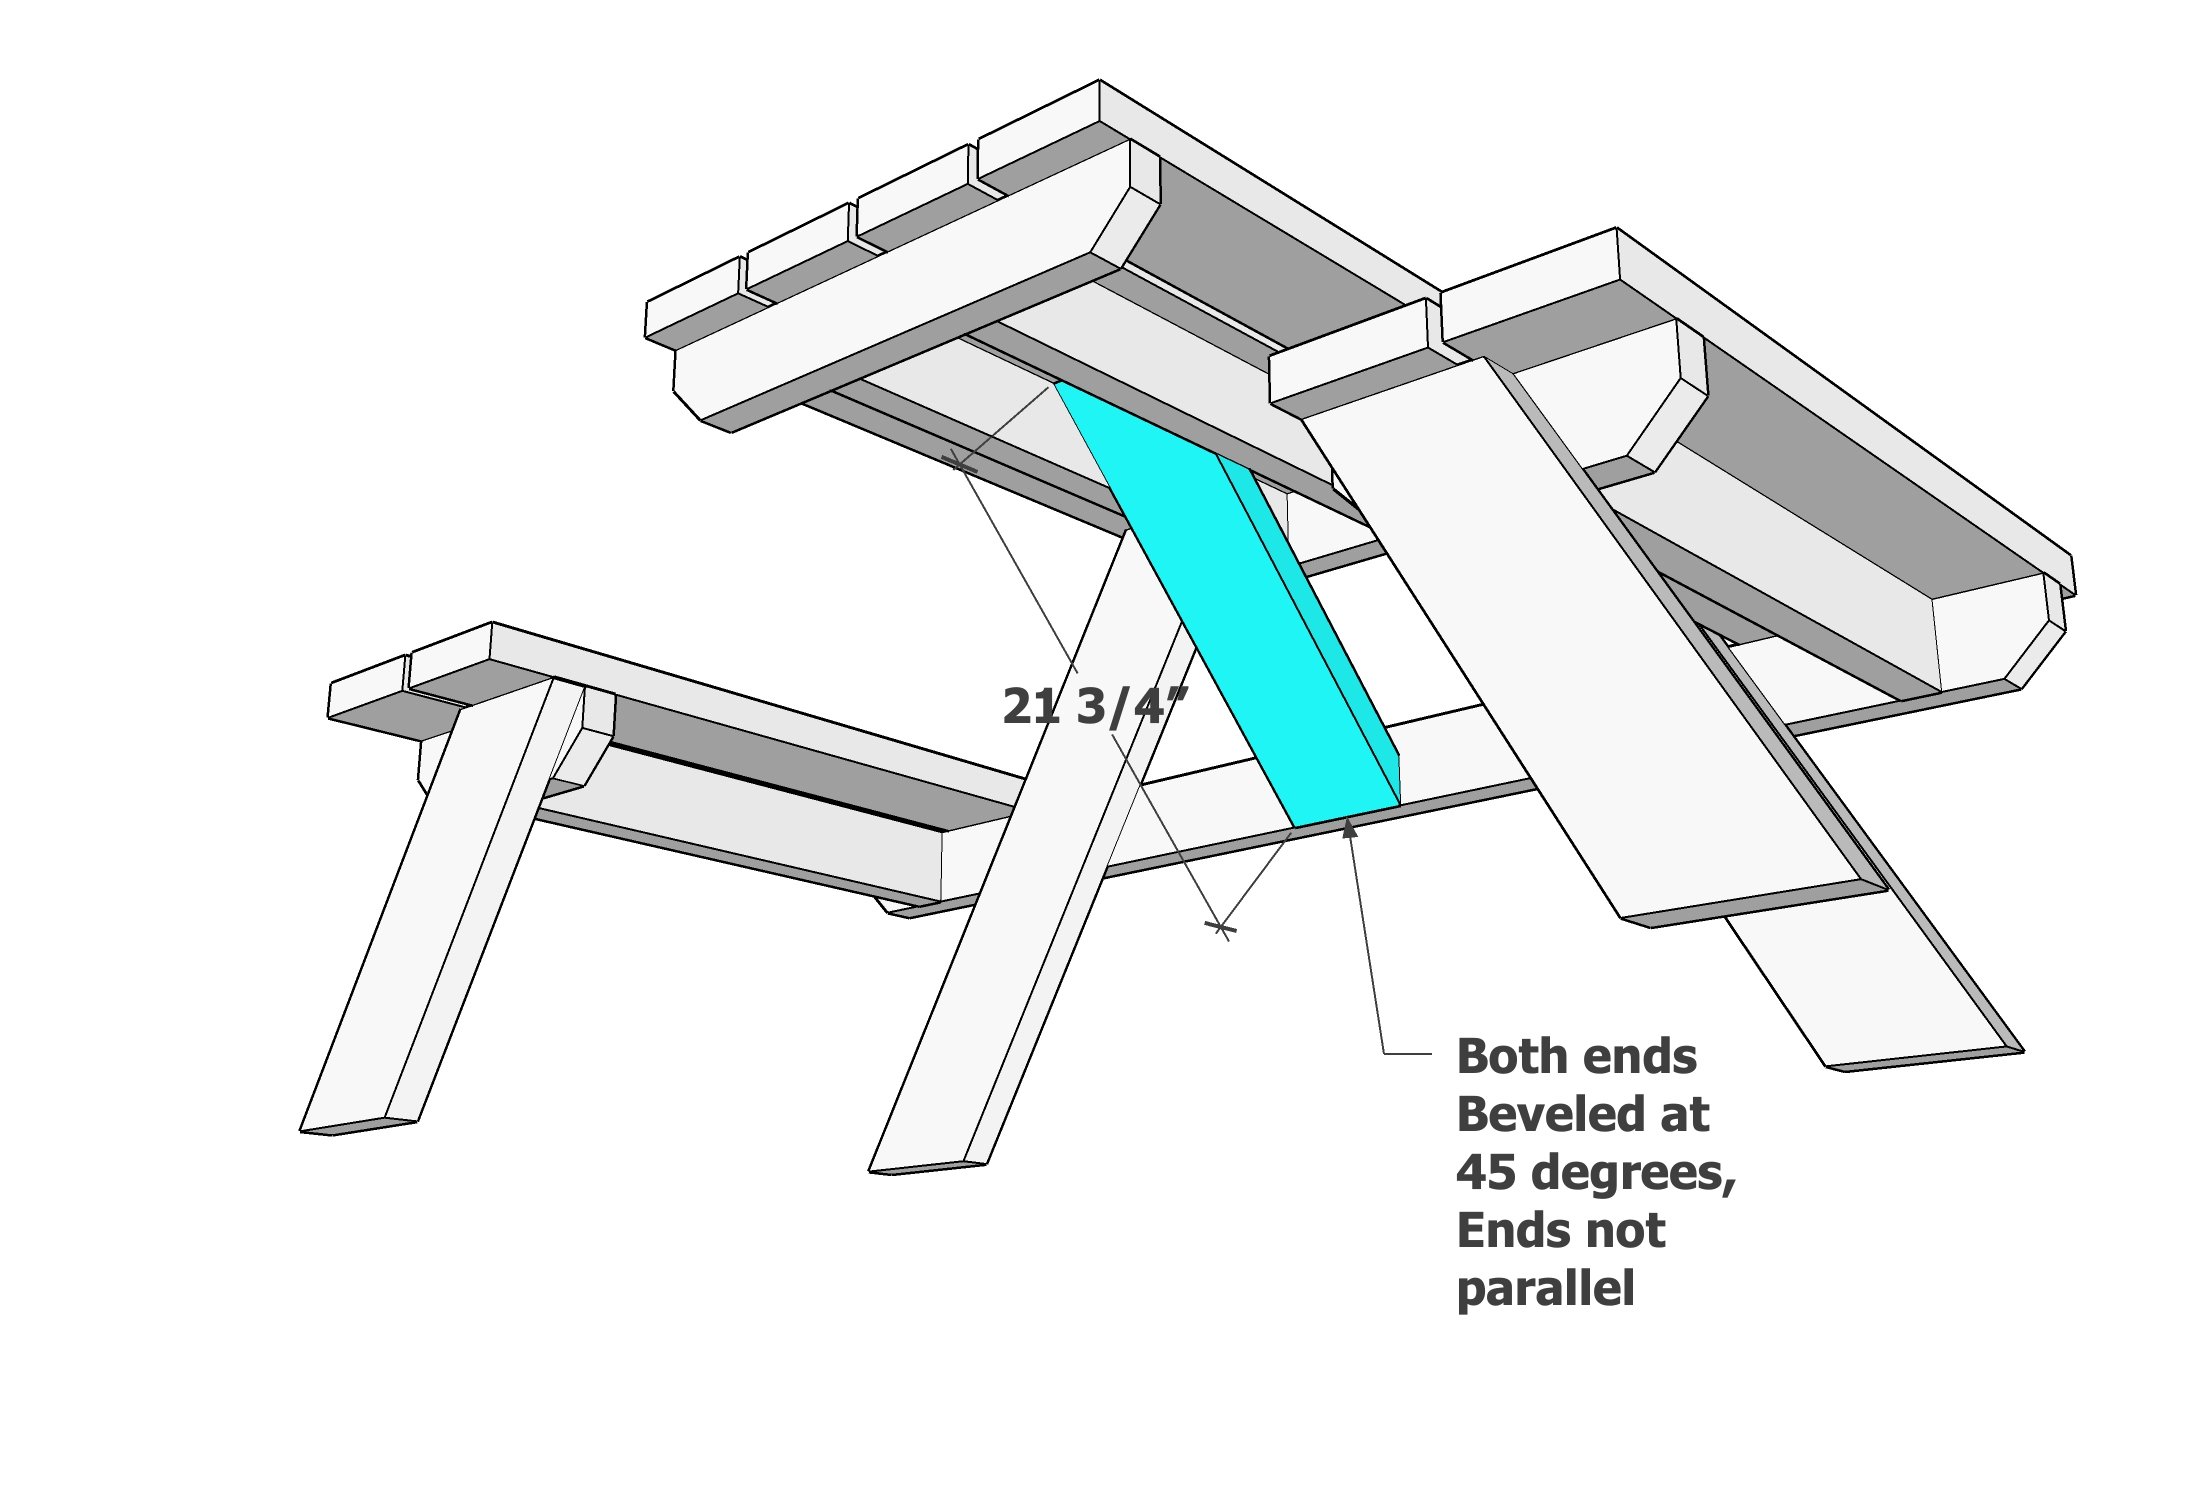
Place the cross support under the table. Screw from sides of tabletop supports into the cross support. Attach from back side of stringer into end of tabletop support.
Sand smooth.