Community Brag Posts

Privacy Planter and Under Deck Storage

Submitted by Anonymous (not verified) on Fri, 08/11/2023 - 11:27

In the middle of a much needed makeover on our back deck! We did not have skirting around the deck and decided that we would like to close it in for extra storage(ladders,compost bin...) and we came up with this little something as a bonus. We are always hosting backyard get togethers and seating is a challenge. Setting up and putting away chairs,ugh. This has been the perfect solution. This was completely an "as we went" plan but the biggest need to know is, heavy duty hinges! (As I said,the deck is getting a makeover so go easy on the appearance:)

Jodi and Matt B.

Built from Plan(s)

Folding Work Table First Project!

Submitted by Anonymous (not verified) on Tue, 09/12/2023 - 09:52

This is my very first project. I have no other tools yet besides the drill, so I had to make all the cuts with the hand saw, but it worked out well :) As I am in Europe, the imperial metrics mean nothing to me. The wood they sell here is of different sizes. That is overall not an issue, although I had a tough time calculating the holes for the legs. Luckily, only one error hole, and all came out level on the first try. No waste of wood! I also had a good helper.
Thank you, Ana

Ventsi

iTable

Submitted by I Rub on Sat, 07/07/2012 - 14:45

Easy build. Great and sturdy results.
Great build for beginners and for some learning experience with a Kreg Jig. Table looks great and bulky.

Built from Plan(s)
Estimated Time Investment
Day Project (6-9 Hours)
Recommended Skill Level
Beginner

Comments

zendup

Sun, 08/11/2013 - 19:21

Did you use treated or untreated 4x4s? I am unable to find untreated ones where I live. Your table finish looks beautiful and I was curious as to whether or not your posts were treated.

JessicaHall

Sun, 08/11/2013 - 21:15

I was wondering the same thing myself about the 4x4's. Where I live the treated ones are about $7 and the untreated about $30. Also I have heard that you may have trouble staining or painting your treated 4x4's. I want to make a coffee table from one of your plans but I do not want to spend that much just on a 4x4. :/ Beautiful table though!

Wood Entryway Bench with Cubbies

Submitted by Anonymous (not verified) on Mon, 01/29/2024 - 11:58

We followed the Essential Entryway Bench plan and modified it slightly to fit our home. We used a 35 degree miter cut at the corners of the trim, and finished the top with a dark walnut wood stain. The accent between the two colors is our favorite part!

Built from Plan(s)

Castle loft bed

Submitted by Anonymous (not verified) on Thu, 10/13/2016 - 14:47

I had been searching for a loft bed for my son for some time but couldn’t find anything affordable until I stumbled across these great plans! I found the instructions to be very easy to follow (though I did spend a lot of time going over them first) and the cut diagrams were great to prevent waste. I also fell in love with hmkeith11 paint job which I copied as well. I used Behr paint in pencil sketch and just a large grout sponge to make the bricks. Super easy and turned out great.

I made a few modifications to the plans. First I made the towers 6ft tall but did not change the height of the mattress platform. I also made the towers one piece and just cut the tops of them to get the “castle look”. I made the towers taller so the rail on the front would be bigger and allow for a more “secure” feeling when sleeping (and to ease my fears of two fearless boys jumping on the bed). I also eliminated the small front piece that connects the slide to the tower. I just made the front door panel longer and attached the slide right to the tower with a few screws. I like the look better and it eliminates a small rail at the top of this small panel giving it clean look (in my opinion). I also added a small door under the stairs since the wall was long enough in my son’s room. Its fun and adds a second exit point. Lastly, I modified the supports for the mattress based on some other brag posts feedback. I rested the support beams on the plywood sides and added a third beam and 2 beams going across tied into the wall studs and the front door panel. I wanted to feel 100% sure my very active kids couldn’t bring this bed down. I also added a piece of plywood on top of the bed supports since we have memory foam mattress, this gave the mattress the correct support it needs.

This was by far the biggest woodworking project I have ever taken on. It took me 2 months of working just weekends for only a few hours a day and some evenings after my kids went to sleep. Perfect size project for me. I’m also a short female, so go for it moms! You can do it!

I had also never cut such large pieces of plywood and didn’t know how to get my cuts straight. I found out how to make a skill saw guide and boom! Problem solved. Just buy a piece of Masonite, rip a 4 inch piece then glue it down on the other piece with the manufacture straight edge pointing in and you got yourself a guide for straight cuts! Here is a link: http://www.provenwoodworking.com/woodworking-saw.html

My son is thrilled with his bed and it was a great challenge to build!

Estimated Cost
600
Estimated Time Investment
Week Long Project (20 Hours or More)
Recommended Skill Level
Beginner

Husky Farmhouse Table

Submitted by renata on Tue, 11/18/2014 - 12:01

This was such a great project and not too complicated for my first large one.  I loved using the milk paint to create the old world distressed charm.

Built from Plan(s)
Estimated Time Investment
Afternoon Project (3-6 Hours)
Recommended Skill Level
Beginner

Comments

Outdoor Storage Bench/ Coffee Table

I love this storage bench!  I modified the cut sizes to make it a coffee table also.  I made it shorter and thinner.  Now I can put my feet up on it, put a drink on it, and store some toys or garden tools in it!  You can check out modifications by clicking here.  Thank you Ana for the great plans!

Estimated Cost
$45
Estimated Time Investment
Afternoon Project (3-6 Hours)
Finish Used
Spray paint and spar urethane spray
Recommended Skill Level
Beginner

Amazing 2x4 Outdoor Sofa

Submitted by Anonymous (not verified) on Fri, 12/31/2021 - 05:44

We have wanted nice deck furniture since we moved into our house 22 years ago but just couldn’t justify the cost. I have made several projects from Ana’s website and I love her easy to follow and FREE plans! But this project was my favorite as you can see by the pics. I used cedar and my wife finished the furniture with stain. Thanks to Ana for providing these plans and helping a DIYer to feel proud!

Built from Plan(s)

Comments

Seasonal And Holiday

DIY Modern Rustic Outdoor Chair

Submitted by susanshamp on Fri, 07/10/2015 - 15:07

I made this outdoor chair by looking at a variety of plans and designs from Restoration Hardware and other stores. Check out more info on the project on my blog link. Thanks for looking!

Estimated Time Investment
Afternoon Project (3-6 Hours)
Recommended Skill Level
Beginner

Comments

My $30 Closet Makeover!

Submitted by scokenour on Mon, 07/11/2011 - 12:57

This project is closest to the Simple Closet Organizer, but I wanted to be able to re-use the existing components of the closet. The only purchased materials were one sheet of cabinet grade plywood and dowel rod holders (since I already had paint and screws).

Estimated Cost
$30
Estimated Time Investment
Afternoon Project (3-6 Hours)
Finish Used
sand, prime, sand, paint
Recommended Skill Level
Beginner

Comments

Lisa's 2x4 couch

Submitted by Anonymous (not verified) on Wed, 01/11/2023 - 19:29

This was the first time I made a piece of furniture since I was in grade 8 shop class and it won't be the last. It was so kuch fun. I modified the plans slightly to have the back a bit higher. Love it!

Built from Plan(s)

Mirror hidden shelf

Submitted by Bread0186 on Fri, 04/14/2023 - 17:52

Built 2 of these for some friends. One of them plans on putting it in the wall! Loved the build and they love the product.

Comments

Rustic X Console

Needed to add a buffet console to the empty wall in our formal dining room.

Built from Plan(s)
Estimated Cost
$65
Estimated Time Investment
Afternoon Project (3-6 Hours)
Recommended Skill Level
Beginner

Outdoor sectional

Submitted by Anonymous (not verified) on Wed, 10/02/2019 - 04:17

Made the outdoor sectional. The coffee table was made out of left over pieces!

Estimated Cost
$260
Estimated Time Investment
Weekend Project (10-20 Hours)
Finish Used
We used a semi transparent stain applied with brush. We would recommend a hand sprayer instead.
Recommended Skill Level
Beginner

Comments

Farmhouse Chairs

I found a picture of this style of chairs, and I really wanted to make them for my table. I created my own plans and adjusted them until they were perfect. I’ve since made several sets of chairs for other people including this set of 6. 

Built from Plan(s)
Estimated Cost
$25
Estimated Time Investment
Afternoon Project (3-6 Hours)
Finish Used
After sanding down the chairs, I apply a coat of Preston by minwax. To get the color I wipe on the stain gunstock by winwax. After letting it dry for about an hour, I then wipe on a coat of espresso stain. For the finish, I apply coats of a gloss polyurethane by Minwax.
Recommended Skill Level
Intermediate

Comments

Modern Adirondack Chair

Submitted by dijonaise on Fri, 06/19/2020 - 05:49

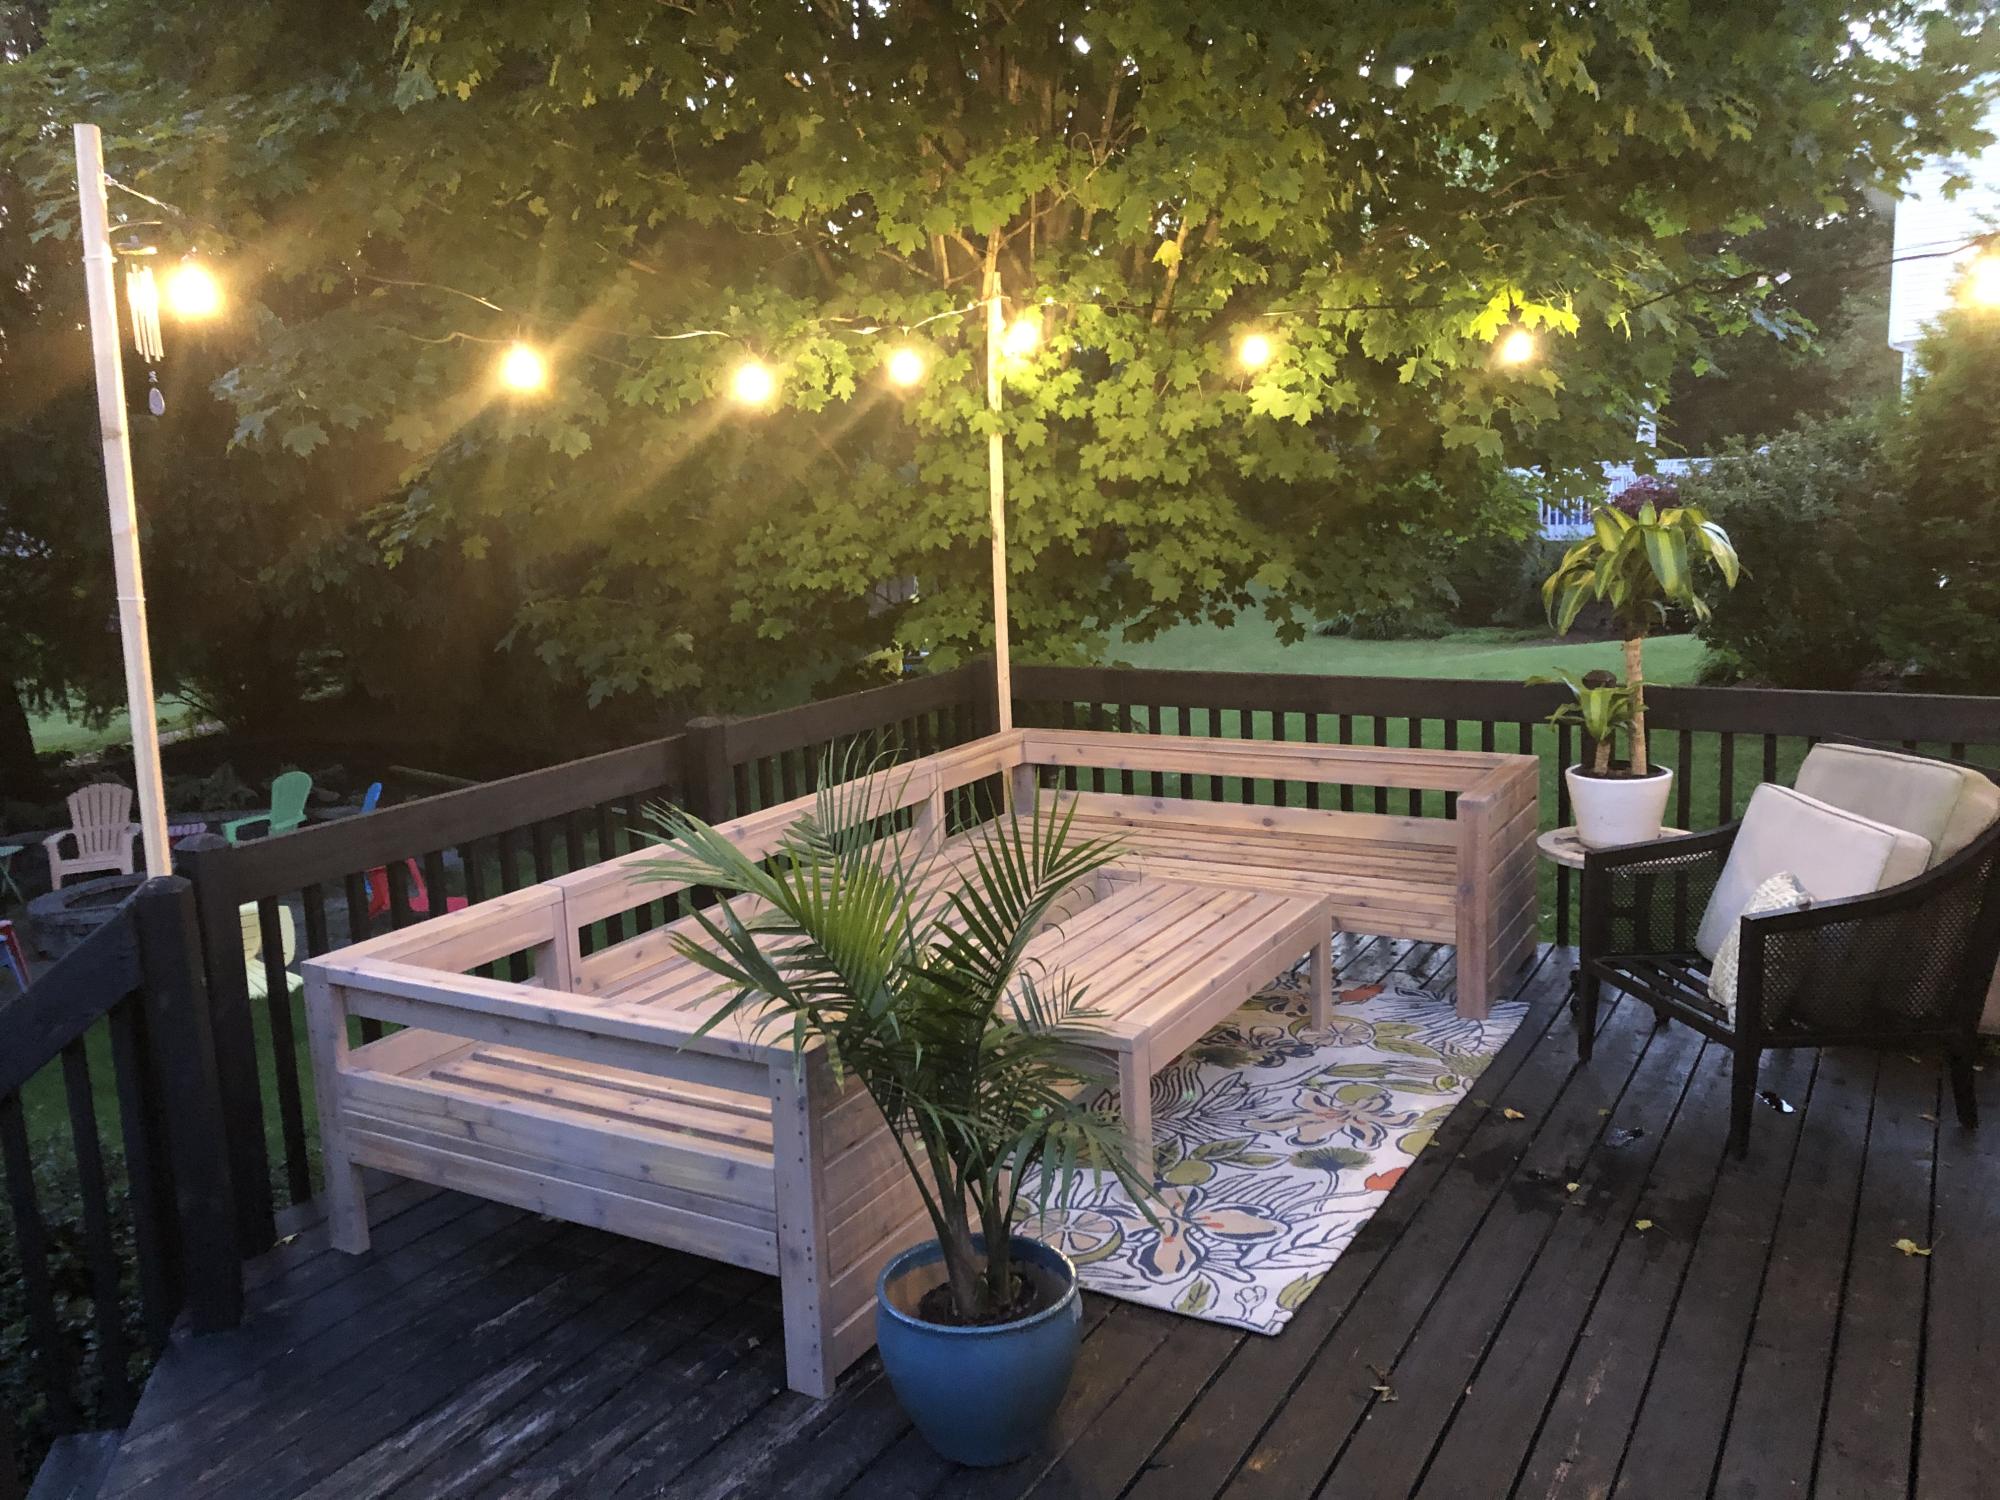
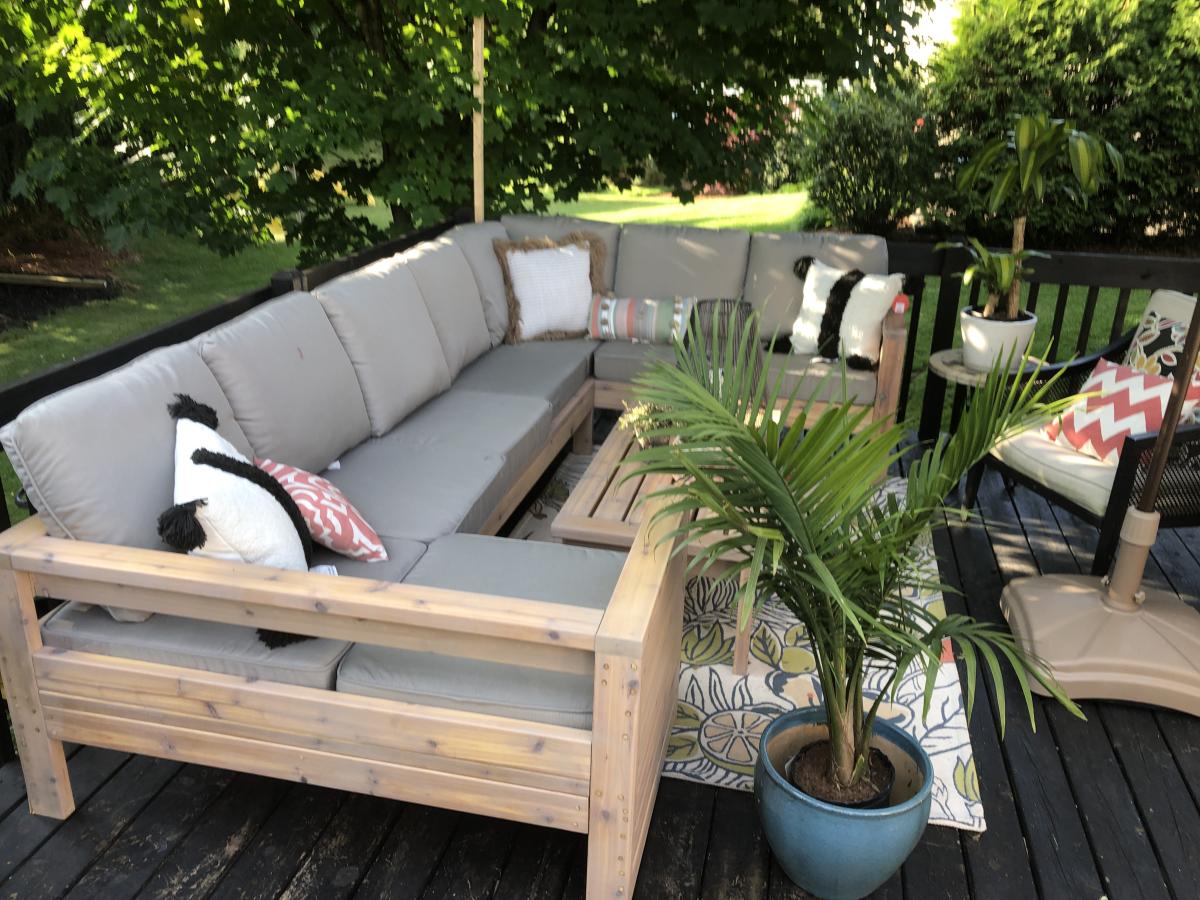
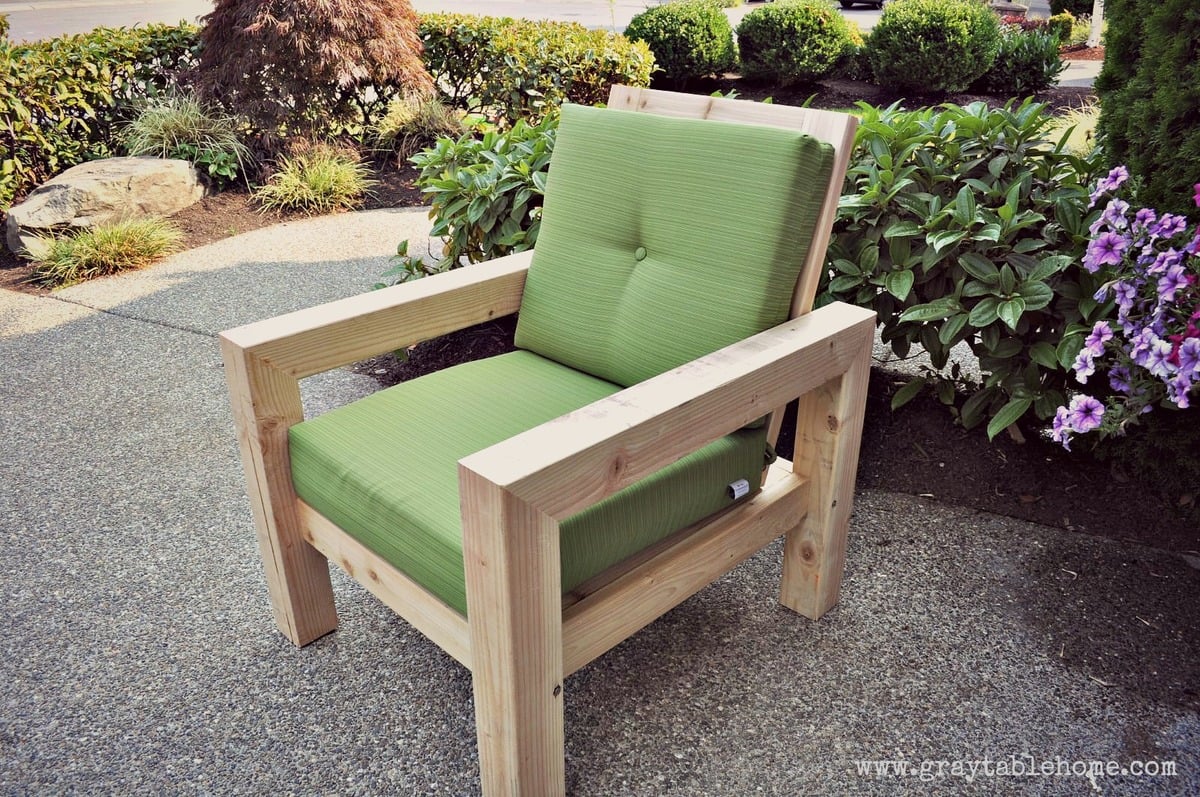
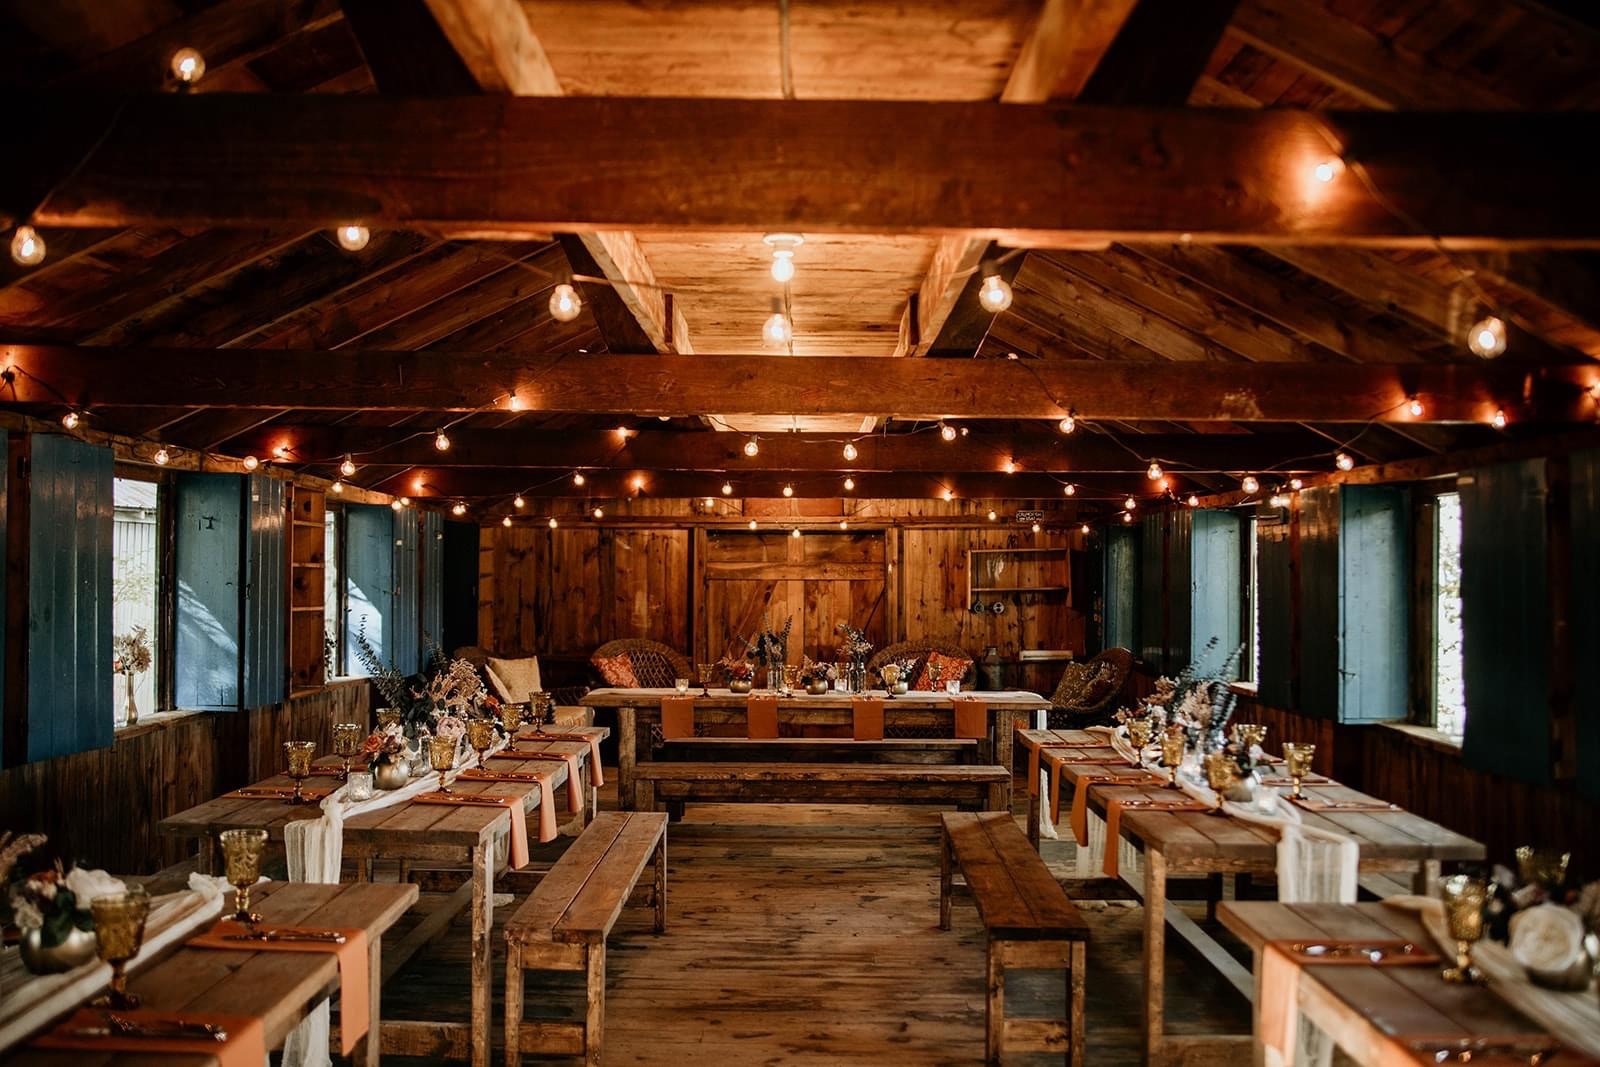
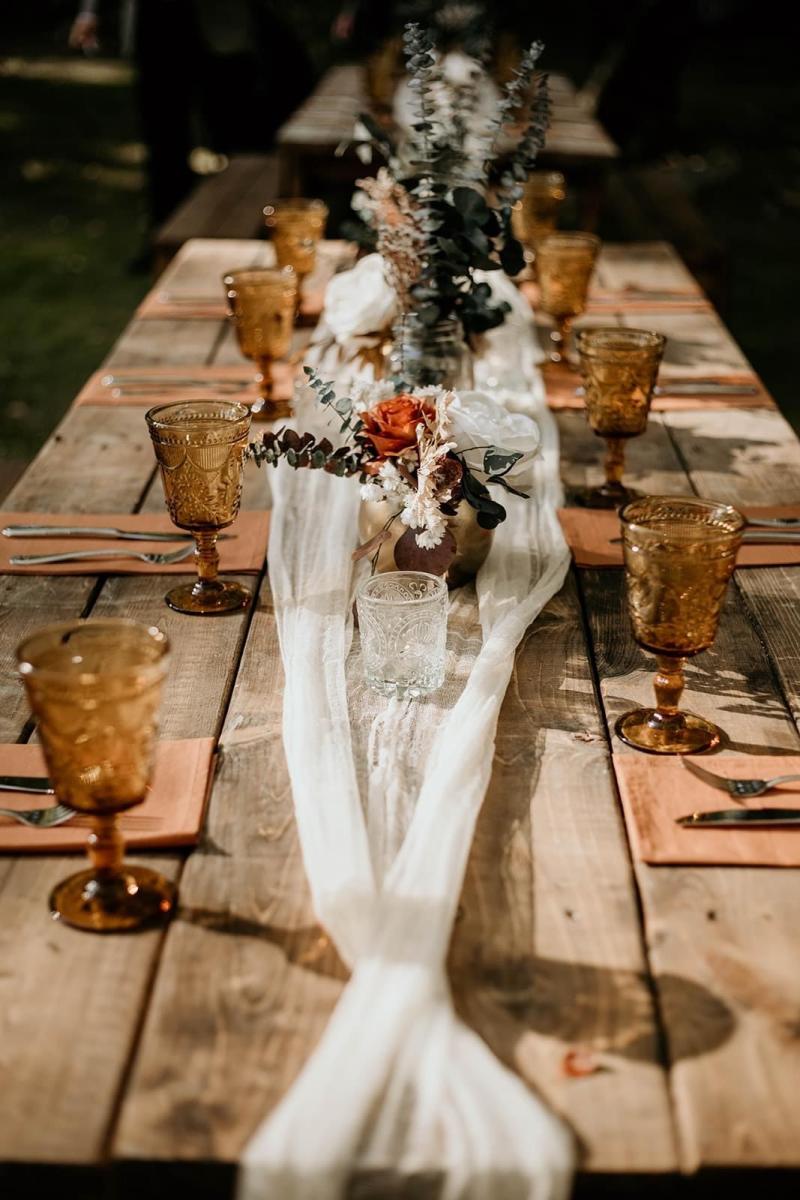
My little quarantine project all started with a three foot circle in the back corner of my yard and turned into this. After finishing the structure, we were looking at different furniture and considered either going on the cheap ($20 plastic chairs) or the expensive route ($1200) for this same setup. That was when I came across your site Ana. Your amazing plans and community's brag posts gave me the confidence to give it a go and we could not be happier with the result.

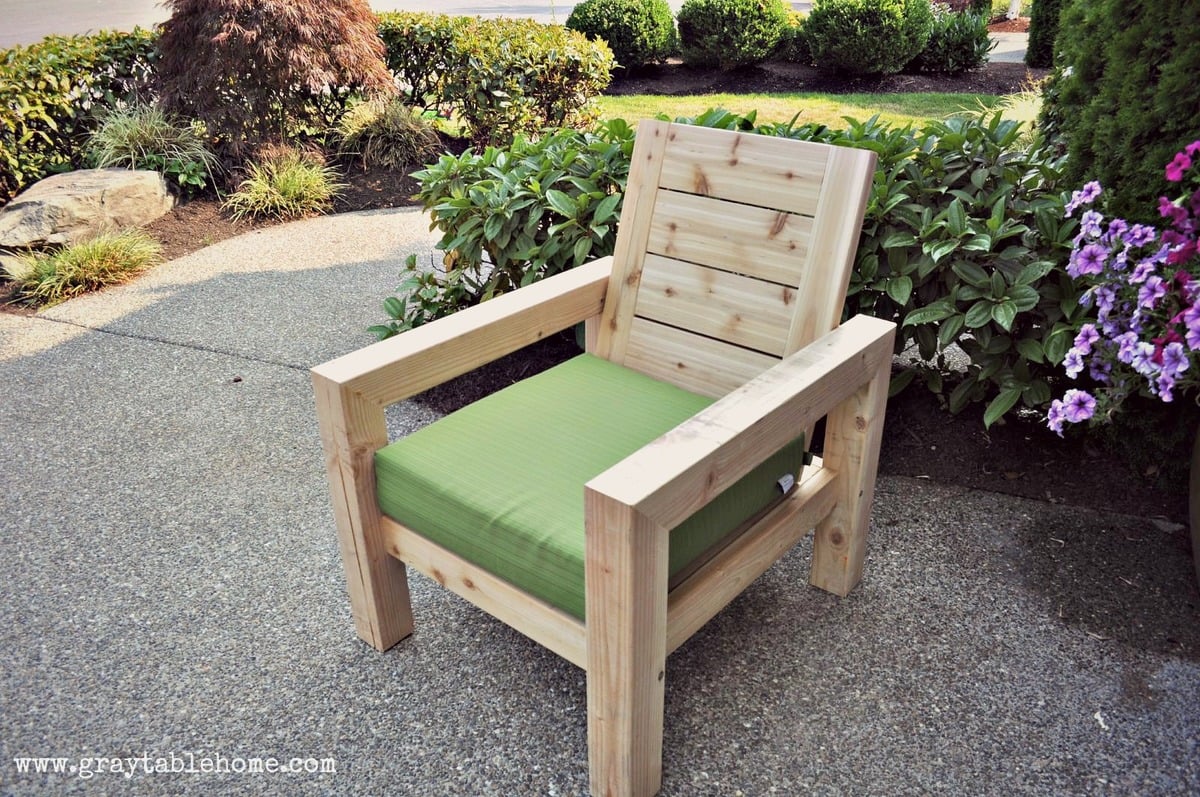
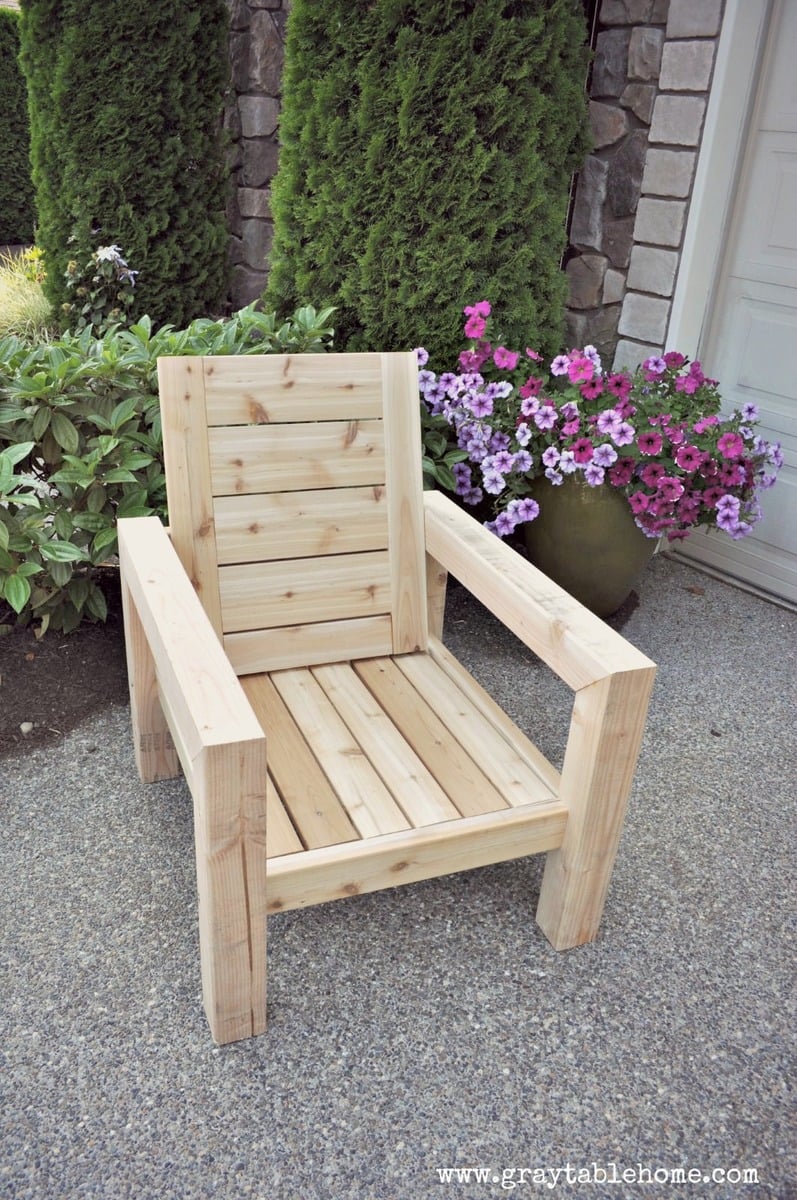
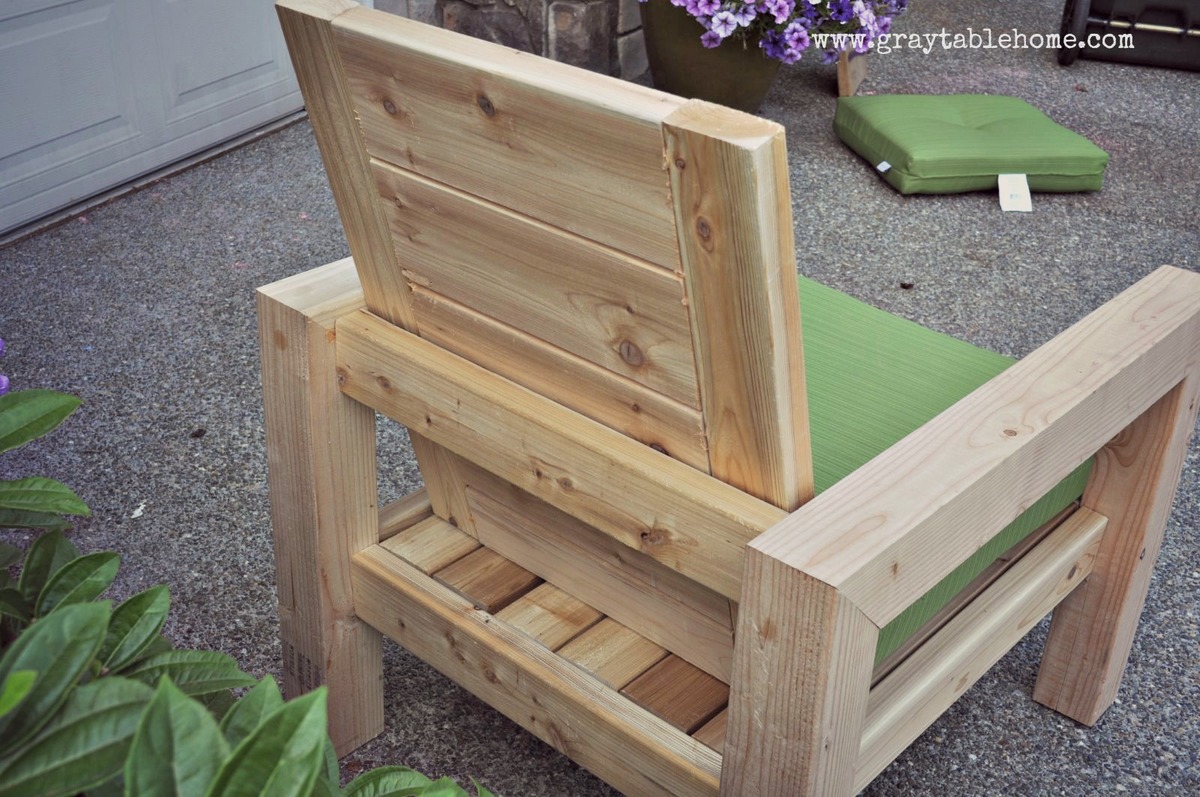
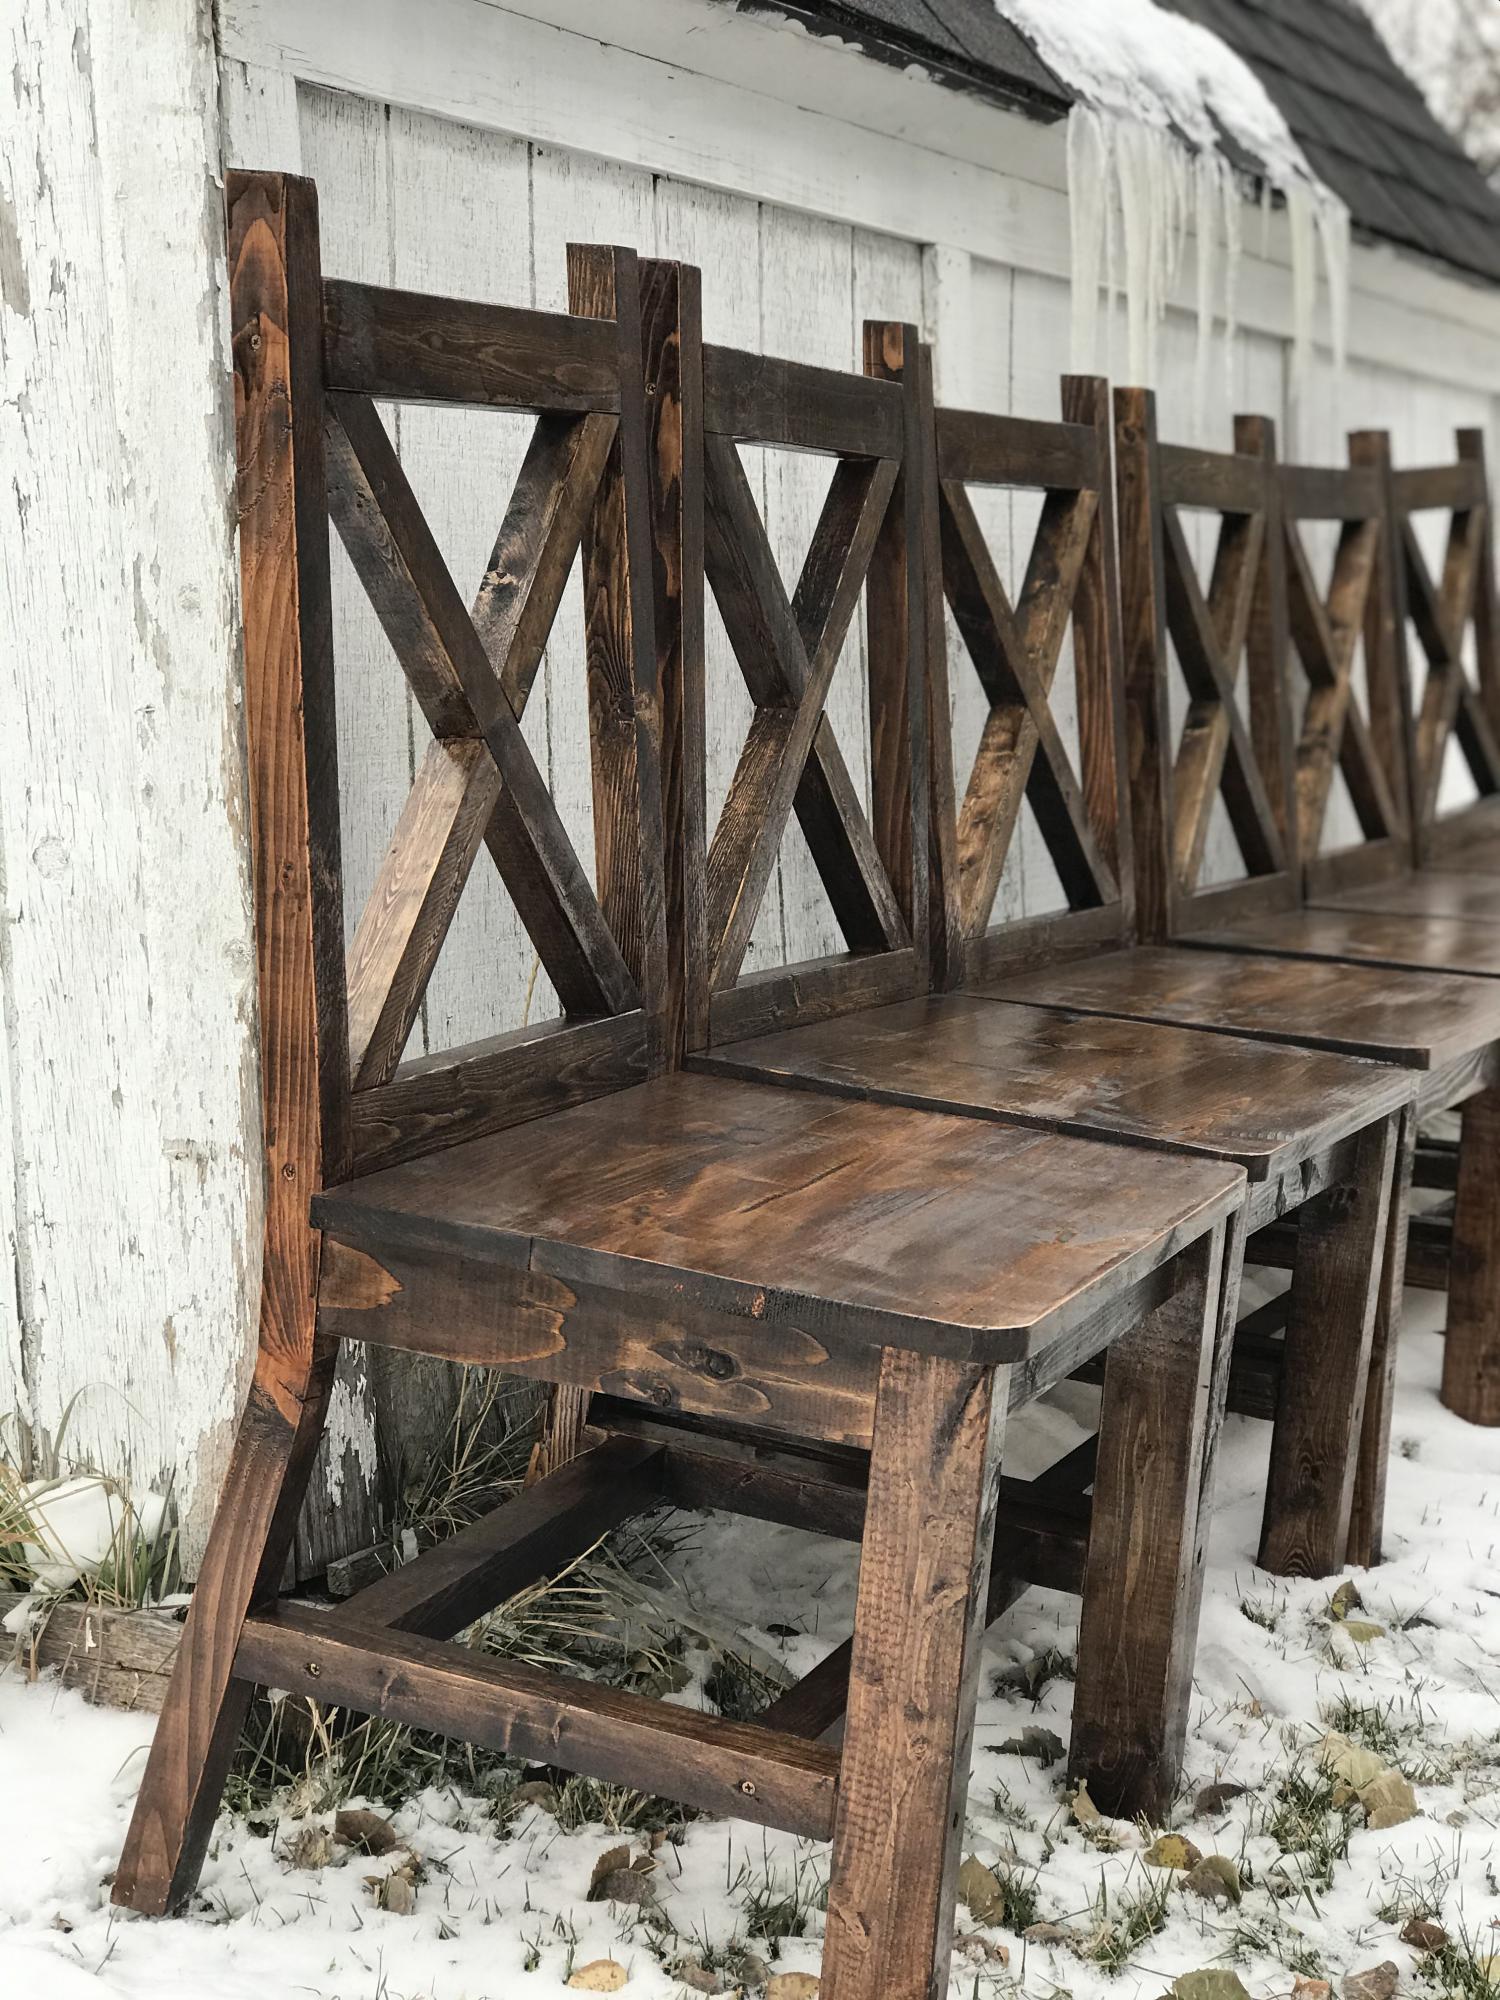
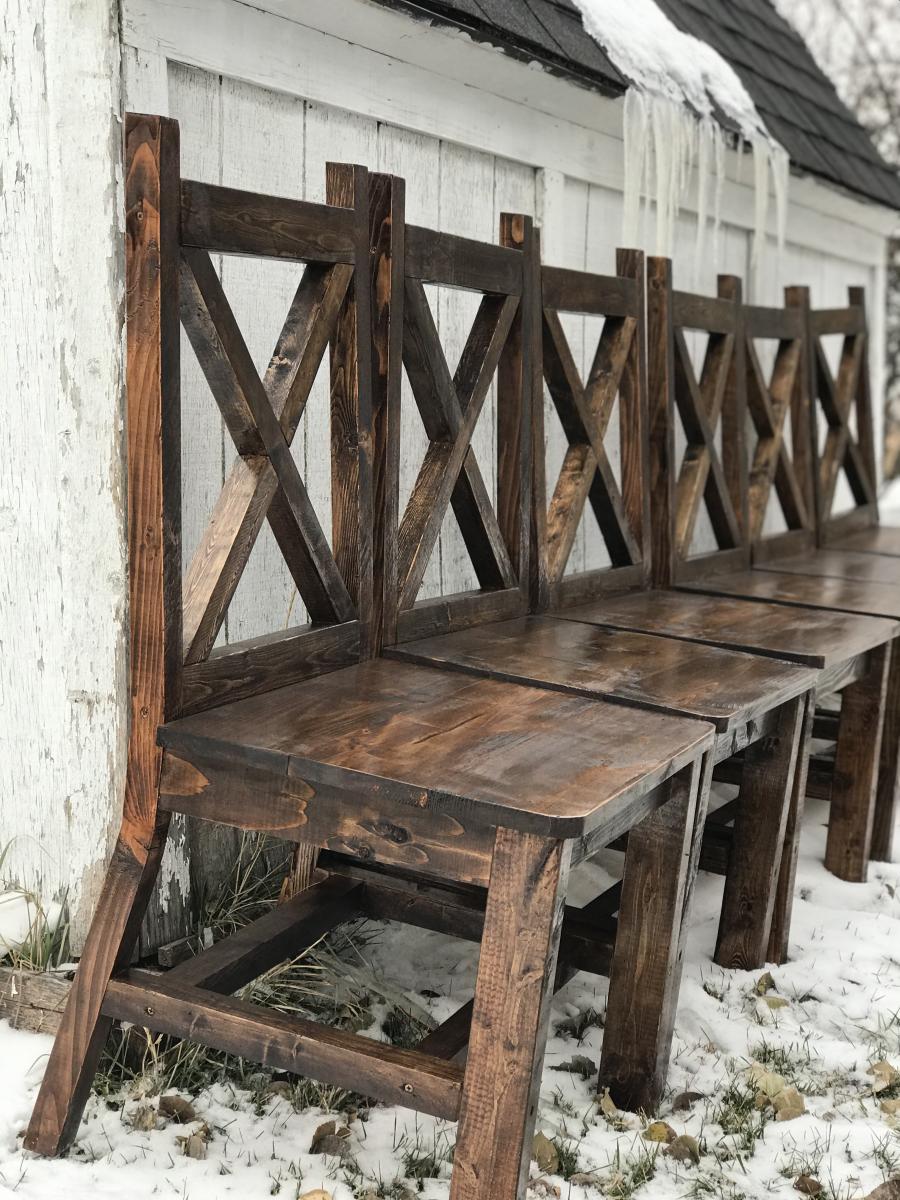
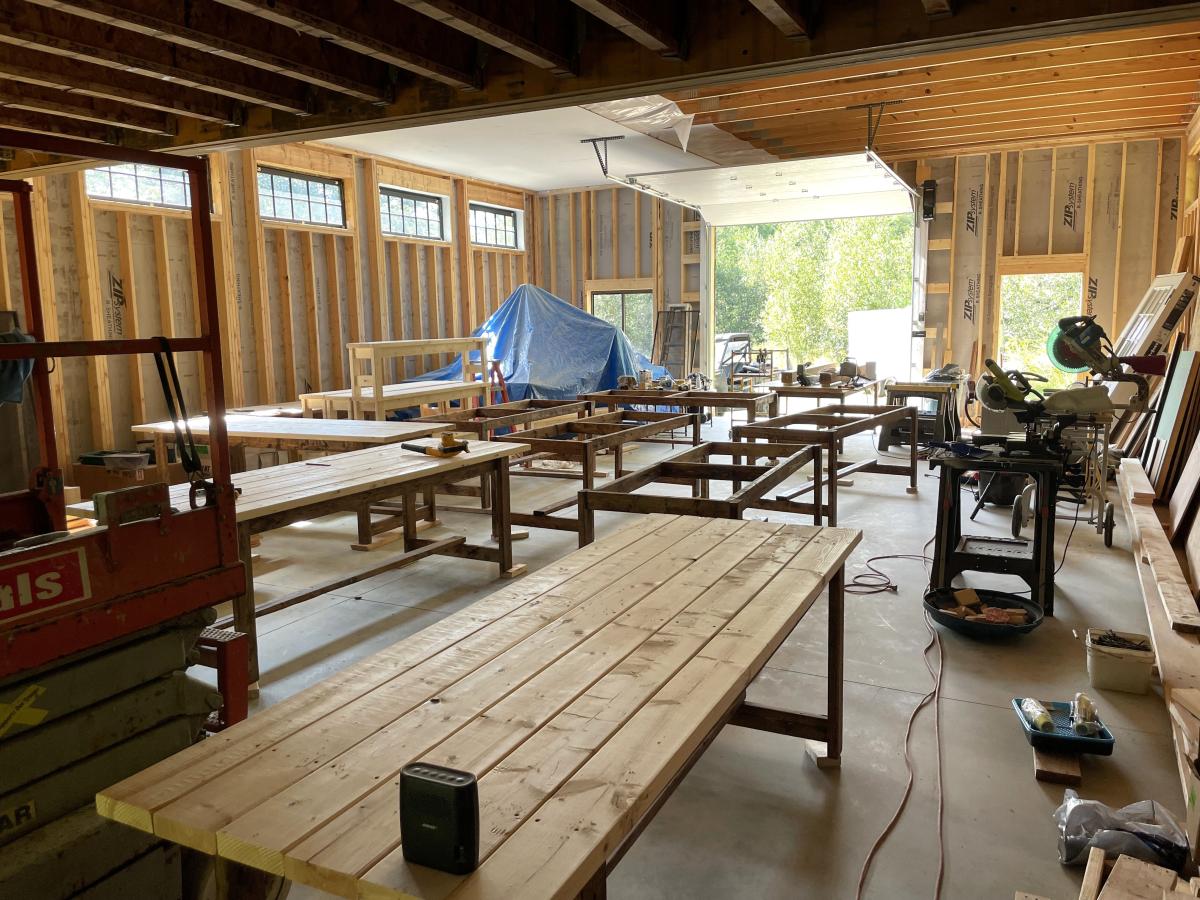
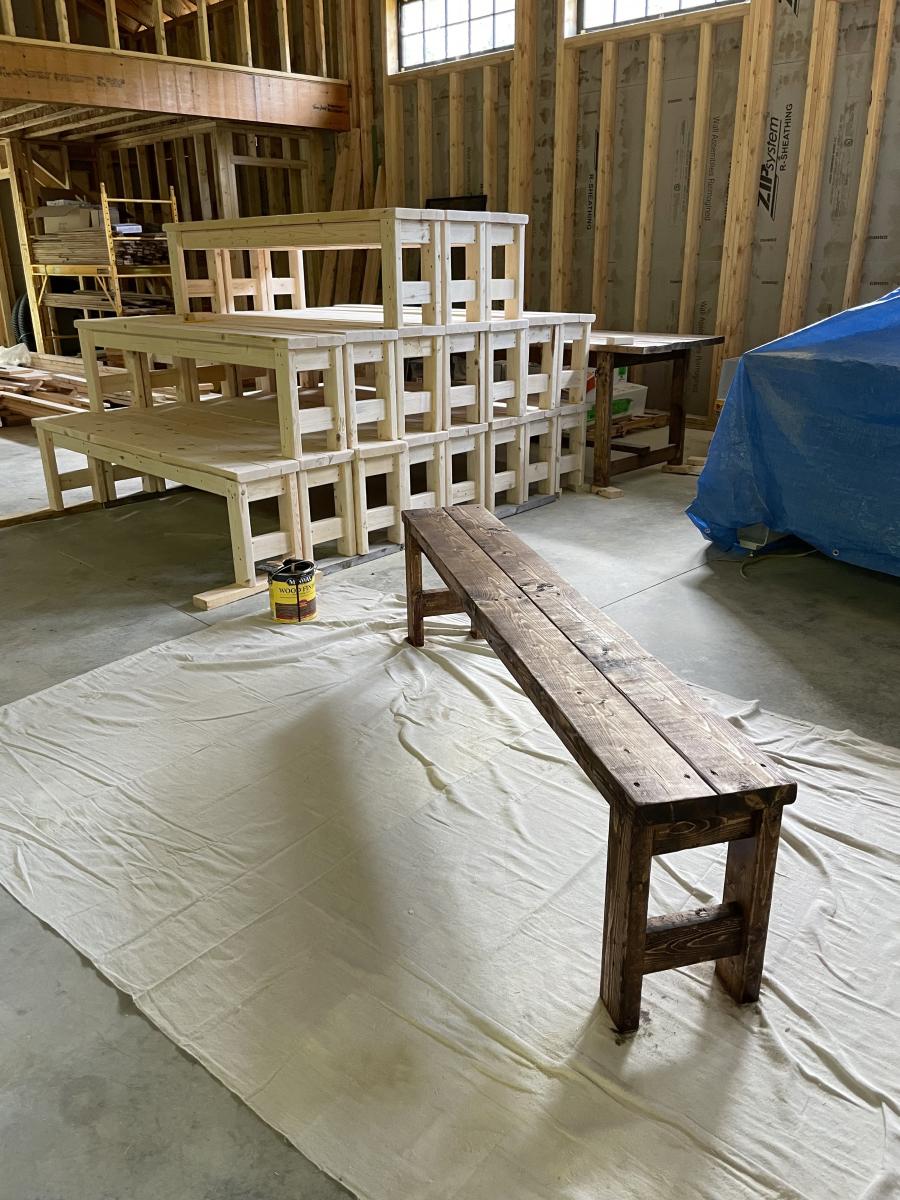
The chairs and tables went together super easy as everyone had mentioned. I sanded everything before cutting and then just sanded the cut ends. I did not have the stain on hand (not did we know the color) so we waited until after assembly to stain, which ended up not being too bad, just a lot of little nooks and crannies to get into. I used a small foam pad to get in between the boards.

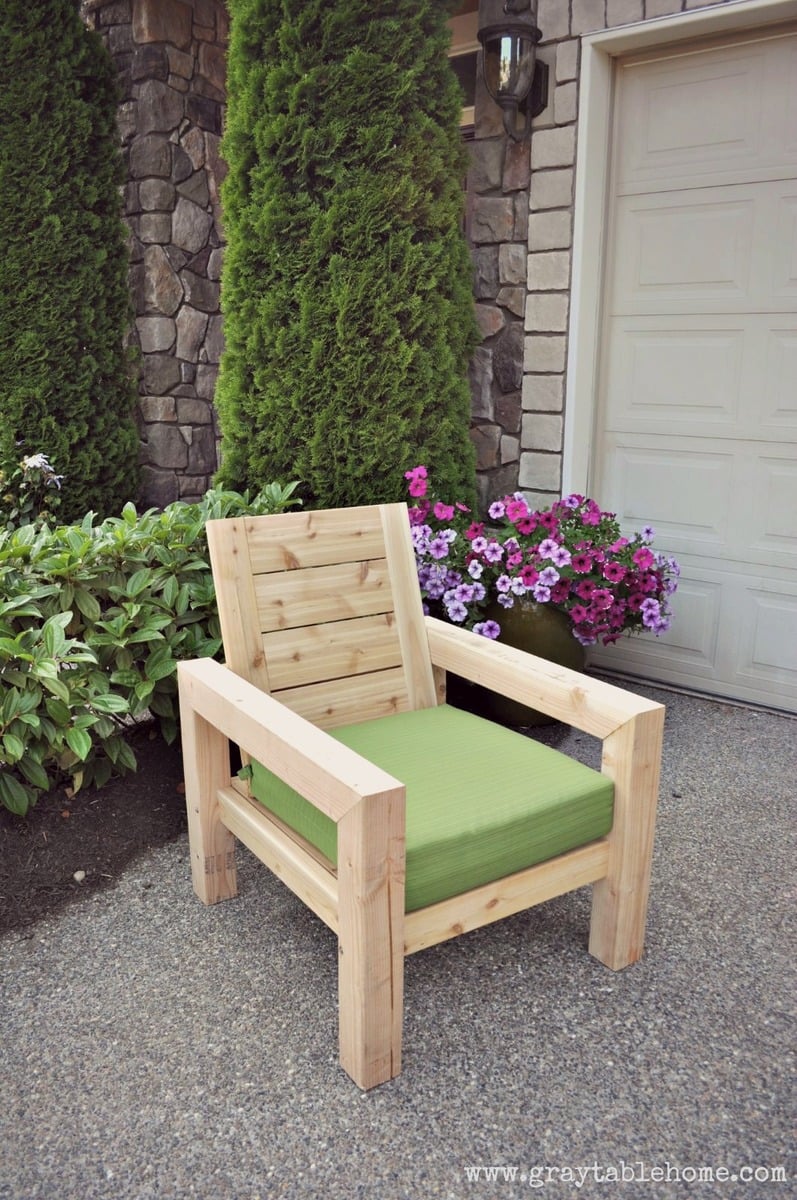
Overall, I would say that the build, from start (rough lumber) to finish (sanded and assembled) took me about 2-3 hours per chair, and about the same to do two coats of stain on top and one on the underside, bringing the total time per chair to about 5 hours.

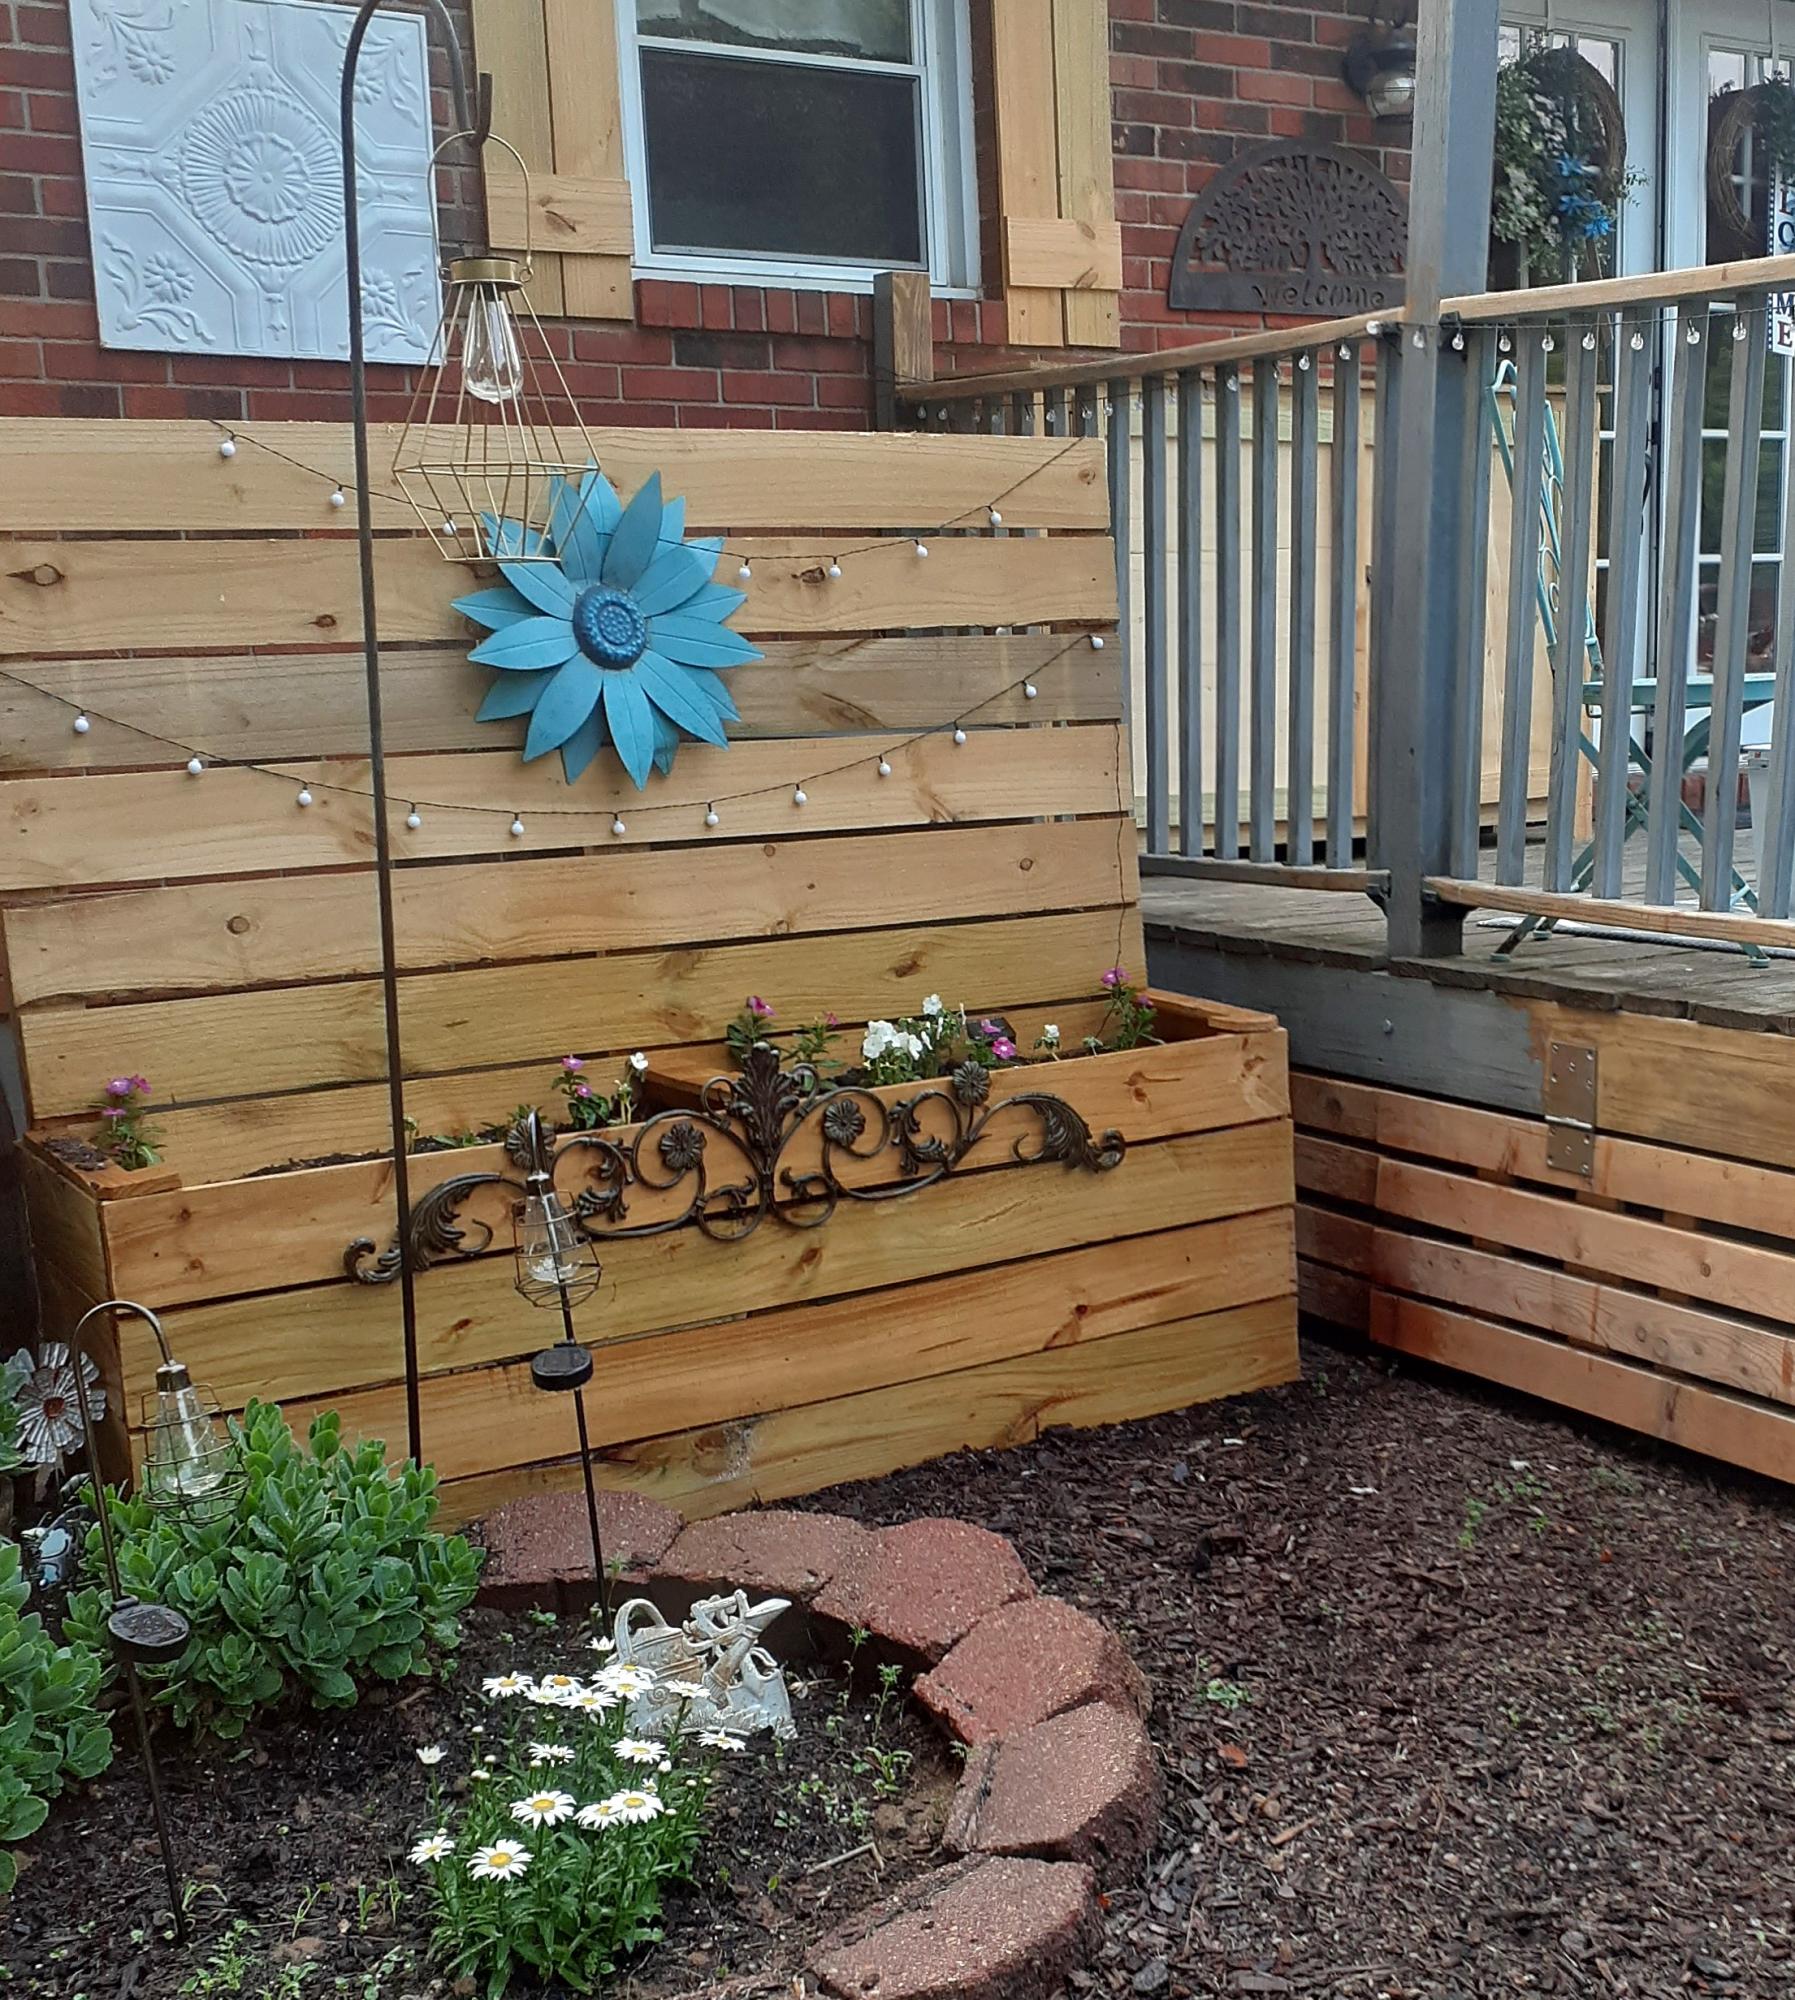
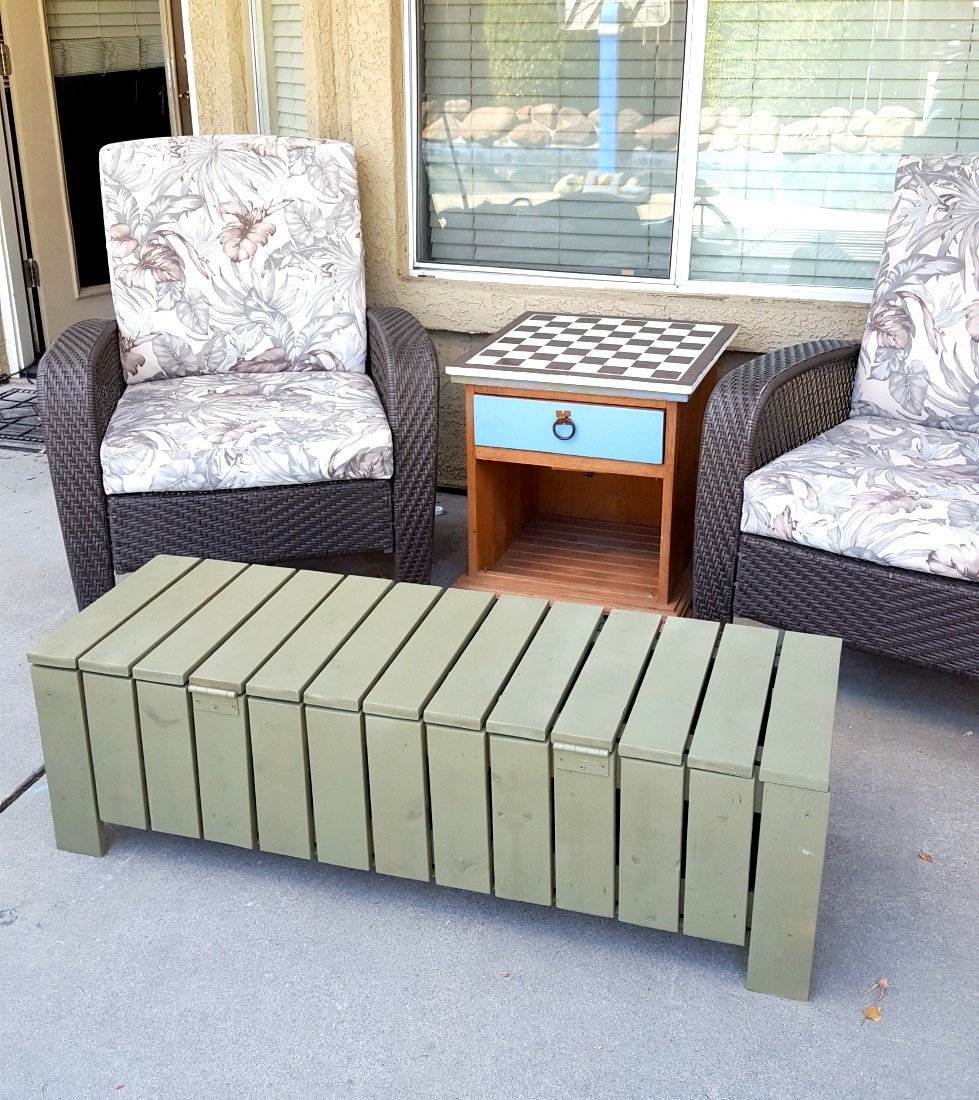
Now on to the landscaping... ;) I am also planning to build some planters to hold posts to hold some string lights around the perimeter. Boy how these little projects have a domino effect...but in the end, there is nothing better than sitting back and enjoying the fruits of your labor.

Estimated Cost
$40/ chair and $10/table. Total Project (including fasteners and stain): ~$300
Estimated Time Investment
Weekend Project (10-20 Hours)
Finish Used
SW6965 - Hyper Blue Solid Deck Stain
Recommended Skill Level
Beginner

Laundry Room Table

Submitted by TX Shaun on Wed, 07/01/2020 - 21:05

I modified the plans for the farmhouse console table to create a laundry room table. I changed the shelf height and used 2x4s running the entire length for the shelf.

Built from Plan(s)
Estimated Cost
$50
Estimated Time Investment
Afternoon Project (3-6 Hours)
Finish Used
Minwax grey stain and white paint.
Recommended Skill Level
Beginner

Nesting Office Station

Submitted by Sb1212 on Tue, 07/14/2020 - 18:38

So loving this nesting office station❤️! We will have a sofa sleeper in the office as well. So we needed a desk that could be moved to the wall when the sofa sleeper is being used by guest. I saw a post from Ana for her Nesting Grill Station and I came up with the idea to make this nesting office station. The cabinet includes a file folder drawer (which is from Ana's mail boss plans), a regular drawer, cabinet doors with shelves. One of the shelves is a pull out shelf for the printer. I think it came together great! Design for nesting desk inspired by these plans: https://www.ana-white.com/woodworking-projects/nesting-grill-station https://www.ana-white.com/woodworking-projects/mail-boss

Estimated Time Investment
Weekend Project (10-20 Hours)
Finish Used
Minwax Golden Pecan
Valspar Signature Ultra White in satin
Recommended Skill Level
Intermediate

Comments

Sb1212

Sat, 10/03/2020 - 08:35

Hi, Thank you! Actually I didn't add wheels to the design since this will be in an office with thick carpeting. I added adjustable metal foot pads to the bottom of the desk.

Camp Loft Bed With Stairs Bunk Style

Used the Camp Loft Bed with Stairs Plans but double the bed rails. I just loved that the stairs and platform make it a little safer getting in and out.

Estimated Time Investment
Weekend Project (10-20 Hours)
Finish Used
Just Ultra White.

Comments

Back