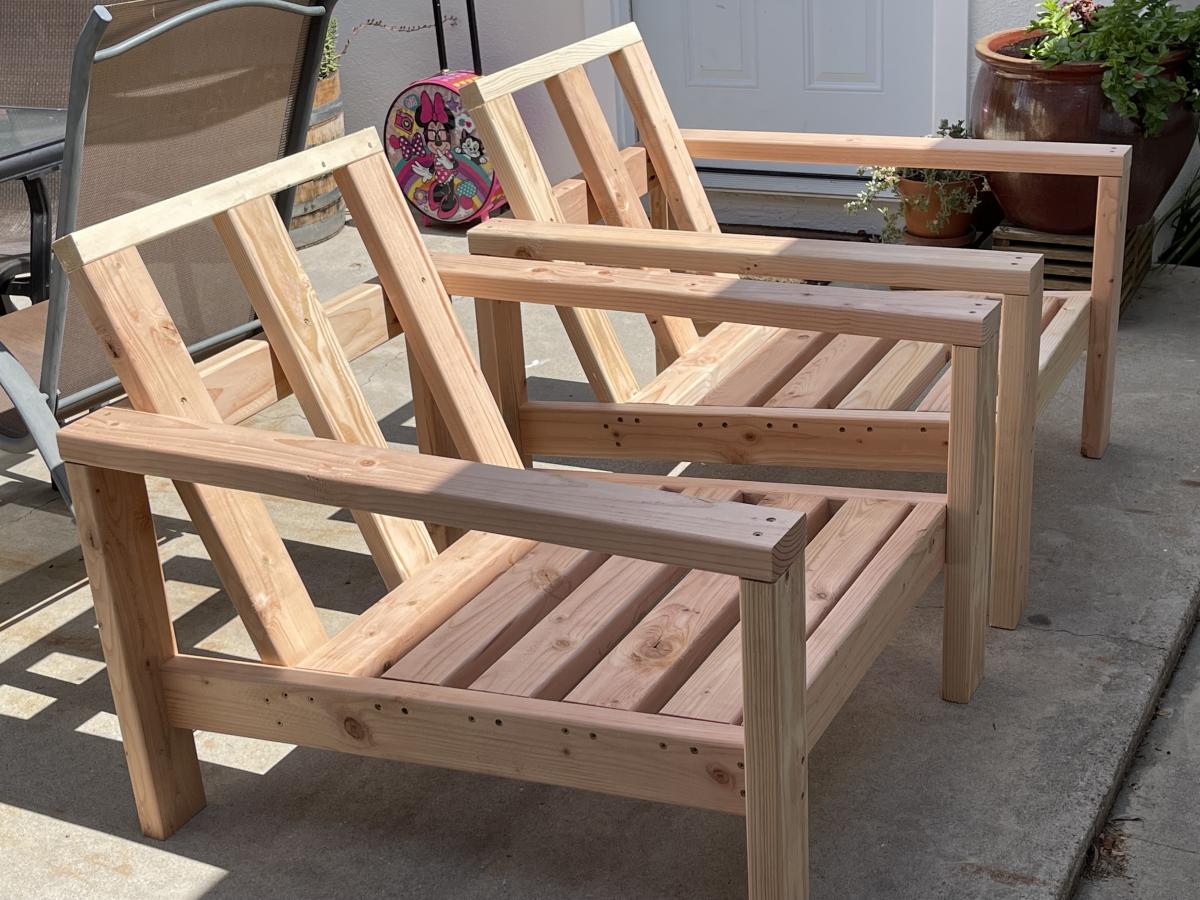
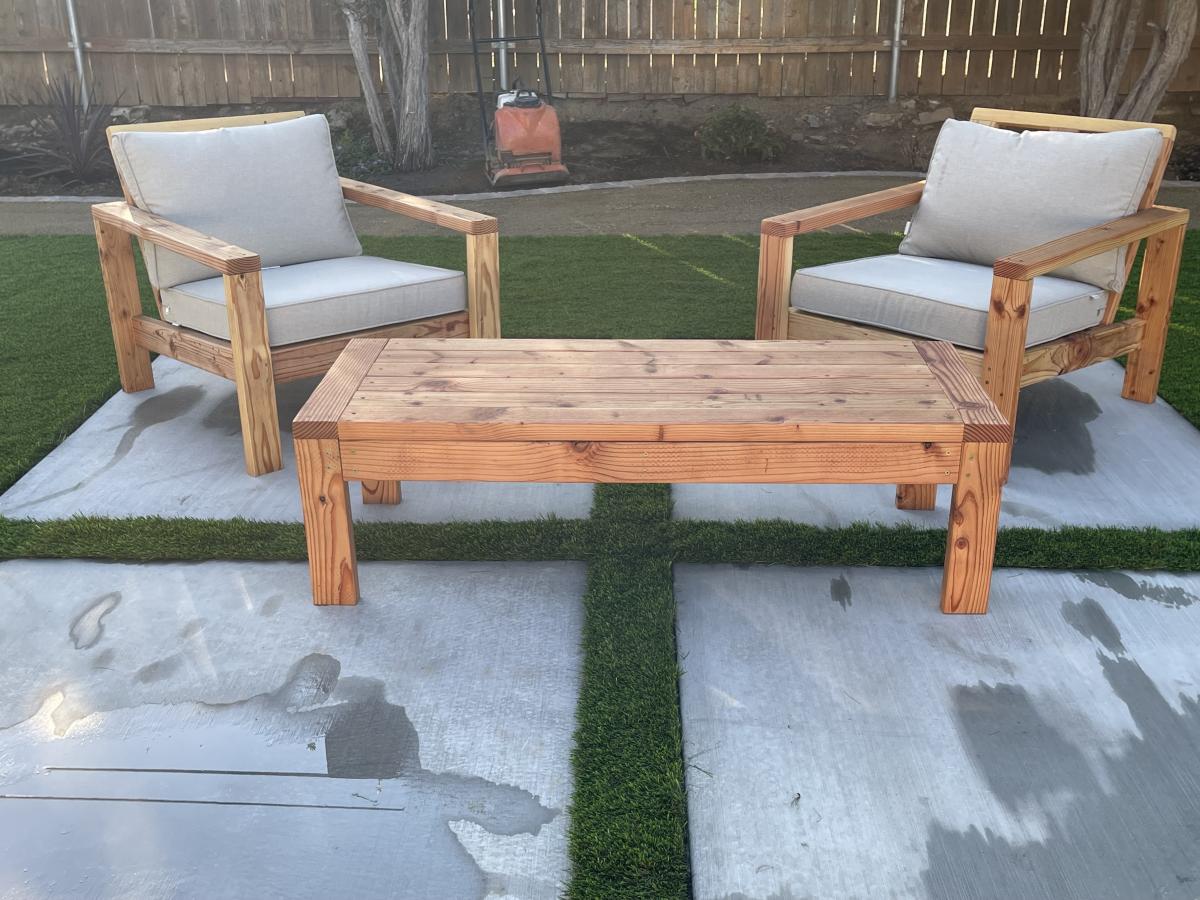
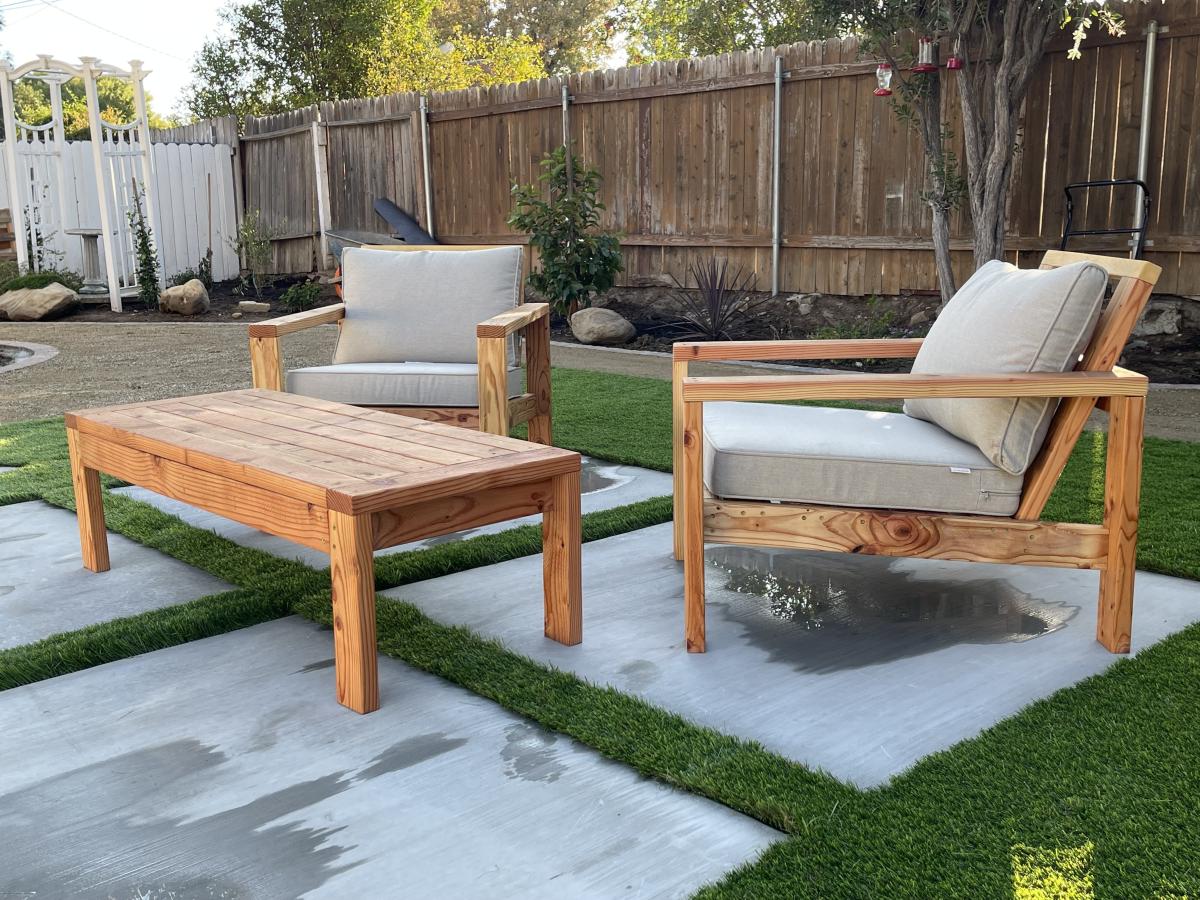
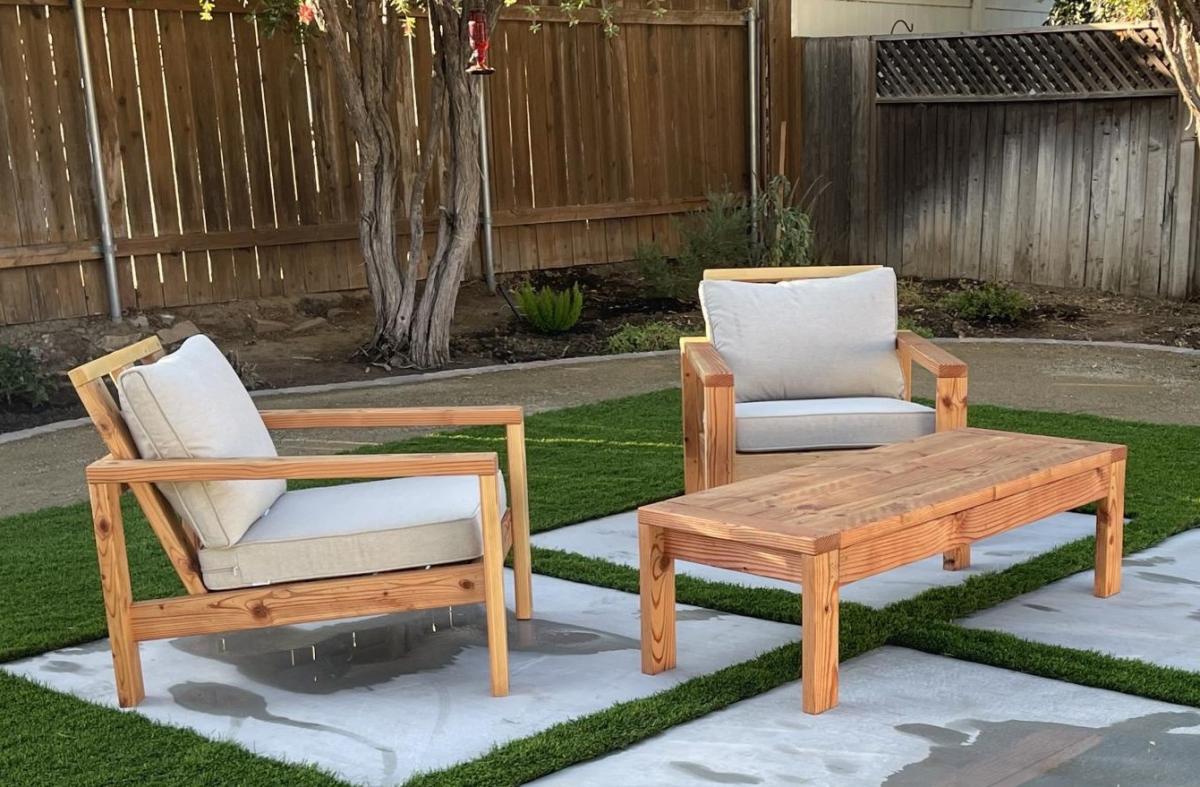
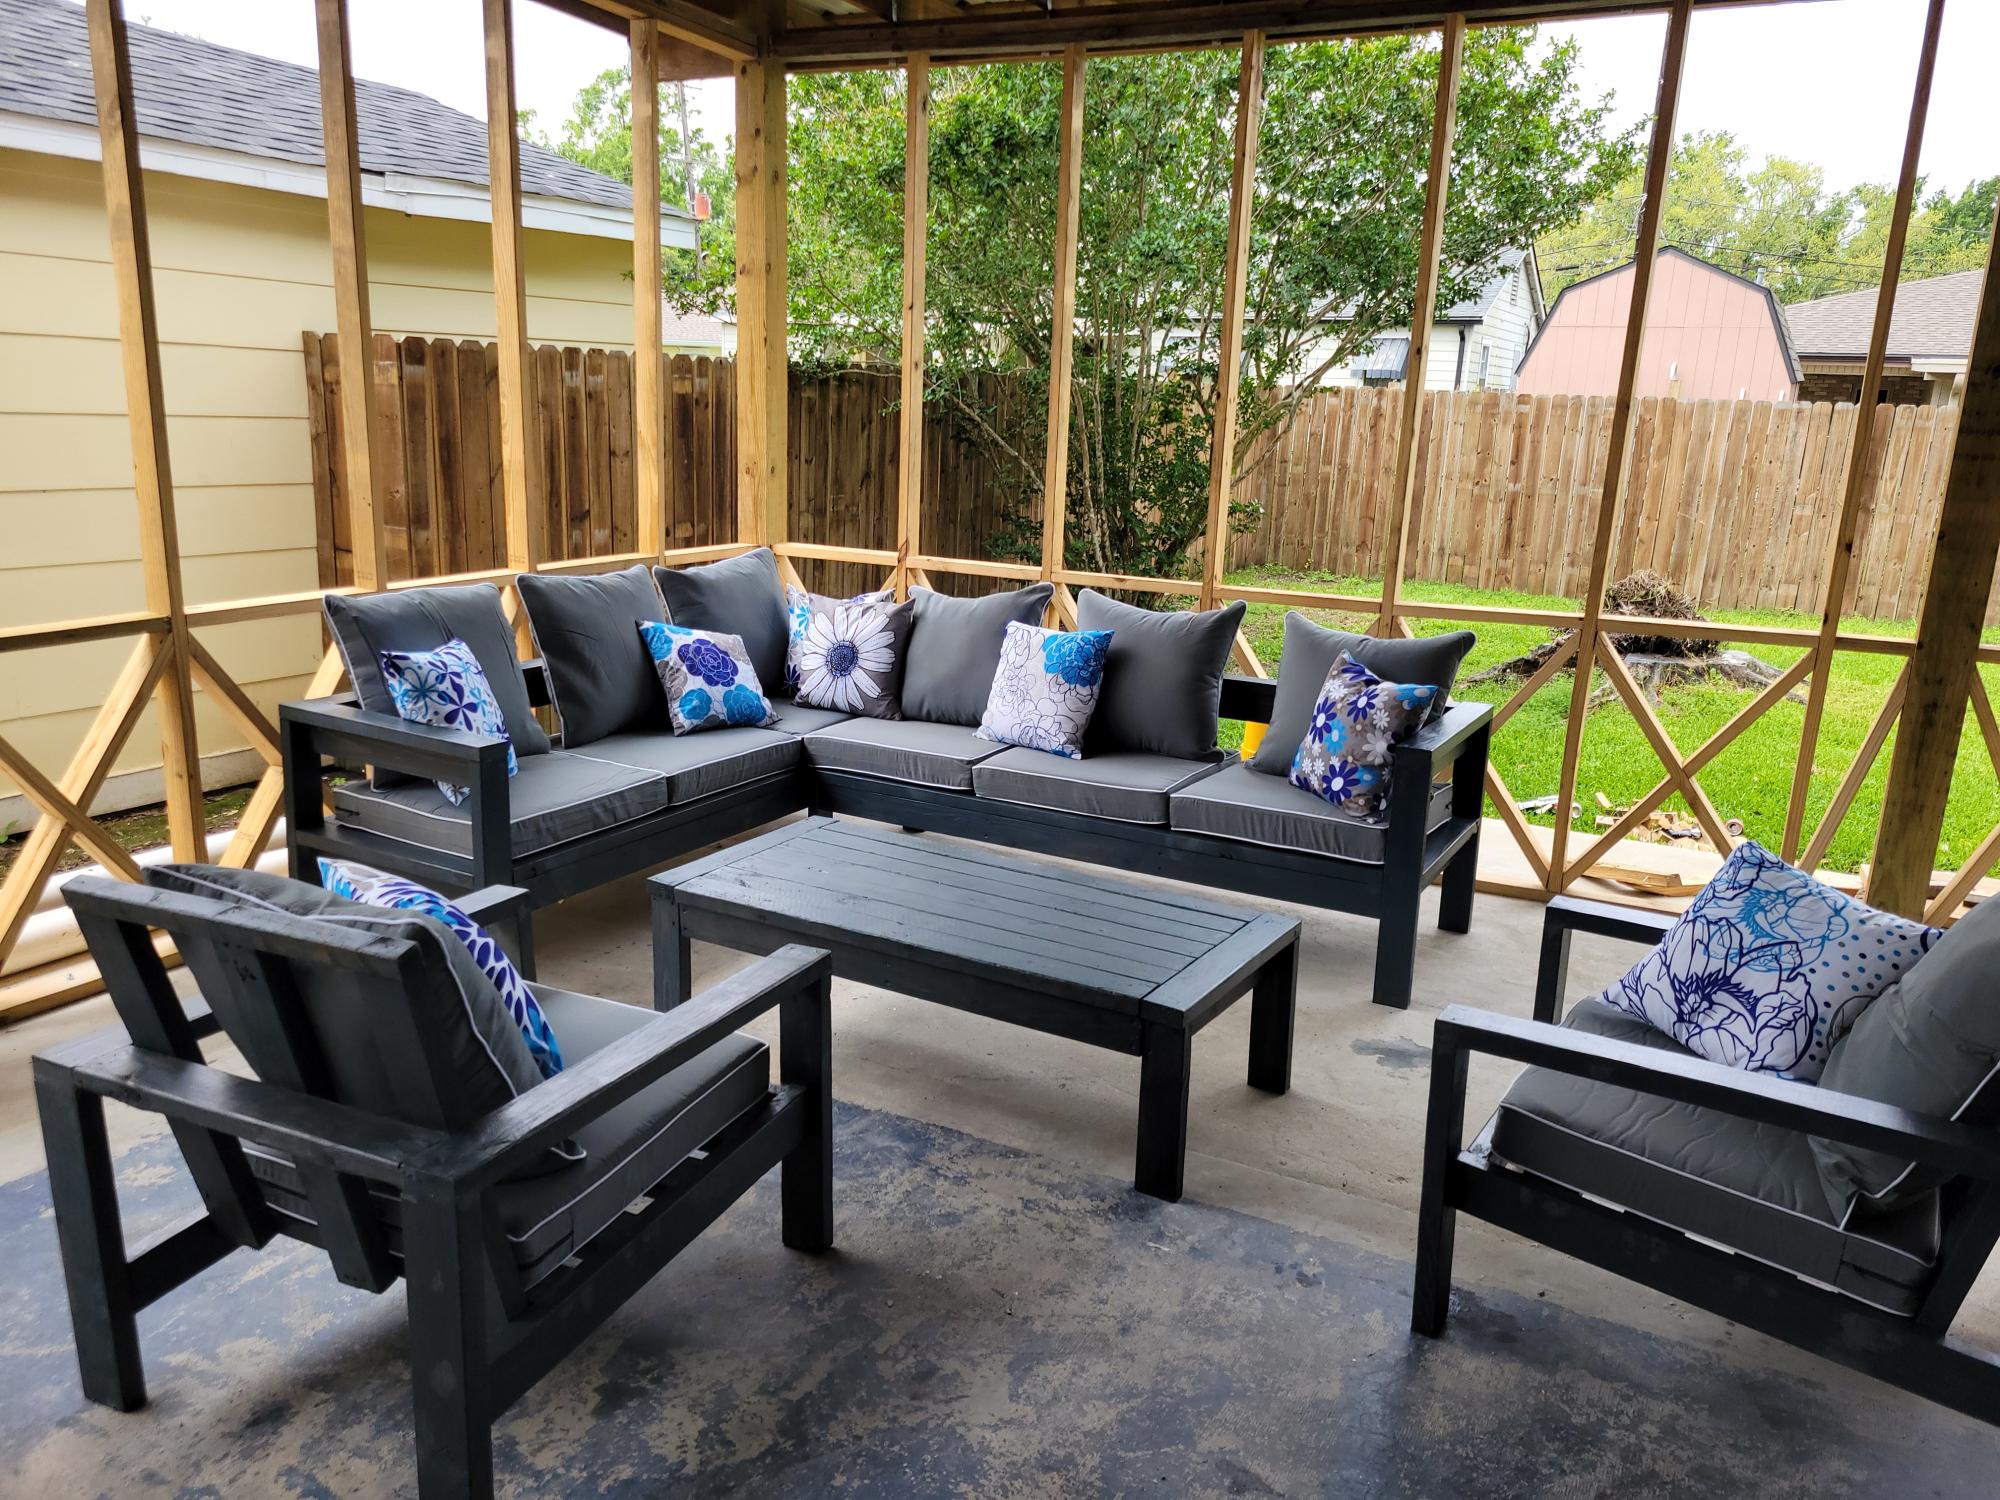
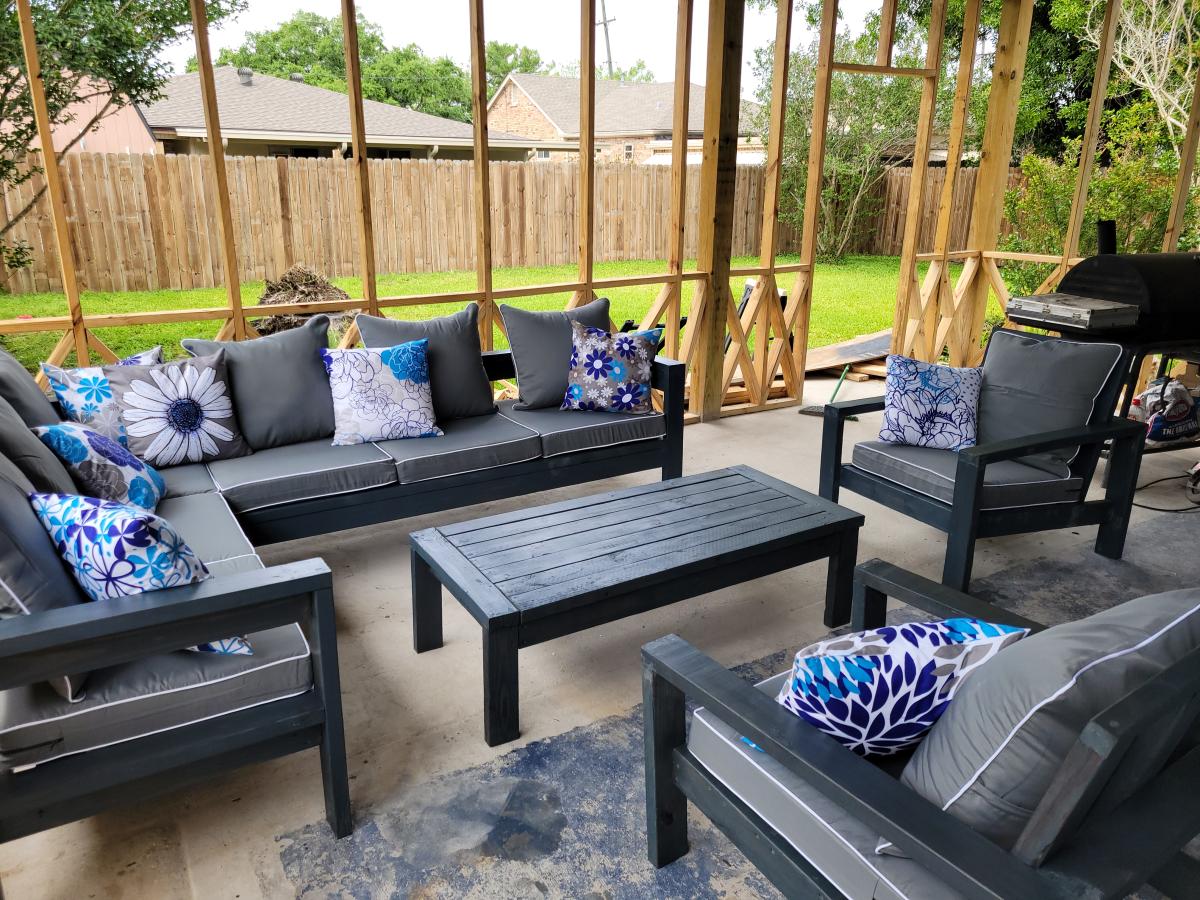
Outdoor chair frames and coffee table
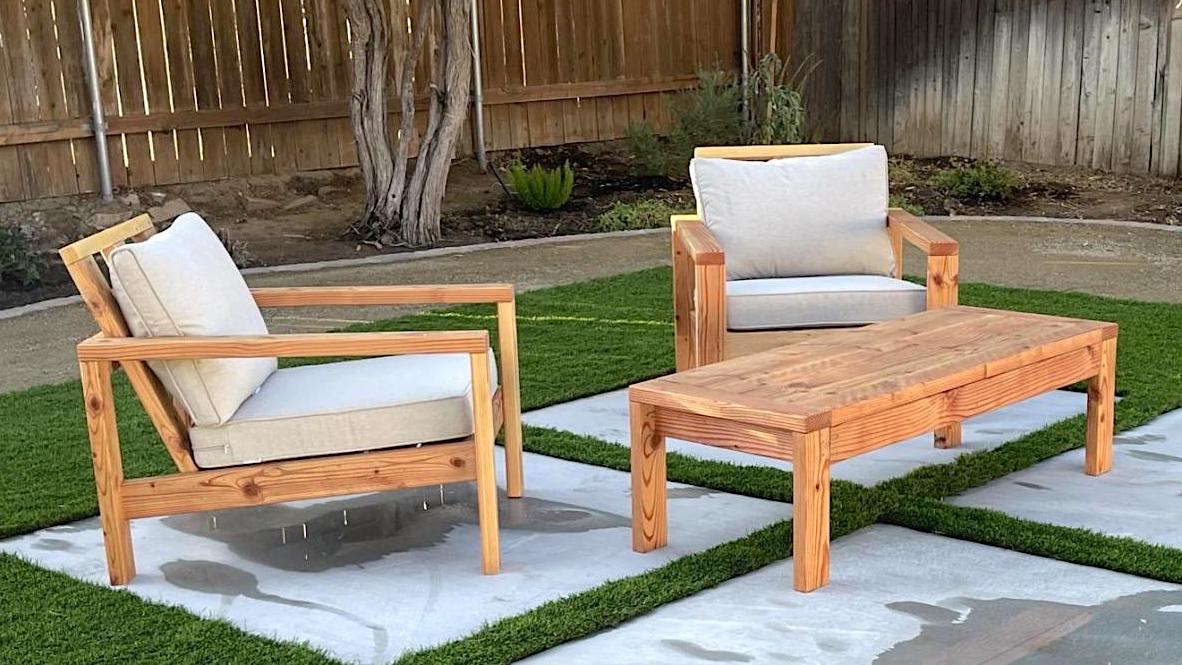
I built a set of chairs and a coffee table for our newly designed outdoor area. These look amazing and people love sitting on them and hanging out outside our house.
Built from Plan(s)
I built a set of chairs and a coffee table for our newly designed outdoor area. These look amazing and people love sitting on them and hanging out outside our house.
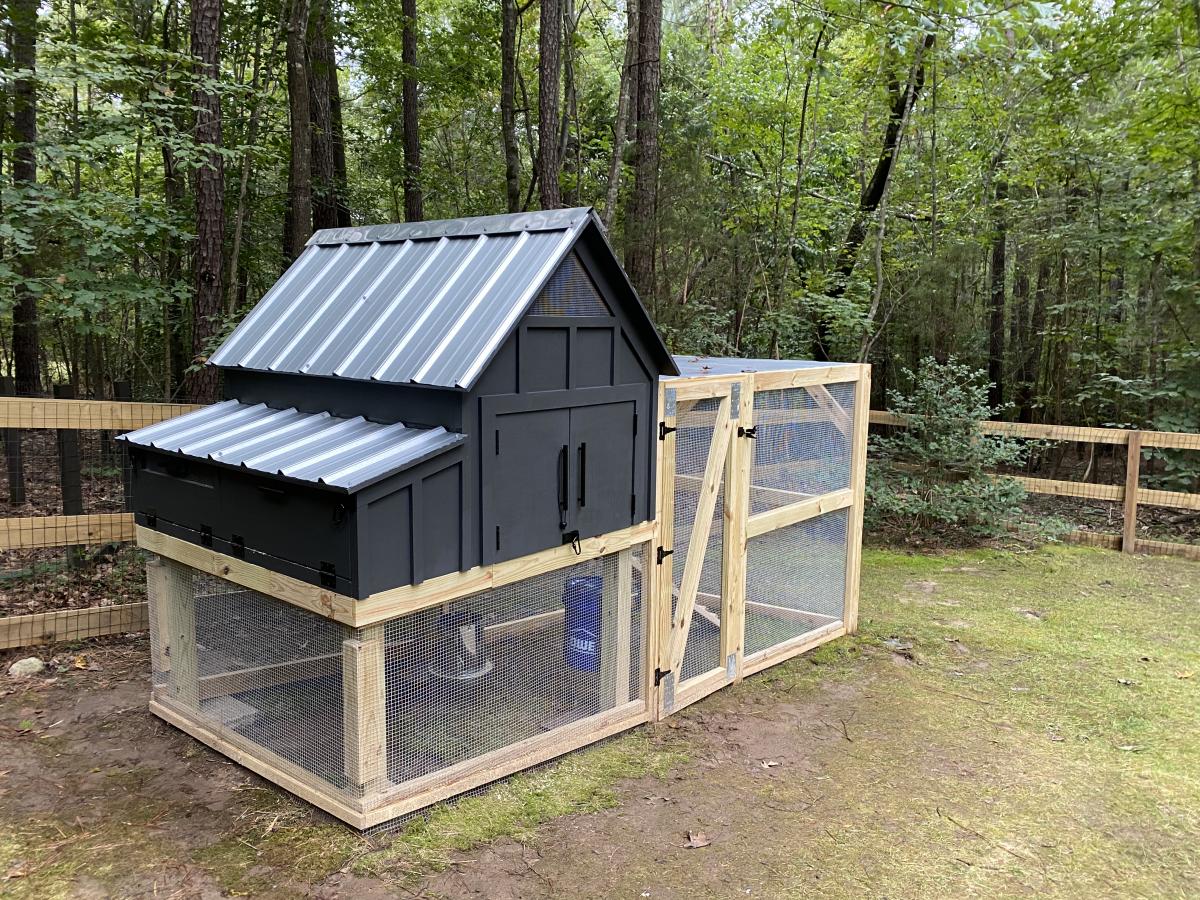
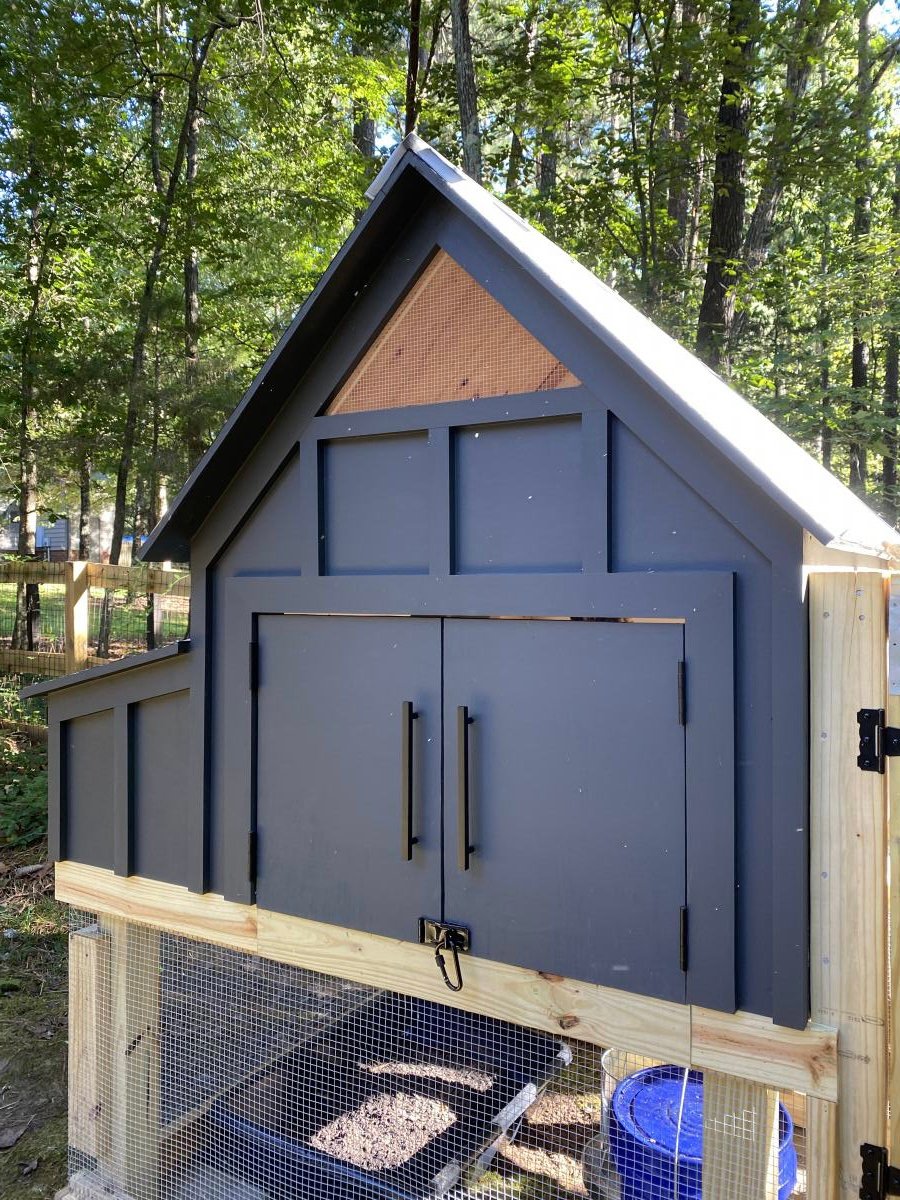
We took some creative liberties on the Williams Sonoma inspired coop posted here. Because we don’t get a whole ton of sun in our backyard, we eliminated the herb garden planter and instead built a longer run. We also made the coop a bit wider to accommodate for the inevitable chicken math. And, you’ll notice the vent both shaped differently and is a bit higher. This was to increase air flow, avoid the dreaded draft, and to lend a more Scandinavian vibe. We also decided to place the chicken exit on the outside wall to allow for more living space under the coop itself. The project took about a month to complete, dedicated to only working weekends. And, it was very much over budget! Who knew wood is so expensive?! But overall, the outcome was even better than I expected. The chickens love it and I don’t mind looking at it!
P.S. this was a pretty advanced project. The fractions alone had me yelling “uncle!” Thankfully my husband is pretty handy, and my father-in-law (career in the construction industry) had a few pointers, so they took the lead in executing. I chose the paint colors and suggested the deviations from the original blue print. ;-)

Wed, 11/18/2020 - 12:55
Thank you! Yes, I suppose everyone is wanting wood for home improvement projects now that we're not leaving the house! Also, I didn't mean to post a picture of my son and his friends. Am I able to delete?
Thu, 01/14/2021 - 07:43
does this roof have the same angle as the 'Small Chicken Coop with Plans'? It seems to be 'less steep'. Wanting to start this project next weekend and trying to get my mind wrapped around everything!. Thanks.
Wed, 03/16/2022 - 09:53
Do you have a run side photo? I am thinking about adding more run onto mine.....

This was my first Wood Project - EVER.
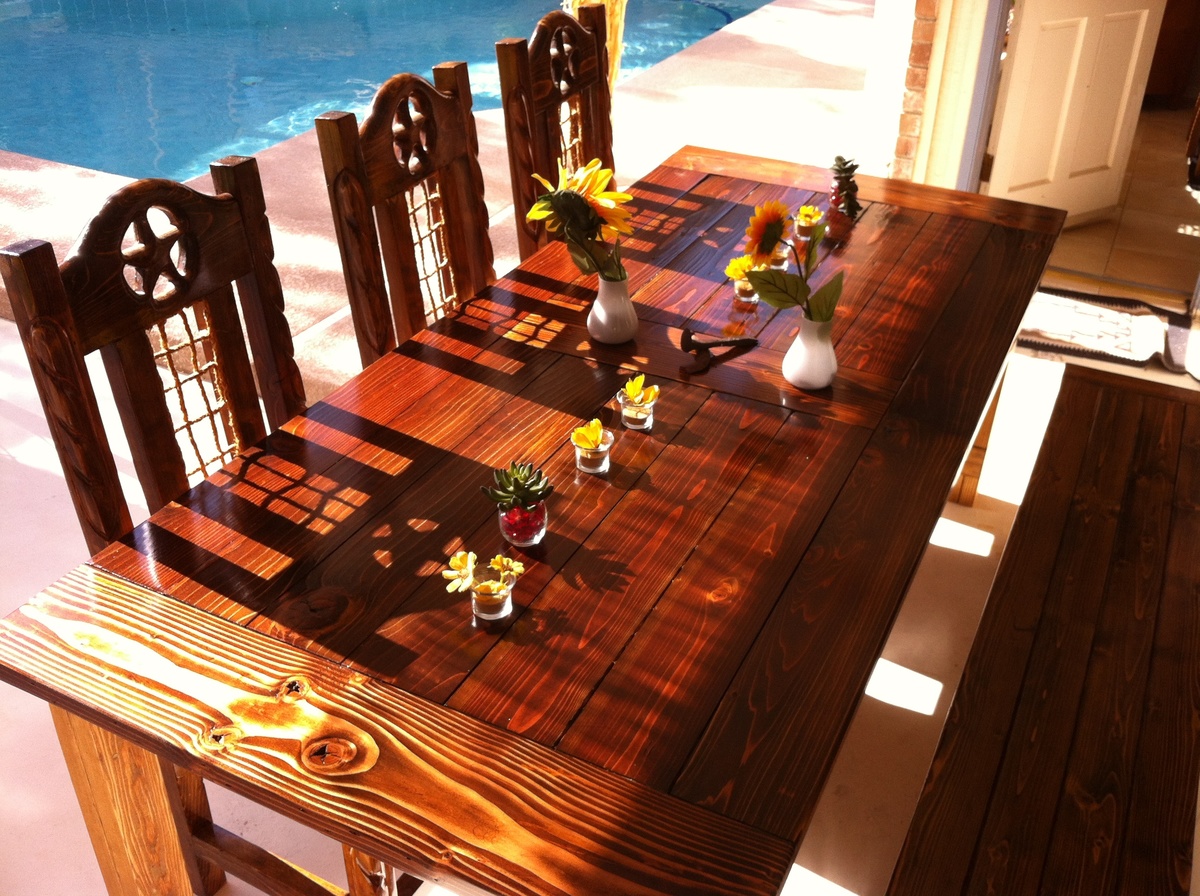
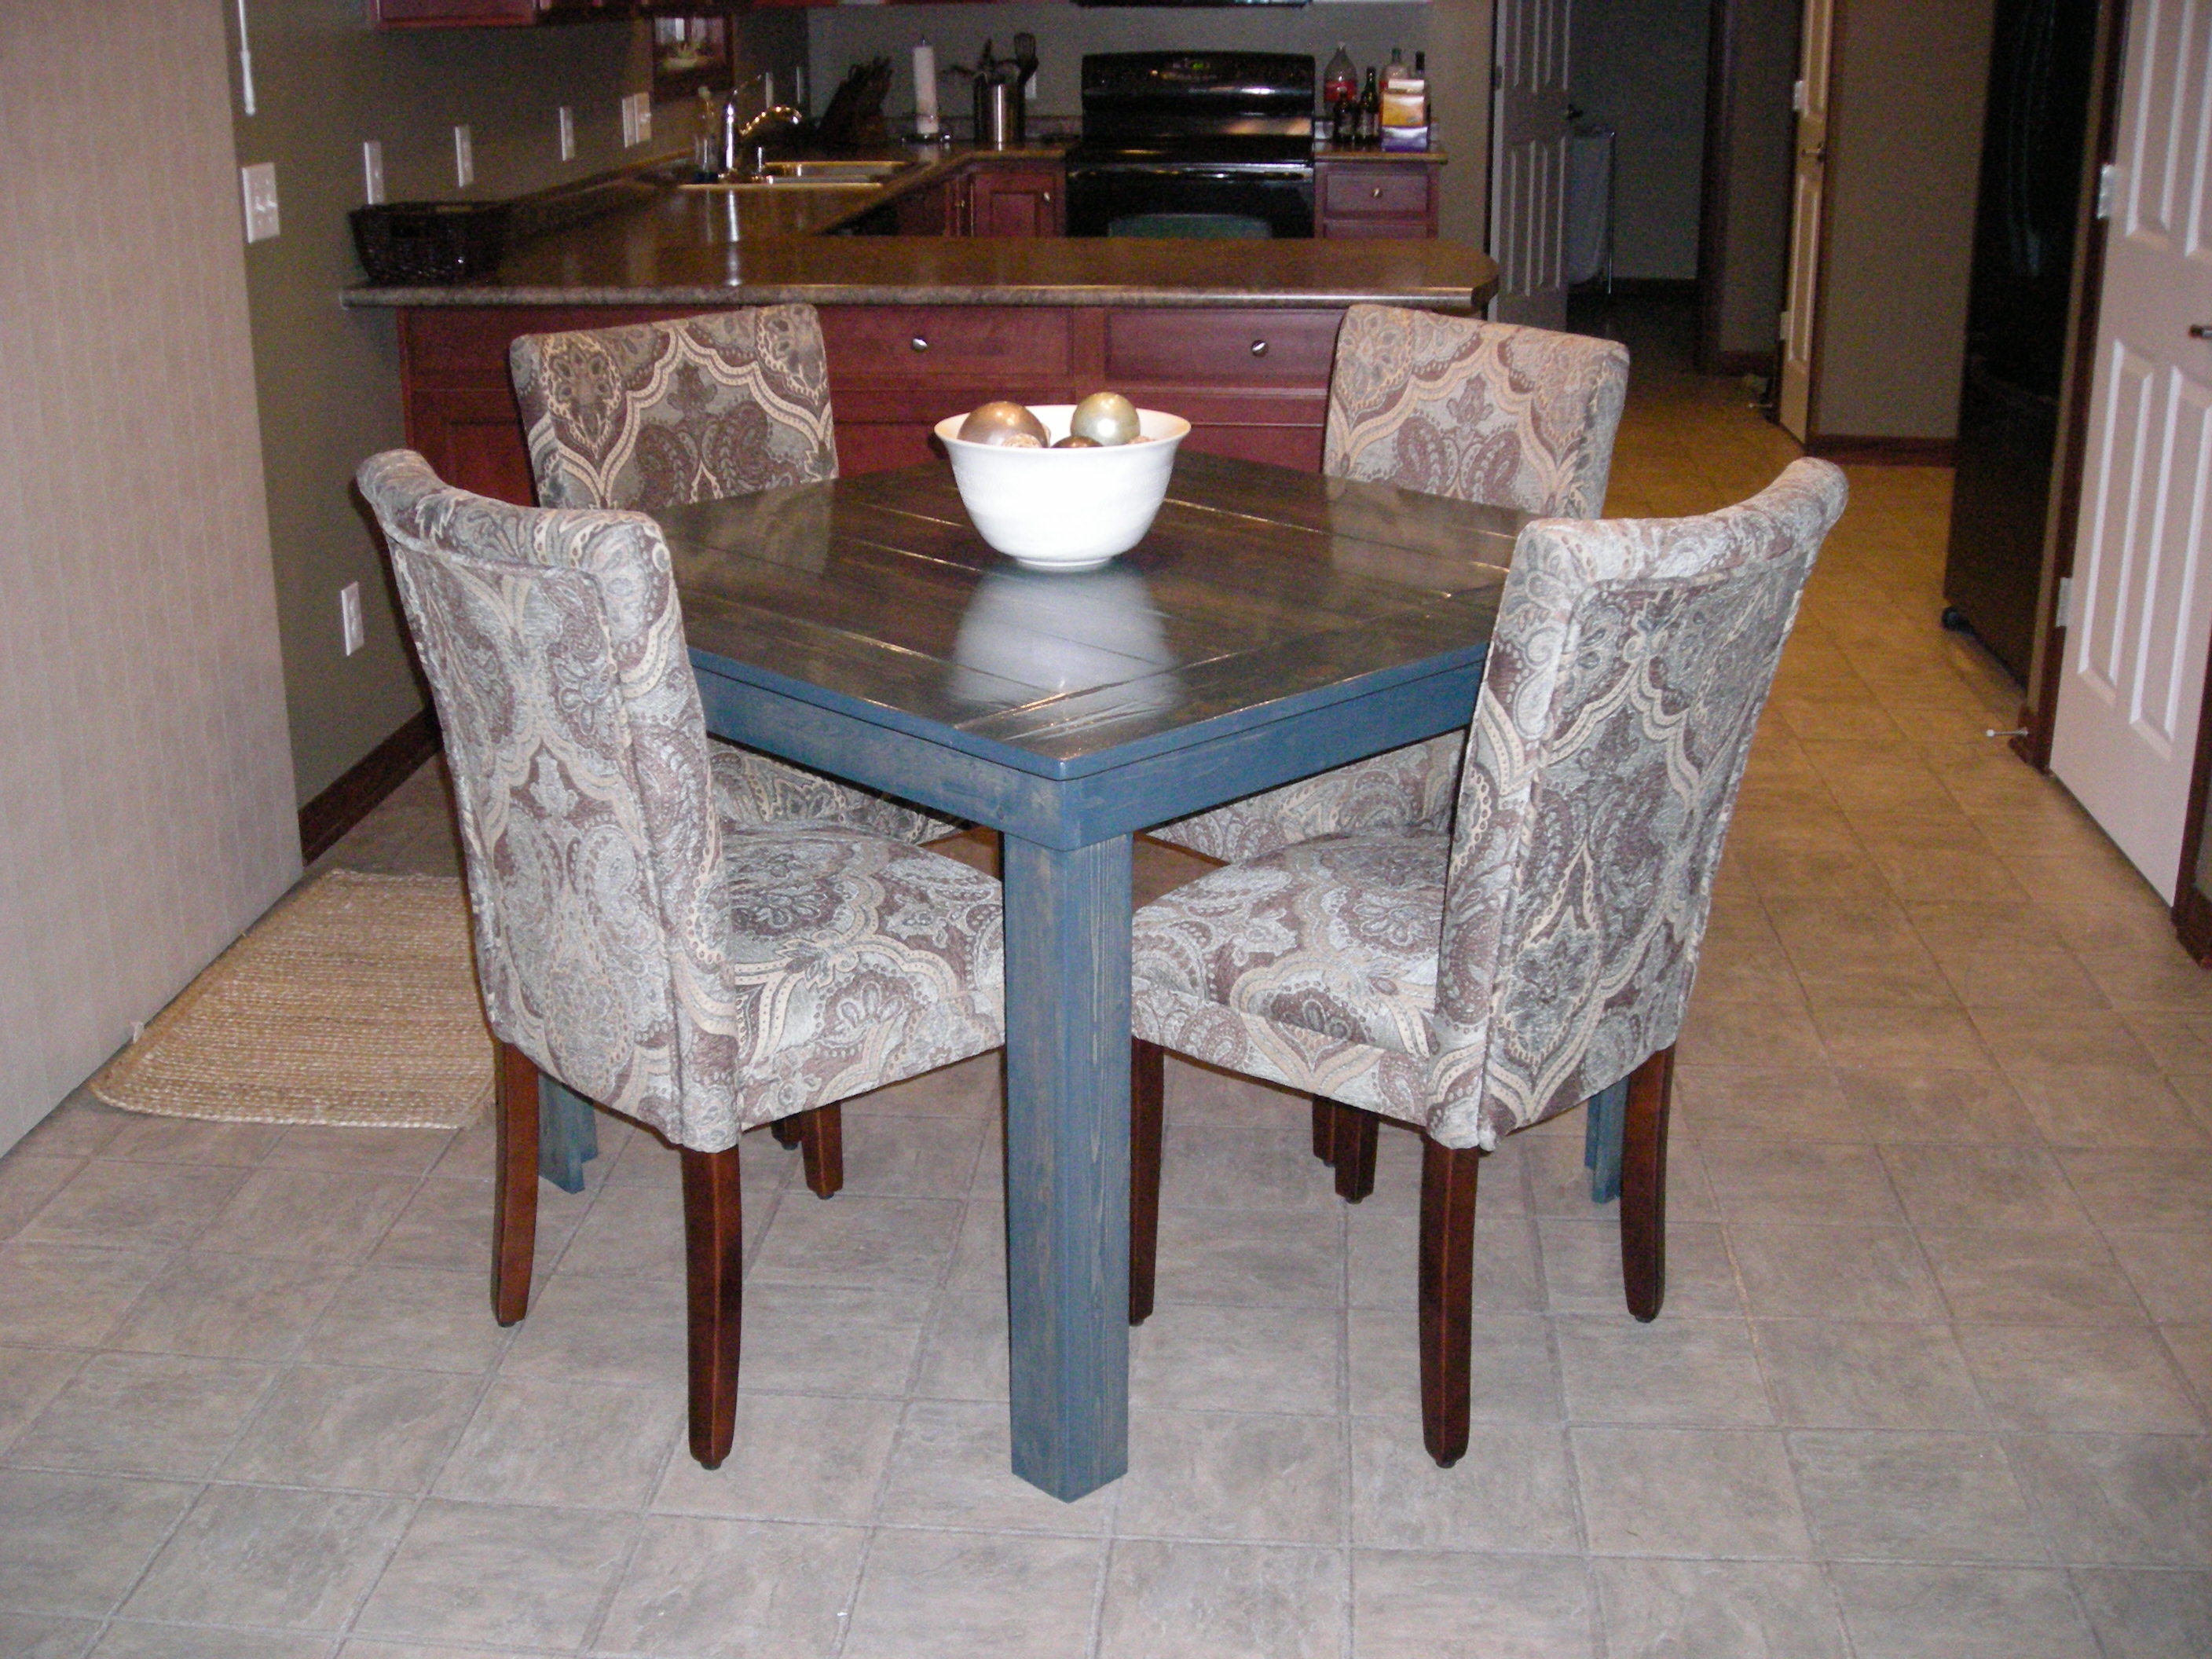
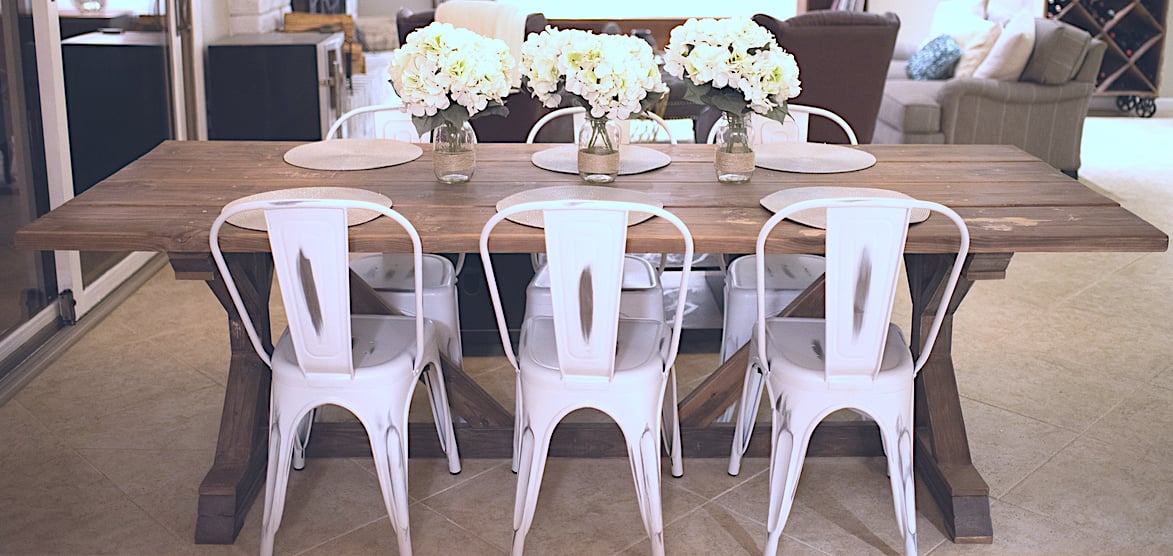
Working with this plan was quite easy. I just changed the design of the table top to my wife´s wish. I used "Golden Oak Stain" for the Legs and "Provincial Stain" for the Table top and Bench. The Legs are covered with Water seal and the Tops with 3 layers of Polyurethane. Chairs are Stained in Provincial also. Was a lot of fun for all of us. Learned a lot during this build.
Thanks


Mon, 07/01/2013 - 21:10
Thanks for the nice comments. I bought the Chairs at a local Mexican Furniture Shop, sanded them, Stained them to fit the Table Top and put 3 layers Polyurethane on it... Came Out nice.
Thanks Alain.
Jann
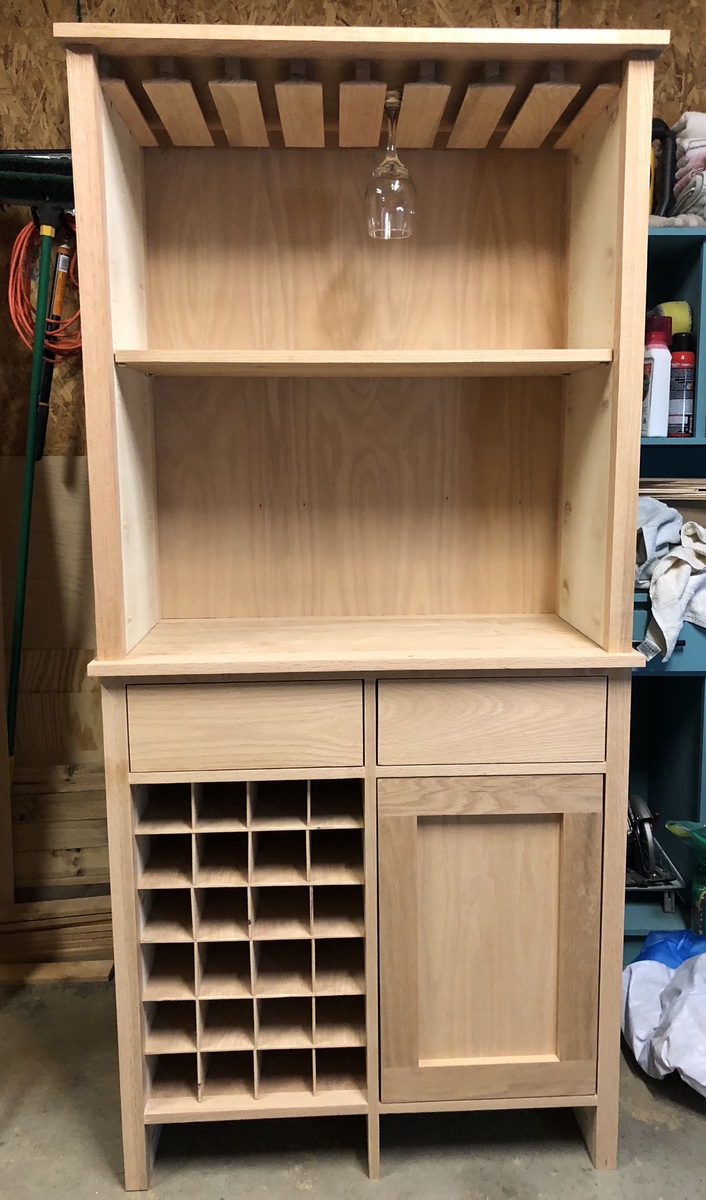
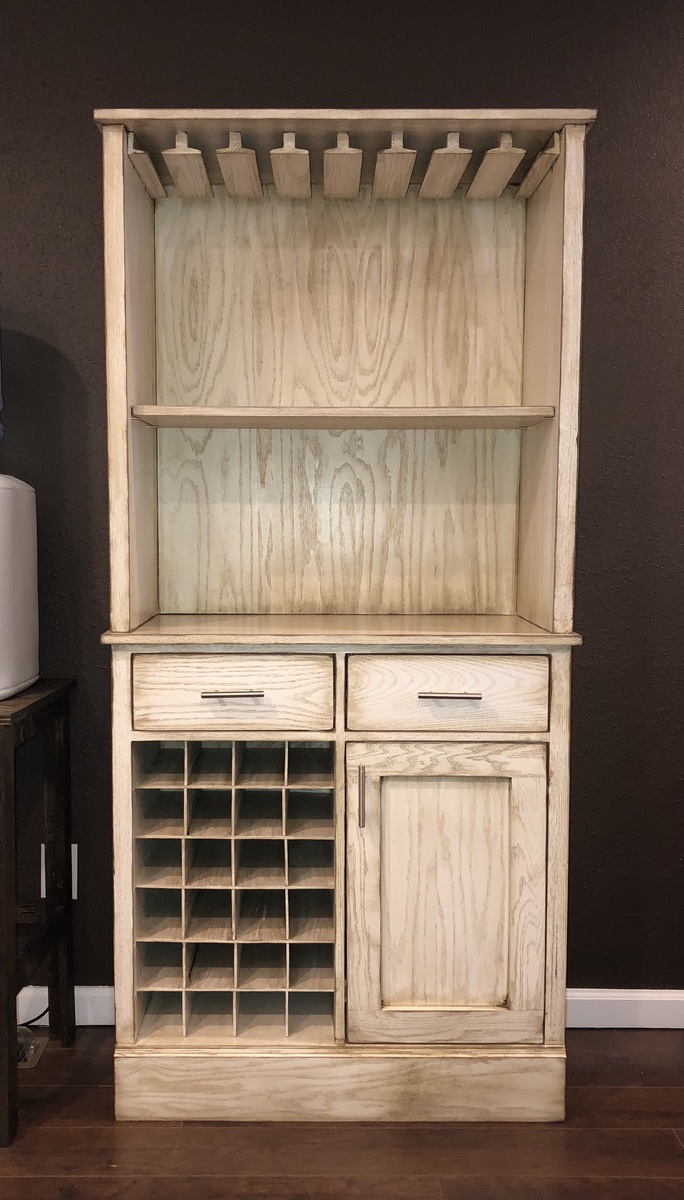
I took what was a single cabinet and doubled it.

I couldn't find an exact plan for the kitchen table I wanted, so I used a combination of the farmhouse table and pub table to create the perfect table for my space. I liked the look of the 4x4 legs, but my local lumber store did not have a good selection of 4x4 boards. So I used a 1x4 and 1x3 kreg jigged together in an L shape to get the look of the 4x4 legs. The overall table dimensions ended up 44" square by 31" tall.


Mon, 04/16/2012 - 18:48
Great make, will you help with the dimensions and size of boards you used? What did use use for the top and aprons? 2x6? Any info would help. This would be a perfect fit for my place
Sun, 10/27/2013 - 01:02
Is it necesery to drill holes on angle and what does it help (picture 3, under the table) ? Thank you
Sun, 07/13/2014 - 05:43
Love the way the color of the table turned out and the size boards you used on top. Where did you find the matching chairs? This is the exact color scheme of my dining room remodel. Thanks!
We were looking at buying this table at Restoration Hardware but couldn't get over the price. I love the look of the table but didn't want to take out a mortgage on it. Once I came across this plan, it was game over. Went out, got the supplies, and had it built before my wife knew what I was doing. It is built like a tank and even my kids can't hurt this! We get so many compliments on it , thanks!


Mon, 04/11/2016 - 07:56
Beautiful!! The chairs go perfectly with the style!
And BTW, what about that wine rack on wheels?!? Did you make it, too? Love that! :) Would love to see a plan for that!
Mon, 04/11/2016 - 12:48
Thanks! We found that wine rack at a store here in Phoenix. I thought about making one from scratch but I definitely was in over my head. We love it though
Tue, 04/12/2016 - 10:48
Thanks for the info on the wine rack! Maybe Ana can add it to her list to make and add a for us! Hint, hint, Ana! :)

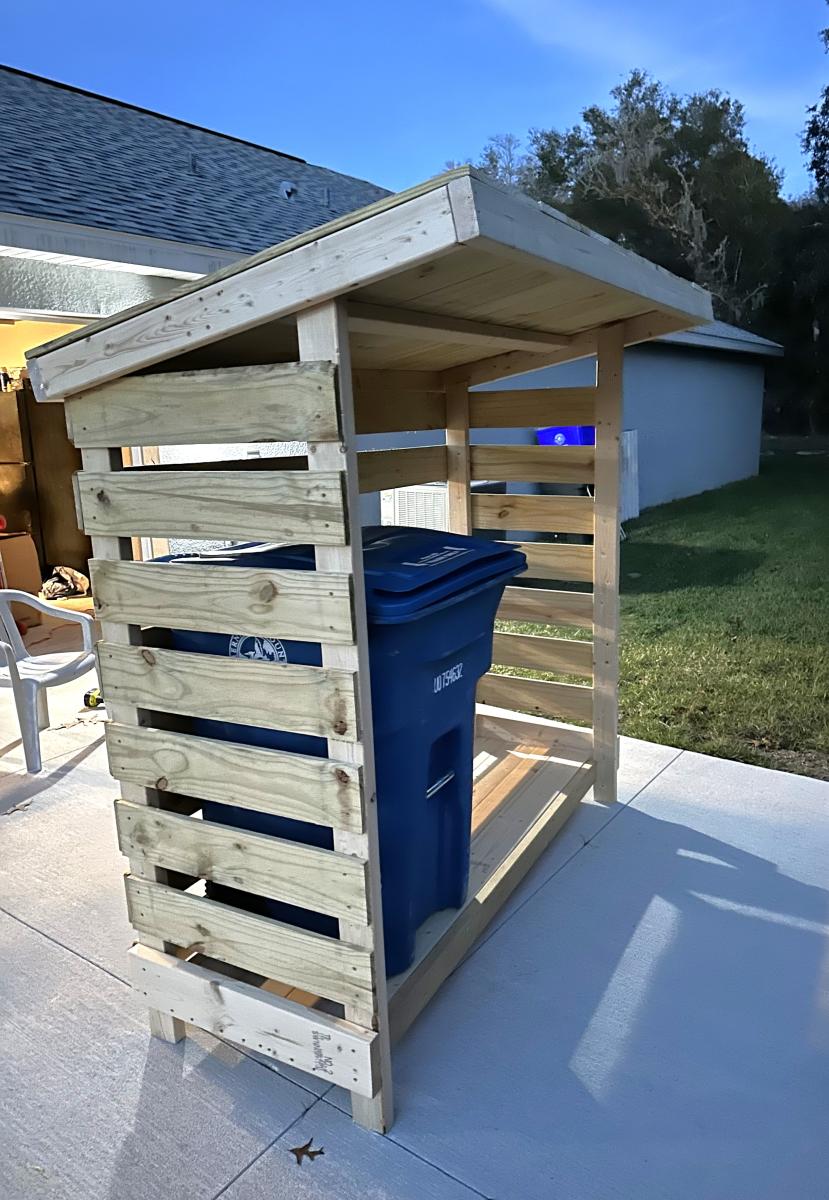
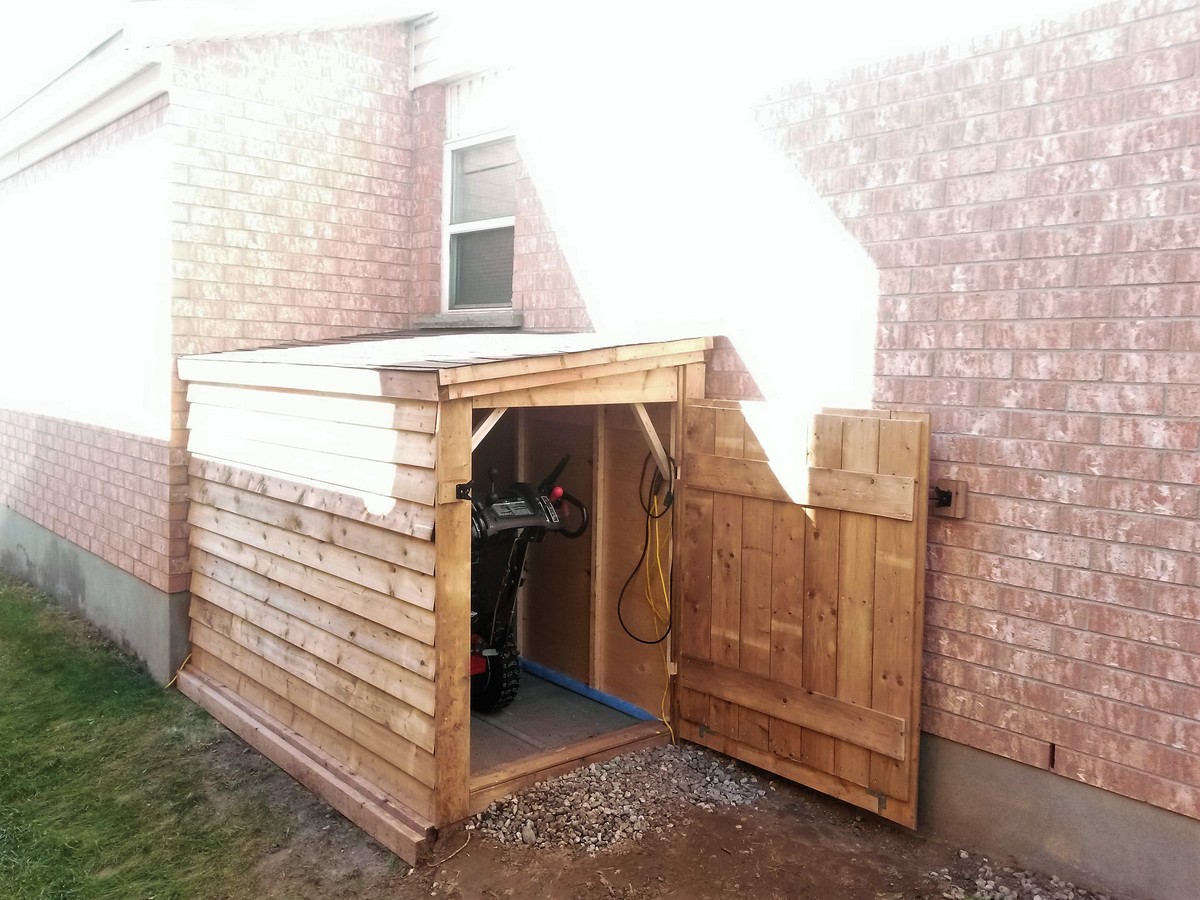
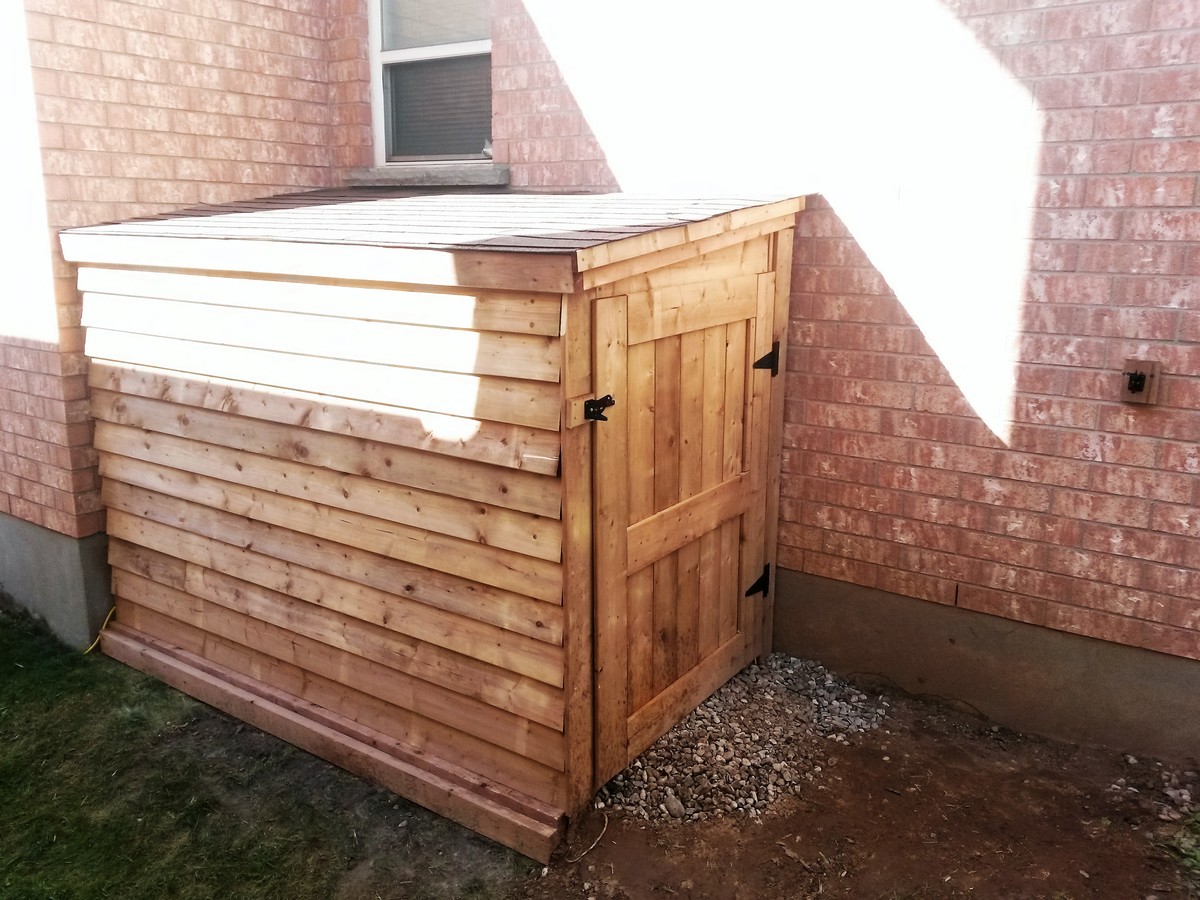
Chose the small firewood shed project as a "template" if you will .. built this to house our garbage cans and eventually put a gate on it to "help deter" the Florida black bears (we do multiple things to keep them at bay) but this will also just be a nicer looking way to keep the cans outside.
I modified the floor since the firewood shed had a floor that was suitable for, well, firewood but not so much for rolling garbage cans. Had to leave the one slat off the back for the depth of the can which I didn't completely account for in the beginning. Overall, still need to paint it and water seal it but happy with how it turned out.

Only slightly modified version of the Farmhouse console table.


I reduced the size of the 2x4 coffee table to make 2 end tables. They can be used as additional seating when needed.

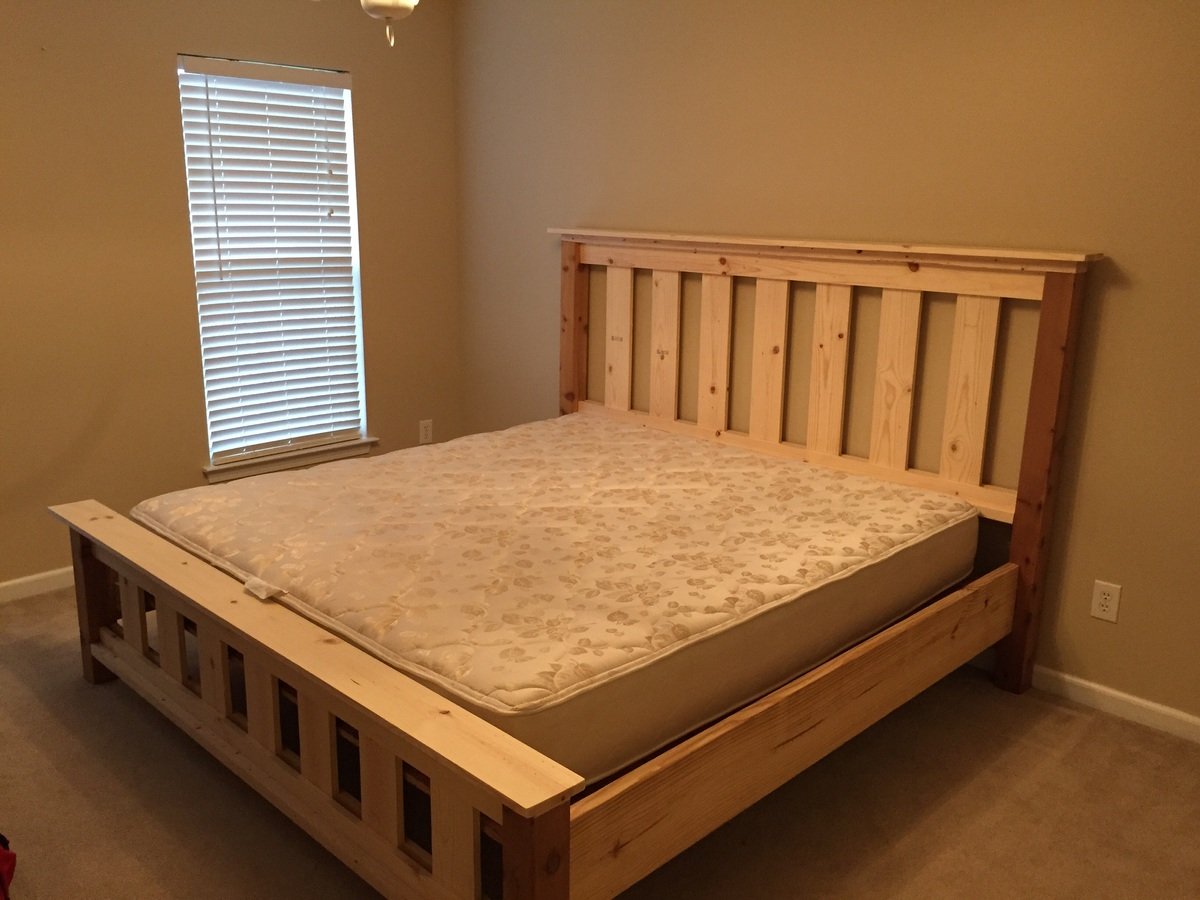
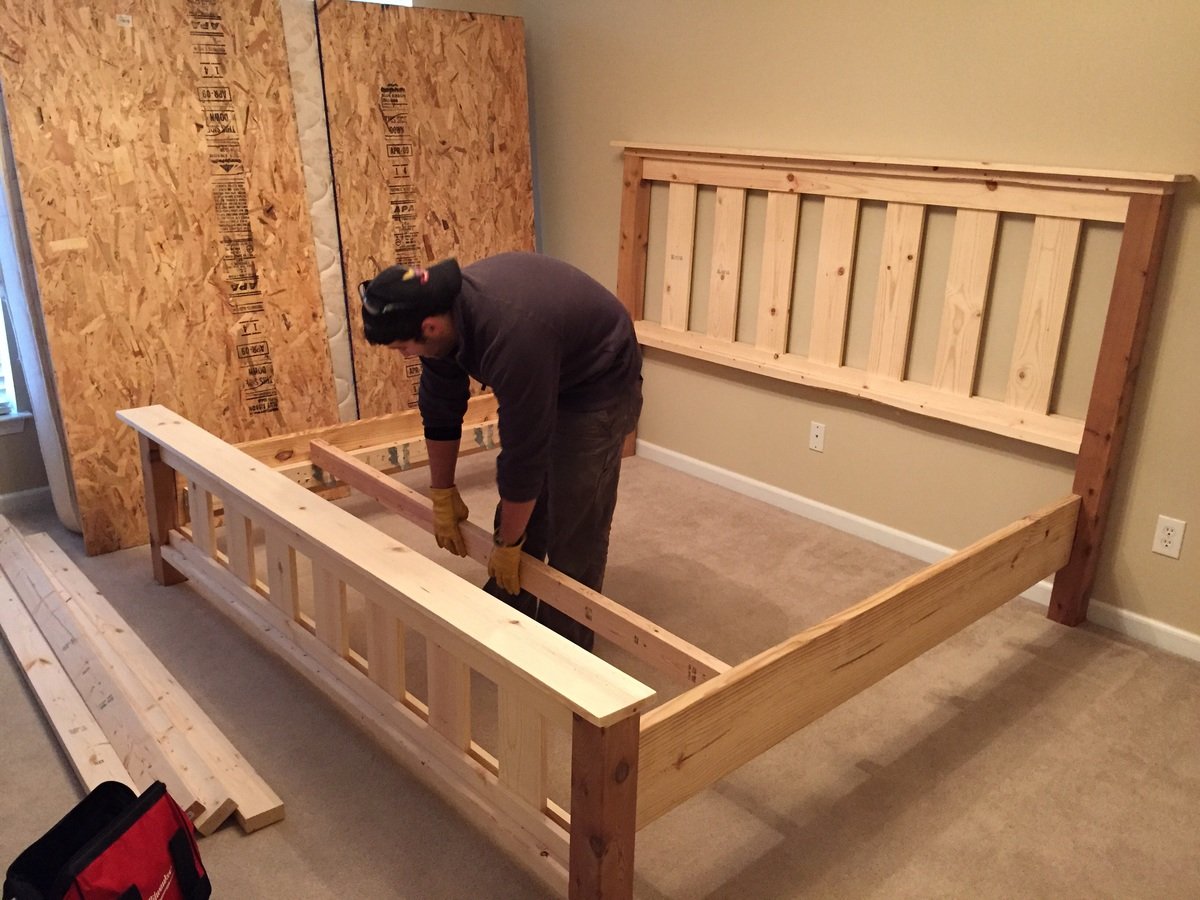
The project went relatively well. Had to readjust in order to fit our king. I used 2x4s and 2x4 joist hangers to support the mattres.
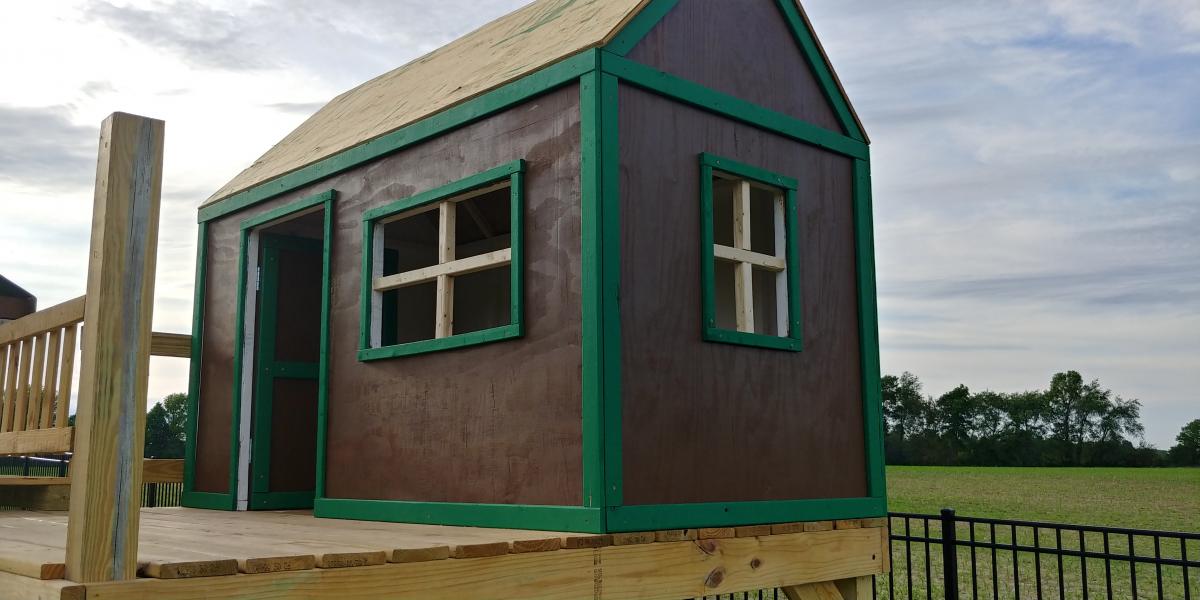
Loosely based on the small cedar fence picket storage shed plan, this was my first attempt at making a storage unit with a roof. There was only one unplanned trip to the store (to replace two 2x4's that I cut to the wrong length). Pro tip: "measure twice, cut once" doesn't work if you measure the wrong length twice. Also almost lost two fingertips because I'm an idiot and forgot the most basic of safety rules for power tools, namely the "don't put your fingers near the blade of a circular saw when it's in use" rule. Very lucky to only come out of it with a good scare and some wounds that will heal without permanent damage.

This was my first project. I am pretty excited how it turned out. If I did it again, I would recommend sanding and painting prior to building.
Your easy to follow 2x4 proje ts turned out amazing. My outdoor set is complete. The chairs, also, came from your plans. I built all of it by myself in one weekend. Thank you
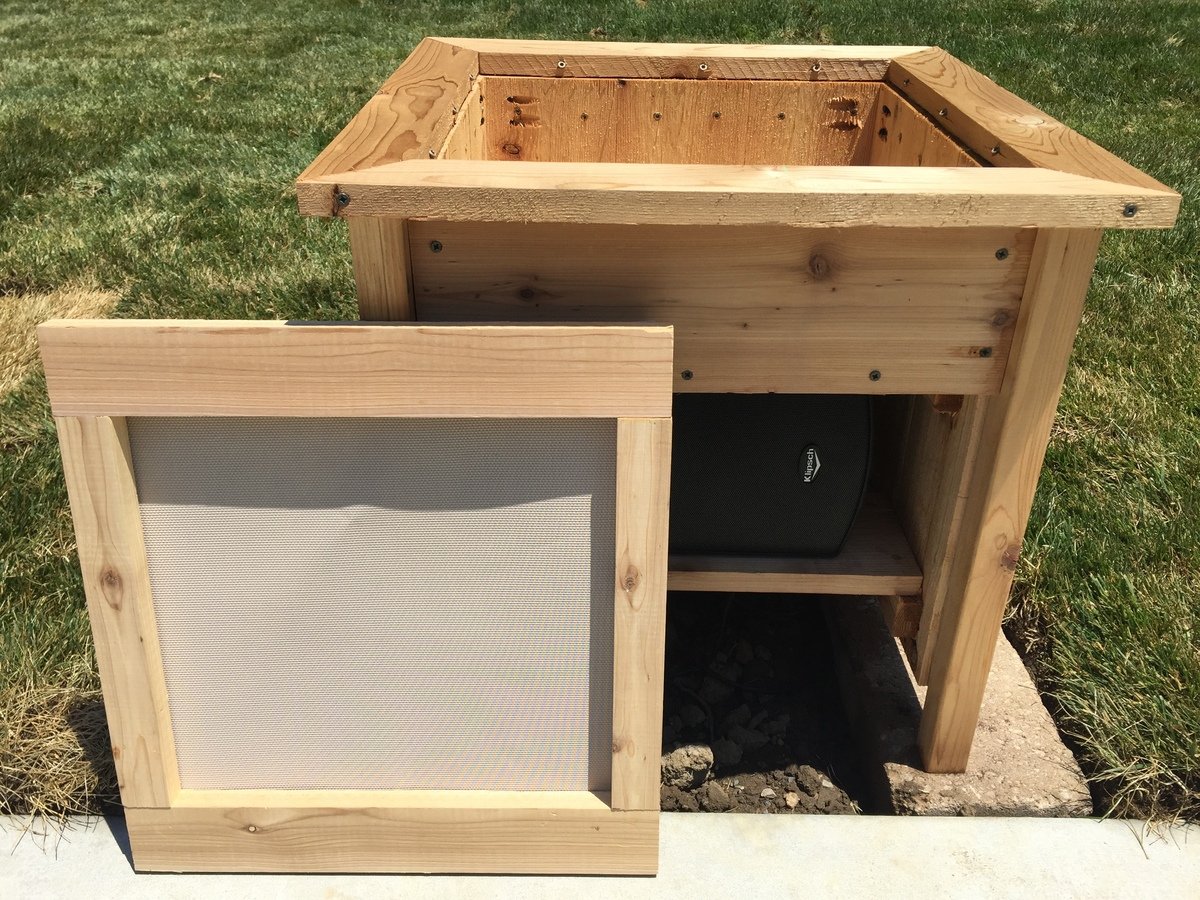
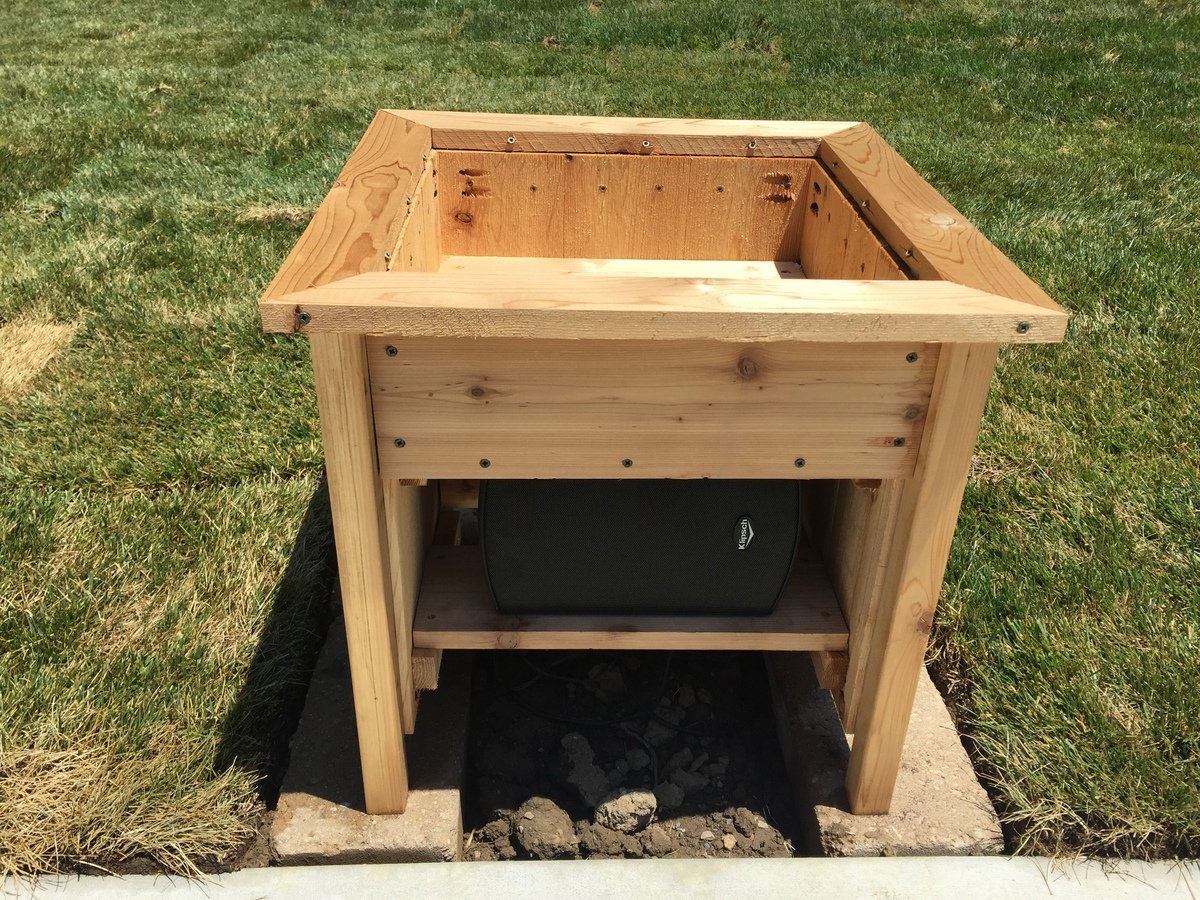
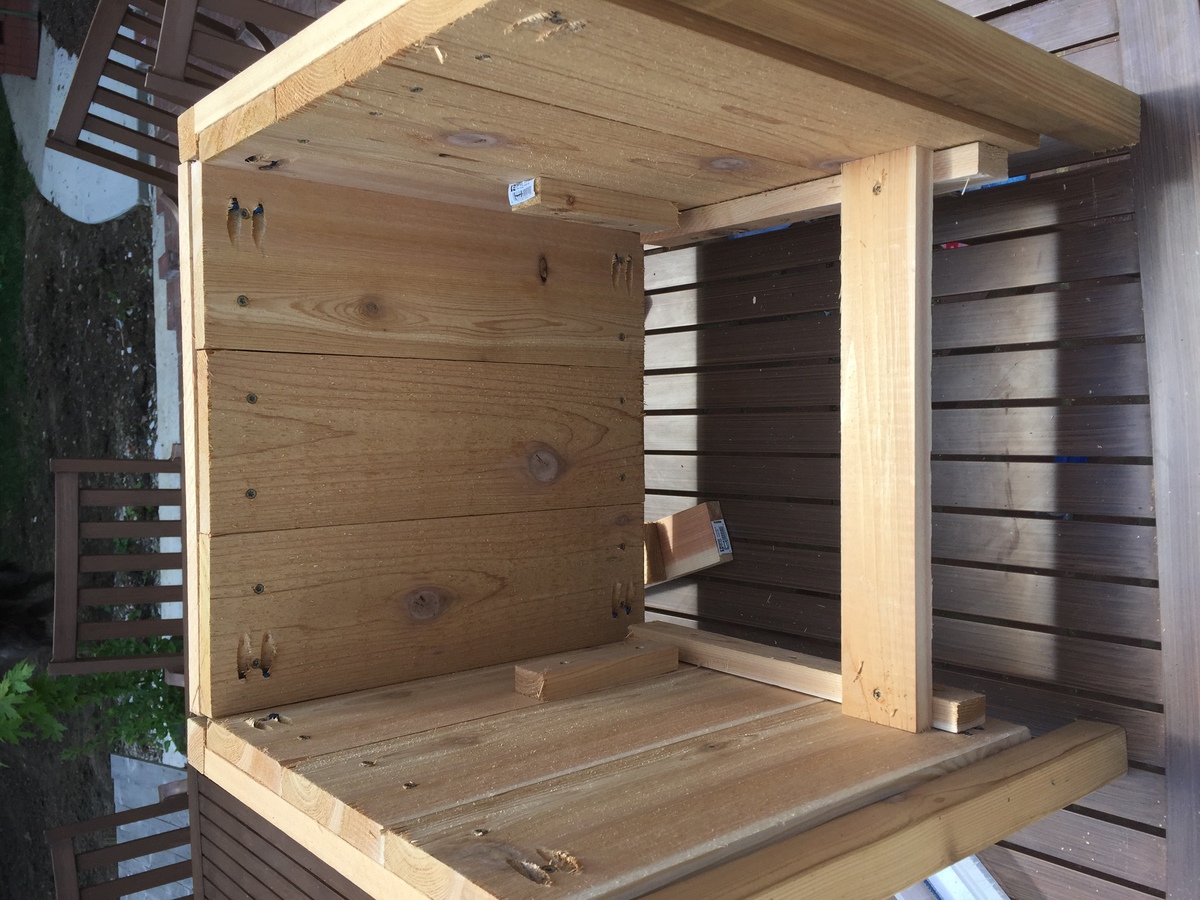
We just put in a pool and I needed something to hide a pair of outdoor speakers. I used Klipsh AW-525 speakers.
Basically I raised the bottom of the planter enough to fit the speaker under and had to add a few framing pieces to secure the speaker mount to. The mount attaches to a vertical board and the weight rests on a horizontal board. The wiring comes up from below.
The front panel uses vinyl mesh from Sailrite.com to hide the speaker but allow sound out. Imm planning to hang it with magnets if it doesn't distort sound too much.

Practically to spec. (When I make a mistake I adjust to accommodate :) if possible)
Ana's plan was exactly what I was looking for. Love the result. Love pocket hole screws!

My wife and I were looking for a larger table for our deck and after searching and seeing that everything out there was 300 dollars and up for something decent I decided I would try building something. This table was perfect for our needs and looked easy enough for me to put together. The most time consuming part was staining all of the boards as I went but it was totally worth it in the end. I also deviated from using screws and used my nail gun along with some glue to put the top frame together and the slats on but I did use some 2inch deckmate screws to attach the legs. One problem I did run into was I was about half a board short on the slats which wasn't a big deal just ripped one on the table saw, not sure if I miss measured or what but either way. We love our table and will entertain around it for years to come.

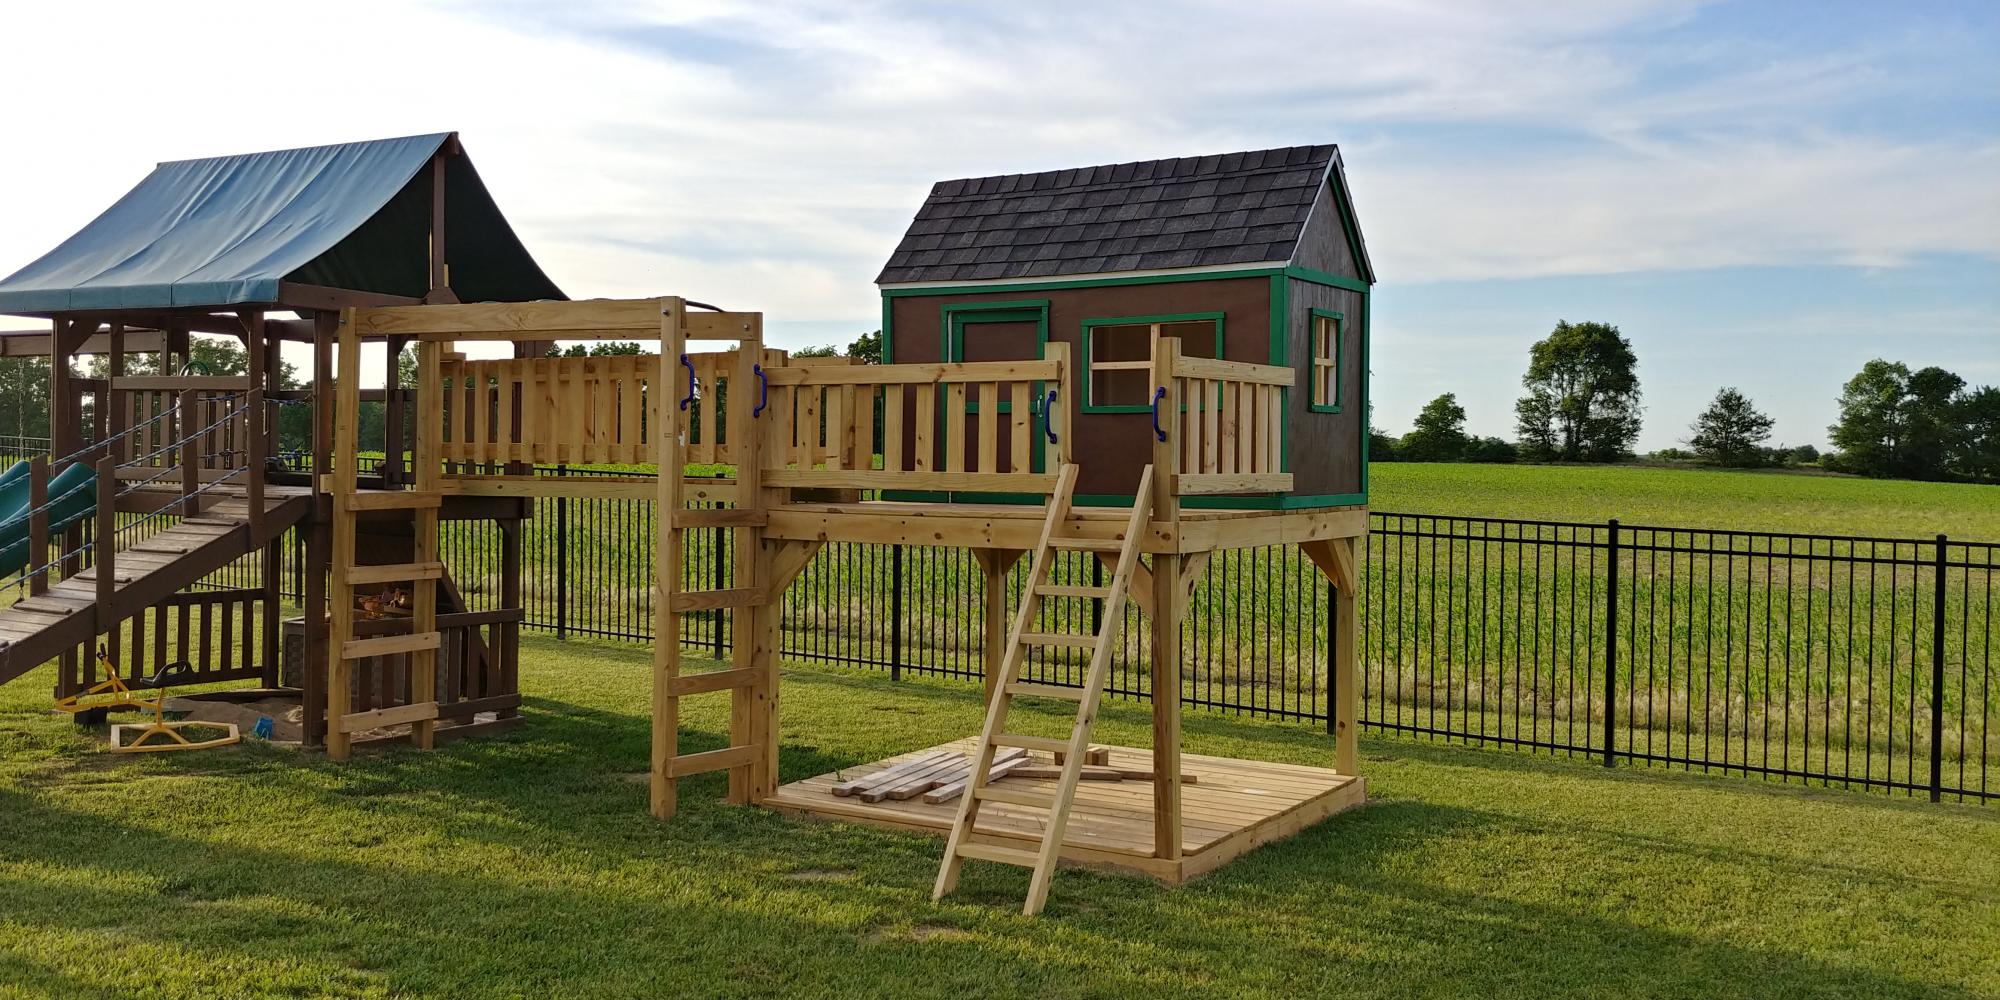
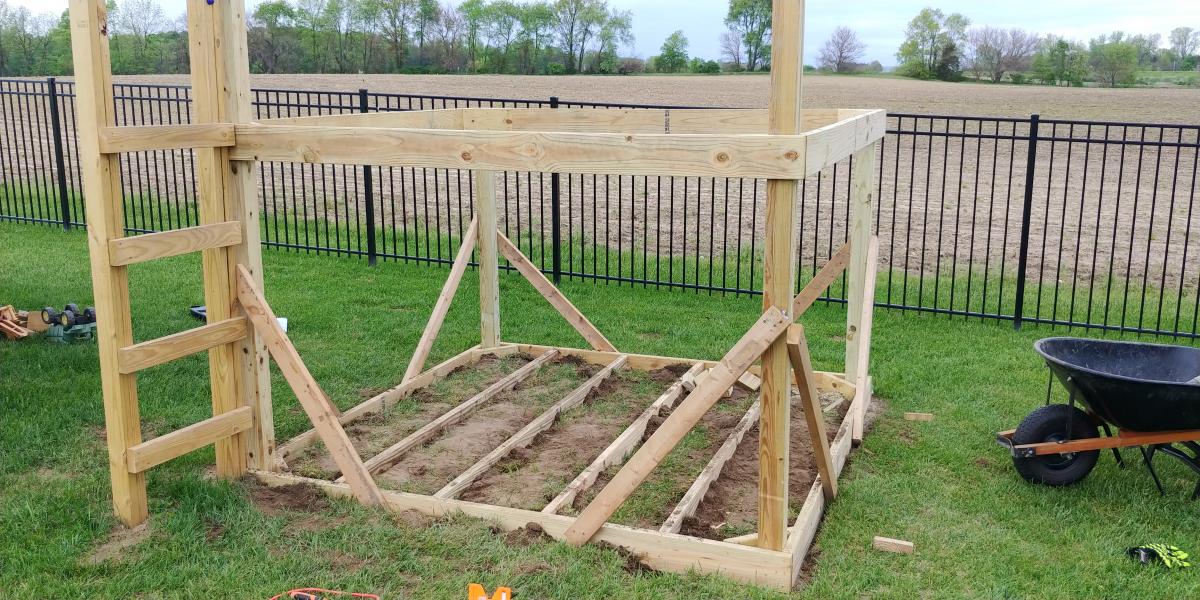
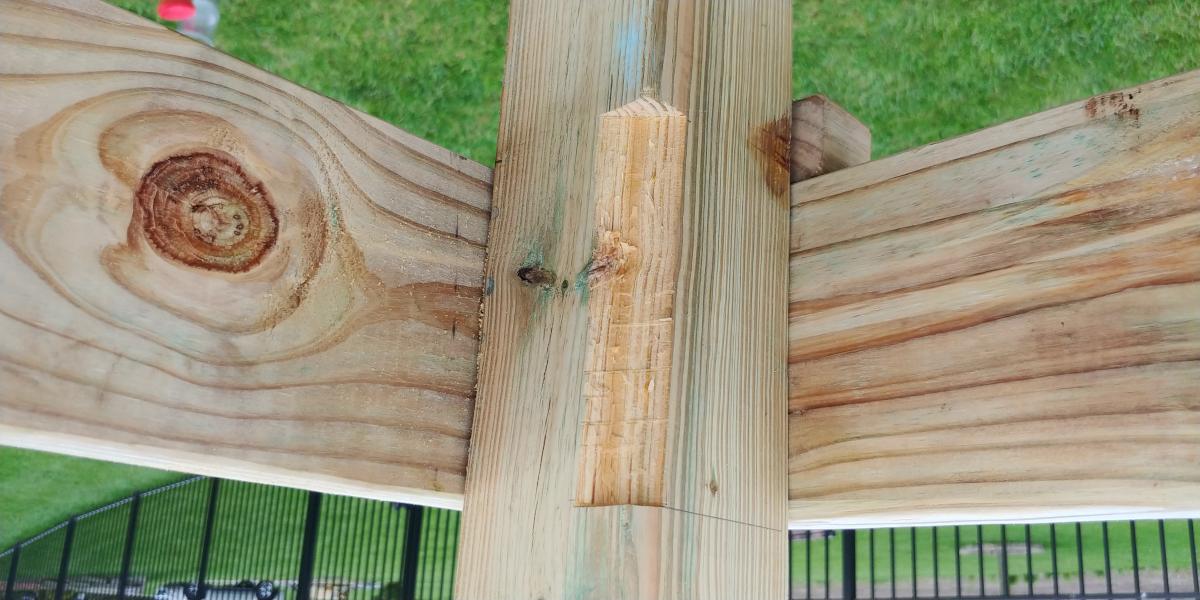
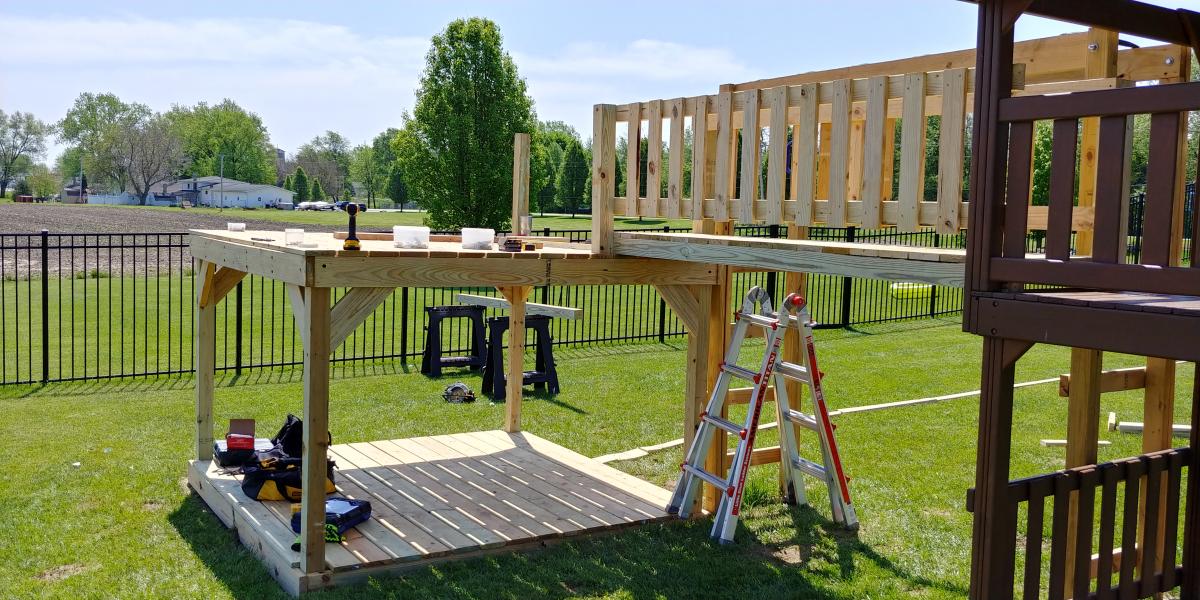
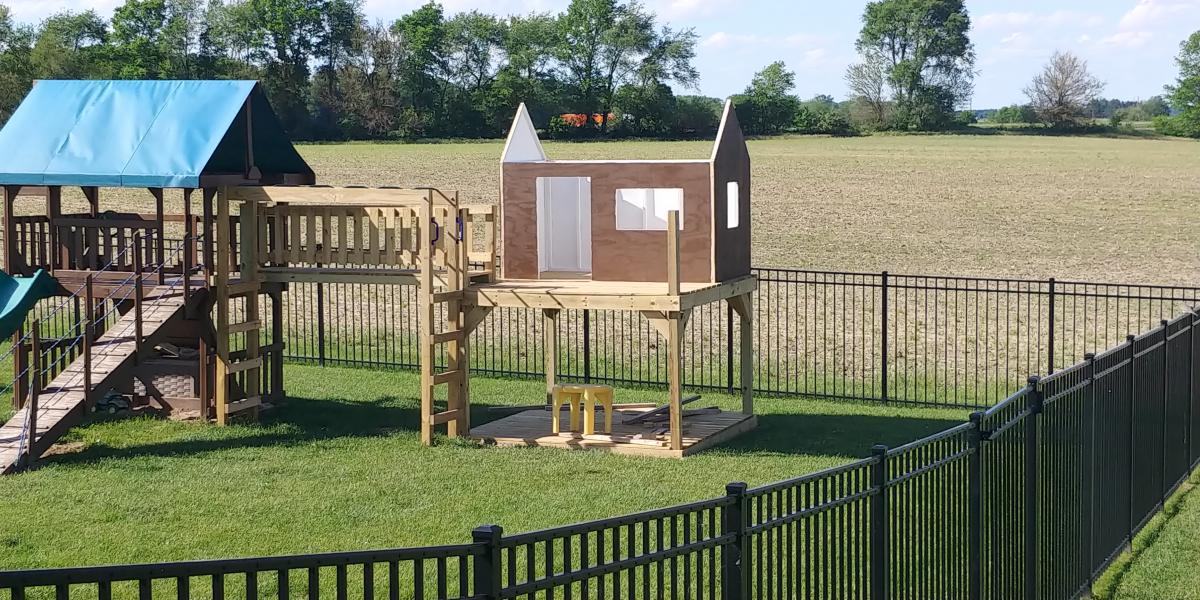
Decided our old play set needed an addition, landed on these plans of Ana's. Sat on them and mulled them over for months. Once the wife said something about adding on to it I made the purchases needed. Connected the two platforms with a bridge. I used 4"x4"x10' for the runners, same boards as the decking for the platform of the bridge(5/4"x6"), 2x4's and 1x4's for the railing. If you look at the 3rd photo, I had to chisel out the 4x4 post to get the 2"x6"x12" support to fit correctly. This should measure 2"x6"x13". Another change I made was to cut the bottom and top trim pieces longer on the front and back sections so that the trim would cover the framing of the gable end walls (see last photo). my son wanted windows so I faked in some windows with scrap 2x2's. I used 2x6's as supports from the 4x4's to the 2x6 framing (see photo 3) I added the monkey bars about a month before deciding to do the platform/deck and playhouse. The ladder is based loosely off of a couple of plans I found online. I was able to do all of this work myself except for the roof. Need my dads help to lift the plywood, he then helped me with the rest of the roof.
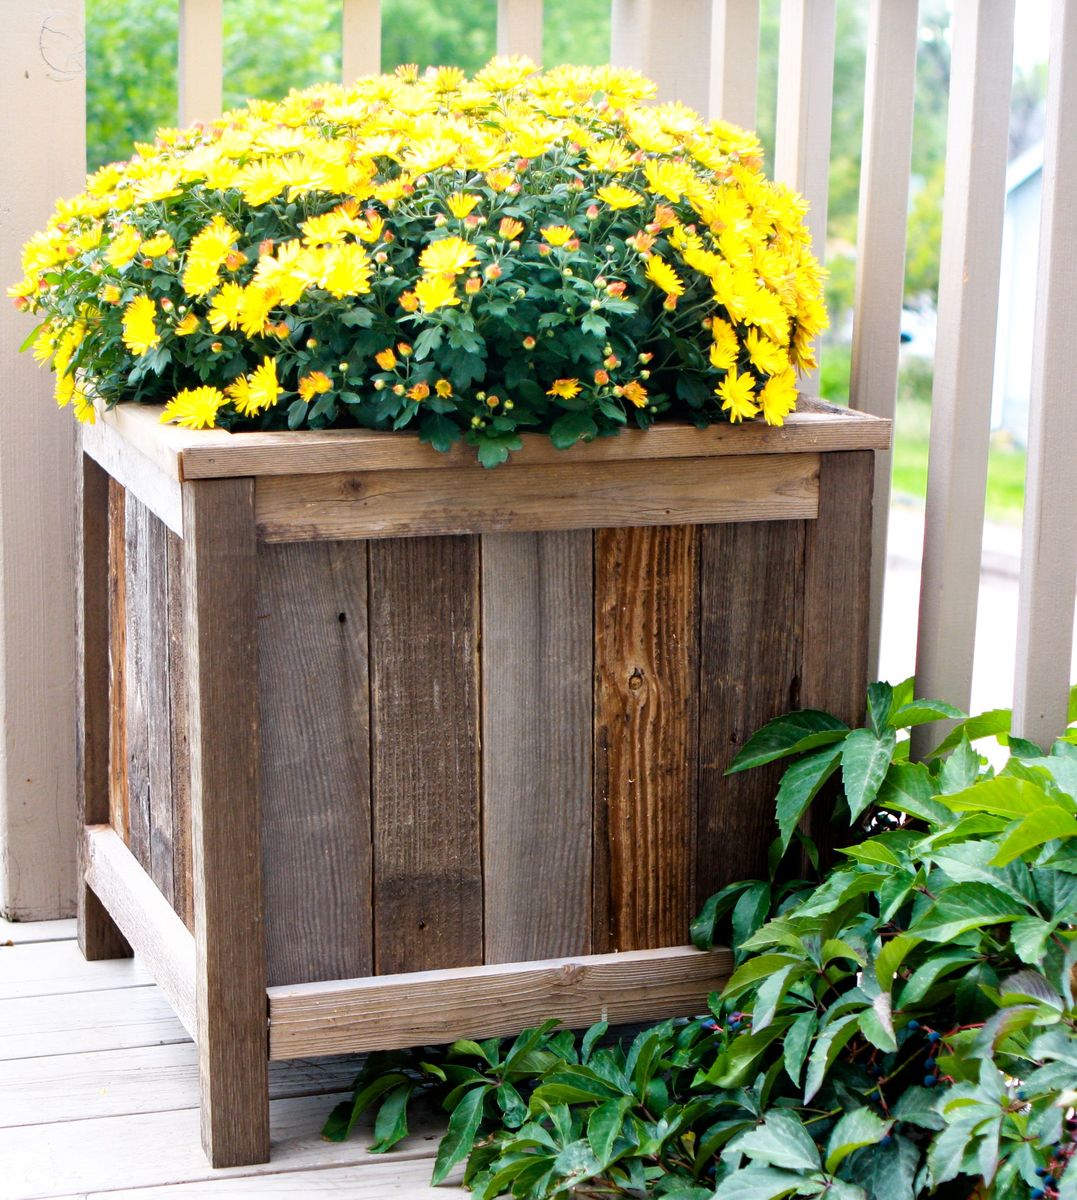
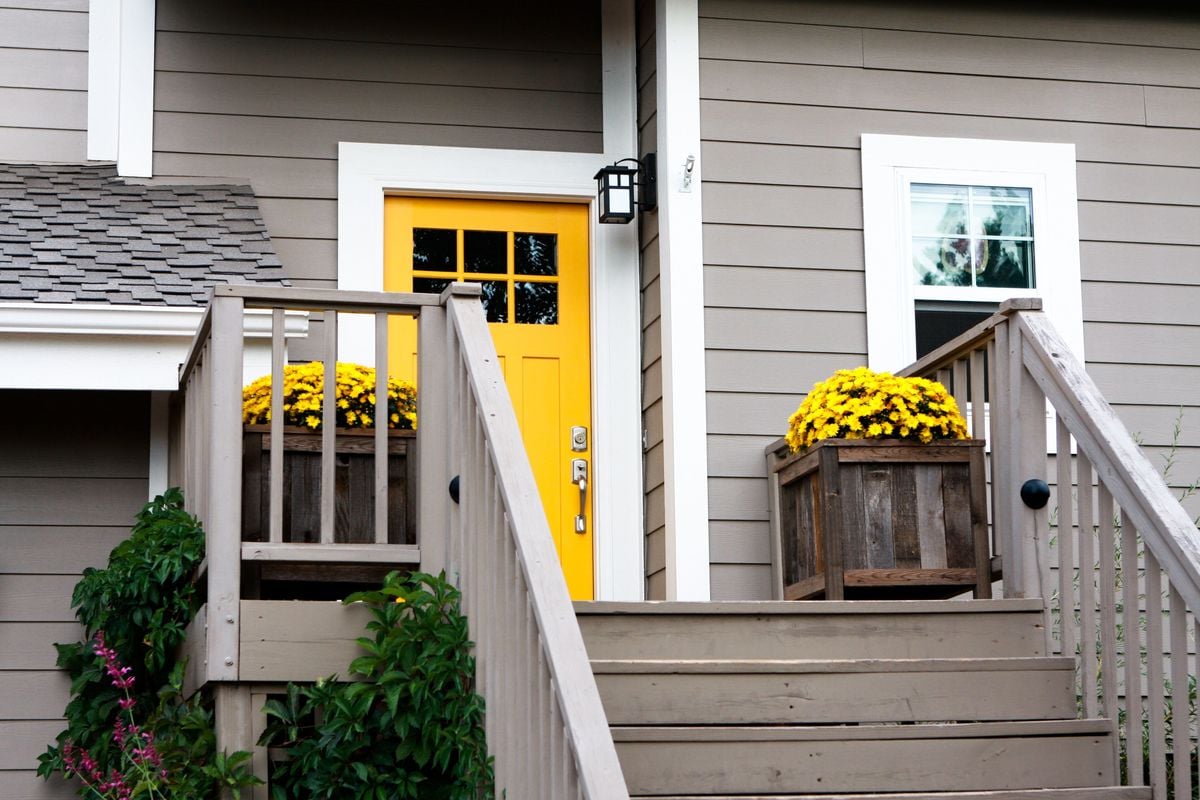
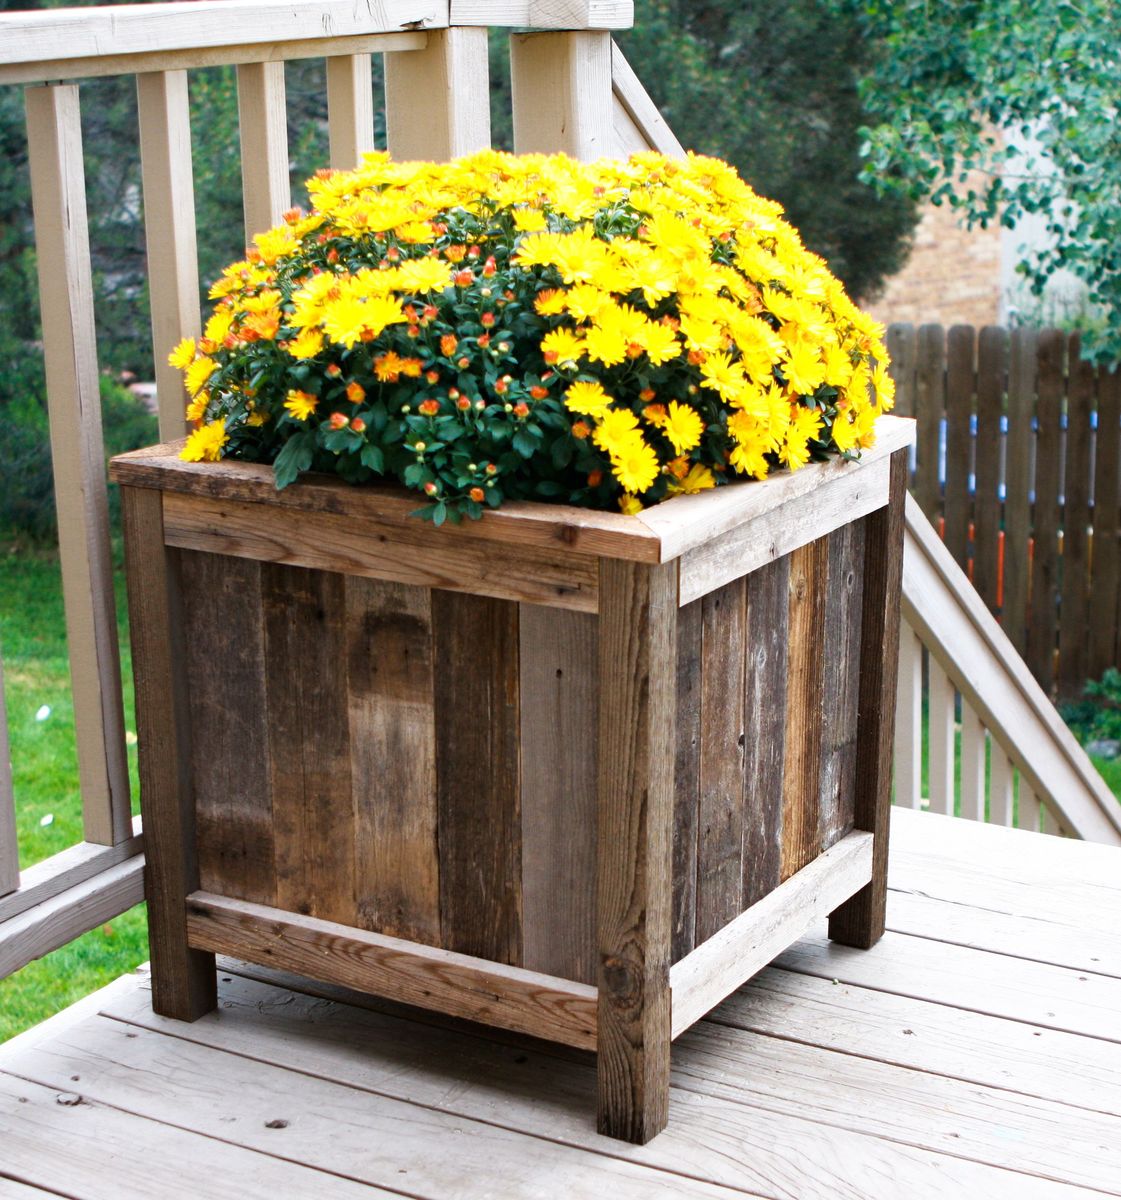
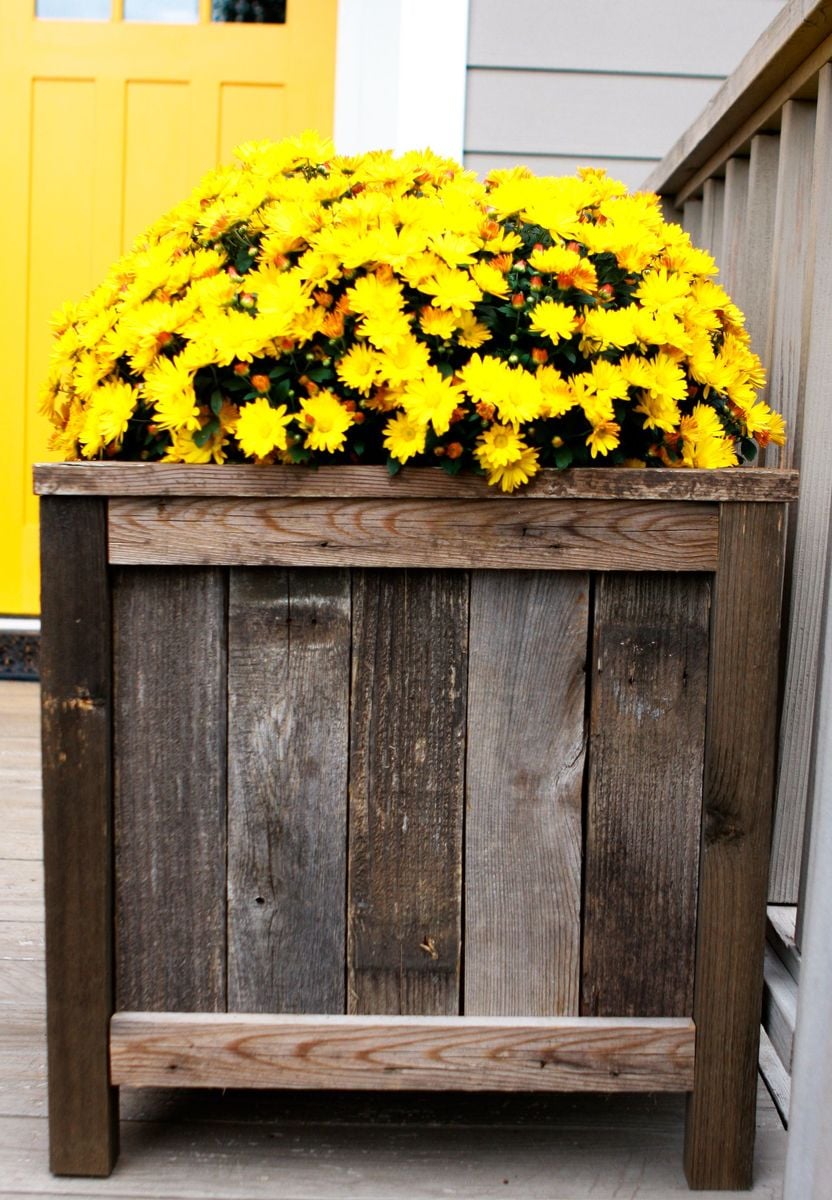
I built Ana's under $20 cedar planters for free. Or, almost free! I had to buy some more wood glue, but I had some of the wood on hand and took some from a friend's pile of old fence wood. It took me about five hours to build both planters from start to finish. See the blog link below for more info.

Tue, 09/08/2020 - 16:12
This is great. I just tore down my old fence and have tons of old cedar pickets. I want to make some planters for my new patio.

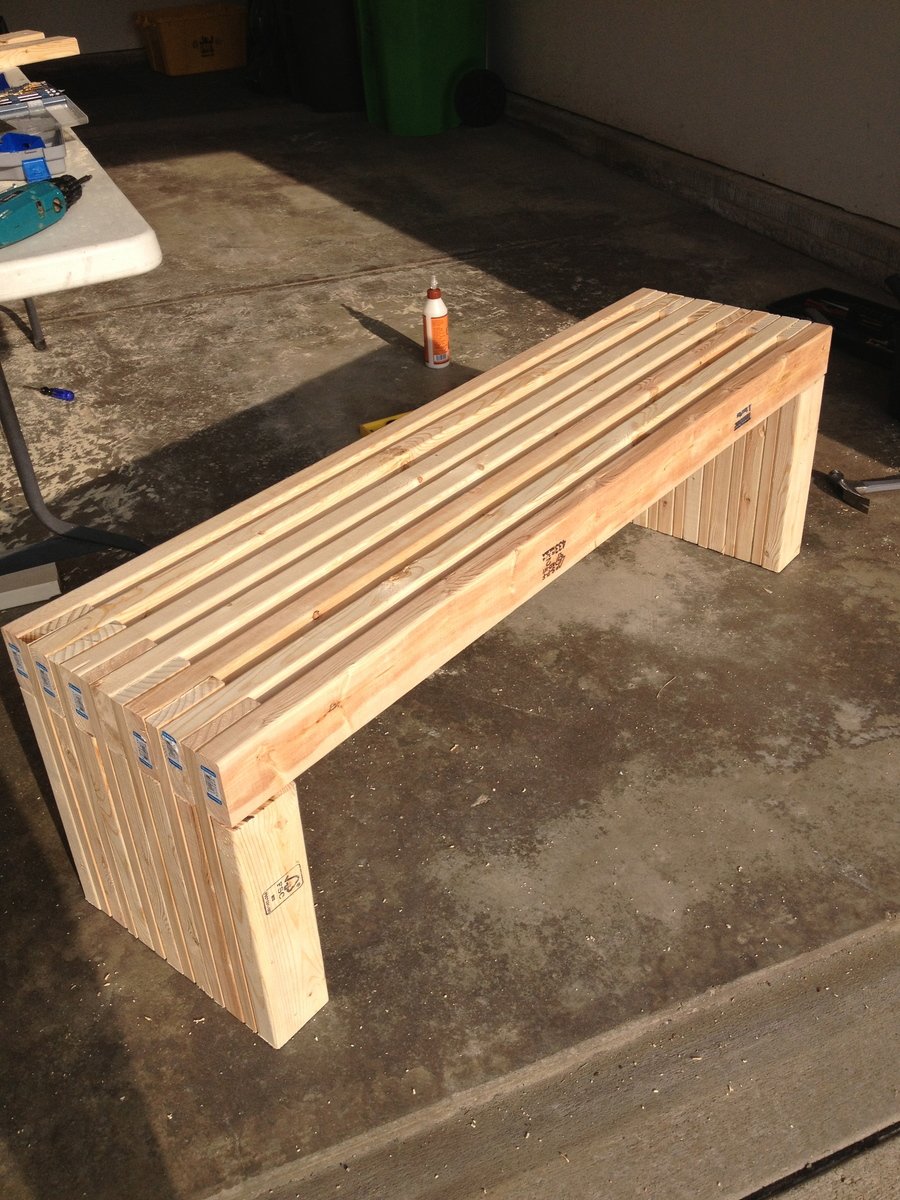
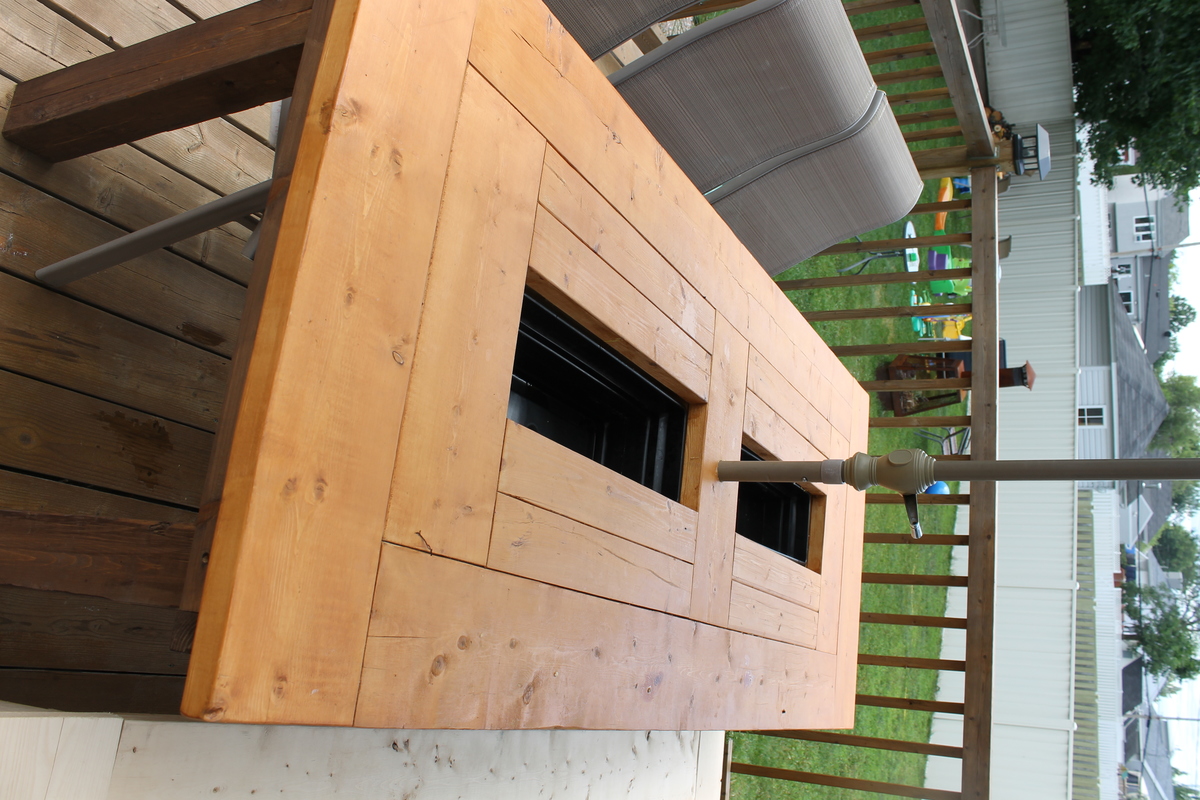
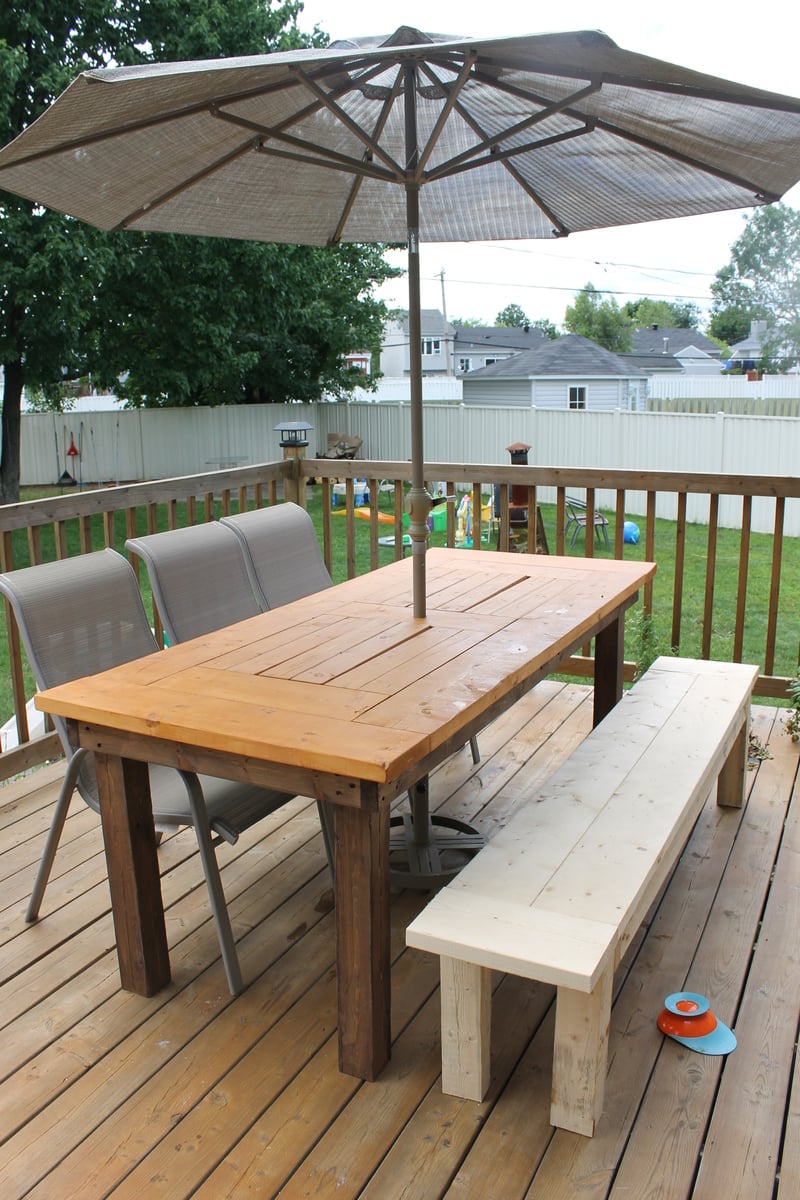
My sister was in love with my 4x4 truss table i made and needed a patio table so we decided to take one day to make 2 tables, one for each. We convinced both daddys to take care of the kids while we made the table by telling them the tables were gonna have beer coolers inside! Attaching the to of the table was a lot a job. If you plan of doing this you really want to have a kreg jig. It works well, we love it. I made a bench to go with it. I made my how plan for it.

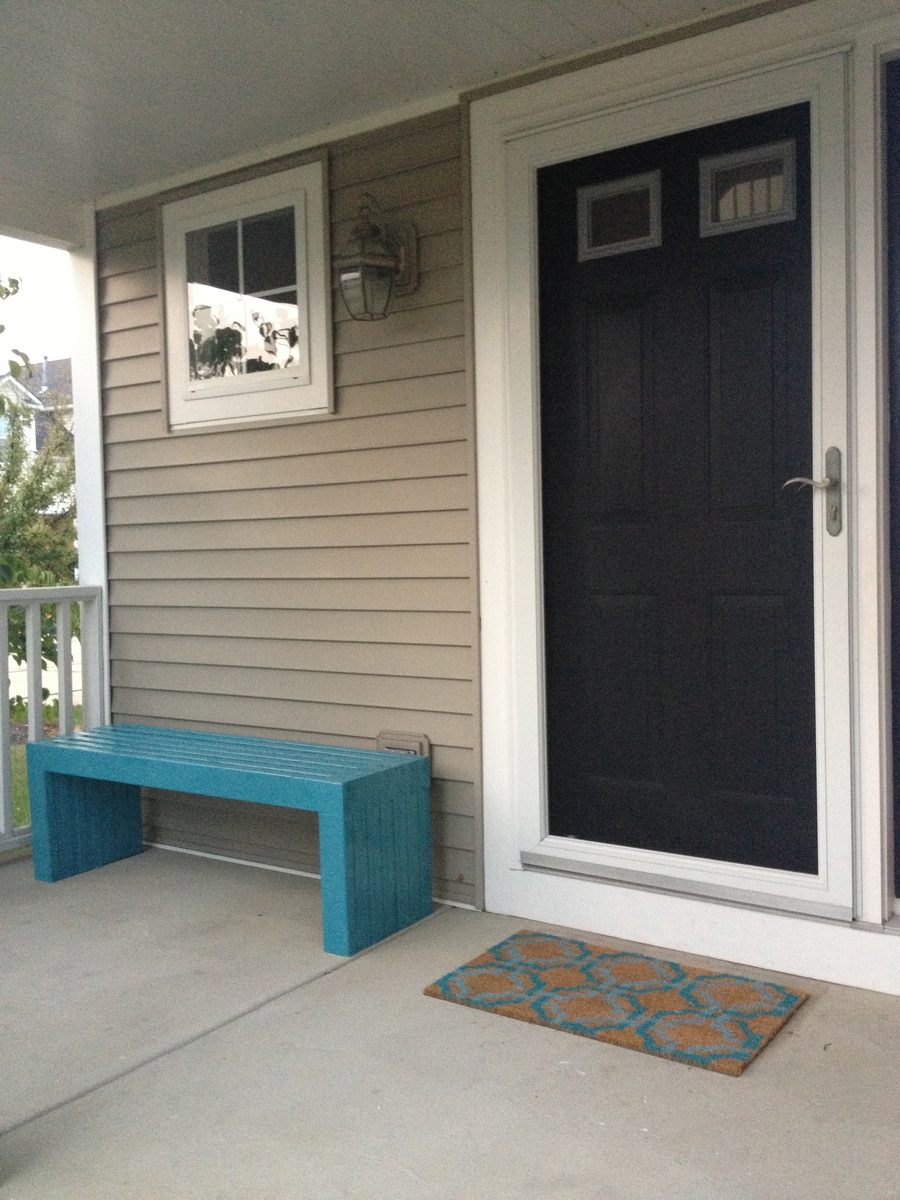
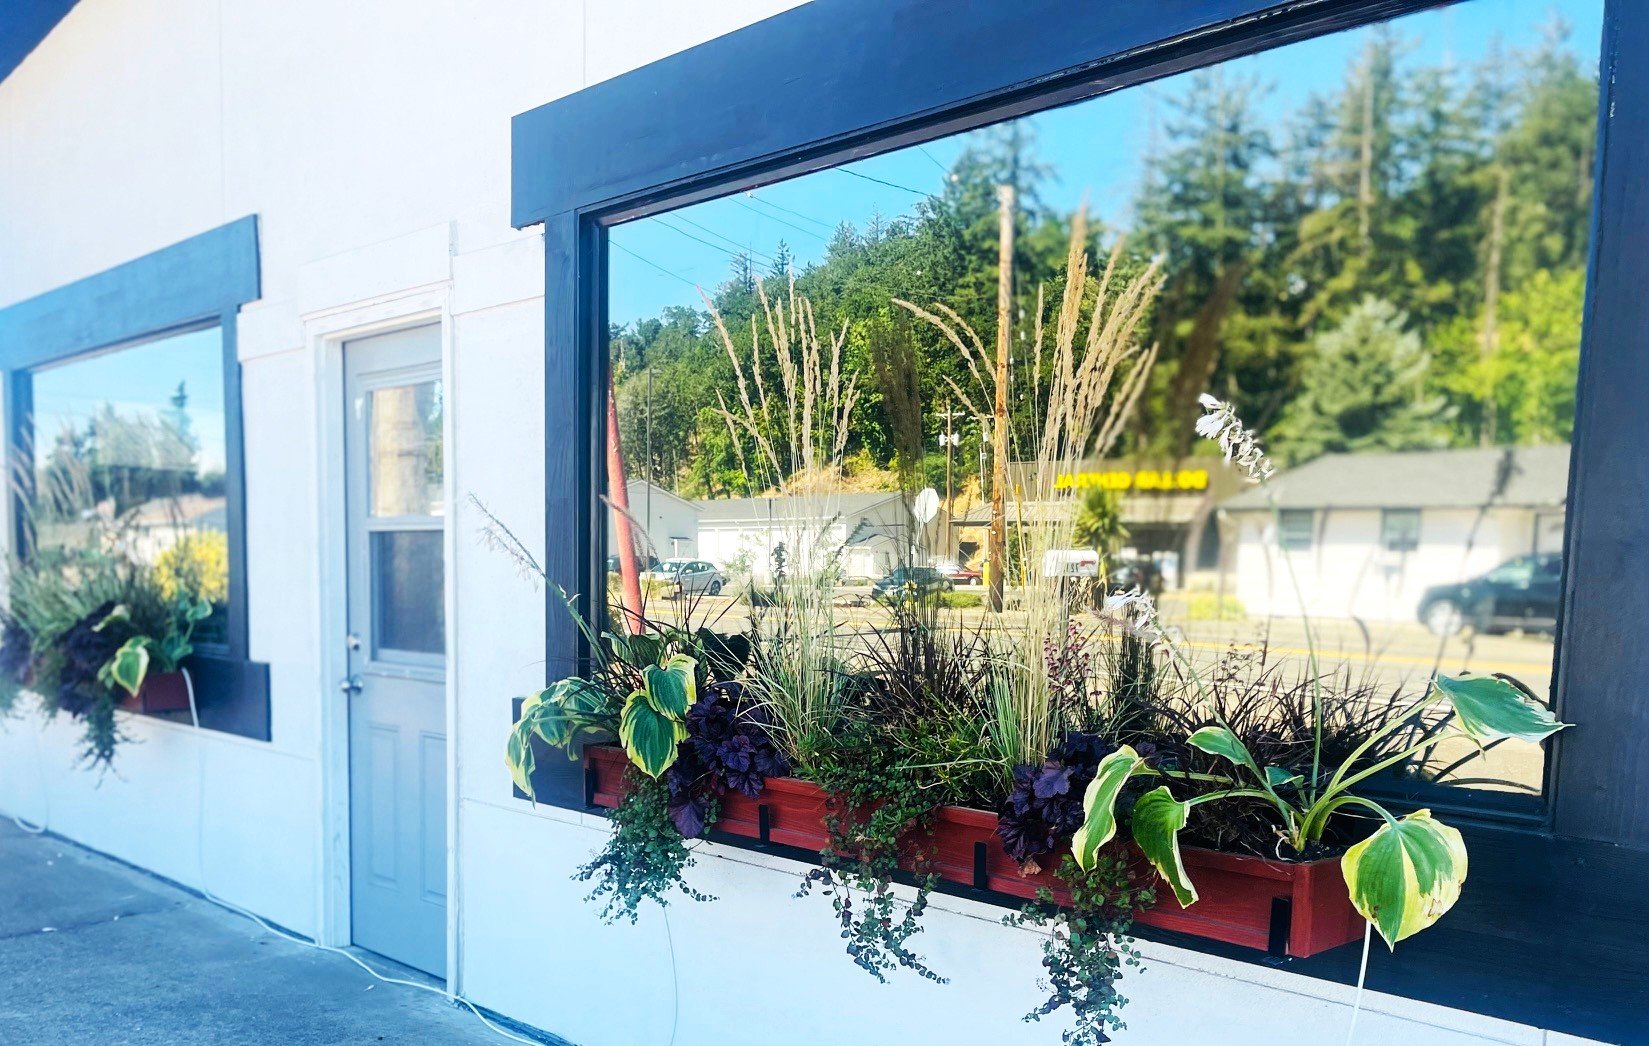
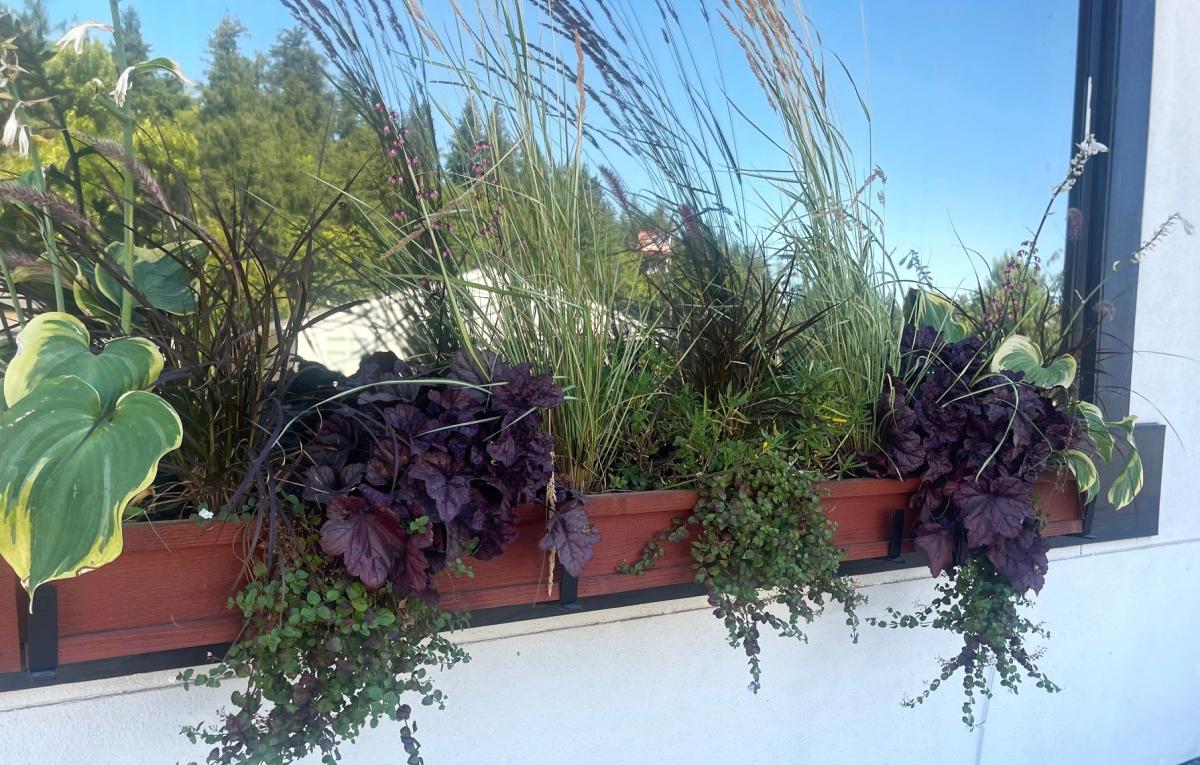
Awesome Ladder Planters with Refresh! See finishing details @kristinliarestoration


Comments
Ana White Admin
Tue, 01/10/2023 - 09:59
YAY!
Love the set, well done!