
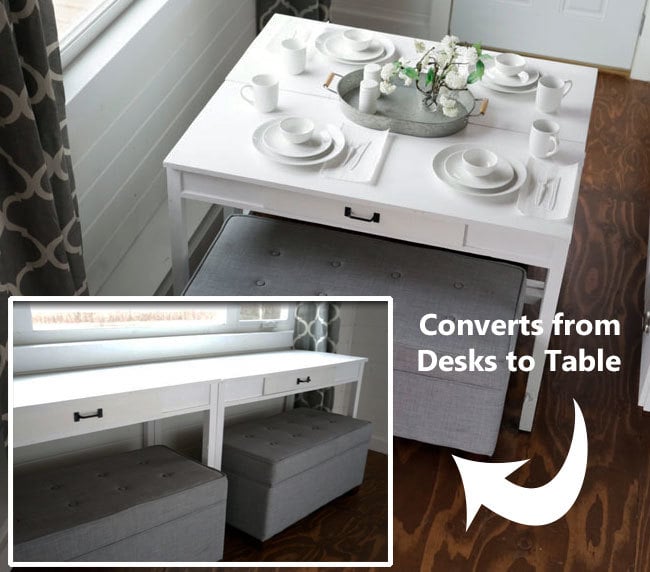

Clever desks that convert to a dining table. Easy DIY plans by ANA-WHITE.com
Man you guys are all the smartest!
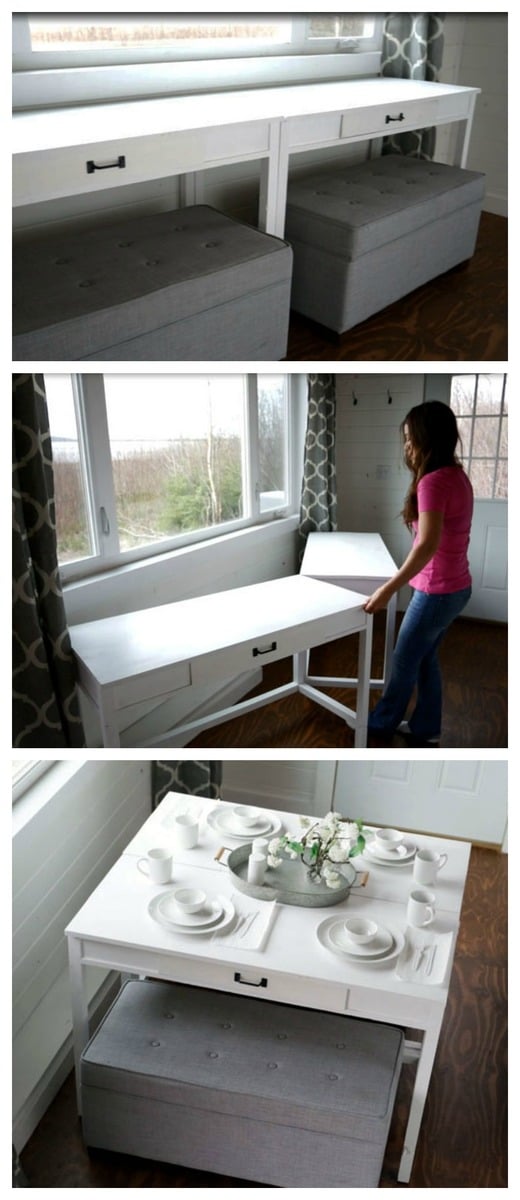
Last week when our DIY desks that convert to a dining table for our Tiny House went live -
Several of you noted that the drawer in the desks only took advantage of about 1/3 of the storage space that it could have. I originally intended for a larger drawer, but the tabletop needed extra reinforcement, so ended up downsizing the drawer for structural reasons.

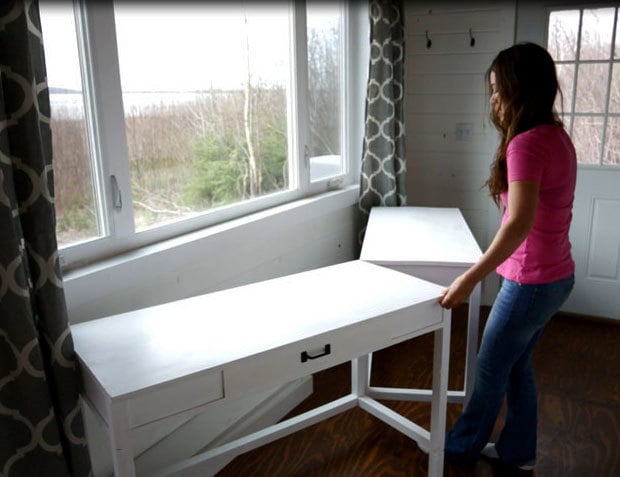
So why not have a flip top? You guys are too smart. Not only does this increase the storage by quite a bit - but this design is easy to build and less expensive. Too good not to do a plan for you.
Just in case you missed the video for this project, here it is -
And the plans follow for the flip up desk.
Enjoy the rest of your week!
Ana

Preparation
3 - 2x2 @ 8 feet long
2 - 1x4 @ 6 feet long
1 - sheet of 3/4" thick plywood (if the desk was made 3" smaller width wise, only 1/2 a sheet of plywood would be needed)
Edge banding in matching veneer(about 15') for finished plywood front edges
Simple butt hinges (3" recommended)
Soft close hinge support (set of 2, right and left hand)
PER ONE DESK
4 - 2x2 @ 29-1/4" (Legs, may need to shorten some legs if building over tiny house wheel wells)
2 - 2x2 @ 15-3/4" (bottom stretcher)
2 - 1x4 @ 15-3/4" (side aprons)
2 - 1x4 @ 48" (front qand back aprons)
1 - 2x2 @ 48" (bottom back stretcher)
1 - 3/4" plywood @ 51" x 18-3/4" (bottom)
1 - 3/4" plywood @ 51" (no side overhangs) x 19-1/4" (front overhang is 1/2") (top)


Instructions
Step 1

Build two of the legs sets per table.
Step 2
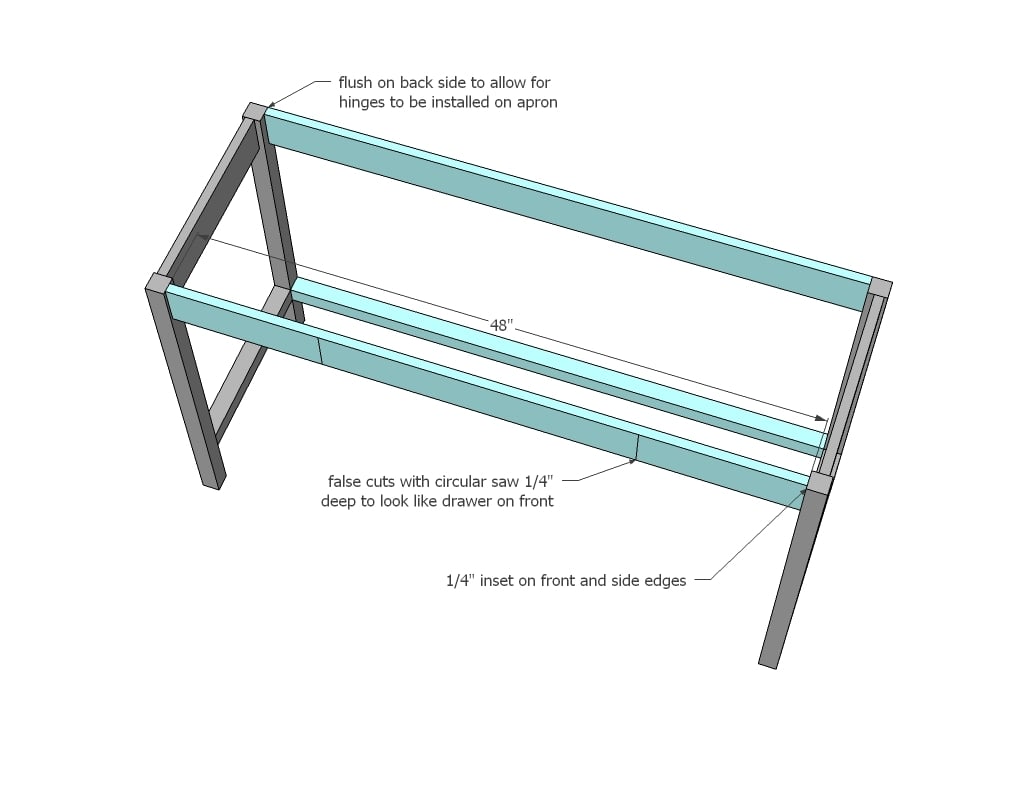
Attach the two leg sets togeter with the aprons and bottom stretcher. Adjust for square.
Step 3
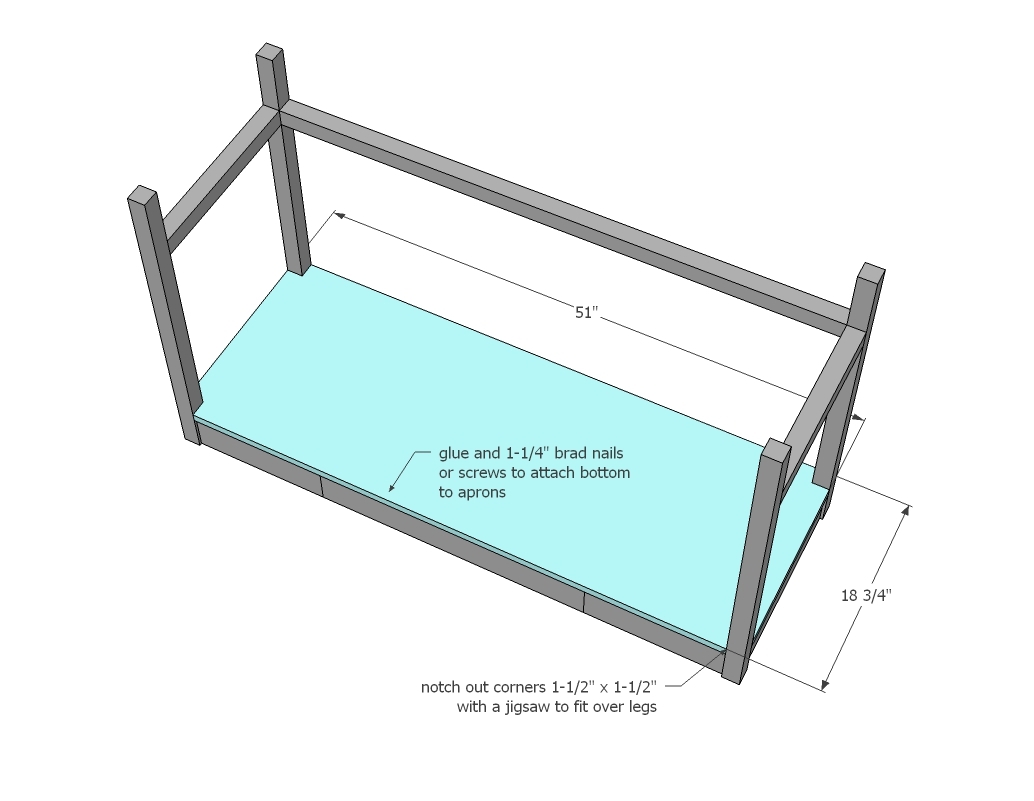
Notch out bottom plywood for legs. Apply edge banding if staining to front and side exposed edges of plywood. Place plywood inside the project and nail and glue down, or use screws.
Step 4
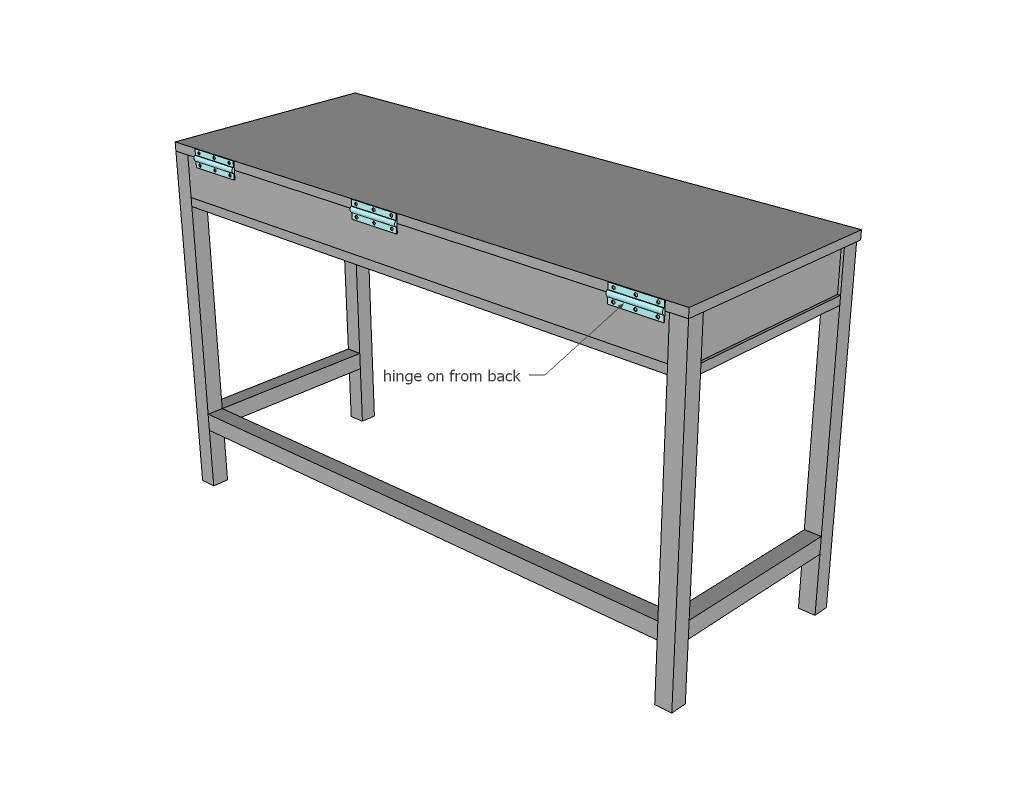
Apply edge banding to the front and side edges of top if staining. Hinge top to back. Also add a hinge support to soft close the top.

Comments
Ridbig
Wed, 09/09/2020 - 19:23
The link for the pdf file…
The link for the pdf file doesn't work!
JPAce
Fri, 10/02/2020 - 08:06
Question: Hinge Connecting desks
On this version of the plan, there is no mention of the hinge to connect the two desks to make the table.
Is that not needed on this?