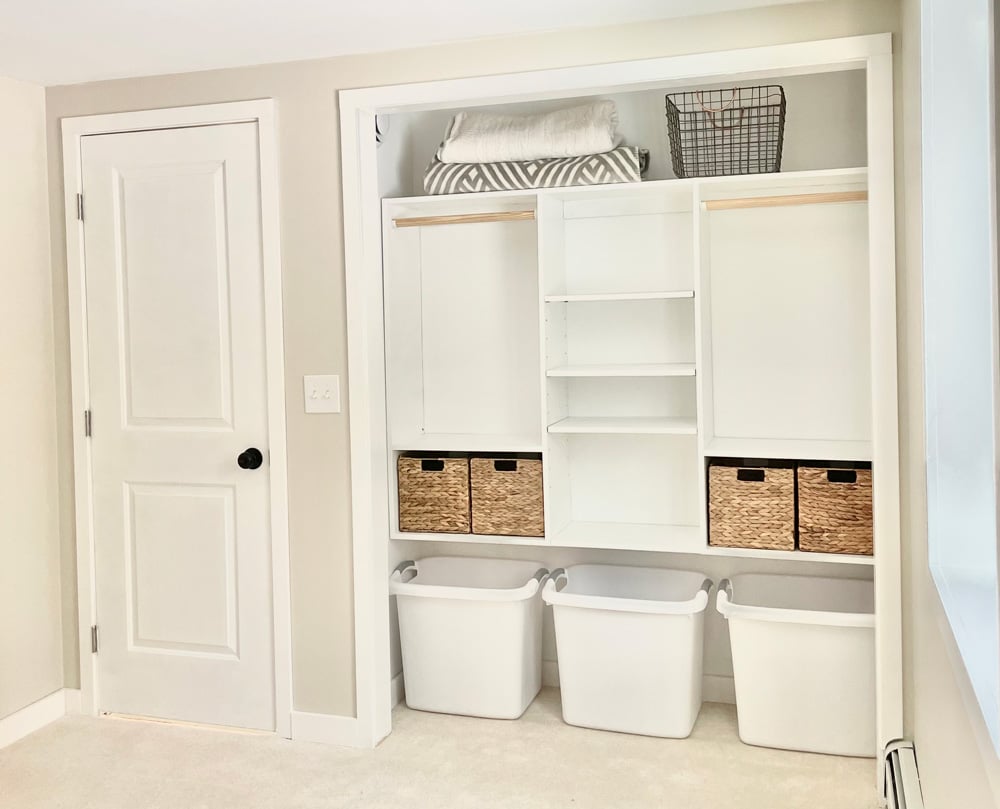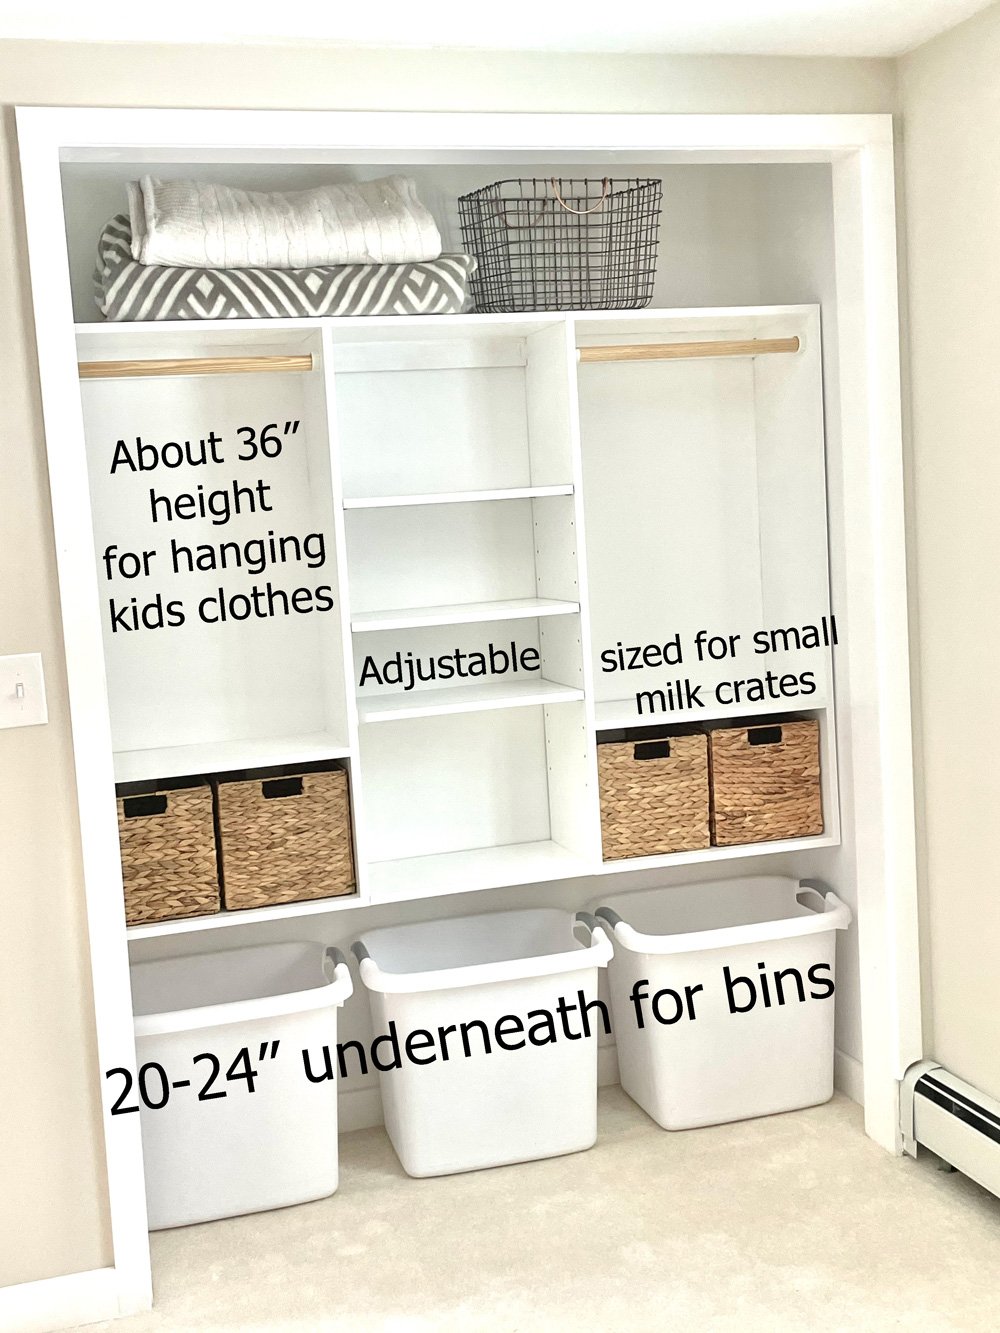
Build your own full width kid's closet organizer, no matter the width of your closet. We love the open bottom perfect for toy bins, the shelves at lower heights so littles can easily access their favorite clothes. And there's even a little hanging space for mom (to hang those cut outfits!).
Pin For Later!

Preparation
- 3/4" plywood ripped to 11.25" (as needed for your closet design)
- 3/4" edge banding for finishing front edges of plywood
- 1 - 1x3 in the total width of your closet interior
- Pocket Hole Jig set on 3/4" setting with 1-1/4" pocket hole screws
- Optional Shelf Pins for adjustable shelves and Shelf Pin Jig
- 3" wood screws (self tapping star bit recommended) for hanging on walls and matching bit
- Drill
- Table Saw
- Miter Saw
- Level and Stud Finder (for hanging in the closet)
- Tape Measure
- Paint or Stain and suitable finishing tools for desired finish
Instructions
Step 1
Designing Your Closet Organizer
Since closets come in varying sizes, it's best to measure your closet and design to fit your closet specifically. Use Ana's Free Furniture Design App to create your own custom design and download the plans:
Here's the configuration I used:
- Depth = 11.25"
- Height = 48"
- Width = Inside width of closet minus about 1"
- Bays = 3 - you may need more or less bays depending on your closet width. Make sure shelf spans are between 12" (to prevent hard to access and build shelves) and 36" (to prevent sagging shelves)
The two outer bays I sized to fit standard milk crates. I do suggest leaving out the shelves on top of the milk crates - they will just be in the way of accessing the milk crates. And when your child grows (and clothes get longer), you can just remove the milk crates.
The middle shelves are all adjustable.
Cutting the Pieces
Download the plans for your custom design and cut the pieces from 3/4" plywood. The front edges of the plywood need to be finished with 3/4" edge banding applied to an iron, then trimmed off and sanded.
Step 2
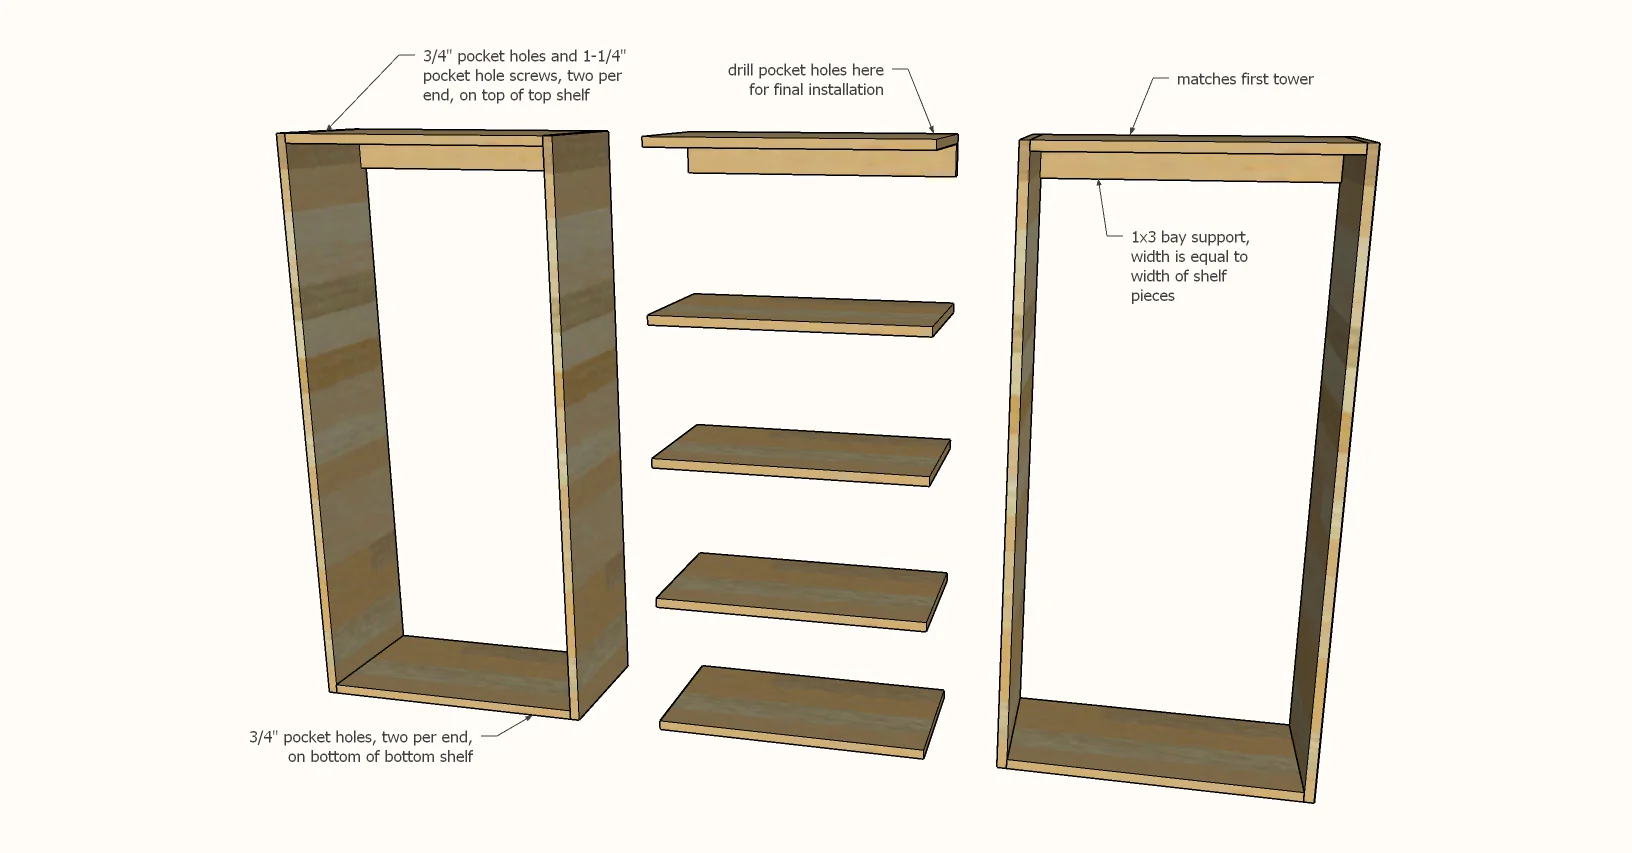
Once you have your carcass pieces cut and front edges finished, simply build the two outside towers with 3/4" pocket holes and 1-1/4" pocket hole screws.
For the middle pieces, also attach the top shelf to a same sized bay support. The bottom shelf of the middle should be drilled with pocket holes for attaching on final assembly.
Paint or stain the closet pieces.
Place inside the closet and attach middle top and bottom to the two outer towers.
Hang the organizer about 24" off the floor through the back cleats into studs in the wall.
Add closet rods and shelf pins for adjustable shelves.
I did sand between coats with fine grit sandpaper.


Comments
Gregg678
Tue, 05/31/2022 - 16:49
Kid's Closet
Kid's closet