
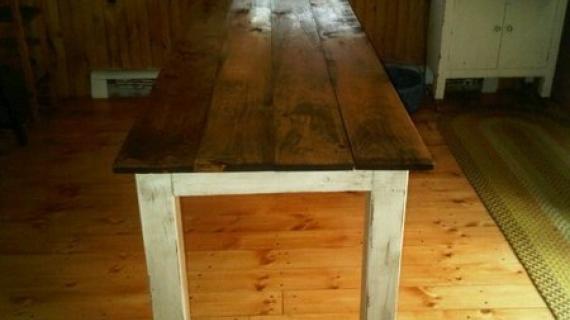
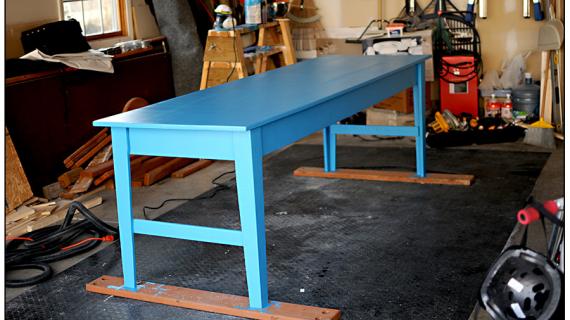
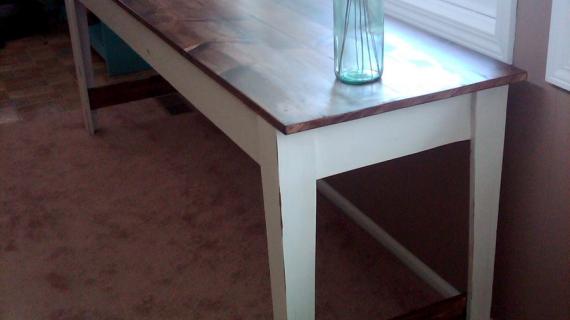
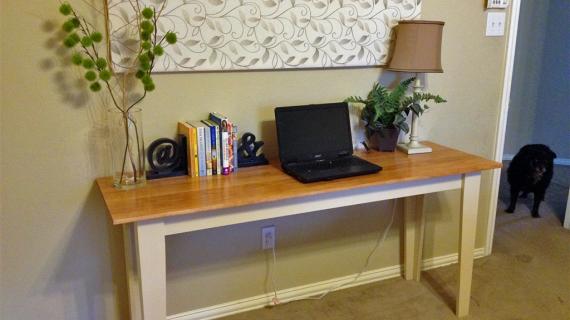
Some dining spaces (or even work spaces) require a long thin table. This rustic simple table is easy to build, yet sturdy and stylish.
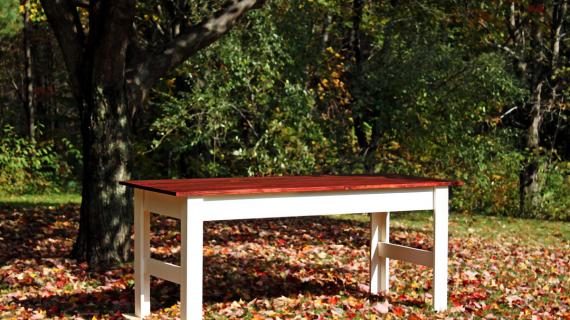
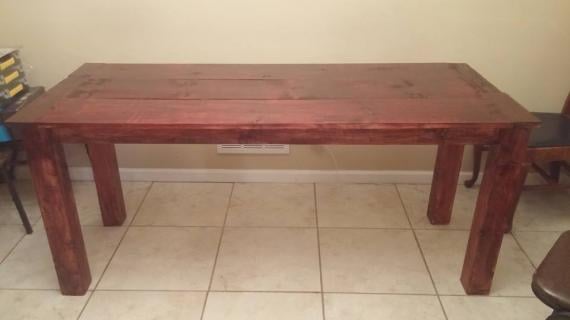
Special thanks to Deux Maison for sharing their amazing photos. Make sure you stop over to see more photos and read about their building experience.

Preparation
2 – 2×2 Boards, 8′ Long ($2 Each for pine)
4 – 1×8 Boards, 8′ Long ($7 Each for pine)
2 – 1×3 Boards, 8′ Long ($1.50 Each for pine)
1 – 1×4 Board, 10′ Long ($4 Each for pine)
2 – 1×6 Boards, 10′ Long ($6 Each for pine)
1 1/4″ and 2″ Finish Nails
2″ Wood Screws (about 100)
2 1/2″ Wood Screws (about 20 screws)
Wood Glue
Wood Filler
Sandpaper
Finishing Supplies
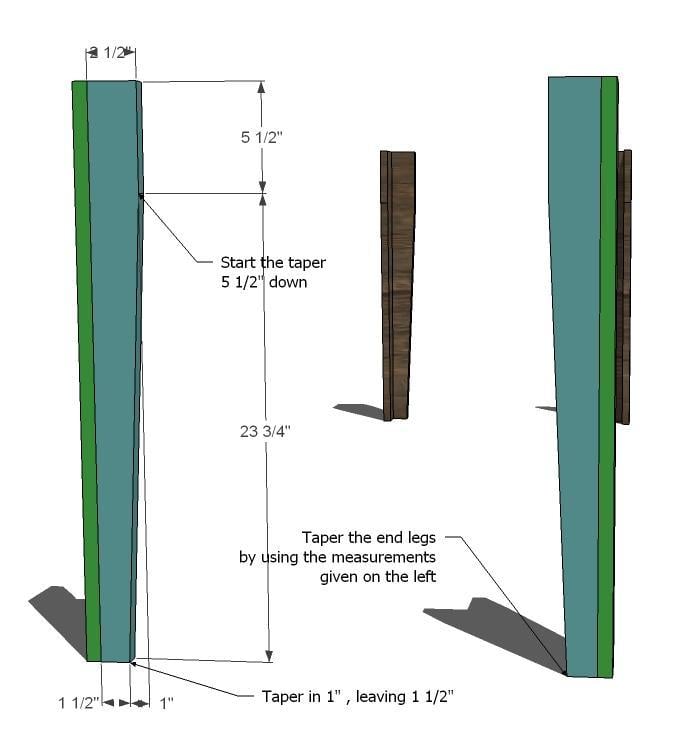
4 – 1×3 @ 29 1/4″ (Table End Legs)
4 – 1×4 @ 29 1/4″ (Table Side Legs)
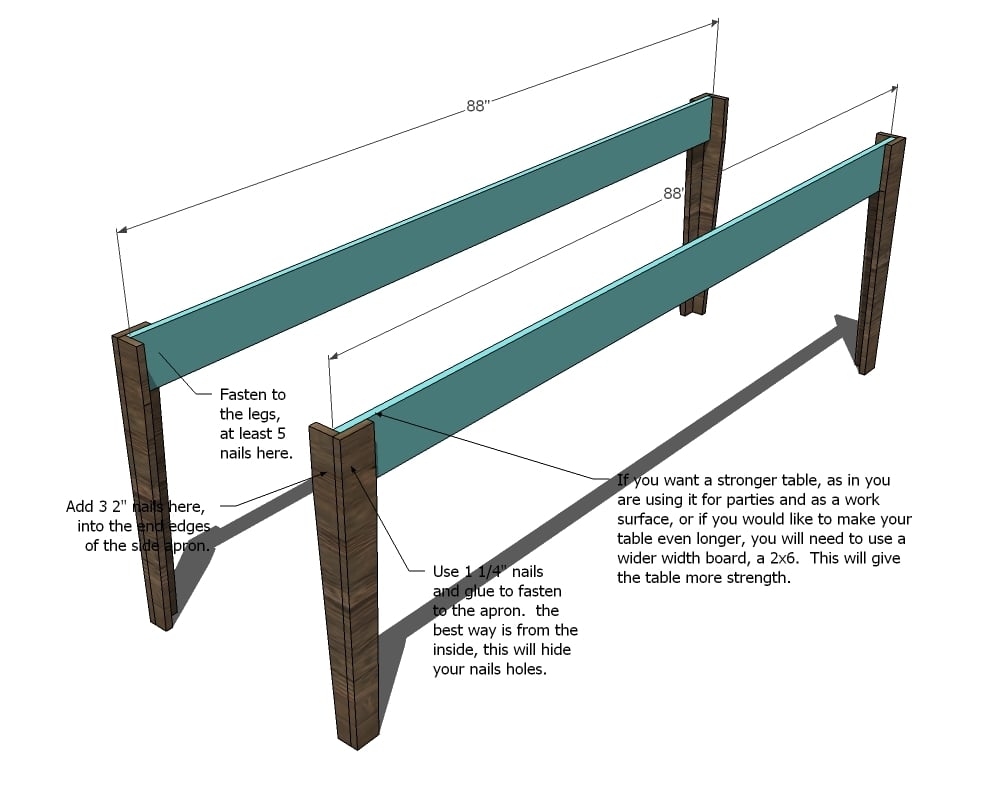
2- 1×6 @ 88″ (Side Aprons)
2 – 1×6 @ 23 3/4″ (End Aprons)
2 – 1×3 @ 23 3/4″ (End Stretcher)
8 – 2×2 @ 23 3/4″ (Under Tabletop Supports)
This table is highly customizeable to fit your needs. Note that the tabletop expects your tabletop boards (the 1x8s) to be 7 1/2" wide. If your 1x8s are not 7 1/2" wide, adjust accordingly.
Work on a clean level surface. Check for square after each step. Use straight lumber. Measure and confirm your cuts before cutting. Dryfit your boards before fastening. Always use glue. Predrill and countersink screws. Use saftey precautions and protective eye and hearing gear.
Instructions
Step 1
Step 2
Step 3
Step 4
Step 6
Step 7
Step 8
Tabletop Pieces. From the underside, fasten through the under tabletop support pieces into the tabletop pieces. Start with the middle boards and work your way out. Minimize any gaps between the boards. Predrill and countersink your screws. To further strengthen the table, you can add simpson strong tie corner brackets to the corners.







Comments
Jess (not verified)
Mon, 02/22/2010 - 03:00
Ana, I love everything about
Ana, I love everything about that post. It is so true. The only thing keeping me from running to the hardware store for lumber right now is the fact that I have the real thing. I was lucky enough to get my grandma's table when she passed. It is over 100 yo and we ate at it every Christmas and Thanksgiving for as long as I can remember. And I look forward to eating at it for many many years to come so that my kids can have the same memory.
Kathy V (not verified)
Mon, 02/22/2010 - 03:22
I've loved this table since I
I've loved this table since I first saw your plans. But this post inspired me. My aunt will be tearing down an old barn on her property that was built by my great-grandfather (it's structurally unsound, or she wouldn't be doing it!). Anyway, I'll be reclaiming some of that wood to build my table. That way, it will REALLY have the meaning invoked by your post. Can't wait, and thanks for the inspiration!
Tracey (not verified)
Mon, 02/22/2010 - 03:35
WOW! What a fabulous
WOW! What a fabulous project...I adore farmhouse tables along with everyone else! I just came across your blog and am so impressed!!! Can't wait to read more of your projects!
:) T
Lorie (not verified)
Mon, 02/22/2010 - 03:36
Another plan I am adding to
Another plan I am adding to my list!
Thank you again for doing the interview for me. And for all of the amazing plans you post on your blog!
Steff (not verified)
Mon, 02/22/2010 - 03:48
I don't know if you've talked
I don't know if you've talked about this, but is there something you can put on the table after you finish it to add kind of a protective layer to it? Especially for those of us with kids--I can see this getting dinged/scratched really easily. It seems like store bought tables and tables at restaurants have something like that on them...
Thanks Ana! Addicted to your blog-- can't wait to start building!
Parties by Hardie (not verified)
Mon, 02/22/2010 - 04:32
I'd love to see a table like
I'd love to see a table like this with a leaf to expand it. We're military so we can't have really big tables since we never know if it will fit in the next house. That's why smaller tables with the ability to expand are great. We've been looking at some at Ikea but I would love to make our own table.
Pine Tree Home (not verified)
Mon, 02/22/2010 - 04:48
I follow your blog and love
I follow your blog and love all your ideas and plans. This is the ONE. The ONE I am going to tackle this spring for my pool house.
Melodie (not verified)
Mon, 02/22/2010 - 05:00
This is exactly the plan I've
This is exactly the plan I've been waiting for! Thanks a million!
3 Sweet P's (not verified)
Mon, 02/22/2010 - 06:18
fabulous! I've been bugging
fabulous! I've been bugging my husband to build me a new table, and I've been saying for over a year now i want a farm table.This makes me think I can get into his tools and do it myself! Thank you for the inspiration. Do you have any plans for bench seating, like the ones on picnic tables? Just not attached?
Anna Jo (not verified)
Mon, 02/22/2010 - 06:48
You made me cry! This is
You made me cry! This is exactly why I have built my table. The hubby doesn't understand it, but eh, he's a boy...haha.
I truly wonder if you have any idea what you are giving women in writing your blog...I am not a feminist by any means, but I do believe that women ought to be capable of caring for themselves. Both of my kids-son and daughter-will learn to build, and they'll both learn to sew and cook as well.
You are an amazing person, and phooey on your sister who said that you are "just a housewife", you are much more than that, and I hope that you've realized that! I know I have, and I've only built one piece so far! LOL
Jennifer (not verified)
Mon, 02/22/2010 - 07:58
Oh love. Your post is so
Oh love. Your post is so true! Now I'm torn on between this and the modern farmhouse table. A table is #4 on our list from your blog :).
I'd like to second the request for plans for a table that has leaves to expand it. I really want a farmhouse table in our kitchen but it would be replacing one (that I don't like btw) that expands to seat 6 (from 4). Our eating space is limited so we need a small table for everyday, but we use the leaf pretty often to give up the capability.
My hubby and I were in PB the other day (comparing my hyde console table to theirs *snicker*) and saw this table with extendable ends. http://www.potterybarn.com/products/benchwright-dining-table-set/?pkey=…
My hubs thinks he could make something similar but I'm a go by plan or recipe girl...
Love this post. I can't wait to build our own farmhouse table and have our family grow with it!
Jenny (not verified)
Mon, 02/22/2010 - 08:22
This is sooooo what I've been
This is sooooo what I've been looking for! The table we have now is just too wide for our dining room...this will be PERFECT! Will have to wait to build this AFTER building bunkbeds!
AdronsCatherine (not verified)
Mon, 02/22/2010 - 08:41
Perfect! I had been
Perfect! I had been considering slimming down the original plans, but now that you've done all the work for me, I should be good to go!
One question - we need to be able to sit people at the ends of the table. Is there a way to build it so the stretcher isn't going to interfere?
Anonymous (not verified)
Mon, 02/22/2010 - 09:19
I know it's less in keeping
I know it's less in keeping with the style, but is there a way to round the edges. Our little one is constantly hitting her head on the corner of the table.
Carrie (not verified)
Tue, 02/23/2010 - 02:43
Now how am I supposed to
Now how am I supposed to choose between this one and the Restoration Hardware table?!?
You Are My Fave (not verified)
Wed, 02/24/2010 - 17:32
Wow! I wish I had at least
Wow! I wish I had at least one carpenter's bone in my body. I'm glad I could help in the inspiration for this amazingness.
Robyn (not verified)
Fri, 02/26/2010 - 16:43
I LOVE this table and it is
I LOVE this table and it is on the top of my project list. In one of the inspiration pics there was a drawer... how would you suggest adding drawers to the ends or the middles? Space is at a premium in our house and I would love to have a napkin drawer or two!!
Arctic Sheets (not verified)
Fri, 03/26/2010 - 09:38
This is the sweetest, most
This is the sweetest, most inspiring post! I just found your blog and I want to thank you so much for sharing all your projects. I am a little intimidated by the idea of building things but I find your words so encouraging. I can't wait for a free weekend to try my hand!
Keep up the great work!
Me (not verified)
Tue, 04/06/2010 - 06:54
What if I want to use the
What if I want to use the spindle leg shown in one of the pictures? Do you have a plan that uses a spindle leg? Thanks for all the plans! I found your site about a week ago and am hoping to make the simple day bed for our screen porch.
Lisa (not verified)
Mon, 05/24/2010 - 16:00
this is the exact table i
this is the exact table i have been looking for for in my kitchen!!! i will be attempting to build this. i too wander how i could use spindled legs as opposed to the tapered leg. i love your blog...thank you thank you thank you for these plans :)
Deux Maison (not verified)
Sun, 06/27/2010 - 13:25
So inspired! Glad to have
So inspired! Glad to have found you. We even blogged about you!
http://deuxmaison.blogspot.com/2010/06/today-i-am-carpenter-wanna-be-ca…
Started this table today. Taking a break to give you props! I am so thrilled. Can't wait to BRAG about it!!!!
Nathan (not verified)
Mon, 07/19/2010 - 18:01
@Steff--Minwax polyurethane.
@Steff--Minwax polyurethane. It's a clear sealant. I built a coffee table 8 years ago when I went to college, and I put one coat of poly on it. Three years of dorm life and five years of marriage later (three of those with kids--three of them, three and under, they use it for their art projects) and it still looks nice.
@ Ana--I'm working on this table now, and I noticed an error--the stretchers on the ends need to be 1 1/2" longer than your plans list. They should be 25 1/4". The error is from taking the end apron length and copying it to the stretchers; the end aprons sit inside the side aprons while the stretchers will butt directly against the 1x4 legs.
@Anonymous--You need a coffee can and a jigsaw. Put the coffee can on the corner of the table so the edges of the can sit at the edges of the table. Trace the curve, then cut with your jigsaw.
@Lisa--The easiest way would be to build the apron, and put the spindles inside the corners:
+-------------+
|0***********0|
|*************|
|0***********0|
+-------------+
but this might not look the best. You can buy angle mounting hardware at home depot:
http://tinyurl.com/25ftlqx
One side of the angle attaches to the inside of the apron, one side attaches to the inside of the spindle.
Jo (not verified)
Wed, 09/22/2010 - 04:27
Parties, Being an
Parties,
Being an ex-military wife, I know your concerns, I would make this table as two square tables that can be arranged together to make one long diningroom table (could of c-clips under to stabalize it and keep it together) or as two independent tables should you be 'blessed' with one of those itsy bitsy tiny wienie 'diningrooms' the 2nd one can be a craft table, or study desk in the corner of the living room for your children, spouse or yourself to work at. This way, you will always have enough seating if need be, and can create the wonderful GIANT dining table if your lucky enough to get a real diningroom in your next base house.
Hope this helps.
Yes, I did do this, we bought, way back when ;) two small retangle tables, four kids, that we could arrange either to make one long table, or one large square table, or two seperate tables in two differnt rooms with two different uses as we moved from base to base, house to house for 21 years.
M (not verified)
Sun, 11/07/2010 - 13:00
We adapted these plans for
We adapted these plans for our own custom version.
Enough Clamps make this project much easier.
Go to [email protected] for more on how we put ours together.
Heidi (not verified)
Sun, 11/28/2010 - 15:16
:) started pulling nails from
:) started pulling nails from reclaimed wood.. I look forward to making this :) thanks for the plans.. :)
Josh (not verified)
Sun, 11/28/2010 - 15:48
Has anyone had trouble with
Has anyone had trouble with the short distance between the bottom of the table and the top of a dining chair? I'm interested in this table but 23 3/4" seems awful short. Am I wrong?
hope_cuevas@ho…
Tue, 04/12/2011 - 08:36
Yes
My father just finished this table and there is not a lot of clearance between an 18" seat height chair and the apron. We are now trying to figure out how to fix that...
Belinda (not verified)
Thu, 12/09/2010 - 04:31
You are looking at the part
You are looking at the part where she tapered the legs, its 30" all together. The taper part starts at the 23 3/4 mark. I am planning on building a desk for our home office using a different plan on here but with the same idea of this one and after that I want to try my hand at a dining table. Going to use 4x4s for the legs though for more support.
LOVE your site!
John Rankin (not verified)
Wed, 01/19/2011 - 17:12
I was won dering if you hvae
I was won dering if you hvae any plans for this bench from pottery barn? Love the site!!!
http://www.potterybarn.com/products/toscana-bench/?pkey=e%7Cbenches%7C1…
Casey (not verified)
Sun, 01/23/2011 - 04:27
I agree. I feel like there
I agree. I feel like there could be some more leg room. After using the table for a few weeks, I simply cut out a section of the side aprons with a jig saw to allow for more room.
First Builds –… (not verified)
Mon, 02/14/2011 - 09:19
[...] in Brag Blog Put on
[...] in Brag Blog Put on my TO-DO List Save as PDF Print this PostShare/Bookmark Builder: Karen Blog or Website:http:// Experience Level: Absolute Beginner Estimated Cost: 120 Estimated Time Investment: 5 hours From Plan: http://ana-white.com/2010/02/plans-narrow-farmhouse-table-beginner.html [...]
hope_cuevas@ho…
Tue, 04/12/2011 - 08:33
What height chair?
What seat height would would work with this table?
Guest (not verified)
Mon, 05/09/2011 - 11:42
End stretcher and end apron length
I learned long ago to double check measurements before cutting and was reminded why with the aprons and stretchers.
Both are 23.75".
However, the apron is 23.75" inside both the side apron and the front facing leg. The stretcher is only inside the front facing leg and should be longer.
Measure accordingly.
gc
Other Josh (not verified)
Wed, 04/25/2012 - 05:48
End stretcher WRONG SIZE
Bingo, I decided to reproduce the drawing in Google Sketchup and discovered this little discrepancy.
By my measurement, if the end skirt is 23 3/4" then the end stretcher should be 25 1/4".
karin thompson (not verified)
Mon, 05/30/2011 - 15:53
tapering legs
Can anyone give me some guidance on how & what saw to use to taper the lags correctly. I am stuck. :)
Guest (not verified)
Mon, 05/30/2011 - 19:28
tapering legs
The tool list says to use a circular saw, but I thought my jigsaw would be easier to keep stable on a 1*4. You can use either and remember that this isn't fine furniture so they don't have to be perfect; no one will notice if they are a little off.
karin thompson (not verified)
Tue, 05/31/2011 - 13:20
Thanks!
Thanks so much for the advice with tapering the table legs! I am going to do my best and remember that this is a One of A Kind piece!
claydowling
Mon, 05/30/2011 - 20:15
Doing it safely
I've never really found a happy solution for tapering legs outside of a table saw. I've got a series of desk and table builds coming up though, and I'm hoping to experiment with using hand saws for it.
I have a lovely Disston rip saw that I will probably use to get a rough cut on the taper, and then clean it up with a hand plane. If I didn't have that saw, I'd pick up a japanese pull saw filed for rip cut at blue or orange and use that for the cut, and still clean up with a hand plane.
Even with a table saw I'd clean up with a hand plane. Unless you have a very expensive table saw (which I don't), there will be saw marks that you'll want a plane to clean up. The upside is that I just found #4 Stanley smoothing planes and decent quality Arkansas stones for sale at Blue.
Jan_is_a_guy
Sun, 06/19/2011 - 12:47
Building and Using a Tapering Jig
If you are going to be doing more than a couple of the same taper cuts, it makes sense to build a jig for it. Here is a video on building a relatively simple jig for doing it on a table saw. I tried this and it worked really well, even considering that I've got the worlds crappiest table saw (about 60 years old with a horrible rip fence).
Jan_is_a_guy
Sun, 06/19/2011 - 12:45
Oops! Forgot to add the link to the post above.
http://woodworking.about.com/od/woodworkingplansdesigns/ss/TaperingJig…
dbck
Mon, 08/08/2011 - 07:58
Screw or Nail?
We are attempting to build this table right now :) But I have a question... how did you make the legs (Step 3)? Ana says to use 1 1/4″ and 2″ Finish Nails, 2″ Wood Screws (about 100), 2 1/2″ Wood Screws (about 20 screws)... but doesn't say when and where to use them all. We are making this for an office desk and want to make sure it's going to hold up. Did you just use nails? Any help would be greatly appreciated!! Thanks!
Guest (not verified)
Mon, 08/08/2011 - 10:05
Screw or nail?
I used the 2" finishing nails and a thin line of wood glue for the legs. Finishing nails will not be nearly as noticeable as screws here.
I would also suggest making the legs a little longer than suggested in the plans. The table is a little snug as illustrated.
In reply to Screw or nail? by Guest (not verified)
dbck
Mon, 08/08/2011 - 13:30
Thanks!
Thanks guest :) I wish we had read the comments before we made all of our cuts! We will be ripping the aprons down an inch before assembling... and will have to lower the desk chairs a bit to give more room.
Guest (not verified)
Mon, 08/15/2011 - 08:47
Stain
I just got done building this desk and I'm ready to sand and stain. I absolutley love the look of it and want to do the same kind of stain. Can anybody tell me exactly what it looks like was used?
staylor (not verified)
Fri, 08/26/2011 - 09:29
Great tables build great memories
Ana,
Great plan! I am impressed by the simple construction methods you devise that yield stunning results. I hope you sign and date every piece you make.
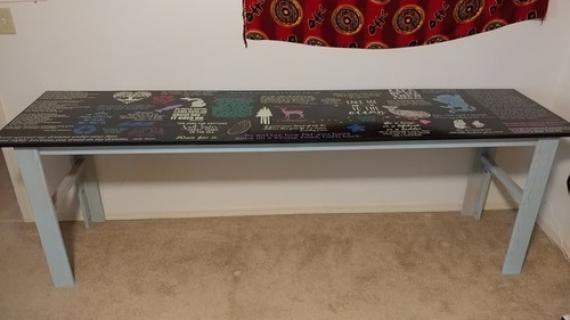
Friends and food go together so as you break bread with anyone who visits your home and eats at your table, encourage them to sign and date the underside of your table with a permanent marker. In this way, our 10' X 38" table has become our guest book and is the focal point in our home and a reminder of cherished moments. In the past 8 years we've had it, hundreds of people representing 6 continents have obliged our request to sign the table's underside. It is fun to hear the chuckles and exclamations of awe as guests sign and add to the table's own story, helping it grow into an hierloom.
eddshead
Tue, 10/25/2011 - 05:07
I'm confused!
We built this table as we understood the plan. The table top is initially secured to the base by screwing 2 1/2" screws through the top of the table (Step 7 above), yet everyone's pictures show seamless table tops. Did everyone do pocket holes instead? Otherwise, how did you fill the countersunk screw holes?
c-e-fogus
Wed, 04/17/2013 - 05:58
Love My Table
I just got done making a shorter/thinner version of this table. I love it and it turned out great. One thing I wanted to suggest is that the aprons be a bit shorter. There is not much room between the chair and the apron. I would recommend pocket holes as well to give it a seamless exterior finish. It takes more time in the beginning to prep the boards but it saves a ton of time finishing the table. I used Minwax Golden Pecan stain and it came out almost exactly like the picture. This was my third project and I continue to love Ana's plans.
Dommers
Fri, 02/07/2014 - 05:18
Not the cost I was expecting
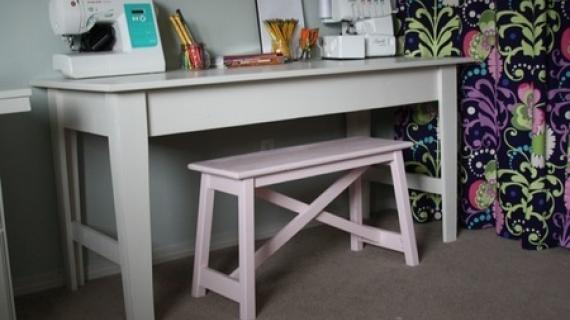
I should have realized these plans were from 2010 but I do want to give a heads up, the cost is a little off. I ended up spending about 130 on lumber screws, wood glue and wood filler.
Dommers
Fri, 02/07/2014 - 05:18
Not the cost I was expecting
I should have realized these plans were from 2010 but I do want to give a heads up, the cost is a little off. I ended up spending about 130 on lumber screws, wood glue and wood filler.
Rover12
Thu, 11/13/2014 - 12:32
Kreg Jig?
Hello all,
I am in the planning stage of building this table to (hopefully) make into a sewing table. I have a Kreg jig and would like to use it to make the joints a bit cleaner. After my initial experience with it, the holes from the drill bit can be quite large. Does anyone with more experience have any insight as to whether that would be a good jointing method for this project?
Thanks!